15 Budget-Friendly DIY Greenhouse Alternatives You Should Try Before Building One
Dreaming of fresh veggies year-round but can’t justify spending hundreds on a greenhouse? I’ve been there – staring at those gorgeous glass structures in gardening magazines while my wallet quietly weeps.
After a disappointing growing season cut short by an early frost, I started experimenting with makeshift plant shelters using materials I already had around the house. What began as desperate attempts to save my tomatoes turned into a collection of surprisingly effective solutions.
The best part? Many of these alternatives cost less than $20 to set up and can be assembled in an afternoon. Perfect for testing whether the greenhouse lifestyle works for your gardening habits before committing to a permanent structure.
1. Plastic Storage Bins
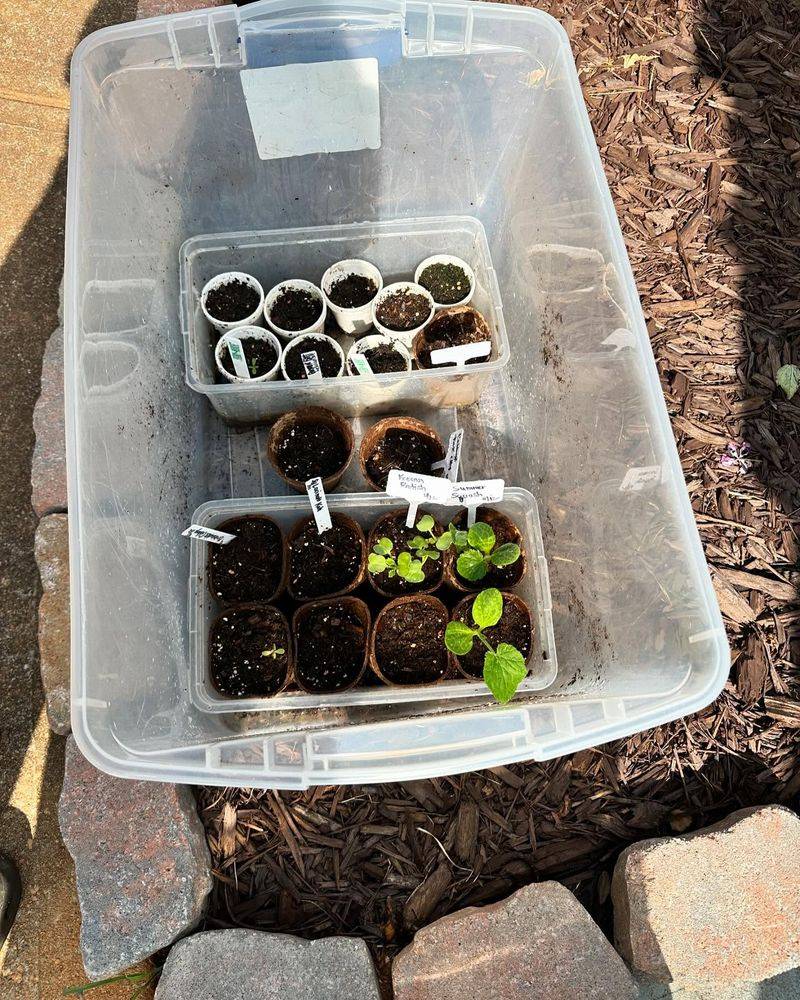
Transform clear plastic storage containers into mini-greenhouses by flipping them upside down over individual plants. The transparency allows sunlight in while the enclosed space traps heat and moisture.
I use these to protect my newly sprouted seedlings from spring frosts and hungry birds. For ventilation, simply prop up one edge with a rock on hot days.
My neighbor thought I was crazy until she saw my lettuce thriving weeks before hers. Now she has a whole row of these bins protecting her early spring vegetables.
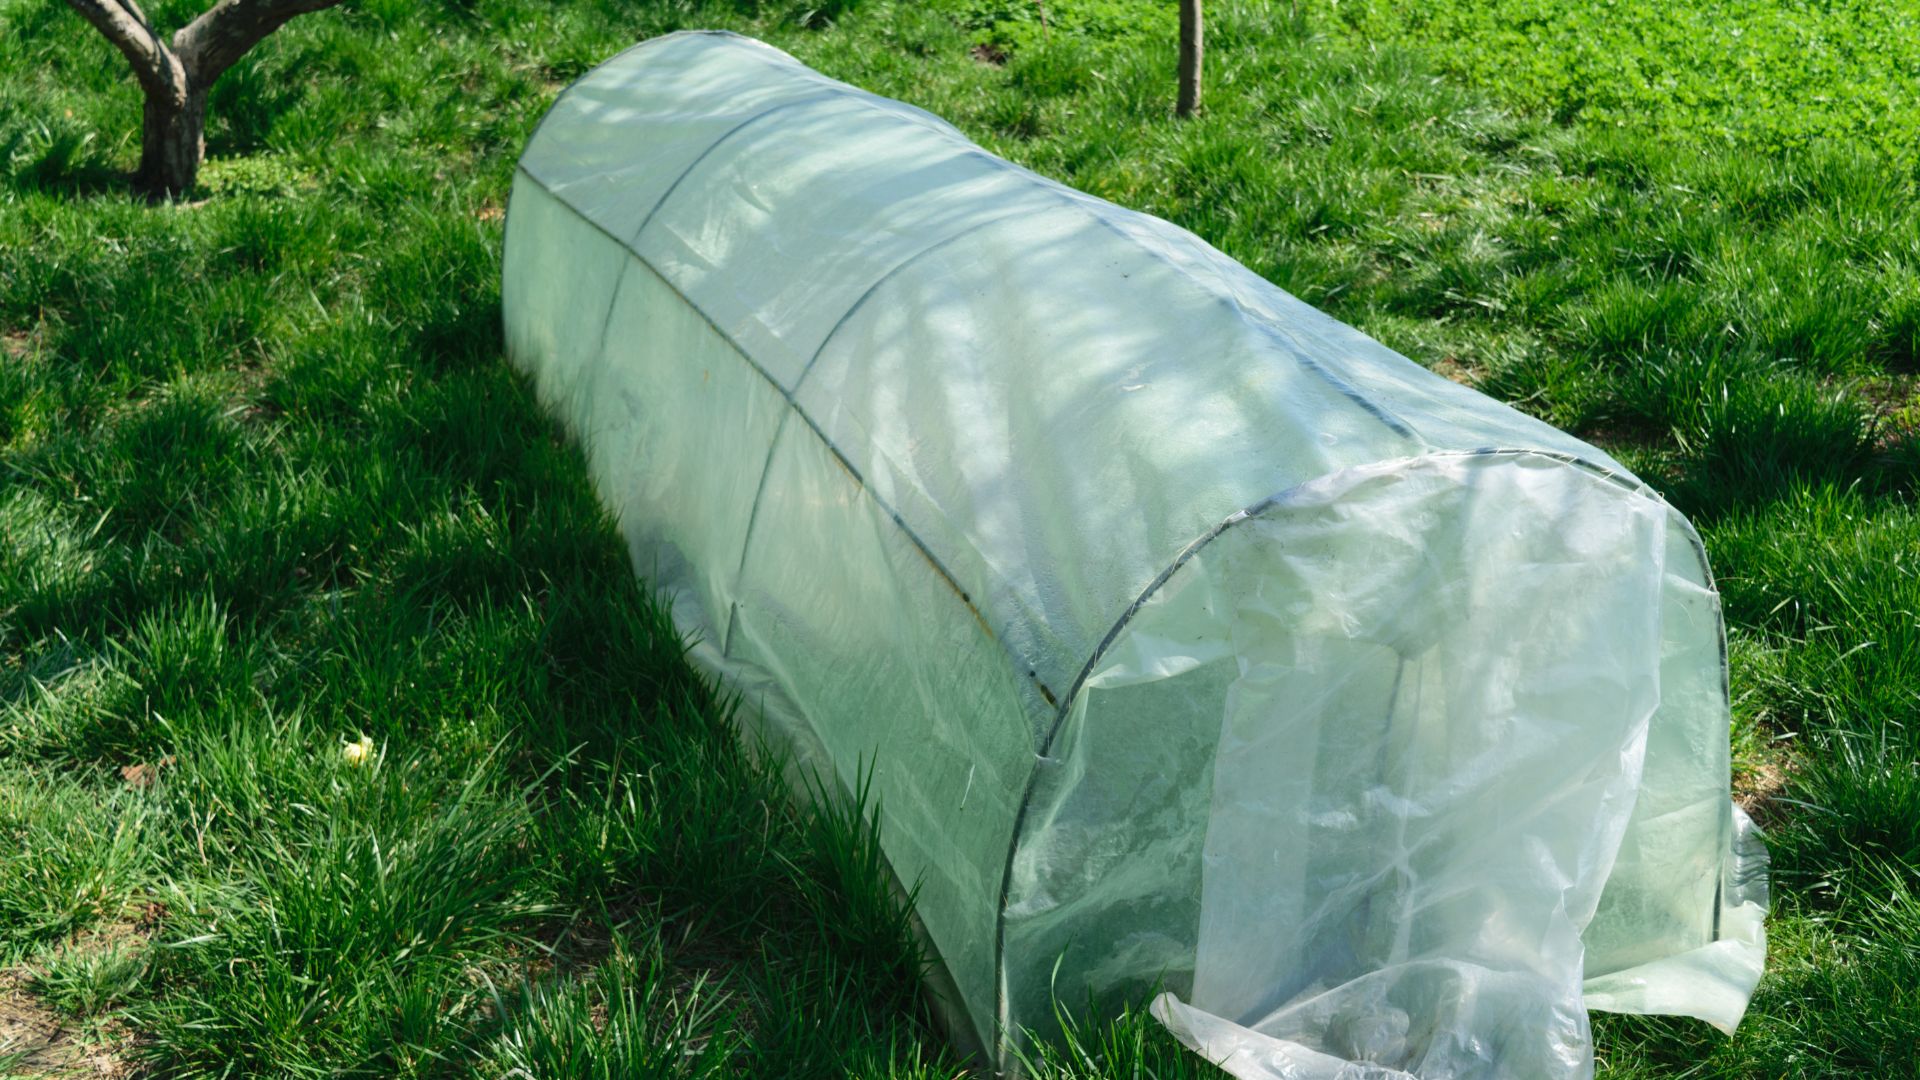
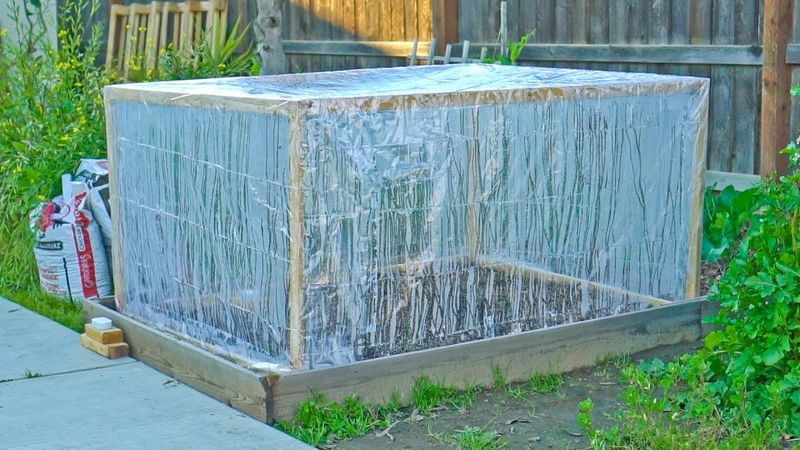
2. PVC Hoop House
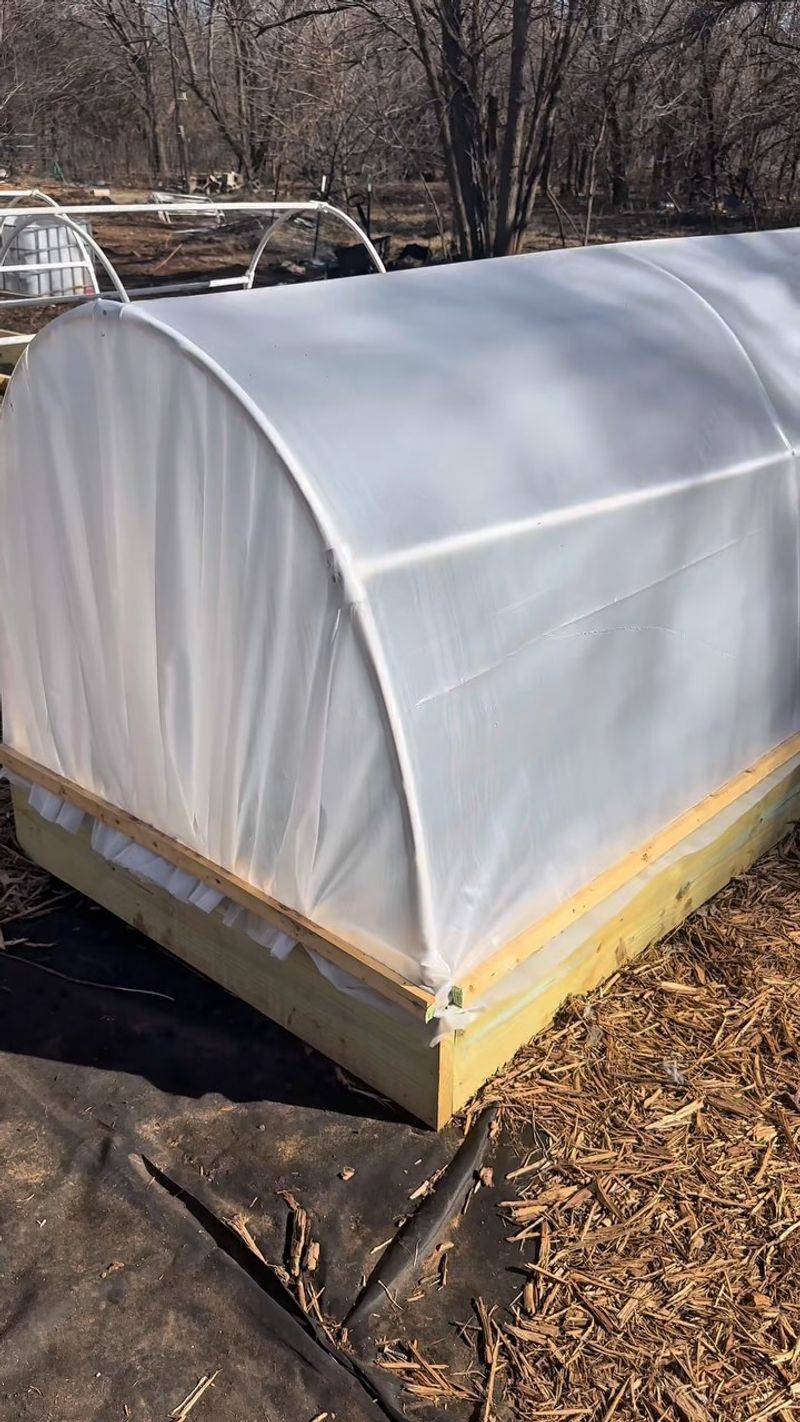
Bend PVC pipes into arches and secure them over your garden bed to create a simple tunnel greenhouse. Cover with clear plastic sheeting and secure with clamps or bricks.
This setup costs about $30 for a medium-sized bed and can be disassembled for storage during summer. The height allows for taller plants like tomatoes and peppers to grow comfortably.
Last winter, my hoop house kept my spinach and kale producing through January—something I never thought possible in my climate zone.
3. Window Frame Greenhouse
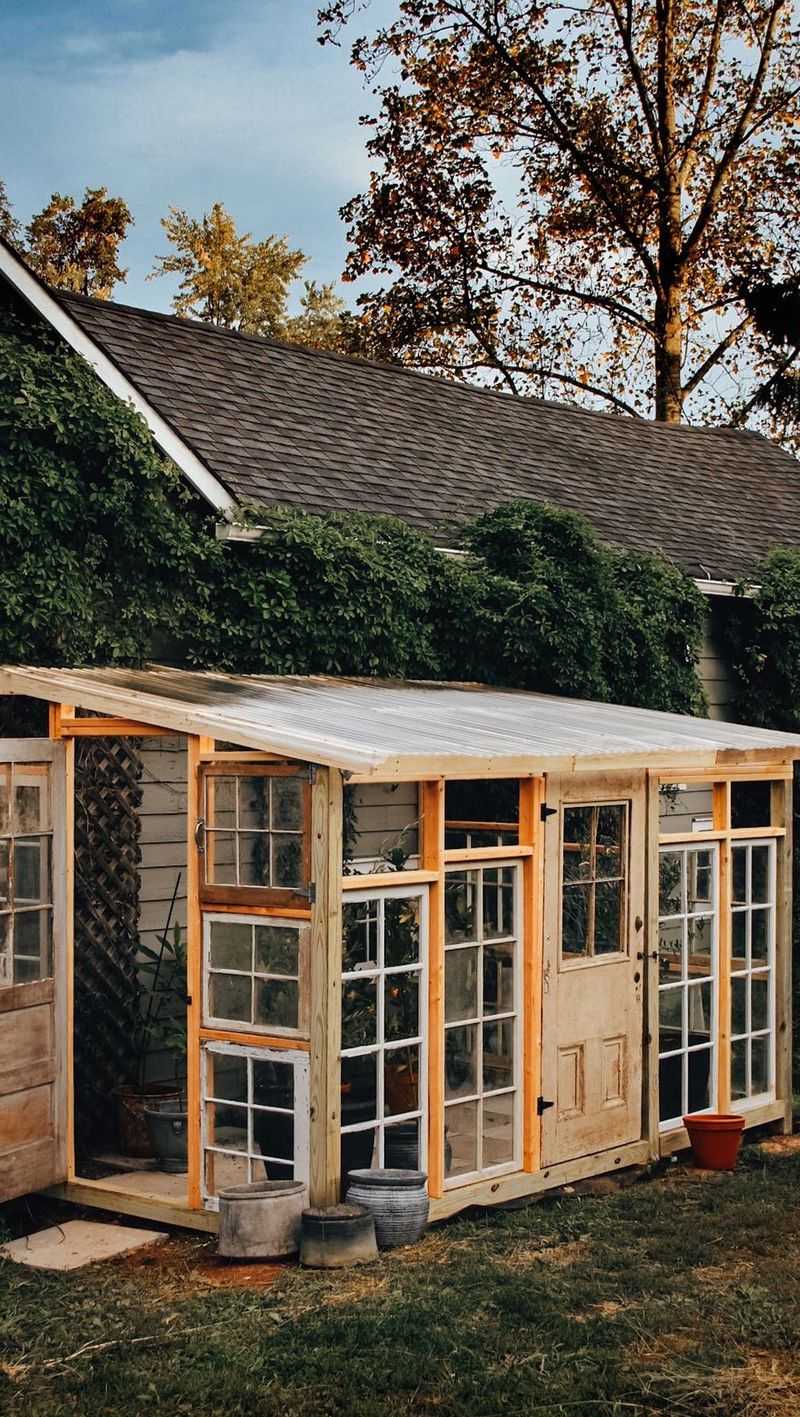
Old windows from home renovation projects make perfect panels for a small greenhouse. Connect four or more windows with hinges to create a box structure, then add a simple roof of plastic sheeting.
The glass panes provide excellent insulation while adding vintage charm to your garden. Check local renovation sites or Facebook Marketplace for free or cheap windows.
My window greenhouse sits on my patio and houses herbs all winter. The different colored frames from various sources actually became a conversation piece during backyard gatherings.
4. Plastic Bottle Cloches
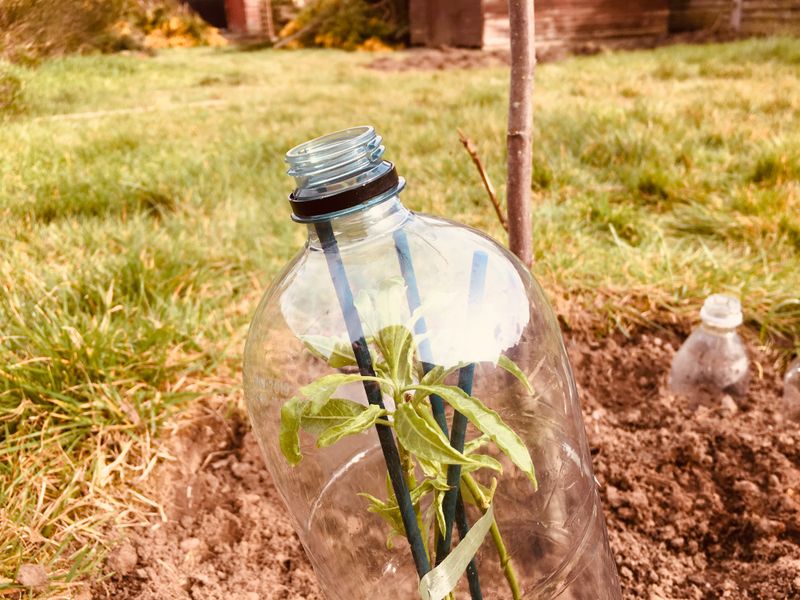
Cut the bottoms off large plastic bottles and place them over seedlings as mini-greenhouses. The bottle traps heat while protecting young plants from wind, cold, and pests.
Remove the cap for ventilation on warm days or when plants need watering. For taller plants, use 2-liter soda bottles; for smaller seedlings, 20oz bottles work perfectly.
After collecting bottles from neighbors for weeks, I protected an entire row of pepper seedlings this way. They grew twice as fast as the unprotected plants in the next row.
5. Bubble Wrap Insulation
Wrap existing cold frames or makeshift structures with bubble wrap to create an extra insulation layer. The air bubbles trap heat while still allowing light to penetrate to your plants.
Secure with garden staples or clothespins for easy removal during warmer days. Large-bubble wrap provides better insulation than small bubbles and lasts longer outdoors.
I saved all the bubble wrap from holiday packages last year and covered my cold frame with it. Even during a surprise snowstorm, the soil temperature inside stayed above freezing.
6. CD Case Mini-Greenhouse
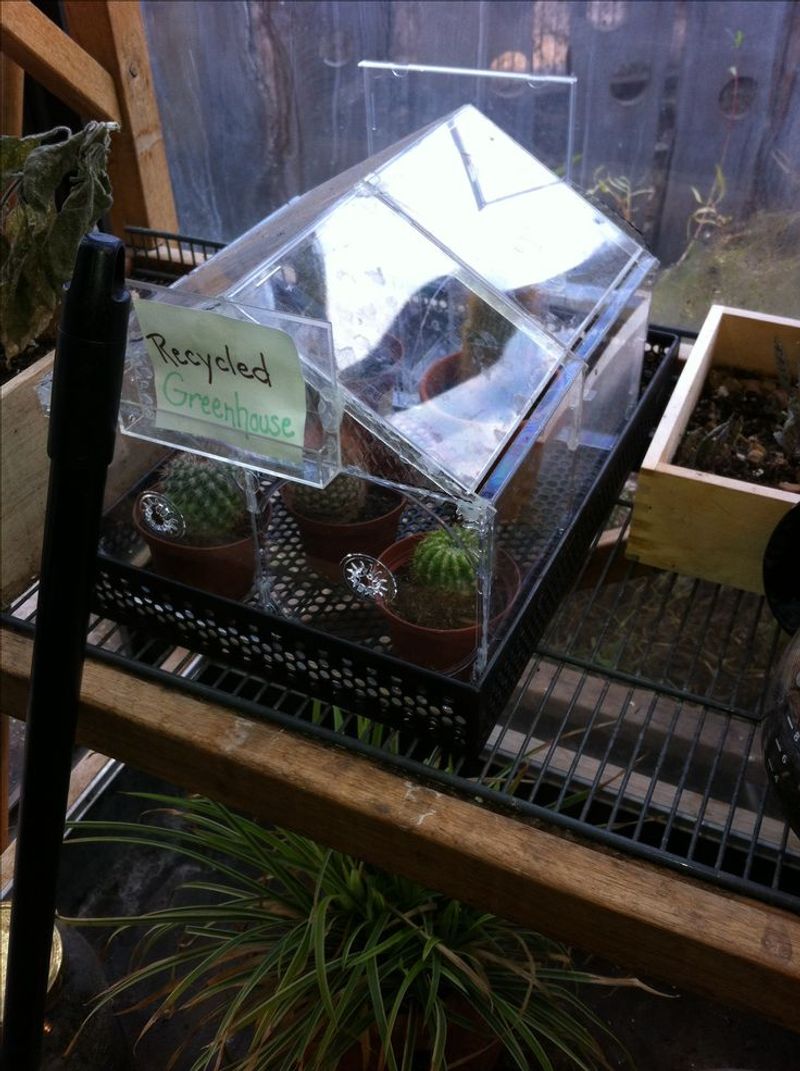
Remember those plastic CD cases gathering dust? Connect them with duct tape or small hinges to build a miniature greenhouse perfect for herbs or starting seeds.
The clear plastic provides excellent visibility while maintaining humidity. Twenty cases can create a structure about the size of a shoe box—perfect for a windowsill.
My daughter’s old music collection found new purpose protecting basil and cilantro seedlings. The rainbow effect when sunlight hits the cases adds unexpected beauty to an otherwise practical project.
7. Shower Curtain Greenhouse
A clear shower curtain makes an excellent greenhouse cover at a fraction of the cost of greenhouse plastic. Drape it over a simple frame of bamboo poles or PVC pipes and secure with clothespins.
The shower curtain’s waterproof nature keeps rain out while trapping heat inside. Look for curtains without patterns for better light transmission.
After finding a clear curtain on clearance for $3, I covered my tomato bed. The plants produced until November—two months longer than usual in my region.
8. Cold Frame From Old Dresser
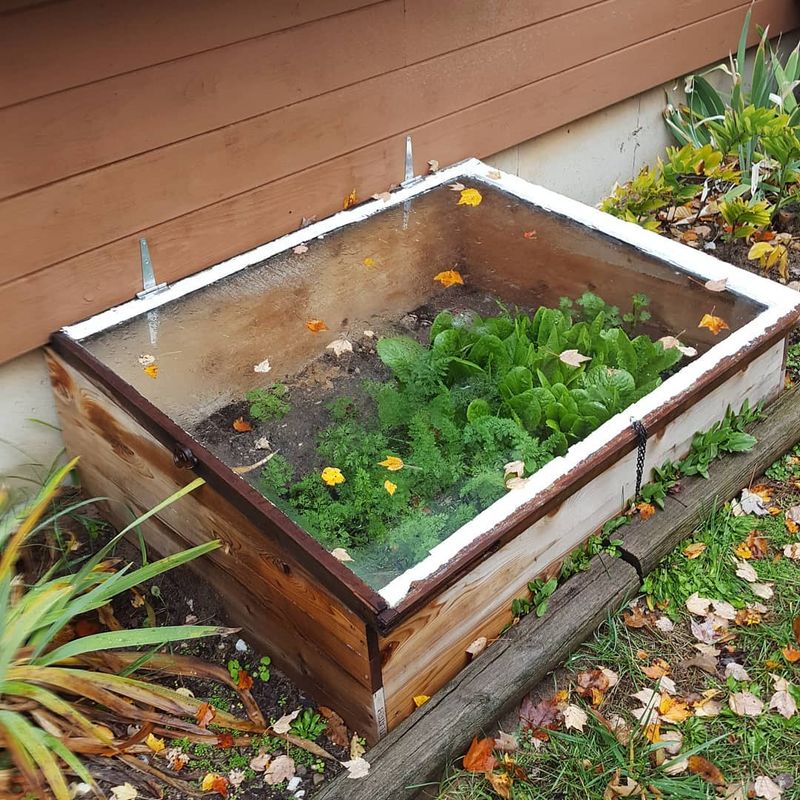
Remove drawers from an unwanted dresser and lay it on its back. Replace the solid back panel with clear plastic to create an instant cold frame with built-in compartments for different plants.
Each drawer space becomes a separate growing zone. The wood provides natural insulation while the plastic top allows sunlight in.
Found an old dresser by the curb last fall and transformed it within an hour. The different drawer depths worked perfectly—deeper ones for root vegetables and shallow ones for greens.
9. Milk Jug Row Covers
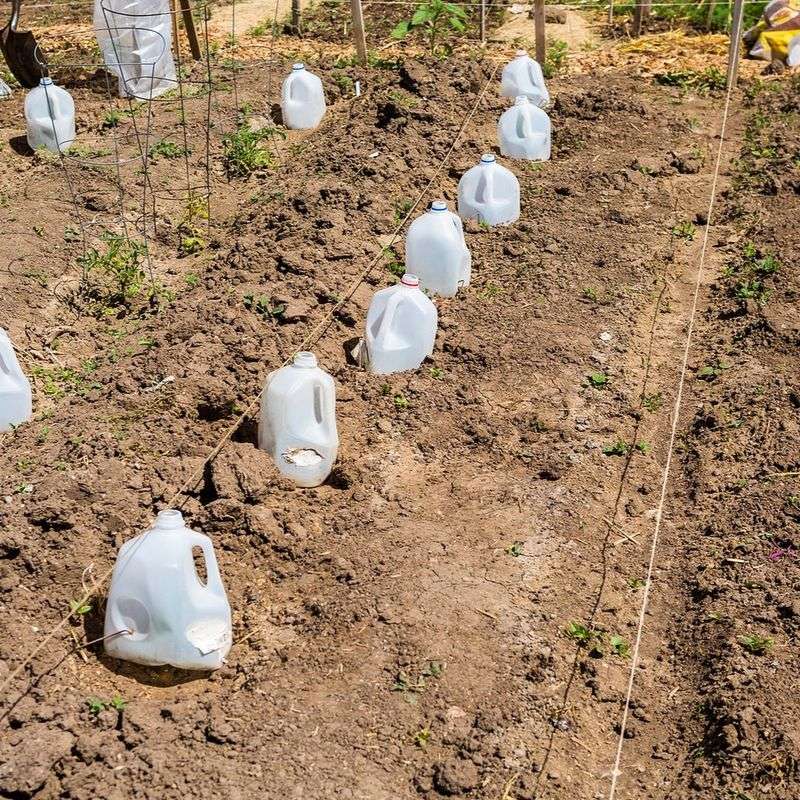
Cut the bottoms off plastic milk jugs and place them in a row over seedlings, creating a protective tunnel. Connect them with duct tape for stability and better heat retention.
The handles make perfect ventilation points—just prop them open on warm days. This method costs virtually nothing if you save jugs over time.
Started collecting milk jugs in January and by March had enough to protect my entire carrot bed. The neighbors stopped asking why I was hoarding empty containers when they saw my early harvest.
10. Pallet Greenhouse
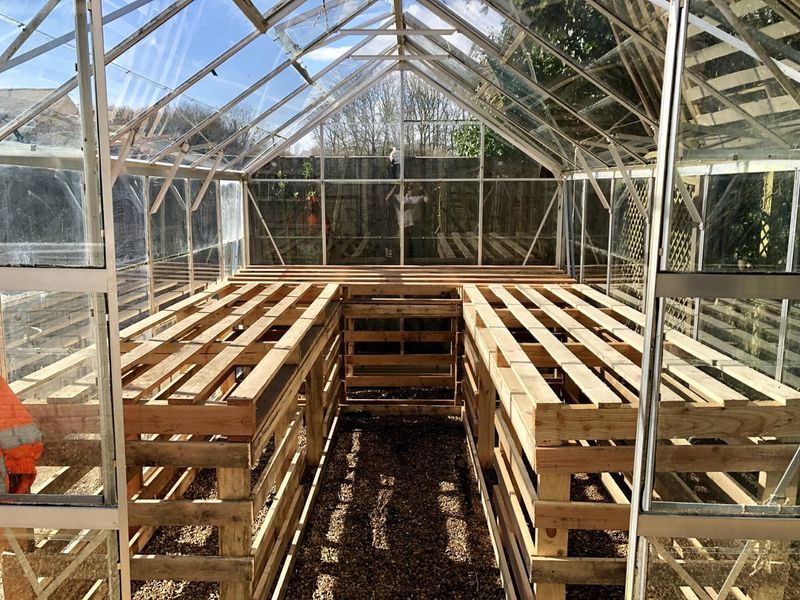
Stand four wooden pallets on edge to form a square, then attach clear plastic to the inside walls and top. Secure with staples or tacks for a sturdy mini-greenhouse that costs almost nothing.
The gaps between pallet slats provide natural ventilation. Add shelves across the middle for additional growing space.
Got free pallets from the local garden center and built this in an afternoon. It’s housed my pepper plants for two seasons now and shows no signs of wear.
11. Pop-Up Laundry Hamper Cover
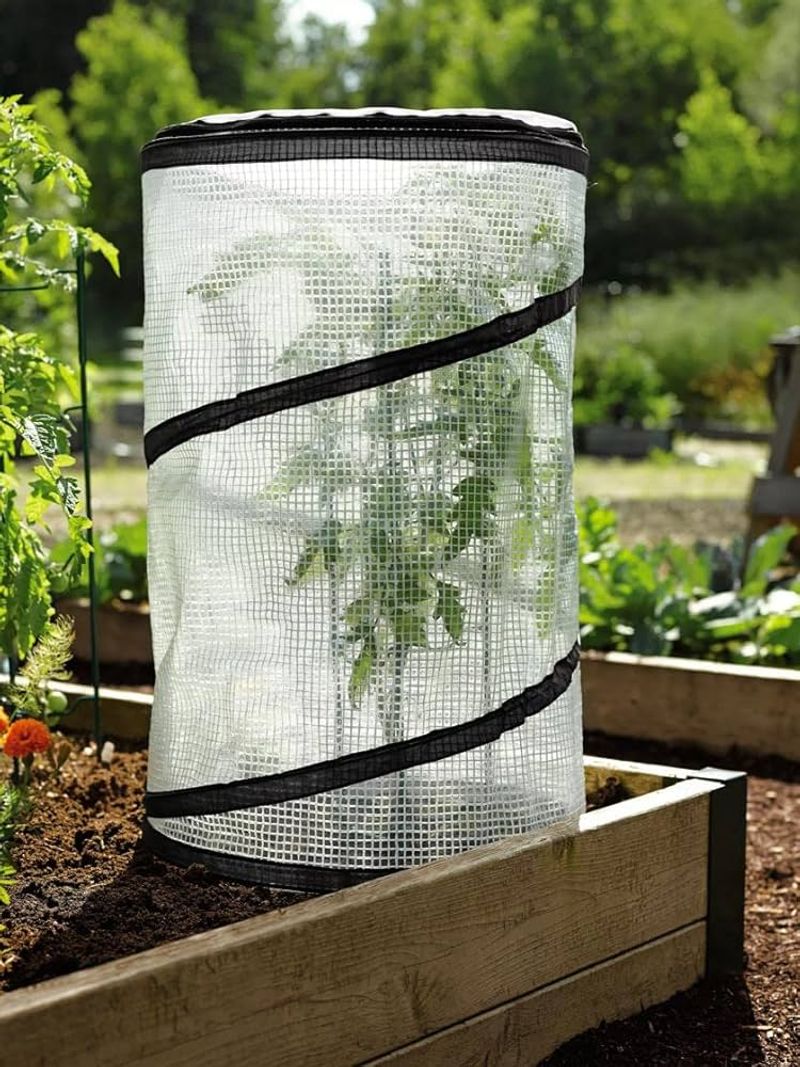
Those mesh pop-up laundry hampers make perfect instant plant protectors. Remove the bottom, place over plants, and cover with clear plastic wrap or a plastic bag.
The wire frame maintains its shape even in wind or rain. For taller plants, look for cylindrical hampers rather than square ones.
Found a set of three on clearance after college move-out season. They’ve protected my cucumber seedlings from both late frosts and the neighborhood cats who thought my freshly turned soil was a new litter box.
12. Umbrella Greenhouse
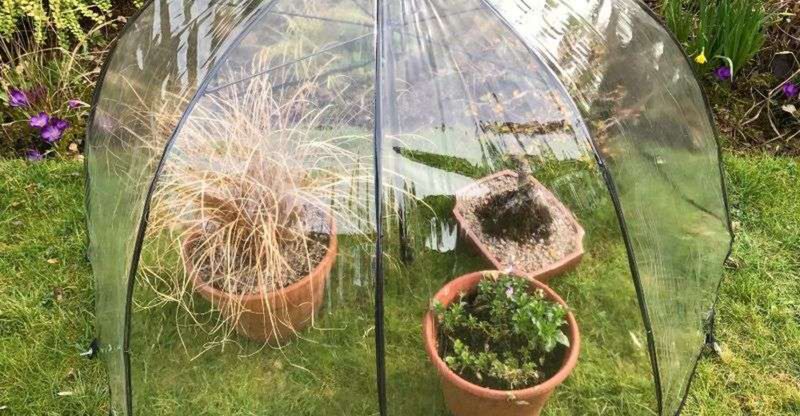
Cover a large patio umbrella with clear plastic sheeting to create a quick greenhouse. Secure the plastic with clothespins or binder clips for easy removal.
The umbrella’s frame provides natural support while allowing you to adjust the height as plants grow. Works best for container plants that can be grouped together.
During an unexpected cold snap, I covered my patio umbrella with plastic from an old shower curtain. My potted tomatoes survived the night when temperatures dropped to 38°F.
13. Plastic Wrap Greenhouse
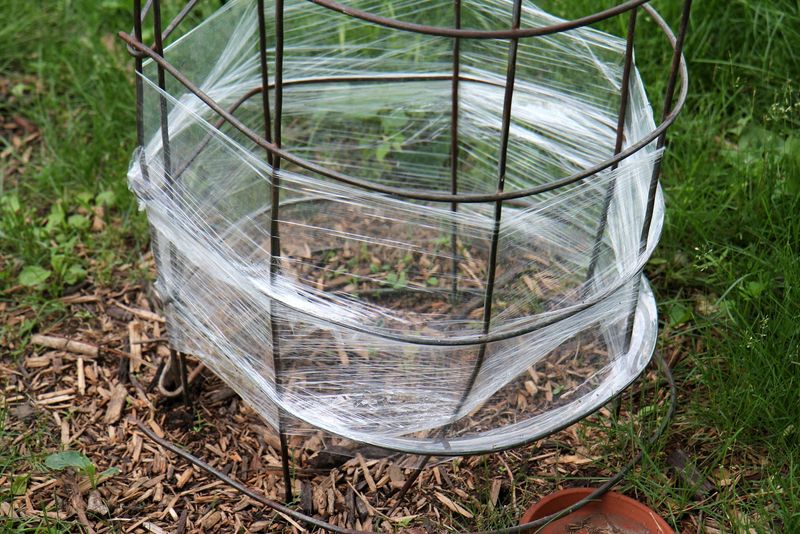
Create simple greenhouse covers by wrapping tomato cages or other plant supports with plastic wrap. The plastic creates a warm microclimate while conforming to any shape.
For ventilation, poke small holes near the top or unwrap partially on warm days. This method uses materials you likely already have in your kitchen.
My grandmother taught me this trick years ago. When a late frost threatened my newly planted tomatoes, I wrapped each cage and saved the entire crop with nothing more than a roll of plastic wrap from the kitchen drawer.
14. Glass Jar Cloches

Large glass jars, cookie jars, or fish bowls make elegant Victorian-style cloches for protecting individual plants. Simply place them over seedlings during cold nights and remove during warm days.
The glass creates a beautiful magnifying effect while trapping heat. Check thrift stores for inexpensive large jars or vases.
Started with one large pickle jar, then became slightly obsessed with collecting interesting glass containers. Now my spring garden looks like an eclectic glass art installation, but my seedlings emerge weeks earlier than my neighbors’.
15. Straw Bale Cold Frame
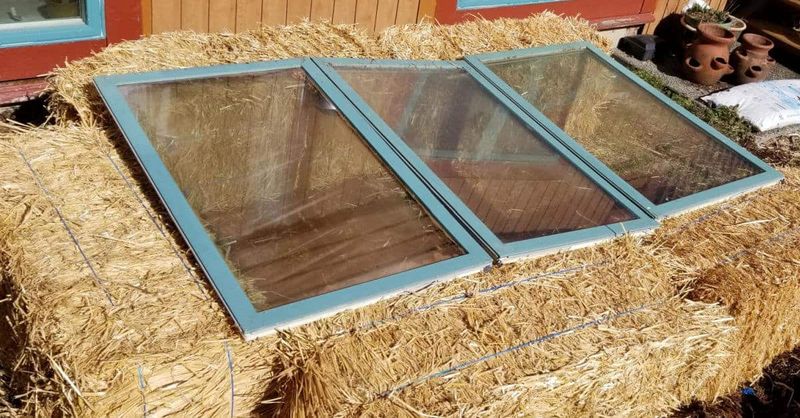
Arrange straw bales in a rectangle, then place an old window or clear plastic sheet on top. The straw provides excellent insulation while the clear top lets in sunlight.
The interior space stays remarkably warm even during cold weather. As the straw slowly decomposes, it actually generates additional heat.
Built this after my first frost three years ago and was amazed when my lettuce continued growing until December. The following spring, I planted directly into the partially decomposed bales for an amazing crop of strawberries.