8 Easy Steps To Grow Snake Plants In Water Without Soil
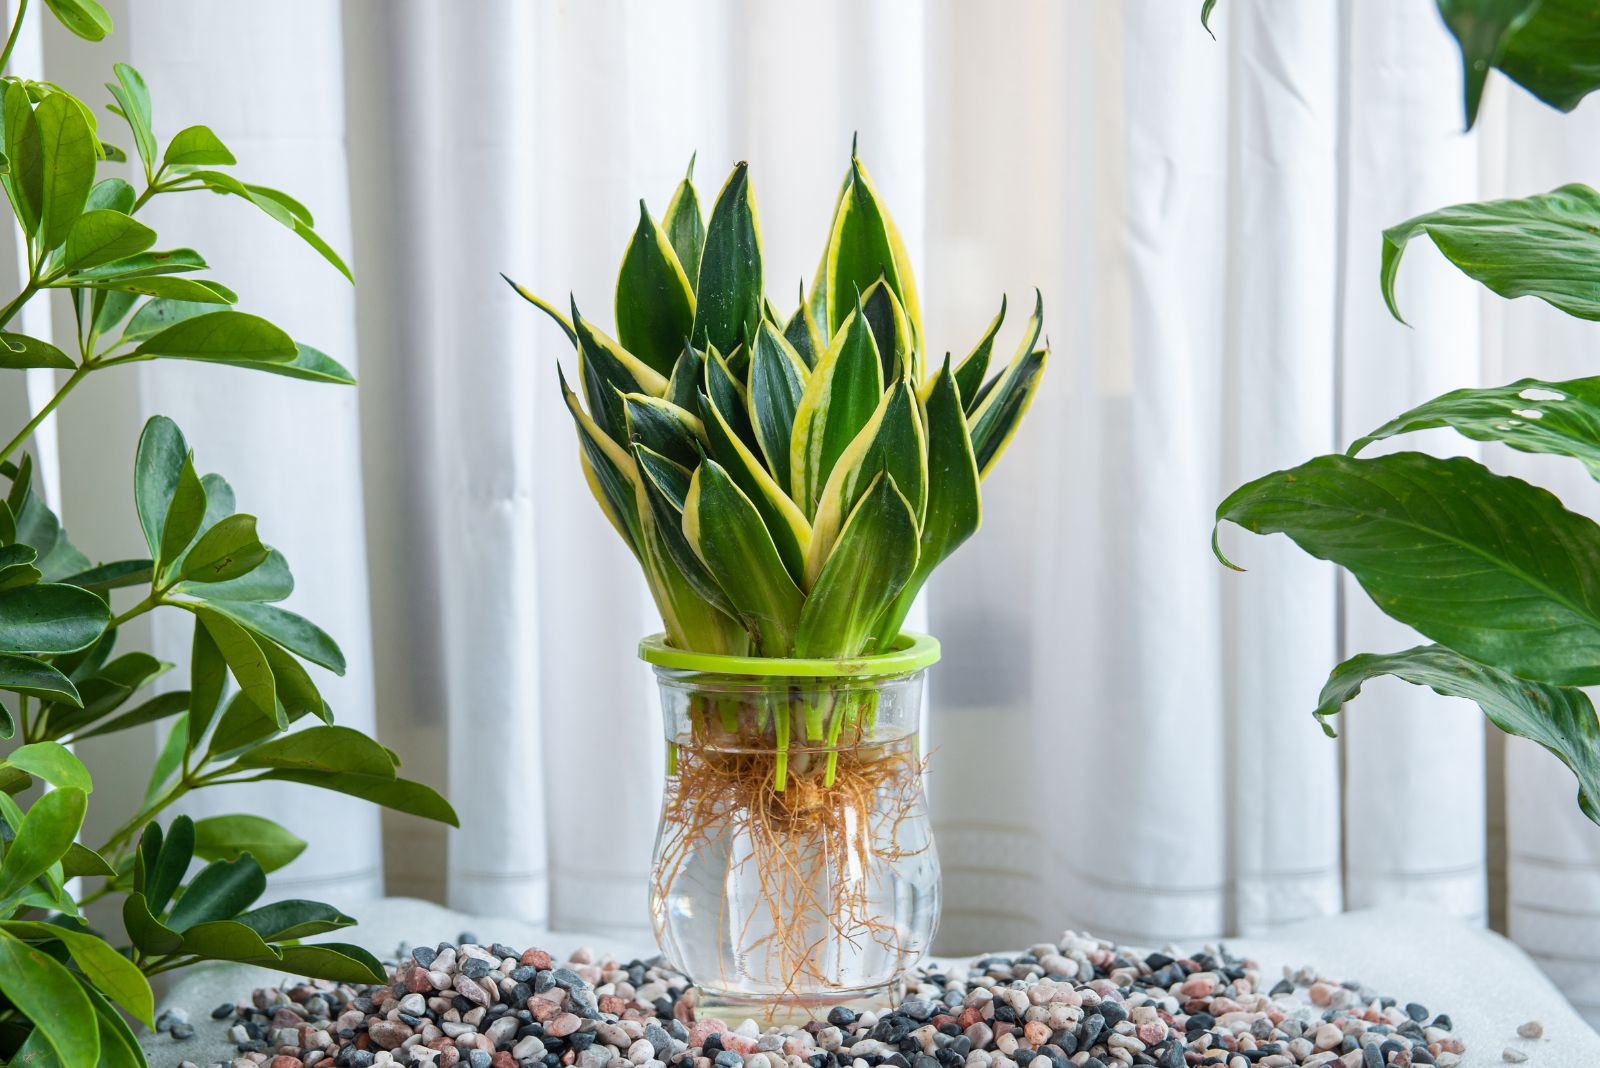
I’ve always been fascinated by the idea of growing plants in water, and snake plants quickly became my go-to for this simple, low-maintenance method.
Watching those sturdy green leaves thrive without soil feels almost like magic, and it’s incredibly satisfying to see roots develop in clear water before my eyes.
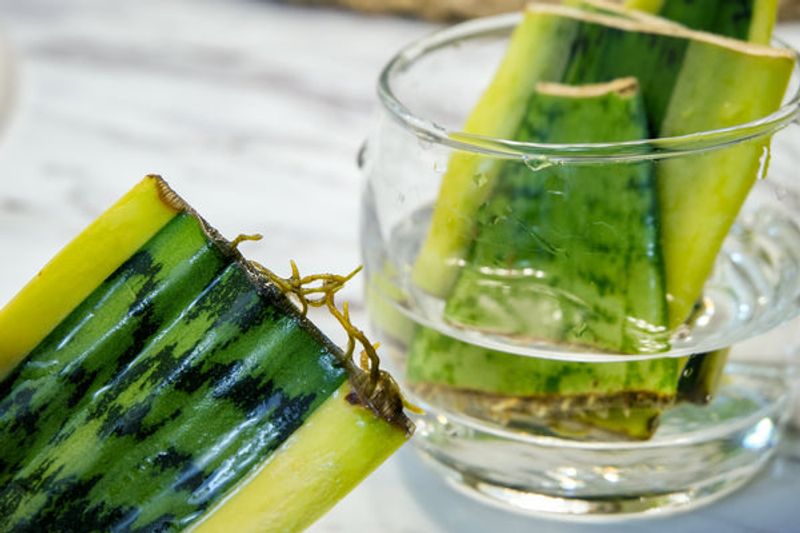
I start by carefully choosing healthy leaves or cuttings, making sure each one has a clean cut to avoid rot.
Then I place them in a glass container, filled just enough to cover the base, and watch as tiny white roots begin to unfurl.
It’s a little experiment that brings life to any corner of my home, and I love how it adds a touch of green without the mess of soil.
Following a few easy steps, I’ve turned snake plant propagation into a relaxing and rewarding routine that anyone can enjoy.
Step 1: Select Your Cutting
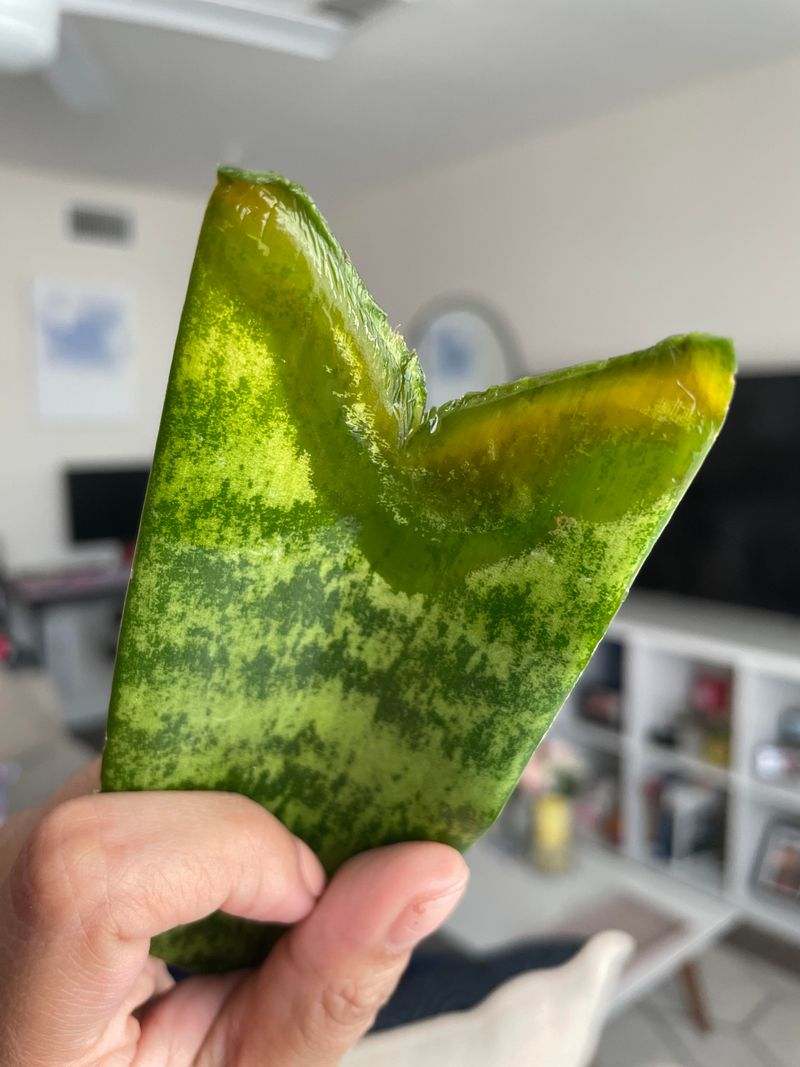
Choosing the right leaf cutting is the first and most important step in starting your snake plant propagation journey.
You want to select a leaf that looks vibrant and healthy, free from discoloration, bruises, or soft spots.
The leaf should come from a mature plant and be at least four to six inches long to ensure it has enough stored energy to support root growth.
Using clean, sharp scissors or pruning shears, cut the leaf as close to the base as possible to give it the best start.
Be sure to sanitize your cutting tool with rubbing alcohol before using it, as this reduces the risk of introducing bacteria.
Once you’ve made the cut, place the leaf somewhere safe and dry for one to two days so the end can callus over.
This drying period is essential, as it helps protect the cutting from moisture damage once it is placed in water.
You can leave it on a windowsill, shelf, or kitchen counter during this brief healing phase.
Using cuttings from your own plant is not only cost-effective but also allows you to grow your collection or share with friends.
It’s a small, satisfying start that brings a sense of community and personal touch to your indoor gardening routine.
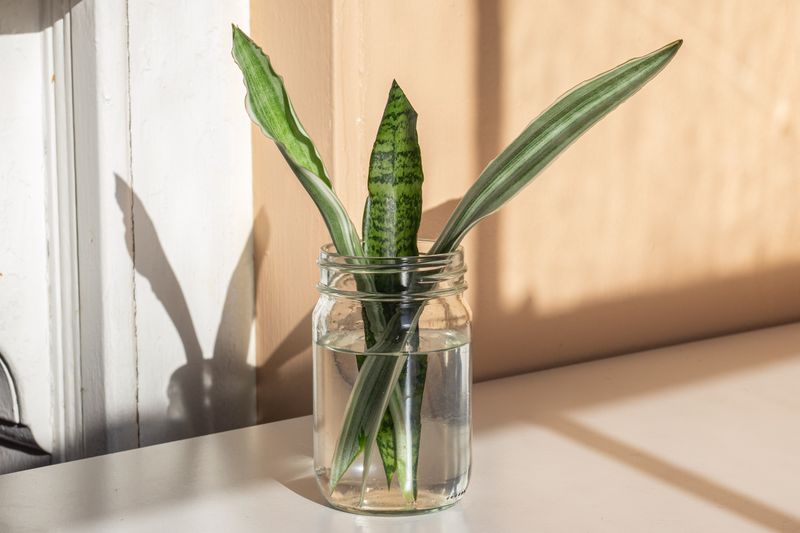
Step 2: Prepare A Clear Jar Or Vase
The container you choose for your cutting plays a quiet but important role in your plant’s success.
A clear glass jar, bottle, or vase is ideal because it lets you easily observe root development and water clarity.
Make sure the jar is tall enough to support the cutting so that it stands upright without leaning or tipping over.
Before placing your cutting in the jar, wash the container thoroughly with warm water and a mild soap to remove any residues.
Rinse it well to ensure no soap remains, as leftover chemicals could interfere with root growth.
Using a narrow-mouthed jar can help support the leaf naturally, though wide jars can also work with a little creativity.
Some people enjoy using colorful or decorative jars, but clear glass remains the most practical choice for beginners.
It allows you to keep an eye on the roots and detect any early signs of issues like cloudiness or unwanted growth in the water.
Taking a few extra minutes to select and clean your jar lays a strong foundation for everything that follows in the process.
This step may feel simple, but it has a surprisingly large impact on both visual enjoyment and plant health in the weeks to come.
Step 3: Fill With The Right Water
Water quality has a big influence on how successful your propagation process will be.
In most cases, standard tap water will work fine, but if your water contains noticeable chlorine or other strong additives, allow it to sit overnight before use.
Letting the water rest gives time for some of these substances to evaporate, making it gentler on your cutting.
Filtered or distilled water is another great option, especially if you’ve had difficulty rooting plants with tap water in the past.
Fill your prepared jar with enough room temperature water to submerge one to two inches of the leaf cutting.
Avoid filling it too high, as excess water could cause unnecessary moisture to affect parts of the leaf that don’t need to be submerged.
The water should feel neutral to the touch, not too cold and definitely not warm.
Water that’s too cold can stress the cutting, while warm water may not support healthy root development.
Keep the water level steady and check it every few days to make sure it hasn’t dropped too low through evaporation.
Taking the time to prepare proper water may seem small, but this thoughtful step helps ensure your cutting grows strong, clean, and ready to thrive.
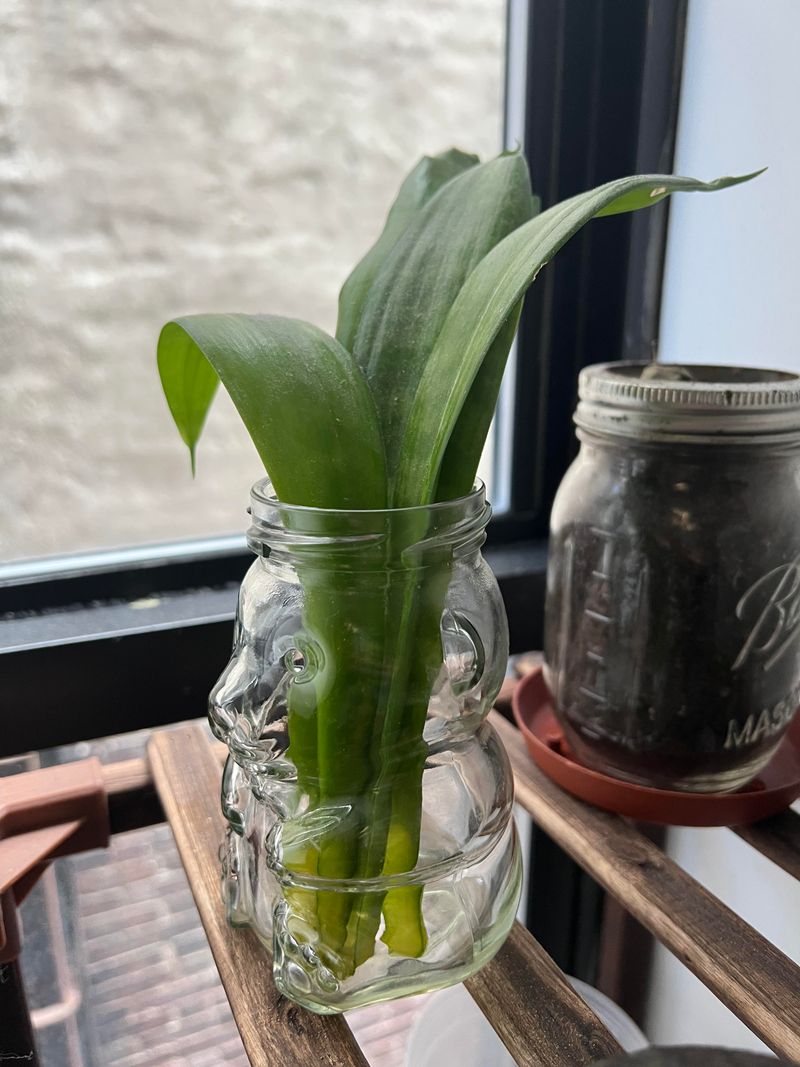
Step 4: Insert The Leaf Cutting
Now that your leaf is properly callused and your jar is ready with clean water, it’s time to combine the two.
Gently lower the cutting into the jar, positioning it so the bottom inch or two sits comfortably in the water.
Be careful to keep the rest of the leaf dry, as only the lower section needs to be in contact with the water for roots to develop.
If your cutting doesn’t stay upright on its own, try adjusting the container or adding small pebbles or marbles to support it.
Propping the leaf against the side of the jar is another simple way to help keep it stable while it gets established.
The submerged end should rest just below the water’s surface but remain fully covered so that root formation is properly encouraged.
Avoid letting the entire leaf soak, as too much moisture in the wrong place can delay progress or create avoidable challenges.
Once your cutting is positioned correctly, step back and appreciate your setup—it may look simple now, but growth is already on the horizon.
This moment marks the transition from preparation to action, setting the stage for the changes that will unfold over the next few weeks.
With your cutting now in place, you’re officially on your way to growing a brand-new snake plant from just one single leaf.
Step 5: Find The Perfect Light Spot
Light plays a vital role in helping your cutting transition from a single leaf into a thriving plant.
Choose a bright location that gets indirect sunlight for most of the day, such as a windowsill that faces east or west.
These spots offer strong yet gentle light, which encourages healthy root growth without overwhelming the leaf.
Avoid placing your jar in direct sun, especially during the warmest parts of the day, as this can overheat the water or cause other issues.
Too much direct sunlight can also lead to unwanted growth in the jar, such as algae, which might affect the health of your cutting.
If natural light is limited, especially during winter, consider using a grow light positioned about a foot above the jar.
Keep it on for about ten to twelve hours per day to mimic the daylight conditions plants need.
As your cutting adjusts, pay attention to how the leaf responds to its environment.
Signs like discoloration or sagging may indicate that it’s getting too much light or not enough.
By fine-tuning your cutting’s light exposure, you create a nurturing environment that gently supports root growth and overall plant vitality.
Step 6: Maintain A Consistent Routine
Once your cutting is in place and your jar is set, maintenance becomes the key to success.
Every week, take a moment to empty the old water and refill the jar with clean, room temperature water.
This prevents bacteria from building up and ensures that your cutting continues to grow in a fresh and supportive environment.
You can also give the jar a quick rinse before refilling to remove any residue that may have built up inside.
Take this opportunity to examine the cutting and check for signs of progress.
In about two to four weeks, you may begin to notice small white roots forming at the base of the leaf.
This is always an exciting milestone, and watching the roots grow longer each week adds a new level of satisfaction to the process.
If the water becomes cloudy or has an unusual smell before the end of the week, change it sooner and gently rinse the cutting under cool water.
Consistent care doesn’t take much time, but it does create the best possible outcome for your plant.
This simple habit of checking, refreshing, and observing becomes a calming part of your weekly rhythm and connects you more deeply with your plant’s growth journey.
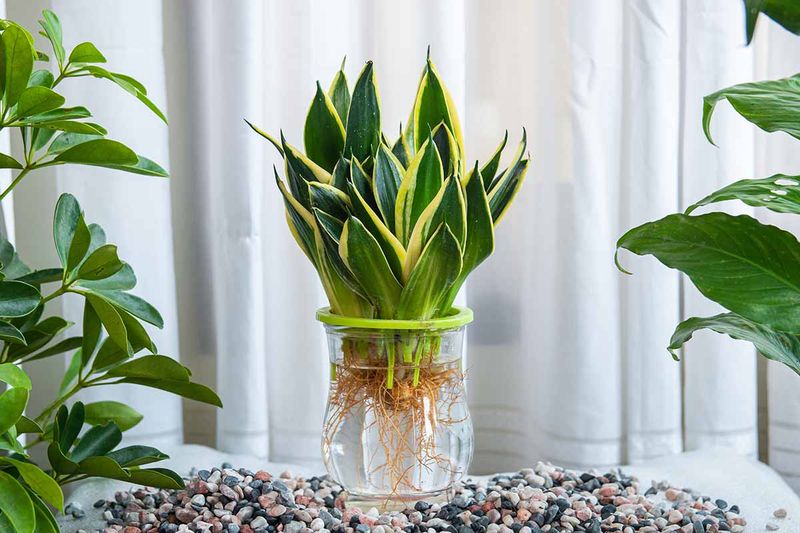
Step 7: Monitor Root Growth Closely
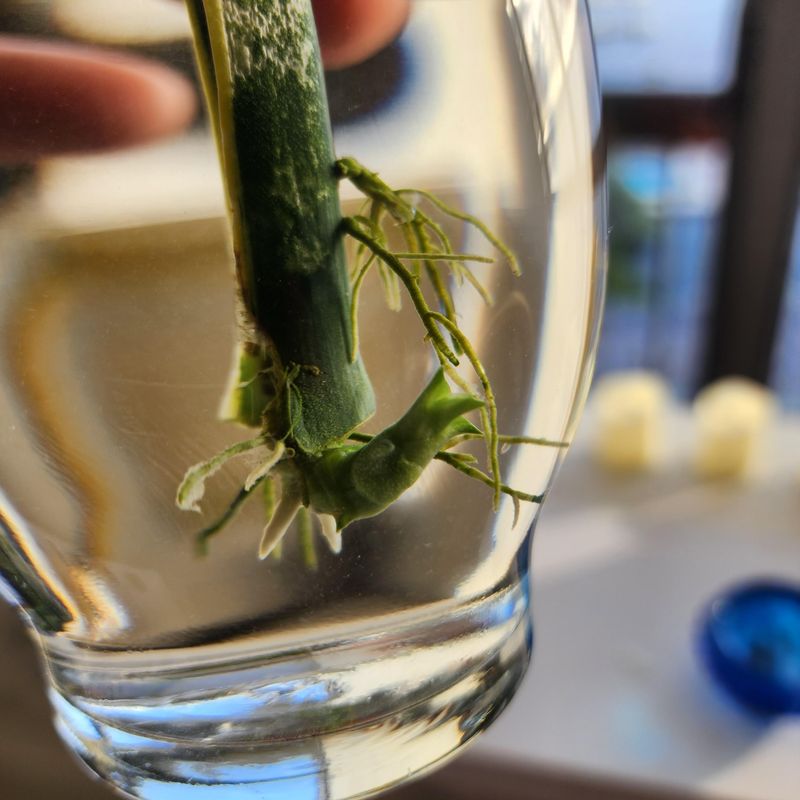
As your cutting begins to root, you’ll notice exciting changes taking place right before your eyes.
Roots typically start as small white nubs and gradually extend into longer strands over the next few weeks.
They should look healthy, firm, and clean, showing steady development from the base of the leaf.
Continue changing the water weekly to encourage strong and healthy growth without interruption.
Avoid touching or moving the roots too often, as they are delicate and still establishing themselves.
If roots appear soft or slimy, it may be a sign that the water has gone too long without changing or that there’s not enough airflow.
In such cases, rinse the roots gently and replace the water promptly to help restore a healthier environment.
Throughout this phase, you’ll develop a sense of how your cutting is responding to care and whether it’s ready for the next stage.
Don’t worry if progress seems slow, some cuttings take longer than others depending on temperature, humidity, and light.
With patience and continued observation, your cutting will begin to transform into a rooted plant that’s well on its way to long-term success.
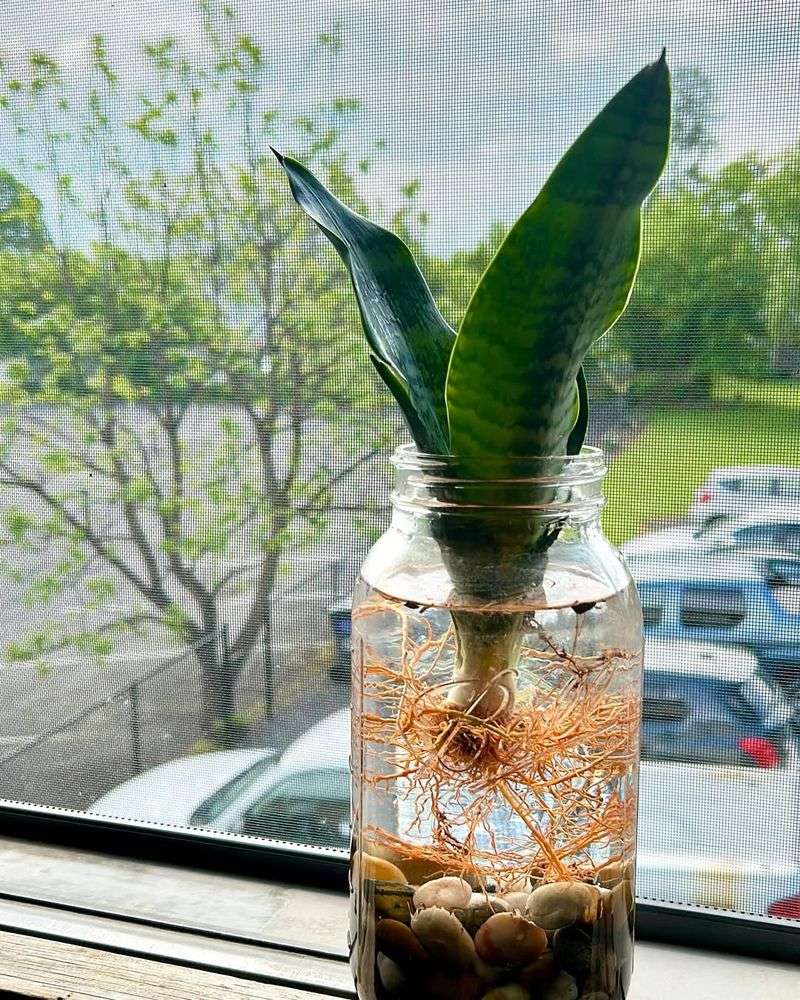
Step 8: Decide When To Transfer Or Continue In Water
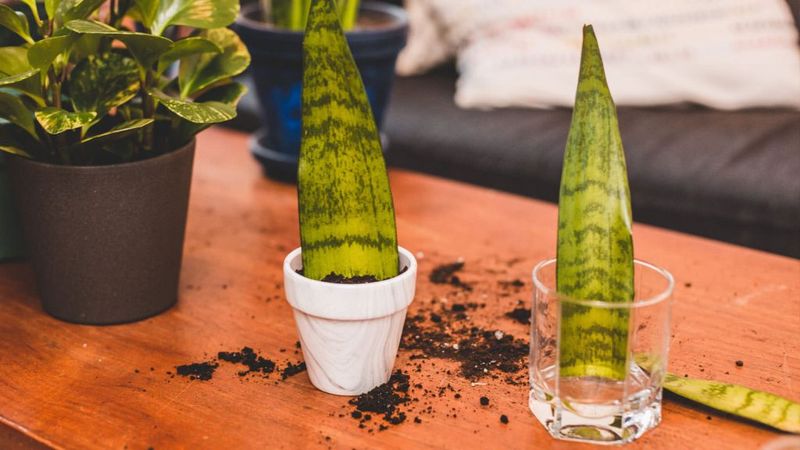
After a few weeks to a couple of months, your cutting may develop a healthy root system several inches long.
At this point, you’ll need to decide whether to keep it growing in water or transfer it into soil.
Both options have their benefits, and your decision may depend on your space, preferences, and long-term care style.
If you enjoy growing in water, simply keep refreshing the jar weekly and watch your plant continue to thrive.
Make sure to monitor root health and provide occasional light fertilizer if needed.
If you prefer to plant in soil, choose a well-draining mix such as one made for succulents or cacti.
Plant the cutting gently into the soil, ensuring the rooted portion is buried but the leaf remains upright and stable.
Keep the soil lightly moist for the first couple of weeks, then allow it to dry out slightly between waterings.
Transitioning your plant from water to soil gives it a new environment to explore and may support faster long-term growth.
Whichever path you choose, your snake plant is now on its way to becoming a beautiful, mature addition to your indoor garden.