These 7 Toilet Paper Roll Tricks Make Seed Starting Easy In Oregon

If you’ve ever saved empty toilet paper rolls and wondered if they were good for anything besides recycling, you’re not alone. They tend to pile up quietly, especially when you’re already thinking ahead to spring planting.
Have you ever looked at one and thought it might be useful, but weren’t quite sure how?
Seed starting doesn’t have to be complicated or expensive. Sometimes the simplest tools are already sitting around the house.
Toilet paper rolls can actually make the process easier, especially if you like low-waste solutions or just enjoy finding practical uses for everyday items. They’re easy to work with, biodegradable, and surprisingly helpful for young seedlings.
If you’ve felt curious about starting seeds but hesitant to buy trays or supplies, this is a comfortable place to begin. These small tricks are straightforward and beginner-friendly, and they don’t require a lot of setup.
These seven toilet paper roll ideas can help simplify seed starting, keep things organized, and make the whole process feel more approachable, even if you’re just getting started.
1. Why Toilet Paper Rolls Work So Well For Seed Starting
Cardboard tubes give your seeds exactly what they need without costing you a dime. The material breathes, which means roots get oxygen while excess moisture escapes through the sides.
This natural air exchange helps prevent the soggy, suffocating conditions that kill so many seedlings in plastic containers.
Your seedlings also benefit from the tube’s depth. Most toilet paper rolls measure about four inches tall, giving tap roots plenty of room to stretch downward instead of circling around the bottom.
Deep root growth creates stronger plants that handle transplant shock much better than shallow-rooted seedlings.
The biodegradable nature solves another huge problem. When transplant day arrives, you don’t have to wrestle plants out of containers or risk damaging delicate roots.
You simply plant the entire tube right into your garden bed or larger pot. The cardboard breaks down naturally within weeks, feeding the soil as it decomposes.
Plus, you’re reusing something that would otherwise end up in the trash or recycling bin. Every tube you save is one less plastic pot you need to buy, wash, and store year after year.
That’s better for your wallet and better for the planet.
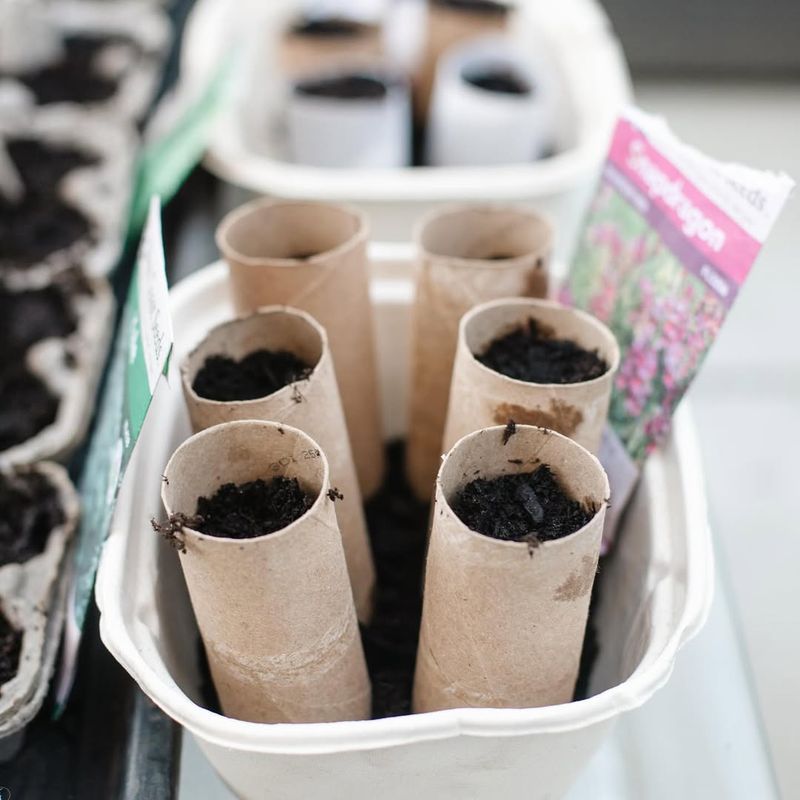
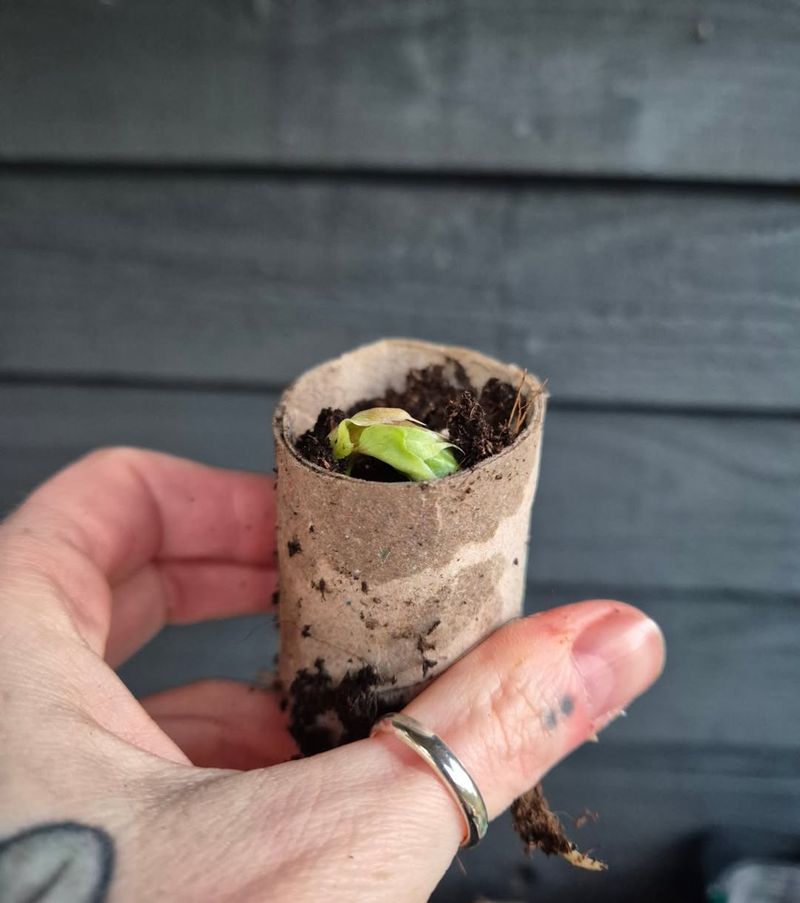
2. Turning Toilet Paper Rolls Into Biodegradable Seed Pots

Making your own seed pots takes about thirty seconds per tube. Start by making four evenly spaced cuts around one end of the roll, each about one inch deep.
These cuts create flaps that you’ll fold inward to form the bottom of your pot. Overlap the flaps like closing a cardboard box, and you’ve got an instant container that holds soil without any tape or glue.
Some gardeners prefer to skip the cutting and simply set the tubes inside a tray or shallow box for support. This method works fine if you’re careful with watering, though the folded-bottom version gives you more flexibility to move individual pots around.
Choose whichever approach fits your workspace and patience level.
Fill each tube with moistened seed-starting mix, leaving about half an inch of space at the top. This gap prevents soil from washing over the edge when you water and gives you room to label each pot with the plant variety.
Press the soil down gently but don’t pack it hard.
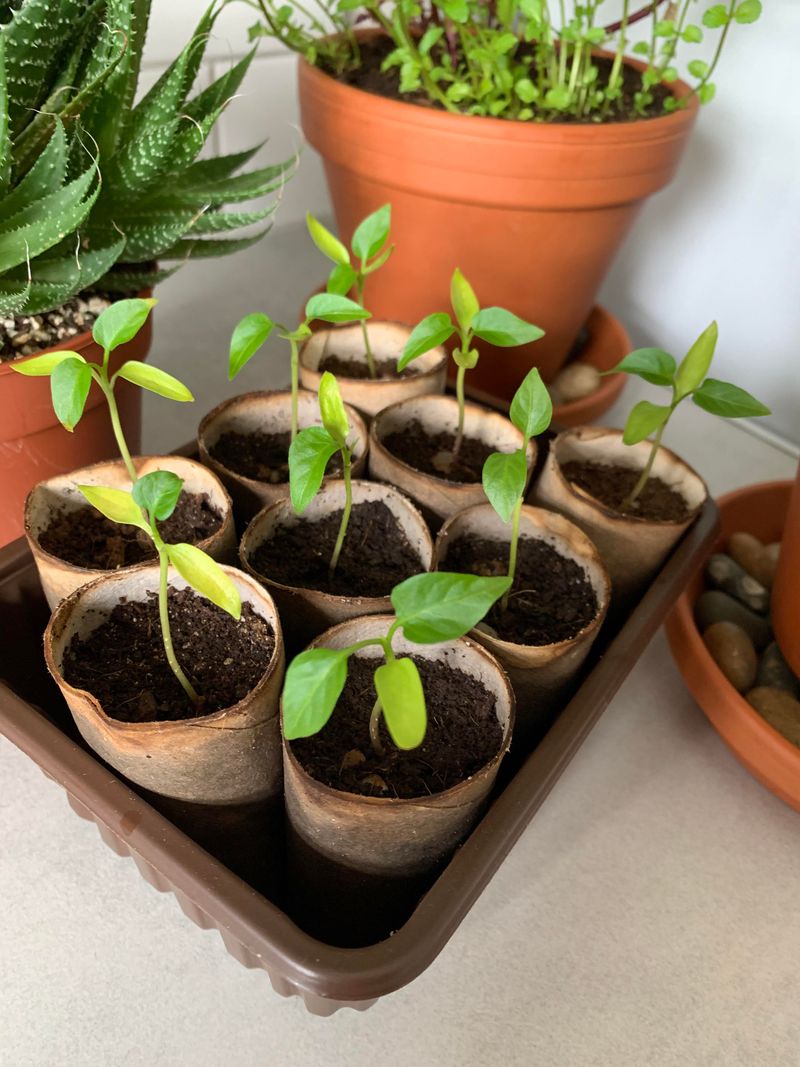
You can fit a surprising number of these homemade pots into a standard baking dish or plastic storage container. The container catches drainage water and makes it easy to move your whole seed-starting operation from table to windowsill without spilling soil everywhere.
3. The Best Seeds To Start In Toilet Paper Rolls

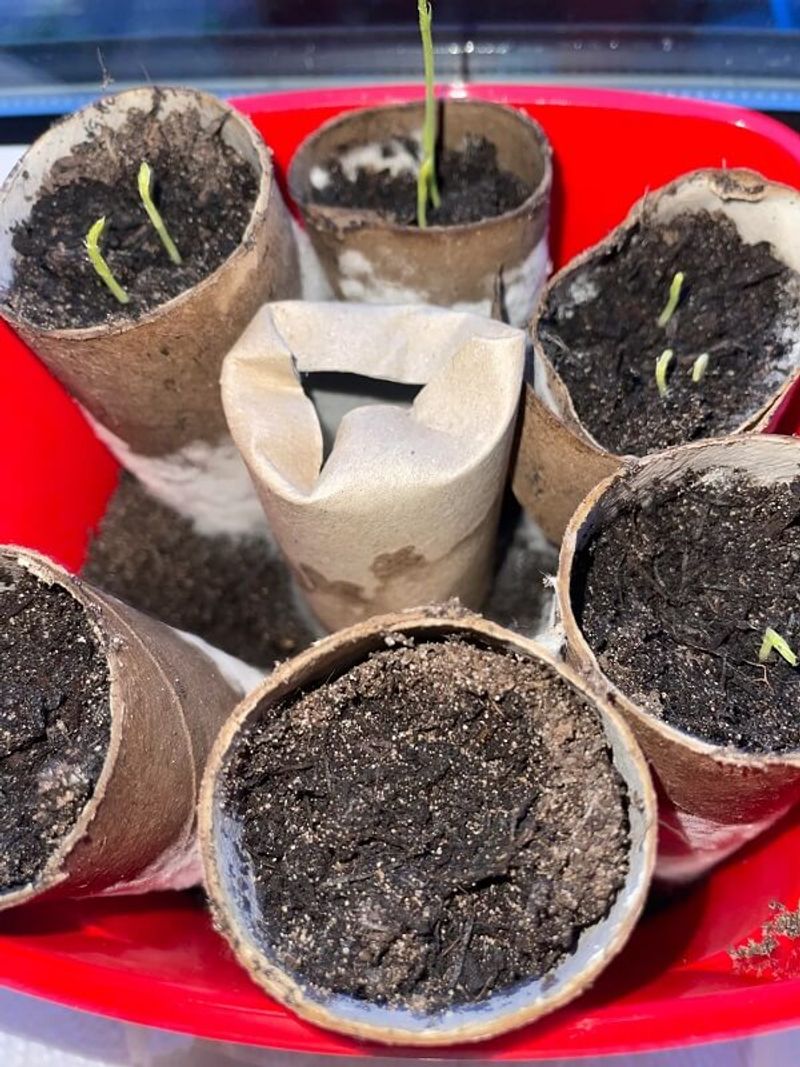
Vegetables with long taproots absolutely love these cardboard tubes. Peas, beans, cucumbers, and squash all develop deep root systems that appreciate the extra vertical space.
When you plant these seedlings with their tubes intact, those roots just keep growing downward without missing a beat.
Tomatoes and peppers also do beautifully in toilet paper rolls, especially if you’re starting them indoors six to eight weeks before your last frost. The tubes give young plants enough room to develop strong stems without needing an early transplant into larger containers.
You can keep them happy in their cardboard homes until the weather warms up.
Herbs like basil, cilantro, and dill work well too, though you might want to transplant these faster-growing plants a bit sooner. Their root systems don’t need as much depth, but they still benefit from the breathable walls and easy transplanting process.
Avoid starting tiny seeds like lettuce or carrots in these tubes. Those crops do better with direct sowing or starting in shallow trays where you can thin them easily.
Save your toilet paper rolls for plants that need individual pots and deeper root space. That’s where these humble tubes really shine and make your gardening life so much simpler.
4. How To Prevent Mold And Overwatering
Cardboard loves moisture a little too much sometimes. If your tubes stay constantly wet, you’ll notice fuzzy white or green mold creeping up the sides within days.
The solution isn’t complicated: water less frequently and focus on keeping the soil moist rather than the cardboard soaked.
Bottom watering works wonderfully with toilet paper roll pots. Pour water into the tray or container holding your tubes and let the soil soak it up from below.
This method keeps moisture where your seeds need it while the upper portions of the tubes stay relatively dry. Empty any standing water after about twenty minutes so your pots aren’t sitting in a puddle.
Good air circulation makes a huge difference too. Don’t crowd your tubes together so tightly that air can’t move between them.
Leave a little breathing room, and if you’re starting seeds indoors, consider running a small fan nearby for a few hours each day. Moving air helps moisture evaporate and discourages mold growth on both cardboard and soil surfaces.
If mold does appear, don’t panic. A bit of surface mold won’t harm your seedlings, though it looks alarming.
You can gently scrape it off or simply reduce watering and improve airflow. Your plants care far more about healthy roots than pristine-looking containers anyway.
5. Using Toilet Paper Rolls To Protect Young Roots
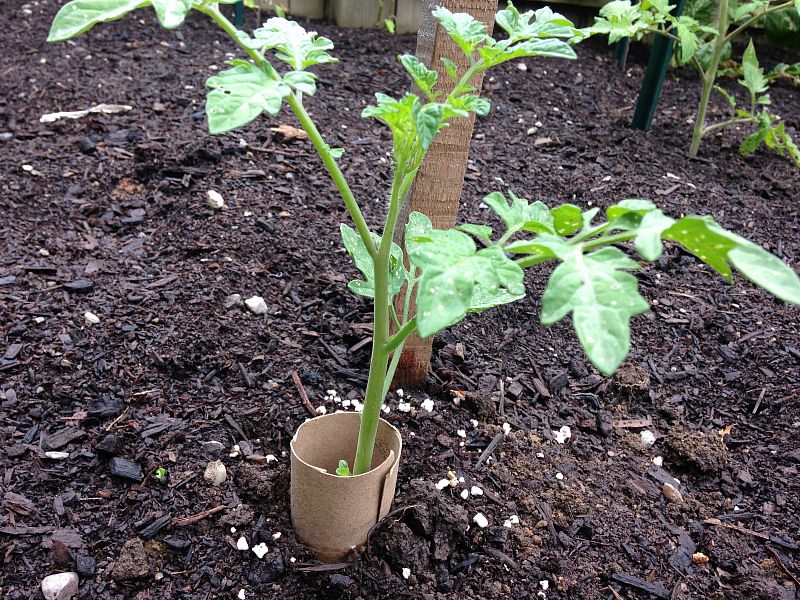
One of the cleverest tricks involves cutting the bottom off your toilet paper rolls completely and pushing them down into the soil of your garden bed before transplanting. This creates a protective collar around your seedling’s root zone that keeps cutworms, slugs, and other pests from munching through tender stems at ground level.
Push each tube about an inch deep into the soil, leaving two to three inches sticking up above the surface. When you transplant your seedling, place it right in the center of this cardboard fortress.
The tube acts as a physical barrier that crawling pests can’t easily cross, giving your young plant time to develop a tougher stem.
The cardboard collar also helps retain moisture around the root ball during those critical first weeks after transplanting. Instead of water spreading out across the entire bed, it concentrates around your new seedling where it’s needed most.
This targeted watering helps establish strong roots faster.
As the weeks pass, the tube gradually breaks down and disappears into the soil. By the time it’s completely decomposed, your plant has grown strong enough to defend itself against most common pests.
You get all the protection benefits without leaving plastic or other non-degradable materials in your garden beds, which keeps your growing space clean and chemical-free.
6. Transplanting Seedlings Without Root Disturbance
The real magic happens on transplant day. When your seedlings have developed their second or third set of true leaves and the weather cooperates, you’re ready to move them outside.
With toilet paper roll pots, this process becomes almost foolproof because you never have to touch the roots at all.
Dig a hole slightly deeper than your cardboard pot and wide enough to accommodate it comfortably. Before placing the tube in the ground, tear or peel away the bottom inch of cardboard.
This small step helps roots break through into the surrounding soil more quickly, especially if your tubes are made from thicker cardboard.
Set the entire pot into the hole so the top edge of the cardboard sits just below soil level. If any cardboard sticks up above the ground, it acts like a wick and pulls moisture away from your plant’s roots.
Bury it completely to avoid this problem. Backfill around the tube with soil and press down gently to eliminate air pockets.
Water thoroughly right after planting to help the cardboard begin breaking down and to settle soil around the root ball. Your seedling experiences virtually zero transplant shock because its roots never got disturbed or exposed to air.
It just keeps growing as if nothing happened, which means you see results faster and lose fewer plants to transplant stress.
7. Common Mistakes To Avoid With Toilet Paper Roll Starters
Using paper towel rolls instead of toilet paper rolls ranks high on the list of well-intentioned errors. Paper towel tubes are too tall and wide for most seedlings, making them awkward to work with and wasteful of seed-starting mix.
Stick with the shorter toilet paper version or cut paper towel rolls into thirds if that’s all you have available.
Another frequent mistake involves starting seeds too early in the season. Just because you have free pots doesn’t mean your seedlings should spend months indoors.
Plants that sit too long in small containers become root-bound and stressed, even in biodegradable pots. Follow normal seed-starting schedules based on your last frost date and the specific needs of each vegetable variety.
Some gardeners also forget to harden off their seedlings before transplanting. Those cardboard pots don’t magically protect plants from sunburn or wind damage when you move them from a cozy indoor spot to the harsh outdoors.
Spend at least a week gradually exposing your seedlings to outside conditions, increasing their time outdoors each day.
Finally, don’t assume every tube will decompose at the same rate. Thicker cardboard takes longer to break down, and dry soil slows the process considerably.
If you’re concerned about decomposition speed, you can pre-soak your tubes in water overnight before filling them with soil, which gives the breakdown process a head start.