Your Go-To Beginner’s Guide For Pruning Clematis In Washington State
Pruning clematis can feel confusing, especially if you’re gardening in Washington’s changing climate. One wrong cut can make beginners nervous, but the truth is it’s easier than it sounds.
With the right timing and simple steps, you can help your clematis grow stronger and bloom better. Pruning is the secret to bigger, healthier flowers.
Imagine your vine bursting with color instead of looking thin or tangled. What if a few small cuts could bring weeks of extra blooms?
You don’t need to be a gardening expert to get great results. The right approach makes all the difference.
Washington’s mild winters and wet springs affect how clematis grows, which is why knowing when and how to prune matters.
Once you understand the basics, pruning becomes quick, simple, and even satisfying. After this, you’ll feel confident caring for your clematis year after year.
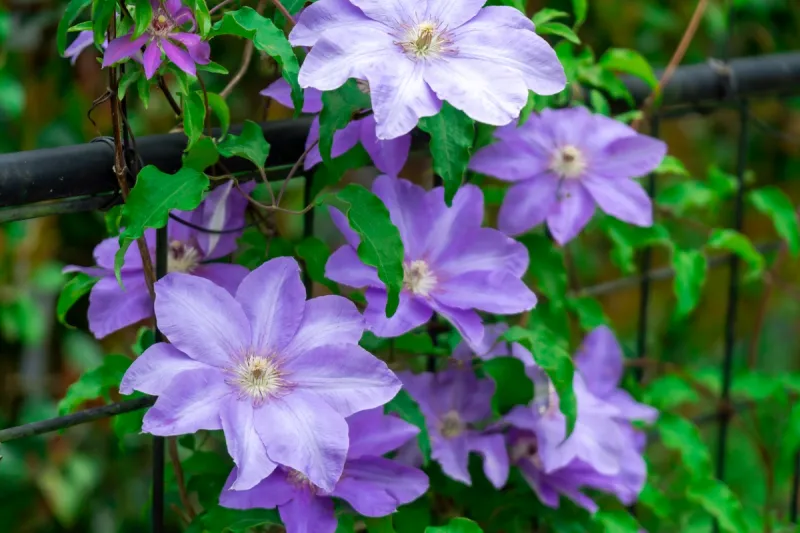
Identify Your Clematis Pruning Group First
Before you pick up those pruning shears, figuring out which pruning group your clematis belongs to is absolutely essential for success. Clematis plants fall into three main pruning groups, and each one requires a completely different approach to cutting back.
Group 1 clematis bloom on old wood from the previous year, Group 2 varieties produce flowers on both old and new growth, and Group 3 types bloom exclusively on new growth from the current season.
Getting this identification right from the start prevents you from accidentally removing flower buds and ensures your vine blooms beautifully throughout the growing season.
In Washington State gardens, you’ll find all three types thriving in various microclimates, from the wetter western regions to the drier eastern areas. Check the plant tag or receipt from your nursery purchase, as this usually lists the pruning group information.
If you’ve inherited a clematis or lost the tag, observe when your plant blooms during the season. Early spring bloomers typically belong to Group 1, late spring to early summer bloomers often fit Group 2, and summer to fall bloomers usually fall into Group 3.
Keeping a simple garden journal helps you track this information year after year, especially if you have multiple clematis vines around your property. Take photos of your clematis when it’s flowering and note the month and any distinguishing characteristics of the blooms.
Washington gardeners benefit from our extended growing season, which gives you plenty of time to observe blooming patterns.
Once you correctly identify your clematis pruning group, the rest of the pruning process becomes straightforward and much less intimidating.
This foundational knowledge sets you up for pruning success and gorgeous blooms season after season in your Pacific Northwest garden.
Master The Timing For Washington’s Climate

Timing makes all the difference when pruning clematis in Washington State, where our mild winters and temperate springs create unique opportunities for gardeners.
Unlike harsher climates that require strict pruning schedules, Washington’s moderate weather gives you a bit more flexibility, but understanding the optimal windows still matters tremendously.
Group 1 clematis should be pruned immediately after flowering in late spring, Group 2 varieties benefit from light pruning in late winter or early spring before new growth starts, and Group 3 types can be cut back hard in late February or early March across most of Washington.
Your Washington Garden Changes Every Week. Your Plan Should Too.
Gardening in Washington changes quickly throughout the season. Every Friday you’ll receive a simple weekly plan showing exactly what to plant, prune, fertilize, harvest, and protect so you never miss the right timing.
Our state’s varied geography means timing can shift slightly depending on whether you’re gardening in coastal areas, the Puget Sound region, or inland valleys. Western Washington gardeners might prune a week or two earlier than those in colder eastern parts of the state.
Pay attention to local frost dates and watch for signs of new growth emerging on your clematis, which signals the plant is waking up from dormancy.
Late winter pruning in Washington typically falls between mid-February and mid-March, when the worst of winter weather has passed but before vigorous spring growth begins.
Avoid pruning during active growth periods or when flower buds are visible, as this removes potential blooms and wastes the plant’s energy.
Washington’s unpredictable spring weather sometimes brings late frosts, so having frost cloth handy protects tender new growth after pruning.
Mark your calendar with reminders for each clematis pruning group you have, accounting for your specific location within the state.
Proper timing aligned with Washington’s seasonal patterns ensures your clematis vines put their energy toward producing spectacular flowers rather than recovering from poorly timed cuts.
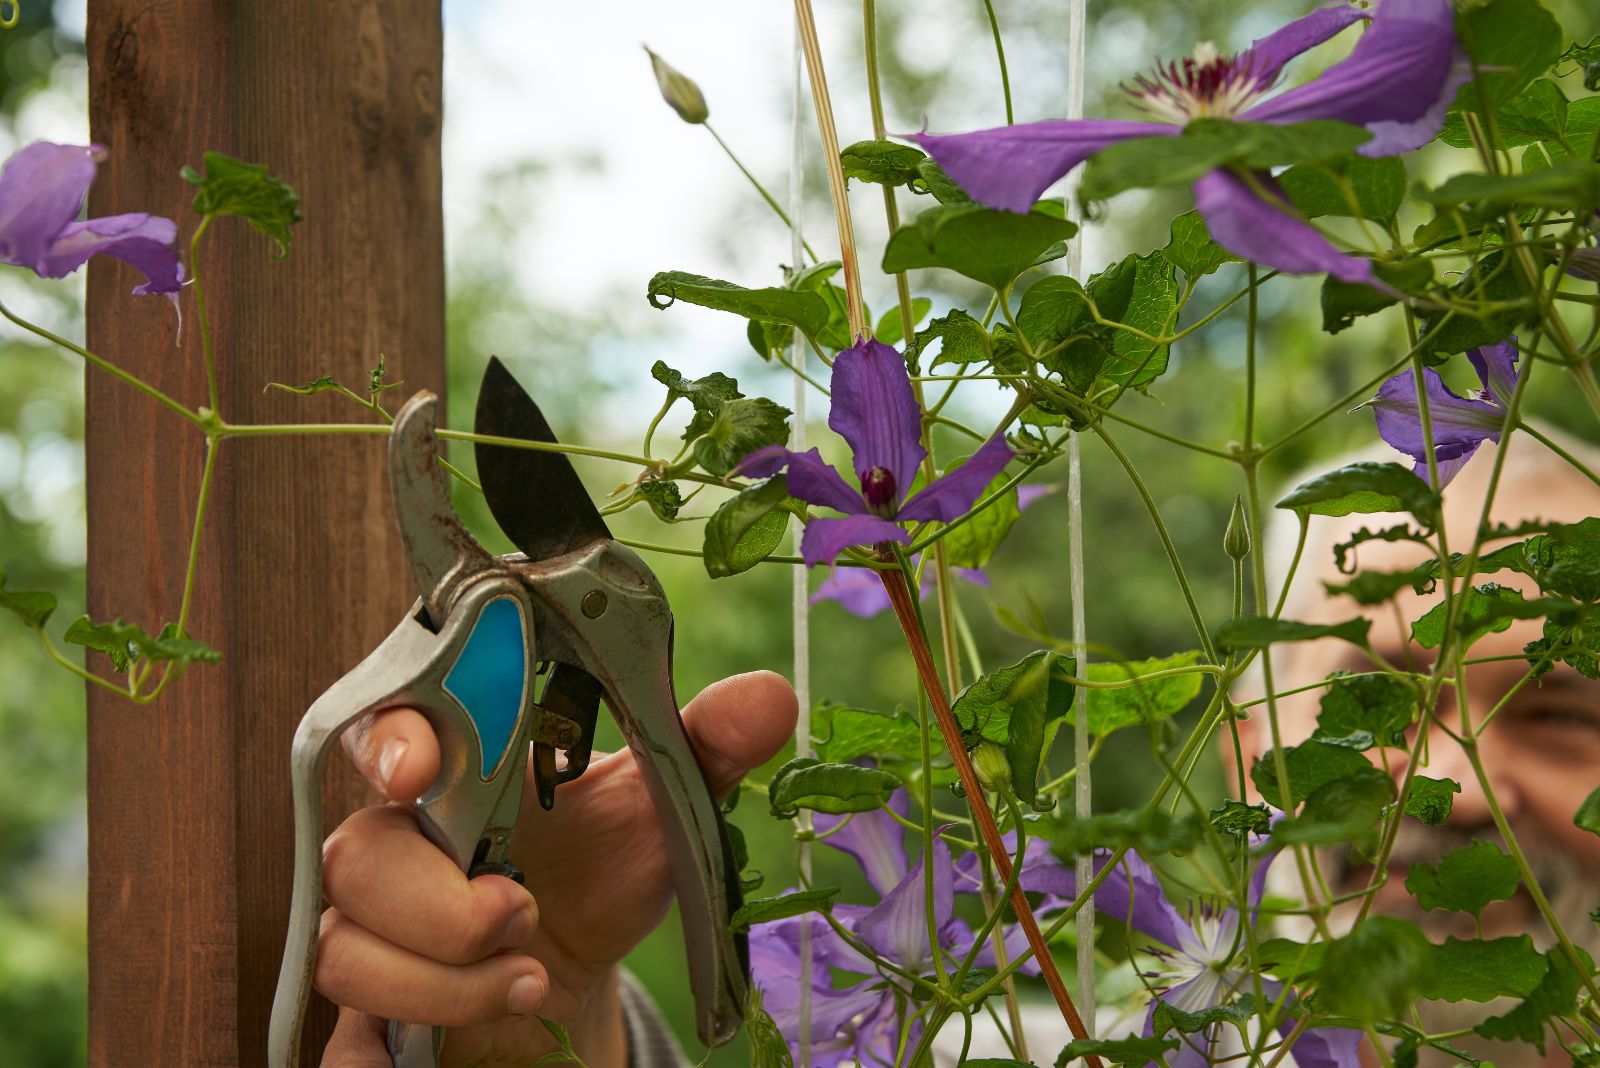
Use Clean, Sharp Tools Every Time
Sharp, clean pruning tools are non-negotiable when working with clematis vines, as dull or dirty blades can damage plant tissue and introduce diseases. Investing in quality bypass pruners designed for clean cuts through stems up to three-quarters of an inch thick serves most clematis pruning needs perfectly.
Bypass pruners work like scissors, creating smooth cuts that heal quickly, while anvil-style pruners crush stems and should be avoided for clematis work.
Washington’s damp climate creates ideal conditions for fungal diseases and bacterial infections, making tool cleanliness even more critical than in drier regions.
Before each pruning session, wipe down your pruner blades with rubbing alcohol or a diluted bleach solution to eliminate any lingering pathogens from previous cuts. This simple step takes only seconds but prevents spreading problems from one plant to another throughout your garden.
Keep your tools sharp by regularly using a sharpening stone or file, as sharp blades require less pressure and create cleaner cuts that heal faster.
Dull tools tear and crush plant tissue, creating jagged wounds that take longer to heal and become entry points for diseases common in Washington’s moist environment.
Consider having dedicated pruning tools specifically for your clematis and other ornamental vines, separate from tools used for vegetable gardening or pruning potentially diseased plants.
Store your pruners in a dry location to prevent rust, which is a constant battle in Washington’s humid climate.
Apply a light coating of oil to metal parts after cleaning and drying to protect against moisture damage. Quality pruning shears last for years when properly maintained, making them a worthwhile investment for any serious gardener.
Clean, sharp tools make pruning easier, faster, and safer for both you and your clematis vines.
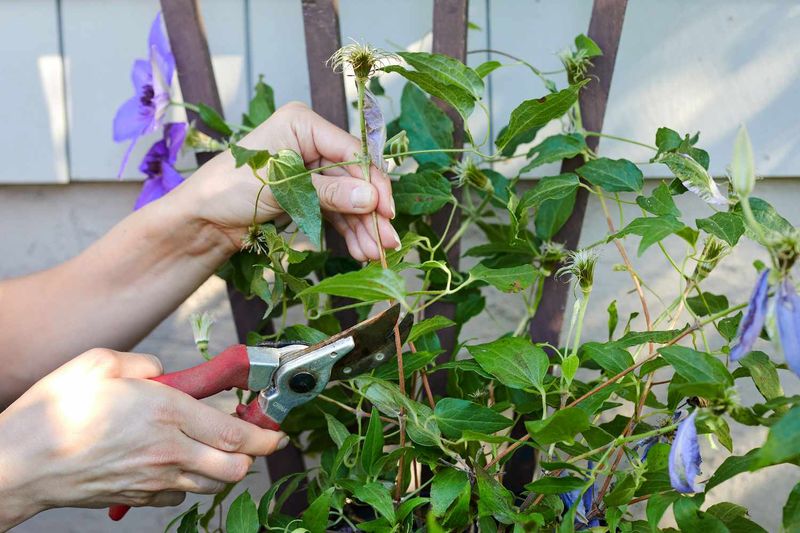
Learn The Proper Cutting Techniques

Making cuts correctly protects your clematis from damage and encourages healthy new growth in the right directions. Always cut at a slight angle about a quarter inch above a healthy bud or set of buds, which directs water away from the bud and promotes outward growth.
The angle should slope away from the bud to prevent water from pooling and potentially causing rot, especially important in Washington’s rainy climate where moisture lingers on plants.
Avoid cutting too close to the bud, which might damage it, or too far away, which leaves a stub that can become diseased.
When removing entire stems, cut back to the main stem or base of the plant rather than leaving stubs sticking out. Stubs rarely produce new growth and often become entry points for diseases that thrive in Washington’s damp conditions.
For Group 3 clematis that require hard pruning, cut all stems back to about 12 to 18 inches from the ground, just above a pair of strong buds.
This might seem drastic, but these varieties bounce back vigorously and produce abundant flowers on the new growth.
Group 2 clematis require a gentler approach, with selective pruning to remove weak or damaged stems while preserving the main framework of healthy growth.
Remove any stems that look shriveled, discolored, or damaged by winter weather common in Washington State.
For Group 1 varieties, limit pruning to shaping and removing spent flowers immediately after blooming finishes. Practice makes perfect with pruning techniques, so don’t worry if your first attempts feel awkward.
Each pruning session builds your skills and confidence, and clematis vines are remarkably forgiving plants that recover well from minor mistakes. Focus on making clean cuts at the proper angle and location, and your clematis will reward you with vigorous, healthy growth.
Remove Dry And Damaged Growth Regularly
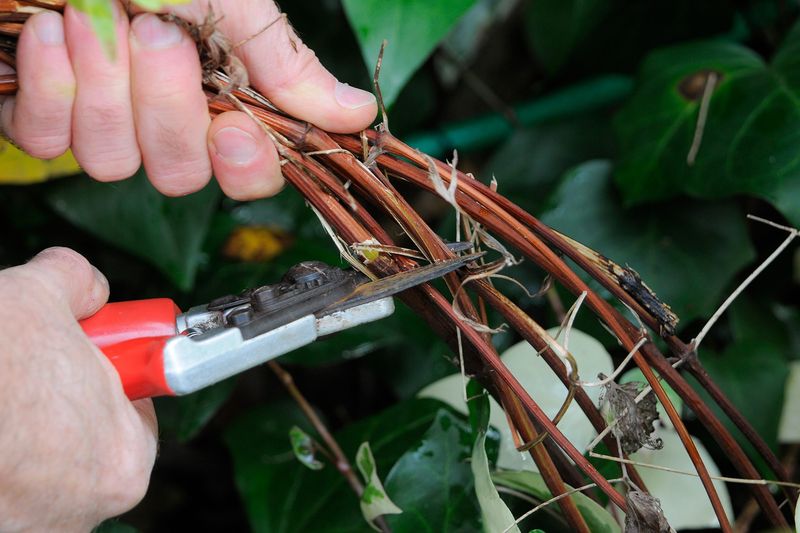
Regularly inspecting your clematis for dry, damaged, or diseased growth keeps your vines healthy and looking their best throughout the growing season.
Washington’s winter weather, while generally mild, can still cause some stem damage from occasional freezes, heavy snow, or ice storms that snap brittle growth.
Dry stems appear brown, shriveled, and brittle rather than green and flexible, and they won’t produce any new growth or flowers.
Removing these promptly improves air circulation around your clematis, which is particularly important in Washington’s humid climate where poor airflow encourages fungal problems.
Start your inspection at the base of the plant and work your way up, gently bending stems to test their flexibility. Living stems bend without breaking, while dry ones snap easily with a dry, crisp sound.
Look for stems with discolored or sunken areas, which might indicate disease or damage from pests. Cut damaged growth back to healthy tissue, where the inside of the stem appears white or green rather than brown.
In western Washington, where rainfall is abundant, checking for rot or fungal issues becomes especially important during the wetter months.
Don’t confuse slow-to-leaf-out stems with dry ones, as some clematis varieties take longer to show signs of life in spring. If you’re uncertain whether a stem is truly gone, wait a few weeks into the growing season before removing it.
Regular maintenance pruning throughout the season keeps your clematis tidy and prevents small problems from becoming bigger issues. Remove spent flowers and seed heads to encourage continued blooming on repeat-flowering varieties.
This ongoing attention to your clematis health pays dividends in stronger growth and more abundant flowers year after year in your Washington State garden.
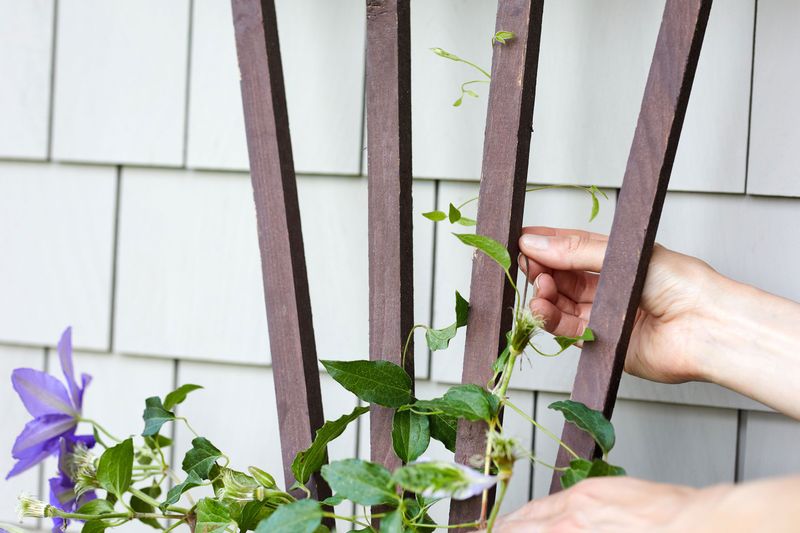
Support New Growth After Pruning
After pruning your clematis, providing proper support for new growth ensures your vine climbs beautifully and flowers abundantly throughout the season. Clematis climb using leaf tendrils that wrap around supports, so they need something to grab onto as new stems emerge.
Check your existing trellis, arbor, or support structure for any damage from winter weather, which is common in Washington State where wind and rain can loosen attachments or rust hardware.
Repair or reinforce supports before new growth begins, as trying to fix structures with vines already growing through them becomes much more difficult.
Washington gardeners have the advantage of a long growing season, giving clematis plenty of time to produce vigorous new growth after pruning.
As fresh stems emerge, gently guide them toward your support structure and loosely tie them in place with soft plant ties or strips of cloth.
Avoid using wire or string that can cut into tender stems as they thicken and grow. Position new growth to fill in bare areas and create the shape you want, whether that’s covering a fence, climbing a mailbox post, or cascading over a pergola.
Space stems evenly across your support structure to maximize flowering and prevent overcrowding that restricts airflow. Good air circulation is especially important in western Washington’s damp climate, where fungal diseases develop quickly in crowded, humid conditions.
Mulch around the base of your clematis with a few inches of compost or bark mulch to retain moisture, suppress weeds, and keep roots cool during summer heat. Washington’s warm, dry summers can stress clematis roots, which prefer staying cool even while the top growth enjoys full sun.
Regular watering during dry spells, especially for newly pruned plants putting energy into regrowth, keeps your clematis thriving.
With proper support and care after pruning, your clematis will reward you with spectacular blooms and healthy growth throughout Washington’s beautiful growing season.