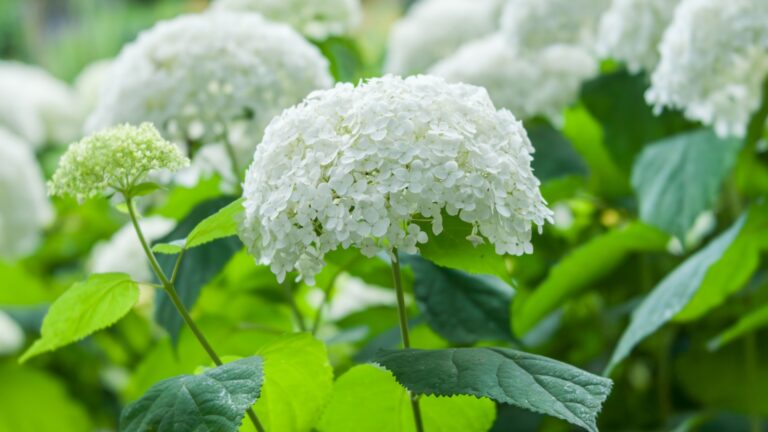
6 Essential Hydrangea Care Tasks You Should Do In January And February

Winter might feel like a quiet time in the garden, but January and February are important months for hydrangea care.
What you do now can decide how big and beautiful your blooms will be later. Don’t wait for spring to start caring for your plants. This is when success begins.
Imagine stepping into your garden and seeing fuller bushes and brighter flowers when warmer weather arrives.
What if a few simple winter tasks could lead to your best hydrangea season ever? Small actions now create big results later. Your future blooms depend on today’s care.
From protecting roots to cleaning up old growth and preparing soil, winter care helps hydrangeas stay healthy and strong. These easy tasks don’t take much time, but they make a huge difference.
When you get into the habit of winter care, you’ll notice better growth, stronger plants, and more impressive blooms year after year.
1. Prune Your Hydrangeas at the Right Time

Winter pruning can feel a bit intimidating if you’re new to hydrangeas, but once you understand which type you have, it becomes straightforward.
Bigleaf and oakleaf hydrangeas bloom on old wood, meaning they set their flower buds the previous summer.
For these varieties, you’ll want to hold off on major pruning until after they bloom in spring.
Panicle and smooth hydrangeas, on the other hand, bloom on new wood and can be pruned hard in late winter without losing any flowers. Late January through February is actually the ideal window for cutting these back.
You can trim them down to about 18 inches from the ground if you want to control size or encourage bushier growth.
Start by removing any damaged, or crossing branches regardless of your hydrangea type. These cuts improve air circulation and help prevent disease when warmer weather arrives.
Use clean, sharp pruning shears to make smooth cuts just above a healthy bud or node. If you’re unsure which type of hydrangea you have, look at last year’s stems.
Old wood varieties will have dried flower heads still attached from last summer, while new wood types typically don’t hold onto old blooms. When in doubt, stick to light pruning and remove only what’s clearly damaged.
Proper pruning now sets up your hydrangeas for better structure and more abundant flowering later. It’s one of those tasks that feels like you’re being harsh, but your plants will respond with vigorous, healthy growth once spring warmth arrives.
2. Apply a Fresh Layer of Mulch
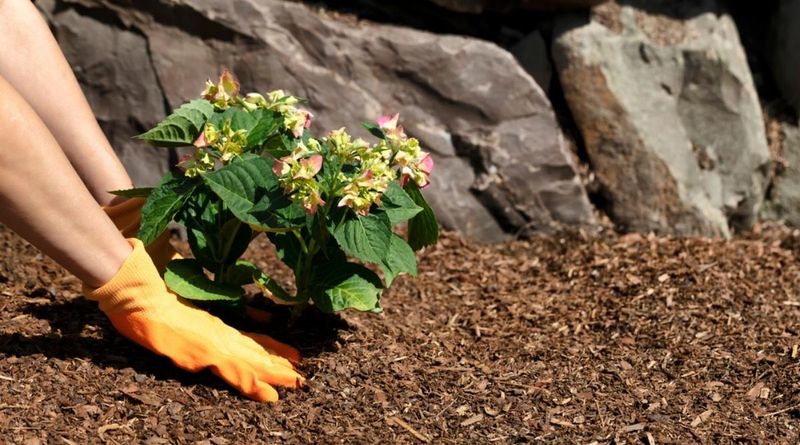
Mulching in late winter might not sound exciting, but it’s one of those simple tasks that makes a real difference.
A good layer of organic mulch helps insulate your hydrangea roots from temperature swings, which can be tough on plants even when they’re dormant. It also keeps moisture levels more consistent as we transition into spring.
Aim for about 2 to 3 inches of mulch around the base of each plant, spreading it out to the drip line where the branches end. Shredded bark, compost, or aged wood chips all work beautifully.
Just make sure to keep the mulch a few inches away from the main stem to prevent rot and discourage pests from settling in too close.
If you already mulched last fall, check whether it’s broken down or gotten thin in spots. Winter weather can really compact and degrade organic materials.
Refreshing the layer now gives your hydrangeas that extra protection before spring growth kicks in.
Mulch also helps suppress early weeds that might try to sprout as soon as temperatures warm up.
Fewer weeds mean less competition for water and nutrients, which your hydrangeas will appreciate. Plus, it gives your garden beds a tidy, finished look even in the off-season.
This task takes maybe 20 minutes per plant and doesn’t require any special skills. Grab a bag or wheelbarrow of mulch, spread it around, and you’re done.
Your hydrangeas get cozy roots, better moisture retention, and you get peace of mind knowing you’ve given them a solid foundation for the growing season ahead.
3. Check and Adjust Soil pH

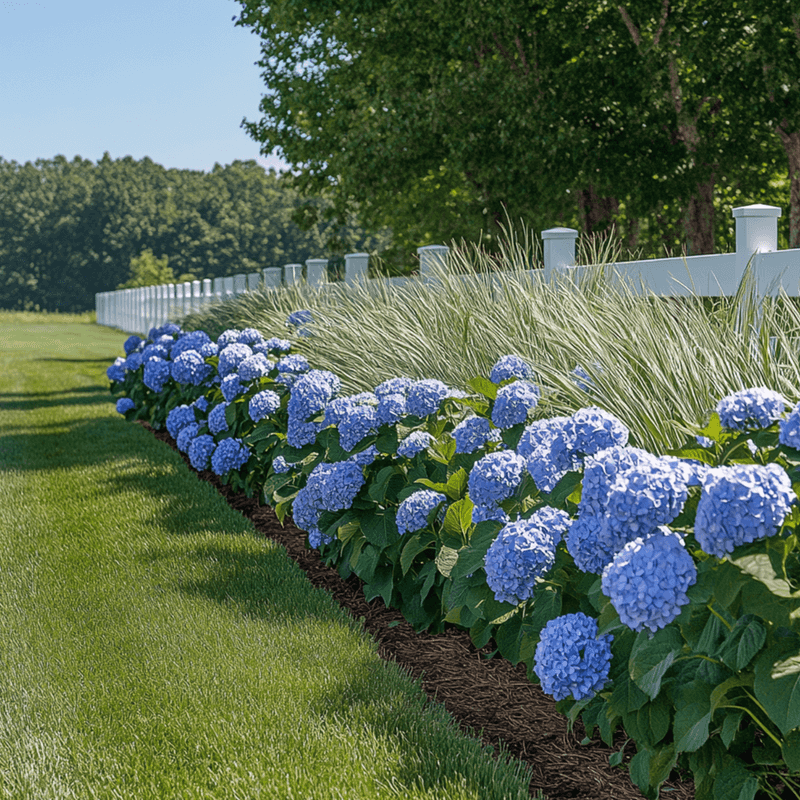
Did you know that soil pH can actually change the color of your hydrangea blooms? It’s one of the coolest things about growing these plants.
Acidic soil tends to produce blue flowers, while alkaline soil pushes them toward pink. If you’ve been dreaming of a specific color, winter is a great time to test and tweak your soil.
You can pick up an inexpensive soil test kit at any garden center or send a sample to your local extension office for detailed results. Testing now gives you time to make adjustments before the growing season begins.
If you want bluer blooms, you can add sulfur or aluminum sulfate to lower the pH. For pinker flowers, lime will raise the pH and make the soil more alkaline.
Even if you’re happy with your current bloom colors, knowing your soil pH helps you understand what your hydrangeas are working with.
It can also explain why a plant might not be thriving despite your best efforts. Sometimes a simple pH adjustment is all it takes to turn things around.
Apply any amendments now while the ground is workable and before new roots start actively growing. This gives the materials time to integrate into the soil.
Follow package directions carefully because too much of any amendment can swing pH too far in the other direction.
White hydrangeas won’t change color based on pH, but they still benefit from balanced soil conditions.
Testing and adjusting soil might sound technical, but it’s really just another way to fine-tune your garden environment and help your plants reach their full potential.
4. Inspect for Winter Damage and Pests

Winter can be rough on hydrangeas, especially if you’ve had heavy snow, ice, or unusually cold snaps.
Taking a few minutes to walk around your plants and look for damage helps you catch problems before they get worse. Broken branches, split stems, or areas where bark has peeled away all need attention.
Remove any damaged wood with clean cuts back to healthy tissue. Leaving broken or diseased branches attached can invite pests and diseases to move in as temperatures rise.
It’s better to trim them off now while the plant is dormant and less stressed by the process.
While you’re inspecting, keep an eye out for signs of overwintering pests. Scale insects, aphid eggs, and spider mite colonies can all hunker down in bark crevices and under old leaves.
If you spot anything suspicious, a gentle spray of horticultural oil can smother many pests without harming the plant.
Check the base of the plant for any signs of rodent damage too. Mice and voles sometimes chew on bark during winter when food is scarce.
If you notice gnaw marks, consider adding some hardware cloth or protective wrapping around the lower stems to prevent further damage.
This inspection doesn’t take long, but it gives you valuable information about how your hydrangeas weathered the cold months. Catching issues early means you can address them before they compromise the health or appearance of your plants.
Plus, it’s kind of satisfying to clear away the evidence of winter and prepare for fresh growth ahead.
5. Plan and Prepare for Fertilizing
Hydrangeas aren’t heavy feeders, but they do appreciate a nutrient boost as they come out of dormancy. Late winter is the perfect time to plan your fertilizing strategy and get your supplies ready.
You don’t want to apply fertilizer quite yet because it could encourage tender new growth that might get nipped by a late frost.
Instead, use this time to decide what type of fertilizer you’ll use. A balanced slow-release formula works well for most hydrangeas, providing steady nutrition throughout the growing season.
If you prefer organic options, compost or well-aged manure are excellent choices that also improve soil structure.
Take note of how your hydrangeas performed last year. If blooms were sparse or foliage looked pale, they might need more nutrients.
If growth was lush but flowers were few, you might have been a bit too generous with nitrogen-rich fertilizers. Adjusting your approach based on past results helps you fine-tune your care routine.
February is also a good time to work some compost into the soil around your plants if the ground isn’t frozen.
This gentle amendment adds organic matter and beneficial microbes without the risk of burning roots. Just scratch it into the top few inches of soil and let it settle in.
Having your fertilizer on hand and a plan in place means you’ll be ready to act as soon as the right time arrives in early spring. It’s one less thing to think about when the gardening season gets busy and you’re juggling multiple tasks across your yard.
6. Clean Up Around Your Hydrangeas
A good cleanup around your hydrangeas does more than just make your garden look tidy.
Removing fallen leaves, dry stems, and other debris eliminates hiding spots for pests and reduces the chance of fungal diseases taking hold when spring moisture arrives. It’s preventive care that pays off later.
Start by raking up any leaf litter that’s accumulated around the base of your plants. While some gardeners leave leaves for winter protection, by late winter they’ve usually broken down enough or gotten matted and soggy.
Clearing them away improves air circulation and lets you see what’s happening at soil level.
If you left dried flower heads on your hydrangeas for winter interest, now’s the time to snip them off. They’ve served their purpose, and removing them makes way for fresh growth.
Toss them in your compost pile unless you noticed any disease issues last season, in which case it’s better to dispose of them separately.
Take a moment to pull any weeds that might be sprouting in the warmer soil around your hydrangeas.
Early weeds are usually easier to remove, and getting them now means fewer problems later. A clean garden bed is also easier to mulch properly.
While you’re cleaning, keep an eye out for anything unusual like fungal growth, discolored bark, or odd swellings on stems. Spotting problems during cleanup gives you a chance to address them before they spread.
It’s amazing how much better your garden feels after a thorough late-winter cleanup, and your hydrangeas will be ready to put on their best show come summer.