These 8 Orchid Pruning Tips Are Helping Oregon Growers Get Better Blooms
Orchids can feel tricky at first. One wrong cut and it’s easy to worry you’ve ruined the plant.
I used to avoid pruning mine because I was afraid of messing it up. Once I learned a few simple rules, everything changed.
Pruning at the right time helps orchids grow stronger and bloom better. It also keeps plants looking clean and healthy.
For Oregon growers, indoor light levels and seasonal changes make proper care even more important. Small adjustments can lead to big improvements.
After using these tips, I started seeing fuller flower spikes and longer-lasting blooms. The plants also recovered faster between flowering cycles.
That made orchid care feel much less stressful.
These pruning tips are easy to follow and beginner friendly. They help you care for your orchids with confidence and enjoy more beautiful blooms year after year.
1. Know When To Prune
Your orchid has just finished its flowering cycle, and you’re staring at a bare spike wondering what to do next. Timing matters when it comes to pruning because cutting at the wrong moment can stress your plant or delay the next bloom cycle.
Most orchids benefit from pruning right after their flowers fade, but the exact timing depends on the type of orchid you’re growing and what you want to achieve.
For Phalaenopsis orchids, which are popular in Oregon homes, you can prune the spike back to just above a node if you want to encourage a secondary bloom. This works well during our longer spring days when plants have energy to spare.
If you’d rather give your orchid a rest period, cut the entire spike down to the base once flowers drop.
Timing also connects to Oregon’s indoor conditions. Our gray winters mean less natural light, so pruning during late fall might not give your plant enough energy to recover quickly.
Wait until late winter or early spring when daylight increases and your orchid can bounce back with vigor. Pay attention to new root growth and fresh leaves as signs your plant is ready for pruning.
Avoid pruning during extreme temperature swings or when your orchid is adjusting to a new location. Patience pays off when you prune at the right time.
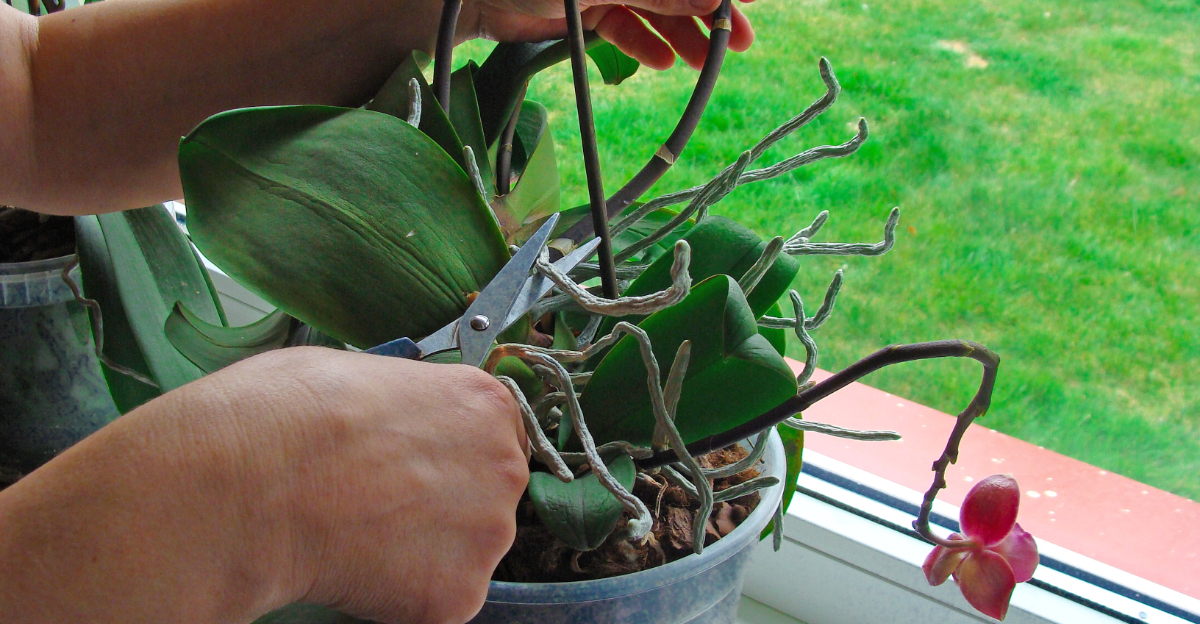
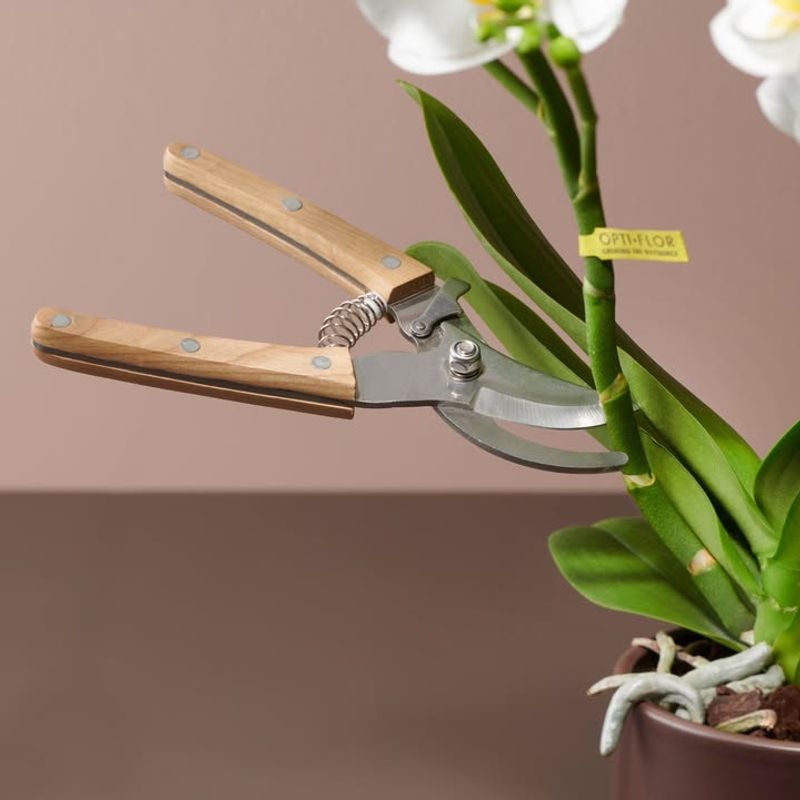
2. Use Clean, Sharp Tools
You wouldn’t use a dull kitchen knife to slice tomatoes, and the same logic applies to pruning orchids. Clean, sharp tools make all the difference between a healthy cut that heals quickly and a ragged wound that invites disease.
I’ve seen orchid leaves turn brown and mushy after someone used old, dirty scissors, and it’s heartbreaking to watch a beautiful plant struggle because of a simple tool mistake.
Invest in a good pair of bypass pruners or sharp scissors designed for delicate plant work. Before each cut, wipe your blades with rubbing alcohol or a diluted bleach solution to remove any lingering bacteria or fungi.
This small step takes seconds but protects your orchids from infections that spread easily in Oregon’s humid indoor environments, especially during our damp fall and winter months.
Your Oregon Garden Changes Every Week. Your Plan Should Too.
Gardening in Oregon changes quickly throughout the season. Every Friday you’ll receive a simple weekly plan showing exactly what to plant, prune, fertilize, harvest, and protect so you never miss the right timing.
Sharp tools also reduce trauma to plant tissue. A clean slice heals faster than a crushed stem, which means your orchid can focus energy on new growth instead of repairing damage.
Dull blades crush and tear, leaving openings for rot to set in.
Keep your tools stored in a dry place and sharpen them regularly. If you notice your cuts leaving jagged edges, it’s time for a tune-up or replacement.
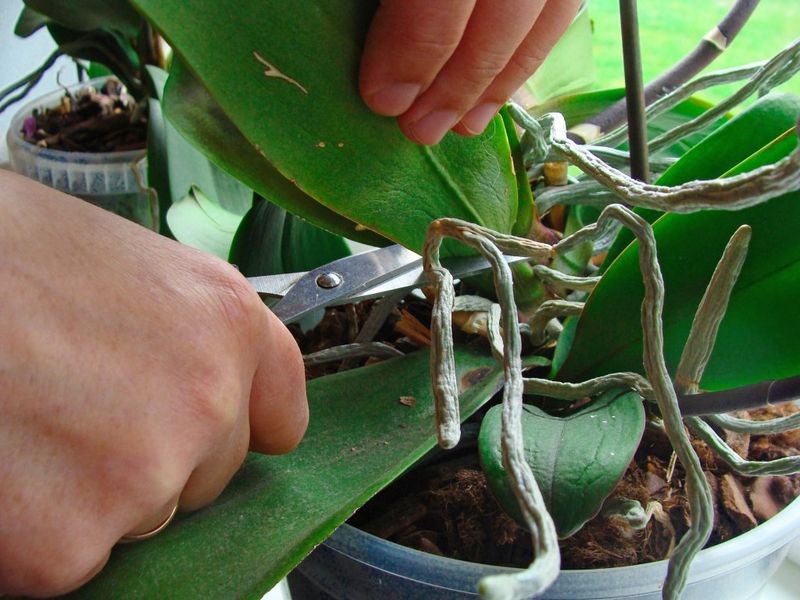
3. Remove Damaged Leaves
Yellowing leaves at the base of your orchid can feel alarming, but it’s often a natural part of the plant’s life cycle. Older leaves fade as the plant redirects energy to new growth and blooms.
However, leaving damaged foliage on your orchid can create problems, from attracting pests to blocking airflow around the roots and crown.
Start by gently tugging on any yellowed or brown leaves. If they come off easily, the plant is ready to release them.
If they resist, use your clean shears to cut them away at the base, being careful not to damage healthy tissue nearby.
Removing these leaves improves air circulation, which is especially important in Oregon homes where humidity can build up around potted plants during our rainy season.
Damaged leaves also provide hiding spots for pests like scale or mealybugs, which thrive in the cozy, damp conditions many of us create indoors. Keeping your orchid tidy reduces the chance of infestations and makes it easier to spot any issues early.
Check your orchids every couple of weeks for signs of damage or decay. Pruning away the old makes room for the new, and your plant will look cleaner and healthier for it.
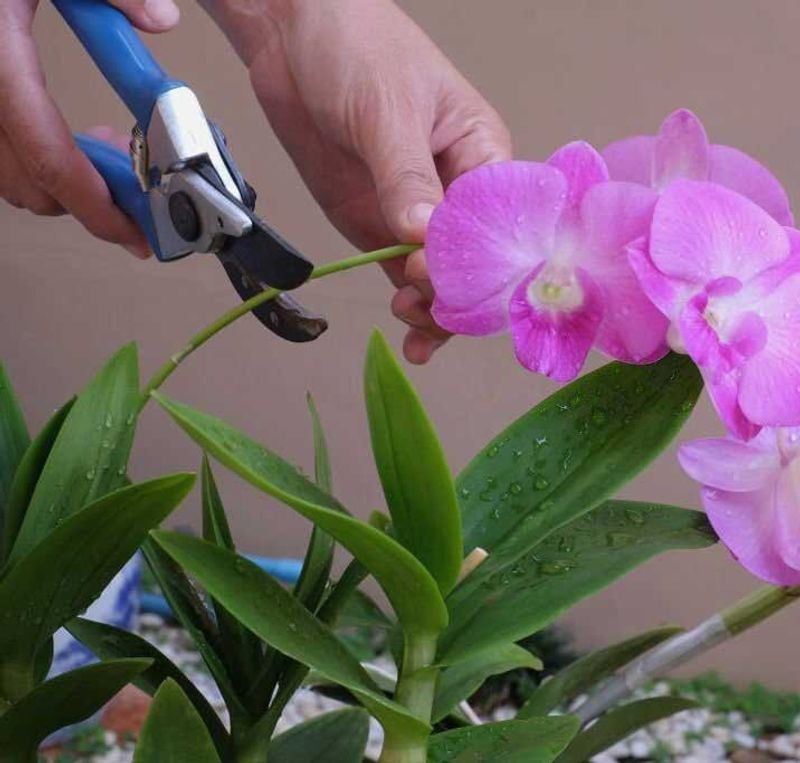
4. Trim Spent Flower Spikes Carefully
After weeks of enjoying gorgeous blooms, the day comes when the last flower drops and you’re left with a bare spike. What you do next can influence whether your orchid reblooms quickly or takes a long rest.
Cutting spent flower spikes carefully gives you control over your plant’s energy and bloom schedule, which is helpful when you’re trying to time flowers for a special occasion or just want to keep your indoor garden colorful year-round.
For Phalaenopsis orchids, examine the spike closely. If it’s still green and firm, you can trim it just above the second or third node from the bottom.
This encourages a side branch to form, often producing smaller flowers within a few months. If the spike turns brown or feels hollow, cut it all the way down to the base so the plant can focus on root and leaf development instead.
Other orchid types, like Cattleyas or Dendrobiums, typically don’t rebloom from old spikes, so it’s better to remove them entirely once flowering finishes. This keeps the plant looking neat and prevents energy waste.
Timing matters here too. Pruning spikes in late winter or spring aligns with Oregon’s increasing daylight, giving your orchid the boost it needs to push out new growth.
5. What About The Healthy Growth?
It’s tempting to tidy up your orchid by trimming anything that looks out of place, but cutting healthy leaves, roots, or spikes can do more harm than good.
Orchids grow slowly compared to many houseplants, and each leaf and root plays an important role in gathering light, absorbing water, and supporting future blooms.
Removing healthy growth weakens the plant and can delay flowering for months.
Green, plump leaves are your orchid’s solar panels, converting light into energy for growth and blooms. Even if a leaf looks a bit floppy or has a small blemish, it’s probably still contributing to the plant’s health.
Save your pruning for leaves that are completely yellow, brown, or mushy.
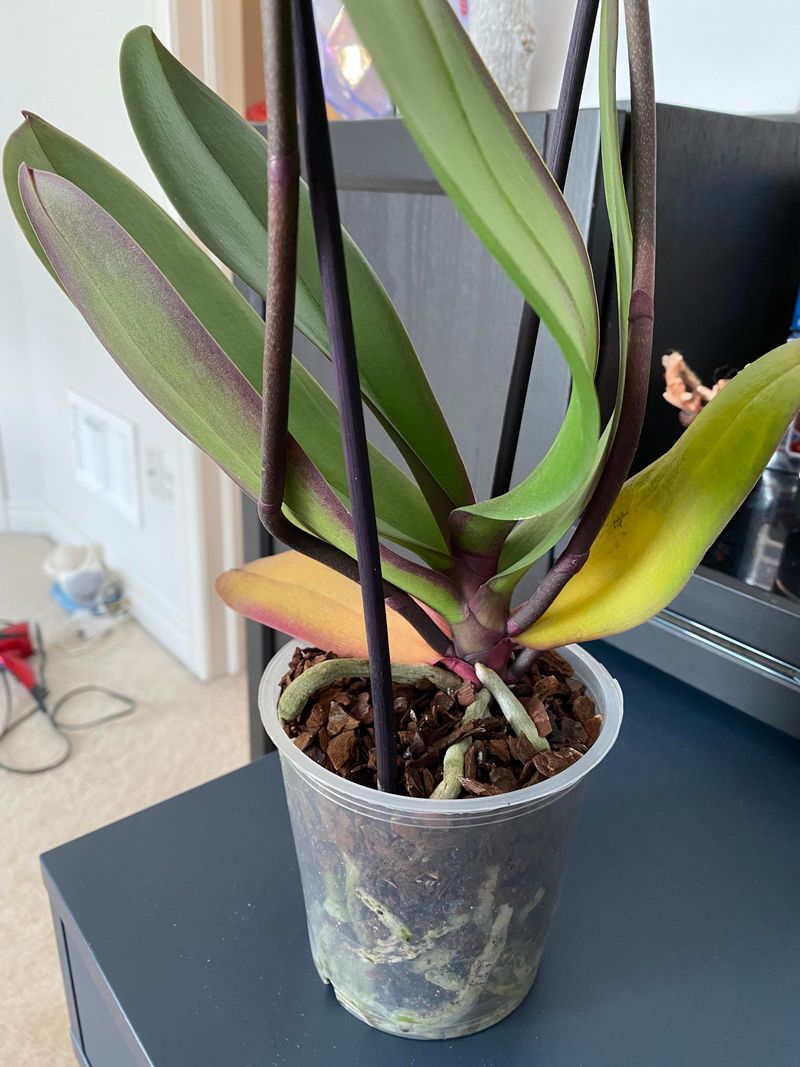
The same goes for roots. Healthy orchid roots are firm and green or silvery-white, depending on moisture levels.
Aerial roots that grow outside the pot might look messy, but they help the plant absorb humidity from the air, which is especially useful in Oregon’s dry indoor winter conditions. Only trim roots that are completely brown, hollow, or slimy.
Resist the urge to over-prune. Orchids thrive when you let them grow naturally, stepping in only when there’s a clear problem or a spent spike to remove.
6. Sterilize Tools Between Plants
If you’re growing multiple orchids, which many Oregon enthusiasts do, sterilizing your tools between plants is one of the smartest habits you can develop.
Diseases and pests spread easily from one orchid to another through contaminated pruning tools, and once an infection takes hold, it can be tough to stop.
A quick wipe with rubbing alcohol between cuts protects your entire collection from potential disasters.
Bacterial and fungal infections often lurk on seemingly healthy plants, waiting for an opportunity to spread.
When you prune an infected orchid and then move to a healthy one without cleaning your shears, you’re essentially inoculating the second plant with whatever pathogens were present on the first.
This is especially risky during Oregon’s damp months when fungi thrive in humid indoor conditions.
Keep a small spray bottle of 70% rubbing alcohol near your orchids and give your tool blades a quick spray and wipe between each plant. Some growers also use a small torch to flame-sterilize metal tools, though alcohol is easier and just as effective for home use.
This simple practice takes just a few seconds but can save you from losing prized orchids to preventable infections. Treat each plant as if it could be carrying something you don’t want to spread.
7. Prune For Shape And Airflow

Crowded orchids with overlapping leaves and tangled roots might look lush, but they’re actually at higher risk for rot, pests, and disease.
Pruning for shape and airflow isn’t just about aesthetics; it’s about creating an environment where your orchid can breathe, dry properly between waterings, and stay healthy through Oregon’s variable indoor humidity levels.
Good airflow around your orchid’s crown and roots helps prevent the buildup of moisture that leads to rot, especially during our rainy fall and winter months when indoor humidity can spike.
When leaves overlap too much or roots pack tightly into the pot, air can’t circulate freely, and damp spots become breeding grounds for fungi and bacteria.
As you prune, step back occasionally and look at the overall shape of your plant. Remove any leaves or spikes that cross over each other or block light from reaching the center of the plant.
If you notice roots growing in a dense mat, consider repotting and trimming away damaged ones to open up space.
A well-shaped orchid not only looks better but also performs better. Improved airflow means faster drying times, fewer disease issues, and healthier growth overall.
Your orchid will thank you with stronger blooms and vibrant foliage.
8. Monitor Your Orchid
Pruning is only half the job; watching how your orchid responds afterward tells you whether you made the right cuts and helps you learn what works best for your specific plants and growing conditions.
Every orchid is a bit different, and paying attention to new growth, leaf color, and overall vigor after pruning helps you become a better grower over time.
In the days and weeks following pruning, check your orchid regularly for signs of stress or disease. Cuts should dry quickly and remain clean without any oozing or discoloration.
If you notice browning around a pruning site, it might indicate an infection, and you may need to re-cut the affected area and apply cinnamon powder as a natural fungicide.
Healthy orchids typically respond to pruning by pushing out new roots or leaves within a few weeks, especially if you prune during active growth periods in spring or early summer.
If your plant seems sluggish or doesn’t show signs of recovery, consider adjusting light, temperature, or watering to better match its needs.
Keep notes on what you prune and when, along with how each plant responds. Over time, you’ll develop a sense for the best pruning timing and techniques for your Oregon indoor conditions, leading to healthier orchids and more spectacular blooms.