Now’s The Perfect Time To Transplant Tomato Seedlings In California
This is the moment many tomato growers across California look forward to each year. Mild days, warming soil, and longer sunlight hours create the perfect window for transplanting seedlings outdoors.
Get the timing right and your plants take off fast. Strong roots settle in.
Stems thicken. Leaves turn deep green.
Miss this window and early growth can slow, delaying overall plant development. Transplanting now gives tomatoes a head start that leads to earlier harvests and heavier yields.
It also helps plants handle summer heat with less stress. This simple step can make the difference between average results and baskets filled with ripe, juicy fruit.
If your seedlings are sturdy and the weather looks steady, it’s time to act. A few careful moves today can set up months of delicious rewards in your garden.
1. Is It Time To Transplant Your Tomatoes?
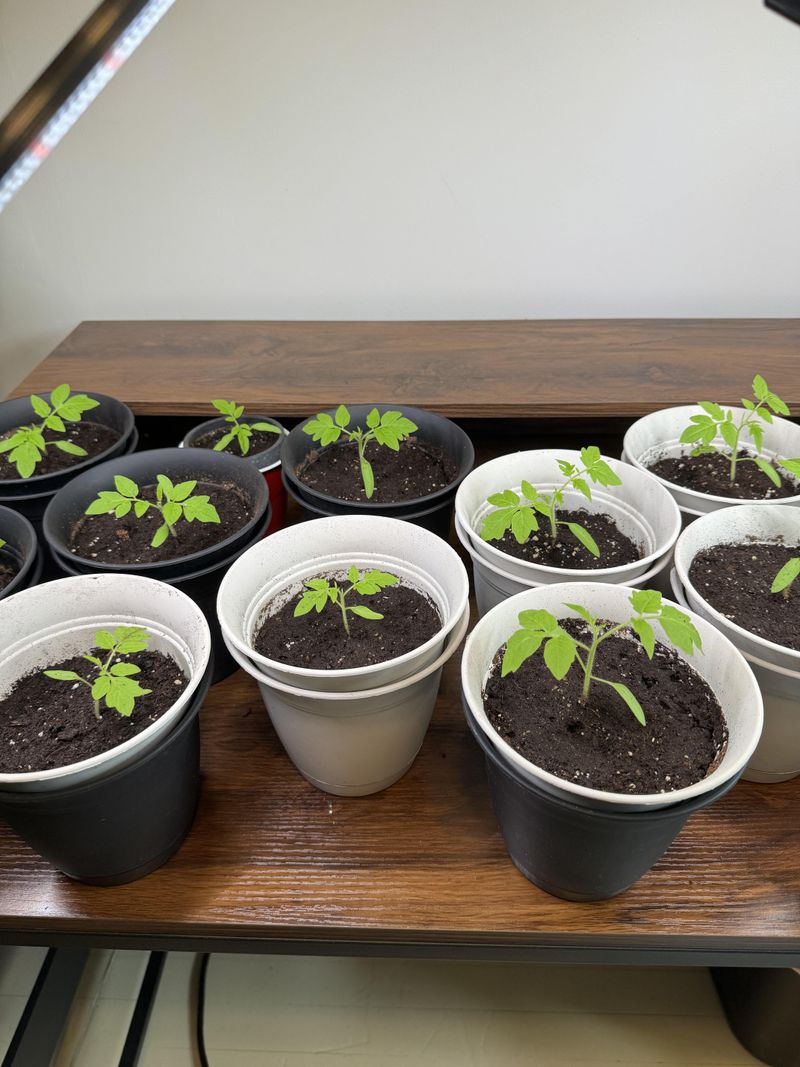
Many gardeners rush their seedlings outdoors too early, before roots have properly developed or stems have thickened enough to handle wind and temperature changes.
Seedlings need specific growth markers before they’re truly transplant-ready, and ignoring these signs often leads to transplant shock or stunted growth.
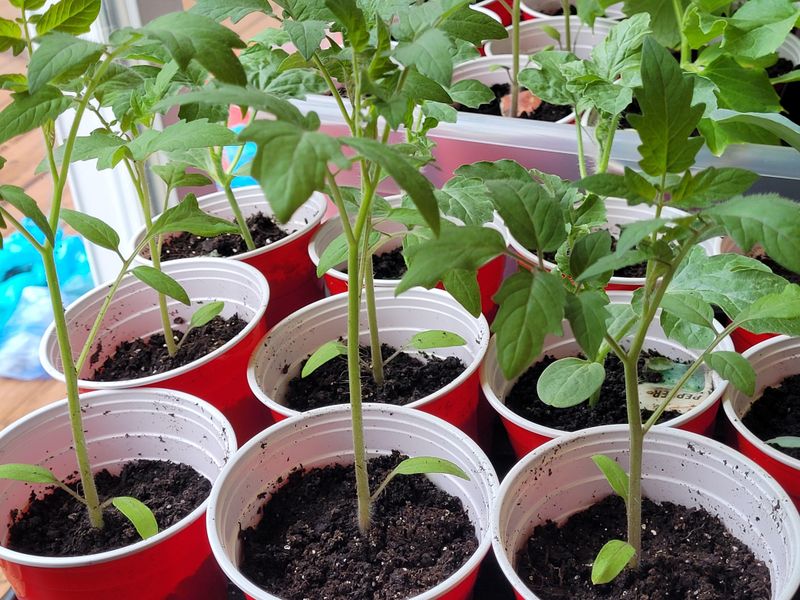
Your tomato seedlings are ready when they’ve developed at least two sets of true leaves beyond the initial cotyledons, stand about six to eight inches tall, and show thick stems rather than spindly growth.
The root system should be visible circling the bottom of the container without being severely root-bound.
Leaves should look deep green and healthy, not pale or yellowing.
Check stem thickness by gently feeling the base, it should feel firm and substantial, not thread-thin. Seedlings started indoors six to eight weeks before your transplant date typically reach this stage right on schedule.
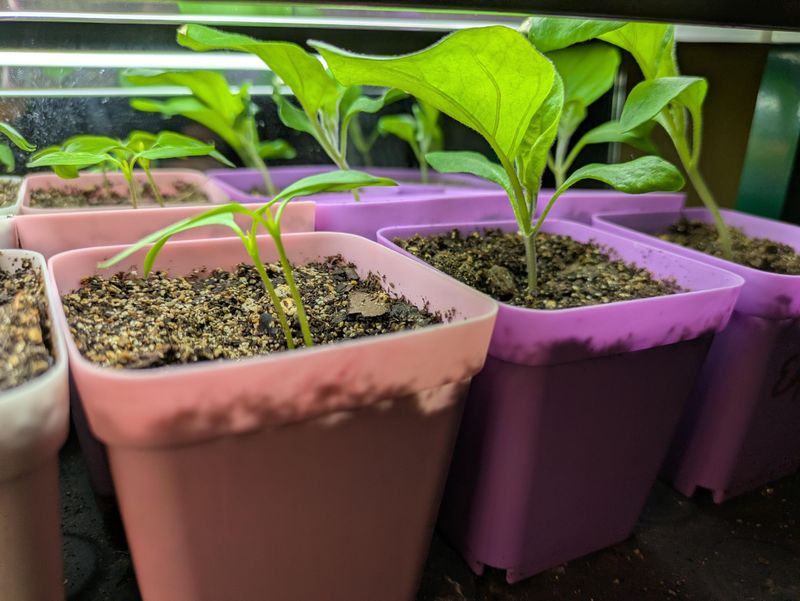
If your plants look leggy with long spaces between leaf sets, they need more light before moving outdoors.
Coastal California gardeners often have slower-growing seedlings due to cooler indoor temperatures and less intense light. Inland and valley gardeners may see faster growth but need to watch for premature flowering, which signals stress.
If seedlings are already flowering or fruiting, pinch these off before transplanting to redirect energy toward root growth.
2. Plant Safely Around The Last Frost In California
Planting too early remains one of the biggest transplanting mistakes California gardeners make, especially in inland areas where warm days fool you into thinking frost season has passed. Cold soil and surprise late frosts can destroy tender tomato plants or set them back weeks, wasting all your careful seedling care.
California’s last frost dates vary dramatically by region and microclimate. Coastal areas from San Diego to San Francisco rarely see frost after mid-March, while inland valleys and foothill areas may experience frost risk through mid-April.
Mountain communities and high desert regions often face frost danger into May.
Soil temperature matters even more than air temperature for tomato success. Wait until soil consistently reaches 60°F at four-inch depth, which usually happens two weeks after your area’s average last frost date.
You can check this with an inexpensive soil thermometer pushed into your planting bed each morning for several days.
Your California Garden Changes Every Week. Your Plan Should Too.
Gardening in California changes quickly throughout the season. Every Friday you’ll receive a simple weekly plan showing exactly what to plant, prune, fertilize, harvest, and protect so you never miss the right timing.
Raised beds and containers warm faster than ground-level gardens, sometimes giving you a week’s head start. South-facing beds protected by walls or fences also warm earlier.
However, don’t let warm afternoon temperatures trick you, cold nights in the low 50s or below can stress young plants and slow early growth.
Central Valley gardeners can often transplant by late March, while Bay Area coastal gardeners might wait until mid-April for consistent warmth.
3. Get Your Seedlings Outdoor-Ready
Skipping the hardening-off process causes more transplant failures than almost any other mistake. Indoor-grown seedlings have soft, tender tissue that sunburns, windburns, and wilts easily when suddenly exposed to outdoor conditions.
Even seedlings grown in greenhouses need gradual adjustment to your specific garden microclimate.
Hardening off means gradually exposing seedlings to outdoor conditions over seven to ten days. Start by placing plants in a protected, shaded spot outdoors for just two hours on the first day, bringing them back inside before temperatures drop.
Increase outdoor time by one to two hours daily, slowly introducing more direct sunlight.
By day five or six, seedlings can stay out most of the day in partial sun. By day eight or nine, they should handle full sun exposure for several hours.
Always bring plants inside if temperatures will drop below 50°F overnight until the final transplant day.
Watch for leaf discoloration, wilting, or burned edges, signs you’re moving too fast. California’s intense spring sun, especially inland, can scorch leaves quickly.
Coastal gardeners face strong winds that can snap stems or shred leaves. Desert gardeners contend with low humidity that desiccates tender tissue.
Place hardening-off plants where they’ll get morning sun and afternoon shade initially, then gradually shift to their final sun exposure. This process strengthens cell walls, thickens leaf cuticles, and prepares plants for permanent outdoor life.
4. Prep Soil For Strong Roots

Poor soil preparation undermines even the healthiest seedlings because tomatoes are heavy feeders that need well-structured soil for deep root growth.
Many California gardeners plant into last year’s depleted beds or fail to address drainage problems, then wonder why plants stay small and produce poorly.
Start by loosening soil to twelve inches deep, breaking up compacted layers that restrict root penetration. Mix in two to three inches of finished compost or well-aged manure to improve soil structure, water retention, and nutrient availability.
Tomatoes thrive in slightly acidic to neutral soil (pH 6.0-7.0), which naturally occurs in most California garden soils.
Test drainage by digging a twelve-inch hole, filling it with water, and watching how quickly it drains. Ideally, water should drain within several hours.
Clay soils common in many California regions benefit from added compost and improved soil structure for better drainage.
Sandy soils found in coastal and desert areas drain too quickly and benefit from compost plus aged manure for water retention.
Add a balanced organic fertilizer at planting time following package rates, tomatoes need steady nutrition but excessive nitrogen produces leafy growth at the expense of fruit. Create planting holes deeper than your seedling containers since you’ll bury stems.
Space plants twenty-four to thirty-six inches apart for determinate varieties, thirty-six to forty-eight inches for indeterminates. Raised bed gardeners can space slightly closer but need excellent soil quality and consistent watering to support the density.
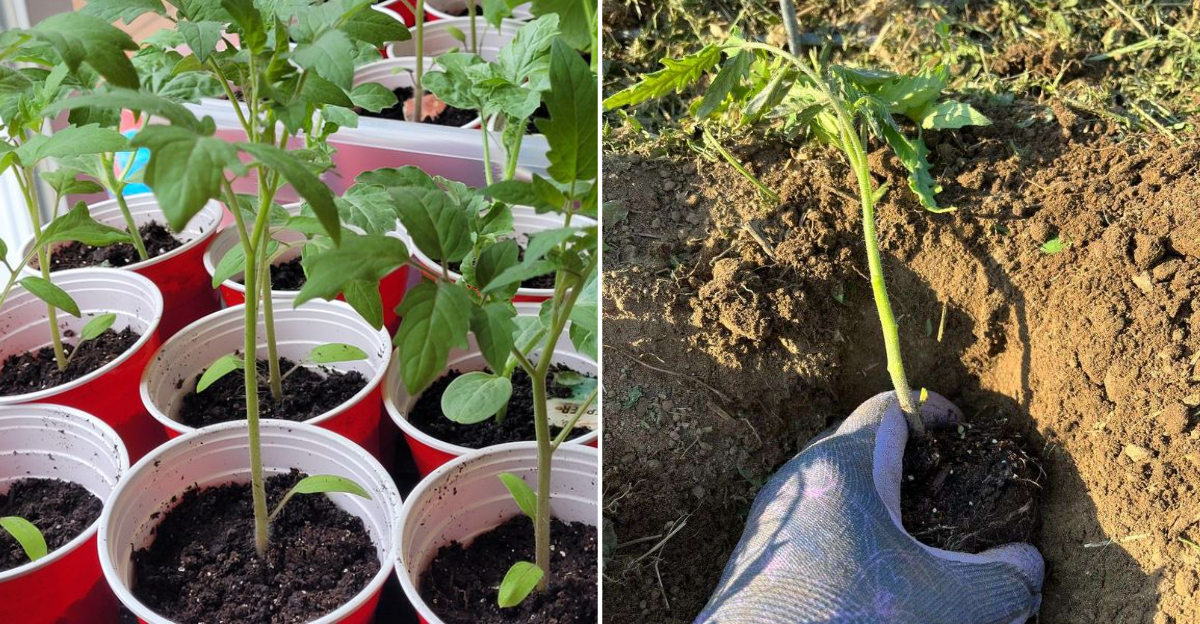
5. Plant Tomatoes Deep For Stronger Growth
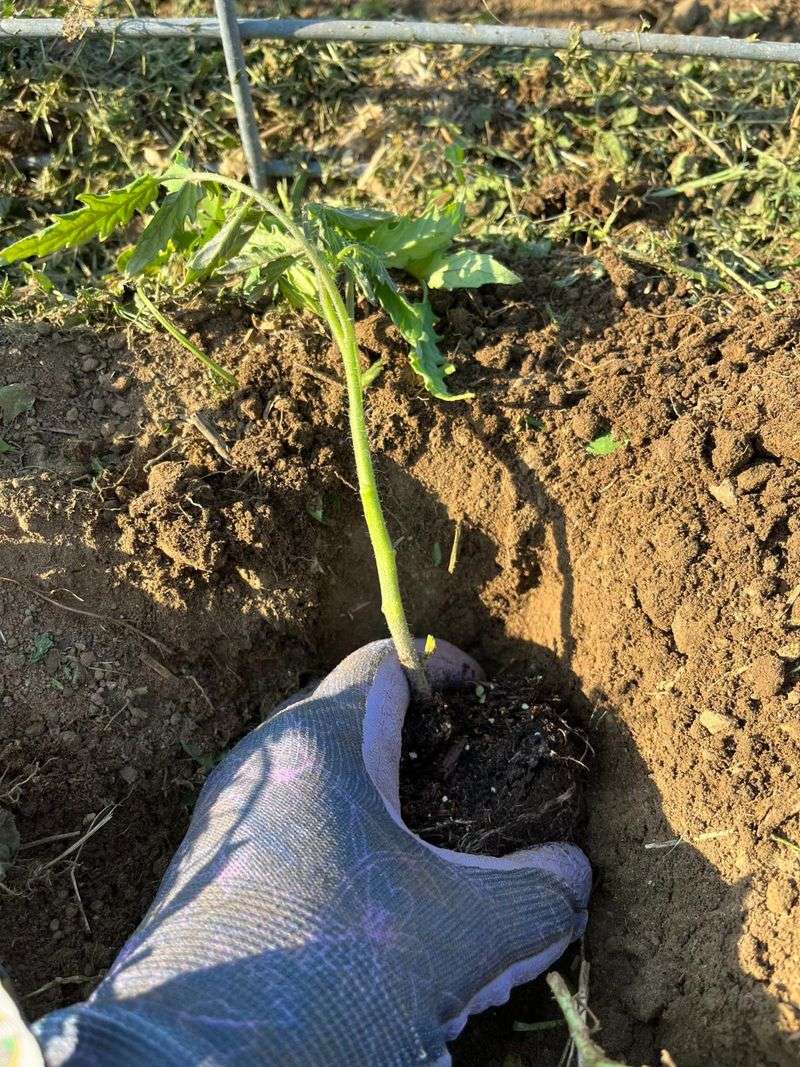
Planting tomatoes deeper than most vegetables gives them a powerful advantage because tomatoes can grow new roots along buried stem sections.
Gardeners who plant at the same depth as the nursery pot often end up with plants that are less stable and more sensitive to heat and dry conditions.
Remove the lowest set or two of leaves from your seedling, leaving several healthy leaves at the top. Dig your planting hole deep enough to bury a large portion of the stem while keeping the leafy top above soil level.
The buried section will begin developing additional roots within the first couple of weeks, expanding the plant’s root system.
If your seedlings are tall or leggy, you can use the trench method by laying part of the stem horizontally in a shallow trench and gently bending the top upward. Roots will form along the buried stem, helping stabilize the plant and improve water uptake.
This technique is especially useful when soil is compacted or digging deep holes is difficult.
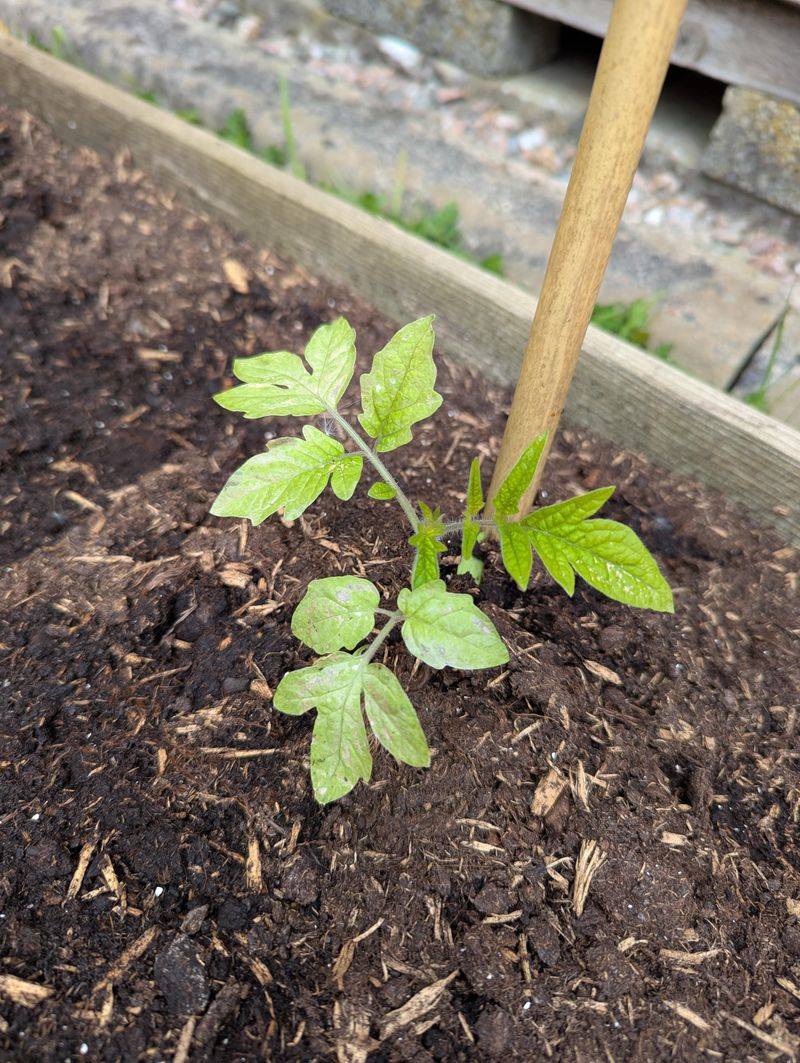
Firm soil gently around the stem to eliminate air pockets, then water thoroughly to settle the soil and encourage good root contact.
Deep planting can benefit California gardeners by improving wind resistance, increasing drought tolerance, and supporting heavier fruit loads later in the season.
Coastal gardeners gain added stability in breezy conditions, while inland and valley gardeners benefit from deeper moisture access as summer heat increases.
6. Water Wisely After Planting

Inconsistent watering during establishment causes more transplant problems than pests or diseases in California gardens.
Newly transplanted seedlings have limited root systems that can’t search for moisture, making them completely dependent on what you provide.
Both underwatering and overwatering create stress that stunts growth or invites root diseases.
Water deeply immediately after transplanting, soaking the root zone until water penetrates eight to ten inches down. This initial watering settles soil, eliminates air pockets, and ensures roots make contact with surrounding soil.
For the first week, check soil moisture daily by pushing your finger two inches into the soil near the plant.
Water when the top couple inches of soil begin to feel dry, which might mean daily watering in warm inland areas or every two to three days in cooler coastal zones. Always water at the base of plants rather than overhead to keep foliage dry and prevent disease.
Deep, infrequent watering encourages roots to grow downward, while frequent shallow watering keeps roots near the surface where they’re vulnerable to heat and drought.
By week two, begin stretching time between waterings as roots expand and plants establish. Container-grown tomatoes need more frequent watering than in-ground plants since pots dry faster.
Drip irrigation or soaker hoses work excellently for consistent moisture delivery in California’s dry spring weather.
Mulch around plants with two to three inches of straw or compost once they’re established to conserve moisture and moderate soil temperature, especially important for inland gardeners facing hot, dry conditions.
7. Shield Young Plants From The Elements
Unprotected transplants face harsh conditions that indoor-grown seedlings aren’t equipped to handle, even after hardening off.
California’s variable spring weather, hot afternoons followed by cool nights, sudden wind events, and intense sun, can damage or destroy young plants within hours if you don’t provide temporary protection.
Use shade cloth (30-50% shade) or floating row covers for the first week after transplanting to filter intense midday sun, especially in inland and valley regions where temperatures can spike into the 80s or 90s.
Drape material over simple hoops or stakes, ensuring it doesn’t touch plant leaves.
Remove covers gradually once plants show strong new growth and appear adjusted to outdoor conditions.
Wind protection matters enormously, particularly in coastal areas and open valley gardens. Even moderate winds can shred tender leaves and snap stems.
Create temporary windbreaks using stakes and burlap, or plant near existing structures like fences. Some gardeners use individual plant collars made from cut plastic bottles or cardboard to shield stems.
Temperature swings stress young plants significantly. If nighttime temperatures threaten to drop below 50°F after transplanting, cover plants with fabric row covers, old sheets, or even large cardboard boxes.
Remove coverings each morning once temperatures rise. Wall o’ Water-style season extenders work well but can cook plants if daytime temperatures climb unexpectedly.
Monitor protected plants daily and provide ventilation during warm afternoons. These protection measures are usually needed for the first week or two, depending on weather conditions!