Do This Now To Revive Your Amaryllis Bulb In Oregon (It’s Easier Than You Think)
Your amaryllis bulb might look tired right now, but that doesn’t mean it’s finished. In many Oregon homes and gardens, this is actually the perfect time to help it recharge and prepare for another round of impressive blooms.
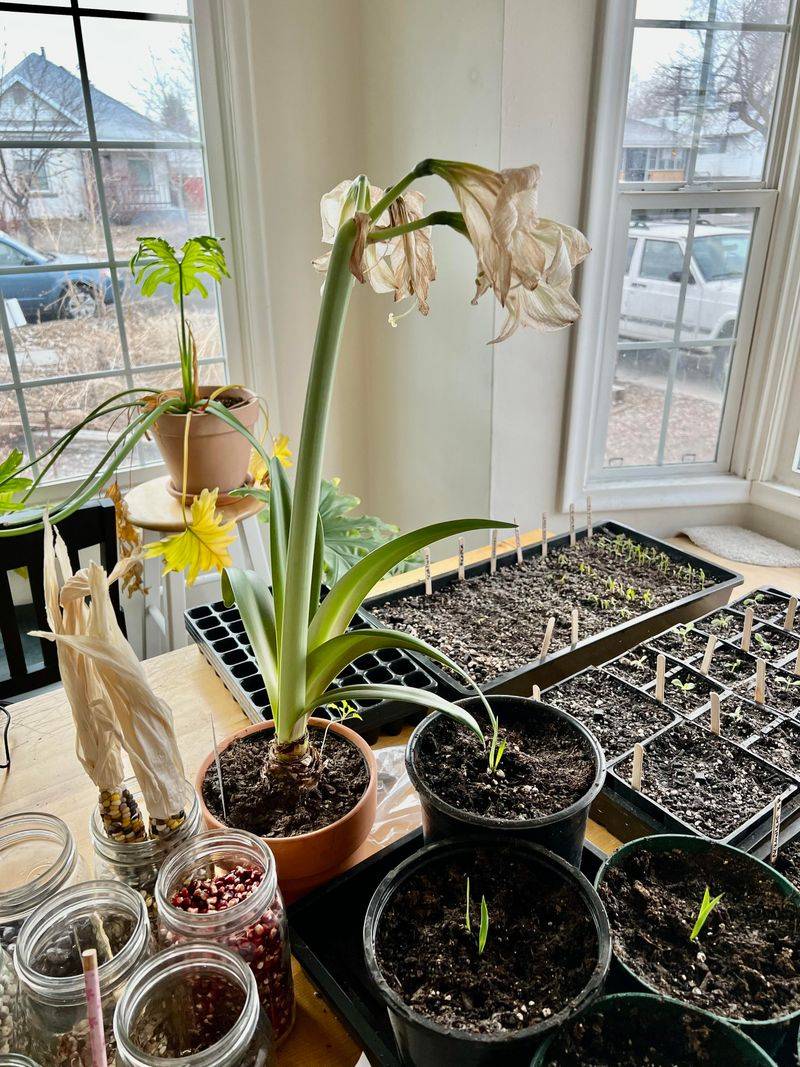
After weeks of bold color and tall flower stalks, most amaryllis plants naturally slow down. Leaves fade.
Stems droop. Growth pauses.
Many gardeners assume the show is over and toss the bulb aside.
But that’s a mistake.
With a simple routine and a few smart adjustments, you can restore strength to the bulb and set it up for an even better performance next season. The process doesn’t require special tools or advanced skills.
Just patience, consistency, and a little understanding of what your plant needs.
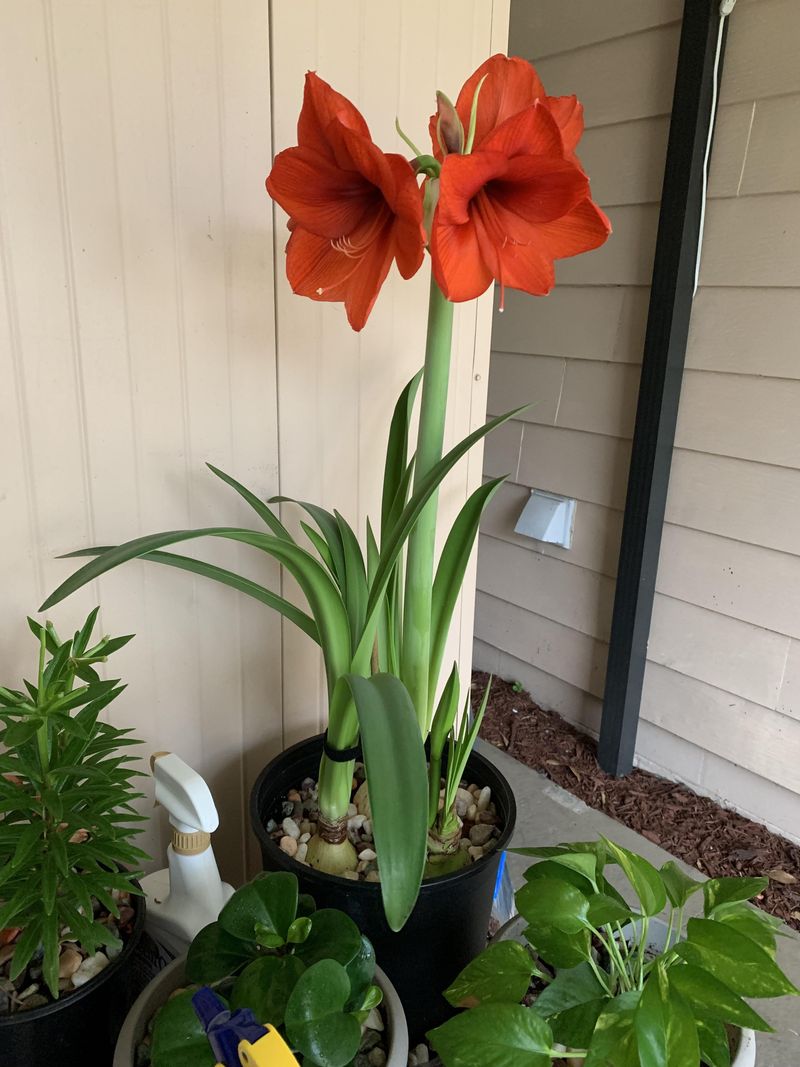
Stronger growth. Healthier leaves.
Bigger, longer-lasting flowers.
If your amaryllis has lost its spark, now is the moment to act. A small effort today can create dramatic results later.
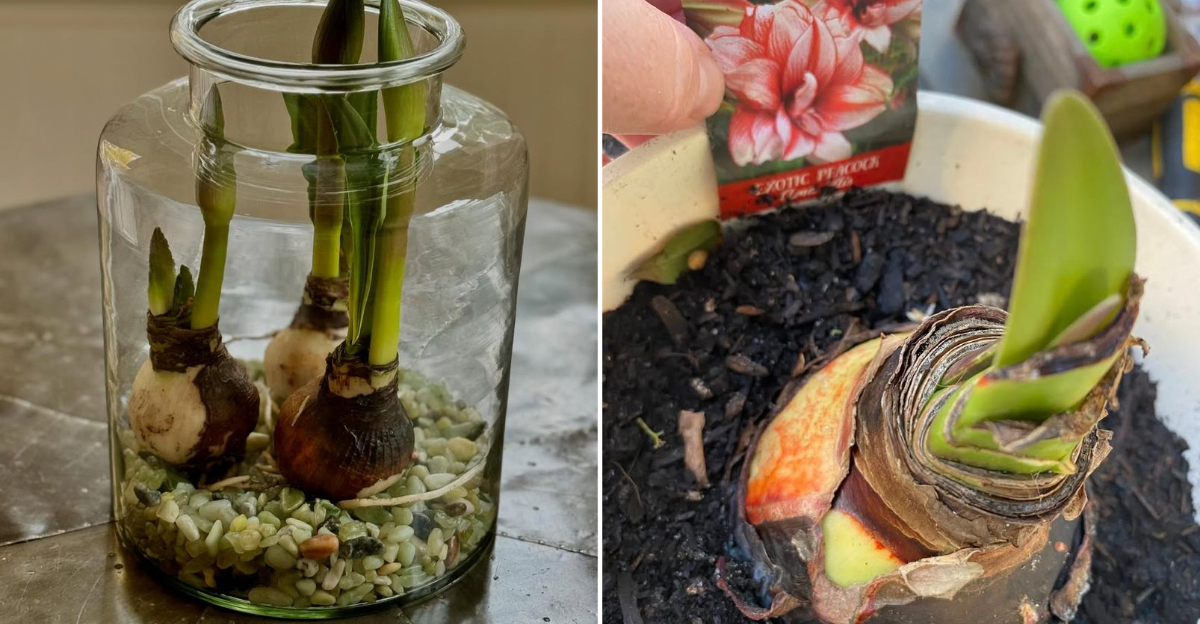
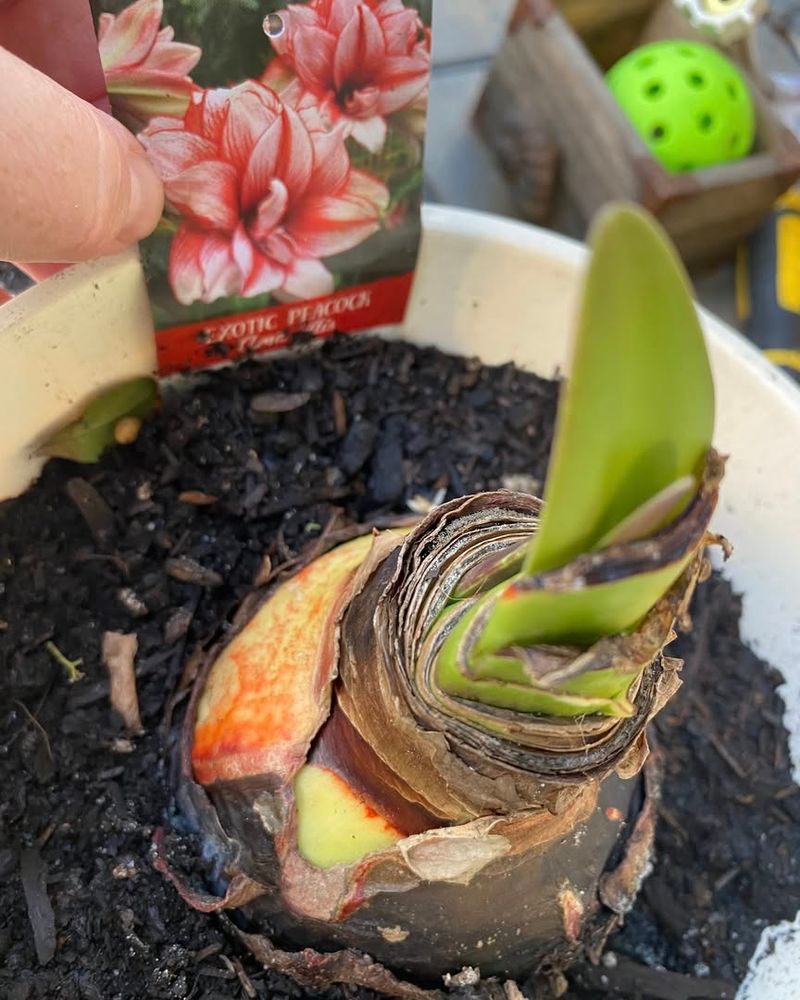
1. Inspect The Bulb For Health
Before changing anything, start by checking the bulb’s condition. You don’t need to immediately pull it from its pot unless you suspect problems.
Instead, gently press the visible portion of the bulb near the soil surface.
Healthy amaryllis bulbs feel firm, similar to a fresh onion. They should resist pressure and spring back slightly when touched.
This firmness tells you the bulb still has stored energy and structural strength.
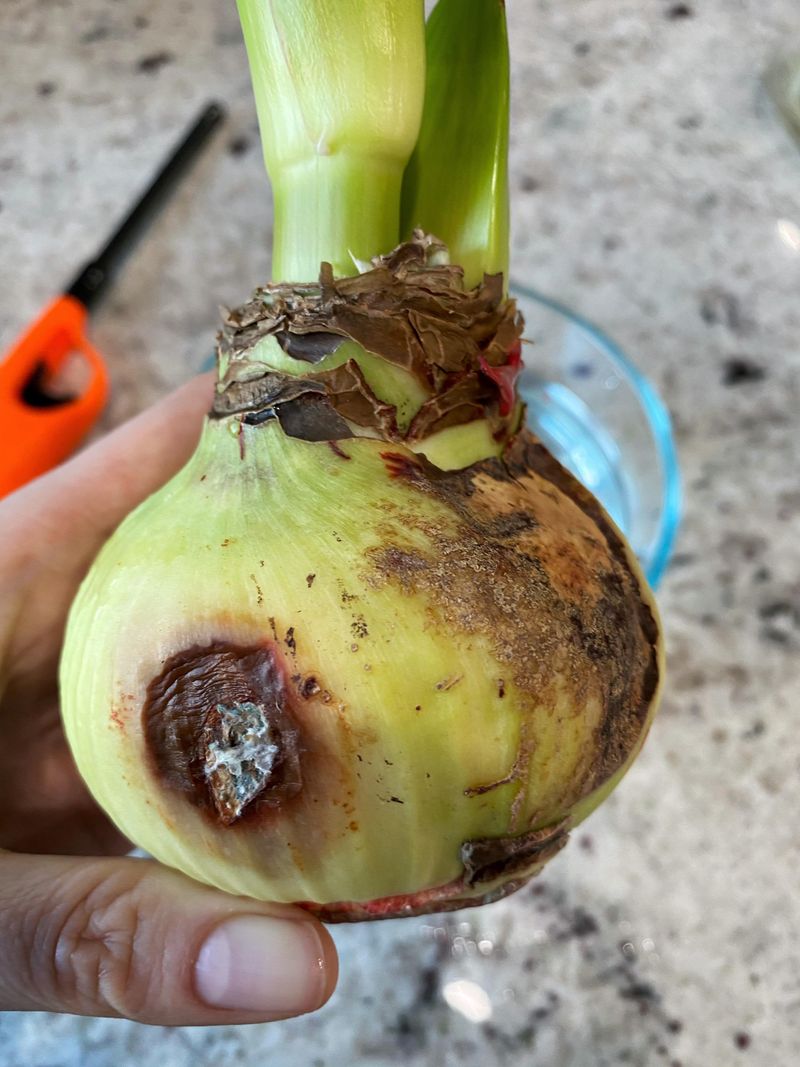
Soft spots, collapsing areas, or strong odors are warning signs. These usually indicate rot, often caused by overwatering or poor drainage.
If you notice these symptoms, carefully remove the bulb from the pot so you can inspect it fully.
Look closely at the base where roots emerge. Check around the neck where leaves previously grew.
These areas are the most vulnerable to moisture buildup and fungal problems.
Some wrinkling of the outer papery layers is normal. Bulbs naturally lose small amounts of moisture during rest periods.
Slight shriveling does not mean the bulb is dying.
What you want to watch for is severe dehydration where the bulb feels hollow or lightweight. That signals the need for gentle rehydration later in the process.
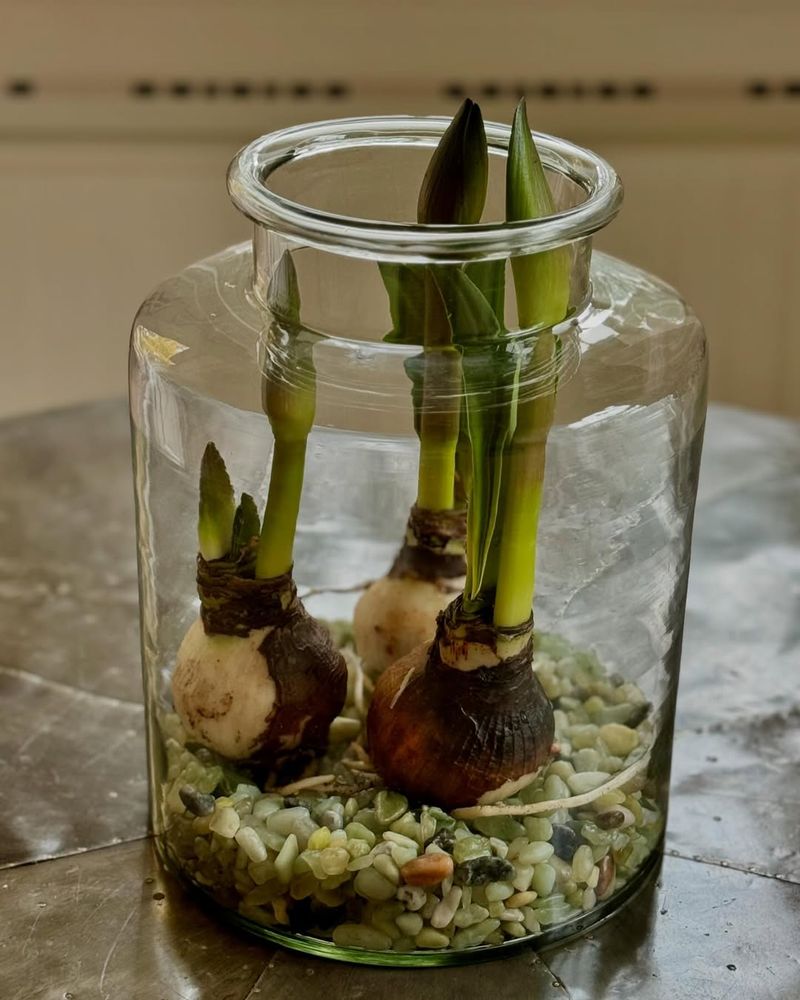
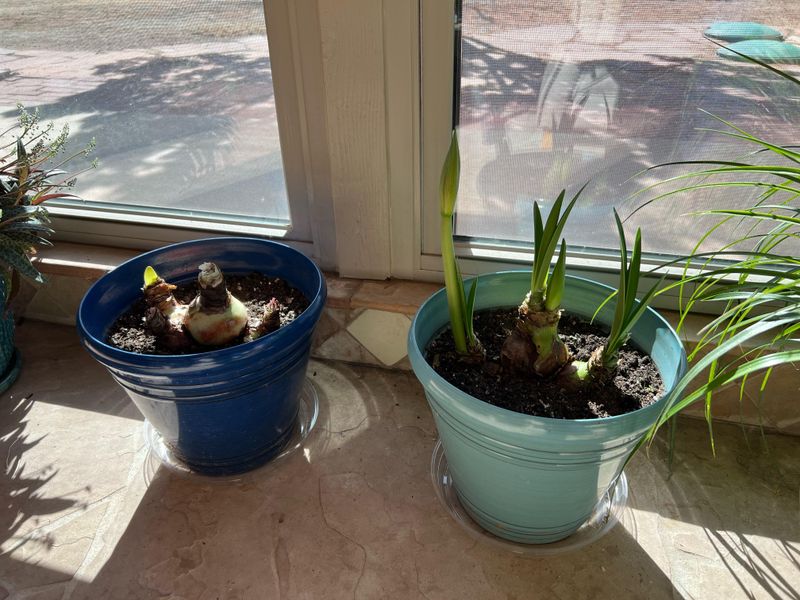
If you see green tips forming near the neck, that’s excellent news. It means the bulb is already waking up and ready to resume growth with the right care.
2. Trim Damaged Roots
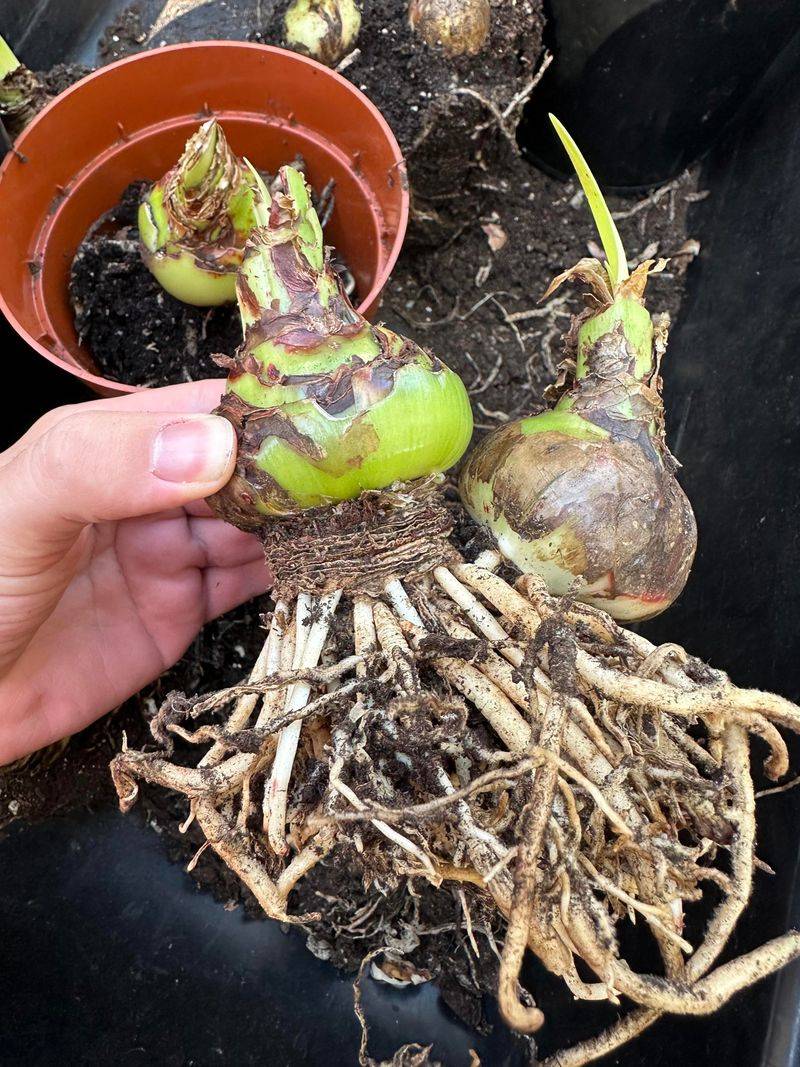
If you removed the bulb from its pot, turn it over and examine the root system. Healthy roots are firm, flexible, and white or light cream in color.
Older roots may appear darker, but they should not be slimy or foul-smelling.
Damaged or diseased roots often look brittle, blackened, mushy, or shriveled. These should be trimmed away using clean, sharp scissors or pruners.
Make cuts close to the bulb base without slicing into the firm bulb tissue itself. Removing damaged roots prevents disease from spreading upward and encourages fresh root growth.
Some gardeners worry about cutting too much. Don’t panic.
Amaryllis bulbs regenerate roots easily when conditions improve. It is better to remove questionable roots than leave decaying material attached.
After trimming, allow the bulb to air dry for one to three hours in a shaded indoor space. This helps seal small cuts and reduces infection risk before replanting.
Avoid applying powders, cinnamon, or home remedies. Good airflow and clean cuts do more to prevent problems than unproven treatments.
3. Rehydrate The Bulb Properly
If your bulb appears slightly shriveled, lightweight, or dull in color, gentle rehydration can help jumpstart the internal processes needed for new growth. The key word here is gentle.
Amaryllis bulbs store energy in thick outer layers, and forcing too much water into the tissue too quickly can cause swelling, splitting, or rot.
Do not fully submerge the bulb in water. Full immersion traps moisture around the neck and outer scales, which creates ideal conditions for fungal growth and bacterial decay.
Instead, place the bulb upright in a shallow container with room-temperature water touching only the bottom quarter to third of the bulb. This allows moisture to enter slowly through the basal plate where roots naturally absorb water.
It mimics how bulbs hydrate in soil without drowning sensitive tissues.
Let the bulb sit this way for 30 to 60 minutes. This time frame allows internal cells to rehydrate gradually while keeping the bulb surface mostly dry.
You may notice the bulb becoming slightly heavier and firmer as it absorbs moisture.
Avoid using cold water, which can shock plant tissue and slow metabolic activity. Also avoid warm or hot water, which may trigger premature sprouting before the bulb is properly planted and supported.
After soaking, remove the bulb and gently pat the base dry with a clean towel. Allow it to air dry for a few minutes before potting.
If the bulb was not severely dehydrated to begin with, you can skip soaking altogether and rely on controlled watering after planting instead.
4. Choose The Right Container And Soil
Container choice makes a huge difference in amaryllis success, especially in Oregon’s cool and often damp indoor winter conditions.
Select a pot that leaves about one to two inches of space around the bulb. Amaryllis prefer snug conditions, but they still need room for root growth.
Avoid oversized containers that hold too much moisture.
Terra cotta pots work especially well because they allow excess moisture to evaporate through the sides. Plastic pots can work too, but only if drainage is excellent.
Drainage holes are essential. Without them, water collects at the bottom and creates ideal conditions for rot.
For soil, use a light, well-draining mix. Regular heavy garden soil is not suitable.
Combine standard potting mix with perlite or coarse sand to improve drainage. Pre-made cactus or succulent mixes also work well.
Fill the pot about halfway with soil. Place the bulb so the top third to half remains above the soil surface.
This exposed portion reduces neck rot and improves airflow. Add soil around the sides and gently firm it in place. Do not pack the soil tightly.
Light pressure is enough to stabilize the bulb. Water lightly once after planting to settle soil, then pause until growth appears.
5. Position For Optimal Light
Light plays a major role in determining how strong your amaryllis grows and how sturdy its flower stalks become.
Without enough light, the plant stretches toward the nearest source, producing thin, weak stems that bend easily under the weight of large blooms.
Proper lighting encourages thicker stalks, richer leaf color, and more balanced growth from the very beginning.
Choose a location with bright, indirect light for most of the day. South-facing windows work especially well during Oregon’s winter months when the sun sits lower in the sky and light is softer and less intense.
East-facing windows also provide excellent morning light that energizes growth without overheating the plant during midday hours.
Oregon’s frequent cloud cover is not a problem for amaryllis. These bulbs do not require intense sunshine to grow and bloom successfully.
In fact, they respond better to steady, moderate brightness than harsh direct rays that can overheat pots and dry soil too quickly.
Avoid placing your plant in dark corners, low-light rooms, or shaded areas far from windows. Insufficient light causes pale leaves, slow growth, and weak flower stalks that struggle to stay upright.
As new shoots emerge, rotate the pot a quarter turn every few days. This simple habit prevents leaning and encourages straight, balanced development.
Consistency matters more than perfection. Keeping the plant in one reliable bright location helps reduce stress and supports steady, predictable growth.
6. Control Watering And Humidity
Watering mistakes are one of the most common reasons amaryllis bulbs fail to recover properly.
After planting, resist the urge to water heavily right away. Bulbs contain stored moisture and energy to initiate growth.
Too much water before roots develop increases the risk of rot.
Once green shoots appear, begin watering lightly. Apply water around the edge of the pot rather than directly onto the bulb neck.
Allow excess water to drain completely.
Never let the pot sit in standing water. Empty saucers within 10 to 15 minutes after watering.
Check soil moisture by inserting your finger about an inch deep. Water only when the surface feels dry at that depth.
Indoor conditions vary widely across Oregon homes depending on heating systems and insulation, so adjust frequency based on observation.
Air circulation also matters. Place the plant where air can move gently around it.
Avoid pressing pots against walls or behind heavy curtains where stagnant air encourages fungal issues.
Misting is not necessary. Indoor humidity levels in heated homes are usually adequate for amaryllis, and excess moisture on leaves can promote disease.
7. Fertilize To Encourage Bloom
Fertilizing helps your amaryllis rebuild energy reserves for future blooms. However, timing is important.
Do not fertilize dormant bulbs. Wait until leaves or flower stalks reach four to six inches tall before feeding.
Use a balanced, water-soluble fertilizer such as 10-10-10 or 20-20-20. Mix at half the recommended strength to avoid salt buildup.
Apply fertilizer every two to three weeks during active growth. This steady feeding supports leaf development, root expansion, and bulb enlargement.
There is no need to switch to high-phosphorus bloom boosters. Balanced nutrition works best and avoids nutrient imbalances.
If you see white crust forming on the soil surface or pot rim, flush the container with plain water to remove excess salts.
Continue fertilizing through the blooming period and for several weeks afterward. The leaves that grow after flowering are critical for storing energy for next season.