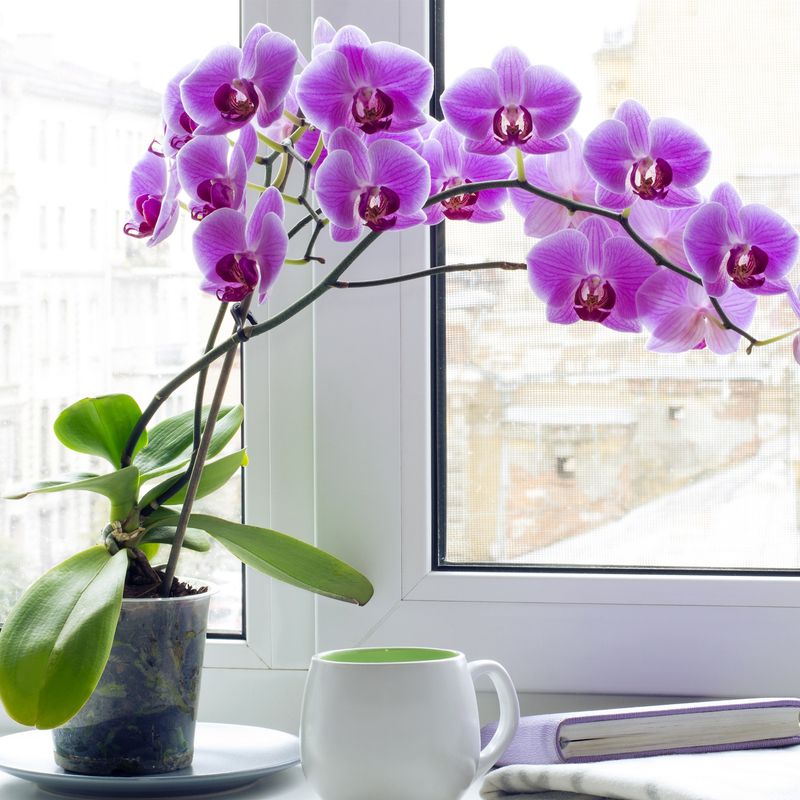
8 Orchid Pruning Tips Michigan Gardeners Use For More Beautiful Blooms
Pruning decides how good orchids look later. One small cut can shape weeks of growth. Clean trims guide energy.
Smart timing boosts flower production. Many indoor growers in California already follow simple pruning habits to keep orchids strong and balanced. The same approach works well in Michigan where indoor plants face dry air and changing light levels.
Michigan gardeners know that random snipping rarely brings great results. Purposeful cuts encourage fresh spikes and healthier leaves. Better airflow keeps plants comfortable.
Balanced growth creates fuller displays. Good pruning saves space and reduces clutter on windowsills. Orchids respond fast when handled the right way.
Strong structure leads to better blooms. Better blooms bring more color into the home. Curious which pruning techniques Michigan gardeners use to get more beautiful orchid blooms without adding extra work?
Keep reading because a few smart cuts could completely change how your orchids perform this season.
1. Wait Until Blooms Fade
Patience pays off when it comes to orchid pruning. Your orchid works hard to produce those gorgeous flowers. Letting them fade completely ensures the plant has extracted every bit of energy possible.
Many beginners make the mistake of cutting too soon. They see one wilted bloom and grab their scissors immediately. This interrupts the natural process and wastes valuable resources the plant could use later.
Watch your flower spike carefully as blooms begin to wilt. Some orchids can hold flowers for months at a time. The entire spike will eventually signal when it’s truly finished blooming.
Michigan’s dry winter air can make flowers fade faster than expected. Keep track of how long your blooms typically last. Most Phalaenopsis orchids bloom for eight to twelve weeks under good conditions.
Once all flowers have dropped and the spike starts changing color, you’re ready. Brown or yellow spikes indicate the plant has finished its blooming cycle. Green spikes might still have life left in them, so hold off a bit longer.
Timing your pruning correctly helps your orchid conserve energy for future growth. This simple practice makes a noticeable difference in overall plant health. Your next blooming cycle will thank you for waiting patiently.
2. Use Sterilized Tools

Clean tools are your orchid’s best friend during pruning time. Bacteria and fungi love to hitch rides on dirty scissors and pruners. A quick sterilization prevents these unwanted guests from infecting your precious plants.
Rubbing alcohol works wonderfully for this task and dries quickly. Simply wipe your blade surfaces thoroughly before each cut. You can also use a solution of one part bleach to nine parts water.
Michigan gardeners often maintain multiple orchids in their indoor collections. Moving from plant to plant without cleaning spreads problems rapidly. One infected orchid can compromise your entire collection within weeks.
Keep a small bottle of isopropyl alcohol near your orchid area. This makes sterilization convenient and ensures you won’t skip this crucial step. Cotton balls or small cloths work perfectly for quick wipes between cuts.
Sharp tools also matter just as much as clean ones. Dull blades crush plant tissue instead of making clean cuts. Crushed tissue invites infection and takes longer to heal properly.
Consider having dedicated orchid tools separate from other gardening equipment. This reduces cross-contamination risks from outdoor plants. Your orchids will reward your careful attention with vigorous, healthy growth and beautiful blooms.
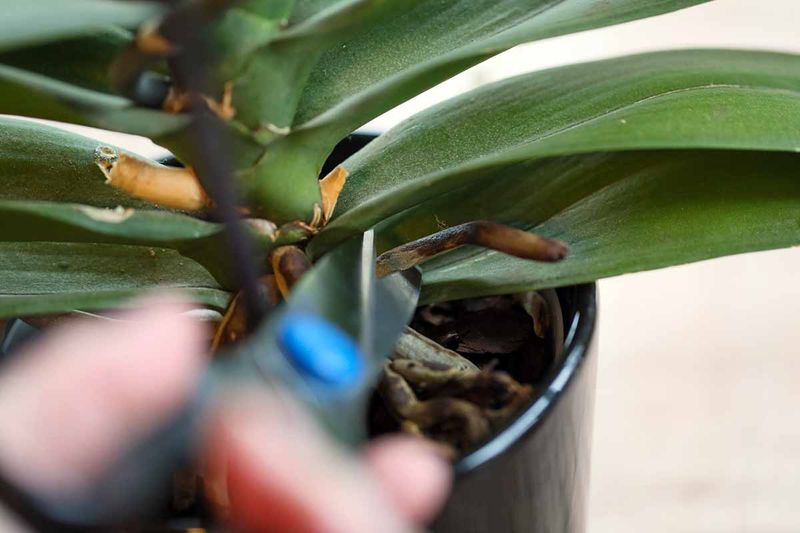
3. Remove Yellowing Or Damaged Leaves
Yellow leaves tell you something important about your orchid’s health. Sometimes they signal natural aging, while other times they indicate problems. Either way, removing them helps your plant focus energy where it matters most.
Lower leaves naturally yellow and drop as orchids mature and grow. This normal process shouldn’t cause alarm or immediate action. However, multiple yellowing leaves might signal watering issues or insufficient light.
Brown spots or black patches indicate more serious concerns than simple aging. These damaged areas can harbor fungal or bacterial infections. Removing affected leaves quickly prevents problems from spreading to healthy tissue.
Use your sterilized tools to cut yellowing leaves close to the stem. Make clean cuts without leaving stubs that could rot. The plant will seal the wound naturally within a few days.
Michigan’s winter heating systems create very dry indoor conditions for orchids. This environmental stress can cause leaf tips to brown and crisp. Trim damaged portions carefully while preserving as much healthy green tissue as possible.
Healthy green leaves perform photosynthesis and store nutrients for future blooms. Removing only truly compromised foliage maintains this important function. Your orchid will look tidier and channel resources toward producing spectacular flowers instead.
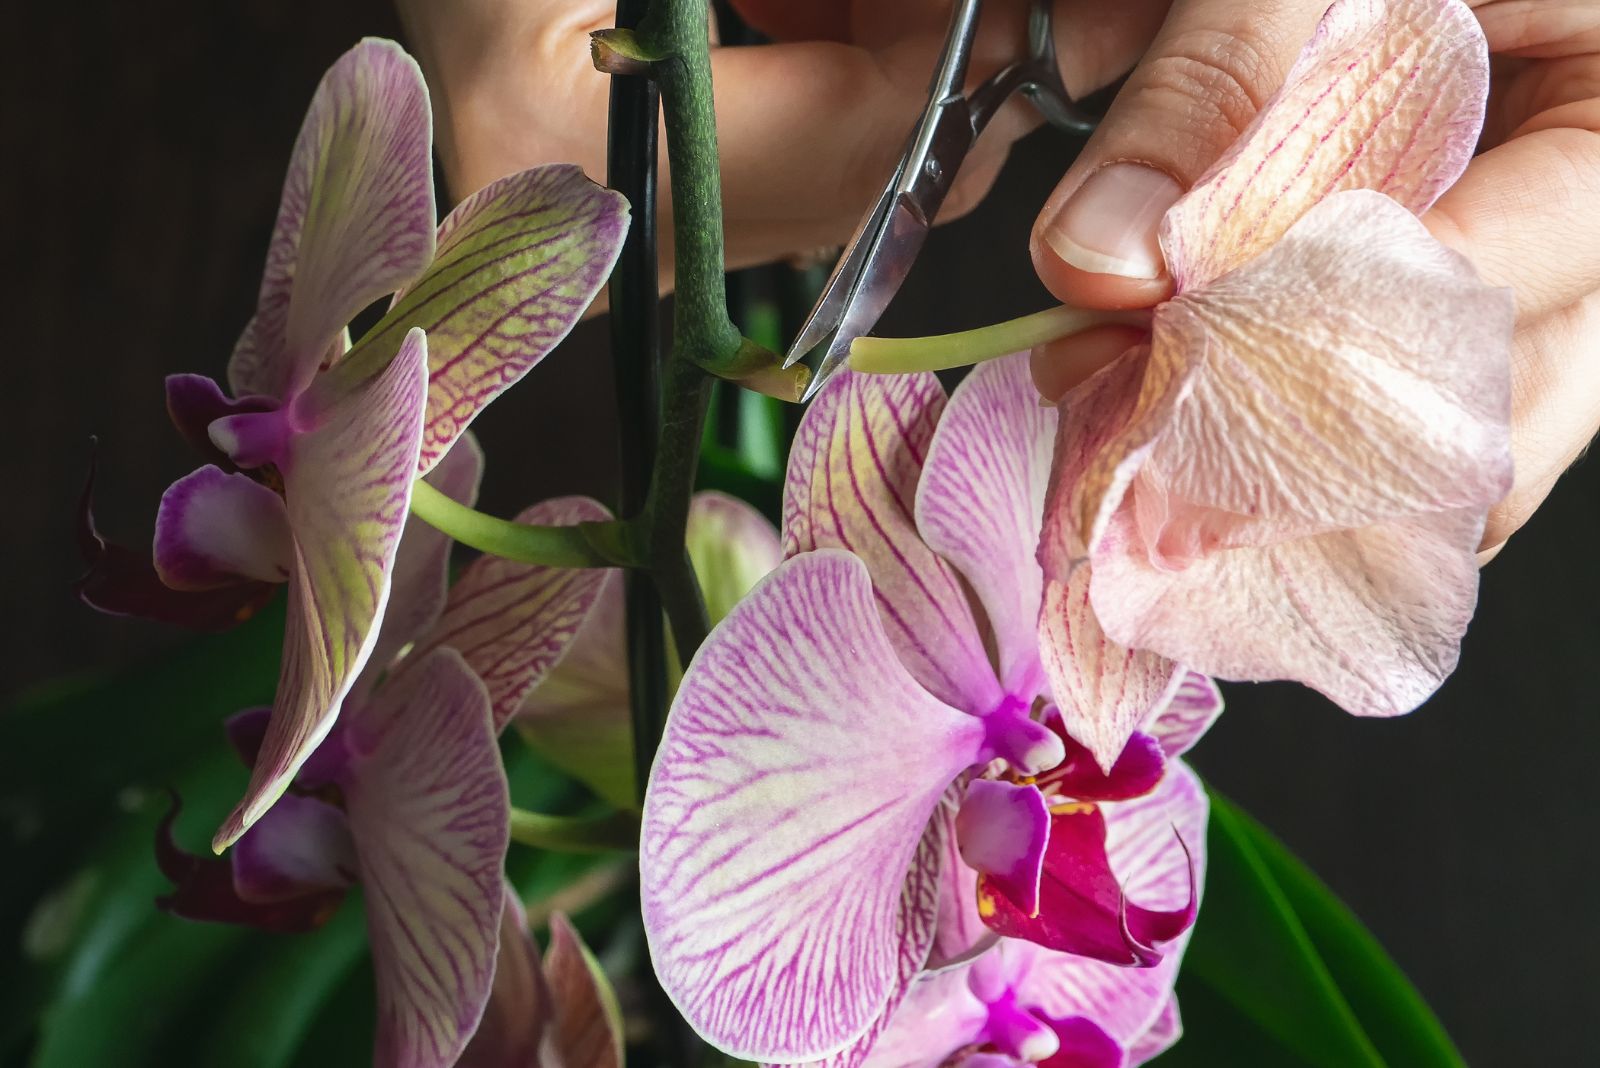
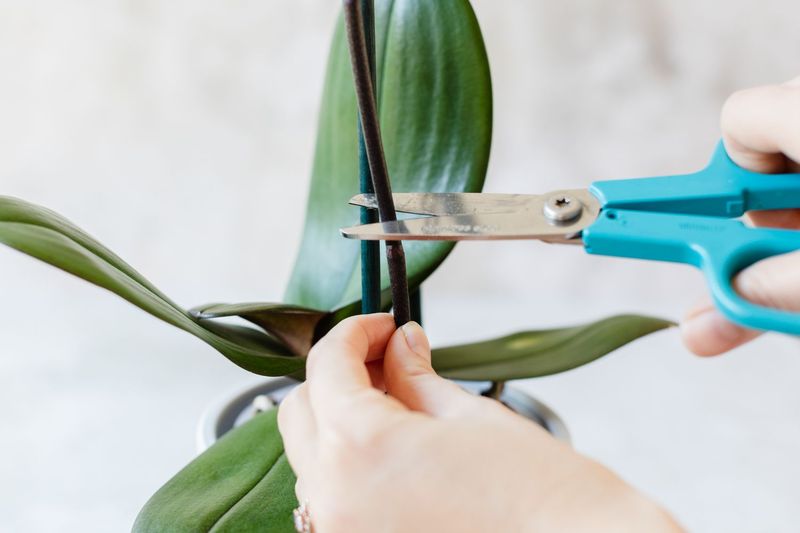
4. Cut Back Old Flower Spikes For Phalaenopsis
Phalaenopsis orchids have a special trick up their sleeves after blooming. Unlike many orchid varieties, they can produce secondary flower spikes. Strategic pruning encourages this bonus blooming behavior that Michigan growers absolutely love.
Look closely at your finished flower spike for small bumps called nodes. These nodes appear as tiny triangular sections along the spike. Counting from the bottom, identify the second or third healthy green node.
Cut about one quarter inch above your chosen node using sharp scissors. This precise cut signals the plant to potentially produce a branch. Not every spike will rebloom, but many will reward your efforts.
If the entire spike has turned brown and papery, cut it at the base instead. Brown spikes won’t produce new flowers no matter where you cut. Removing them completely lets the plant redirect energy toward growing new spikes.
Secondary spikes typically produce fewer flowers than the original spike did. However, they bloom much faster, sometimes within eight to twelve weeks. This gives you more flowers throughout the year with minimal waiting.
Some Michigan orchid enthusiasts prefer cutting all spikes to the base regardless. This approach encourages the plant to produce robust new spikes instead. Both methods work well depending on your patience level and preferences.
5. Avoid Removing Green, Healthy Spikes
Green spikes hold tremendous potential that many novice growers accidentally waste. That green color indicates living tissue capable of producing more flowers. Cutting these spikes prematurely throws away months of potential blooming.
Feel the spike gently to assess its condition and vitality. Firm, plump green spikes are very much alive and functional. Soft or shriveling spikes have likely finished their useful life.
Even without flowers, green spikes continue supporting your orchid’s health. They perform photosynthesis just like leaves do in bright conditions. This extra energy production benefits the entire plant throughout the year.
Michigan’s limited winter sunlight makes every photosynthesizing surface valuable for orchids. Those green spikes help compensate for shorter, darker days. Your plant needs all the help it can get during our challenging winters.
Sometimes a green spike will surprise you with new buds months after initial blooming. This delightful bonus happens more often when spikes remain intact. Patience and observation beat hasty pruning decisions every single time.
Only remove green spikes if they’re blocking new growth or causing aesthetic concerns. Otherwise, let nature take its course and allow them to brown naturally. Your orchid knows what it’s doing better than we do most of the time.
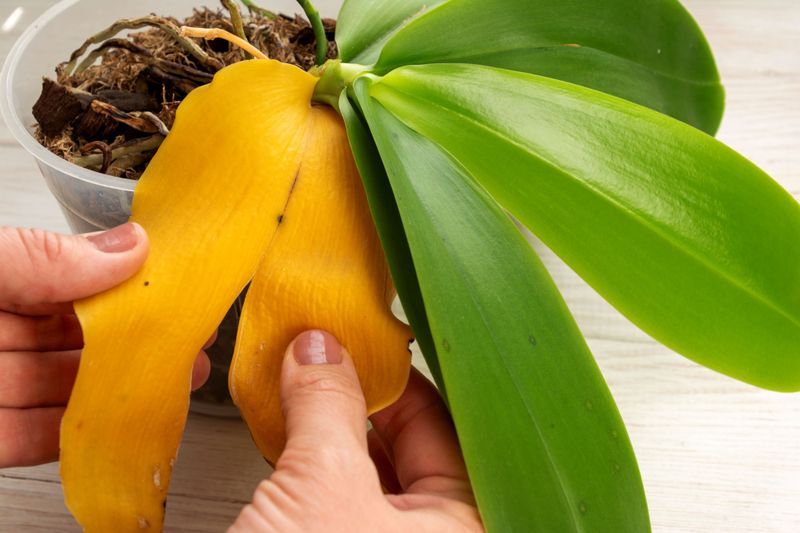
6. Trim Thin, Dried Roots
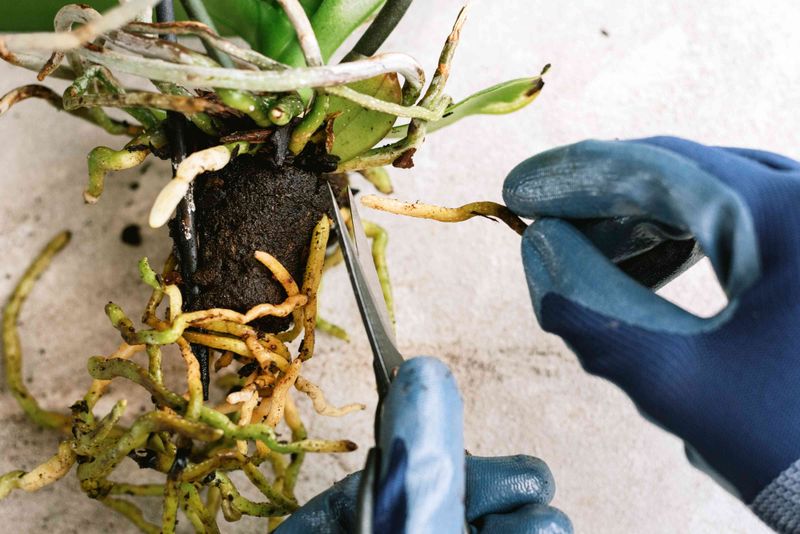
Root health determines everything else about your orchid’s wellbeing and performance. Healthy roots absorb water and nutrients efficiently while supporting strong growth. Compromised roots drag down the entire plant no matter how well you care for it.
Repotting time offers the perfect opportunity to inspect and prune roots. Gently remove old potting medium to expose the root system. You’ll immediately notice differences between healthy and problematic roots.
Healthy orchid roots appear plump, firm, and green or silvery white. They feel solid when you touch them gently. These roots are your plant’s lifeline and should never be removed.
Dried, papery brown roots have stopped functioning and just take up space. They can’t absorb anything and may harbor harmful organisms. Snip these away cleanly where they meet healthy tissue.
Michigan’s dry indoor winter air can desiccate orchid roots faster than expected. Regular humidity monitoring helps prevent excessive root loss. Consider using pebble trays or humidifiers near your orchid collection.
Some black, mushy roots indicate rot from overwatering or poor drainage. Remove these immediately as they spread decay to healthy roots. Sterilize your tools between cuts when dealing with rotted tissue to prevent contamination.
A good root pruning session rejuvenates your orchid remarkably well. The plant can focus resources on healthy roots instead.
7. Prune Carefully Around New Growth
New growth represents your orchid’s future blooming potential and overall vitality. Those tender new leaves and developing buds are incredibly fragile. One careless snip can set your plant back by months.
New leaves emerge from the center of most orchid plants. They start as small, tightly wrapped shoots that gradually unfurl. These delicate structures bruise and damage very easily during their development.
Position your pruning tools carefully when working near active growth points. Take your time and use good lighting to see clearly. Rushing this process leads to accidental nicks that invite infection.
Flower buds can appear along spikes or at the base of plants. They look like small green bumps that gradually enlarge and develop. Bumping or cutting these buds stops flower development completely.
Michigan orchid growers often work in less-than-ideal lighting during dark winter months. Use a bright lamp or work near a window. Good visibility prevents costly mistakes that take months to overcome.
If you accidentally damage new growth, don’t panic or make it worse. Leave the damaged area alone and let it heal naturally. Most orchids can recover from minor injuries with proper care.
Careful pruning near new growth shows respect for your plant’s natural cycles. This mindful approach results in healthier orchids that bloom reliably year after year.
8. Maintain Consistent Post-Pruning Care
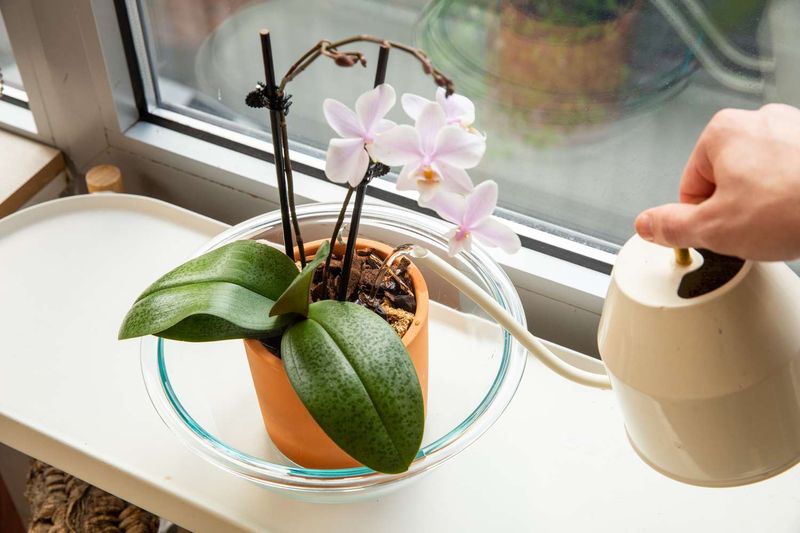
Pruning stresses your orchid even when done perfectly and with good intentions. The plant needs consistent care afterward to recover and redirect energy. This critical period determines whether your orchid thrives or merely survives.
Water your orchid according to its normal schedule after pruning sessions. Don’t increase or decrease watering unless specific problems arise. Consistency helps the plant maintain its established routines and rhythms.
Michigan’s winter heating creates challenging humidity levels for recovering orchids. Aim for 40 to 60 percent humidity around your plants. Group orchids together or use humidity trays to create better microclimates.
Light requirements don’t change after pruning, so maintain your usual placement. Phalaenopsis orchids prefer bright, indirect light near east or west windows. Too much direct sun burns leaves while too little prevents blooming.
Fertilize lightly once new growth appears after your pruning session. Use a balanced orchid fertilizer diluted to half strength. Over-fertilizing stressed plants causes more harm than good despite good intentions.
Monitor your orchid closely for several weeks following any pruning work. Watch for signs of infection, unusual yellowing, or wilting. Early intervention prevents small problems from becoming major setbacks.
With proper post-pruning care, your orchid will bounce back stronger than before. You’ll see vigorous new growth and eventually those spectacular blooms you’re working toward.