8 Orchid Pruning Tips North Carolina Gardeners Use For More Beautiful Blooms

Orchids have a reputation for being picky, but North Carolina gardeners know the real secret: smart pruning makes a huge difference.
With our mix of warm summers, indoor heating in winter, and shifting light levels, orchids can easily get out of balance if they are not trimmed the right way. The result? Fewer blooms, weak spikes, and plants that look tired instead of tropical.
The good news is orchid pruning is not complicated once you know what to cut and when to do it. A few simple snips can redirect energy, encourage fresh growth, and set the stage for bigger, better flowers.
Whether you are new to orchids or trying to level up your bloom game, these proven pruning tips will help your plants stay healthy and show off stunning flowers season after season.
1. Wait Until Flowers Have Finished
Patience pays off when you grow orchids indoors. Your plant works hard to produce those gorgeous blooms.
Rushing to prune before flowers naturally fade wastes all that energy. North Carolina homes provide excellent conditions for extended blooming periods.
Phalaenopsis orchids often flower for two to three months straight. Some varieties even push four months when conditions stay ideal.
Watch your flowers closely as they age gracefully. Blooms start losing their vibrant colors and texture. Petals become papery and begin to wrinkle noticeably. Once all flowers have completely wilted, your orchid signals readiness.
The plant can now redirect stored energy toward root development. New growth emerges stronger when timing works perfectly.
Cutting too early forces your orchid to waste resources. The plant must heal wounds while still supporting active flowers.
This double demand weakens overall health significantly. Humidity levels in North Carolina fluctuate throughout seasons.
Your orchid adjusts its blooming cycle accordingly. Spring and fall often bring the longest flowering periods. Mark your calendar when flowers first open fully. Tracking bloom duration helps you predict future cycles.
Most orchids follow consistent patterns year after year. Resist the temptation to snip fading flowers early.
Your orchid knows exactly when to finish blooming. Trust the natural process for best results.
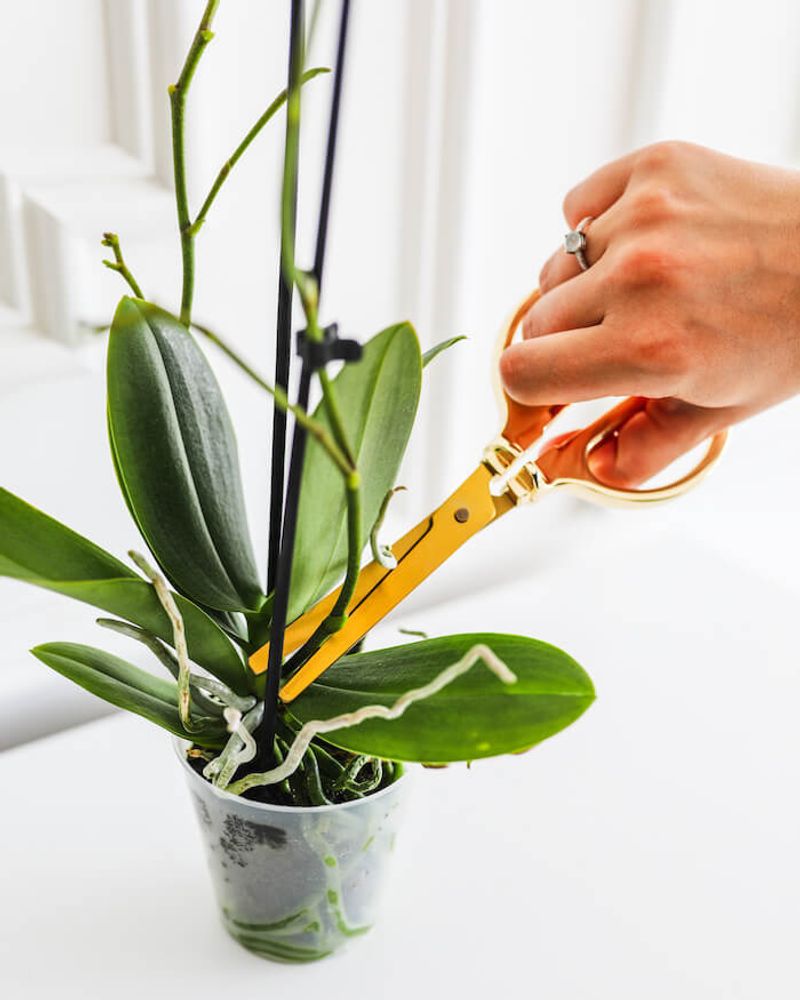
2. Sterilize Pruning Tools
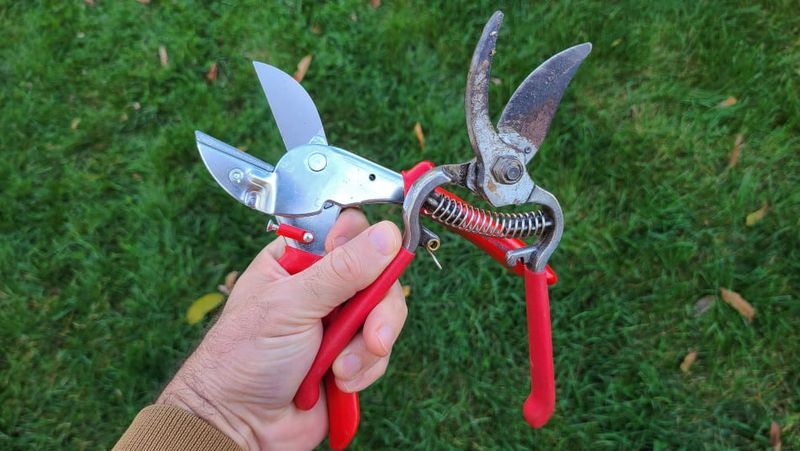
Disease spreads incredibly fast among orchids through contaminated tools. One quick snip with unclean scissors transfers bacteria instantly.
Your beautiful plant collection faces serious risk without proper sanitation. Rubbing alcohol with 70% concentration works perfectly for sterilization.
Keep a small bottle near your orchid growing area. Cotton pads or paper towels make application simple and quick.
Wipe down your cutting blades thoroughly before each use. Let the alcohol sit for thirty seconds minimum.
This contact time ensures complete pathogen elimination effectively. North Carolina’s humid climate creates ideal conditions for bacterial growth.
Warm temperatures combined with moisture accelerate disease spread rapidly. Clean tools become even more critical in these conditions.
Fungal infections devastate orchid collections without warning signs initially. Crown rot and root rot spread through contaminated equipment.
Prevention costs pennies compared to replacing expensive plants later. Professional orchid growers never skip this essential step ever.
They understand one infected plant threatens their entire greenhouse. Home gardeners deserve the same level of protection always. Consider keeping separate tools for each orchid variety. This practice provides an extra layer of safety.
Label tools clearly to avoid accidental cross-contamination issues. Fire sterilization offers another effective method for metal tools. Hold pruner blades over a flame until glowing red. Cool completely before touching any plant tissue carefully.
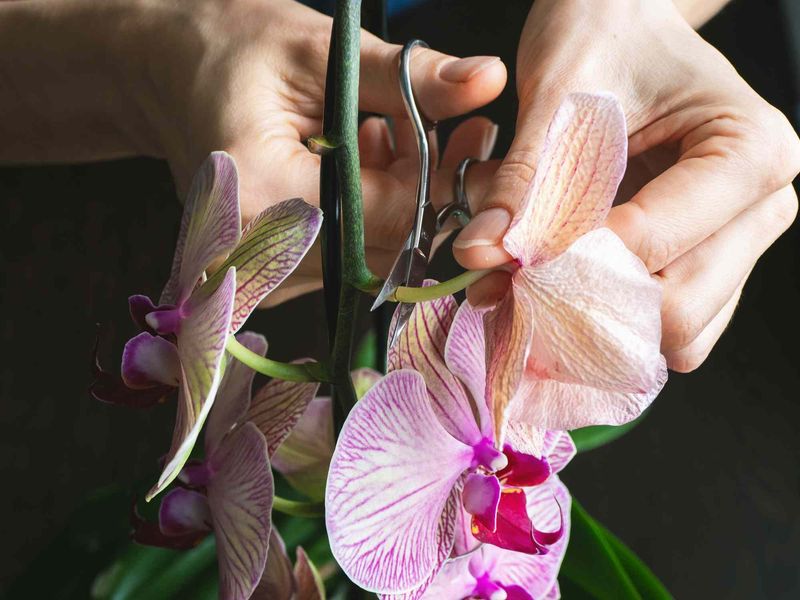
3. Remove Discolored Leaves
Yellow or brown leaves signal your orchid needs attention now. These discolored portions drain valuable energy from healthy tissue.
Removing them redirects resources toward flower production and growth. Leaf discoloration happens naturally as orchids age and mature.
Older bottom leaves typically yellow first before dropping off. This normal process shouldn’t cause concern or worry unnecessarily.
However, sudden yellowing across multiple leaves indicates problems brewing. Overwatering ranks as the most common culprit in homes.
North Carolina tap water sometimes contains excessive minerals too. Examine each leaf carefully before making any cuts today. Firm green leaves contribute to photosynthesis and plant health. Only remove foliage that appears clearly damaged or diseased.
Brown spots with yellow halos often indicate bacterial infections. These must be trimmed away immediately to prevent spreading.
Cut well into healthy tissue to ensure complete removal. Use sharp, clean scissors for precise cuts every time.
Jagged edges take longer to heal and invite infections. Smooth cuts seal faster and reduce stress significantly.
Some orchid varieties naturally develop spotted or mottled foliage. Research your specific type before removing unique leaf patterns.
What looks like damage might actually be normal coloration. After trimming damaged leaves, adjust your care routine accordingly.
Most leaf problems stem from watering or light issues. Correcting the underlying cause prevents future damage effectively.
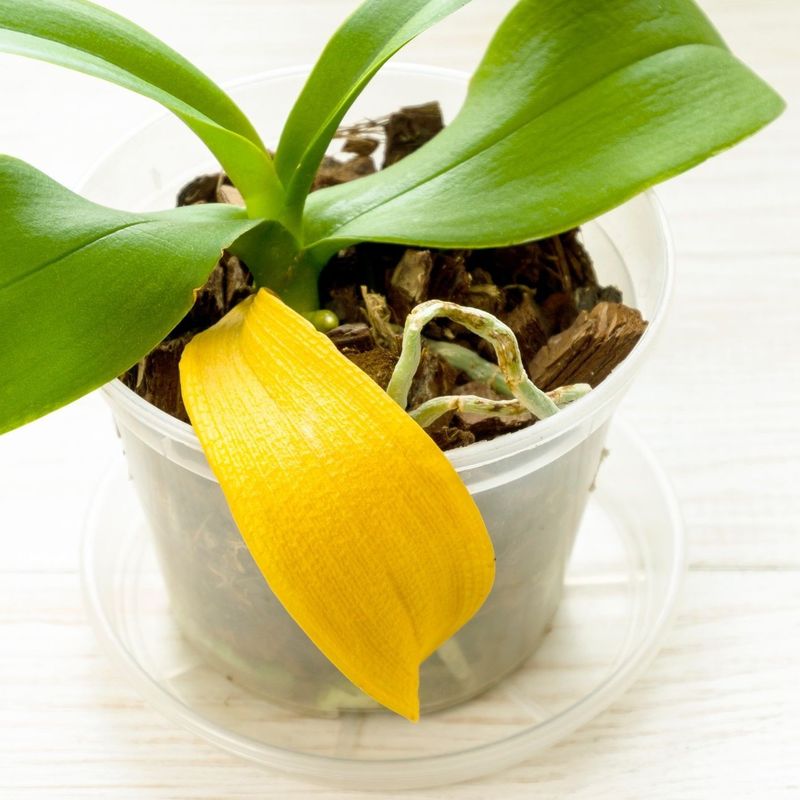
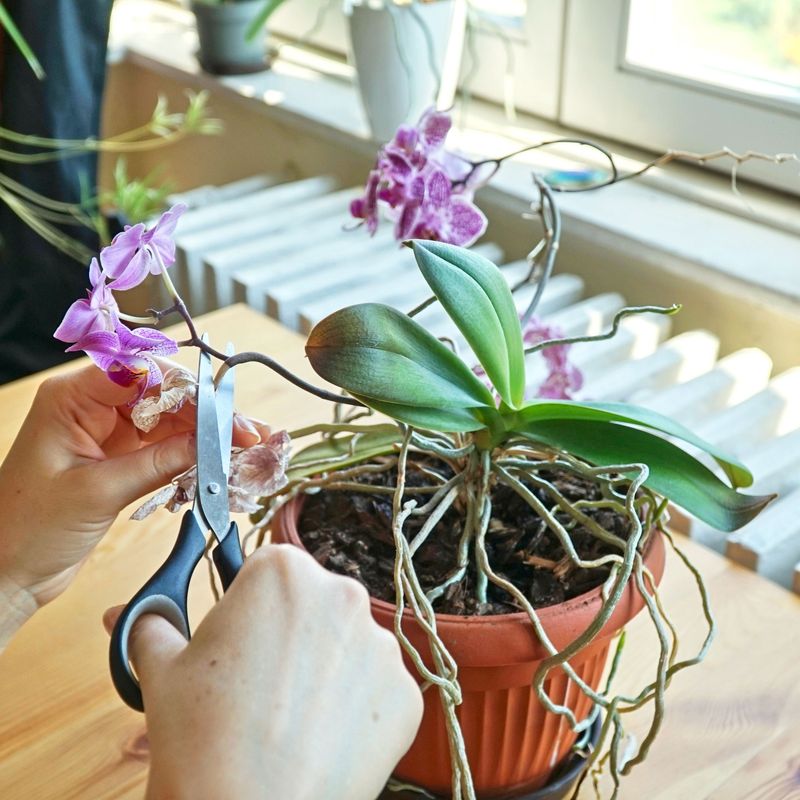
4. Cut Back Old Flower Spikes On Phalaenopsis
Phalaenopsis orchids possess a special talent for repeat blooming. These popular varieties can produce flowers multiple times yearly.
Strategic pruning of old spikes encourages this wonderful trait. After blooms fade completely, examine the spike closely now.
Look for small triangular nodes along the stem length. These bumps hold dormant buds waiting for activation signals.
Count down from the top to the second healthy node. Make your cut about one quarter inch above it.
This positioning gives the best chance for secondary flowering. Sometimes the entire spike turns brown after blooming finishes.
This signals the plant wants to rest and recover. Cut brown spikes down to the base completely then.
Green spikes still contain active tissue and stored nutrients. Cutting to a node preserves this energy investment wisely.
New flower branches often emerge within two months time. North Carolina’s seasonal temperature changes trigger blooming cycles naturally.
Cooler fall nights signal orchids to initiate flower development. Proper spike pruning works with these natural rhythms perfectly.
Secondary blooms typically produce fewer flowers than primary displays. Expect three to five flowers instead of eight to ten.
Quality remains excellent despite the reduced quantity though. Some growers prefer cutting all spikes to the base.
This method forces the plant to build strength completely. The next blooming cycle then produces fuller, more impressive displays.
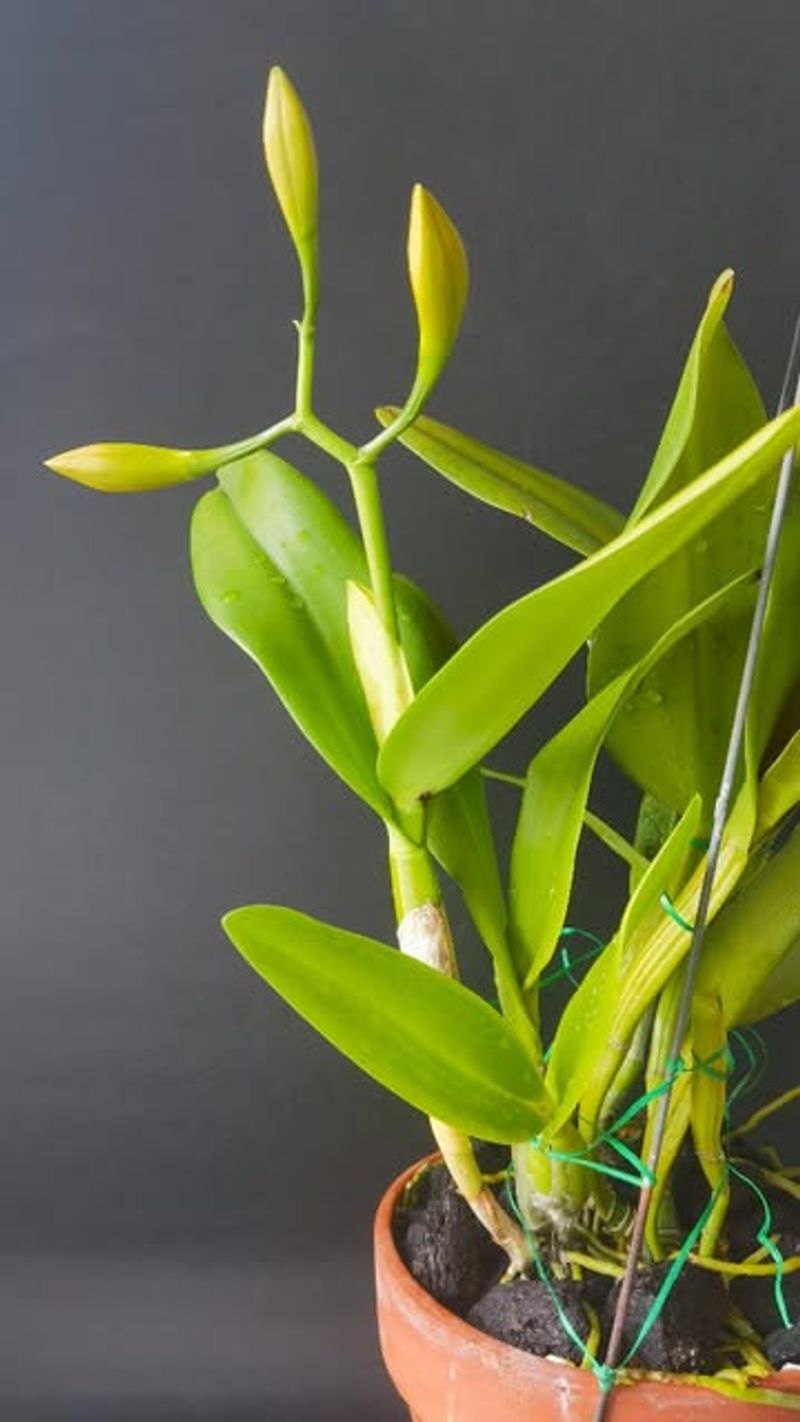
5. Avoid Cutting Green Healthy Spikes
Green flower spikes serve multiple important purposes for orchids. These structures perform photosynthesis just like leaves do.
Premature removal wastes the plant’s significant energy investment unnecessarily. Many beginners mistakenly cut green spikes after flowers drop.
They assume the spike has finished its job completely. This common error reduces future blooming potential dramatically though.
A healthy green spike can remain active for months. Phalaenopsis varieties often keep spikes for an entire year.
Some even produce flowers on the same spike repeatedly. Feel the spike texture to assess its health status. Firm, plump tissue indicates active growth and vitality. Soft or shriveled areas suggest the spike is declining.
North Carolina’s indoor heating during winter creates challenging conditions sometimes. Low humidity can stress orchid spikes and cause browning.
Maintain moisture levels between 50 and 70 percent ideally. Green spikes may pause between blooming cycles temporarily here.
The plant gathers strength before pushing new flower buds. Patience during these rest periods gets rewarded with blooms.
Watch for tiny bumps swelling along the spike length. These developing buds signal another flowering round is starting.
Your patience has paid off wonderfully with minimal effort. Only remove green spikes if they become damaged physically.
Broken or bent areas won’t produce flowers successfully anymore. Clean cuts prevent infection and help the plant recover.
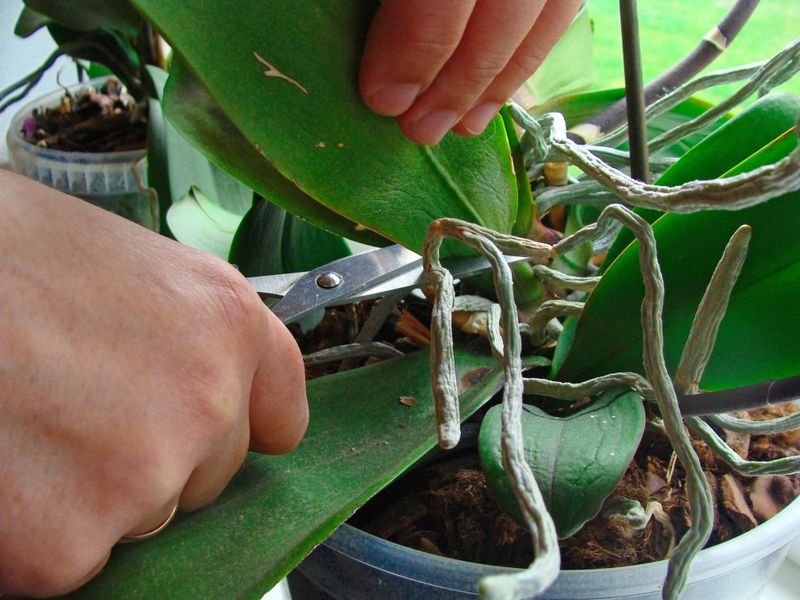
6. Trim Damaged Roots
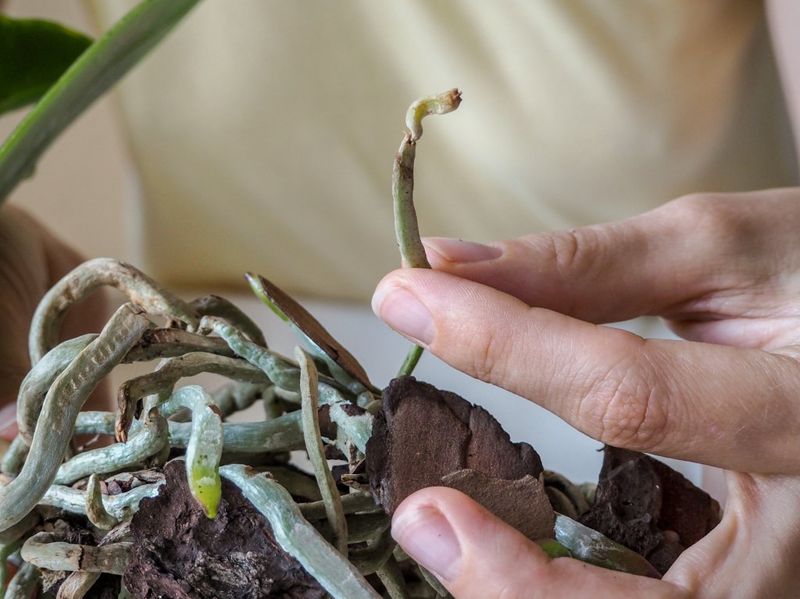
Root health determines your orchid’s overall vigor and blooming ability. Damaged roots cannot absorb water or nutrients effectively anymore.
Regular inspection during repotting reveals problems before they escalate badly. Healthy orchid roots appear silvery white when dry outside.
They turn bright green after watering thoroughly each time. Firm texture indicates good moisture absorption and nutrient uptake.
Brown, mushy roots have succumbed to rot from overwatering. These must be removed completely to save the plant.
Cut back to healthy white tissue using sterilized tools. Dry, papery roots also serve no useful purpose anymore.
They’ve shriveled from insufficient moisture over extended periods. Snip these away to make room for new growth.
North Carolina gardeners typically repot orchids every two years minimum. This schedule allows thorough root system inspection and maintenance. Spring provides the ideal timing for this task. Remove the orchid from its pot very carefully now.
Shake off old bark media gently to expose roots. Take your time examining every root section thoroughly.
Trim conservatively when roots show mixed health conditions present. Leave questionable roots unless they’re clearly damaged or diseased.
Orchids recover faster with more root mass remaining intact. After pruning roots, choose fresh potting media specifically for orchids.
Bark-based mixes provide excellent drainage and air circulation. Proper media prevents future root problems from developing quickly.
7. Prune Carefully Around New Growth
New growth represents your orchid’s future blooming potential entirely. These tender shoots need protection from accidental damage always.
One careless cut can set back flowering for months. Orchids produce new leaves from the central crown area.
This growth point remains vulnerable while developing and maturing. Sharp tools or rough handling cause irreparable harm easily.
Watch for small green spikes emerging from leaf axils. These will develop into flower spikes over several weeks.
Bumping or bruising them stops flower development completely unfortunately. Position your pruning tools away from active growth zones.
Work slowly and deliberately with each cut you make. Good lighting helps you see exactly what you’re doing.
North Carolina’s bright spring sunlight encourages vigorous new growth naturally. Your orchid responds to lengthening days with fresh leaves.
This active growing period requires extra caution during maintenance. New roots also emerge throughout the growing season regularly.
These bright green tips search for moisture and nutrients. Breaking them off reduces the plant’s ability to thrive.
Support older leaves gently when trimming nearby damaged tissue. This prevents accidentally tearing healthy parts of the plant.
Your non-cutting hand provides stability and control nicely. Consider waiting until new growth matures before major pruning.
Established leaves and roots handle the stress much better. Timing your maintenance work protects vulnerable developing tissue effectively.
8. Maintain Proper Post-Pruning Care
Pruning stresses your orchid even when done correctly and carefully. The plant needs consistent care to recover and thrive.
Your attention during the following weeks determines long-term success rates. Reduce watering frequency slightly for one week after major pruning.
Cut surfaces need time to seal and heal properly. Excess moisture invites bacterial infections into fresh wounds unfortunately.
North Carolina homes often have adequate natural light year-round fortunately. Position your orchid near east or west-facing windows.
Bright indirect light supports recovery without causing additional stress. Humidity becomes even more important after pruning operations complete.
Maintain levels around 60 percent for optimal healing conditions. Group orchids together or use humidity trays effectively.
Avoid fertilizing for two weeks following any pruning session. The plant focuses energy on healing rather than growth.
Resume your regular feeding schedule once recovery appears complete. Watch for signs of new growth emerging within weeks.
Fresh root tips indicate your orchid has bounced back. New leaf growth follows shortly after root development begins.
Temperature stability helps orchids recover from pruning stress faster overall. Avoid placing plants near heating vents or drafty windows.
Consistent conditions between 65 and 80 degrees work perfectly. Document your pruning dates and observations in a simple journal.
Tracking patterns helps you improve techniques over time. Successful orchid growing requires learning from each experience gained.