How North Carolina Gardeners Grow Clematis Successfully
Clematis might look delicate and fancy, but plenty of North Carolina gardeners grow it with great success. The secret is understanding what this climbing beauty really wants.
With the right sun, soil, and support, clematis can reward you with stunning blooms that turn fences, trellises, and arbors into eye-catching garden features.
North Carolina’s warm growing season gives clematis plenty of time to thrive, but humidity, summer heat, and pruning confusion can trip up beginners. The good news is it is much easier than it seems once you learn a few key tricks.
From choosing the right variety to knowing when and how to prune, small adjustments can make a huge difference in bloom power and plant health.
Whether you are new to clematis or trying again after a struggle, these proven tips will help you grow strong, healthy vines that flower beautifully year after year.
Choose The Right Variety
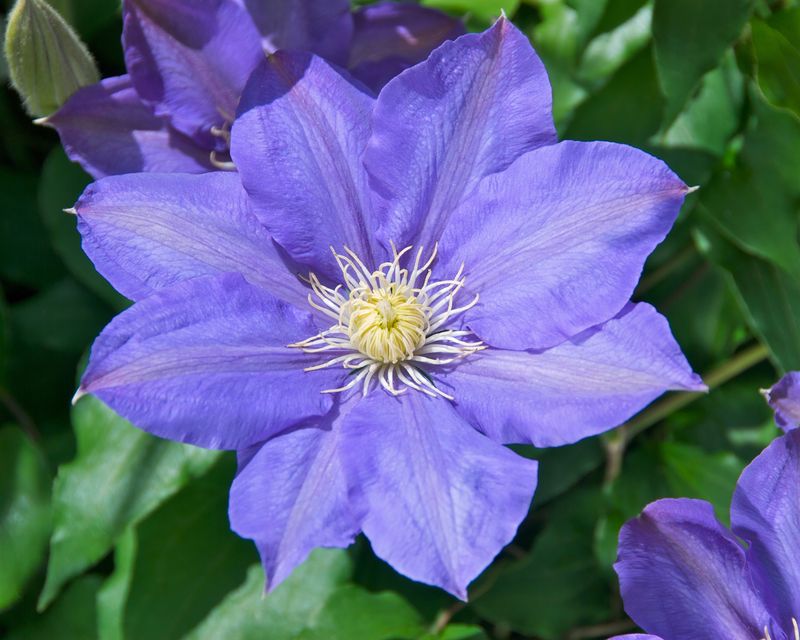
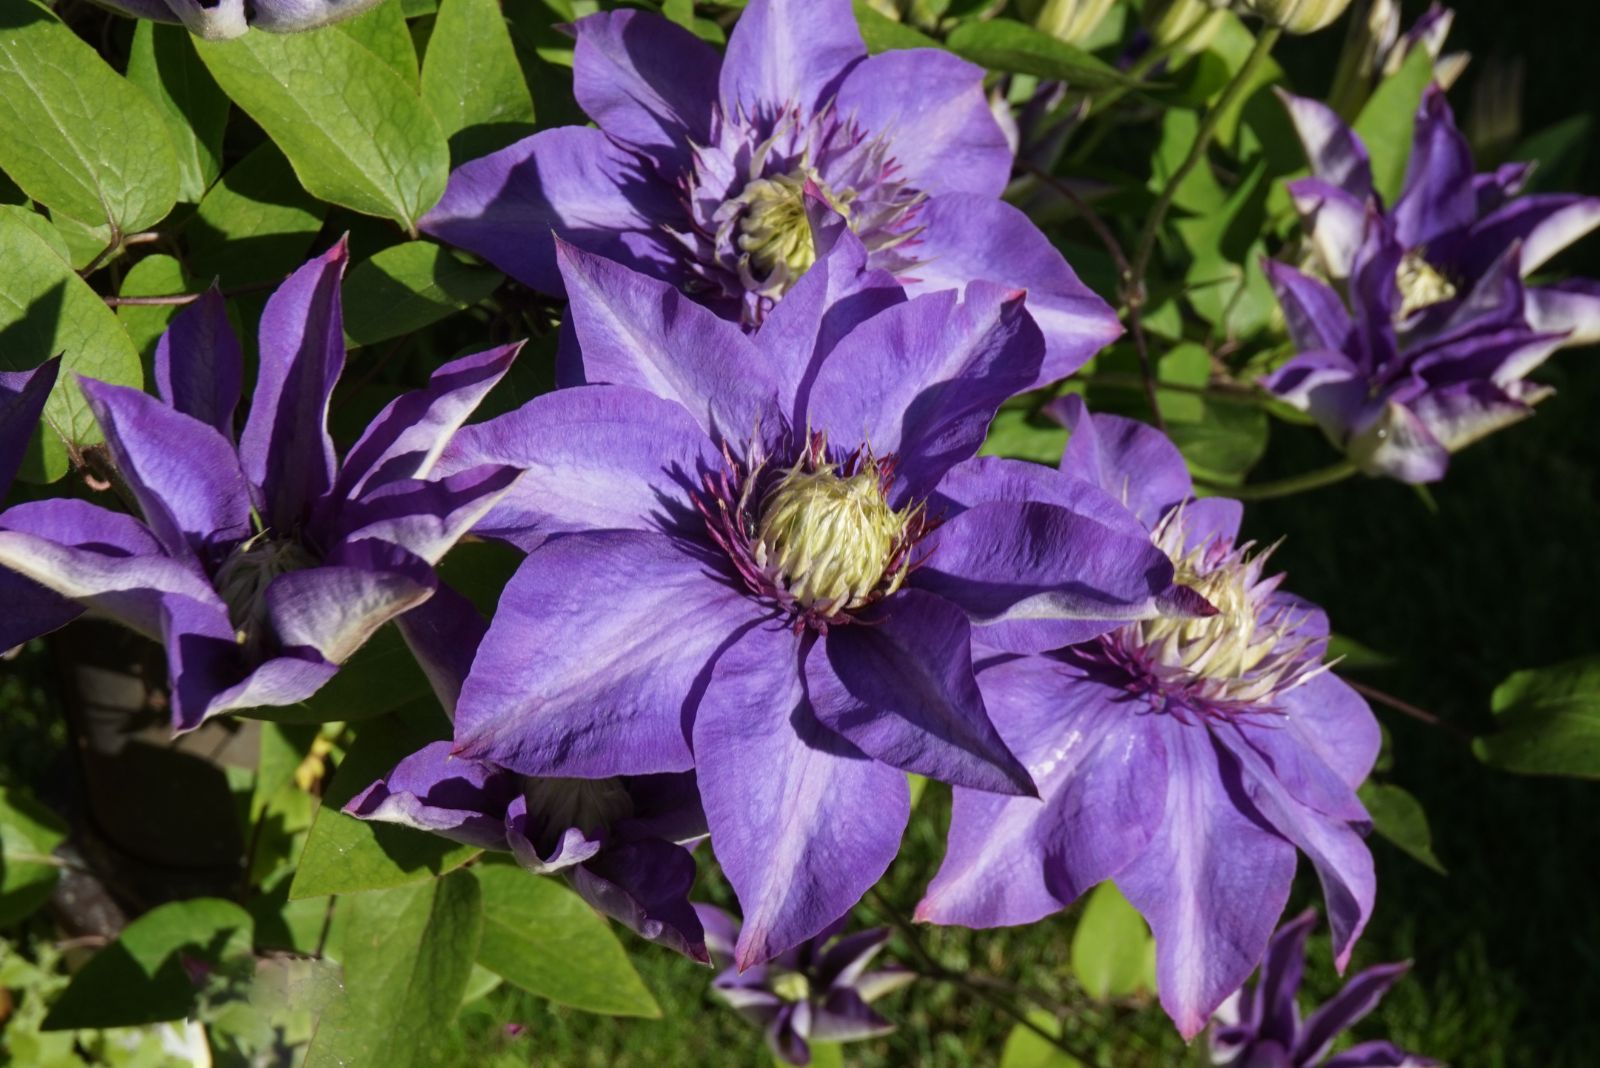
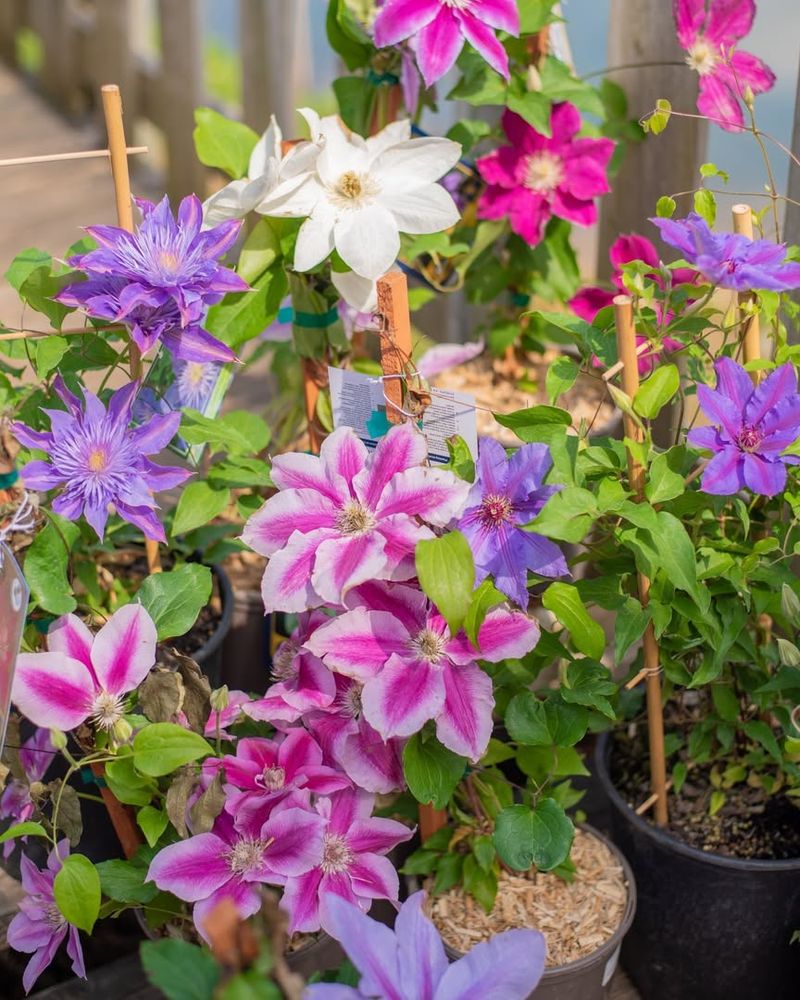
North Carolina’s diverse climate zones offer wonderful opportunities for growing different clematis varieties, but selecting the right cultivar makes all the difference between struggling vines and spectacular bloomers.
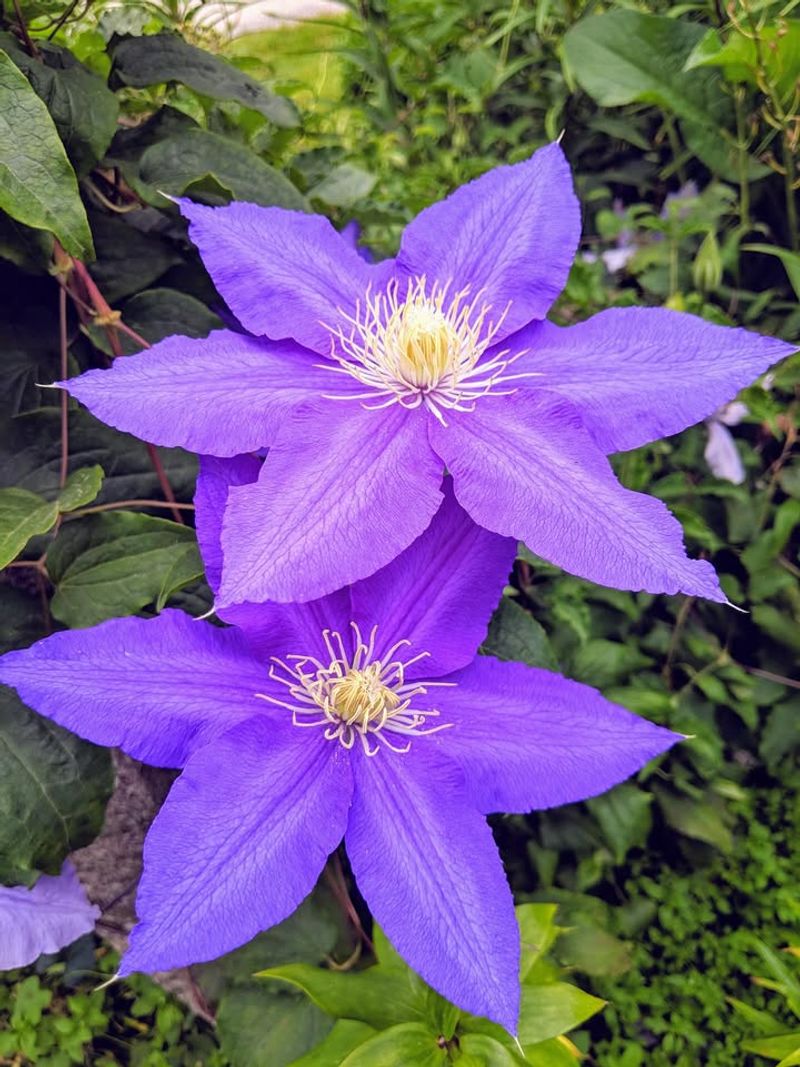
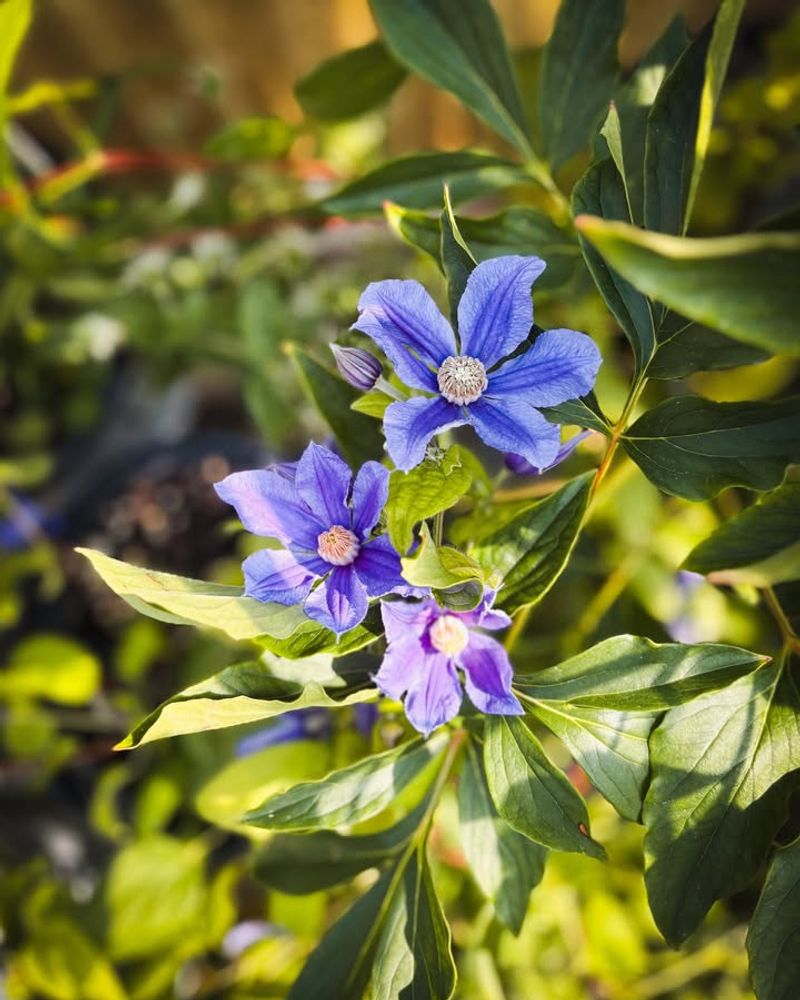
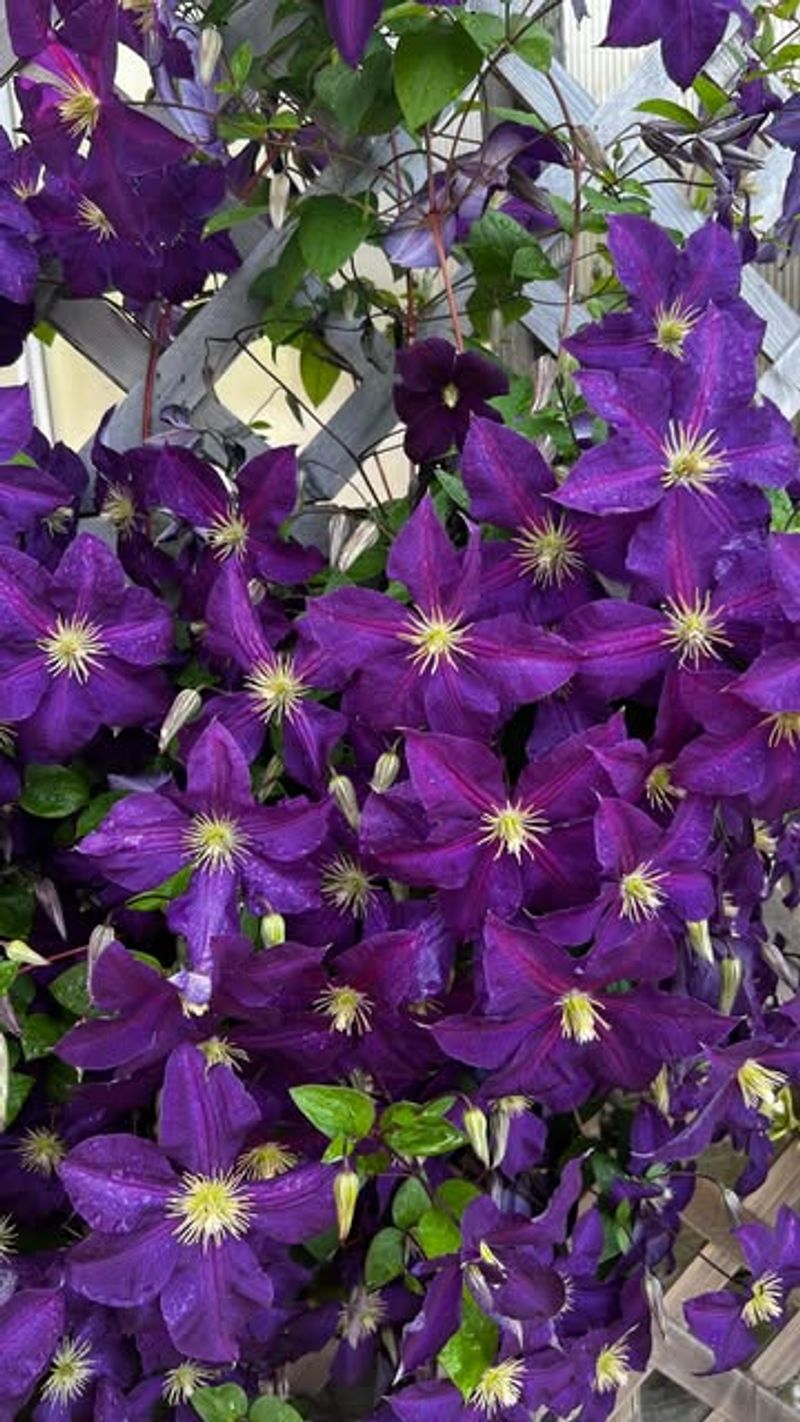
The classic Jackmanii produces masses of deep purple flowers that absolutely love our warm summers, while Nelly Moser showcases stunning pink blooms with darker stripes that brighten shaded spots.
Native Clematis virginiana, sometimes called virgin’s bower, naturally thrives throughout our state and requires minimal fussing once established.
This variety handles our humidity better than many imported cultivars and supports local pollinators beautifully.
Consider your specific growing zone within North Carolina, as mountain gardeners experience cooler temperatures than coastal residents, affecting which varieties perform best.
Group 3 clematis varieties, which bloom on new wood, tend to perform exceptionally well across most of North Carolina because our winters rarely damage new spring growth.
Sweet Autumn clematis fills late summer gardens with fragrant white blooms just when other flowers start fading.
Henryi offers large white flowers perfect for brightening darker garden corners, while Princess Diana produces unique tulip-shaped pink blooms throughout the growing season.
Visit local nurseries to see which varieties they stock regularly, as these businesses understand what thrives in your specific area.
Starting with proven performers gives you confidence and beautiful results from your very first growing season.
Plant In Well-Drained Soil

Our famous North Carolina red clay presents challenges for many plants, and clematis roots absolutely detest sitting in waterlogged conditions that heavy clay creates.
Amending your planting area transforms problematic soil into a clematis-friendly environment where roots can breathe and expand freely.
Mix generous amounts of compost into your native soil, aiming for a ratio of about one-third compost to two-thirds existing soil for optimal drainage improvement.
Coarse sand also helps break up dense clay particles, creating air pockets that prevent water from pooling around sensitive roots.
Avoid using fine sand, which can actually make drainage worse by filling spaces between clay particles rather than opening them up.
Test your drainage by digging a hole, filling it with water, and observing how quickly it disappears. Water should drain within a few hours rather than sitting overnight, indicating your soil is ready for clematis planting.
Raised beds offer an excellent solution for areas with persistent drainage problems, allowing you to create ideal growing conditions above problematic native soil.
Perlite mixed into planting holes provides another lightweight amendment that improves aeration without adding much weight to the soil structure.
Remember that clematis appreciates consistent moisture but never soggy conditions, so getting drainage right from the start prevents the most common cause of struggling vines.
Proper soil preparation might seem like extra work initially, but it pays dividends in healthy, vigorous growth for years to come.
Provide Full Sun For Blooms
Gardeners often hear the saying that clematis likes its head in the sun and feet in the shade, which perfectly describes this plant’s unique sunlight requirements.
The flowering portions of your vine need at least six hours of direct sunlight daily to produce those spectacular blooms you’re hoping for.
Morning sun works especially well in our hot North Carolina summers, giving plants energy without the intense afternoon heat that can stress blooms.
Position your clematis where it can climb toward bright light while keeping the root zone naturally cooler and protected.
Planting on the east or north side of structures often provides this ideal combination, with upper vines receiving plenty of sunshine while lower stems stay comfortably shaded.
Some lighter-colored varieties, particularly those with pink or white flowers, actually appreciate a bit of afternoon shade to prevent bleaching in our intense summer sun.
Companion planting offers a natural solution for shading clematis roots while the vine reaches upward toward light.
Low-growing perennials like hostas, ferns, or coral bells create living mulch that keeps soil cool without competing for sunlight at higher levels.
If your garden lacks natural shade for the base, position a large decorative stone or use extra mulch to protect the root zone from direct sun exposure.
Watch how sunlight moves across your intended planting spot throughout the day before committing to a location.
This observation helps you understand exactly how much sun your clematis will receive as seasons change and the sun’s angle shifts.
Mulch The Base To Keep Roots Cool
A generous layer of organic mulch around your clematis base acts like a protective blanket, moderating soil temperature and retaining precious moisture during our sometimes unpredictable North Carolina weather.
Shredded hardwood bark, pine straw, or composted leaves all work beautifully as mulching materials that gradually break down to enrich your soil.
Apply mulch in a circle extending about eighteen inches from the base of your plant, creating a cool root zone even when summer temperatures soar.
Keep mulch a few inches away from the actual stem to prevent moisture from encouraging fungal problems where stem meets soil.
A three to four-inch depth provides excellent insulation without smothering roots or preventing water from reaching the soil beneath.
Pine straw, particularly abundant in our state, offers the added benefit of slightly acidifying soil as it decomposes, which many clematis varieties appreciate.
Refresh your mulch layer annually, typically in early spring before new growth emerges vigorously.
As organic mulches decompose, they contribute valuable nutrients and improve soil structure, creating an increasingly hospitable environment for expanding root systems.
During particularly hot, dry spells, check beneath your mulch layer to ensure soil remains moderately moist rather than bone dry.
Mulching also suppresses weeds that would compete with your clematis for water and nutrients while keeping soil from splashing onto lower leaves during heavy rains.
This simple practice prevents many common problems while requiring minimal effort once initially applied, making it one of the easiest ways to support healthy clematis growth.
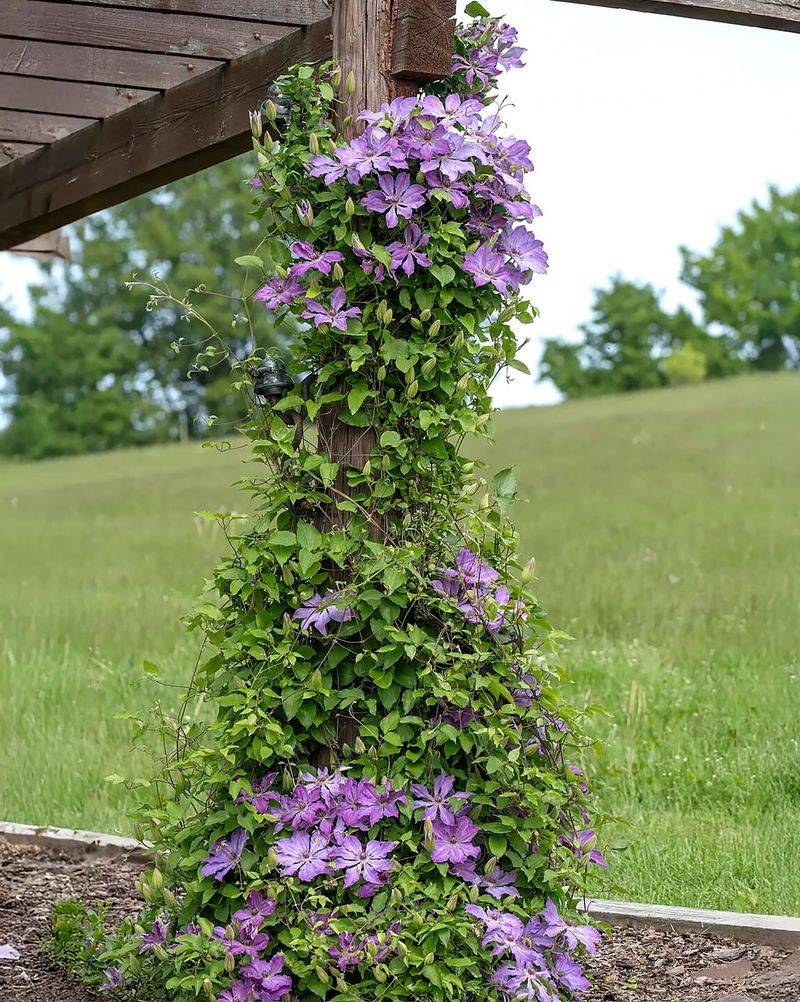
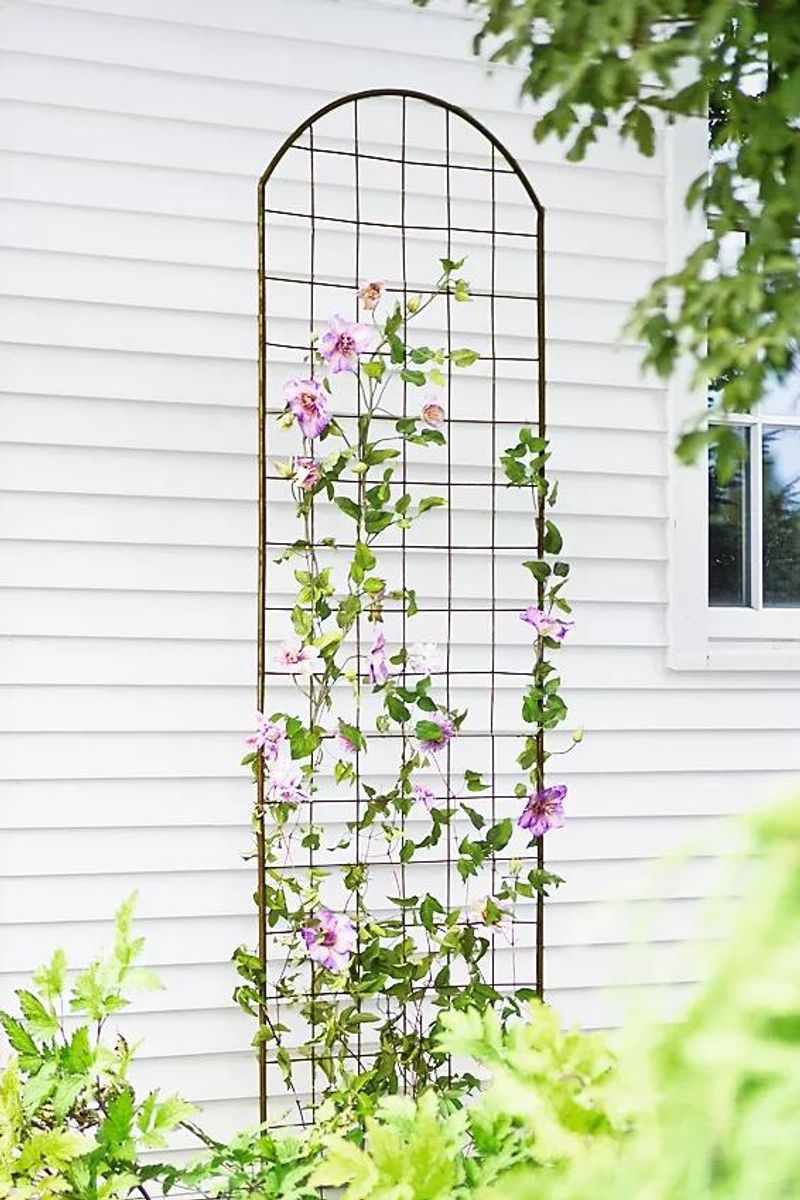
Install Support Structures
Clematis vines climb by wrapping their leaf stems around supports, so they need structures with elements thin enough for these tendrils to grasp effectively.
Trellises with openings between four to six inches work perfectly, giving vines plenty of attachment points without creating tangled messes that become problematic later.
Install your support system before or during planting to avoid disturbing established roots when you try adding structures afterward.
Wooden arbors create stunning focal points while providing sturdy frameworks for vigorous clematis varieties that can grow quite heavy with mature foliage and blooms.
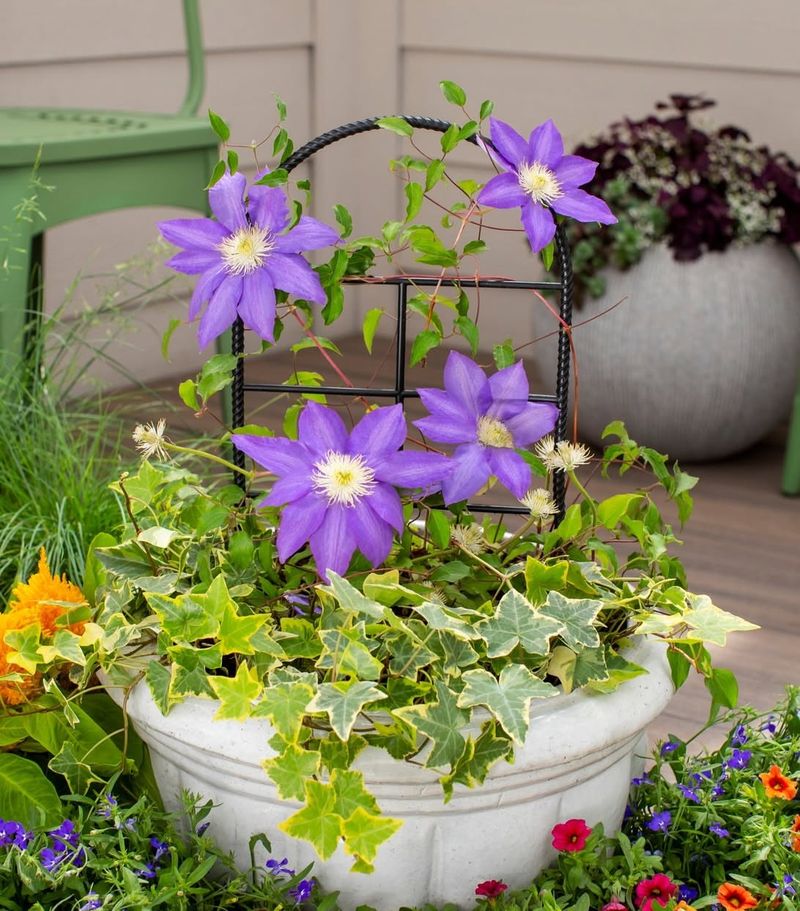
Metal obelisks offer elegant vertical interest in smaller garden spaces, supporting clematis beautifully while taking up minimal ground area.
Even simple bamboo poles arranged in a teepee shape provide adequate support for lighter varieties, proving that effective structures don’t require expensive materials.
Position supports about six inches behind your clematis to allow room for the root zone while giving vines an easy path upward.
Fences already existing in your landscape make excellent clematis supports, transforming ordinary boundaries into flowering walls that enhance privacy and beauty simultaneously.
Wire or plastic mesh attached to walls works well, though ensure it’s secured firmly enough to handle the weight of a fully mature, blooming vine.
Guide young stems gently toward your chosen support structure, using soft ties if necessary to encourage growth in the right direction.
Once clematis begins climbing enthusiastically, it generally continues upward with minimal additional guidance, filling your support structure with gorgeous blooms season after season.
Water Consistently
Establishing a consistent watering routine helps your clematis develop strong root systems capable of supporting abundant flowering throughout our growing season.
Newly planted vines need regular watering, typically every few days, until their roots establish and begin spreading into surrounding soil.
Deep watering encourages roots to grow downward rather than staying near the surface, creating more drought-resistant plants over time.
During typical North Carolina summers, established clematis generally needs about an inch of water weekly, either from rainfall or supplemental irrigation.
Hot, dry spells may require more frequent watering, particularly for plants growing in containers or those positioned in particularly sunny, exposed locations.
Check soil moisture by inserting your finger several inches into the ground near your plant’s base.
If soil feels dry at that depth, it’s definitely time to water thoroughly rather than giving shallow sprinkles that don’t reach root zones.
Morning watering proves ideal because it allows foliage to dry before evening, reducing the likelihood of fungal diseases that thrive in our humid climate.
Soaker hoses or drip irrigation systems deliver water directly to root zones without wetting leaves unnecessarily, making them excellent choices for clematis care.
During flowering periods, consistent moisture becomes especially important because water stress can cause buds to drop before opening or blooms to fade prematurely.
Watch your plants for signs of water stress like wilting leaves or drooping stems, and adjust your watering schedule accordingly based on weather conditions and individual plant needs rather than following a rigid calendar.
Prune According To Group
Understanding clematis pruning groups transforms what seems like a mysterious task into a straightforward process that dramatically improves flowering performance.
Group 1 clematis bloom on old wood from the previous year, so they need minimal pruning right after flowering to avoid removing next year’s flower buds.
Group 2 varieties bloom on both old and new wood, benefiting from light pruning in early spring to remove damaged stems while preserving some older growth for early flowers.
Group 3 clematis, which includes popular varieties like Jackmanii, blooms exclusively on new growth and can be cut back hard in late winter without sacrificing any flowers.
When you purchase a clematis, the plant tag should indicate its pruning group, so keep this information for future reference.
If you inherit a clematis without knowing its group, observe when it blooms for a year before pruning significantly.
Early spring bloomers typically belong to Group 1, while late summer and fall bloomers usually fall into Group 3, with mid-season bloomers often fitting Group 2 classifications.
Sharp, clean pruning tools make precise cuts that heal quickly, reducing disease risk and promoting vigorous new growth.
Make cuts just above a set of healthy buds, angling your cut slightly to encourage water runoff rather than pooling at the cut site.
Remove any stems that appear damaged, diseased, or obviously weak regardless of your clematis’s pruning group, as this housekeeping maintains overall plant health.
Proper pruning might seem intimidating initially, but following these group-specific guidelines soon becomes second nature and rewards you with increasingly spectacular floral displays.
Fertilize For Flower Production
Clematis plants are moderate feeders that respond beautifully to appropriate fertilization, producing more abundant blooms and healthier foliage when given proper nutrition.
A balanced fertilizer with equal amounts of nitrogen, phosphorus, and potassium, such as a 10-10-10 formulation, supports overall plant health without encouraging excessive leafy growth at the expense of flowers.
Apply your first feeding in early spring as new growth emerges, giving plants the nutritional boost they need for the growing season ahead.
A second application after the first flush of blooms encourages many varieties to produce additional flowers later in the season, extending your enjoyment considerably.
Organic options like compost, well-rotted manure, or fish emulsion provide gentler, slow-release nutrition that improves soil quality while feeding your plants.
Scratch granular fertilizers lightly into the soil surface around your clematis base, then water thoroughly to help nutrients reach root zones where they’re absorbed most effectively.
Avoid fertilizing after mid-summer in most North Carolina locations, as late feeding can encourage tender new growth that suffers damage when cold weather arrives.
Container-grown clematis need more frequent fertilization than in-ground plants because nutrients wash through potting mix more quickly with regular watering.
Watch for signs of nutrient deficiency like yellowing leaves or reduced flowering, which indicate your feeding schedule might need adjustment.
Too much fertilizer can actually harm clematis, causing excessive foliage production with fewer flowers or even burning roots with concentrated salts.
Follow package directions carefully, and remember that more isn’t necessarily better when it comes to plant nutrition.
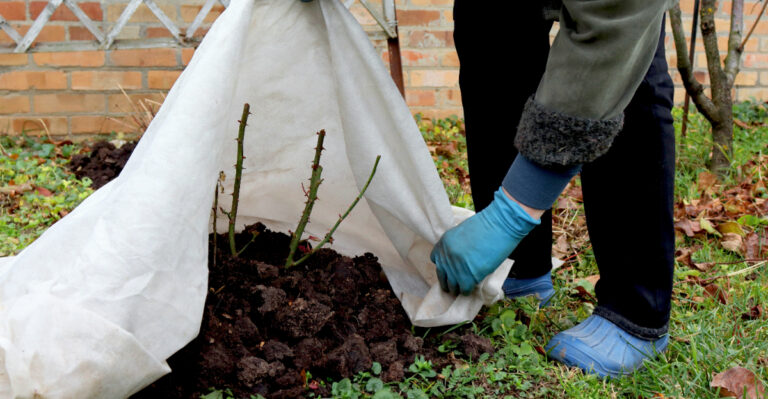
Protect From Winter Damage
While much of North Carolina enjoys relatively mild winters, mountain regions and occasional cold snaps can damage clematis vines that aren’t adequately protected.
Adding extra mulch around the base in late fall insulates roots and crown from temperature fluctuations that can heave plants from the ground.
Pile mulch several inches deeper than your normal summer layer, creating a protective mound that extends well beyond the root zone.
In colder microclimates or exposed locations, wrapping the lower two to three feet of stems with burlap provides additional protection against harsh winds and extreme cold.
Remove these protective wrappings in early spring as temperatures moderate and new growth begins, preventing moisture buildup that could encourage fungal problems.
Container-grown clematis face greater winter challenges because their roots lack the insulation that ground soil provides.
Move containers against your home’s foundation or into an unheated garage during the coldest weeks, protecting them from the worst temperature extremes.
Even supposedly hardy varieties appreciate some winter protection during their first year or two while they’re establishing strong root systems.
Young plants simply haven’t developed the resilience that mature clematis possess, making them more vulnerable to winter stress.
Don’t cut back Group 2 or Group 3 clematis before winter arrives, as stems provide some natural protection for the plant’s crown and root system.
Wait until late winter or early spring to perform your regular pruning, giving plants maximum protection during the coldest months while still allowing proper maintenance before new growth begins vigorously.
Monitor For Pests And Diseases
Regular monitoring helps you catch pest and disease problems early when they’re easiest to manage, preventing minor issues from becoming major setbacks.
Slugs find young clematis shoots particularly tasty, especially during our humid spring weather when these pests are most active.
Check around your plant’s base in early morning or evening when slugs are actively feeding, removing any you find and setting up barriers or traps to reduce their populations.
Aphids sometimes cluster on tender new growth, sucking plant juices and potentially spreading viral diseases while leaving behind sticky honeydew.
A strong spray from your garden hose often dislodges these soft-bodied pests effectively, or you can use insecticidal soap for heavier infestations.
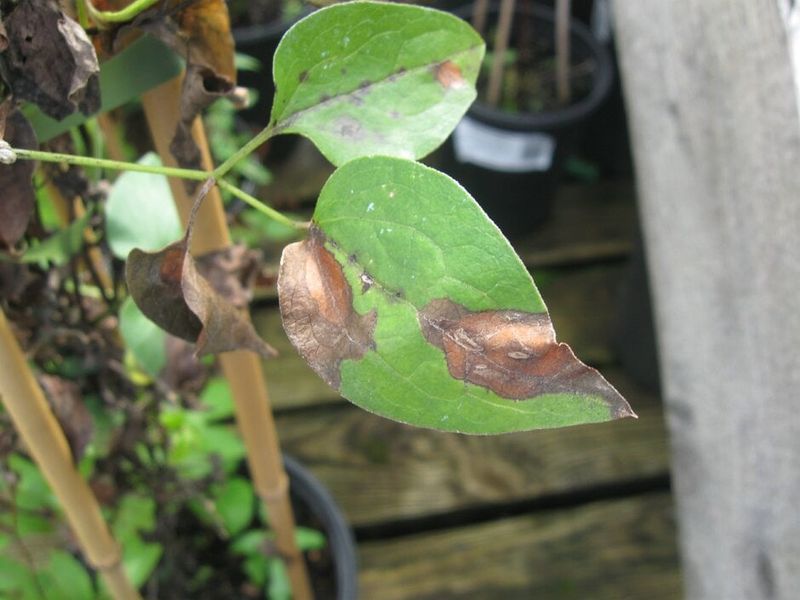
Powdery mildew appears as white, dusty patches on leaves, particularly during periods of high humidity combined with poor air circulation around your vines.
Improve airflow by properly spacing plants and ensuring vines aren’t overcrowded, and remove affected leaves promptly to prevent spread.
Clematis wilt, a fungal disease specific to these plants, causes stems to suddenly collapse and wither, often just as the plant reaches peak bloom.
While alarming, affected plants often recover by producing new shoots from the base if you prune out wilted portions immediately and improve soil drainage.
Inspect your clematis at least weekly during the growing season, looking for unusual spots, wilting, chewed leaves, or visible insects.
Early intervention using the least toxic methods appropriate for the specific problem keeps your plants healthier while minimizing environmental impact and protecting beneficial garden insects.