Plant This One Time And Enjoy Color All Year In Oregon Gardens
What if one plant could keep your Oregon garden looking alive and colorful through every season? Camellia might be the closest thing to that magic.
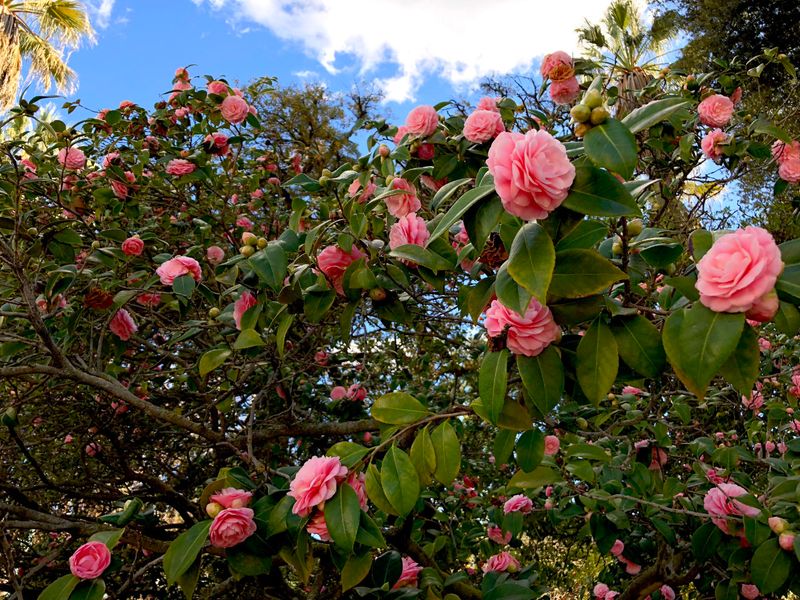
This evergreen beauty delivers glossy green leaves year round, then bursts into stunning blooms just when most gardens look tired and gray.
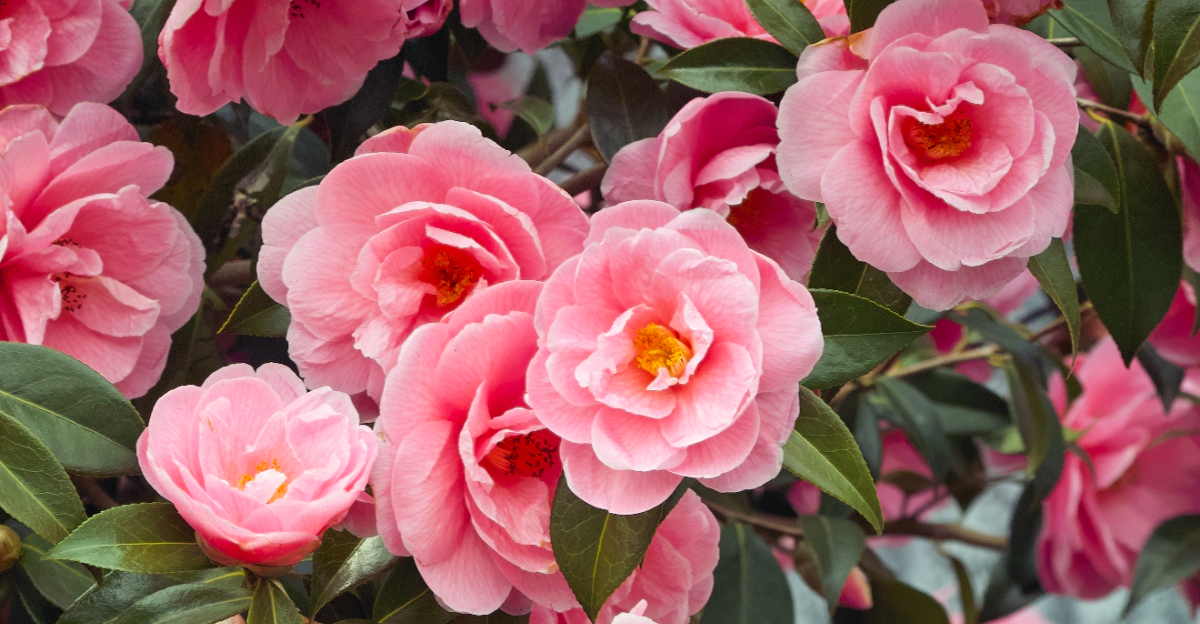
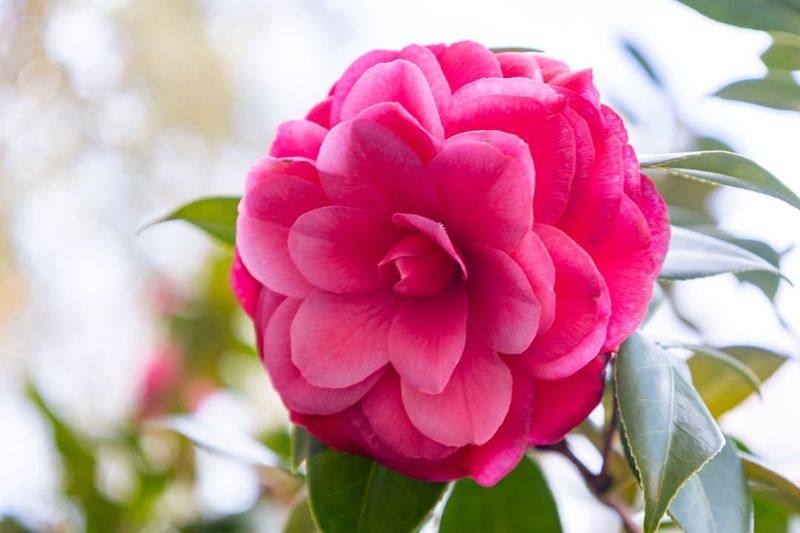
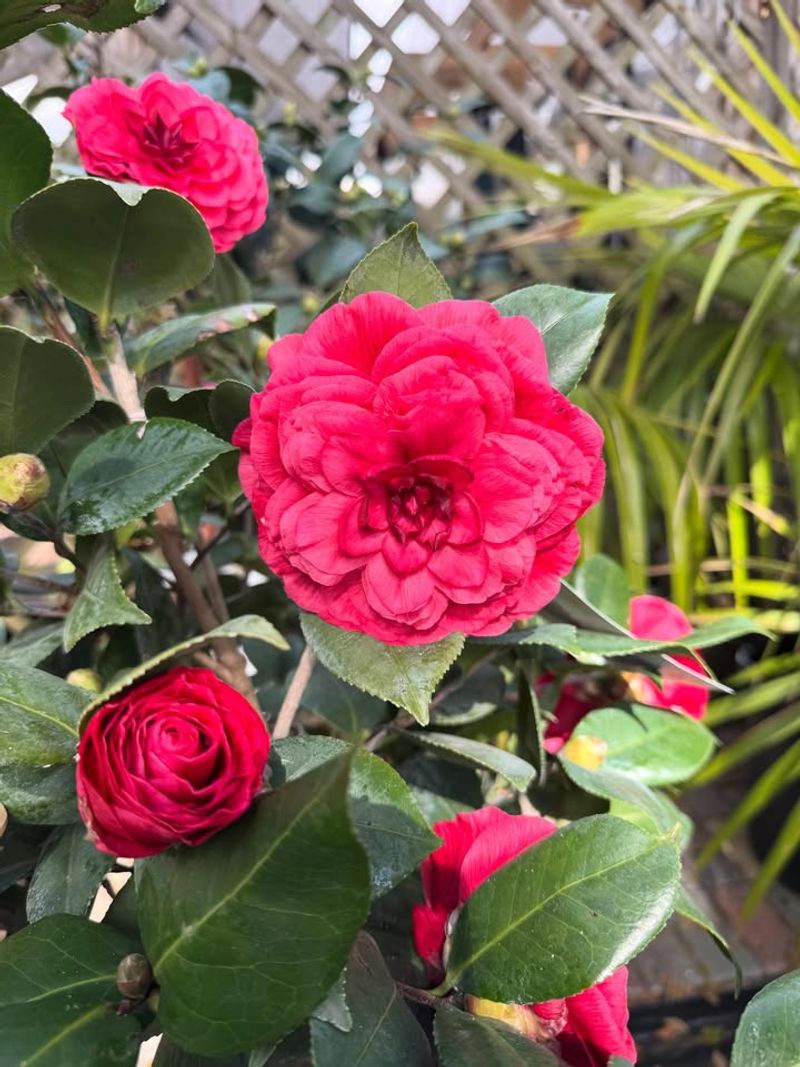
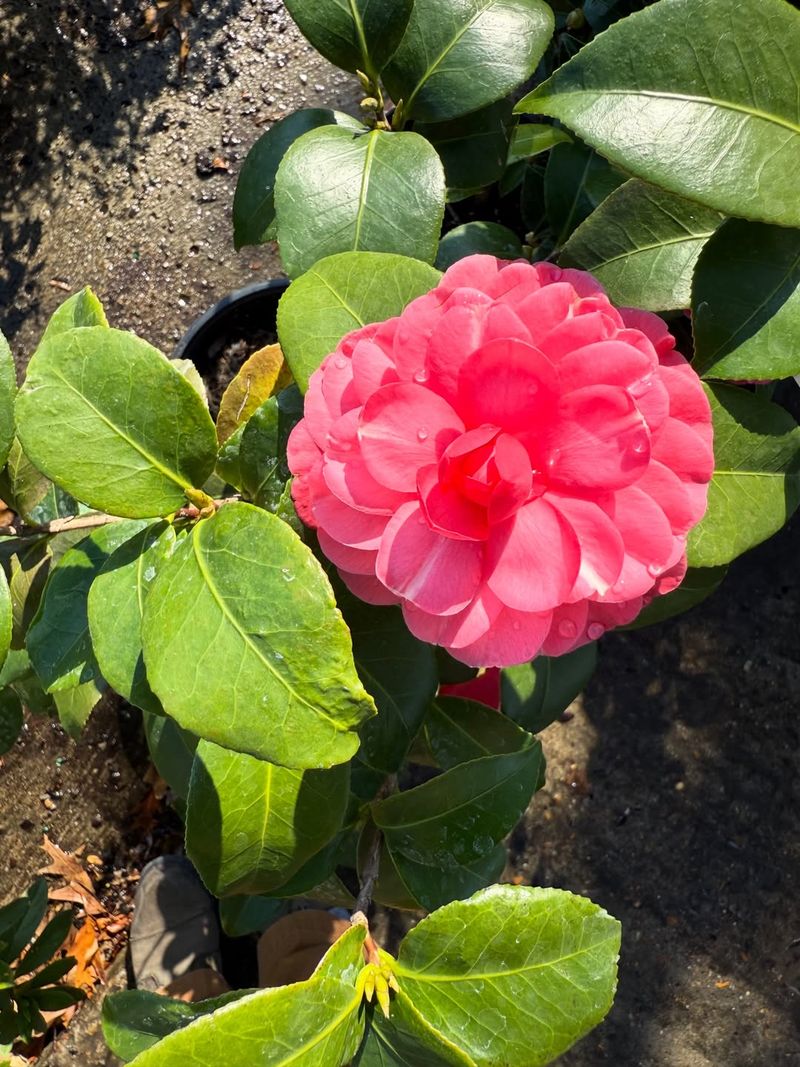
From late fall through early spring, camellias light up the landscape with soft pinks, rich reds, and creamy whites, bringing life exactly when you need it most.
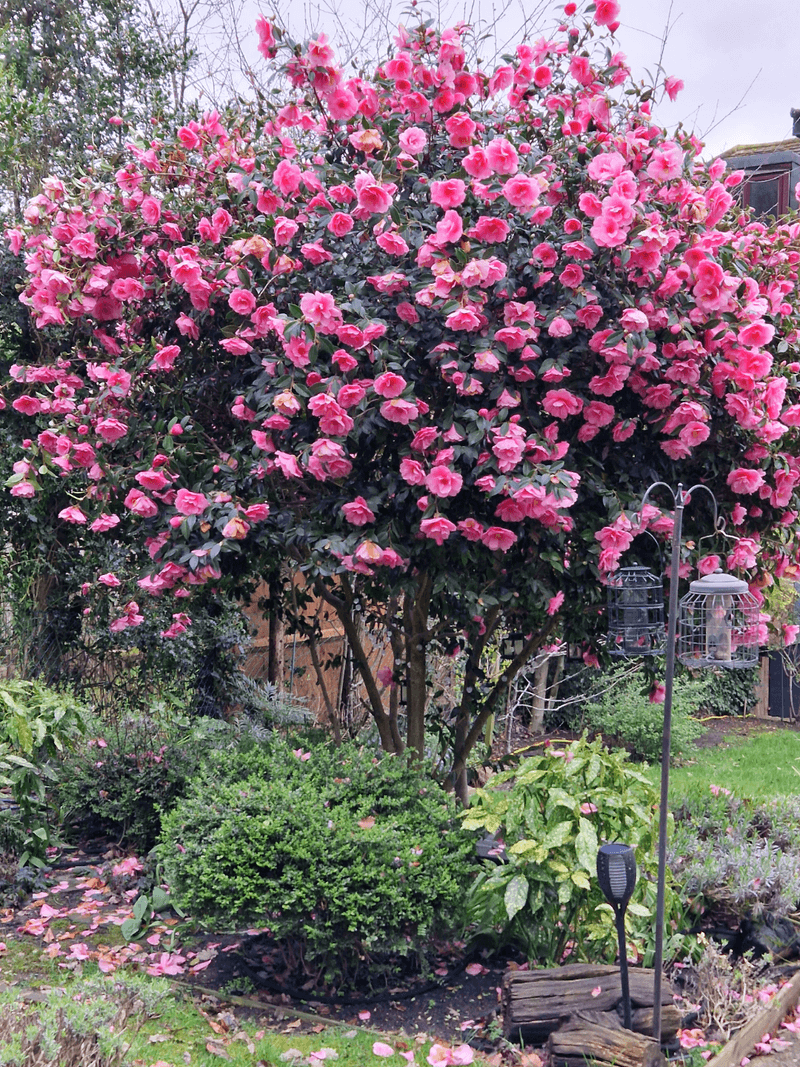
They thrive in Oregon’s mild, moist climate, ask for very little once established, and can live for decades with minimal fuss. Planted in the right spot, a single camellia becomes a long term showpiece that anchors your garden with color, structure, and timeless charm.
If you love plants that give back season after season, camellia might be the one you plant once and enjoy for years.
Choose The Right Camellia Variety
Selecting the appropriate camellia variety makes the difference between sporadic blooms and continuous seasonal color in your Oregon garden.
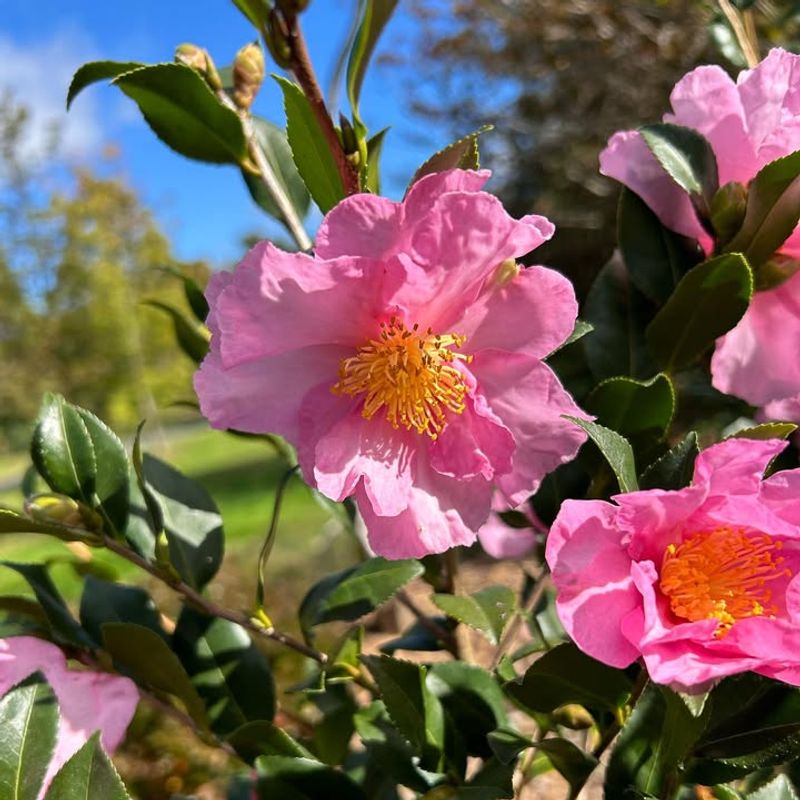
Camellia japonica varieties bloom from late winter through spring, typically February through April, offering large showy flowers when little else provides color.
Camellia sasanqua varieties flower earlier, from October through December, filling the autumn garden with fragrance and blooms during Oregon’s rainy season.
Your garden size influences variety selection significantly. Compact cultivars like ‘Shi Shi Gashira’ reach only four to five feet, fitting perfectly into smaller yards or foundation plantings.
Larger varieties such as ‘Debutante’ can grow ten to twelve feet tall, creating impressive privacy screens or background plantings in spacious landscapes.
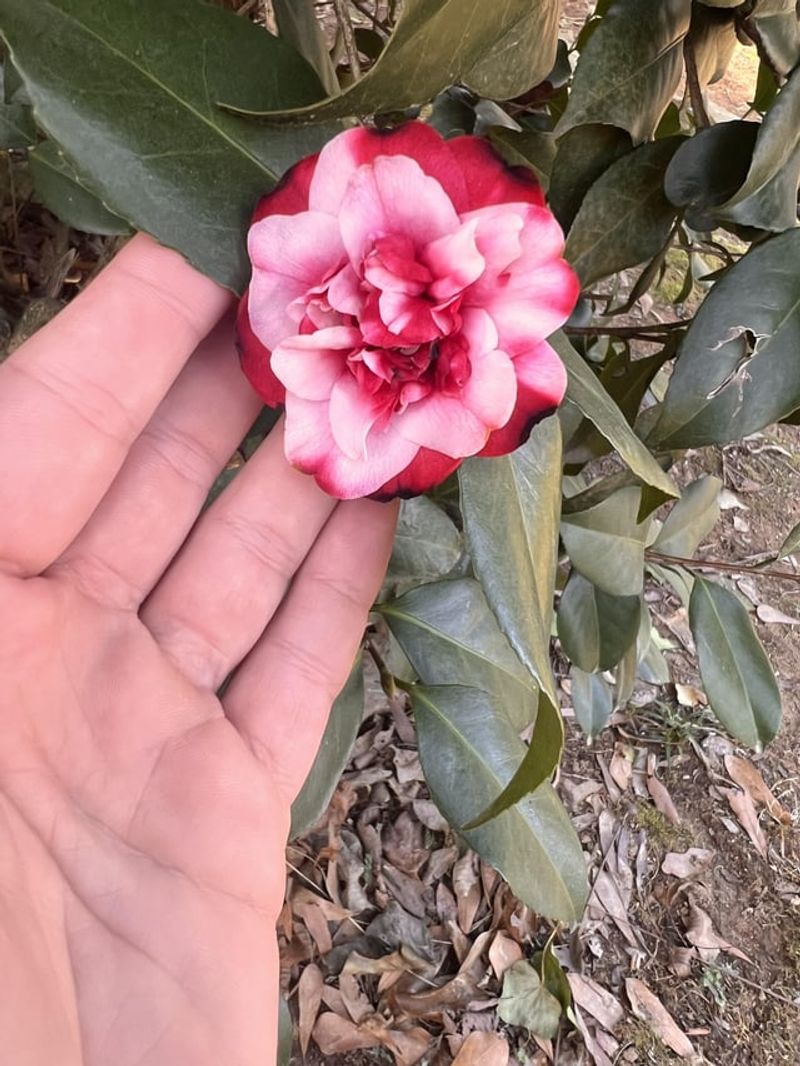
Bloom color matters for your overall garden design. Pink varieties like ‘Pink Perfection’ complement spring bulbs beautifully.
Red cultivars such as ‘Yuletide’ create dramatic contrast against Oregon’s winter greenery. White bloomers including ‘Snow Flurry’ brighten shady corners and reflect available light during shorter days.
Cold hardiness varies among camellia types. Most japonica varieties handle Oregon winters well, tolerating temperatures down to ten degrees Fahrenheit.
Sasanqua types show similar hardiness while offering better sun tolerance.
Hybrid varieties often combine the best traits of both parents, providing extended bloom periods and improved weather resistance for Oregon’s variable climate conditions throughout the growing season.
Select An Ideal Planting Location
Location determines your camellia’s long-term health and flowering performance more than any other factor. These evergreen shrubs prefer morning sun with afternoon shade, particularly in warmer inland Oregon areas where intense summer heat can stress plants.
Coastal gardeners enjoy more flexibility since maritime climates provide natural cooling, allowing camellias to tolerate slightly more sun exposure without leaf scorch.
Wind protection proves essential for maintaining healthy foliage and protecting delicate blooms. Strong winter winds can desiccate evergreen leaves and knock off flower buds before they open.
Plant camellias on the sheltered side of structures, fences, or established trees that block prevailing winds while still allowing air circulation to prevent fungal diseases.
Drainage ranks as critically important for camellia success in Oregon’s wet climate. These plants dislike standing water around their roots, which can lead to root rot during our rainy winters.
Avoid low spots where water collects after storms. Sloped areas work wonderfully, allowing excess moisture to drain away naturally while maintaining the consistent moisture camellias appreciate.
Consider your soil’s existing pH and composition before finalizing the planting spot. Camellias thrive in acidic conditions, preferring pH levels between 5.5 and 6.5, which fortunately matches much of Oregon’s naturally acidic soil.
Testing your soil beforehand helps you determine whether amendments will be necessary to create optimal growing conditions for these acid-loving ornamental shrubs.
Prepare The Soil For Long-Term Health
Proper soil preparation sets the foundation for decades of beautiful camellia growth in your Oregon garden. Start by testing your soil’s pH level using an inexpensive home kit or sending samples to your local extension service.
While Oregon soils tend toward acidity naturally, some areas, particularly those with heavy clay or recent construction activity, may require adjustment to reach the ideal range for camellias.
Amending heavy clay soil improves drainage and root penetration significantly. Mix generous amounts of organic matter into the planting area, incorporating compost, aged bark, or peat moss to lighten dense soil structure.
Work amendments into the top twelve to eighteen inches of soil, creating a friable mixture that allows roots to spread easily while preventing waterlogging during Oregon’s wet winter months.
Sandy soils present opposite challenges, draining too quickly and failing to retain adequate moisture or nutrients. These soils benefit from organic matter additions as well, but focus on materials that improve water retention.
Compost works particularly well, increasing the soil’s ability to hold moisture between rainfalls or irrigation sessions while gradually releasing nutrients as it decomposes.
Creating a slightly raised planting bed offers additional insurance against drainage problems. Mound soil six to eight inches above the surrounding grade, then taper the edges gradually to blend with existing landscape contours.
This elevation provides excellent drainage during heavy winter rains while maintaining the acidic, organic-rich environment camellias require for optimal root development and nutrient uptake throughout the year.
Planting Properly For Success
Planting depth determines whether your camellia thrives or struggles for years to come. Position the root ball so its top sits slightly above the surrounding soil level, roughly one to two inches higher than grade.
This elevation prevents water from pooling around the crown during Oregon’s rainy season, reducing the risk of crown rot that can destroy established plants. Planting too deeply ranks among the most common mistakes gardeners make with camellias.
Dig your planting hole two to three times wider than the root ball but no deeper than the container height.
Wide holes encourage roots to spread laterally into the surrounding soil, establishing a strong anchor system.
Rough up the sides of the hole with your shovel to prevent glazing, which can restrict root penetration in clay soils common throughout Oregon valleys.
Carefully remove the camellia from its container, gently loosening circling roots around the outside of the root ball. Roots that continue circling after planting can eventually girdle the plant, restricting water and nutrient flow.
Tease them outward so they grow into the surrounding soil rather than continuing their circular pattern from container growth.
Backfill around the root ball with the amended soil mixture, firming gently to eliminate air pockets without compacting the soil excessively.
Water thoroughly after planting, applying enough moisture to settle soil around roots and establish good soil-to-root contact.
Create a shallow watering basin around the plant’s perimeter to direct irrigation toward developing roots during the critical first growing season.
Watering And Mulching Strategies
Establishing a consistent watering routine during the first year helps your camellia develop the extensive root system needed for long-term drought tolerance.
Water deeply once or twice weekly during dry periods, applying enough moisture to penetrate eight to twelve inches into the soil.
Shallow, frequent watering encourages surface roots that remain vulnerable to heat stress and drought, while deep watering promotes downward root growth into cooler, more stable soil layers.
Oregon’s rainfall patterns create unique watering challenges for camellia care. Winter rains typically provide ample moisture, sometimes too much in poorly drained locations.
Summer dry spells require supplemental irrigation, particularly during July and August when rainfall becomes scarce.
Monitor soil moisture by checking several inches below the surface; water when the top few inches feel dry but before the soil becomes completely parched.
Mulching conserves soil moisture, moderates temperature fluctuations, and suppresses weeds that compete for water and nutrients.
Apply a two to three-inch layer of organic mulch around your camellia, using materials like shredded bark, pine needles, or composted leaves.
Keep mulch several inches away from the plant’s stem to prevent moisture accumulation against the bark, which can encourage fungal diseases and pest problems.
Refresh mulch annually as it decomposes, maintaining consistent depth throughout the year. Decomposing mulch gradually acidifies soil and adds organic matter, creating ideal conditions for camellias.
During establishment, check moisture levels weekly, adjusting your watering schedule based on weather conditions, soil type, and plant response to create optimal growing conditions.
Pruning For Shape And Bloom
Timing your pruning correctly preserves next season’s flower display while shaping your camellia attractively. Prune spring-blooming japonica varieties immediately after flowers fade, typically in April or May in Oregon.
This timing allows the plant to develop new growth and set flower buds for the following year. Pruning too late removes developing buds, sacrificing next season’s blooms.
Fall-blooming sasanqua varieties require different timing since they flower on current season’s growth. Prune these camellias in late winter or early spring before new growth begins, typically February or March in Oregon.
This approach encourages vigorous spring growth that produces autumn flowers, maintaining the continuous color sequence you planted camellias to achieve.
Remove damaged, or crossing branches first, improving air circulation and plant structure. Cut branches back to their point of origin or to a healthy outward-facing bud, making clean cuts at slight angles that shed water.
Avoid leaving stubs, which invite disease and pest problems while looking unsightly on these ornamental shrubs.
Light annual pruning maintains better shape than severe pruning every few years. Remove no more than one-third of the plant’s total growth in any single year, preserving the camellia’s natural form while controlling size.
Camellias tolerate hard pruning when necessary for renovation, but recovery takes several years and sacrifices blooms during regrowth.
Selective thinning of interior branches improves light penetration and air movement, reducing disease pressure during Oregon’s damp winters while encouraging healthy foliage throughout the canopy.
Seasonal Fertilization And Care
Fertilizing at appropriate times maximizes bloom production and foliage quality without encouraging excessive growth that remains vulnerable to cold damage.
Apply fertilizer in early spring as new growth emerges, typically March in Oregon, providing nutrients when plants actively grow and develop flower buds for the following season.
A second lighter application in early summer supports continued growth without pushing late-season development that won’t harden off before winter.
Choose fertilizers formulated for acid-loving plants like azaleas, rhododendrons, and camellias. These products contain the proper nutrient ratios and include sulfur or other acidifying agents that maintain the low pH camellias require.
Slow-release formulations work particularly well, providing steady nutrition over several months rather than quick bursts that can burn roots or encourage excessive vegetative growth at the expense of flowers.
Apply fertilizer according to package directions based on plant size, spreading it evenly over the root zone extending beyond the branch tips.
Water thoroughly after fertilizing to dissolve granules and carry nutrients into the root zone where plants can absorb them.
Avoid fertilizing in late summer or fall, as this encourages tender new growth that may not harden adequately before winter temperatures arrive.
Monitor your camellia’s appearance throughout the growing season for signs of nutrient deficiency or excess.
Yellowing leaves with green veins indicate iron chlorosis, common in alkaline soils where iron becomes unavailable despite adequate soil levels.
Treat with chelated iron products formulated for acid-loving plants. Dark green foliage and few blooms suggest excessive nitrogen, requiring adjustment to your fertilization program for better flowering performance.