Ohio Gardeners Are Using This Simple Trick To Get More Hydrangeas
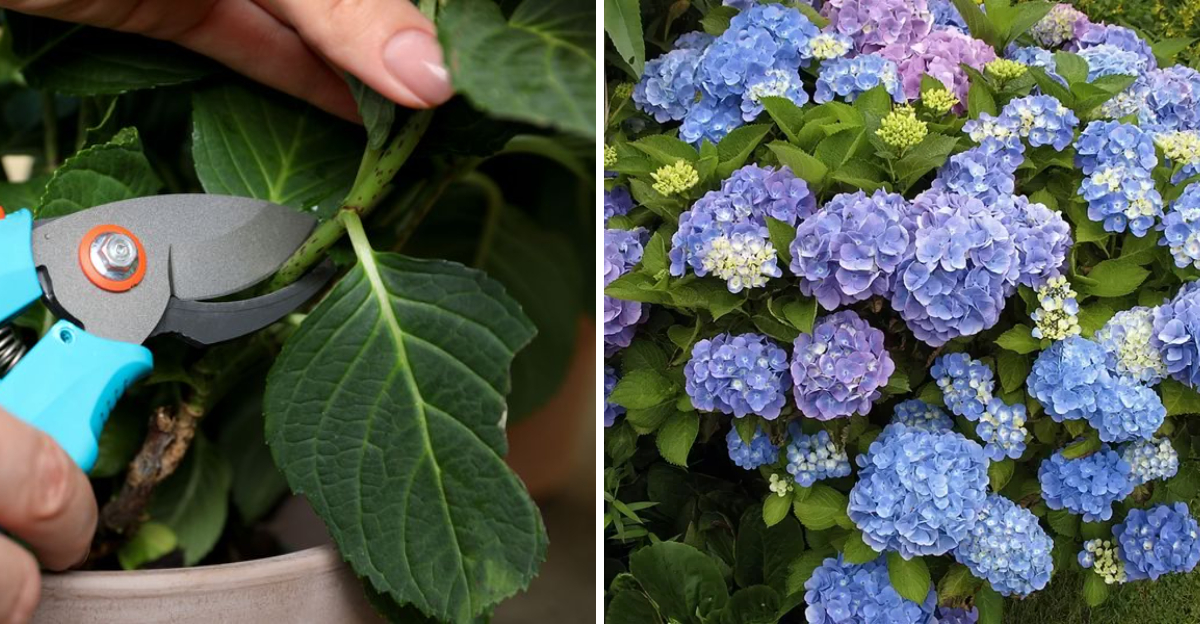
Can one hydrangea stem really turn into a whole new shrub?
It sounds like a garden rumor, but this one has roots. Early summer gives Ohio gardeners a narrow sweet spot, when hydrangea stems are fresh, flexible, and ready for cuttings.
Pick the right stem, treat it gently, and the shrub you already own can help start another one.
No greenhouse. No complicated setup. No expensive nursery run.
The trick is knowing which stem deserves the scissors. A healthy, non-flowering stem has a much better shot than one carrying a big bloom.
A clean cut below a leaf node, light moist soil, and bright shade can give that cutting the quiet conditions it needs to root.
Miss the timing, bake it in afternoon sun, or keep poking at it, and the whole thing can go sideways.
Done right, this simple cutting method can help Ohio gardeners grow more hydrangeas from plants already thriving in their yards.
1. Take Cuttings While Stems Are Still Flexible
Walk out to your hydrangea on a calm morning in late May or June, and try gently bending one of the newer stems between your fingers. If it bends without snapping, you are probably looking at prime cutting material.
That flexible, almost rubbery quality is exactly what you want when taking softwood or semi-softwood cuttings.
Ohio’s growing season lines up well with hydrangea propagation because new stems push out steadily from late spring through midsummer.
During this window, the plant is actively growing, and those fresh stems carry enough moisture and energy to begin forming roots when given the right conditions.
Waiting too long into the season can mean working with stems that have started to harden and become more woody, which generally slows down rooting.
On the other hand, going too early can be a problem too. Very young, extremely soft growth that just emerged in the last week or two tends to wilt fast once it is cut, making it harder to keep alive long enough to root.
A stem that is flexible but not mushy, and has at least a couple of inches of new growth with visible leaf nodes, is your best starting point.
Ohio State University Extension notes that softwood cuttings are a reliable propagation method for many shrubs, and hydrangeas are a good candidate when timing is handled carefully.
2. Choose A Healthy Stem Without Flowers
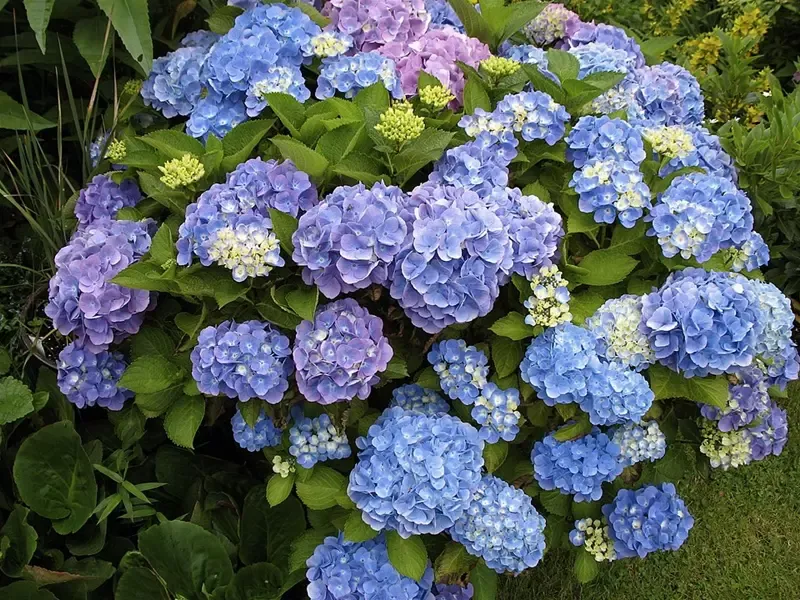
Not every stem on a hydrangea is created equal when it comes to propagation. The ones most likely to root successfully are those that are not carrying any flower buds or open blooms.
A stem that is busy supporting a flower cluster is putting its energy into that bloom, which leaves less available for the hard work of forming new roots.
Look for a stem that is fully green and healthy-looking, with no yellowing, spotting, wilting, or signs of insect feeding. You want to see clean leaves and a firm but flexible stem.
Ideally, that stem will have at least two or three sets of leaf nodes along its length, since roots tend to form near those nodes once the cutting is in the growing medium.
Avoid stems that look stressed, have been chewed on, or show any powdery coating that might signal a fungal issue. Starting with clean, vigorous material gives your cutting the best possible foundation.
A stem that already shows signs of disease or pest pressure is unlikely to root well and may spread problems to other cuttings sharing the same tray or pot.
Taking an extra minute to inspect your cutting material carefully before making any cuts is a small habit that makes a real difference in how many cuttings succeed by the end of the season.
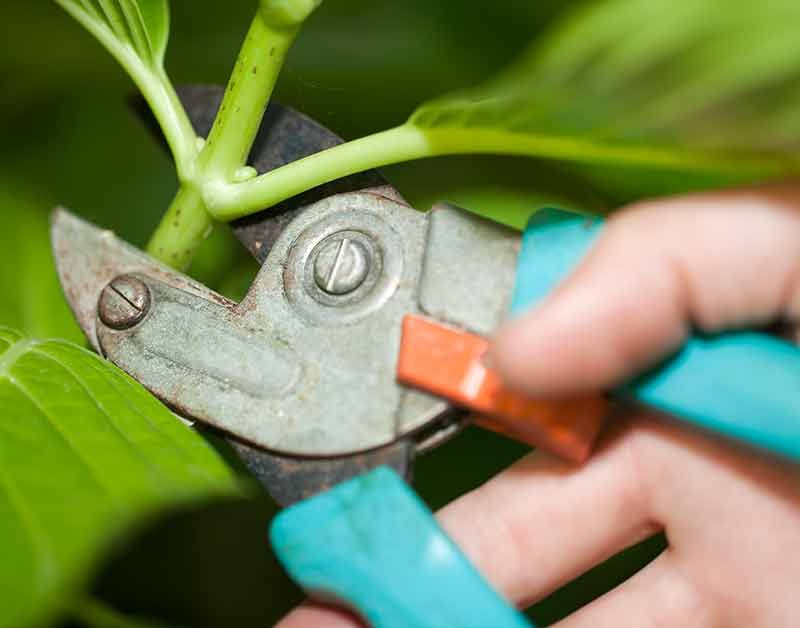
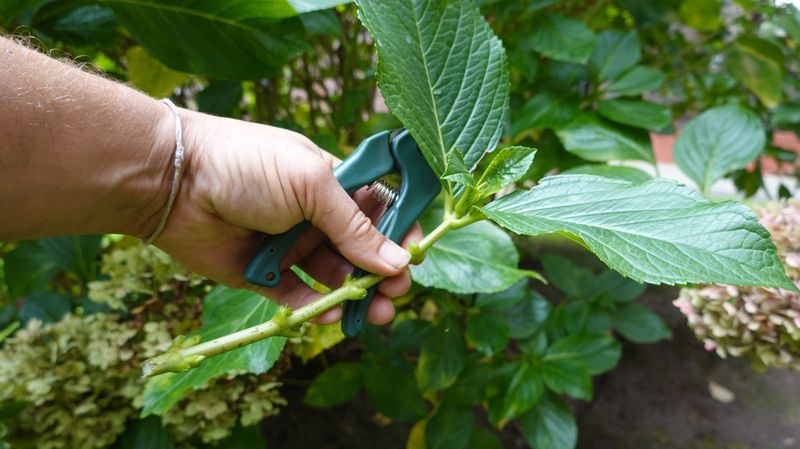
3. Make The Cut Below A Leaf Node
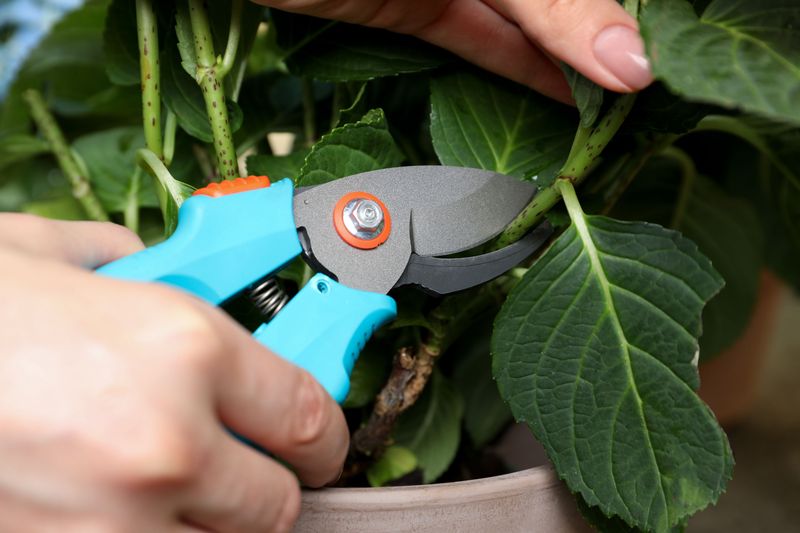
Grab a pair of clean, sharp pruning shears or scissors before you touch any stem. Dull or dirty blades can crush the stem tissue or introduce bacteria, both of which work against a clean start for your cutting.
A quick wipe with rubbing alcohol between cuts is a simple habit that keeps things clean without much extra effort.
Position your blade just below a leaf node, which is the small bump or joint on the stem where leaves attach. This placement matters because roots are most likely to develop from or near these nodes once the cutting is in the growing medium.
Aim for a cutting that is roughly four to six inches long and includes at least two or three nodes along its length.
Make the cut at a slight angle if you can, since an angled cut creates a bit more surface area for moisture uptake and rooting. Once the cut is made, try to get the cutting into your prepared pot fairly quickly rather than leaving it sitting out in the sun.
Exposed cuttings can begin to lose moisture within minutes on a warm Ohio summer day, and a stem that has wilted significantly before it even reaches the growing medium is already at a disadvantage.
Move with a little purpose, and your cuttings will have a much better start.
4. Strip The Lower Leaves Before Planting
Once you have your cutting, take a moment to prepare it before sticking it into the growing medium. Any leaves that would end up buried in the soil need to come off.
Buried leaves rot quickly in moist conditions, and that rot can spread upward into the stem itself, ending the cutting’s chances before roots ever form.
Gently pinch or snip off the lower leaves, leaving one or two sets of leaves near the top of the cutting intact. Those upper leaves are doing important work.
They are still capturing a small amount of light energy and helping the cutting stay somewhat active while it works on producing roots. Removing all the leaves would leave the cutting with nothing to support even basic function.
If the remaining leaves are very large, as they often are on big-leaf hydrangeas, consider trimming each leaf in half crosswise. Smaller leaf surface area means less moisture escapes through the leaves while the cutting has no roots to draw water from the soil.
This simple adjustment can make a noticeable difference in how well cuttings hold up during those first one to two weeks.
The whole prep process takes only a minute or two per cutting, but doing it right sets up each one for the best possible rooting environment from the very first day in the pot.
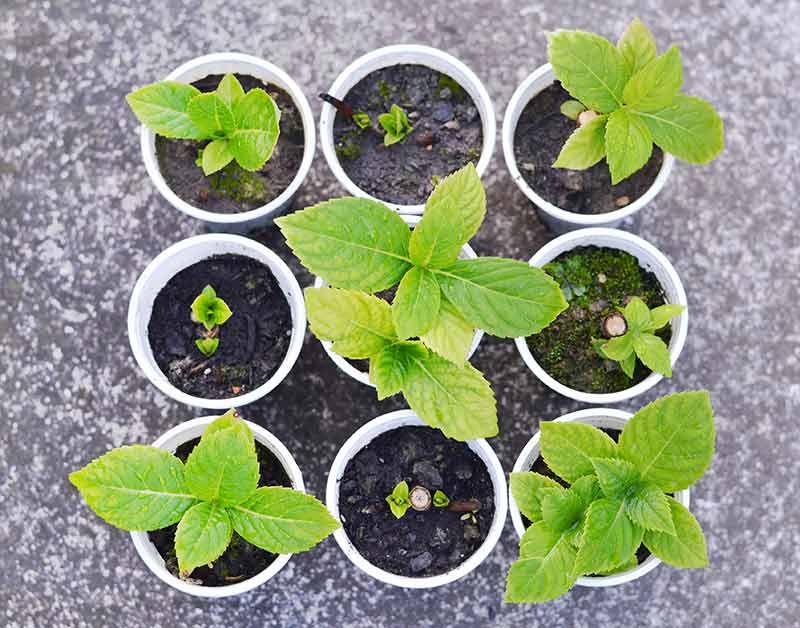
5. Give Each Cutting Light Moist Soil
Regular garden soil pulled straight from a flower bed is too heavy and too dense for cuttings that have no roots yet.
Without roots to move water through, a cutting sitting in compacted soil is more likely to stay too wet in some spots and too dry in others, neither of which helps rooting happen reliably.
A light, well-draining growing medium works much better. Seed-starting mix is a solid choice because it holds some moisture while still allowing air to move through.
Mixing standard potting mix with extra perlite is another option that many home gardeners find easy to put together with materials already on hand. The goal is a medium that stays evenly moist throughout but does not hold standing water or feel soggy when squeezed.
Before inserting the cutting, moisten the medium so it is damp all the way through. Then use a pencil or your finger to make a small hole before placing the cutting in, rather than pushing the stem directly into the mix.
Pushing the stem in directly can scrape off the outer tissue right at the base, which is exactly where you want roots to emerge. Firm the medium gently around the base of the cutting so it stands upright and has good contact with the growing mix on all sides.
Keep the medium consistently moist but never waterlogged throughout the rooting period.
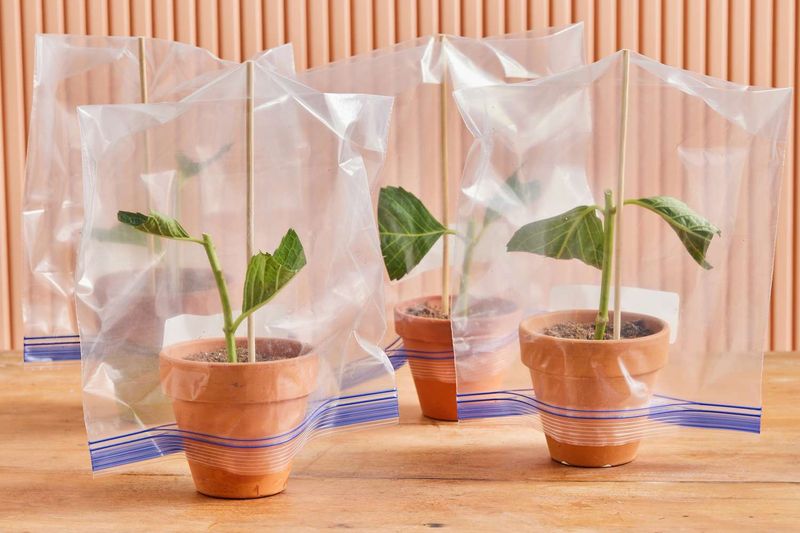
6. Cover The Pot To Hold Humidity
Here is something that trips up a lot of first-time propagators: a cutting with no roots cannot pull moisture from the soil the way an established plant does.
Until roots form, the cutting cannot replace lost moisture efficiently, so humid air around the leaves helps keep it from wilting.
Without some help holding humidity in, cuttings can dry out and wilt surprisingly fast, especially on warm Ohio summer days.
Covering the pot with a clear plastic bag is one of the most practical and low-cost ways to trap humidity around the cutting. A plastic storage bag works fine, and so does a purchased humidity dome if you have one.
The cover creates a mini greenhouse effect that slows moisture loss from the leaves and stem while roots are forming.
Use a few small sticks or wooden skewers to prop the bag up so it does not press directly against the leaves, since contact between the plastic and the foliage can encourage mold.
Check the inside of the cover every few days. If heavy condensation is building up on the walls of the bag, open it briefly to let some fresh air circulate before closing it again.
A little condensation is normal and expected. A lot of standing water droplets running down the inside of the bag every day is a sign the cutting may be getting too much moisture.
Balancing humidity with occasional airflow keeps conditions right without encouraging rot.
7. Keep Cuttings Bright But Out Of Harsh Sun

Bright indirect light is the sweet spot for cuttings that are working on forming roots. Direct afternoon sun in Ohio during July or August can be intense, and for a small cutting sitting under a plastic cover with no roots yet, that kind of heat builds up fast.
Too much direct sun raises the temperature inside the humidity cover quickly, which stresses the cutting and speeds up moisture loss at exactly the wrong time.
A covered porch that gets morning light but is shaded by midday is a great placement option for Ohio gardeners. A spot under a large tree that filters sunlight works well too.
If you are working indoors, a bright windowsill that receives good natural light without direct sun hitting the pot for hours at a time can also get the job done.
The cutting still needs some light to function. Moving it to a dim corner or a basement with no natural light is not the answer either.
Think of the ideal spot as somewhere that feels bright and comfortable to sit in yourself, not glaring and hot, but not dark and cool. That balance supports the cutting without pushing it into stress.
Once roots form and the cutting is moved out of the humidity cover, it can gradually handle more light as it transitions into a normal growing environment over the following weeks.
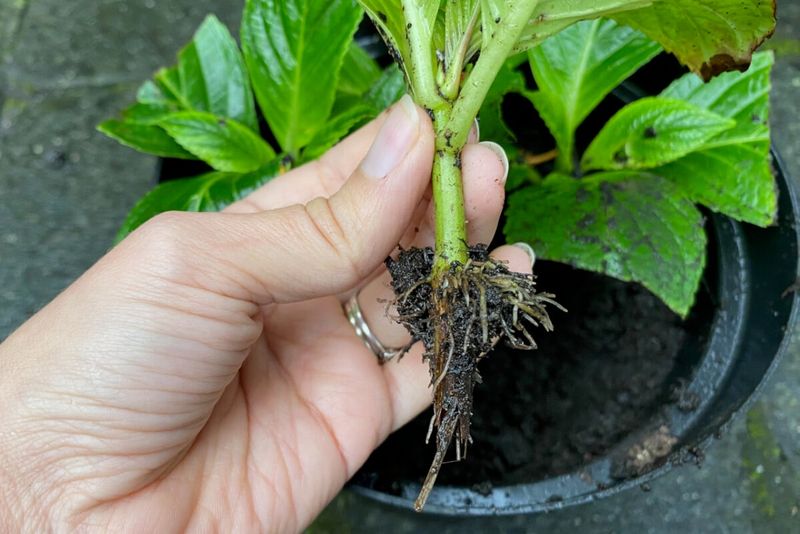
8. Wait For Roots Before Moving Them
Patience is genuinely the hardest part of propagating hydrangeas from cuttings. After all the preparation, it can be tempting to check on progress every few days by tugging at the stem or pulling the cutting out to look at the base.
Try to resist that urge. Disturbing a cutting that is just beginning to push out root tissue can set the whole process back or end it entirely.
A few gentle signs that rooting is underway include new leaf growth at the top of the cutting, or very slight resistance when you give the stem the softest possible tug.
Neither of these signs is definitive on its own, but together they suggest something is happening below the surface.
Most hydrangea cuttings taken during the right window of Ohio’s growing season may show some signs of progress within three to six weeks, though results vary depending on the hydrangea type, the conditions, and the timing.
Once you are reasonably confident roots have formed, begin hardening the cutting off gradually. Start by removing the humidity cover for longer periods each day over the course of a week or so.
Then transition the young plant to a slightly sunnier spot before eventually moving it outdoors full time. Newly rooted cuttings are not ready for harsh weather, strong wind, or full-day direct sun right away.
A gradual transition gives the young plant the best chance of settling in successfully before its first Ohio winter arrives.