10 Things To Do With Dahlias After The First Frost
One chilly morning you step outside in your slippers, and the garden looks like burnt toast. Those proud blooms that dazzled the neighbors all season now droop like wet paper towels on sticks.
Frost sneaks in overnight, quiet as a cat, and leaves the foliage crispy, dark, and slightly embarrassed. Many gardeners sigh, shrug, and walk away, figuring the show is over until the next warm season.
Here is the funny part, though, because the real treasure is hiding underground, snug and very much alive. Beneath that soggy mess sits a secret stash that can multiply like rabbits if you treat it right.
The smell of cold soil, the crunch of frosty grass, and a few smart moves make all the difference. Skip them, and next year you might be buying the same plants again with a slightly guilty face.
The ground usually stays soft enough to dig for a couple of weeks after the first frost, so there is a small window to act. A flower bed left untouched all winter can turn into a very fancy banquet for squirrels.
1. Wait A Week Before You Grab The Shovel
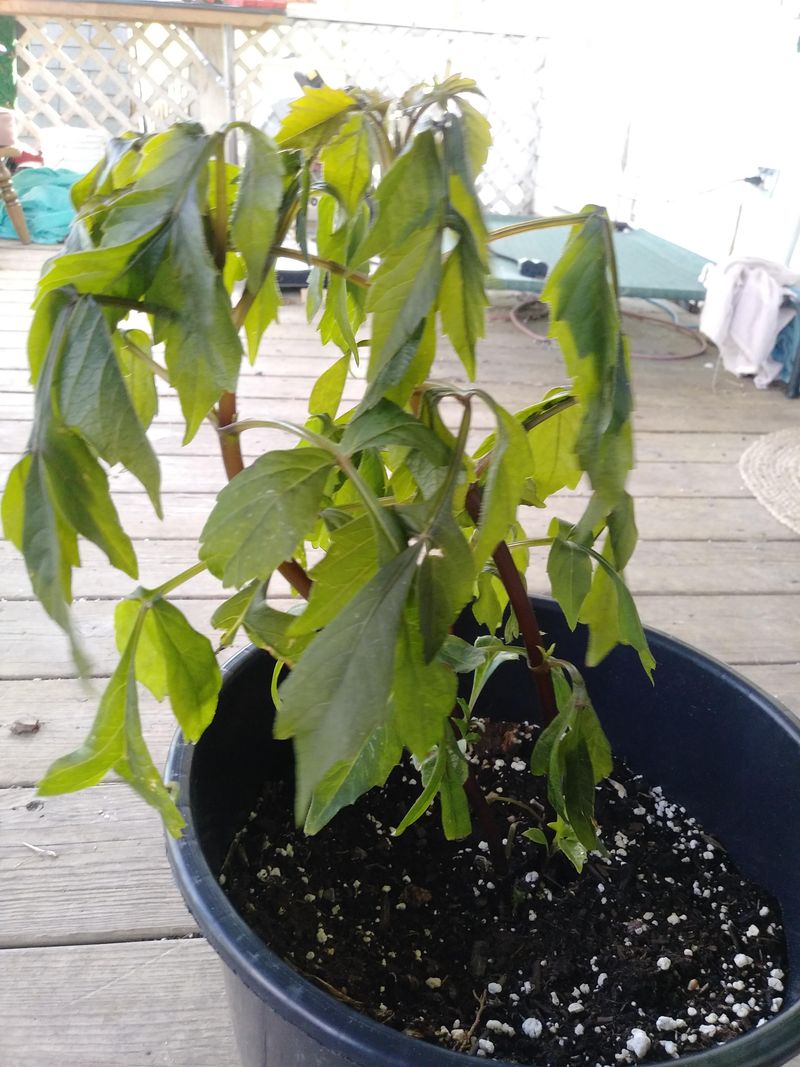
Patience feels strange when your flower bed looks like it has given up, but waiting a little helps your tubers. After the first hard frost blackens the leaves, give the plants about seven to fourteen days before digging anything up.
During that short pause, the tubers toughen their skins, which helps them survive months of storage in your basement. Think of it like letting fresh bread cool before slicing, since rushing the job often leaves you with a mess.
Thin, tender skins bruise easily, and bruised tubers are more likely to rot or shrivel before spring finally arrives. A week of cool weather lets the plant pull its last bits of energy down into those chunky roots.
Keep an eye on the forecast, though, because a deep freeze that hardens the soil can harm the tubers. If temperatures are about to drop into the low twenties °F, go ahead and dig sooner rather than risk it.
Use this quiet week to gather supplies like a sturdy fork, some old newspaper, markers, and a few boxes. You will feel wonderfully organized when digging day arrives, and your future self will thank you with a grin.
2. Chop The Blackened Stalks Down To Size
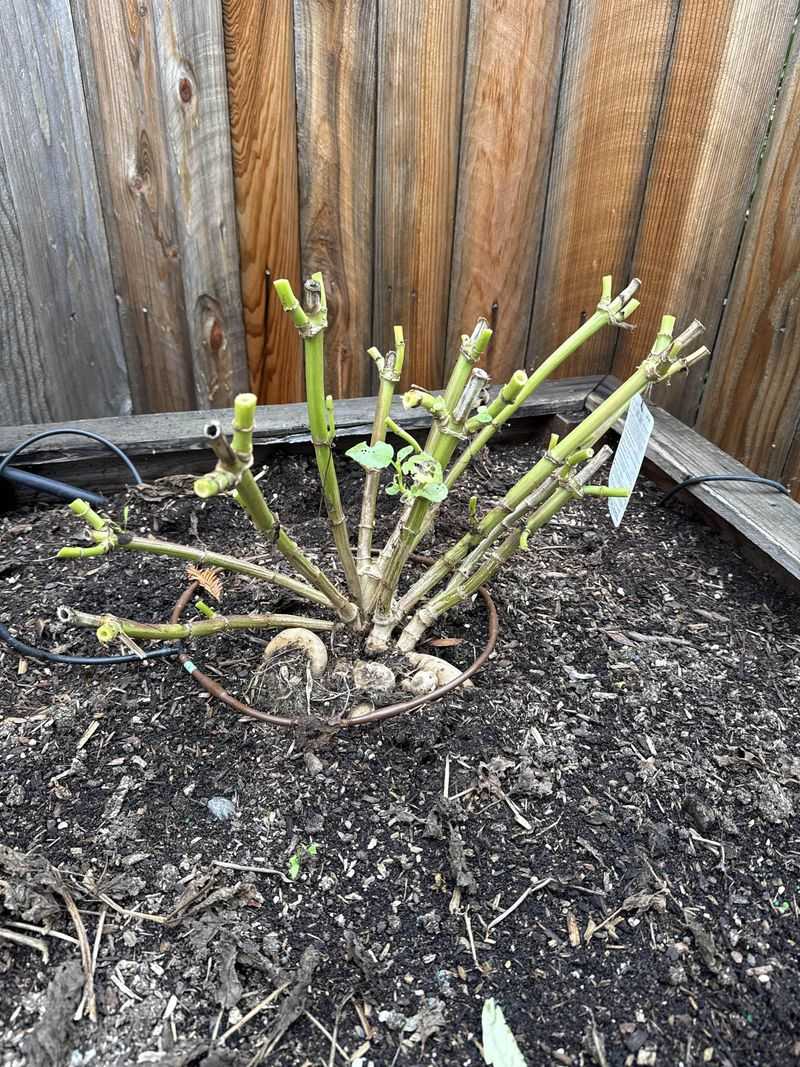
Grab your pruners and channel your inner lumberjack, because those tall, floppy stems need to come down before digging. Cut each stalk to about four to six inches above the ground, leaving a short handle you can grip.
That little stub works like a name tag, showing exactly where each plant sits once the leafy tops disappear. It also gives you something to hold while lifting the clump, though yanking on it hard is a bad idea.
Here is a clever trick many growers swear by after cutting the hollow stems down to their short stubs. Cover each open stem with foil or tilt the cut, so rainwater cannot pool inside and cause rot.
Toss the soggy leaves and stems into the compost pile, unless they showed signs of mildew or other disease. Sick foliage belongs in the trash, since tossing it in compost can spread trouble around your whole yard next year.
Clean your pruners with a disinfecting solution between plants if any of them looked spotty, wilted, or strangely yellow this season. A quick wipe takes seconds and helps keep viruses from hitching a ride from one plant to the next.
3. Dig The Tubers With A Gentle Hand
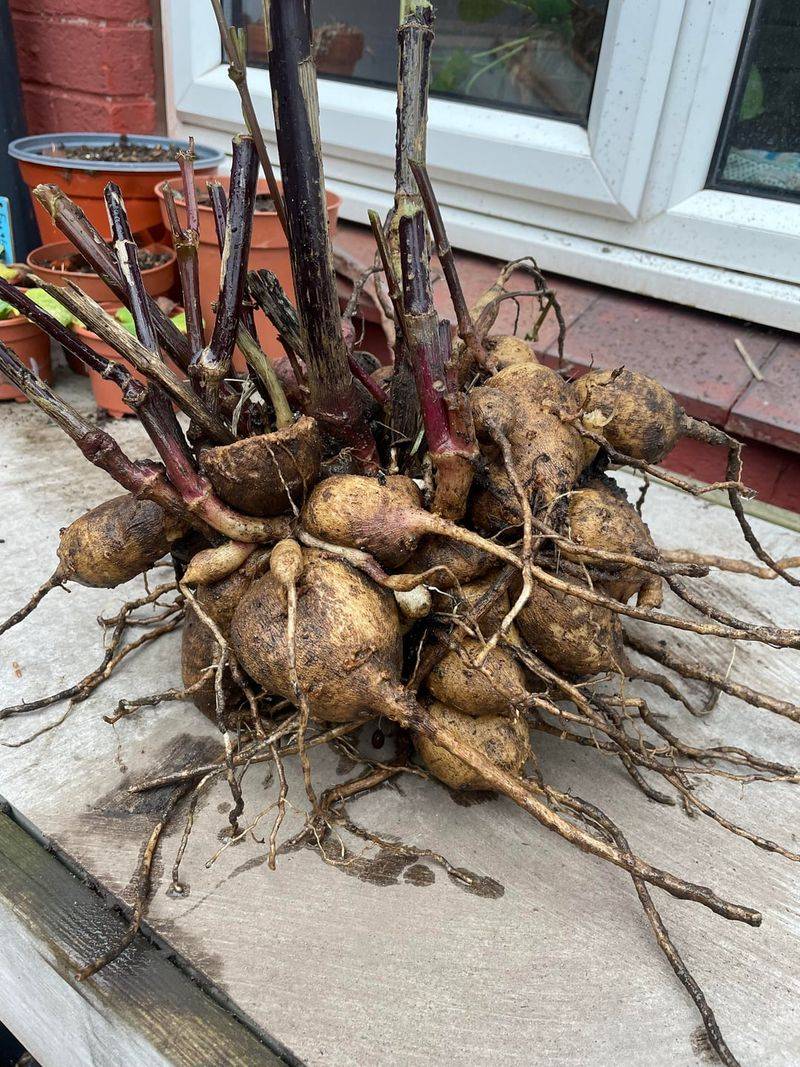
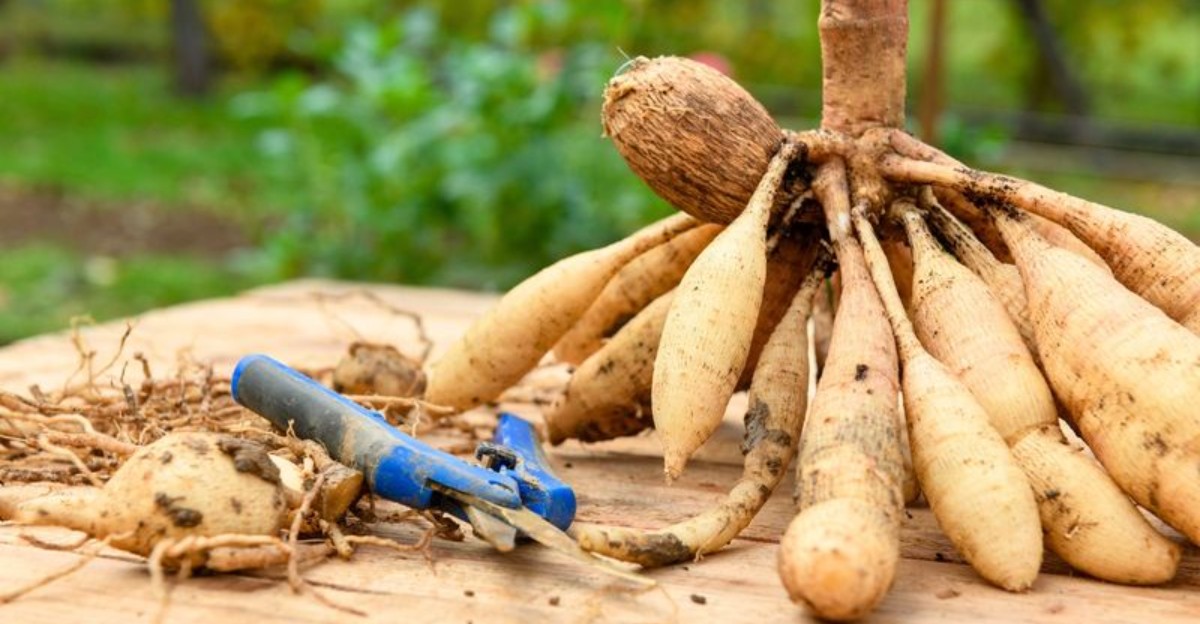
Picture sweet potatoes joined at the neck and buried together, and you have a clear image of a dahlia clump. Those necks are fragile, and a tuber that snaps off at the neck rarely sprouts again the following spring.
Start by pushing a garden fork into the soil about a foot away from the main stalk on every side. Rock the fork back and forth slowly, loosening the dirt in a wide circle like you are opening a jar.
Once the soil feels loose, slide the fork underneath and lift the whole clump upward with steady, even pressure. Avoid pulling on the stalk like a rope, since that often tears the delicate necks right off the crown.
A shovel works too, but the sharp blade can slice through tubers hiding farther out than you might expect. Big, happy plants sometimes spread their roots nearly two feet wide, so give yourself plenty of room to work.
Pick a dry, sunny afternoon for digging, since wet clay clings to everything and makes the clumps extra heavy. Your back will appreciate the lighter load, and your boots will stay a lot cleaner on the walk inside.
4. Rinse Off The Mud And Check For Trouble
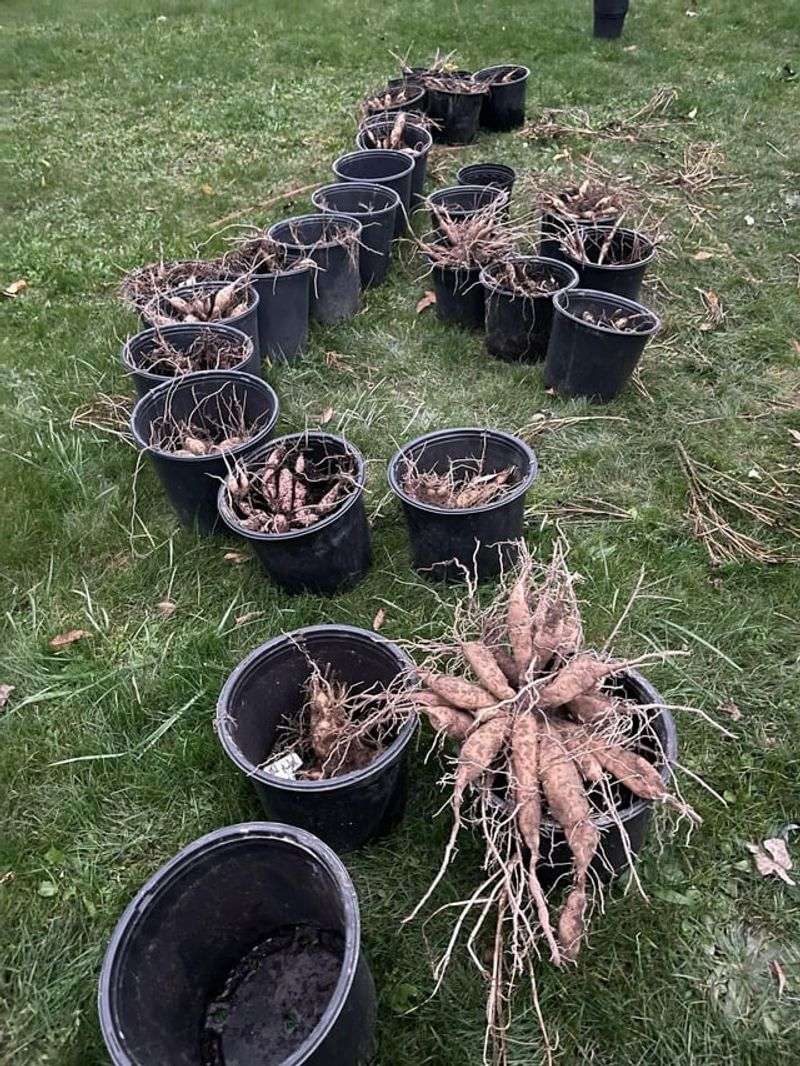
Did you know that gardeners argue about washing tubers almost as fiercely as people argue about pineapple on pizza? Many growers rinse them gently, because you cannot spot problems when everything is caked in dirt.
Use a garden hose on a soft spray setting, washing away soil without blasting the thin skins right off. Your fingers can help loosen stubborn clumps of mud, but skip the scrub brush since it scratches the surface.
With the dirt gone, turn each clump over slowly and look closely at every tuber like a curious detective. Healthy ones feel firm, much like a fresh potato, while mushy or hollow ones should be cut away and tossed.
Watch for soft brown spots, white fuzzy mold, or tiny holes that could mean hungry insects moved in underground. Trim small bad spots with a clean knife, then let the fresh cut dry before the tuber goes into storage.
Some growers dip clean tubers in a weak bleach solution, about one part bleach to ten parts cool water. That quick bath helps reduce fungus problems, though you should wear gloves and rinse again with plain water afterward.
5. Let The Clumps Air Out Like Fresh Laundry
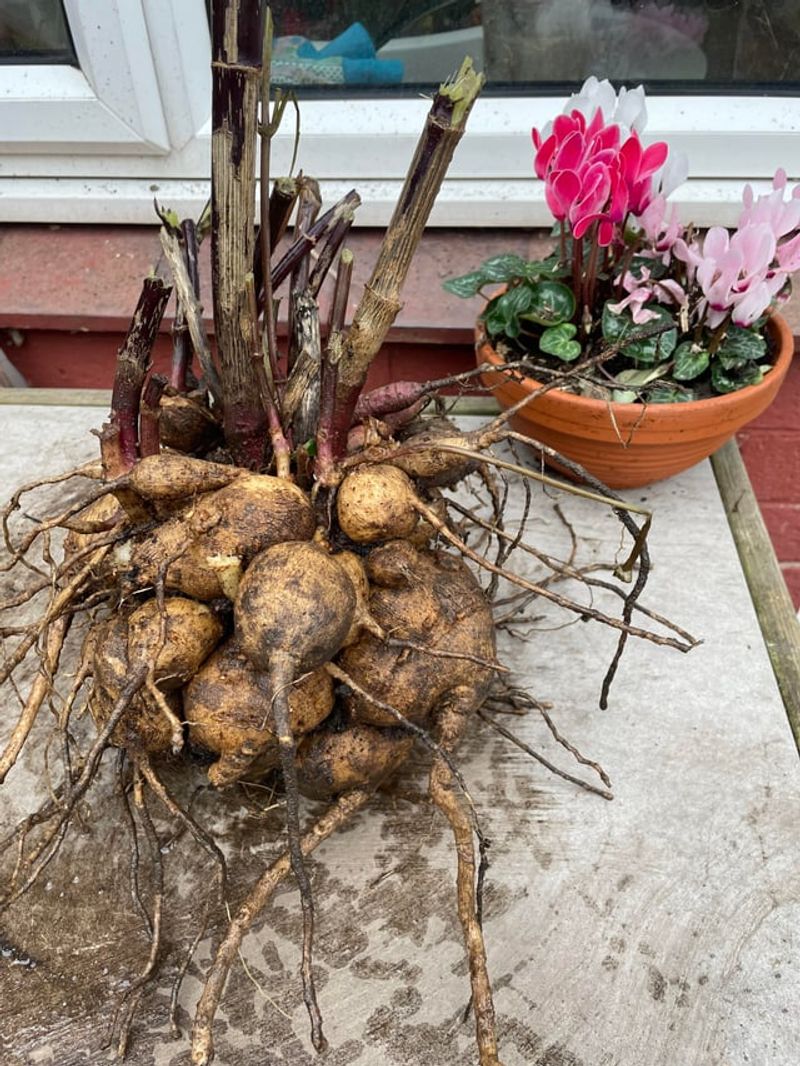
Freshly washed tubers are a bit like kids after a bath, and they need time to dry off properly. Packing them away while damp invites mold, which can spread through a storage box faster than a rumor spreads.
Set the clumps upside down on newspaper or a wire rack, letting water drain out of the hollow stems. A garage, covered porch, or garden shed works nicely, as long as the spot stays above freezing at night.
Aim for somewhere cool, shady, and breezy, since hot sun can shrink the tubers and wrinkle them like raisins. Most clumps need one to three days of drying, depending on how humid your October weather happens to be.
You will know they are ready when the skins feel dry to the touch but the tubers still feel firm. Leaving them out for weeks is a mistake, because they slowly lose moisture and turn light as dry corks.
A small fan set on low can speed things up if the air in your garage feels sticky and still. Just keep pets away from the drying area, since chewing on dahlia tubers can upset a dog’s or cat’s stomach.
6. Divide The Clumps For Next Year’s Bonus Plants
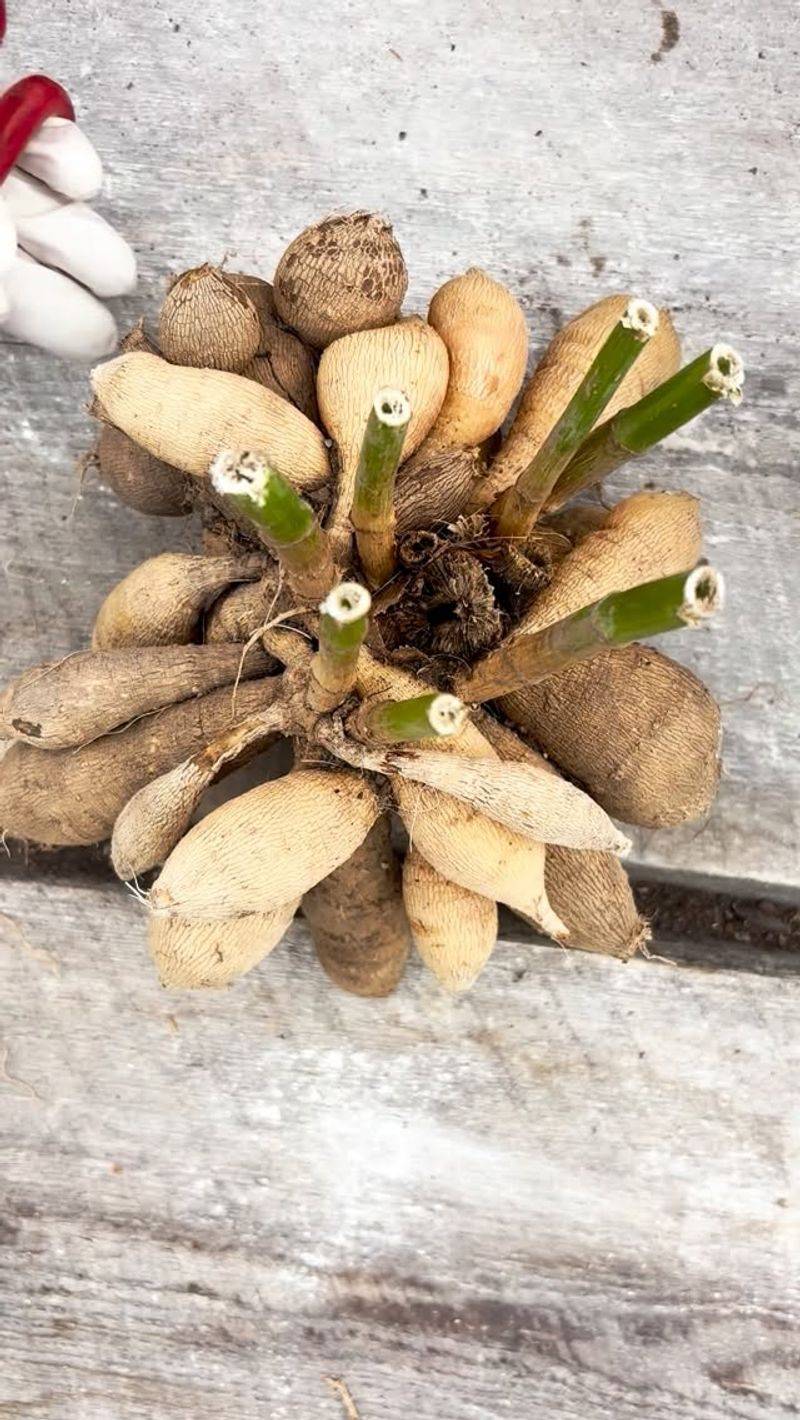
One clump planted in May can turn into five, ten, or fifteen tubers by October, which feels like free money. Splitting them up now gives you extra plants to grow, trade with friends, or sell at a spring plant swap.
The secret to dividing is finding the eyes, which are tiny bumps near the crown where new sprouts will grow. A tuber without an eye is like a car without an engine, since it simply cannot produce a new plant.
Eyes can be hard to see in fall, so some gardeners wait until late winter when they swell up. Others divide right away because fresh tubers are softer and easier to slice than tough, dried out ones later.
Use a sharp, clean knife or sturdy pruners, cutting through the crown so each piece keeps a neck and eye. Start by cutting the clump in half, then keep splitting smaller sections until each tuber stands on its own.
Toss the old mother tuber in the center, since it is often woody and rarely grows well a second time. Your garden just multiplied for zero dollars, and honestly, that might be the best bargain in the whole hobby.
7. Label Every Tuber Before Memory Fails You
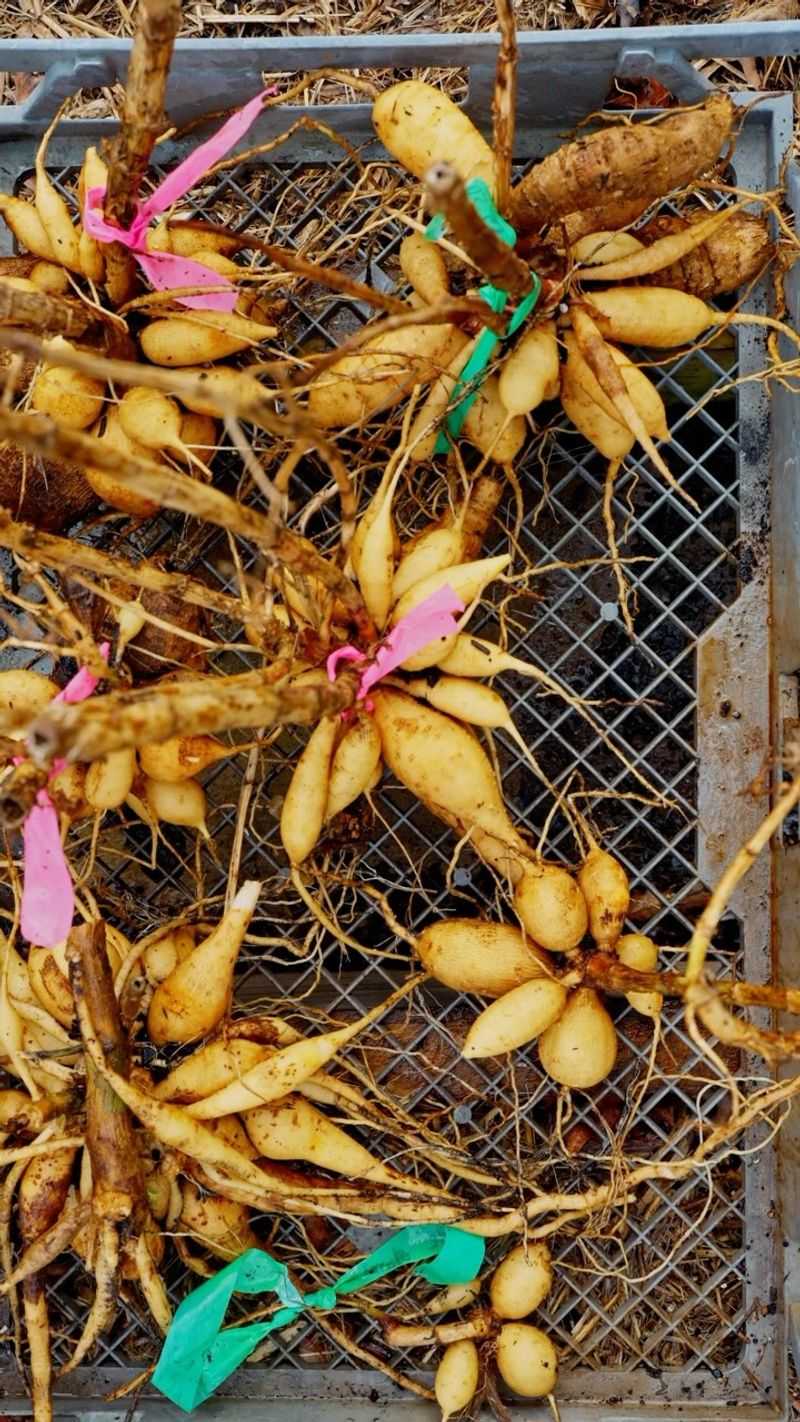
Plenty of gardeners have confidently said they will remember which tuber is which, and most have been wrong. By April, that pile of brown lumps all looks the same, and your fancy dinnerplate variety becomes a mystery.
Grab a permanent marker or a garden pencil and write the variety name directly on each dry tuber skin. Short codes work surprisingly well on smaller tubers, like CL for Café au Lait or KF for Kelvin Floodlight.
Keep a notebook or phone list that matches each code to its full name, color, height, and bloom size. Adding notes about how each plant performed this year helps you decide which varieties deserve a spot next season.
Plant tags from the garden can go right into the storage bag, giving you a second layer of backup. Some growers even snap a photo of each plant in bloom before frost arrives, creating a handy visual catalog.
Fun fact, the dahlia is the national flower of Mexico, where the Aztecs once grew it for food and medicine. Those ancient farmers probably had no labels at all, but you have markers and notebooks, so use them with pride.
8. Pack Them Snugly In A Cozy Storage Box
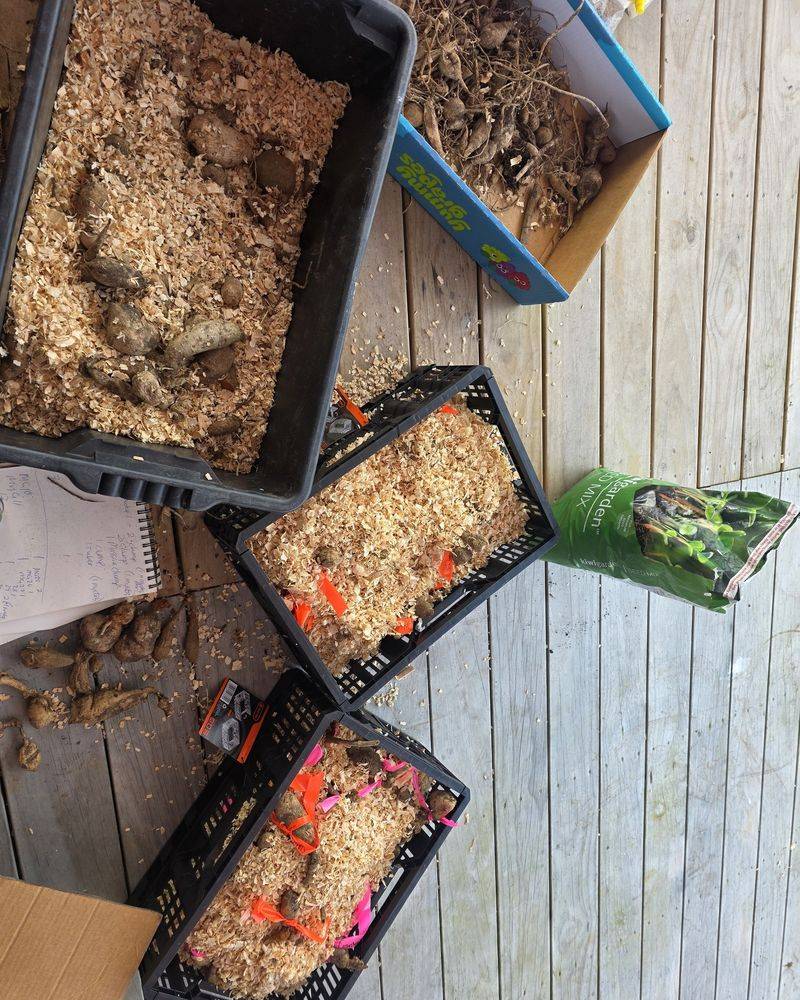
Goldilocks would make an excellent dahlia keeper, because tubers want storage that is not too hot, cold, wet, or dry. The sweet spot sits between forty and fifty degrees Fahrenheit, which is why basements and cool closets work so well.
Fill a plastic tub, cardboard box, or paper bag with slightly damp peat moss, clean wood shavings, or coarse vermiculite. Nestle the tubers inside so they do not touch each other, like eggs tucked safely into a sturdy cardboard carton.
Keeping them apart matters, since one rotten tuber can quickly spread its trouble to every neighbor it rubs against all winter. Another popular method involves wrapping each tuber in plastic kitchen wrap, which holds moisture in without any extra packing.
Check your stash about once a month, gently squeezing a few tubers to see how they are holding up. Wrinkly ones need a light misting of water, while soft or moldy ones should be removed from the box quickly.
Avoid storing them near apples or pears, since ripening fruit gives off gases that can trigger early, weak sprouting. A cool, dark corner of the basement, away from the furnace, gives your tubers a long, peaceful winter nap.
9. Mulch Heavily If You Live Somewhere Mild
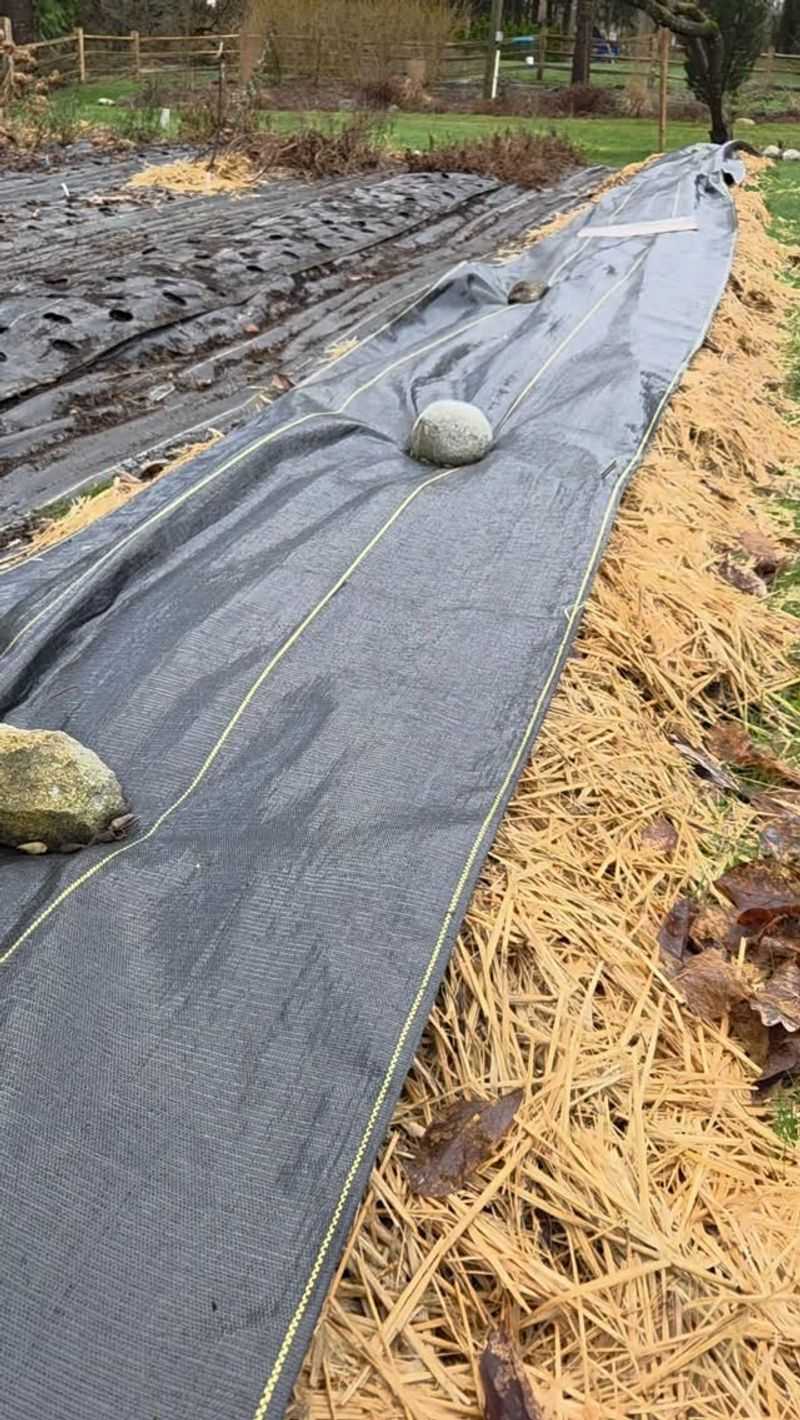
Gardeners in warm places like South Texas, coastal Georgia, or coastal California often get to skip most of the muddy digging adventure. If your ground rarely freezes more than an inch or two deep, your tubers can usually stay tucked in place.
Dahlias are often hardy in zones eight through ten, while colder zones need to lift tubers before winter arrives. Zone seven gardeners sometimes succeed, especially with a thick blanket of mulch on top and well drained soil.
After cutting the stalks down, pile four to six inches of shredded leaves, straw, or pine needles over the bed. That fluffy layer acts like a warm quilt, holding in ground heat and softening sudden temperature swings at night.
Drainage matters just as much as cold, because soggy winter soil can cause tubers to rot. Heavy clay beds may need raised soil or a few handfuls of grit mixed in before you trust them outdoors.
Mark each spot with a sturdy stake, so you do not accidentally plant tulips right on top next month. Pull the mulch back in spring once the soil warms, and watch those sleepy tubers wake up refreshed and ready.
10. Plan Next Year’s Dahlia Bed Over Hot Cocoa
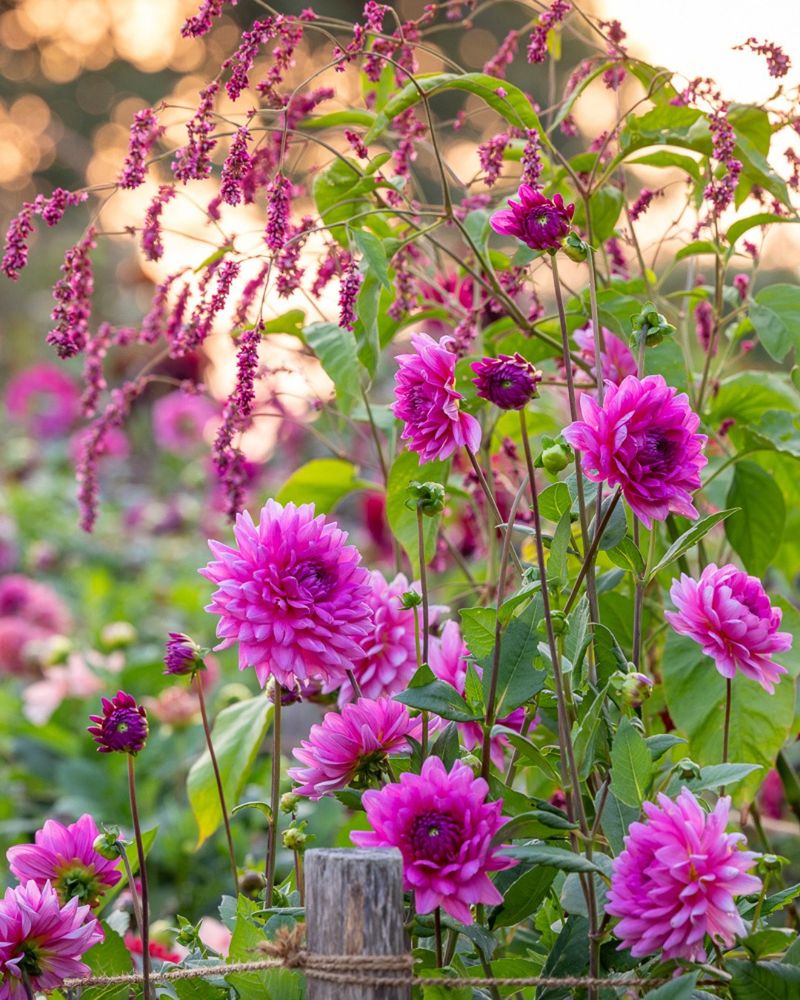
Few things feel better than curling up with a warm mug and a tuber catalog while chilly October rain taps against the window. Your memories of this season are still fresh, making now the smartest time to plan next year’s flower show.
Think about which plants flopped over, which ones bloomed like crazy, and which spots stayed too shady all season. Dahlias love at least six to eight hours of sun, so moving a struggling plant might solve the problem.
Sketch a simple map of your garden, marking where each variety grew and how tall it reached by fall. Tall types belong in the back, while short, bushy ones look adorable along the sunny front edge of flower borders.
Popular varieties sell out surprisingly fast, sometimes by early January, so browsing catalogs early gives you the best possible selection. Make a wish list now, and you will be ready to pounce the moment your favorite growers open their shops.
Consider trying one bold new color next year, since experimenting is half the fun of growing these showy flowers. Just be warned that collecting dahlias is famously hard to stop, and one small bed can turn into a backyard jungle.