Dahlia Tubers Rot In Winter Storage More Often Than They Freeze, So These 9 Steps Keep Them Firm Until Spring
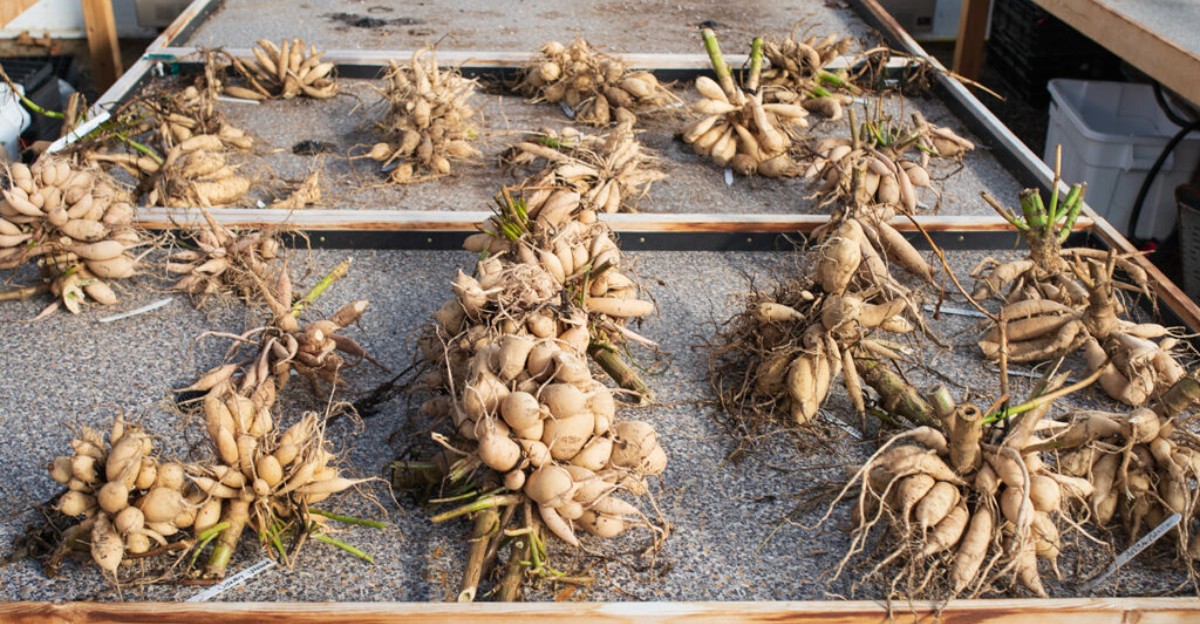
Frozen tuberous roots in a cool basement are rare, but moldy and mushy ones show up in many gardens each spring. The real trouble often starts with excess moisture, including water trapped inside hollow stems, not with a cold snap outside the window.
These plants come from the cool highlands of Mexico, where they grew wild long before any garden catalog existed. Their swollen roots hold water and stored carbohydrates, so they act like tiny sponges that spoil when kept too damp.
I learned the hard way after opening a storage bin and smelling something sour that no gardener forgets. Half my favorite clumps had turned soft, and I had blamed the chilly garage for weeks before that.
Truth is, firm roots in spring come from a handful of small habits that start the moment frost arrives. Now, which of those habits are you skipping, and could one tiny change save your best plants this year?
1. Wait For Frost To Blacken Dahlia Foliage Before Digging
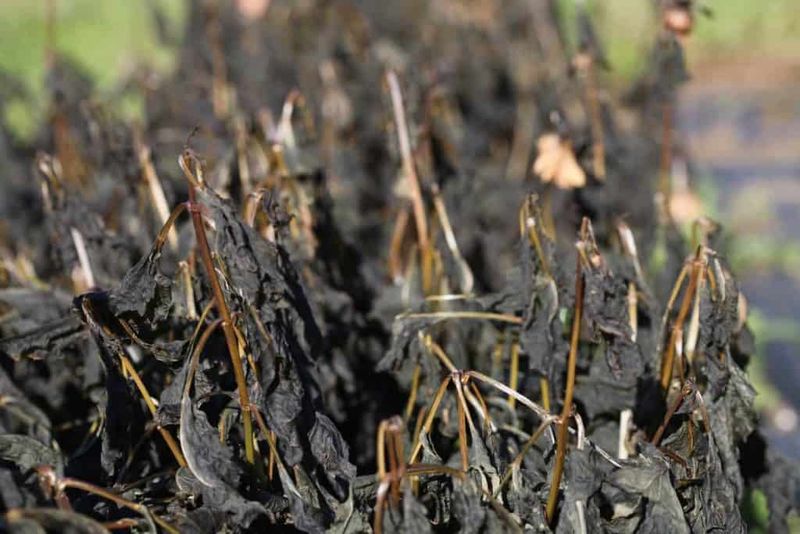
That first hard frost turns lush dahlia leaves into limp black rags overnight, and it looks tragic. Believe it or not, that ugly scene is your signal that the tubers have stopped growing for the year.
Plants keep feeding their roots right up until cold weather shuts the leaves down for good. Tubers dug too early often have thin skins, and thin skins lose moisture or invite rot in storage.
In my yard, I wait about one to two weeks after that blackening frost before digging. That short pause helps the skins toughen up and gives the eyes near the crown time to show themselves.
Eyes are the tiny growth buds that become next year’s shoots, so you want them easy to spot. A tuber without an eye will sit in the soil all summer and refuse to sprout.
Gardeners in mild areas without a reliable frost can dig once the plants yellow and fade in late fall. Many growers in zones eight and warmer leave clumps in the ground if the soil drains well all winter.
Watch the forecast, though, because a deep freeze that reaches the tubers underground can turn them to mush. Light frost on the leaves is fine, but frozen soil around the roots creates a much bigger problem.
I mark each plant with a sturdy tag before frost hits, since blackened stems all look alike later. Trust me, guessing which clump was the giant orange dinnerplate gets frustrating once blooms are gone.
2. Cut Dahlia Stalks Down To A Short Handle Before Lifting
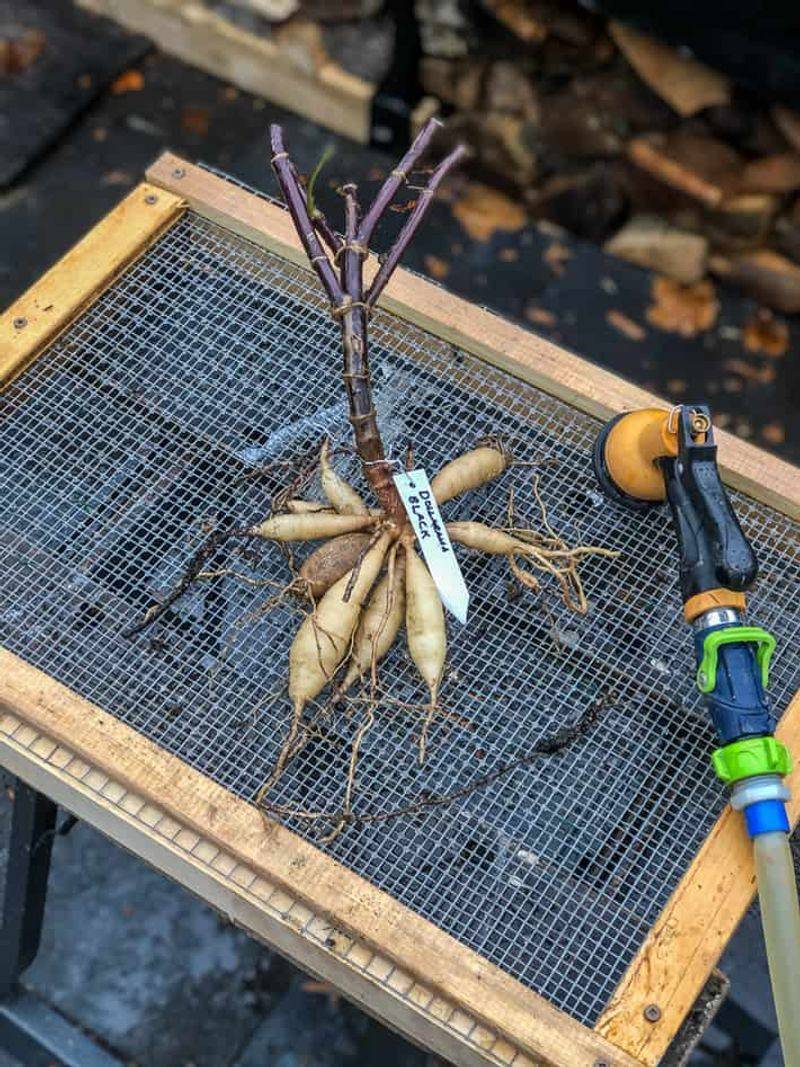
Dahlia necks are shockingly fragile, and one careless yank on a stalk can snap a perfect tuber loose. A tuber that loses its neck connection to the crown rarely grows again, no matter how plump it looks.
Before digging, I cut each stem back to roughly four to six inches above the soil line. That short stump becomes a handy grip, and it shows exactly where the crown sits underground.
Start your fork or spade about a foot away from the stalk, since clumps spread wider than expected. Push straight down in a circle around the plant, then rock the tool gently to loosen the soil.
Patience pays off here, because a fork tine through a tuber leaves a wound that fungus loves. Bruised spots often soften first in storage, and that softness can creep toward healthy neighbors in the box.
Once the soil feels loose, slide the fork under the clump and lift it up slowly from below. Avoid pulling the clump out by the stem, since all that weight hangs on those skinny necks.
Hollow dahlia stems hold water, so I tip each lifted clump upside down for a little while. Water trapped inside the stem drips toward the crown and can start rot from the inside out.
Heavy clay makes this job slower, so I wait for a dry day when the soil crumbles easily. Wet, sticky soil clings to everything and adds extra weight that strains the delicate necks even more.
3. Wash Dahlia Clumps And Let Hollow Stems Drain Upside Down
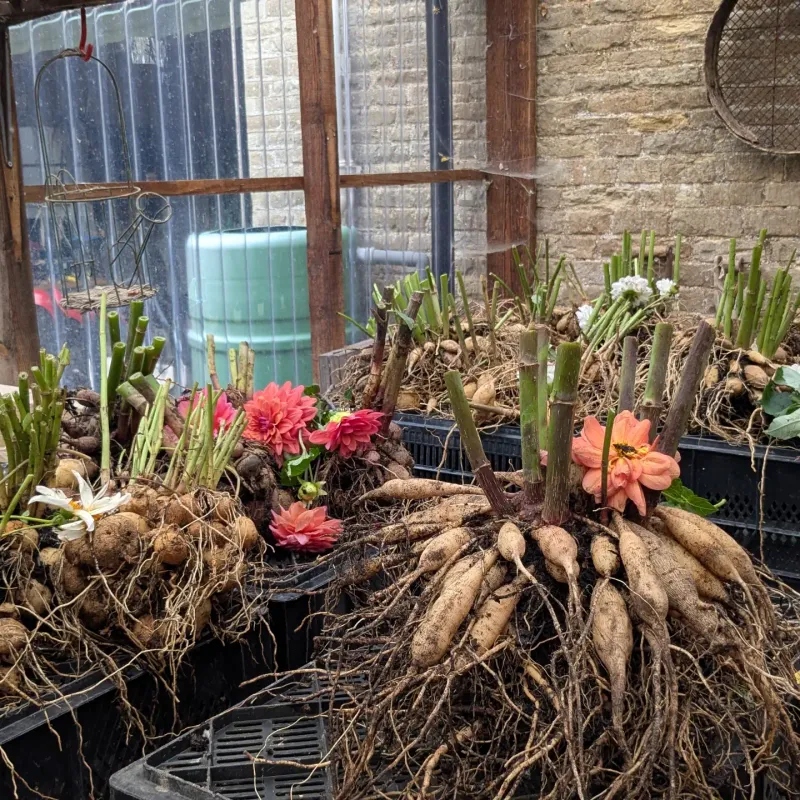
Nothing hides trouble like a crust of dried mud, and dahlia clumps from clay often look like potatoes. A gentle rinse with the garden hose reveals cracks and hidden eyes that were buried under all that dirt.
Sandy soil usually shakes off easily, so washing is optional if your garden drains fast and stays loose. Clay is another story, and leftover clumps around the crown can hold moisture well into winter storage.
I use a soft spray instead of a hard jet, since strong pressure scrapes the thin skin. Some growers add a short soak in diluted bleach, but plain water works fine for most home gardeners.
After rinsing, flip each clump upside down on a rack or tray so water drains out of the stems. Leaving them stem side up lets water pool in the crown, which is exactly where rot likes to begin.
Next comes the inspection, my favorite part because it feels a bit like a treasure hunt. Squeeze each tuber gently, and set aside any that feel soft or oddly light in your hand.
Brown mushy patches or white fuzz signal trouble, so remove those tubers from the batch right away. Small surface nicks can be trimmed with a clean knife, then left to dry before storage.
Guilty as charged, I once kept a squishy favorite out of sentiment and lost three healthy tubers beside it. One bad tuber is rarely worth risking a whole box, so be honest during this sorting step.
4. Cure Freshly Dug Dahlia Tubers In A Cool Shady Spot
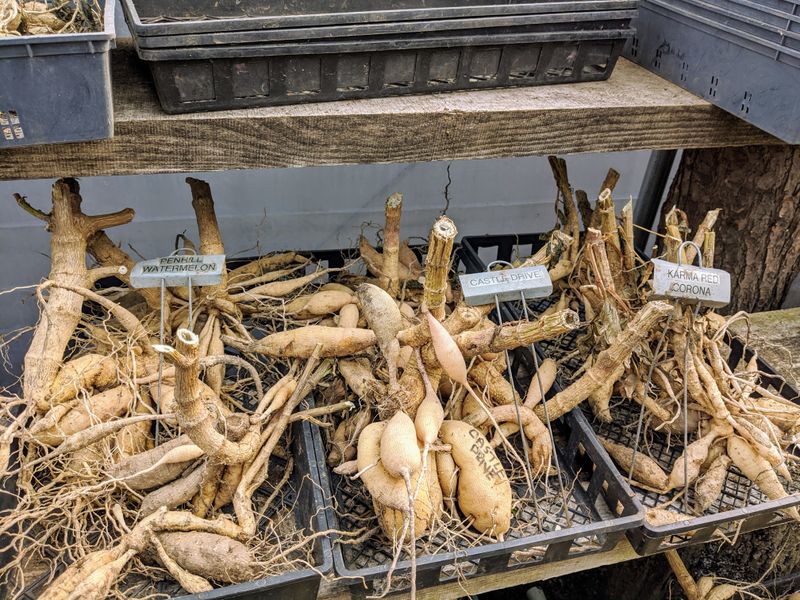
Fresh dahlia tubers have skin about as tough as a ripe peach, and that thin layer bruises easily. Curing gives the skin time to firm up, almost like letting a fresh scrape form a scab.
Set your clean clumps somewhere cool and shaded with good airflow, such as a garage or covered porch. Keep them out of direct sun, because bright light and wind can shrivel them faster than you expect.
Most growers cure tubers for anywhere from one day to about a week, depending on local humidity. Dry climates need less time, while damp coastal areas may need a few extra days for skins to set.
Ready tubers feel slightly leathery, and any cuts or scrapes look sealed over instead of shiny and wet. Those sealed cuts act like a little barrier that keeps fungus out during the long months ahead.
Not going to lie, I used to skip this step because I was eager to pack everything away. My boxes held far more fuzzy mold back then, and curing made a noticeable difference the very next spring.
Overdrying causes its own headache, so check on them daily instead of forgetting them on the shelf. Wrinkled, rubbery tubers have lost too much water, and they may struggle to sprout when planting time arrives.
Protect curing clumps from freezing nights, since even a few hours below thirty two degrees can damage them. If a cold snap is coming, I simply carry the trays into the basement until the weather settles.
5. Divide Dahlia Clumps So Every Tuber Keeps An Eye

Every dahlia clump is basically a family reunion, with a dozen tubers clinging to one old crown. Splitting them up multiplies your plants for free, which still feels like a small miracle to me.
Each division needs a plump tuber attached by a firm neck to a piece of crown. That crown piece must carry at least one eye, because the tuber body alone cannot form new shoots.
You can divide in fall after curing or wait until spring when the eyes swell and show clearly. Fall dividing saves space in storage, while spring dividing makes the eyes far easier for beginners to spot.
I’m the first to admit my early fall divisions were mostly guesswork, and plenty turned out eyeless. Now I divide some clumps in fall and leave tricky ones whole until the eyes start swelling.
Use a sharp, clean knife or pruners, and wipe the blade with household disinfectant between clumps. Clean tools reduce the chance of carrying viruses or rot from one variety over to the next.
Toss skinny, stringy roots and any tuber with a cracked neck, since they rarely produce a healthy plant. Small, chunky tubers with solid necks often outperform giant ones, so size alone tells you very little.
Let fresh cuts dry for a day or two before packing, so they form a protective callus. Wet cut surfaces are an open door for rot, and a little waiting keeps that door mostly shut.
6. Pack Dahlia Tubers In Wood Shavings Or Peat Moss
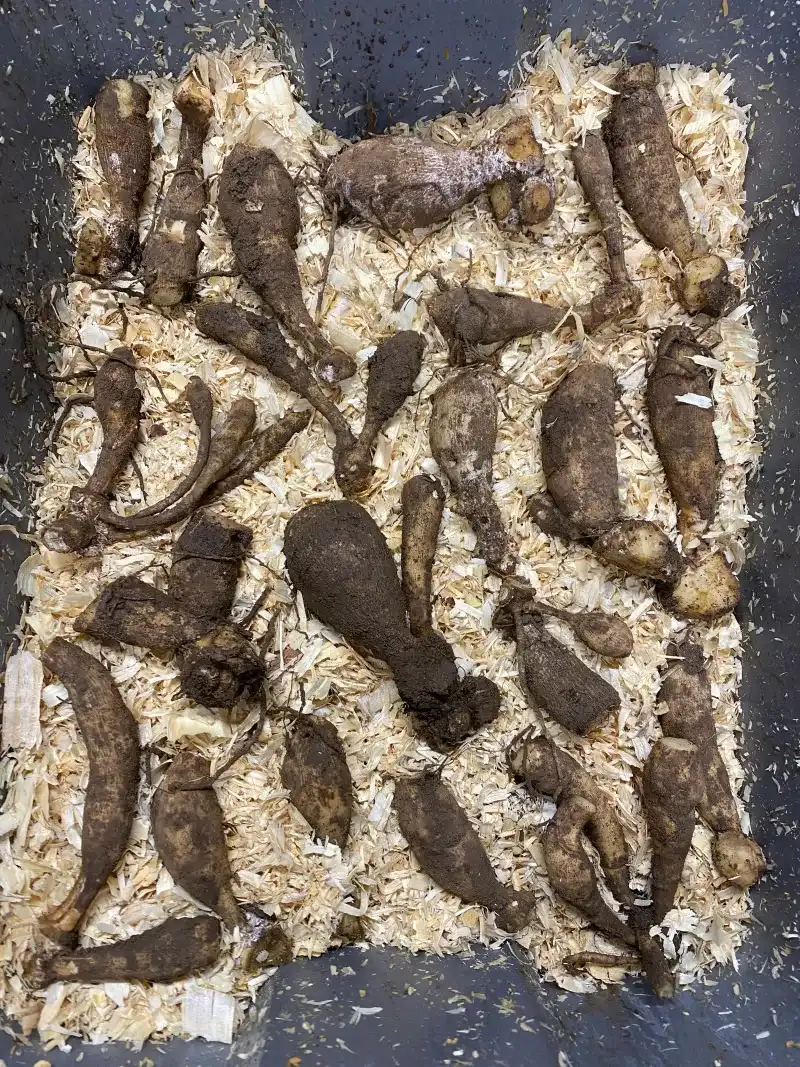
Bare tubers tossed in a box are like ice cubes left on a counter, slowly losing their moisture. A good packing material acts as a buffer, holding gentle humidity without letting water sit on the skin.
Pine wood shavings and coarse vermiculite are popular choices, and many growers also use peat moss or coir. Each one holds a little moisture while still letting air move around the tubers in the box.
Skip cedar shavings, since many growers find them too harsh and drying for stored dahlia tubers. Fine sawdust can also pack down tightly, so coarser material usually breathes better through the winter.
The packing material should feel barely damp, like a wrung out sponge, and not dripping wet. Soggy material is one of the fastest ways to start rot, which defeats the whole purpose of packing.
For containers, I like cardboard boxes or plastic bins with a few small holes drilled in the lids. Sealed plastic bags trap moisture against the tubers and turn into steamy little greenhouses for mold.
Some growers prefer wrapping each tuber in plastic wrap, which works well in very dry basements. Wrapped tubers still need to be fully dry and cured first, or the plastic seals in trouble.
Fair warning, every home stores a little differently, so testing two methods side by side teaches a lot. By spring, you will know which material kept your tubers plumpest in your particular storage spot.
7. Keep Stored Dahlia Tubers Between Forty And Fifty Degrees
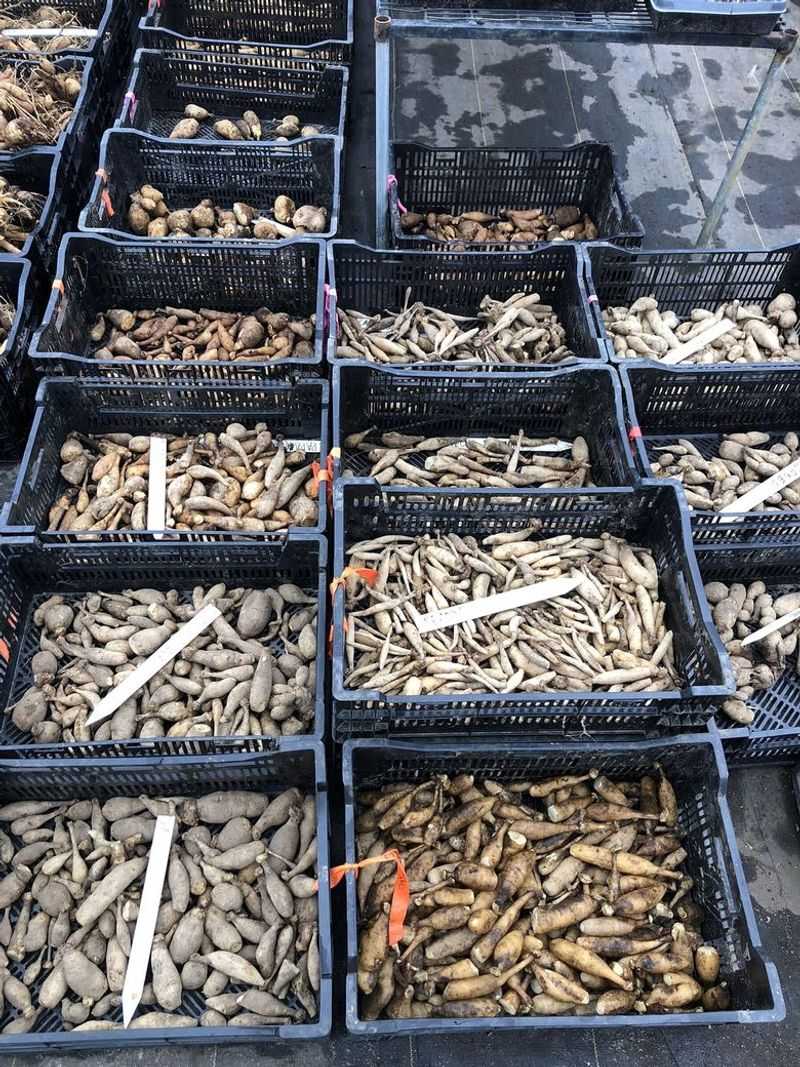
Dahlia tubers are a bit like Goldilocks, fussing over storage that runs neither too warm nor too cold. Most experts recommend a steady range between forty and fifty degrees Fahrenheit for the whole winter.
Below freezing, the water inside the tubers turns to ice and leaves them soft and mushy when thawed. Above about fifty degrees, they may sprout pale shoots early or slowly dry out in their boxes.
Unheated basements and insulated garages often hit that sweet spot in colder parts of the country. Attached garages near an outside wall can dip below freezing, so check the coldest corner before choosing.
Humidity matters just as much, and many growers aim for a fairly moist range around eighty percent. Too dry and tubers shrivel, while stale, damp air near a leaky pipe can encourage mold growth.
I keep a cheap digital thermometer with a humidity reading right beside my boxes all winter. Checking it every week or so takes seconds, and the numbers often surprise me during cold snaps.
Avoid storing tubers next to a furnace or water heater, because those spots run warm and dry. Concrete floors can stay colder than shelves, so raising boxes onto a pallet or shelf often helps.
Gardeners in warm southern areas may lack a cool spot, and a spare refrigerator can work instead. Keep fruit out of that fridge, since ripening apples release ethylene gas that may affect stored tubers.
8. Space Dahlia Tubers Apart And Label Every Storage Box
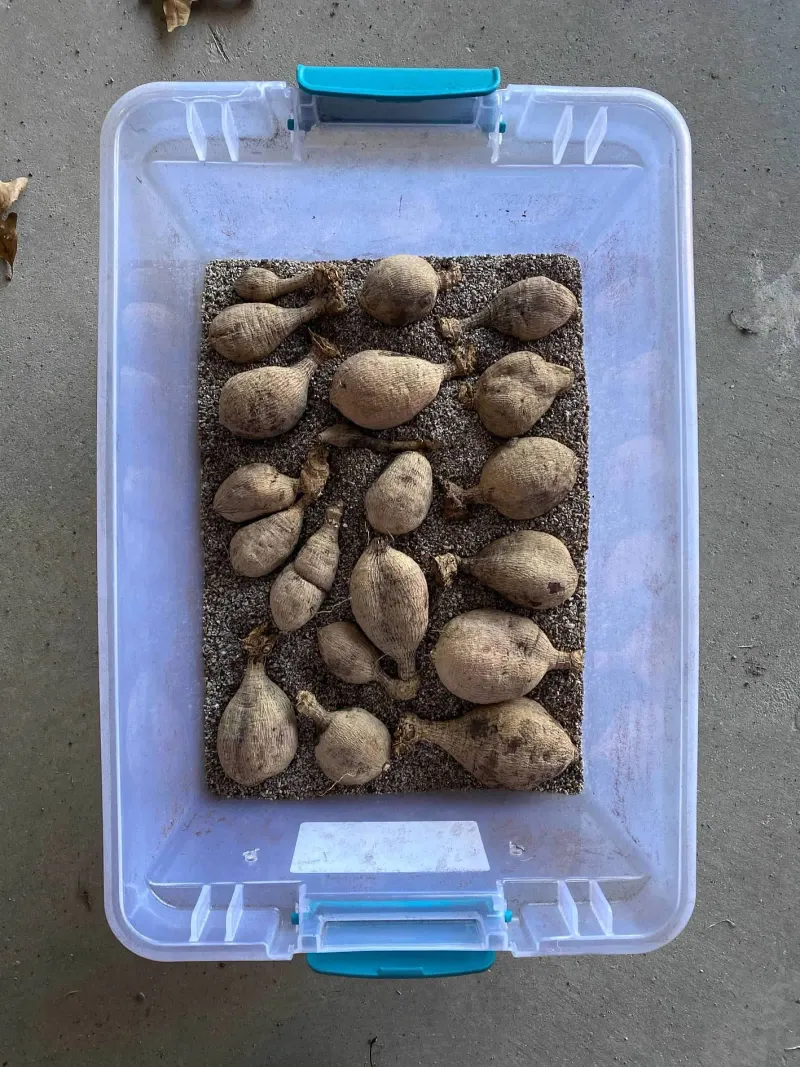
Rot spreads through a crowded box the way gossip spreads through a small town, quickly and quietly. One soft tuber touching three neighbors can turn a winter supply into a smelly surprise by February.
When packing, I lay down a layer of material, then set tubers so none of them touch. Another layer goes on top, and I repeat until the box is full but not tightly crammed.
That small gap gives each tuber its own pocket of air and slows any rot that does appear. It also makes monthly checks easier, since you can lift one tuber without disturbing the whole bunch.
Undivided clumps take more room, so give them extra space and keep the stem stubs pointing downward. Wrapping single tubers in newspaper is another trick when space is tight and boxes keep filling up.
Labels feel boring in October, but they become pure gold once spring planting season rolls around. Write the variety name right on each tuber with a permanent marker or pencil after the skin dries.
I also note the storage date and the packing material used on the outside of every box. Over a few winters, those notes reveal which varieties store well and which ones struggle in your conditions.
I’ll say this much, some fancy varieties are known among growers as poor keepers with thin skins. Keeping notes helps you spot those divas early and give them a little extra attention next fall.
9. Check Dahlia Tuber Boxes Once A Month All Winter
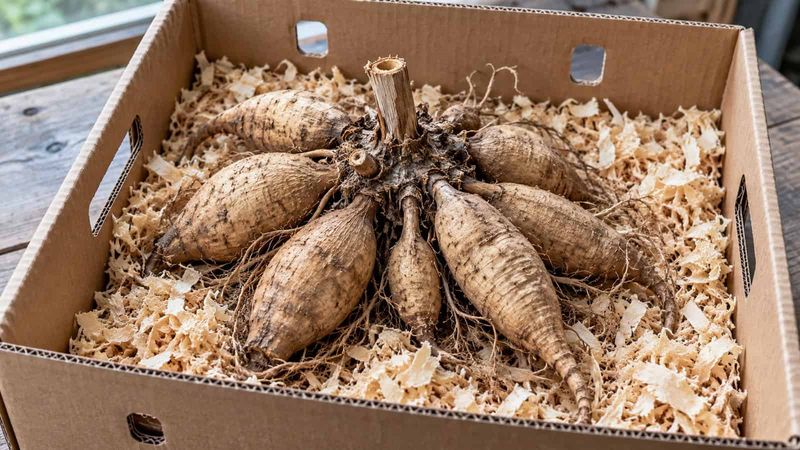
Out of sight usually means out of mind, and that habit has cost me more tubers than any freeze. A quick monthly peek is one of the best ways to catch small problems before they spread.
Set a phone reminder for the first weekend of each month from late fall into early spring. Pull out a few tubers from each box and give them a gentle squeeze to test their firmness.
Healthy tubers feel firm like a fresh potato, with smooth skin and no strange or sour smell at all. Wrinkled, shriveled tubers mean the air is too dry, so lightly mist the packing material and recheck.
Soft, mushy spots or fuzzy mold point to too much moisture or warmth inside the storage area. Remove those tubers right away, and trim small bad patches with a clean knife if the rest stays firm.
Small patches of mold on the surface can sometimes be wiped away and dusted with a little sulfur powder. Spread the box contents out for a day to dry if mold shows up on several tubers at once.
Pale sprouts appearing in midwinter suggest your storage is too warm, so look for a cooler corner. Snapping off long sprouts is fine, since the eyes usually push out fresh shoots after planting.
Every spring, I feel a little thrill opening the boxes and finding plump, firm tubers ready to plant. Those monthly checks take maybe ten minutes, and they turn spring from a gamble into a much safer bet.