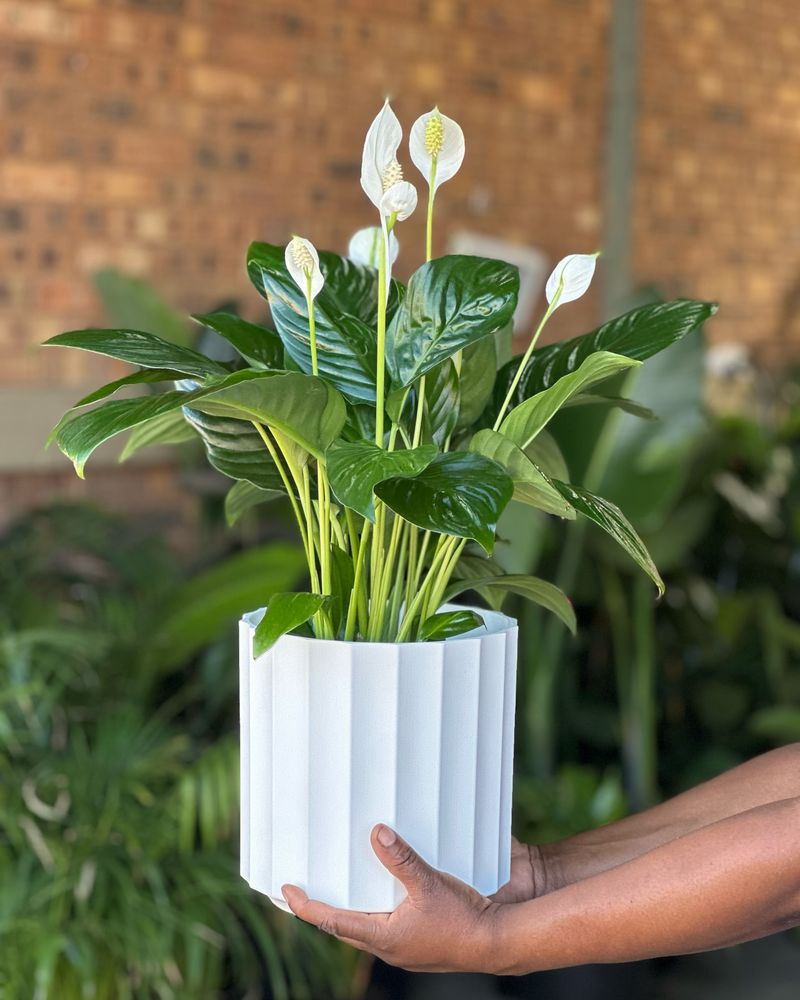
10 Common Peace Lily Problems And Smart Ways Michigan Gardeners Fix Them

Peace lilies might look calm and graceful, but Michigan plant lovers know they can be surprisingly dramatic. One week they are standing tall and glossy, the next they are drooping like they missed their morning coffee.
Between low winter light, dry indoor air, and the temptation to overwater during colder months, it is easy for these popular houseplants to run into trouble. The good news is most peace lily problems are simple to fix once you know what to look for.
With a few smart adjustments and easy care habits, you can bring your plant back to life and keep it thriving year-round.
Whether you are dealing with yellow leaves, slow growth, or flowers that refuse to appear, there is a practical solution that works. Let’s break down the most common peace lily issues Michigan gardeners face and how to fix them fast.
1. Browning Leaf Tips
Brown tips appearing on your peace lily leaves often signal that something in its environment needs adjustment. Michigan winters bring particularly dry indoor air thanks to furnaces running nonstop.
Your plant loses moisture faster than it can absorb it. Low humidity is usually the main culprit behind those crispy brown edges. Peace lilies naturally grow in humid tropical forests where moisture hangs thick in the air.
Our heated homes offer the complete opposite environment during colder months. Tap water containing fluoride or chlorine can also cause tip browning over time. These chemicals accumulate in leaf tissue, creating visible damage.
Using filtered or distilled water helps prevent this chemical buildup issue. Over-fertilization adds another layer of problems for sensitive peace lilies. Excess salts from fertilizer concentrate in leaf tips, burning the delicate tissue.
This happens more often than most gardeners realize with indoor plants.
The fix involves several simple steps that work together beautifully. Group your plants together to create a humidity zone, or place your peace lily on a pebble tray filled with water.
Mist the leaves regularly during dry winter months.
Flush the soil thoroughly every few months by running water through it. This washes away accumulated salts and chemicals. Trim brown tips with clean scissors for a neater appearance.
2. Drooping Leaves
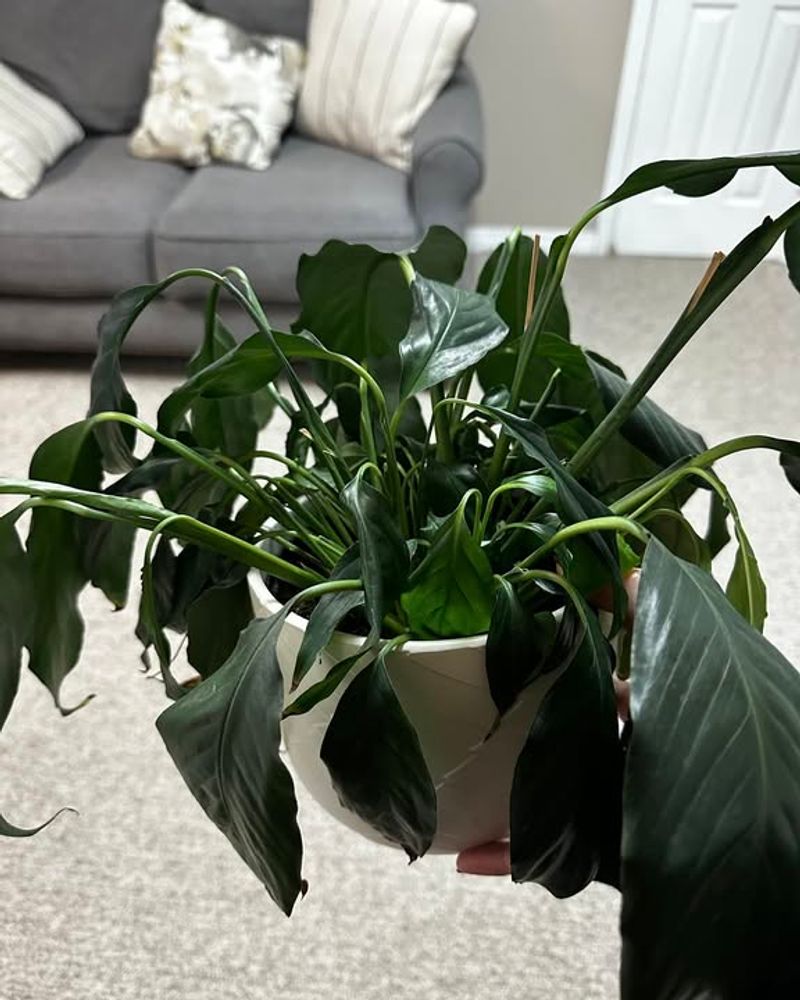
Drooping peace lily leaves create quite a dramatic display that catches your attention immediately. The entire plant seems to collapse, with leaves hanging limply toward the ground.
This obvious distress signal usually has a straightforward cause and solution. Underwatering is the most common reason for this sudden drooping appearance. Peace lilies are somewhat dramatic about their water needs and wilt noticeably when thirsty.
The good news is they bounce back quickly once watered.
Interestingly, overwatering can also cause leaves to droop in a similar fashion. The difference lies in the soil moisture level when you check.
Soggy soil means too much water, while dry soil confirms thirst. Temperature stress from cold drafts near windows causes drooping during Michigan winters. These tropical plants dislike sudden temperature drops below 60 degrees.
Drafty spots near doors or windows create problems for sensitive peace lilies.
Establish a consistent watering routine based on your plant’s actual needs. Water thoroughly when the top inch of soil feels dry. The leaves will perk up within hours after a proper drink.
Move your plant away from cold windows and heating vents that blast hot air. Find a stable location with consistent temperatures between 65 and 80 degrees.
Monitor soil moisture regularly rather than watering on a fixed schedule.
3. Yellowing Leaves
Yellow leaves on your peace lily usually mean the roots are sitting in too much moisture. Overwatering ranks as the number one mistake indoor gardeners make with these plants. The roots need oxygen just as much as they need water.
When soil stays constantly soggy, roots cannot breathe properly and begin to suffocate. This stress shows up quickly as yellowing foliage that starts at the bottom. Older leaves turn yellow first, then the problem spreads upward.
Poor drainage compounds the overwatering issue significantly in many Michigan homes. Pots without drainage holes trap water at the bottom where roots sit.
Even pots with holes can have problems if the soil is too heavy.
Sometimes yellow leaves indicate a natural aging process rather than a real problem. Peace lilies regularly shed their oldest leaves as new growth emerges.
One or two yellow leaves occasionally is completely normal behavior.
Check your watering schedule and adjust it based on actual soil conditions. Stick your finger two inches deep into the soil before watering again. The top layer should feel dry to the touch.
Make sure your pot has proper drainage holes at the bottom. Use a well-draining potting mix designed for tropical houseplants.
Allow excess water to drain completely after each watering session.
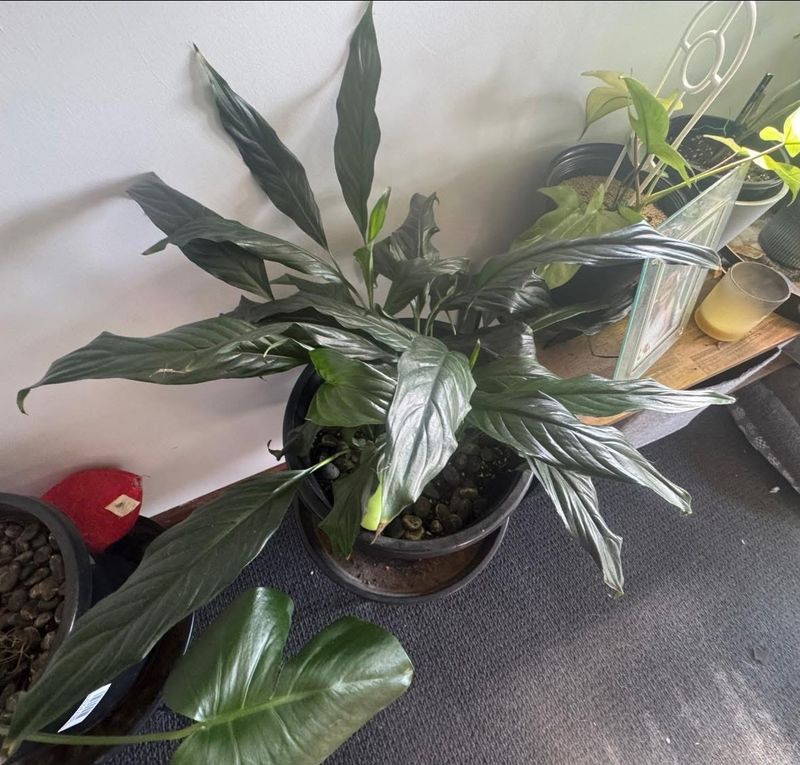
4. Slow Growth
A peace lily that seems frozen in time, producing barely any new leaves or growth, signals underlying environmental issues. These plants should produce fresh foliage regularly during their active growing season.
Stalled growth means something important is missing from their care routine.
Insufficient light is often the hidden reason behind sluggish growth patterns. Peace lilies tolerate low light but actually prefer bright, indirect sunlight for optimal development.
Michigan’s shorter winter days compound this light shortage problem indoors.
Nutrient-depleted soil cannot support healthy growth over time in container plants. The limited soil in pots runs out of essential nutrients eventually.
Without regular feeding, your peace lily simply lacks the building blocks for new leaves.
Root-bound conditions restrict growth when roots circle the pot with nowhere to expand. The plant exhausts available resources and cannot access fresh soil. This commonly happens after several years in the same container.
Relocate your peace lily to a brighter spot with filtered sunlight. North or east-facing windows work wonderfully in Michigan homes. Avoid direct afternoon sun that can scorch the leaves.
Feed your plant monthly during spring and summer with a balanced, diluted liquid fertilizer. Use half the recommended strength to avoid over-fertilization.
Check if roots are circling the pot and repot into a slightly larger container with fresh soil.
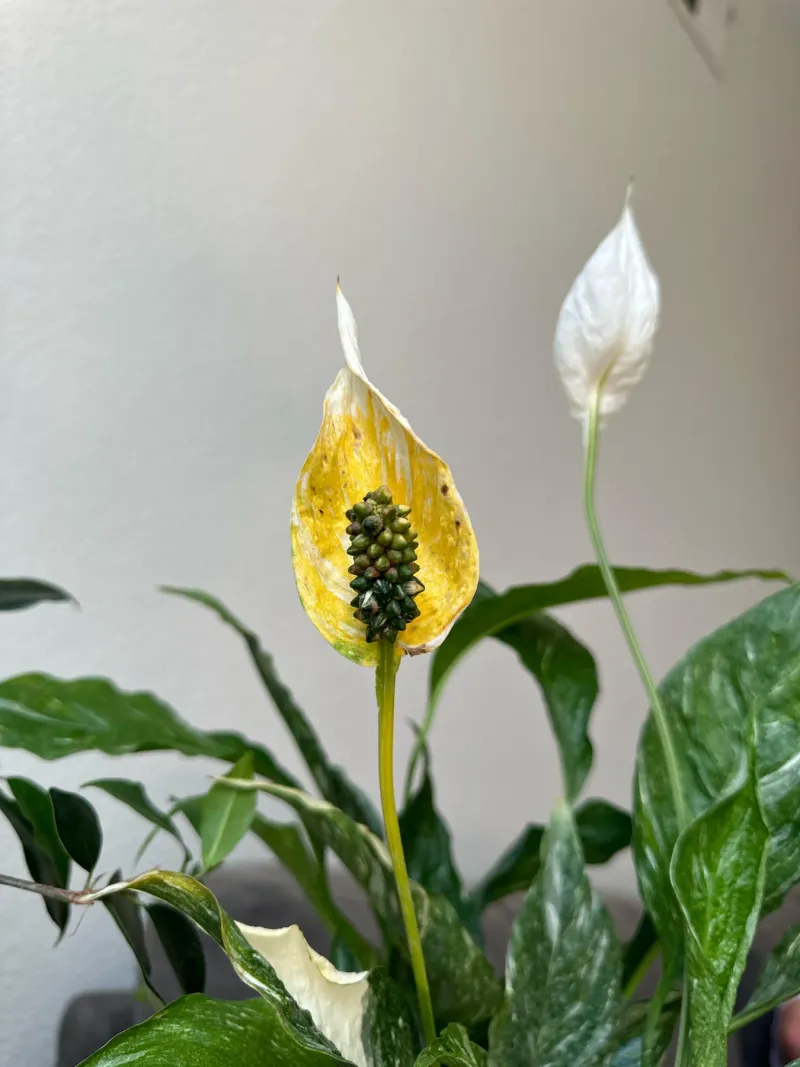
5. Faded Or Lack Of Blooms

Peace lily blooms are the main attraction, those elegant white spathes that rise above the foliage like graceful sails. When your plant refuses to bloom or produces only pale, lackluster flowers, disappointment sets in quickly.
Flowering issues usually stem from specific care gaps that are easily corrected.
Inadequate light levels prevent blooming more than any other single factor. These plants need bright, indirect light to trigger flower production.
The low light corners where peace lilies survive are simply too dark for blooming.
Stress from inconsistent care, temperature fluctuations, or recent transplanting can halt flowering temporarily. Peace lilies need to feel settled and comfortable before directing energy toward blooms.
Michigan’s winter heating challenges can create ongoing stress for tropical plants.
Age plays a role in blooming frequency as well for these houseplants. Young peace lilies may take a year or two to reach blooming maturity. Very old plants sometimes slow their flowering as they age naturally.
Move your plant to the brightest indirect light available in your home. East-facing windows provide ideal morning sun without harsh afternoon rays.
Maintain consistent watering and temperature conditions throughout the year.
Remove spent flower stalks by cutting them at the base once they fade. This encourages the plant to produce new blooms instead of wasting energy.
Consider a bloom-boosting fertilizer with slightly higher phosphorus during growing season.
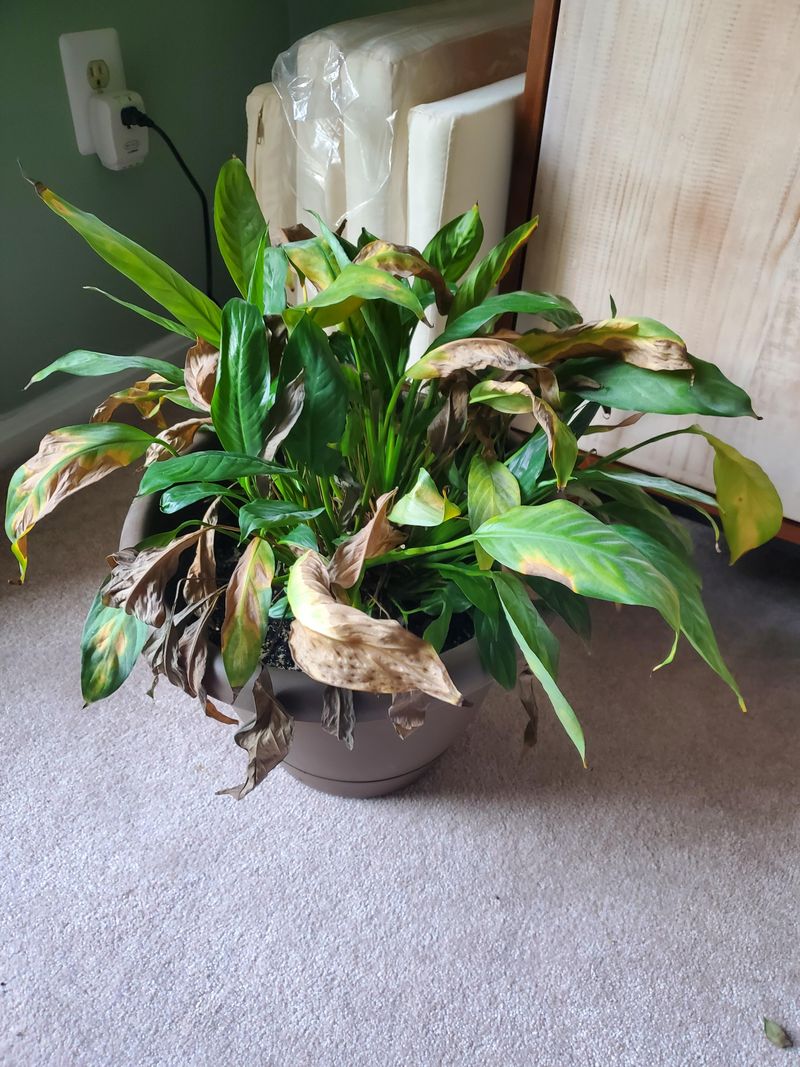
6. Brown Patches On Leaves
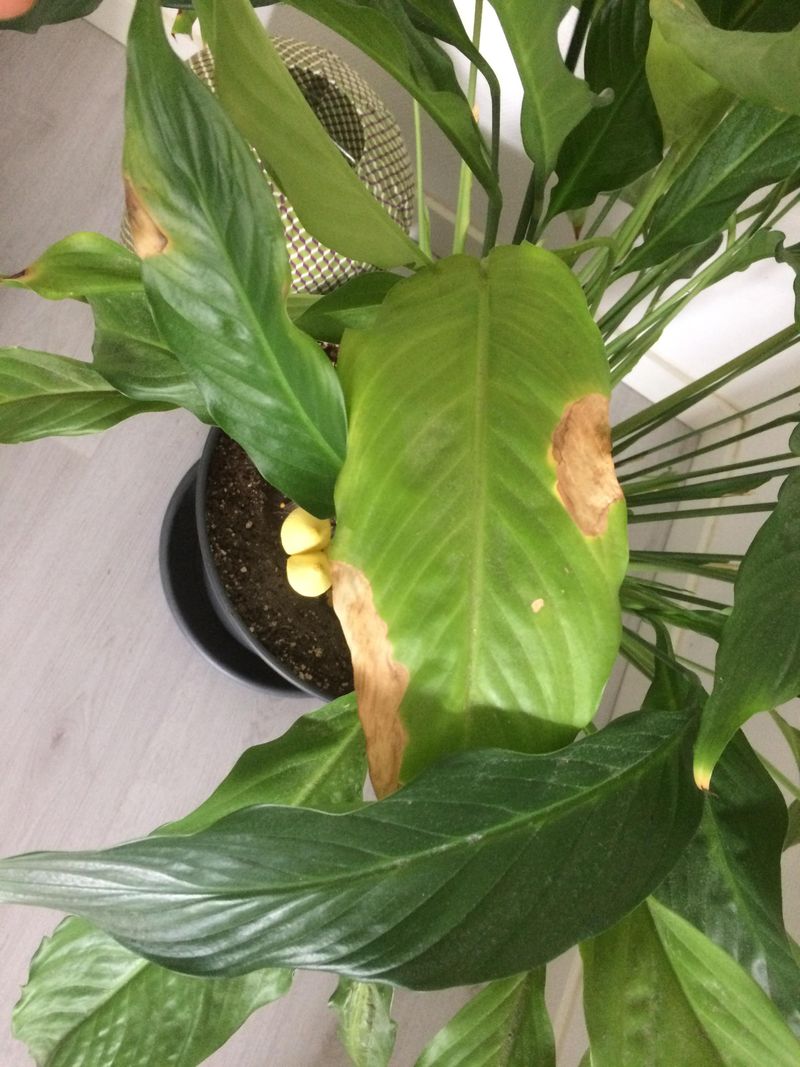
Large brown patches appearing on peace lily leaves look alarming and quite different from simple tip browning. These irregular spots or sections indicate more serious damage to the leaf tissue.
The patches often have a papery, burned appearance that stands out against healthy green areas.
Direct sunlight is the primary cause of these unsightly brown patches on leaves. Peace lilies evolved under rainforest canopies with filtered light, not harsh direct sun.
Even a few hours of direct rays through Michigan windows can scorch the foliage.
Sudden temperature changes from drafts or heating vents also create brown patches on leaves. Cold air blasting from air conditioning or hot air from furnace vents damages leaf tissue.
This type of damage appears more gradually than sunburn but looks similar.
Chemical exposure from cleaning products or leaf shine sprays sometimes causes brown spotting. Fluoride toxicity from tap water can create brown patches as well.
These chemicals damage cells and create visible injury on the leaves.
Relocate your plant away from windows where direct sunlight streams through during any part of the day. Find a spot with bright but filtered light instead.
Sheer curtains help diffuse harsh sunlight beautifully.
Keep your peace lily away from heating and cooling vents that blow directly on the foliage. Maintain stable temperatures without sudden fluctuations. Use distilled water if your tap water contains high fluoride levels.
7. Pests Like Spider Mites, Mealybugs, And Aphids
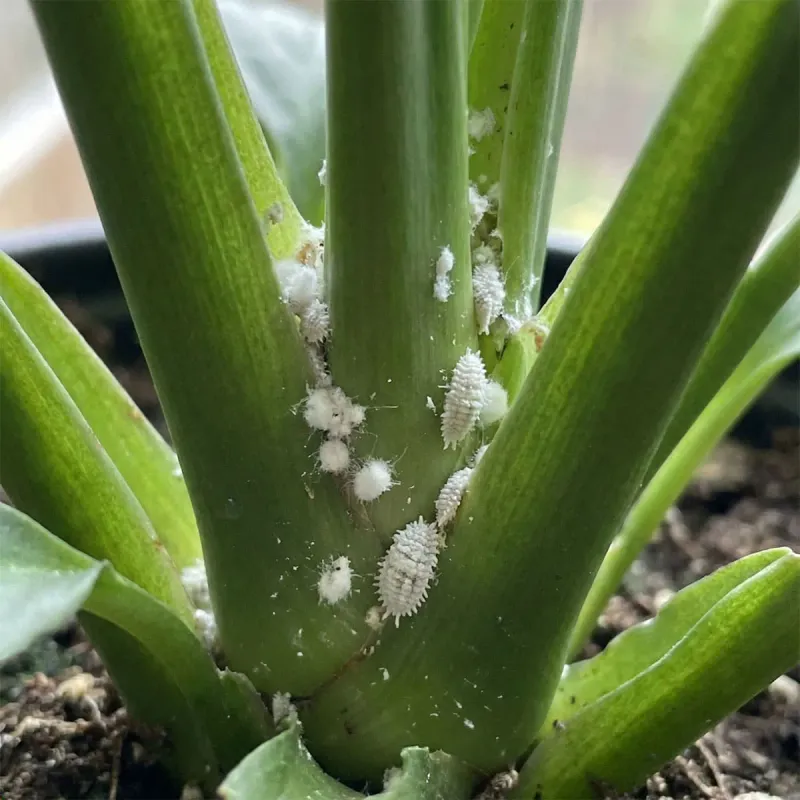
Discovering tiny insects crawling on your peace lily leaves creates an immediate sense of urgency. Common indoor pests including spider mites, mealybugs, and aphids occasionally target these plants.
Dry indoor air during Michigan winters makes peace lilies more vulnerable to pest infestations.
Spider mites are nearly invisible tiny pests that create fine webbing on leaves. They suck plant juices, causing stippled yellow spots and eventually leaf drop.
These pests multiply rapidly in warm, dry conditions typical of heated homes.
Mealybugs appear as small white cottony masses tucked into leaf joints and stems. They also feed on plant sap, weakening the peace lily over time. These pests are slightly larger and easier to spot than spider mites.
Aphids are small, soft-bodied insects that cluster on new growth and flower stems. They reproduce quickly and can spread to other nearby houseplants. Sticky honeydew residue on leaves indicates their presence even before you spot them.
Inspect your peace lily regularly by checking under leaves and along stems. Wipe leaves with a damp cloth to remove pests and their eggs. Increase humidity around the plant with regular misting or a humidifier.
Spray affected plants with insecticidal soap or neem oil solution following label directions. Isolate infested plants from other houseplants to prevent spreading.
Repeat treatments every few days until pests are completely gone.
8. Root Rot

Root rot represents one of the most serious problems that can affect your peace lily. This condition develops silently beneath the soil surface before symptoms appear above ground.
By the time you notice problems with the foliage, significant root damage has already occurred.
Overwatering combined with poor drainage creates the perfect conditions for root rot fungi. The roots literally drown in waterlogged soil without access to oxygen. Healthy white roots turn brown, mushy, and eventually disintegrate completely.
Heavy potting soil that retains too much moisture makes the problem worse. Clay-based mixes or old, compacted soil cannot drain properly after watering. Water pools around roots instead of flowing through the container.
Symptoms include yellowing leaves, wilting despite wet soil, and a foul odor from the pot. The plant looks increasingly unhealthy no matter what you do.
Eventually, the stems become soft and the entire plant collapses.
Remove your peace lily from its pot immediately and examine the roots carefully. Healthy roots appear white or tan and feel firm to touch. Trim away all brown, mushy, or foul-smelling roots with sterile scissors.
Repot the plant in completely fresh, well-draining potting mix formulated for houseplants. Choose a pot with multiple drainage holes at the bottom.
Water sparingly until new growth indicates the plant is recovering and establishing new roots.
9. Leaf Curling
Peace lily leaves that curl inward or develop a cupped appearance signal environmental stress. This defensive response helps the plant reduce moisture loss through its foliage.
Curling leaves look unusual and indicate the plant is struggling with its growing conditions.
Low humidity is the leading cause of leaf curling in Michigan homes. Winter heating systems strip moisture from indoor air, creating desert-like conditions.
Peace lilies respond by curling their leaves to conserve precious water.
Underwatering allows soil to become too dry, triggering the same curling response. The plant cannot maintain proper leaf turgor pressure without adequate moisture.
Leaves curl to minimize the surface area exposed to dry air.
Temperature stress from cold drafts or excessive heat also causes leaves to curl. These tropical plants prefer consistent warmth without extreme fluctuations.
Michigan’s variable indoor temperatures during seasonal transitions create challenges for sensitive houseplants.
Increase humidity around your peace lily using several methods that work together. Place the pot on a tray filled with pebbles and water. Group plants together to create a more humid microclimate.
Mist the leaves daily during dry winter months when heating systems run constantly. Check soil moisture regularly and water when the top inch feels dry.
Move your plant away from drafty windows, exterior doors, and heating vents that create temperature swings.
10. Soil Odor Or Fungus
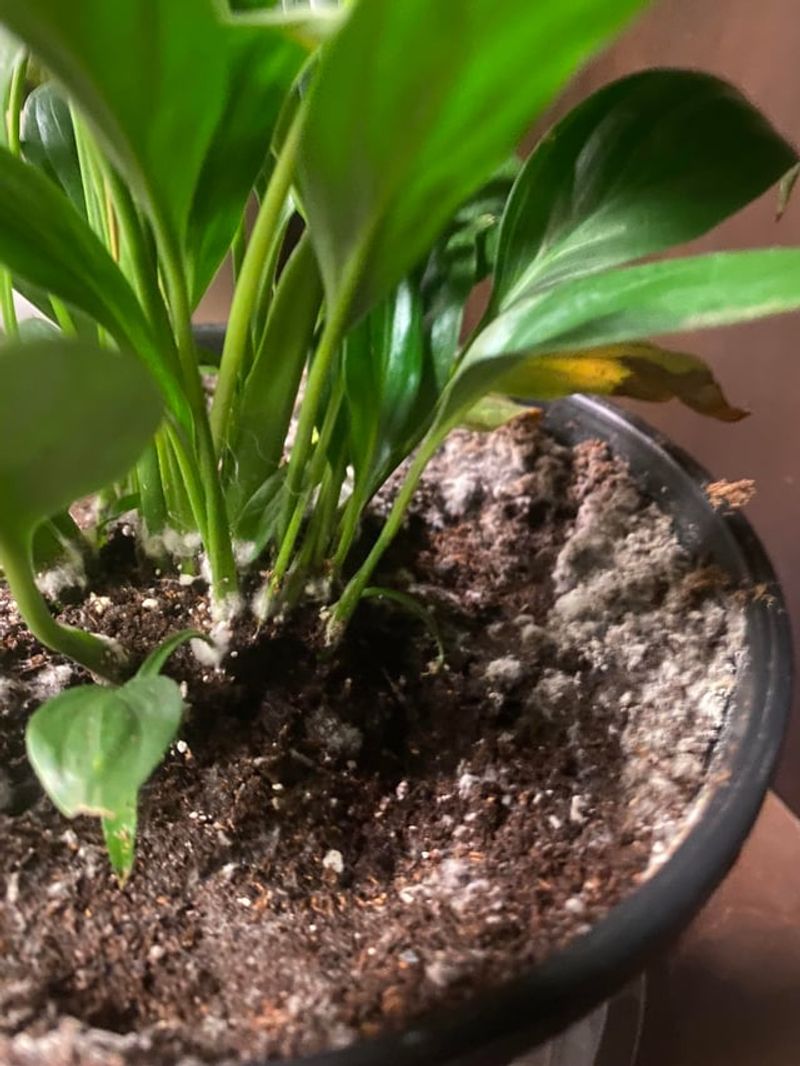
A musty, unpleasant smell coming from your peace lily’s soil signals trouble brewing beneath the surface. Healthy potting soil should smell earthy and fresh, not sour or rotten.
This odor indicates anaerobic conditions where beneficial organisms cannot survive and harmful fungi thrive.
Overwatering is almost always the root cause of smelly, fungal soil problems. Constantly saturated soil lacks oxygen and creates perfect conditions for mold and fungus.
White, fuzzy growth may appear on the soil surface as the problem worsens.
Poor air circulation around the pot contributes to fungal growth on soil. Stagnant air in corners or crowded plant displays prevents the soil surface from drying. Michigan’s humid summer months can make this issue worse despite our dry winters.
Old, compacted potting soil that has broken down loses its structure over time. Water cannot drain properly through degraded soil, leading to soggy conditions. The soil becomes a breeding ground for unwanted organisms.
Reduce your watering frequency immediately if you notice soil odor or surface mold. Allow the top several inches of soil to dry out completely. Scrape off any visible mold or fungus from the soil surface.
Improve air circulation around your peace lily by spacing it away from walls and other plants. Consider repotting in fresh, well-draining soil if the problem persists.
Always use pots with drainage holes to prevent water accumulation at the bottom.