Early Spring Gardening Tasks North Carolina Gardeners Use To Wake Up Their Gardens
North Carolina gardeners know that the first hints of early spring mean it is time to wake the garden up and get ahead of the growing season.
As chilly days fade and the soil slowly warms, what you do now can make the difference between an average garden and one that truly thrives. This is the moment to refresh beds, boost soil health, and set the stage for strong roots and vibrant growth.
A few smart moves early on can lead to fuller blooms, healthier plants, and bigger harvests in the months ahead. Skip these steps, and your garden may struggle to catch up all season. The good news is you do not need complicated methods or expensive tools to get it right.
These ten essential early spring tasks will help you prepare your North Carolina garden for a lush, colorful, and highly productive growing season.
1. Check Soil Moisture Before Working Beds
Eager gardeners sometimes rush into spring tasks before conditions are right. Working waterlogged soil from winter rains causes compaction that squeezes out air pockets roots need to thrive.
Compacted soil becomes dense and hard, making it difficult for roots to penetrate and water to drain properly.
The squeeze test tells you when your soil is ready. Grab a handful of soil and squeeze it firmly in your palm. If water drips out or the soil forms a tight ball that doesn’t crumble, it’s too wet.
Properly workable soil will form a loose ball that breaks apart easily when you poke it. This texture indicates the right balance of moisture for cultivation. Working soil at this stage protects its structure and promotes healthy root development.
North Carolina’s variable spring weather means some weeks are wetter than others. Be patient and wait a few days after heavy rain before digging or tilling. Your patience now prevents problems that can last the entire growing season.
Different soil types dry at different rates. Clay soils hold moisture longer than sandy soils. Get to know your garden’s drainage patterns so you can time your work perfectly each spring.
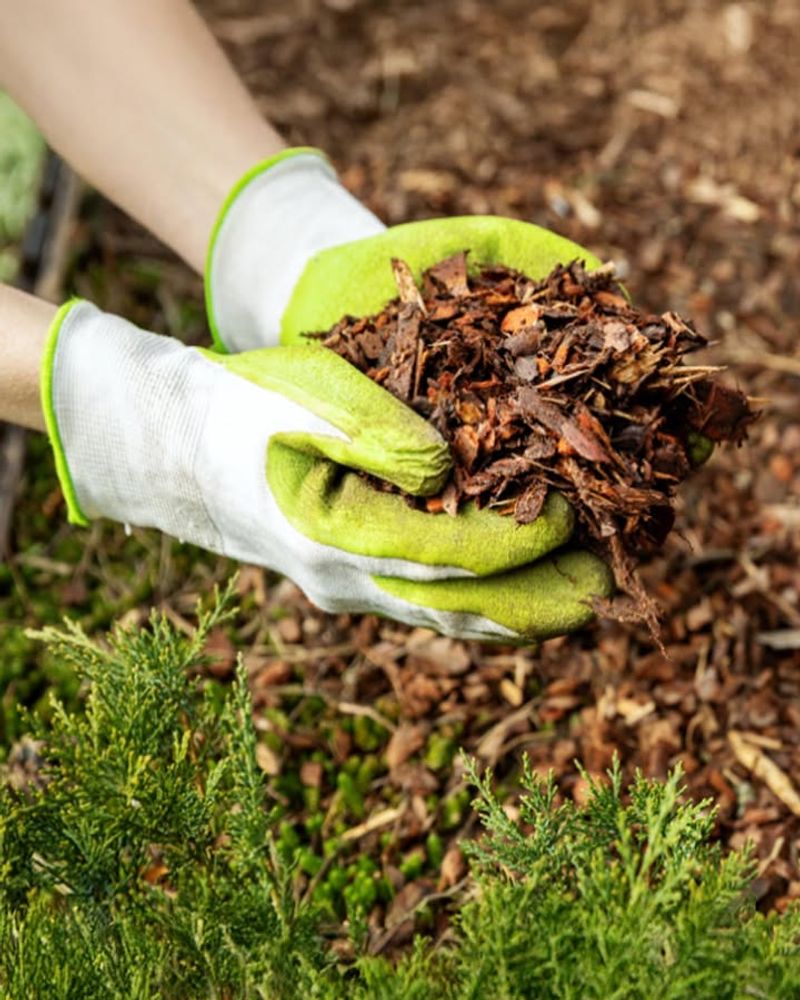
2. Clear Winter Debris And Garden Residue

Winter leaves behind a blanket of fallen leaves, broken stems, and leftover plant material that can smother emerging growth.
This debris traps moisture against the soil surface, creating conditions where fungal issues and plant stress can develop. Removing these materials allows fresh air to circulate freely around your plants.
Start by raking away leaves from garden beds and around the base of perennials. Pull out any remaining annual plant stems from last season. Check under shrubs and along fences where debris tends to accumulate.
Good airflow is essential for preventing moisture-related problems as temperatures fluctuate in early spring. When beds are clear, sunlight reaches the soil more effectively, helping it warm up faster. This encourages beneficial soil organisms to become active again.
Add the collected debris to your compost pile if it’s disease-free. Diseased material should be disposed of separately to prevent spreading problems. A clean garden bed gives you a fresh canvas for the season ahead.
This simple task takes just an hour or two but makes a tremendous difference. Your plants will thank you with stronger growth and fewer complications. Plus, you’ll be able to see exactly what survived winter and what needs replacing.
3. Prune Dormant Trees And Shrubs
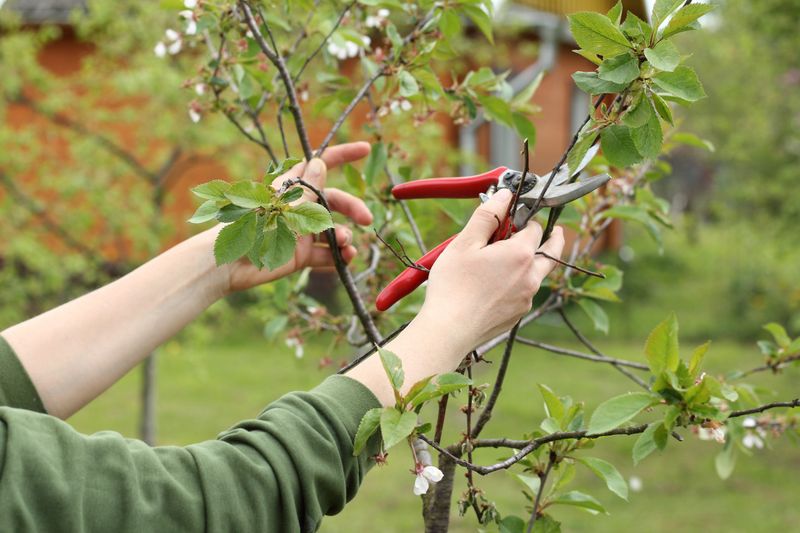
Late winter through early spring offers the best window for pruning most trees and shrubs. Plants are still dormant, making it easier to see their structure without leaves blocking your view. Cuts heal quickly once growth resumes, and you reduce stress on the plant.
Focus on removing branches that cross or rub against each other. Take out any damaged or diseased wood you notice. Thin crowded areas to improve light penetration and air circulation throughout the canopy.
Proper pruning encourages balanced growth and helps maintain the natural shape of your plants.
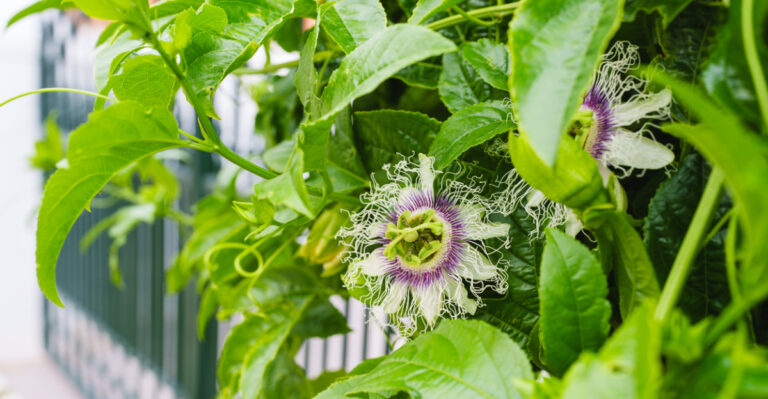
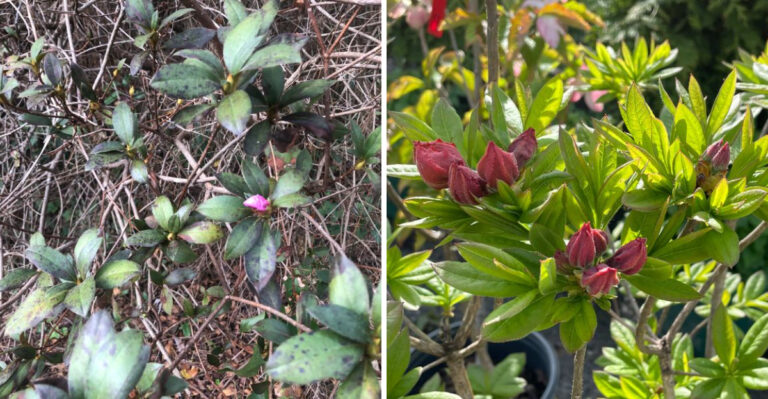
It also redirects energy toward developing strong, productive branches. Spring-flowering shrubs like azaleas should wait until after they bloom, but summer bloomers can be pruned now.
Make clean cuts just above a bud or branch junction. Avoid leaving stubs that can invite decay. Use sharp, clean tools to prevent tearing bark or spreading disease between plants.
NC State Extension recommends pruning while buds are still tight and dormant. This timing minimizes sap loss and reduces the chance of attracting insects to fresh wounds. Your trees and shrubs will respond with vigorous, healthy growth as temperatures rise.
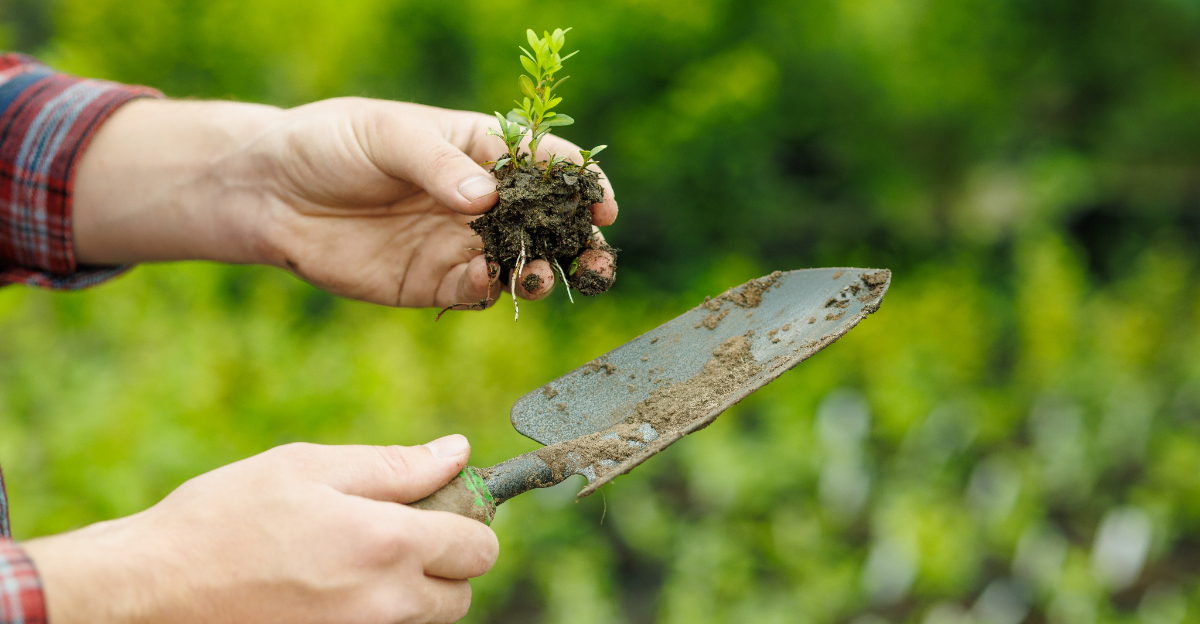
4. Divide And Replant Overcrowded Perennials
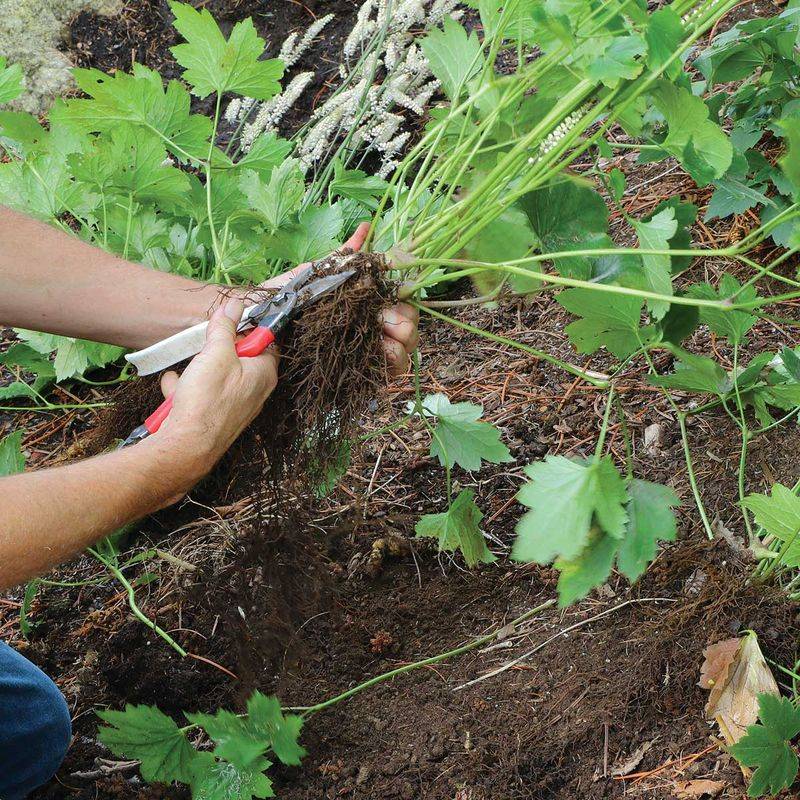
Perennials that have been growing in the same spot for several years often become overcrowded. Their centers may look sparse while outer edges stay lush. This crowding reduces flowering and overall plant vigor as roots compete for nutrients and water.
Early spring division rejuvenates these tired clumps before they put energy into new growth. Hostas, daylilies, and ornamental grasses respond especially well to this treatment. Dig up the entire clump and use a sharp spade or knife to separate it into sections.
Each division should have healthy roots and several growth points. Replant divisions at the same depth they were growing before. Space them appropriately to allow room for future growth.
Water newly divided perennials thoroughly to help them establish. They may look small at first, but they’ll fill in quickly with renewed energy. Division also gives you extra plants to share with friends or fill other garden areas.
Most perennials benefit from division every three to five years. This regular maintenance keeps them blooming abundantly and looking their best. Spring’s cool, moist conditions help divisions recover quickly with minimal stress.
5. Apply Fresh Mulch After Soil Warms Slightly
Mulch acts as a protective blanket that regulates soil temperature and conserves precious moisture. Wait until the soil has warmed a bit before applying mulch in spring. Putting it down too early can trap cold in the soil and slow plant growth.
A two to three inch layer provides optimal benefits without suffocating plant roots. Pull mulch back slightly from plant stems and tree trunks to prevent moisture buildup against bark. This spacing reduces the risk of rot and pest problems.
Organic mulches like shredded hardwood, pine straw, or compost break down gradually, improving soil structure over time. They also suppress weed seeds by blocking light needed for germination. Less weeding means more time enjoying your garden.
Fresh mulch gives beds a neat, finished appearance that enhances curb appeal. It creates a consistent background that makes flowers and foliage stand out beautifully. The layer also cushions soil from heavy rain, preventing erosion and nutrient loss.
Replenish mulch annually as it decomposes and settles. Avoid piling new mulch on top of old layers that have become matted. Fluff existing mulch first or remove excess before adding fresh material for best results.
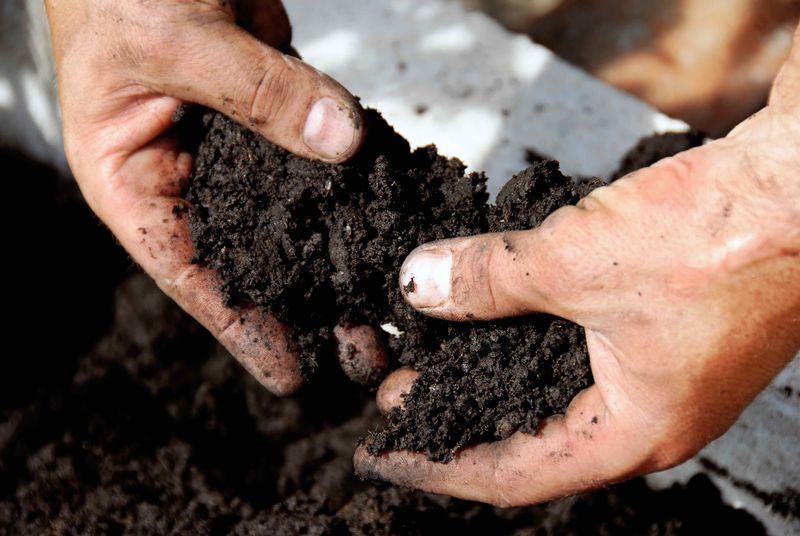
6. Test And Adjust Soil Nutrients
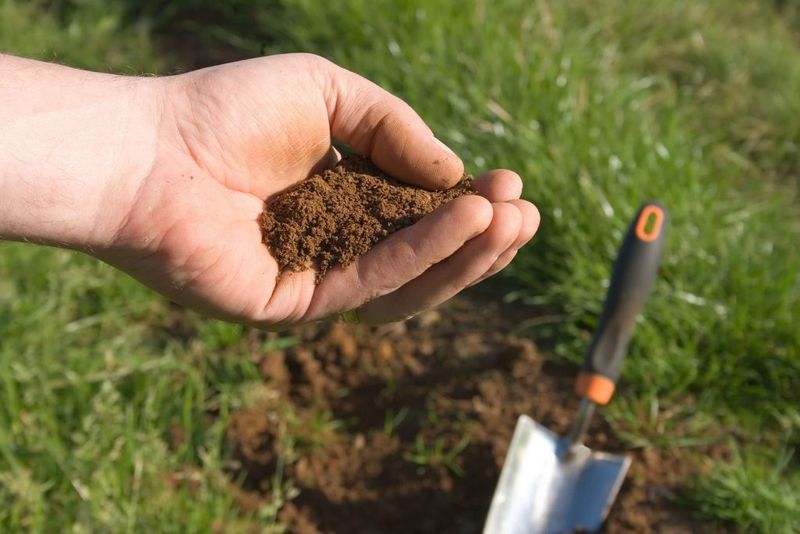
Soil testing removes the guesswork from fertilizing and amending your garden. A simple test reveals pH levels and nutrient concentrations that directly affect plant health.
North Carolina soils often need lime to raise pH or sulfur to lower it for optimal nutrient availability.
Contact your local Cooperative Extension office for soil testing information. They provide reliable testing at reasonable prices with detailed recommendations. Collect samples from different garden areas since conditions can vary across your property.
Test results guide you toward the right amendments and fertilizers for your specific needs. Over-fertilizing wastes money and can harm plants and waterways. Applying exactly what your soil needs promotes healthy growth without excess.
Early spring testing gives you time to incorporate amendments before planting. Lime and sulfur need several weeks to adjust pH effectively. Organic matter additions also benefit from time to begin breaking down.
Most gardens benefit from testing every two to three years. Vegetable gardens may need annual testing due to heavy nutrient demands. Keep records of your results and amendments to track changes over time and refine your approach each season.
7. Plant Cool-Season Crops
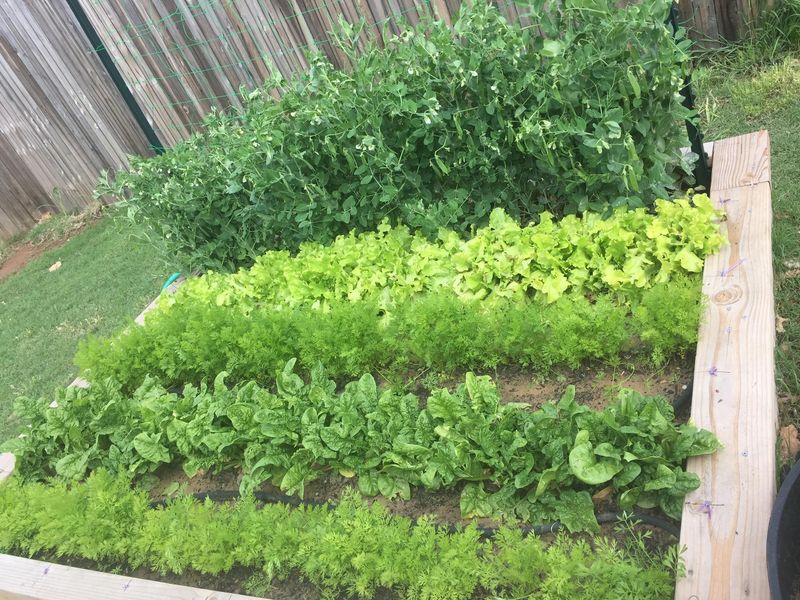
Cool-season vegetables thrive in the moderate temperatures of North Carolina’s early spring. Lettuce, spinach, peas, and carrots actually prefer cooler weather and can tolerate light frosts. Planting them now gives you fresh harvests before summer heat arrives.
Wait until soil is workable and has dried sufficiently from winter moisture. Seeds germinate poorly in cold, soggy conditions. Soil temperature matters more than air temperature for successful germination and early growth.
Direct sow peas, carrots, and radishes right into garden beds. Start lettuce and spinach from transplants or seeds depending on your preference. Transplants give you a head start, while seeds offer more variety choices.
These crops grow quickly in spring’s lengthening days. Many will be ready to harvest in just six to eight weeks. Succession planting every two weeks extends your harvest period throughout spring.
Protect young seedlings from unexpected late cold snaps with row covers or cloches. These simple covers trap warmth while allowing light and moisture through.
Cool-season crops are forgiving and resilient, making them perfect for both new and experienced gardeners looking for early success.
8. Remove Winter Protection Gradually
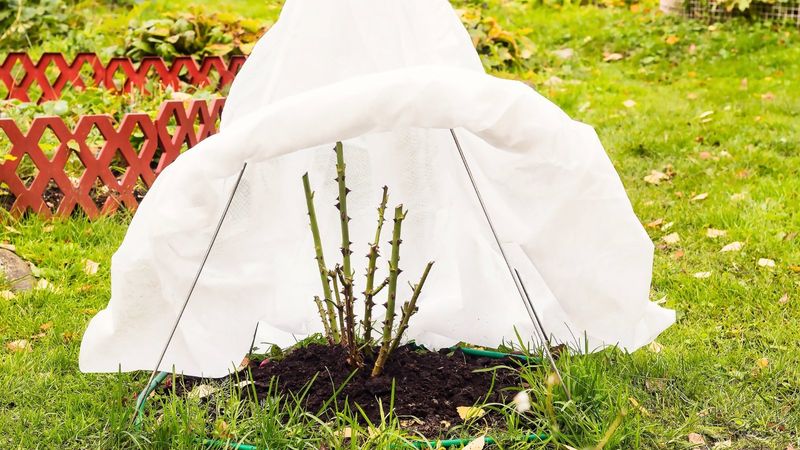
Winter protection like burlap wraps, frost blankets, and mulch mounds served your plants well during cold months.
Removing these safeguards requires a thoughtful approach rather than rushing to strip everything away at once. Sudden exposure can shock plants adjusting to changing conditions.
Monitor weather forecasts for late cold snaps that sometimes surprise North Carolina gardeners.
Keep protection materials handy in case temperatures drop unexpectedly. Gradual removal allows plants to acclimate naturally to increasing light and fluctuating temperatures.
Start by loosening wraps or opening one side to allow air circulation. After several days of mild weather, remove coverings completely during daytime hours. Replace them at night if frost threatens, then try again when conditions stabilize.
Pull back extra mulch mounded around tender plants once new growth appears. Leave the standard mulch layer in place for continued benefits. Watch for signs of new shoots emerging, which indicate plants are ready for full exposure.
This careful transition prevents sunscald on bark and foliage that has been covered for months. It also reduces stress that can weaken plants just as they need energy for spring growth. Patience during this phase pays off with healthier, more resilient plants.
9. Edge And Repair Garden Borders

Winter weather takes a toll on garden bed edges through freeze-thaw cycles and heavy rainfall.
Soil shifts and spreads into lawn areas, while grass creeps into beds. Well-defined edges improve drainage, contain mulch, and give your landscape a polished, professional appearance.
Use a flat spade or half-moon edger to cut a clean line between beds and lawn. Angle your cut slightly toward the bed to create a small trench. This depression catches water runoff and prevents grass roots from spreading into planted areas.
Remove excess soil that has washed or shifted out of place. Add it back to low spots in beds or use it to fill other areas of your landscape. Proper bed height and shape direct water away from plant crowns where it could cause problems.
Consider installing permanent edging materials like metal strips or stone if you prefer less maintenance. These barriers reduce the need for frequent re-edging while maintaining clean lines. They also make mowing easier by creating a clear boundary.
Sharp edges make even a simple garden look intentional and cared for. This task takes minimal time but dramatically improves overall appearance. Your entire landscape will look more cohesive and well-maintained with crisp, defined borders.
10. Monitor For Early Weed Growth

Weeds wake up right alongside your desirable plants as soil temperatures rise. Catching them while they’re small and haven’t developed extensive root systems makes removal far easier.
Early intervention prevents these opportunists from stealing water, nutrients, and sunlight your plants need.
Walk through your garden regularly to spot new weed seedlings. Pull them by hand when soil is slightly moist, which releases roots more completely. A few minutes of weeding now saves hours of work later when weeds have matured and spread seeds.
Mulch helps suppress weed germination, but some determined seedlings still push through. Address these promptly before they establish strong roots. Perennial weeds like dandelions need their entire taproot removed to prevent regrowth.
Avoid disturbing soil unnecessarily, as this brings buried weed seeds to the surface where they can germinate. Use a sharp hoe to sever annual weeds just below the soil surface rather than cultivating deeply. This technique is quick and effective for large areas.
Consistent early-season weeding establishes control that lasts throughout the growing season.
Weeds compete aggressively with young plants trying to establish themselves. Removing this competition gives your flowers and vegetables the best possible start for vigorous, healthy growth ahead.