How To Plant And Grow Garlic Successfully In Oregon
Growing garlic in Oregon is one of those gardening moves that feels almost suspiciously rewarding. You plant a few humble cloves, wait through the seasons, and end up pulling fat, fragrant bulbs out of the ground like some kind of backyard magician.
Of course, Oregon likes to keep things interesting. The wet weather, cool temperatures, and heavy soils in many parts of the state can make garlic either a total success story or a soggy little disappointment.
That is why a good start matters. The right planting time, decent soil, and a little restraint with watering can make all the difference between bulbs that thrive and bulbs that pout.
The good news is garlic actually does very well in Oregon when you give it what it wants. Once you know the basics, it is one of the easiest and most satisfying crops to grow.
And yes, homegrown garlic really does taste better, which makes the whole thing even more worth it.
1. Start With Seed Garlic
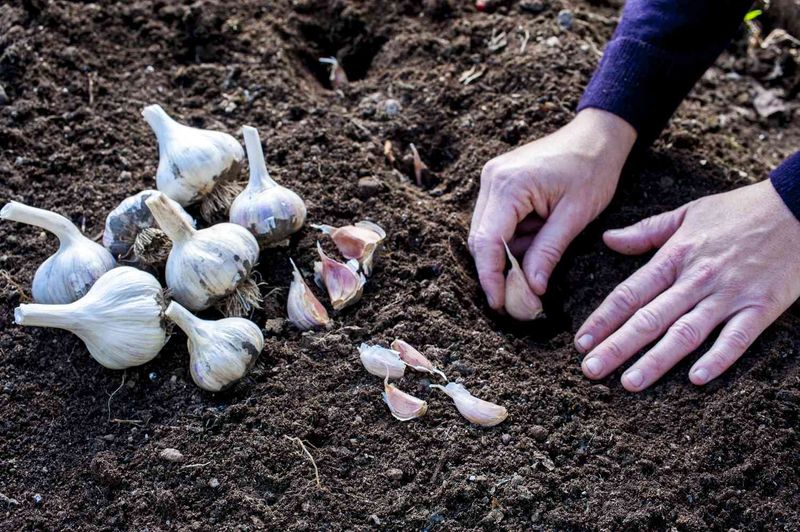
Not all garlic is created equal, and the type you start with makes a huge difference in your final harvest. Seed garlic is garlic that has been grown specifically for planting.
It’s clean, disease-free, and selected for strong bulb production. Never use garlic from the grocery store.
Store-bought garlic is often treated with chemicals that slow sprouting, and it may carry diseases that can spread through your Oregon garden soil.
Oregon State University Extension recommends choosing varieties that match your local climate. Hardneck varieties like ‘Spanish Roja,’ ‘German Red,’ and ‘Music’ are excellent choices for Oregon.
They produce bold, rich flavors and are well-suited to the state’s cool winters. Softneck types like ‘Silverskin’ and ‘Inchelium Red’ grow larger bulbs and store longer, making them great if you want garlic that lasts through the year.
You can buy seed garlic from local Oregon nurseries, farmers markets, or online seed companies. Look for bulbs that are firm, large, and free from soft spots or mold.
The bigger the clove you plant, the bigger the bulb you’ll harvest. Break the bulbs apart just before planting, not weeks ahead.
Keeping cloves in the bulb until planting day helps protect them and gives you the strongest possible start for your Oregon garden.
2. Plant In Full Sun
Garlic is a sun-loving crop. It needs at least six to eight hours of direct sunlight each day to grow strong, healthy bulbs.
When picking your planting spot in Oregon, look for an area that gets full morning and afternoon sun. Avoid planting near tall fences, large shrubs, or trees that cast shade for most of the day.
Shaded garlic tends to produce smaller bulbs and weaker plants overall.
Oregon’s western side, including the Willamette Valley, gets plenty of sun during the spring and summer growing season. Eastern Oregon tends to be even sunnier, which makes it excellent for garlic production.
No matter where you are in the state, finding the sunniest patch in your yard is the first key to success. Even a few extra hours of daily sun can lead to noticeably larger bulbs come harvest time.
Full sun also helps keep the soil warm and dry between waterings, which reduces the chance of rot and fungal problems. Garlic planted in shady, damp spots is much more likely to struggle with disease.
Think about how the sun moves across your yard throughout the day. Watch the spot for a full day before committing to it.
A little planning at this stage pays off with a much healthier, more productive garlic bed all season long in your Oregon garden.
3. Use Loose, Rich Soil
Soil quality is one of the biggest factors in how well your garlic grows. Garlic needs loose, well-drained soil that’s packed with organic matter.
Heavy clay soil holds too much water and can cause bulbs to rot before they ever get a chance to develop. Sandy soil drains too fast and doesn’t hold enough nutrients.
The sweet spot is a loamy, crumbly soil that holds some moisture but also lets excess water drain away easily.
Before planting, work your Oregon garden bed with a fork or tiller to loosen the soil to about 10 to 12 inches deep. Add a generous layer of compost or aged manure and mix it in well.
This boosts nutrients and improves soil texture at the same time. Garlic thrives in soil with a pH between 6.0 and 7.0.
If you’re unsure about your soil’s pH, pick up a simple test kit from a local Oregon garden center. It’s quick, easy, and takes the guesswork out of soil prep.
Many Oregon gardeners also add a slow-release balanced fertilizer at planting time to give cloves an early nutrient boost. Avoid high-nitrogen fertilizers in late spring, as too much nitrogen late in the season pushes leafy growth instead of bulb development.
Healthy, prepared soil gives garlic roots room to spread out and anchors the plant through Oregon’s wet winter months. Great soil is the foundation of a great harvest.
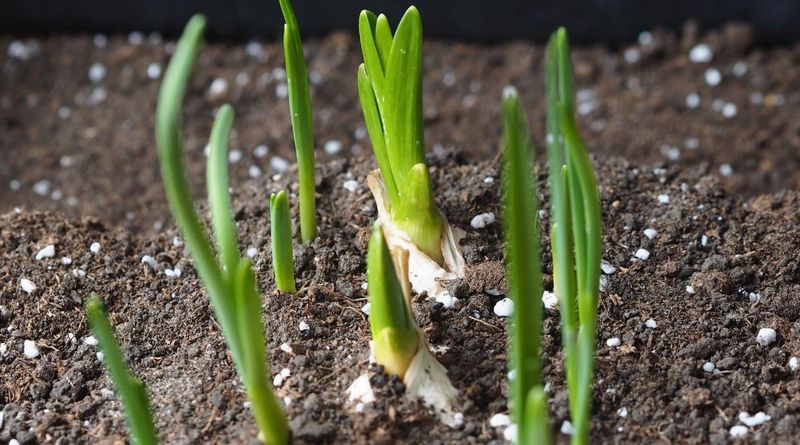
4. Plant Cloves The Right Way Up
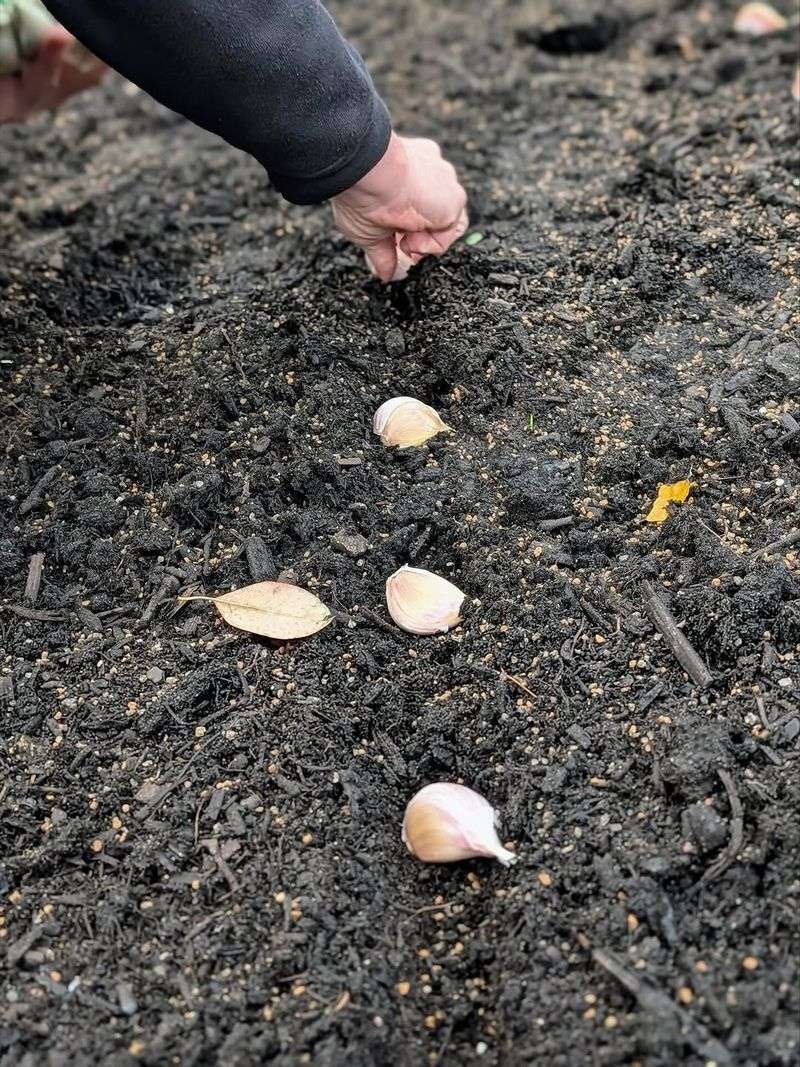
Here’s a detail that trips up a lot of first-time garlic growers: the clove must go into the ground pointed end up. The pointed tip is where the green shoot will emerge.
The flat, root end goes down. If you plant it upside down, the garlic will still grow, but it’ll have to twist and work its way around underground, which wastes energy and often leads to smaller, oddly shaped bulbs.
Plant each clove about two inches deep in Oregon’s garden soil. Push it in gently with your finger or use a small dibber tool to make a hole.
Place the clove in the hole with the pointed tip facing the sky, then cover it with soil and firm it down lightly. Don’t press too hard, as compacted soil makes it harder for roots to spread.
Two inches of depth is the sweet spot. Too shallow and the clove may heave out of the ground during Oregon’s winter freeze-thaw cycles.
Too deep and it struggles to push through.
After planting, water the bed thoroughly to settle the soil around the cloves. Then add a two to three inch layer of straw or shredded leaf mulch over the top of the bed.
Mulch keeps the soil temperature stable through cold Oregon winters, holds in moisture, and slows weed growth. It’s one of the simplest things you can do that makes a real and noticeable difference in how your garlic performs come spring.
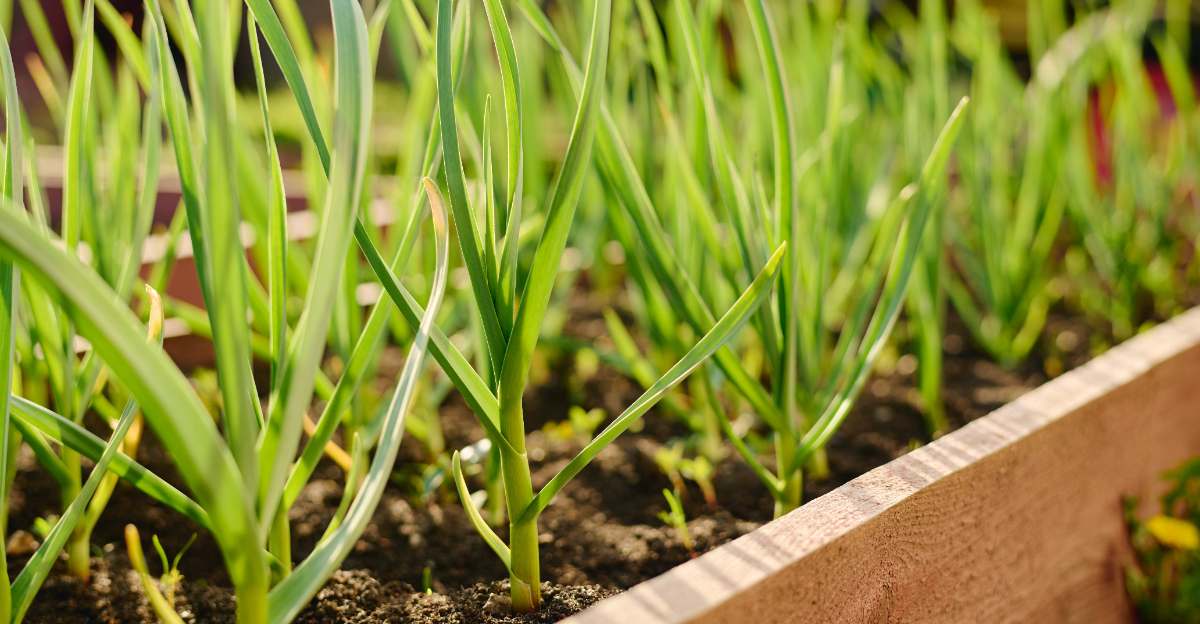
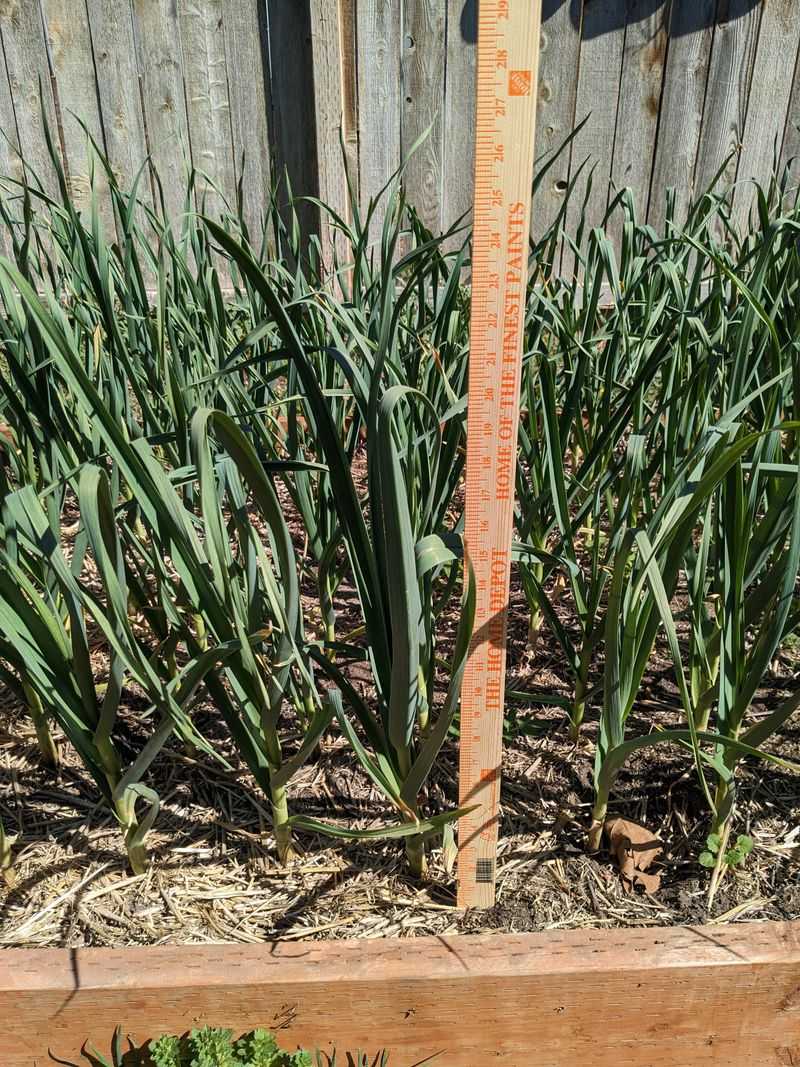
5. Space Them For Bigger Bulbs
Crowding is one of the most common mistakes Oregon garlic growers make. When cloves are planted too close together, they compete for water, nutrients, and space underground.
The result is a bunch of small, underdeveloped bulbs instead of the large, round heads everyone hopes to pull out of the ground in summer. Giving each clove enough room is one of the easiest ways to improve your harvest without spending any extra money.
Plant cloves four to six inches apart within each row. Leave about ten to fourteen inches of space between rows.
This spacing gives each bulb room to expand underground as it grows through winter and spring. It also allows for better air circulation between plants, which helps reduce the risk of fungal diseases.
Oregon’s wet winters can make moisture-related issues more common, so spacing matters even more here than in drier climates.
If you’re working with a small raised bed in your Oregon backyard, you can plant in a grid pattern instead of traditional rows. Just maintain that four to six inch spacing in every direction.
Mark your rows with small stakes or string before planting so you stay consistent. It’s surprisingly easy to accidentally squeeze cloves too close when you’re excited to get them all in the ground.
A little extra space now leads to noticeably larger, more impressive bulbs when harvest time finally arrives in your Oregon garden.
6. Keep Weeds And Water In Check
Garlic is not a fan of competition. Weeds steal nutrients, water, and light right from under your garlic plants.
Once weeds get established in your garlic bed, they’re much harder to remove without disturbing the growing bulbs below the soil. Staying on top of weeding from early spring through late spring is one of the most important maintenance tasks for Oregon garlic growers.
Pull weeds by hand or use a shallow hoe, being careful not to dig too deep near the garlic roots.
The mulch you applied at planting time will help a lot with weed control through Oregon’s rainy winter months. But once spring arrives and growth picks up, check the bed weekly and remove any weeds that push through.
Staying consistent with this task throughout the season makes a real difference. A clean, weed-free bed allows garlic to put all its energy into building bigger, fuller bulbs rather than fighting for resources.
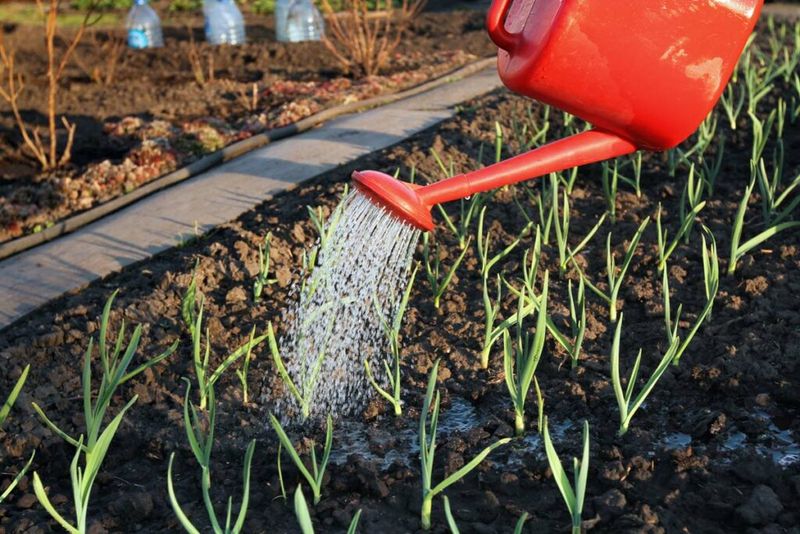
Watering needs to be balanced carefully. Garlic needs steady moisture during its active growing period, especially from March through May in Oregon.
Water deeply once or twice a week during dry spells, letting the soil dry slightly between sessions. Overwatering is a common issue and can lead to soft, rotted bulbs.
Stop watering entirely about two weeks before your expected harvest date. This helps the outer skin of the bulb dry and firm up, which protects it during curing and storage after harvest.
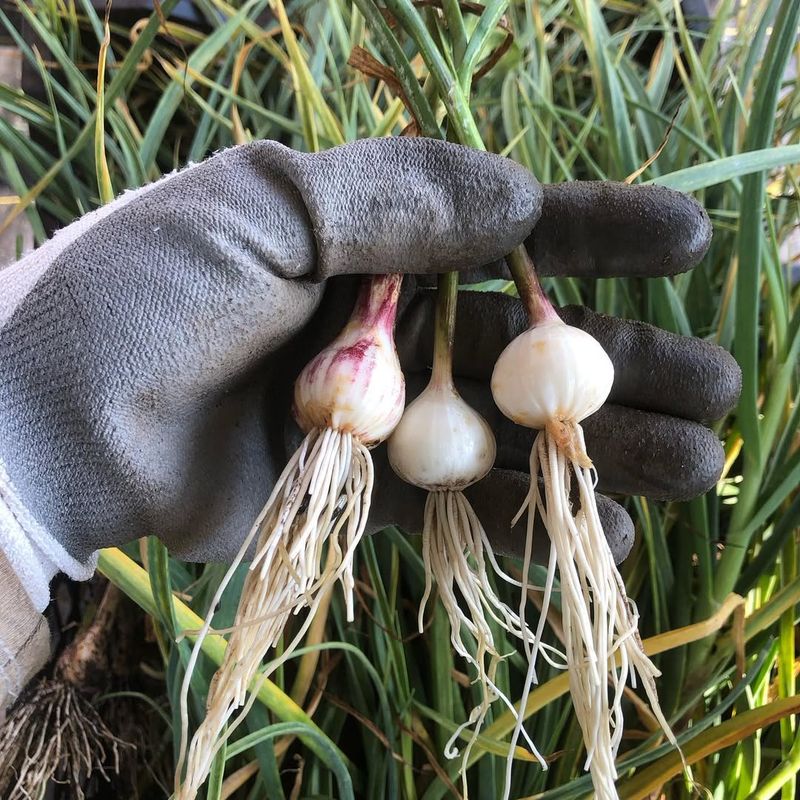
7. Harvest When Leaves Yellow
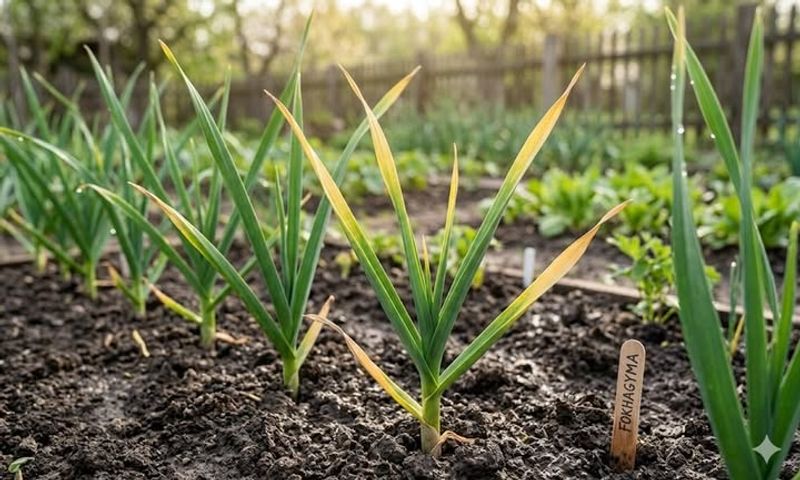
Knowing when to harvest is just as important as knowing how to plant. Pull garlic too early and the bulbs won’t be fully developed.
Wait too long and the outer skin breaks down, making the garlic harder to store. The right time to harvest in Oregon is typically mid to late summer, usually between July and August, depending on your variety and local conditions.
Watch the leaves carefully as your signal.
Garlic is ready when the lower three to four leaves have turned brown and dry, but the upper leaves are still green. Each leaf on the plant corresponds to a layer of papery skin on the bulb.
If all the leaves are brown, you may have waited a little too long and the protective wrappers will be thin. Aim to harvest when about half the leaves are still green for the best-looking, best-stored bulbs.
Use a garden fork to loosen the soil around each plant before pulling. Don’t yank the stalks straight up or they may snap off.
Gently lift each bulb free and brush off excess dirt. After harvesting, move your Oregon garlic to a shaded, dry, well-ventilated spot and let it cure for two to three weeks.
Hang bunches or lay bulbs on a screen. Once cured, trim the roots and store in a cool, dry place.
Properly cured garlic can last six months or longer.