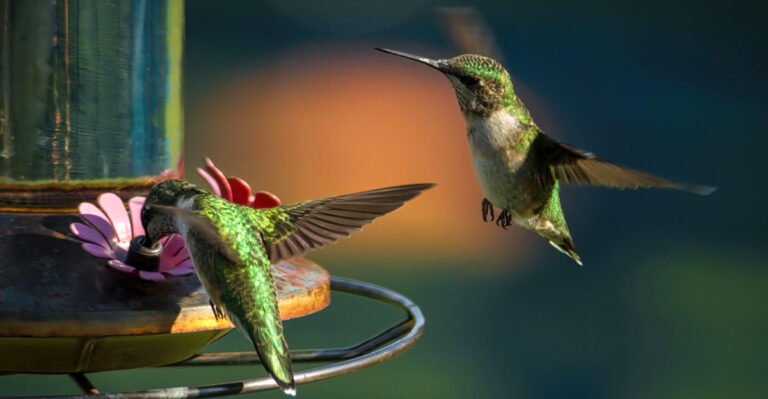
How To Plant Own-Root Roses In Arizona Desert Gardens This Spring
Spring is the make-or-break season for planting own-root roses in Arizona. Roots need time to settle before serious heat arrives, because rapid temperature spikes can slow establishment and weaken early growth.
At this stage, planting timing carries more weight than the specific variety you choose.
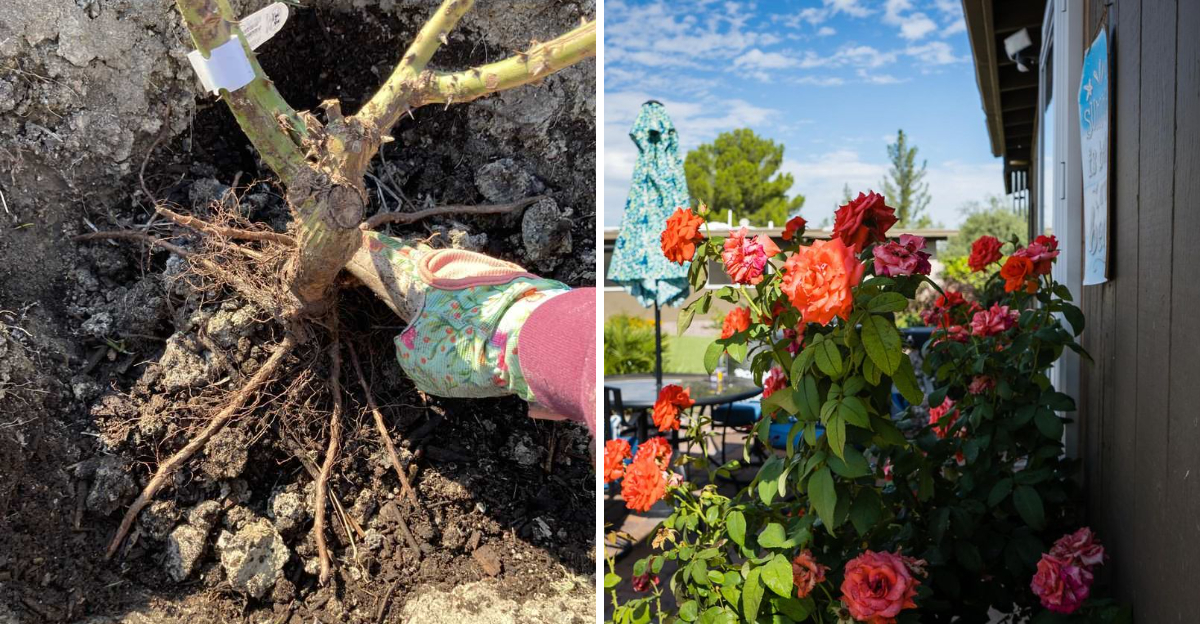
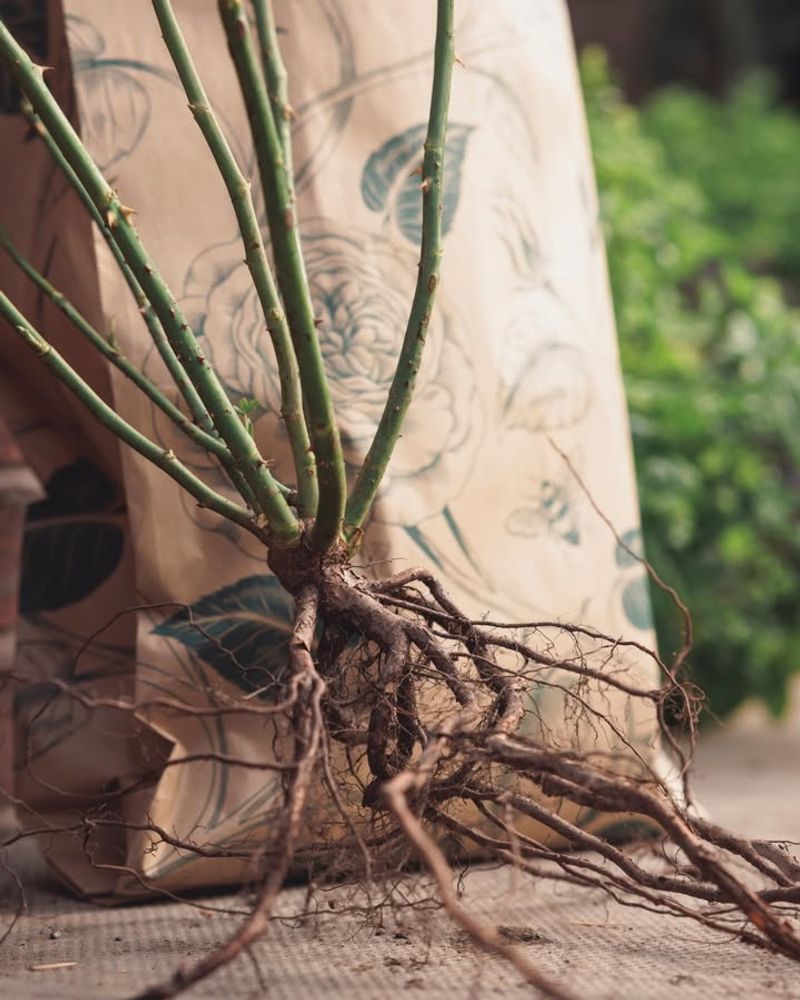
Own-root roses develop on their own root system rather than grafted stock, so any new shoots that appear remain true to the original plant. That reliability becomes valuable after summer stress or top growth damage.
Planting early, improving the soil before setting the rose in place, and keeping irrigation consistent from the start determine whether the plant merely gets through its first season or develops the strength it needs for long-term performance.
1. Plant In Early Spring Before Extreme Heat Arrives
February through mid-March gives you the perfect window for getting own-root roses into Arizona ground. Temperatures during these weeks hover in the comfortable 60s and 70s, allowing roots to spread without stress.
Your roses need at least six to eight weeks of moderate weather to build a foundation before facing desert summer.
Waiting until April cuts your success rate dramatically because roots struggle to establish when soil temperatures spike above 85 degrees. Early spring also brings occasional rain showers that help newly planted roses settle in naturally.
You can skip some watering sessions when Mother Nature does the work for you.
Garden centers across Arizona stock their best rose selections in late winter specifically for this planting season. Shopping early means better variety and healthier specimens to choose from.
Bare-root roses shipped from specialty growers also arrive during this timeframe, giving you access to varieties you won’t find locally.
Check your local frost dates before planting because some higher elevation areas around Flagstaff or Prescott might need to wait until late March. Phoenix, Tucson, and lower desert regions can start as early as Valentine’s Day.
Soil that’s workable and not waterlogged signals readiness regardless of the calendar date.
Morning planting works better than afternoon sessions because you avoid working in climbing temperatures. Your roses experience less transplant shock when moved during cooler hours.
This simple timing adjustment can make a real difference in how quickly they recover and start growing.
2. Choose A Location With Morning Sun And Afternoon Protection
Six hours of morning sun gives roses everything they need for blooming without the punishment of afternoon rays that can scorch leaves in Arizona.
Eastern exposure works perfectly because your roses soak up gentle early light while staying shaded when temperatures peak between 2 and 5 PM.
Western exposures create problems you’ll fight all summer.
Buildings, walls, or large trees that block western sun become your best friends when situating rose beds. Even a solid fence provides enough shade relief to drop temperatures by 10 to 15 degrees in that immediate area.
Some Arizona gardeners build simple ramadas or shade cloth structures specifically to protect their rose collection during brutal months.
Avoid planting against south-facing block walls that radiate stored heat long after sunset. These spots turn into ovens that stress roses around the clock.
North sides of structures stay cooler but might not provide sufficient morning light for good flowering.
Air circulation matters almost as much as sun exposure in desert gardens. Roses tucked into tight corners without airflow develop fungal problems when you water them.
Space your planting area at least three feet from walls or solid barriers to let breezes flow through the foliage.
Test your chosen spot by observing light patterns throughout a full day before digging. What looks shaded at 9 AM might be in blazing sun by 3 PM.
Taking photos every two hours helps you map actual sun exposure rather than guessing.
3. Dig A Wide Hole And Loosen Surrounding Soil For Strong Root Expansion
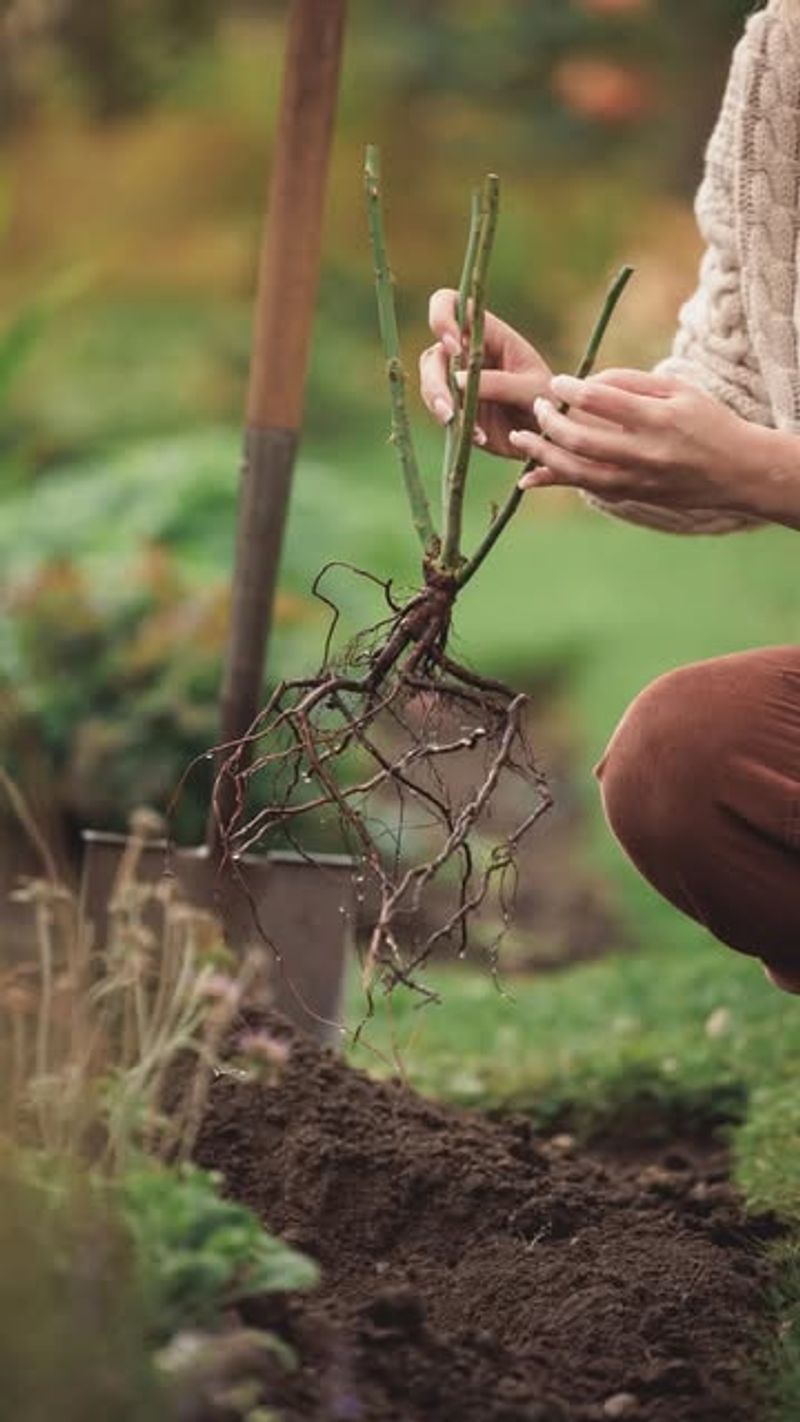
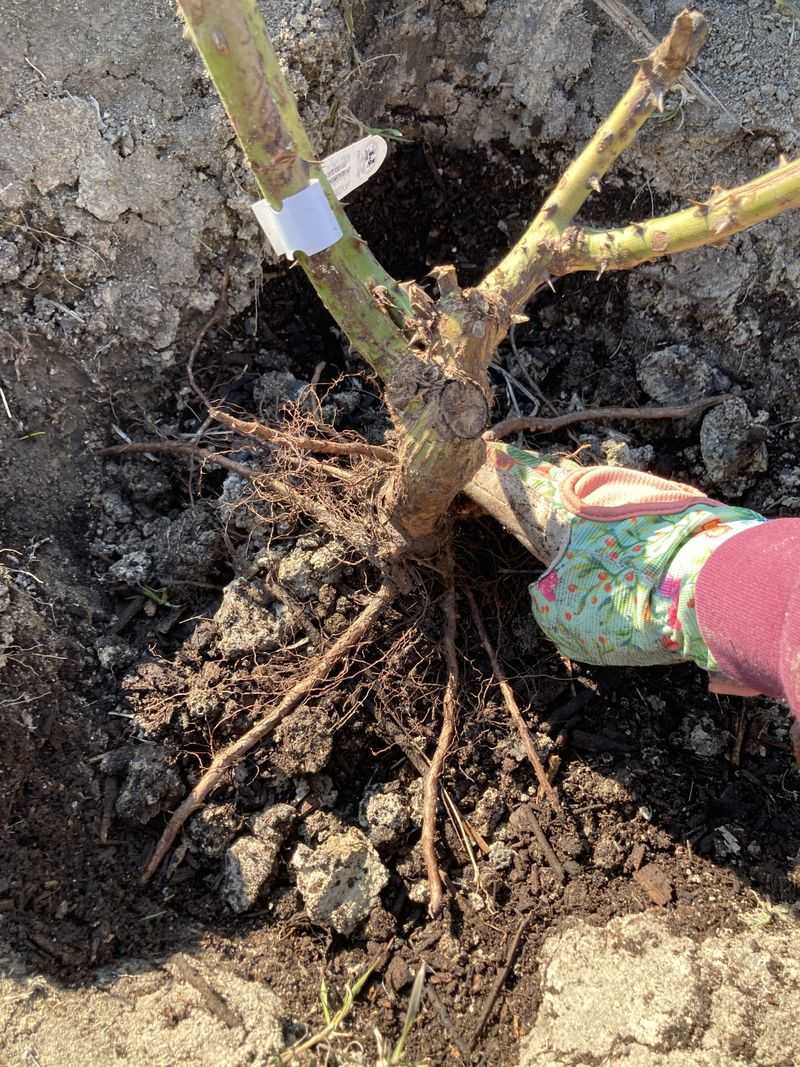
Width matters more than depth when preparing holes for own-root roses in Arizona’s hardpan soil. Dig your hole at least 24 inches across even if the root ball only measures 12 inches wide.
Roots spread horizontally much more than they grow downward, and compacted desert soil fights this natural expansion unless you break it up first.
Depth should match the root ball height with an extra inch or two at the bottom for settling. Going too deep encourages water pooling that rots roots in our poorly draining native soil.
Use your shovel to rough up the sides of the hole so they’re not slick and smooth, which creates a barrier roots won’t penetrate easily.
Caliche layers present the biggest challenge for Arizona rose growers. This concrete-like hardpan sits anywhere from 6 to 18 inches below the surface across much of the state.
You might need a pickaxe or digging bar to break through it. Leaving caliche intact creates a bathtub effect where water can’t drain and roots can’t escape the planting hole.
Loosen soil in a three-foot radius around your hole by jabbing a garden fork repeatedly into the ground. This extra step seems tedious but it transforms the entire planting area into a zone where roots can travel freely.
Roses with room to spread develop into much stronger plants.
Save the soil you remove in a wheelbarrow for mixing back into the hole. You’ll need most of it for backfilling around the roots after your rose is positioned correctly.
4. Amend Native Soil Lightly To Improve Drainage Without Overenriching

Arizona soil needs help with drainage more than it needs nutrients added. Our native dirt often contains plenty of minerals but packs down into dense clay that suffocates roots when wet.
Mixing one part compost to three parts native soil strikes the right balance for own-root roses without creating problems down the road.
Resist dumping bags of fancy potting mix into your planting hole because this creates a texture boundary that roots refuse to cross. Your rose will circle endlessly in the fluffy stuff rather than venturing into surrounding native ground.
Think of amendments as a gradual transition zone rather than a complete soil replacement.
Composted steer manure or homemade compost both work well for opening up tight Arizona soil. Add about three gallons of organic matter to the soil pile you removed from the hole.
Mix it thoroughly before using it to backfill around your rose roots.
Skip fertilizers completely at planting time despite what some rose guides recommend. Pushing rapid growth before roots establish leads to weak, stressed plants in desert conditions.
Your lightly amended soil provides everything the rose needs for its first few months in the ground.
Sulfur amendments help if your water tests extremely alkaline, which is common across Arizona. Work a cup of soil sulfur into your soil mix to gradually lower pH toward the 6.5 range that roses prefer.
This adjustment takes months to show results but improves long-term rose health significantly.
5. Water Deeply After Planting To Eliminate Air Pockets
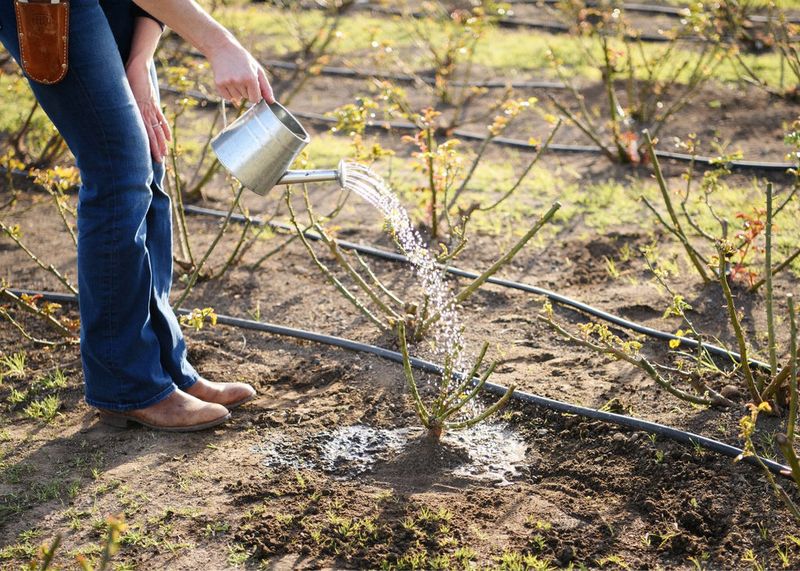
Filling your planting hole with water before placing the rose creates a muddy base that helps roots make immediate contact with soil. Pour at least five gallons into the empty hole and let it drain completely.
This pre-watering also reveals drainage problems you can fix before the rose goes in.
Position your own-root rose so the crown sits level with or slightly above the surrounding ground. Backfill halfway with your amended soil mixture, then flood the hole again with another five gallons of water.
Watch the water soak in while gently rocking the plant to work soil between all the roots and eliminate hidden air gaps.
Air pockets around roots spell trouble in Arizona because they dry out instantly in our low humidity. Roots that hit these dry spots stop growing in that direction and may never recover.
The water settling technique forces soil into every crevice around the root system.
Finish backfilling once the second watering drains away, leaving a slight basin around the plant to catch future irrigation. Water one more time with another three to four gallons to ensure complete saturation of the root zone.
This initial deep watering is the most important one your rose will ever receive.
Avoid the common mistake of tamping soil down with your feet, which compacts it right back into that dense clay texture you’re trying to avoid. Water does a better job of settling soil naturally without creating a hardpan layer around tender roots.
6. Apply Mulch To Cool Roots And Reduce Moisture Loss

Bare soil in Arizona turns into a heat conductor that bakes roots and evaporates moisture within hours of watering. Spreading a four-inch layer of organic mulch around your newly planted roses drops soil temperature by 20 degrees during peak summer heat.
This cooling effect becomes critical for survival once May arrives.
Wood chips work better than bark nuggets because they interlock and don’t blow away in desert winds. Mulch made from local trees like mesquite or palo verde breaks down slowly while adding trace nutrients.
Avoid dyed mulches that contain unknown chemicals you don’t want near plants you might touch regularly.
Pull mulch back about four inches from the rose stem to prevent crown rot issues. Piling mulch against the base creates a damp environment where fungal problems start.
You want the crown area exposed to air circulation while the root zone stays protected and cool.
Replenish your mulch layer twice a year because Arizona’s intense UV rays and low humidity break down organic materials faster than in other climates. Add fresh chips in late spring before extreme heat and again in fall after summer subsides.
Decomposed mulch from previous applications works into the soil and improves its structure over time.
Gravel mulch looks attractive but actually increases soil temperature by reflecting and storing heat. Save decorative rock for pathways and use organic materials directly around your roses for their health and your watering budget.
7. Delay Heavy Fertilizing Until New Growth Is Well Established
Roots need time to spread and anchor before you ask the plant to push out lots of new leaves and flowers. Fertilizing right after planting forces top growth while the root system remains small and stressed.
Wait at least six to eight weeks after planting before applying any concentrated fertilizers to your own-root roses in Arizona.
Watch for signs that roots have taken hold, like new leaves emerging with good color and stems showing obvious growth. Established roses bounce back quickly when you tug gently on a branch, while newly planted ones still move easily in the ground.
This simple test tells you when the root system has grabbed onto surrounding soil.
Start with a light application of balanced fertilizer once you see active growth happening. Use half the package-recommended rate because desert-grown roses don’t need the heavy feeding schedules written for roses in other climates.
Our long growing season means you can feed lightly and often rather than dumping large amounts at once.
Organic fertilizers like alfalfa meal or fish emulsion release nutrients slowly and won’t burn tender new roots if you miscalculate amounts. These gentle options work particularly well for own-root roses during their first season in Arizona ground.
Save the synthetic rose foods for year two when plants have tougher, more extensive root systems.
Stop all fertilizing by late August to let your roses harden off before winter. Pushing growth into fall creates tender new shoots that suffer damage during occasional freezes that hit parts of Arizona.