10 Smart Things North Carolina Gardeners Should Do Before Spring Fully Arrives
The first warm days of the year bring a rush of possibility, as North Carolina gardens begin to stir with new life and fresh color. What was once a quiet winter space quickly transforms into a lively growing environment filled with promise.
Preparing early is the key to making the most of this exciting season. Taking care of essential tasks now, before planting begins in full swing, helps create the strong foundation every successful garden needs.
From improving soil to planning layouts and refreshing beds, small efforts made at the right time lead to healthier plants and smoother progress throughout the season.
Gardeners across North Carolina know that early preparation reduces stress and increases rewards once growth accelerates.
Whether your focus is vibrant flowers, productive vegetables, or a mix of both, these ten smart moves will help your North Carolina garden start strong, grow steadily, and deliver a beautiful, satisfying spring.
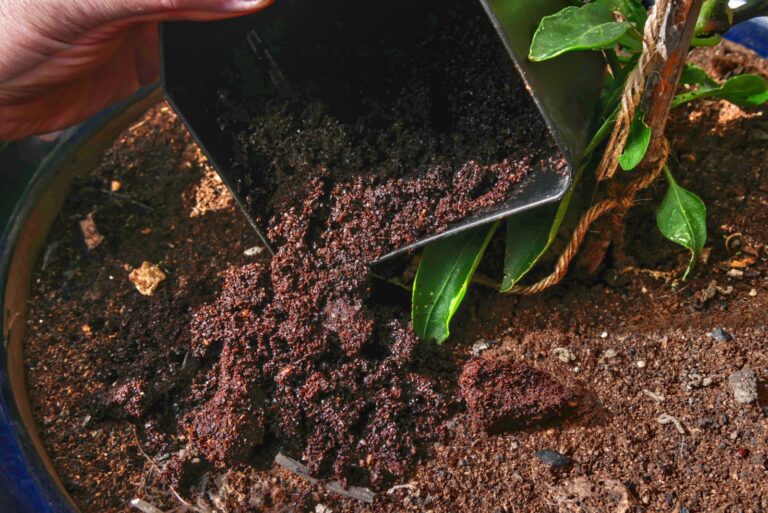
1. Test Your Soil Before Planting Anything New

Knowing what your soil needs makes all the difference in how well your plants grow throughout the season. Late winter gives you the perfect window to collect soil samples and send them off for testing.
North Carolina State Extension offers affordable testing that reveals your soil’s pH level and nutrient content.
Most vegetables prefer soil with a pH between 6.0 and 7.0, while blueberries thrive in more acidic conditions around 4.5 to 5.5. Testing takes the guesswork out of amendments and helps you avoid wasting money on fertilizers your soil doesn’t need.
You’ll receive detailed results within a few weeks, giving you time to adjust before planting.
Collect samples from different areas of your garden since pH and nutrients can vary across your yard. Mix soil from several spots in each growing area for the most accurate reading.
Use clean tools and containers to avoid contamination that could skew your results.
Once you receive your test results, follow the recommendations for lime or sulfur applications to adjust pH. Add organic matter like compost to improve soil structure and nutrient availability.
These amendments need time to work into the soil, so applying them now means your garden will be ready when warmer weather arrives and planting season begins in earnest.
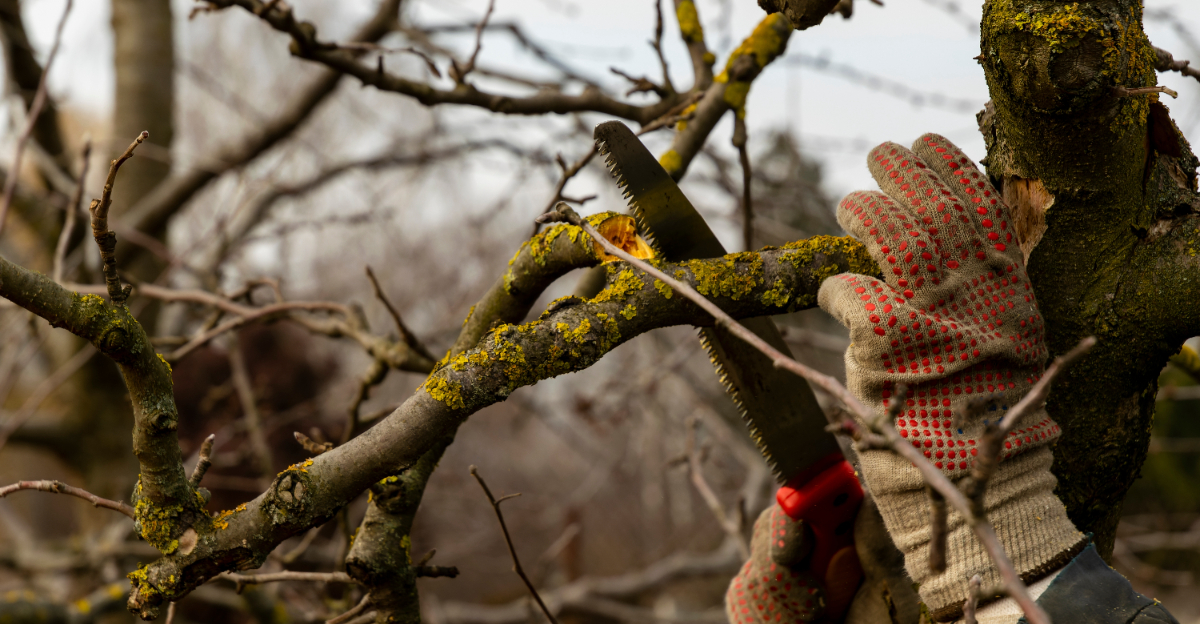
2. Prune Dormant Trees And Shrubs At The Right Time
Late winter provides an excellent opportunity to prune many trees and shrubs while they’re still dormant. You can see the branch structure clearly without leaves blocking your view, making it easier to identify problem areas.
Pruning now also reduces stress on plants since they haven’t started actively growing yet.
Focus on removing branches that cross or rub against each other, as these create wounds where diseases can enter. Take out any branches that grow inward toward the center of the plant or straight up from main limbs.
Clean cuts heal faster than ragged tears, so use sharp tools and cut at a slight angle just above a bud or branch collar.
Avoid pruning spring-blooming shrubs like azaleas, forsythia, and flowering quince right now since they set buds on old wood. Cutting them before they bloom means sacrificing this year’s flowers.
Wait until right after they finish blooming to shape these plants.
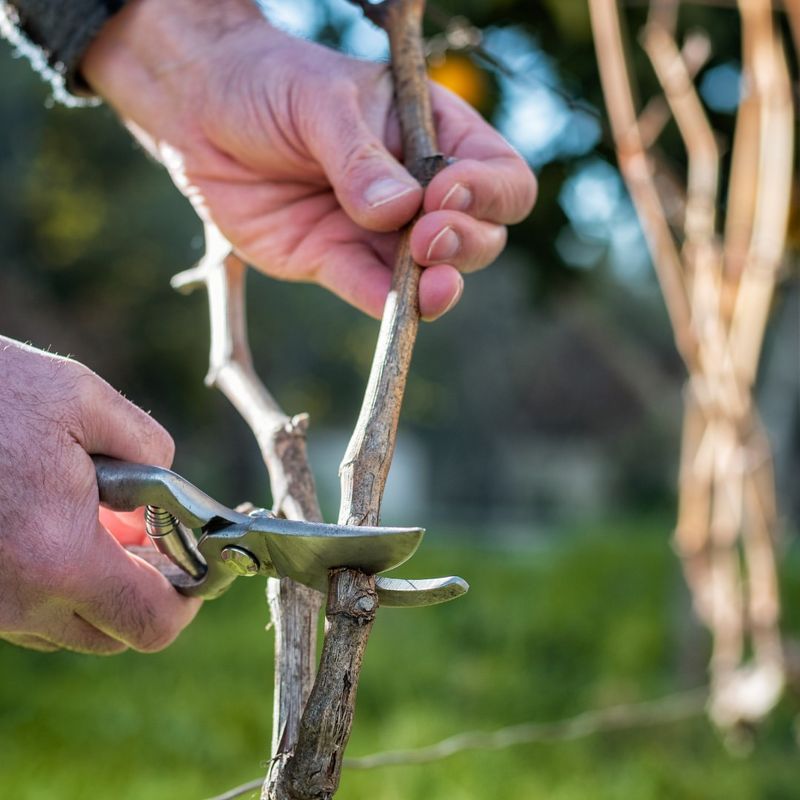
Summer-blooming shrubs like crape myrtles and butterfly bushes can be pruned now since they flower on new growth. Remove about one-third of the oldest stems on overgrown shrubs to encourage fresh, vigorous growth.
Always step back frequently while pruning to check your progress and maintain a natural shape rather than creating stiff, unnatural forms that look awkward in the landscape.
3. Clean And Sharpen Garden Tools Before Heavy Use
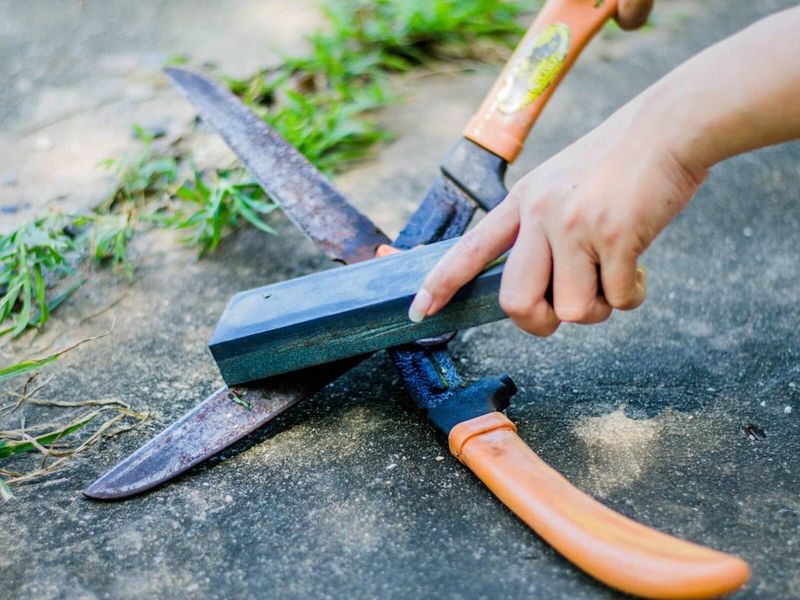
Your garden tools work hard all season, and preparing them now saves frustration later when you’re eager to plant. Clean tools cut better, last longer, and reduce the spread of plant diseases between cuts.
Rust and dirt buildup make tools harder to use and less effective at their jobs.
Start by scrubbing off dried soil and plant residue with a stiff brush and soapy water. Rinse thoroughly and dry completely to prevent new rust from forming.
For stubborn rust spots, use steel wool or a wire brush to scrub them away, then wipe down metal surfaces with a light coating of oil.
Sharp cutting tools make cleaner cuts that heal faster on plants, reducing stress and disease risk. Use a mill file or sharpening stone to restore edges on pruners, shears, and hoe blades.
Work the file along the original bevel angle in smooth, even strokes until you feel a burr on the opposite side.
Check wooden handles for splinters and sand them smooth if needed. Tighten any loose bolts or screws on tools with moving parts.
Oil the pivot points on pruners and loppers so they open and close smoothly. Store your freshly maintained tools in a dry place where they’ll stay clean and ready for action when spring planting kicks into high gear across your garden beds.
4. Apply Fresh Mulch To Protect Roots And Suppress Weeds
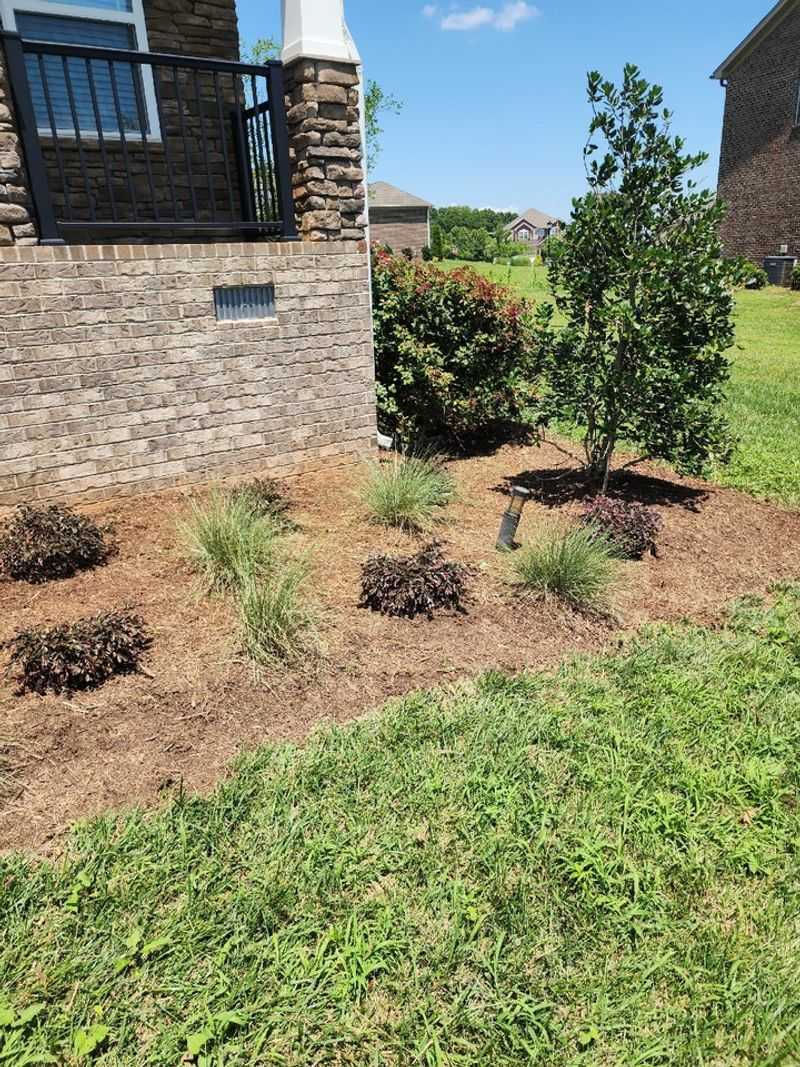
Adding a fresh layer of mulch before spring growth begins gives your garden beds a clean start and provides multiple benefits throughout the growing season. Mulch helps soil retain moisture during dry spells, reducing how often you need to water.
It also moderates soil temperature, keeping roots cooler in summer heat and warmer during cold snaps.
Weed seeds struggle to germinate under a proper mulch layer, saving you hours of pulling unwanted plants later. As organic mulches break down, they add nutrients and improve soil structure over time.
Choose mulch materials that suit your plants and budget, such as shredded hardwood bark, pine straw, or compost.
Pull back old mulch that has become compacted or matted, as these layers can prevent water from reaching plant roots. Spread fresh mulch two to three inches deep around plants, keeping it a few inches away from stems and tree trunks.
Mulch piled against bark creates a perfect environment for rot and pest problems.
Avoid using mulch from unknown sources that might contain weed seeds or plant diseases. Buy from reputable suppliers or make your own from yard waste and leaves.
Apply mulch before weeds start growing aggressively in spring warmth, creating a barrier that makes your maintenance work much easier throughout the coming months when you’d rather enjoy your garden than constantly battle unwanted plants.
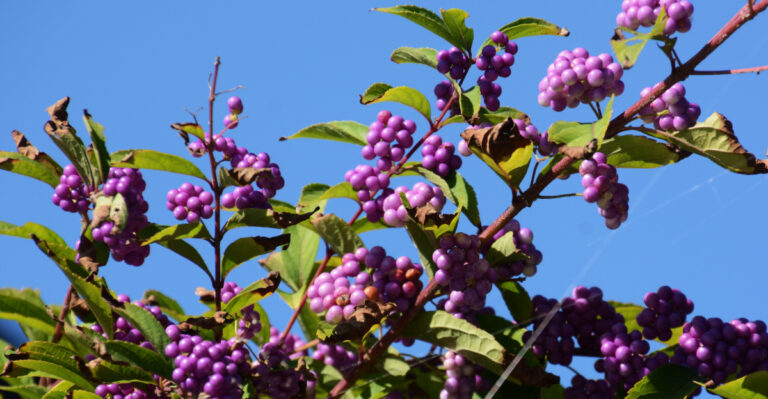
5. Divide Overcrowded Perennials Before Active Growth Starts
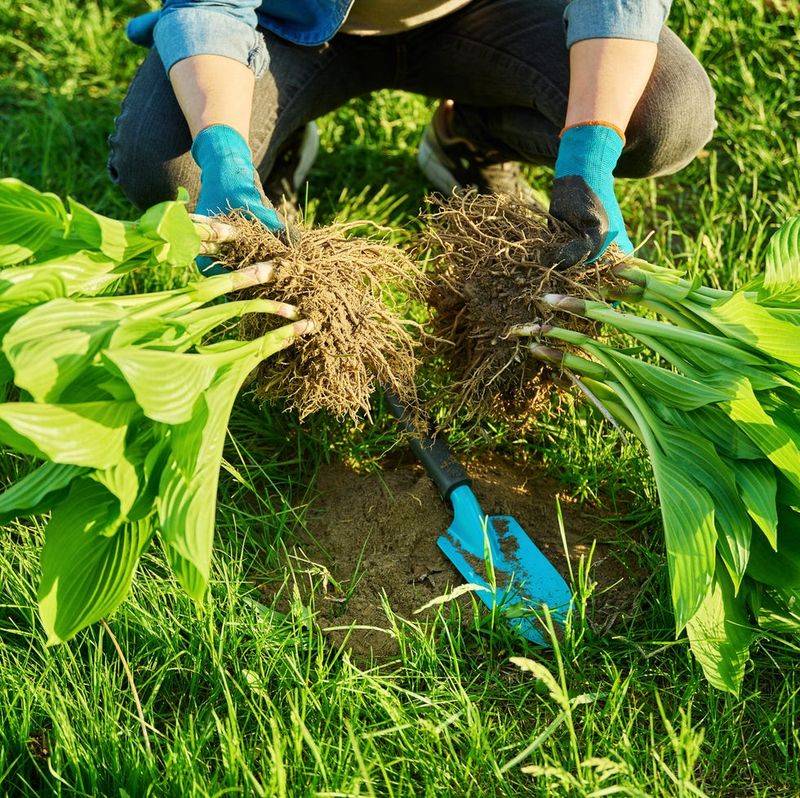
Perennials that have grown together in tight clumps benefit from division every few years to maintain their vigor and flowering. Early spring, just as new growth emerges, offers ideal conditions for this task in North Carolina.
Plants recover quickly when divided at this time since they’re entering their active growing phase.
Look for perennials with crowded centers, reduced flowering, or sections that appear less healthy than others. Hostas, daylilies, coneflowers, and ornamental grasses respond well to spring division.
Dig up the entire clump carefully, preserving as many roots as possible.
Use a sharp spade, knife, or even your hands to separate the clump into smaller sections. Each division should have healthy roots and several growth points or shoots.
Discard any sections that look diseased or have rotted roots.
Replant divisions at the same depth they were growing before, spacing them appropriately for their mature size. Water thoroughly after planting to settle soil around roots and eliminate air pockets.
Mulch around newly planted divisions to conserve moisture and suppress weeds.
Division not only rejuvenates existing plants but also gives you extras to fill bare spots, trade with neighbors, or donate to community gardens. This simple task multiplies your garden’s beauty without spending money on new plants while ensuring your perennials continue blooming abundantly for years to come in your landscape beds.
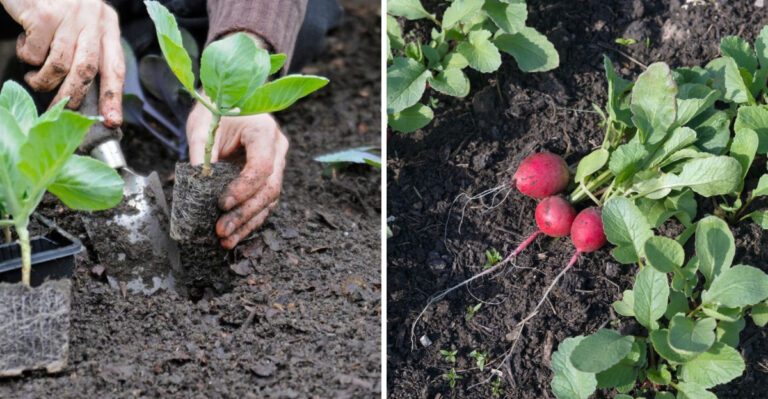
6. Start Cool Season Crops At The Right Time
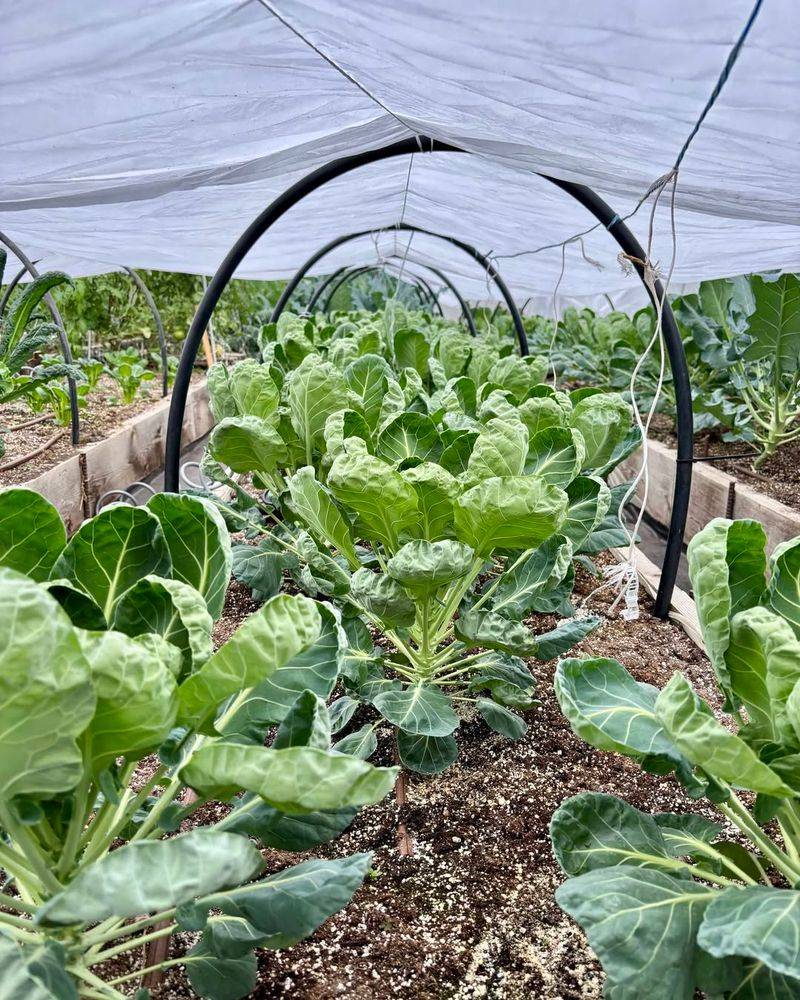
North Carolina’s climate allows for an extended cool-season vegetable harvest if you time plantings correctly before warm weather settles in. Lettuce, spinach, peas, and other cold-hardy crops thrive in the moderate temperatures of early spring.
Planting now means you’ll harvest fresh produce before summer heat makes these crops bolt and turn bitter.
Direct sow pea seeds into prepared garden beds as soon as soil can be worked without clumping. These hardy legumes tolerate light frosts and actually prefer cooler growing conditions.
Plant lettuce and spinach seeds or transplants in succession every two weeks for a continuous harvest throughout spring.
Cool-season crops grow best when daytime temperatures stay between 60 and 70 degrees. They slow down or stop producing once consistent heat arrives.
Starting early gives plants time to mature and produce abundantly before weather turns hot.
Add radishes, kale, and broccoli to your cool-season planting list for variety in your harvest basket. These vegetables establish quickly in spring conditions and provide nutrition-packed additions to meals.
Choose varieties bred for bolt resistance if you live in warmer parts of the state.
Protect young seedlings from unexpected late frosts with row covers or cloches you can remove during warm days. Keep soil consistently moist since these crops develop shallow root systems that dry out quickly.
Your reward for timely planting will be tender, flavorful vegetables that taste far better than anything from a grocery store.
7. Inspect Plants For Winter Damage

Winter weather can stress plants in ways that aren’t immediately obvious until you look closely at branches, stems, and emerging growth. Walking through your garden now with a critical eye helps you identify problems before they worsen.
Catching issues early means you can take corrective action that saves plants from further decline.
Check for broken or cracked branches that need removal before they tear further and create larger wounds. Look at bark on trees and shrubs for splits or areas where cold caused damage.
These injuries provide entry points for diseases and insects if left unaddressed.
Examine evergreen foliage for brown or scorched areas that indicate winter burn from cold, dry winds. While unsightly, this damage often affects only outer foliage, and plants recover once new growth emerges.
You can lightly prune affected areas to improve appearance without harming the plant.
Gently scrape bark on questionable branches to check for green tissue underneath, which indicates the branch is still alive. Brown or gray tissue means that section won’t recover and should be pruned back to healthy wood.
Start at branch tips and work backward until you find living tissue.
Note any signs of pest activity like egg masses, tunnels, or unusual growths on branches and trunks. Early detection of pest problems allows for targeted treatment before populations explode in spring warmth and cause serious damage to your carefully tended landscape plants throughout the growing season ahead.
8. Edge Garden Beds For A Clean Seasonal Reset
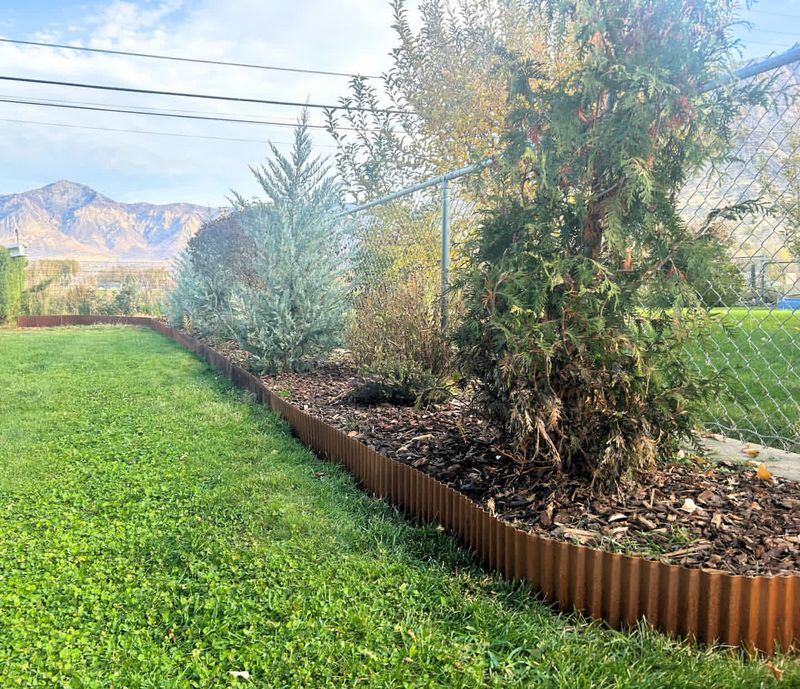
Crisp, well-defined edges between lawn and garden beds create visual appeal and serve practical purposes in your landscape. Reestablishing these borders before spring growth begins gives your garden a fresh, maintained appearance.
Proper edging also prevents grass from creeping into beds where it competes with flowers and shrubs.
Use a flat spade or half-moon edger to cut a clean line along bed perimeters. Work the tool straight down into soil, then angle it slightly to create a small trench between lawn and bed.
This barrier stops grass roots from spreading while making mowing easier since you can run one wheel in the trench.
Remove soil and grass from the trench and add it to compost or use it to fill low spots elsewhere in your yard. Clean edges need maintenance only a few times per season, unlike undefined borders that require constant attention.
The time you invest now reduces ongoing work throughout busy summer months.
Consider installing permanent edging materials like metal, plastic, or stone if you want to minimize future maintenance. These products create lasting barriers that need only occasional adjustments.
Choose materials that complement your garden style and fit your budget.
Freshly edged beds make mulch application easier and help retain mulch within designated areas rather than letting it scatter onto lawn. This simple task transforms your landscape’s appearance and demonstrates the care you put into maintaining your outdoor spaces for maximum beauty and function.
9. Fertilize Lawns And Plants According To Seasonal Needs
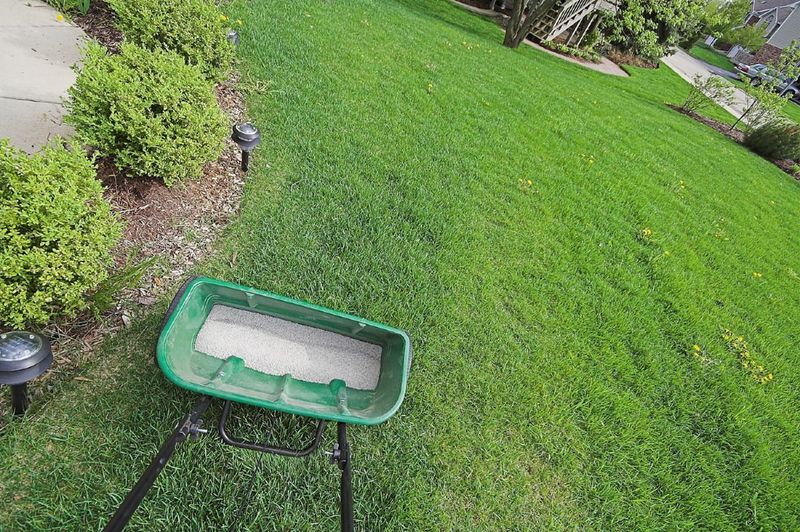
Strategic fertilization in early spring supports vigorous growth as plants emerge from dormancy and temperatures warm. However, timing and product selection matter significantly for best results.
Applying fertilizer too early can encourage tender growth vulnerable to late frosts, while waiting too long means plants miss the nutrients they need during active growth.
Warm-season lawns like bermudagrass and zoysiagrass shouldn’t receive fertilizer until they green up and begin active growth, usually in late April or May. Feeding these grasses too early wastes product and can encourage weeds.
Cool-season grasses benefit from light spring feeding as temperatures rise.
Base your fertilization program on soil test results rather than guessing what your plants need. Tests reveal which nutrients are deficient and which are adequate, preventing over-application that wastes money and can harm plants.
Follow recommended rates carefully since more fertilizer doesn’t mean better growth.
Organic fertilizers release nutrients slowly as soil organisms break them down, providing steady nutrition over weeks or months. Synthetic fertilizers act quickly but require more frequent applications.
Choose products appropriate for your plants and gardening philosophy.
Apply fertilizer when rain is forecast within a day or two, or water it in thoroughly after application. This moves nutrients into the root zone where plants can absorb them.
Avoid fertilizing right before heavy rains that could wash products into storm drains and waterways, creating pollution problems while providing no benefit to your landscape plants or lawn areas.
10. Plan Your Planting Calendar Based On Frost Dates

Understanding frost dates for your specific area in North Carolina prevents the heartbreak of losing tender plants to unexpected cold snaps. The state’s varied geography means last frost dates range from early April in coastal regions to late April or early May in mountains.
Planning around these dates protects your investment in plants and seeds.
Average last frost dates represent statistical probabilities, not guarantees. Some years experience late frosts well after the average date.
Conversely, many springs see the last frost occur earlier than predicted. Smart gardeners balance risk with reward when deciding planting times.
Hardy vegetables and flowers tolerate light frosts and can go into gardens several weeks before the last frost date. Tomatoes, peppers, and other warm-season crops need soil temperatures above 60 degrees and no frost risk.
Planting these too early results in stunted growth or plant loss.
Create a planting calendar that works backward from your area’s frost dates. If your last frost typically occurs April 15, plan to transplant tomatoes around May 1 when soil has warmed adequately.
Start seeds indoors at the appropriate time so transplants are ready when outdoor conditions suit them.
Keep row covers or cloches handy for unexpected cold nights even after your average last frost date passes. These simple protections can save crops from damage during surprise temperature drops.
Careful planning based on reliable climate data sets you up for gardening success throughout the entire growing season ahead in your North Carolina landscape.