7 Smart Ways Pennsylvania Gardeners Prepare Garden Beds Now For Spring Blooms
Even in winter, Pennsylvania gardeners know that preparing garden beds now sets the stage for a vibrant spring.
Early preparation improves soil health, encourages strong growth, and helps ensure plants bloom beautifully when the season changes. Start early and your garden will flourish with colorful, healthy blooms.
These strategies include clearing debris, adding compost or organic matter, testing and amending soil, mulching, planning plant placement, and sharpening tools for spring planting.
Taking these steps reduces weeds, improves drainage, and creates optimal conditions for seeds and perennials to thrive. Smart preparation now means healthier plants and stress-free gardening later.
Pennsylvania gardeners who follow these tips enjoy lush, colorful gardens and a smoother transition into the growing season. Prepare your beds now and enjoy a spring garden full of blooms.
1. Test Soil pH And Nutrient Levels Before Spring Planting
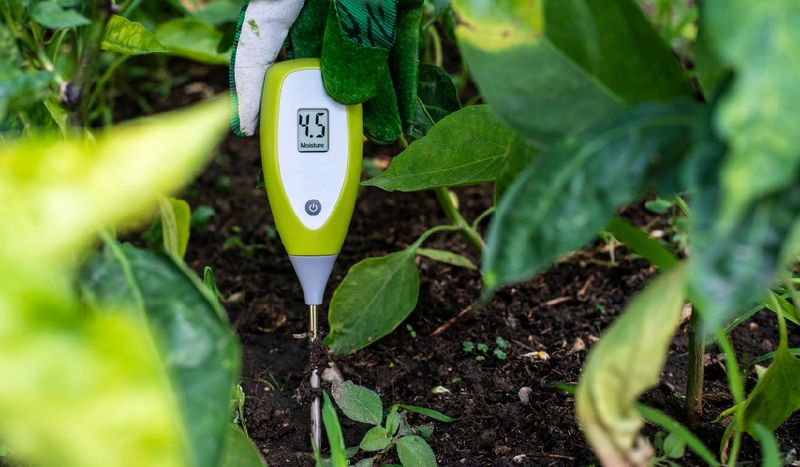
Pennsylvania soils carry a secret that many gardeners discover only after their plants struggle, and that secret lies in the pH level.
Most soils across the state naturally trend toward the acidic side of the spectrum, which can lock up essential nutrients even when they’re present in abundance.
Understanding your specific soil chemistry before planting season gives you the power to make targeted improvements that flowering plants will reward with vigorous growth.
Penn State Extension offers affordable and accurate soil testing services that reveal not just pH but also nutrient levels, organic matter content, and specific amendment recommendations.
The process is surprisingly simple: collect samples from different areas of your beds, mix them together, and send them to the lab with a small fee. Results typically arrive within two weeks, giving you a clear roadmap for success.
Most flowering perennials and annuals prefer a pH range between 6.0 and 7.0, where nutrients remain readily available to plant roots.
If your test reveals acidic soil below 6.0, adding lime raises the pH gradually over several months. Conversely, sulfur lowers pH for acid-loving plants like azaleas and rhododendrons.
Testing in late winter or early spring allows amendments time to work before planting. Lime and sulfur need weeks to alter soil chemistry, so early action prevents delays when you’re eager to get blooms in the ground and growing strong.
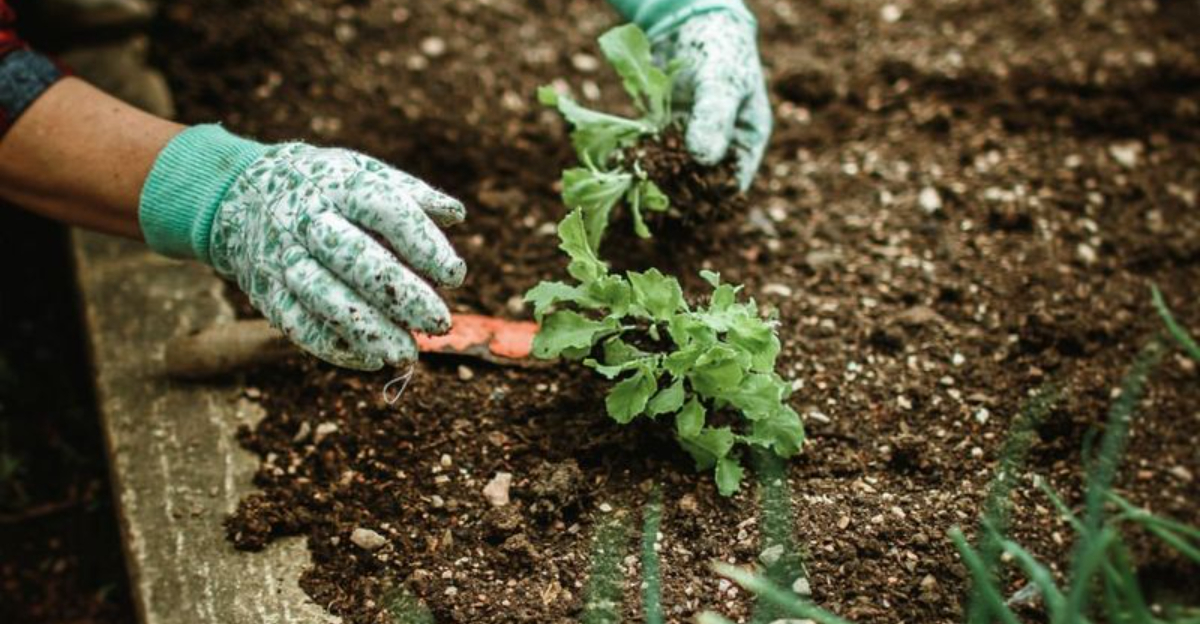
2. Add Compost To Improve Heavy Clay Soil Structure
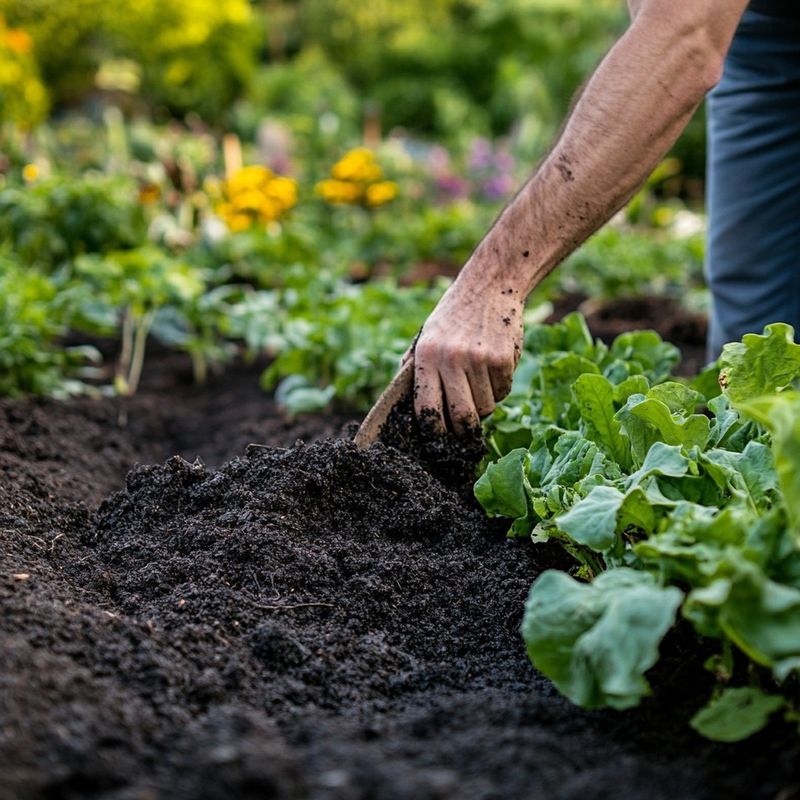
Clay soil dominates much of Pennsylvania’s landscape, and while it holds nutrients well, it also holds water with an iron grip that can suffocate plant roots.
The dense, sticky texture of clay prevents proper drainage and limits the oxygen flow that roots desperately need for healthy development.
Fortunately, compost offers a remarkably effective solution that transforms problematic clay into a thriving growing medium for spectacular spring blooms.
High-quality compost works magic in clay beds by creating air pockets that improve both drainage and aeration.
As organic matter breaks down, it releases substances that help clay particles clump together into larger aggregates, fundamentally changing the soil structure.
This improved texture allows water to drain properly while still retaining moisture during dry spells, giving you the best of both worlds.
Spread a layer of compost two to three inches deep across your garden beds in late winter or early spring. Avoid digging it in too deeply, which can disrupt beneficial soil organisms and damage existing root systems.
Instead, use a light incorporation method, gently working the top inch or two with a garden fork or cultivator.
The compost will continue working its way deeper naturally through earthworm activity and weather cycles.
This approach also adds essential nutrients that become available gradually throughout the growing season, feeding your flowering plants exactly when they need nourishment most for producing abundant, colorful blooms.
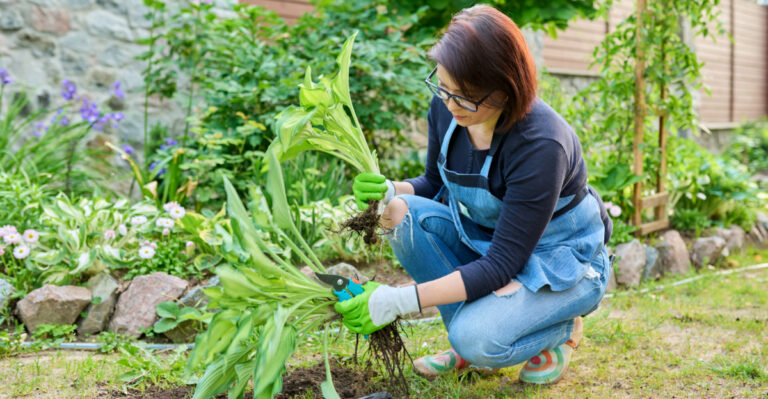
3. Remove Diseased Plant Debris While Leaving Beneficial Organic Matter
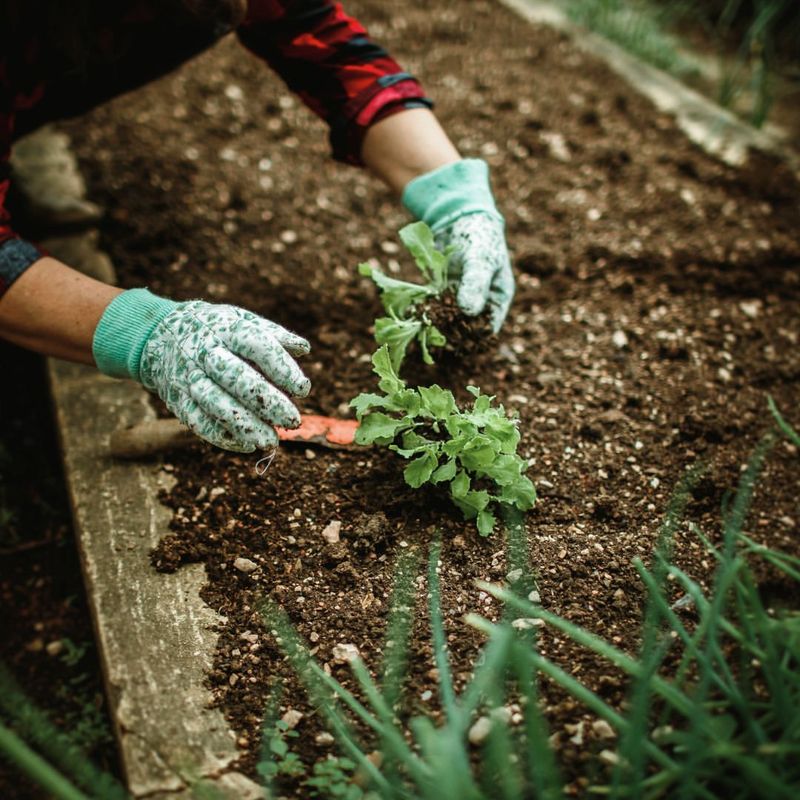
Walking through your garden beds on a crisp late winter day reveals the remnants of last season’s growth, and knowing what to clear away makes all the difference.
Diseased foliage, spotted leaves, and stems showing signs of fungal infection should be removed and disposed of properly, never added to your compost pile.
These troublesome materials harbor overwintering pests and fungal spores that will eagerly attack your spring blooms if given the chance. However, not everything needs to go.
Healthy leaf litter and chopped stems from disease-free plants actually benefit your beds by breaking down into valuable organic matter that feeds soil organisms.
This natural mulch protects beneficial insects that overwinter in your garden and slowly releases nutrients as it decomposes. Timing this cleanup perfectly matters in Pennsylvania’s climate.
Late winter, typically February through early March, works best because the ground has thawed enough to work but spring growth hasn’t started yet. You can easily spot problem areas without accidentally disturbing emerging bulbs or perennials.
Use a gentle approach when clearing beds, carefully raking around plant crowns and known bulb locations. Keep a bag handy for diseased material and another for healthy organic matter you want to redistribute.
This selective cleanup protects your investment in spring-flowering plants while maintaining the ecological balance your garden ecosystem needs to thrive beautifully.
4. Apply Mulch Strategically To Protect Beds From Freeze-Thaw Damage
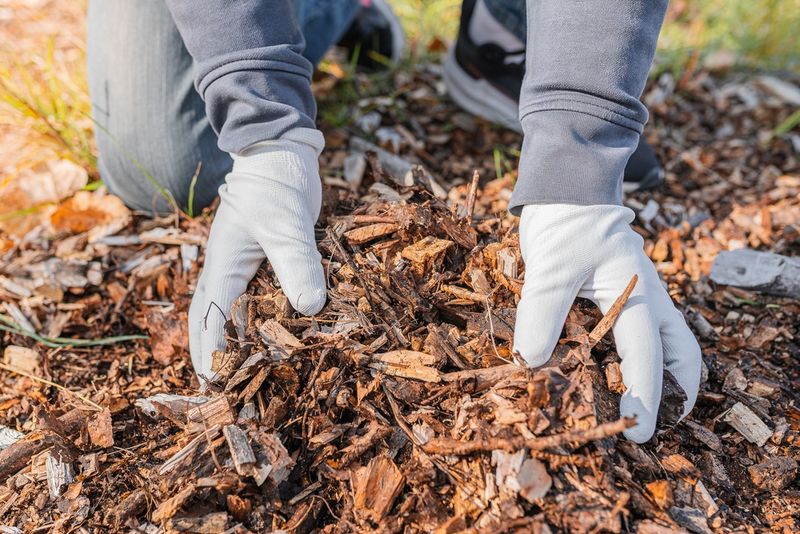
Pennsylvania winters play a cruel game with garden beds, alternating between freezing temperatures and unexpected warm spells that heave plants right out of the ground.
This freeze-thaw cycle causes more damage to perennials and spring bulbs than consistently cold weather ever could.
A well-placed layer of mulch acts like an insulating blanket that stabilizes soil temperature and keeps your plants safely tucked in until genuine spring arrives.
Shredded hardwood bark, pine needles, and aged wood chips all make excellent mulch choices for Pennsylvania gardens.
These materials break down slowly, adding organic matter while protecting beds from erosion caused by late winter rains and snowmelt.
A layer three to four inches deep provides optimal insulation without smothering plant crowns, which need air circulation to prevent rot. Strategic placement matters enormously when mulching around overwintering perennials.
Keep mulch pulled back about two inches from plant crowns and stems to prevent moisture buildup that encourages fungal diseases.
Around bulb beds, apply mulch after the ground freezes to prevent premature sprouting during warm spells, then gradually pull it back as green shoots emerge in spring.
Fresh mulch applied now also suppresses early weed germination, giving your flowering plants a competitive advantage when growth begins.
The clean, finished appearance of freshly mulched beds provides immediate visual appeal while working behind the scenes to create perfect growing conditions for your most beautiful spring display.
5. Edge And Redefine Garden Beds Before Growth Starts

Grass possesses an aggressive nature that gardeners often underestimate until it has invaded several inches into their carefully planned flower beds.
Over winter, lawn edges blur and grass roots creep steadily into garden territory, stealing water and nutrients meant for your blooming plants.
Reshaping bed borders now, before spring growth explodes, prevents this encroachment and creates clean lines that dramatically improve your landscape’s overall appearance.
Late winter and early spring offer the ideal window for edging work in Pennsylvania because the ground has thawed enough to cut easily but plants haven’t started active growth yet.
You can work freely without worrying about damaging emerging shoots or accidentally slicing through bulb foliage. The cooler temperatures also make the physical work more comfortable than tackling it during summer heat.
A sharp spade or half-moon edger creates the cleanest cuts, slicing vertically about four inches deep to sever grass roots completely.
For longer-lasting results, consider installing physical barriers like metal or plastic edging that prevents grass from tunneling back into beds.
These materials also help direct water flow, keeping rainfall and irrigation where your flowering plants need it most. Well-defined edges make maintenance easier throughout the growing season by clearly marking where to mow and where to avoid.
The crisp borders also enhance the visual impact of your spring blooms, creating a professional, polished look that makes every flower stand out beautifully against the clean lines of your newly refreshed garden beds.
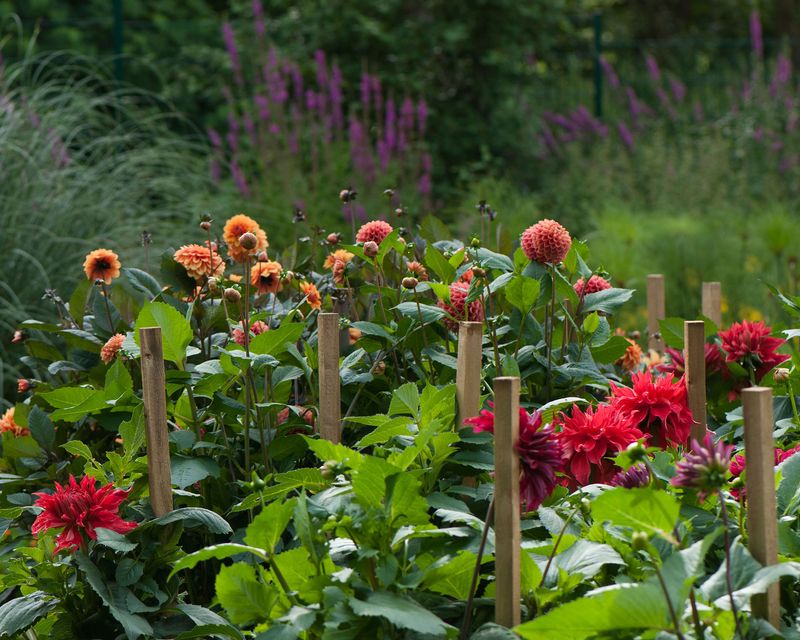
6. Identify And Mark Emerging Perennials And Bulb Locations
Every spring, well-meaning gardeners accidentally damage their most treasured plants simply because they forgot exactly where everything was planted.
Tulips, daffodils, peonies, and native perennials like purple coneflower spend winter hidden beneath the soil, offering no visual clues about their locations.
One careless thrust of a shovel or rake can slice through bulbs or emerging shoots, setting back or even preventing the spectacular bloom display you’ve been anticipating.
Marking plant locations now, before any growth appears, protects your investment and prevents heartbreaking accidents during early spring cleanup and planting activities.
Simple plant markers, decorative garden stakes, or even small stones arranged in patterns can indicate where precious bulbs and perennials lie dormant.
Take photos of your beds in full bloom and sketch simple maps showing plant positions for future reference. As the earliest bulbs like snowdrops and crocuses begin poking through the soil, mark their locations immediately while they’re visible.
Daffodils and tulips follow soon after, and their emerging foliage helps you map out bulb colonies before you start working the beds.
Herbaceous perennials emerge later, so markers placed now prevent accidental disturbance when you’re eager to start planting annuals or dividing overcrowded clumps.
This simple precaution saves money by protecting plants you’ve already invested in and preserves the design you’ve carefully planned.
It also reduces frustration and disappointment when you can work confidently, knowing exactly where everything grows and how to work around your most valuable flowering plants safely.
7. Repair Raised Beds And Garden Structures Early
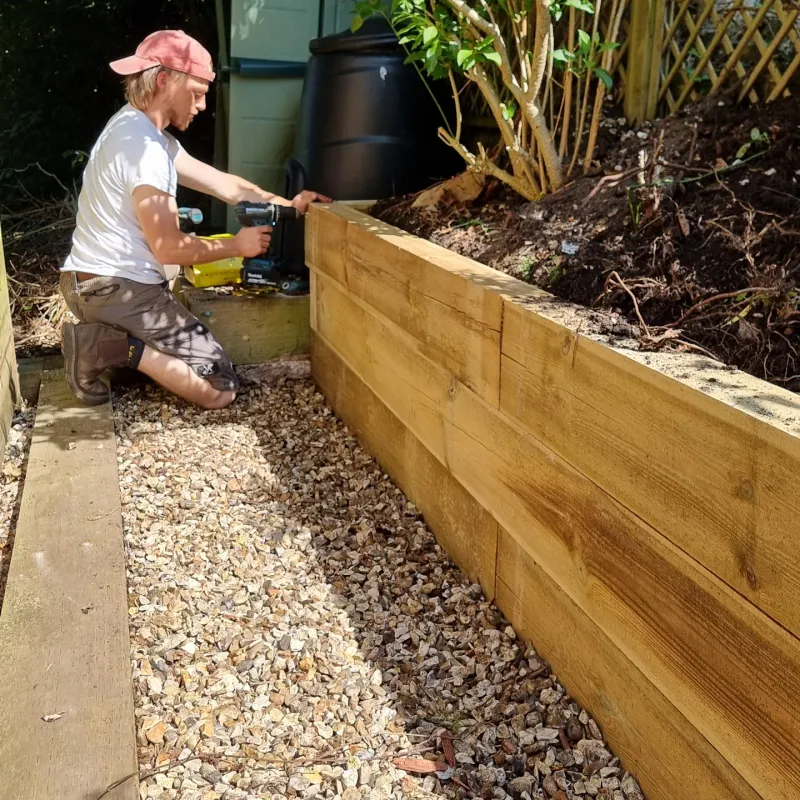
Winter weather takes a serious toll on garden infrastructure, and Pennsylvania’s combination of heavy snow loads, freeze-thaw cycles, and moisture exposure causes boards to warp, joints to loosen, and trellises to lean precariously.
Addressing these issues now, before planting season arrives in full force, saves enormous amounts of time and prevents the frustration of trying to repair structures while plants are actively growing around them.
You also avoid disturbing established root systems that develop quickly once warm weather begins. Inspect raised bed corners and joints carefully for signs of separation or rot.
Replace any compromised boards before they fail completely and spill soil across your paths. Check that trellises and supports stand firmly vertical and secure them with fresh stakes or hardware as needed.
Arbors and fencing may have shifted or sustained damage from snow weight, requiring realignment or reinforcement.
Early repairs also give you the opportunity to make improvements you’ve been considering, like adding height to beds that proved too shallow or installing better drainage systems.
Working on these projects during cool weather is far more pleasant than attempting repairs during hot summer days when you’d rather be enjoying your blooming garden.
Fresh paint or sealant applied to repaired wood structures now has time to cure completely before plants grow up against them.
This preparation ensures your garden infrastructure remains strong and attractive throughout the entire growing season, providing reliable support for climbing roses, clematis, and other flowering vines that will transform these structures into living works of art.