Step-By-Step Clematis Trellis Setup That Works In Virginia Gardens
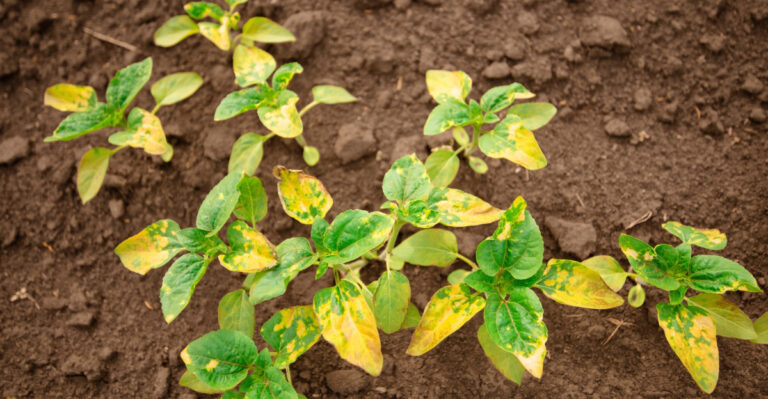
You step outside and notice your clematis leaning or sprawling in ways you didn’t expect. It makes you wonder if it’s growing “wrong.”
Maybe last year it seemed happy climbing, but now it’s tangled or looking a little lost among your other plants. It’s natural to feel unsure about whether your support setup is enough.
Not every twist or droop signals a serious problem, but when your clematis keeps flopping or struggles to reach the sun, it usually means the trellis isn’t quite giving it the support it needs.
Pinpointing the reason your vine isn’t climbing confidently is the first step to helping it thrive. In this guide, you’ll learn why clematis behave this way.
You’ll also see how to build a trellis in Virginia gardens that encourages strong, healthy growth without frustration.
1. Choose The Right Trellis Spot First So Your Clematis Actually Climbs
Sunlight patterns change throughout the growing season, and Virginia gardens experience distinct shifts that affect how well your clematis performs. Most varieties need at least six hours of sun on their leaves and flowers to produce those stunning blooms you see in catalogs.
The catch is that while the top craves brightness, the roots prefer cooler conditions underneath.
Picking a location near a wall, fence, or existing structure gives your vine natural protection from harsh afternoon sun that can scorch tender growth during July and August heat waves. Eastern or northern exposures work beautifully across Virginia because they provide gentler morning light without the intensity that stresses plants.
Southern spots can succeed too, but you’ll need to plan extra root shading.
Air circulation matters more than most gardeners realize when selecting your trellis spot. Tight corners or completely enclosed areas trap humidity, which encourages fungal issues that plague clematis in our muggy summers.
Leave space for breezes to move through while still offering some shelter from strong winds that can snap stems.
Avoid placing your trellis under large trees where roots compete aggressively for moisture and nutrients. Clematis are not shy feeders, and they struggle when forced to battle established tree systems.
Open garden beds or spots near shrubs work better because you control the soil quality and watering schedule without interference from bigger plants.
2. Pick A Trellis Style That Won’t Wobble In Virginia Wind And Storms
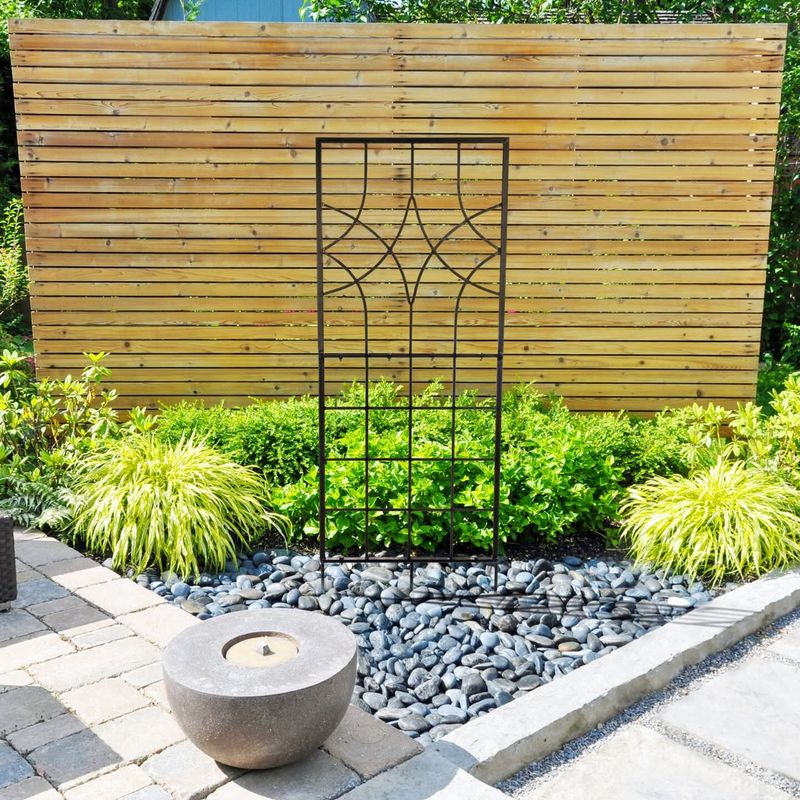
Flimsy garden structures collapse under the weight of mature clematis vines, especially when summer thunderstorms roll through Virginia with sudden gusts and heavy rain. Your trellis needs to support not just the plant itself but also the extra weight from water-soaked foliage and flowers during downpours.
Metal options generally outlast wood and resist warping through our freeze-thaw cycles better than cheaper materials.
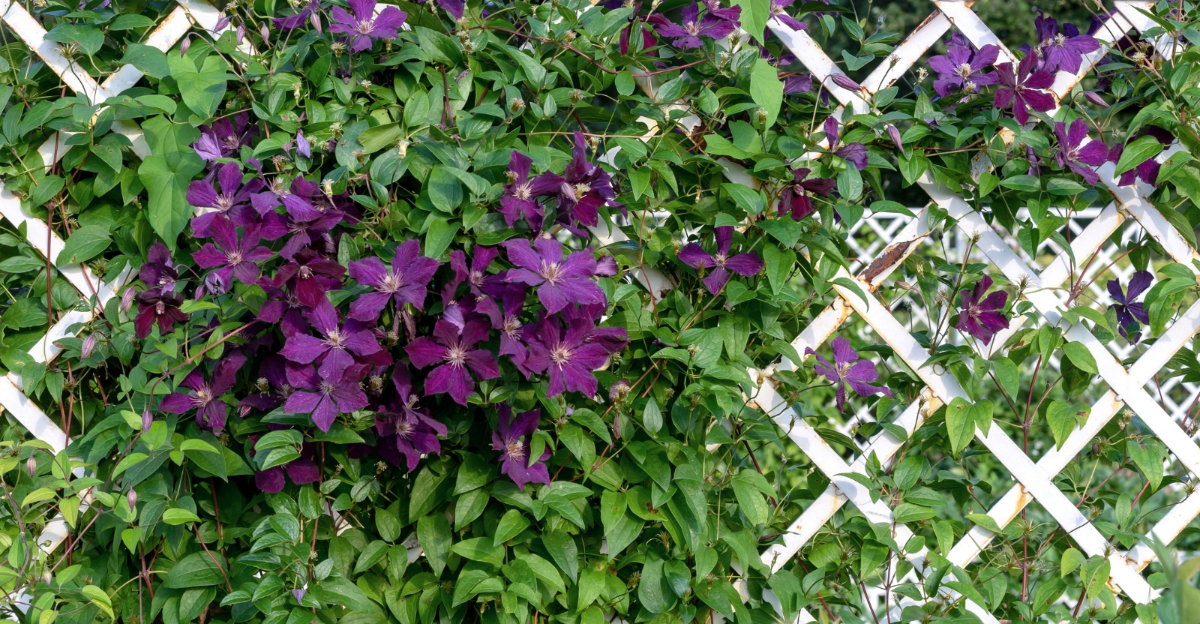
Lattice panels look charming but often lack the strength needed for vigorous clematis varieties that produce dense growth over several seasons. Opt for designs with crossbars or grid patterns spaced four to six inches apart, which gives tendrils plenty of places to grab without creating such a tight weave that air can’t flow.
Openwork designs also make it easier to inspect your vine and spot problems early.
Anchoring systems separate temporary garden decor from permanent trellis installations that survive Virginia’s weather extremes. Ground stakes alone won’t cut it for anything taller than three feet.
You’ll want to secure your trellis to solid posts sunk at least eighteen inches deep, or attach it firmly to existing structures like porch columns or garage walls using heavy-duty brackets.
Consider how the trellis will look year-round, not just during peak bloom season. In Virginia, your structure will be visible through winter when clematis goes dormant and loses leaves.
Choose materials and styles that add visual interest even when bare, so your garden maintains appeal across all four seasons.
3. Set The Base Deep Enough So It Stays Put Through Freeze And Thaw
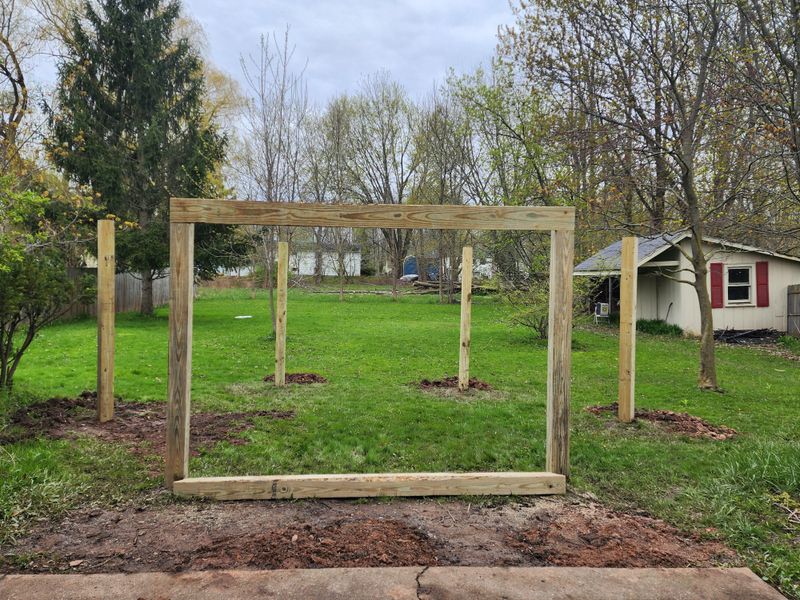
Frost heaving wreaks havoc on shallow installations across Virginia every winter, pushing posts out of alignment and destabilizing entire trellis systems by spring. Our soil freezes and thaws repeatedly between December and March, creating underground pressure that shifts anything not anchored below the frost line.
For most of Virginia, that means sinking posts at least eighteen to twenty-four inches down.
Digging deeper feels like extra work initially, but it saves you from having to reset a leaning trellis every year or watching your clematis get damaged when the structure tips. Use a post hole digger rather than a regular shovel to create narrow, deep holes that concentrate your effort where it counts.
Wider holes require more concrete or soil to fill, adding unnecessary expense and labor.
Gravel at the bottom of each post hole improves drainage and prevents water from pooling around the base where it can freeze and expand. Pour three to four inches of small stones before setting your post, then tamp them down firmly.
This layer acts like a drain field, channeling moisture away from the wood or metal so it doesn’t rot or rust prematurely.
Concrete collars around posts provide maximum stability in Virginia clay soils that shift dramatically with moisture changes. Mix your concrete slightly thicker than recommended so it sets firmly without slumping.
Let it cure for at least forty-eight hours before attaching trellis panels or planting your clematis, giving the installation time to harden completely through our variable spring temperatures.
4. Give Clematis The “Cool Roots” Setup Before You Plant Anything
Root zone temperature directly impacts how well clematis establishes and thrives through Virginia’s hot summers and unpredictable spring weather. While the vine itself loves climbing toward sunshine, the underground portion performs best when kept consistently cool and moist.
Creating this environment before you plant sets your clematis up for long-term success rather than forcing it to adapt after the fact.
Low-growing companion plants act as living mulch around the base of your trellis, shading the soil naturally while adding visual interest to your garden bed. Shallow-rooted perennials like catmint, coral bells, or sweet alyssum work perfectly in Virginia because they don’t compete aggressively with clematis roots.
Space them six to eight inches away from where your vine will go, creating a protective ring that keeps soil temperatures down.
Rocks or flat stones placed strategically over the root zone provide instant cooling without waiting for plants to fill in. Choose pieces large enough that they won’t shift easily but not so massive that you can’t move them when you need to check soil moisture or add fertilizer.
Light-colored stones reflect heat rather than absorbing it, which works better during peak summer months across Virginia.
Mulch layers add organic matter while insulating roots from temperature swings that stress clematis throughout the growing season. Apply two to three inches of shredded bark, leaf compost, or pine straw in a circle roughly twelve inches across, centered where your plant will sit.
Keep mulch pulled back slightly from the actual stem to prevent moisture buildup that encourages rot.
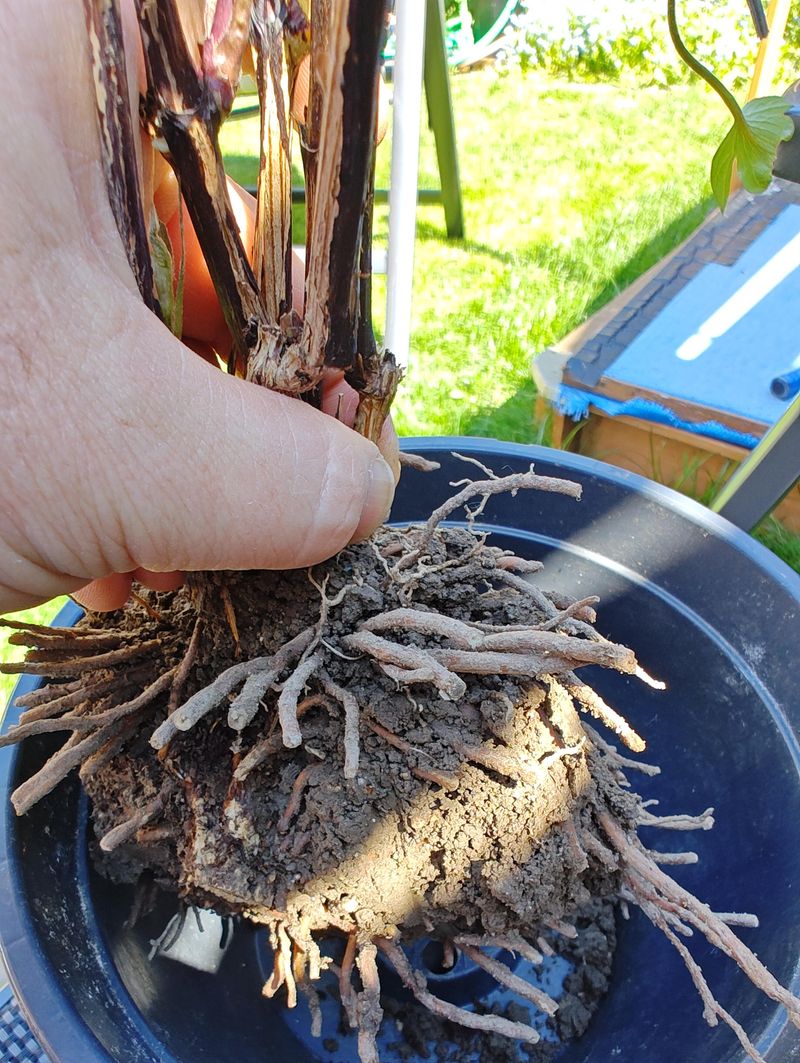
5. Plant At The Right Depth So The Vine Starts Strong And Stays Safer
Clematis planting depth confuses many Virginia gardeners because these vines break the usual rule about keeping root crowns at soil level. Instead, you want to bury the stem junction two to three inches below ground, which seems wrong until you understand how it protects your plant.
This deeper placement encourages additional roots to form along the buried stem section, creating a more robust system that supports vigorous growth.
Extra roots mean your clematis can access more water and nutrients during stressful periods like summer droughts or early fall dry spells common across Virginia. The buried nodes also serve as insurance if something damages the main stem above ground.
New shoots can emerge from below soil level, giving your vine a chance to recover rather than losing the entire plant to one unlucky incident.
Measure carefully when digging your planting hole so you end up with the right depth without guessing or making adjustments after your clematis is already positioned. The hole should be roughly twice as wide as the nursery pot and deep enough that when you set the root ball in, the stem sits two to three inches lower than it was growing in its container.
This precision matters more than speed during installation.
Loosen roots gently before planting, especially if they’ve circled inside the pot and formed a tight mass. Virginia clay soils compact easily, so mixing compost or aged manure into your planting hole improves drainage and gives roots a softer medium to push through initially.
Backfill gradually, firming soil as you go to eliminate air pockets that can dry out roots or cause settling later.
6. Add Soft Ties Early So New Growth Grabs The Trellis Faster

Young clematis stems wander aimlessly if you don’t guide them toward your trellis structure during the first few weeks after planting. These vines climb using leaf petioles that curl around supports, but new growth emerging from a freshly planted root system hasn’t developed that grasping behavior yet.
Gentle intervention helps your plant understand where you want it to go without waiting for it to figure things out randomly.
Soft cloth strips, stretchy plant tape, or even old pantyhose cut into loops work better than wire or hard plastic ties that can cut into tender stems as they thicken. Virginia’s growing season produces rapid stem expansion during May and June, and restrictive ties create permanent damage if you forget to loosen them.
Soft materials give slightly as the vine grows, reducing the risk of girdling that weakens or stunts your clematis.
Start tying stems when they reach about eight to ten inches long and begin flopping sideways or trailing along the ground. Loop your tie around the stem loosely, then attach it to the nearest trellis crossbar or vertical support.
Leave enough slack that the stem can move slightly in the breeze but not so much that it whips around and breaks during summer storms that blow through Virginia quickly.
Check your ties every two weeks throughout the first growing season, adjusting or replacing them as needed when stems outgrow their original supports. This regular attention seems tedious but prevents problems that take months to fix later.
Once your clematis develops thicker, woody stems near the base, it will climb independently, and you can stop babysitting every new shoot that emerges.
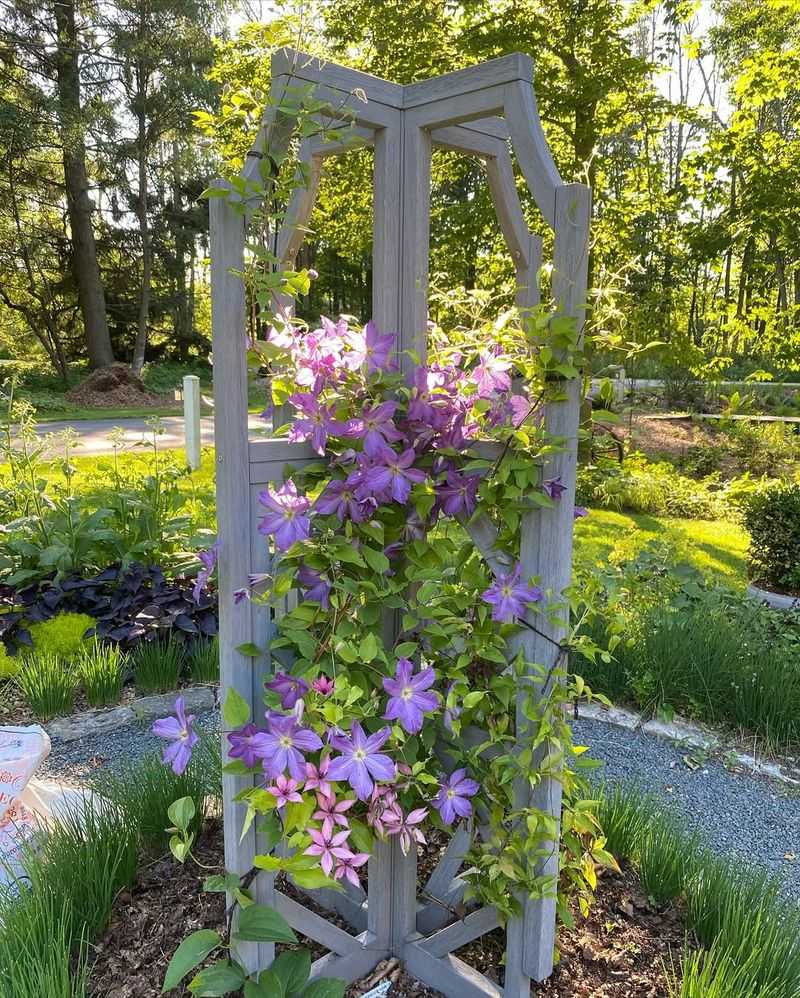
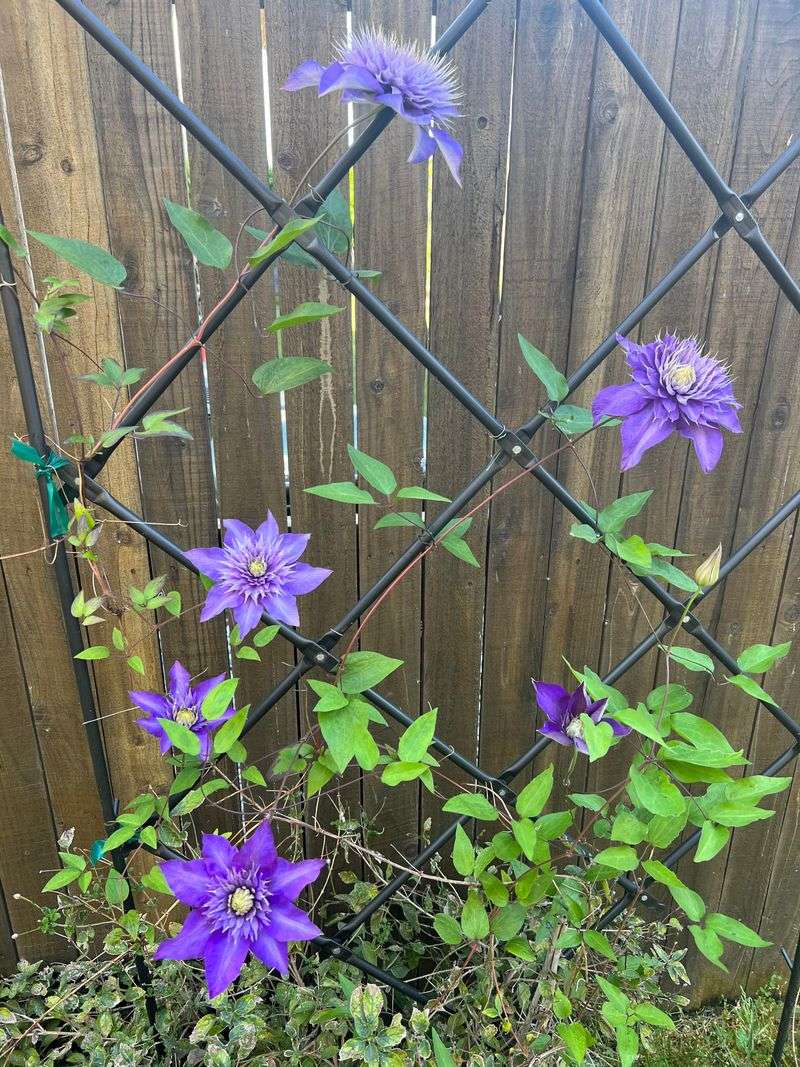
7. Train The First Stems On Purpose So You Get Full Coverage Not A Mess
Random growth patterns create lopsided clematis displays where one side of your trellis fills in beautifully while the other remains bare and awkward-looking. Vines naturally grow toward the strongest light source, which in Virginia gardens often means all your stems cluster on the south or west side unless you intervene.
Deliberate training during the first year establishes a framework that produces balanced coverage across your entire trellis structure.
Spread emerging stems horizontally rather than letting them all shoot straight up toward the top of your support. This horizontal arrangement encourages side shoots to develop all along the main stems, creating fuller growth from top to bottom.
Use your soft ties to position stems at different levels, spacing them evenly across available crossbars so each section of trellis gets attention.
Patience during this training phase pays off dramatically by the second and third growing seasons when your clematis explodes with blooms across a well-structured framework. Rushing this process or ignoring stem placement creates tangles that become nearly impossible to fix once woody growth hardens.
Virginia’s long growing season gives you plenty of time to adjust and reposition stems if your first attempts don’t look quite right.
Remove any stems that cross over each other or grow in completely wrong directions, even if it feels harsh to cut back growth you worked hard to produce. Crowded, tangled vines trap moisture and block airflow, inviting fungal problems that plague clematis in our humid climate.
Clean, organized growth not only looks better but also stays healthier through the challenges of Virginia summers and winters.
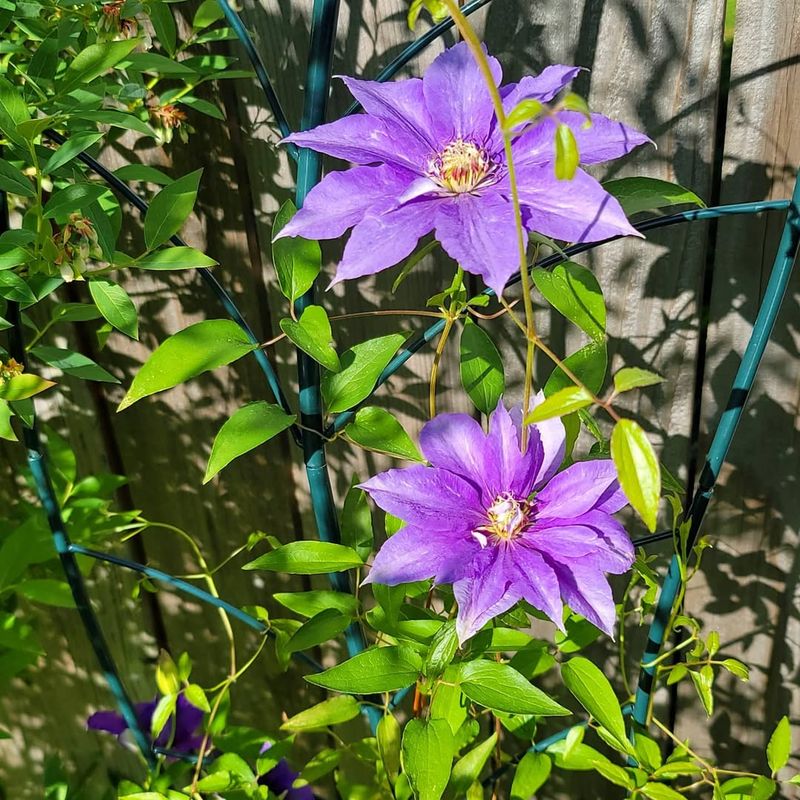
8. Lock In A Simple Water And Mulch Routine So The Trellis Pays Off All Season
Consistent moisture makes the difference between clematis that limps through Virginia summers producing sparse blooms and vines that cascade with flowers from May through September. These plants aren’t drought-tolerant despite their tough appearance, and irregular watering causes bud drop, leaf scorch, and stunted growth that disappoints gardeners who expect better results.
Establishing a reliable routine right after planting prevents most common problems.
Deep watering once or twice weekly beats frequent shallow sprinkles that encourage roots to stay near the surface where they’re vulnerable to heat stress. Aim to moisten soil down to at least eight inches, which you can check by pushing a finger into the ground near your plant.
Virginia clay holds moisture well once saturated, so you won’t need to water as often as gardeners dealing with sandy soils, but you do need to ensure water penetrates deeply rather than running off.
Soaker hoses or drip irrigation deliver water directly to root zones without wetting foliage unnecessarily, which reduces fungal disease pressure in our humid climate. Position your watering system inside the mulch ring around your clematis base, then let it run slowly for thirty to forty minutes rather than blasting the area with a strong spray.
Slow delivery gives clay soils time to absorb moisture instead of shedding it.
Refresh mulch layers each spring and again in midsummer as organic materials break down and thin out across Virginia gardens. This twice-yearly attention maintains the cool root environment your clematis craves while suppressing weeds that compete for water and nutrients.
Pull old mulch back slightly before adding new material so you don’t build up excessive layers that can smother roots or create habitat for pests.