The Easiest Way To Multiply Spider Plants In Water For California Homes
Spider plants might be the most generous houseplant you will ever own. Give them a little light, a splash of water, and they start producing baby plants like it is their full time job.
The best part? You can turn those tiny offshoots into brand new plants with almost no effort, no fancy tools, and no gardening experience required.
Even better, propagating spider plants in water works beautifully in California homes, where bright windows and mild indoor temperatures create the perfect rooting environment.
If you have ever wanted more greenery without spending more money, this is your moment.
Learn a straightforward way to propagate spider plants in water, boost root development, and transition your new plants into soil at just the right time for the best results.
One plant can quickly become many, and yes, it is as simple as it sounds.
1. Choose Healthy Spider Plant Babies
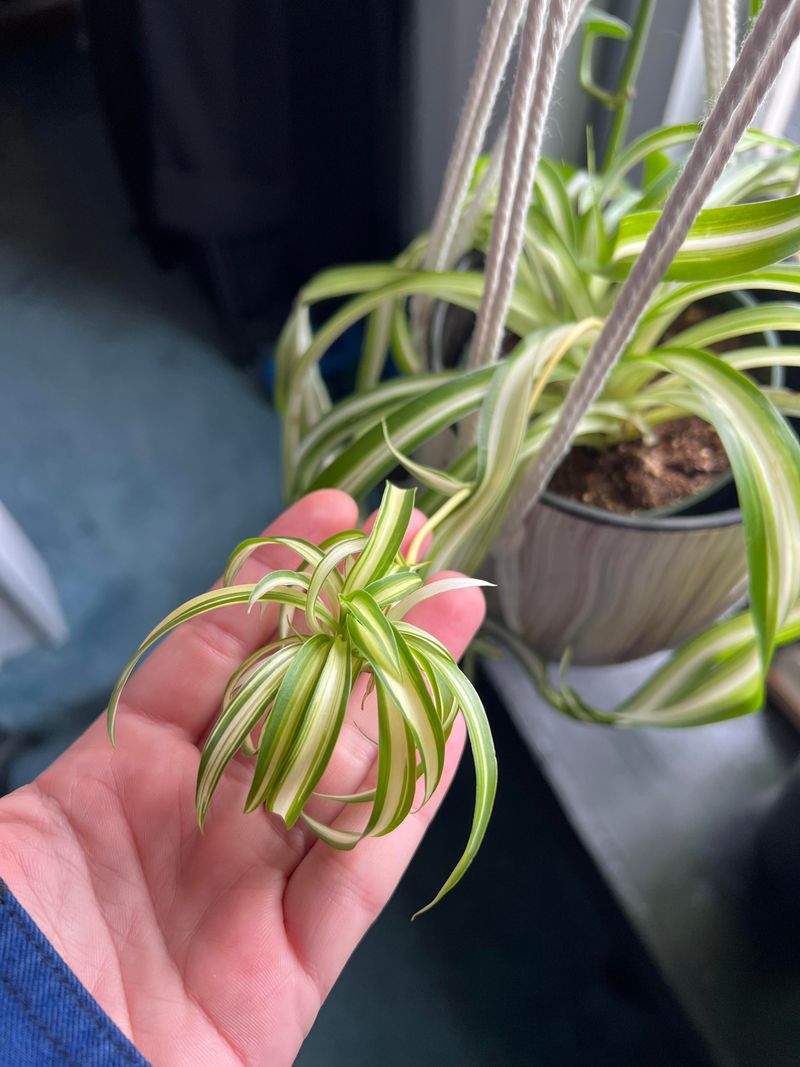
Many people grab the first plantlet they see without checking if it’s actually ready for rooting. Spider plant babies need to be mature enough to survive on their own, which means looking for specific signs before you snip them off the mother plant.
A healthy baby should have several leaves that are at least two to three inches long and show the classic green and white striping. Look for tiny root nubs forming at the base where the plantlet connects to the stem.
These little bumps indicate the baby is preparing to root, making your job much easier.
California’s bright indoor light often produces vigorous plantlets that develop quickly. Choose babies that feel firm to the touch and show no yellowing or brown tips.
Avoid any that look wilted or damaged since stressed plantlets struggle to establish roots in water.
Size matters when selecting which babies to propagate. Plantlets smaller than two inches often lack the energy reserves needed to develop a strong root system.
Waiting until they’re three to four inches tall gives them the best chance of success in your propagation setup.
Cutting too early leads to disappointing results and wasted effort.
2. Use Clean Water And Containers
Tap water straight from the faucet might seem convenient, but it contains chlorine and minerals that can interfere with root development.
California tap water varies dramatically by region, with some areas having hard water that leaves mineral deposits on container walls and developing roots.
Let tap water sit out overnight in an open container before using it for propagation. This allows chlorine to evaporate and brings the water to room temperature, which spider plant roots prefer.
Cold water can shock delicate developing roots and slow down the entire process.
Your container choice matters more than you might think. Clear glass works best because it lets you monitor root growth without disturbing the plantlet.
Mason jars, drinking glasses, or small vases all work perfectly as long as they’re spotlessly clean.
Wash containers with hot soapy water and rinse thoroughly before adding your plantlets. Any soap residue or previous bacterial growth can cause root rot before roots even have a chance to form.
California’s dry indoor air means water evaporates faster than in humid climates, so check water levels daily.
Starting with pristine conditions gives your spider plant babies the healthiest environment possible for successful rooting.
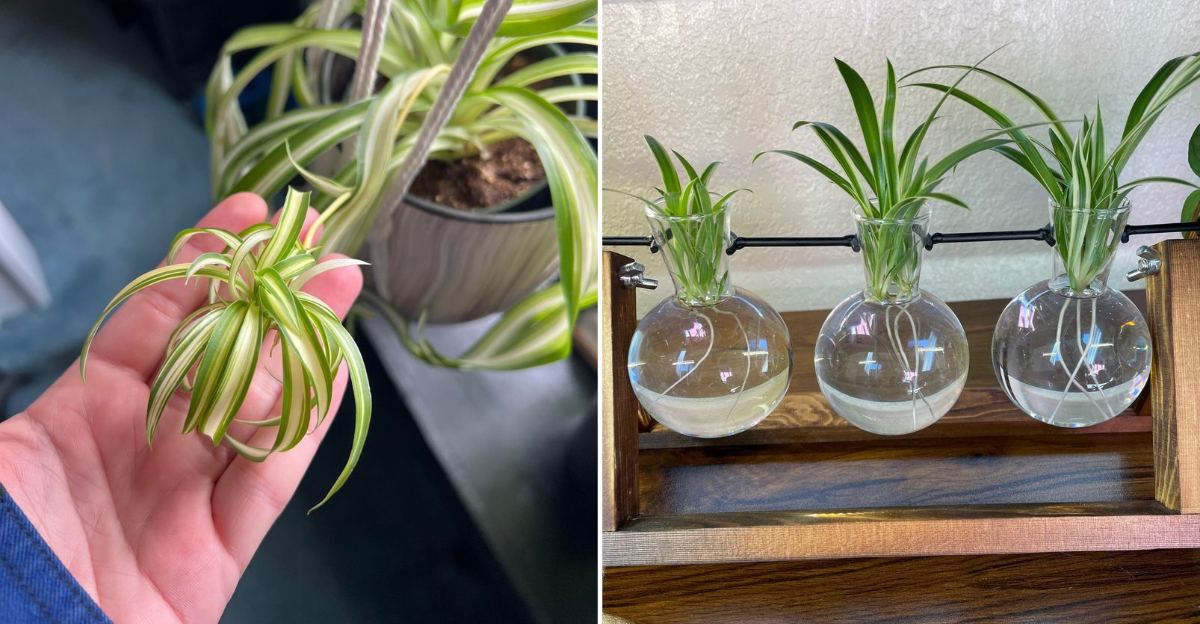
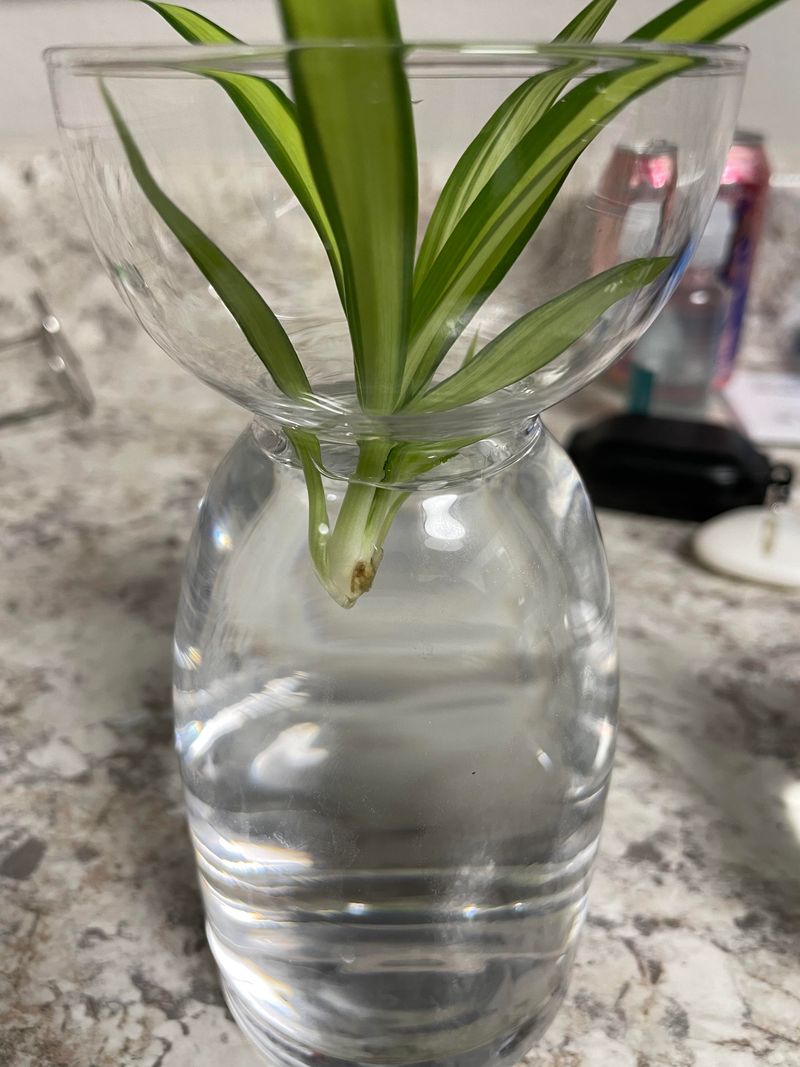
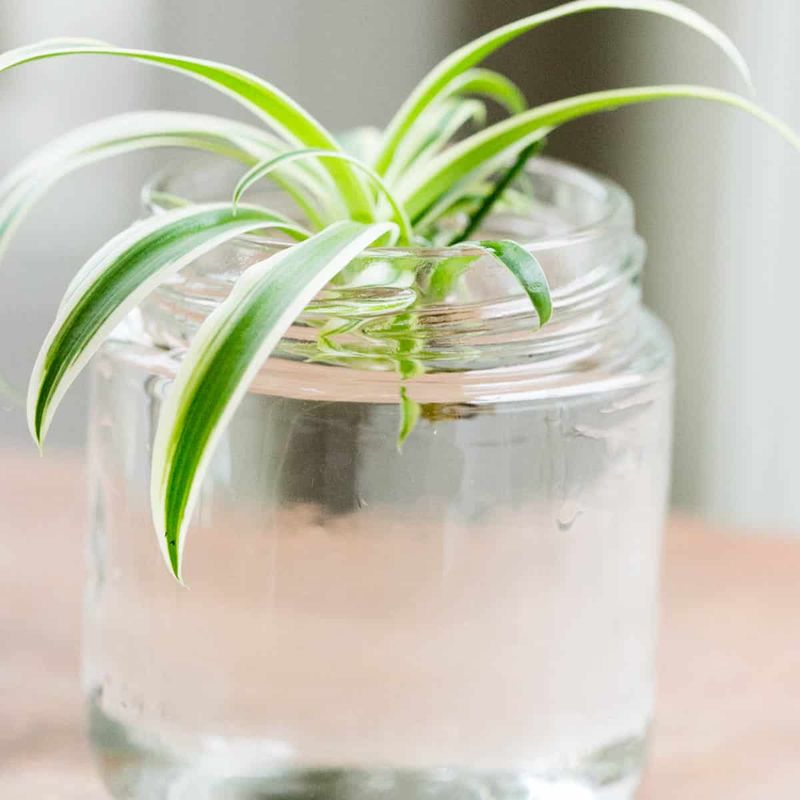
3. Keep Roots Submerged, Leaves Dry
One of the most common mistakes is submerging the entire plantlet or letting leaves touch the water surface. Spider plant foliage isn’t designed to stay wet, and constant moisture contact leads to rot that spreads quickly through the whole baby.
Position your plantlet so only the bottom half-inch sits below the water line. The root nubs need moisture to activate and grow, but the leaves and crown must stay completely dry.
If your container opening is too wide and the baby keeps falling in, try using a piece of plastic wrap over the top with a small hole poked through for the stem.
California homes often have lower humidity than other regions, which actually works in your favor here. Dry air helps prevent fungal issues on leaves while roots happily develop underwater.
Check your setup daily to ensure water levels haven’t risen to touch the foliage as you add fresh water.
Some plantlets naturally curve or have leaves that want to droop into the water. Gently prop these leaves up using toothpicks or position the container so the plantlet rests at a slight angle.
Maintaining this dry-wet boundary is crucial for preventing the heartbreak of watching a promising baby turn mushy and brown just when roots start forming.
4. Provide Bright Indirect Light
Placing propagation containers in dim corners or far from windows is a setup for failure. Spider plant babies need energy from light to fuel root development, but California’s intense direct sun can overheat water and cook developing roots in glass containers.
Find a spot near an east or north-facing window where bright light fills the room without direct sun rays hitting the water. South and west windows work too if you use sheer curtains to diffuse the intensity.
The goal is creating conditions where you can comfortably read a book without artificial light during daytime hours.
Watch for signs your lighting isn’t quite right. Babies that develop long, pale leaves are stretching toward light and need a brighter location.
If water in the container feels warm to the touch by afternoon, you’re getting too much direct sun exposure.
California’s year-round sunshine means you can propagate spider plants any month without worrying about seasonal light changes. This gives you consistent results whether you start babies in January or July.
Rotate containers every few days so all sides of the plantlet receive equal light exposure and develop balanced growth.
Proper lighting makes the difference between roots appearing in one week versus three weeks of frustrating waiting.
5. Change Water To Prevent Rot
Leaving the same water sitting for weeks seems easier than regular changes, but stagnant water quickly becomes a bacterial soup that attacks developing roots.
You might not see problems immediately, but root rot often starts invisibly before suddenly killing your entire plantlet.
Replace the water completely every three to four days without exception. This simple habit prevents bacterial buildup and ensures developing roots receive fresh oxygen dissolved in the water.
California’s dry air causes faster evaporation, so you’ll need to top off water levels between full changes too.
When changing water, gently rinse the container and wipe away any slimy film forming on the glass. This biofilm harbors bacteria that can quickly overwhelm young roots.
Handle the plantlet carefully during water changes since developing roots are extremely fragile and break easily.
If you notice water turning cloudy or developing an odor between scheduled changes, dump it immediately and refresh it regardless of your timeline. Cloudy water signals bacterial growth that’s already too advanced.
Some people add a tiny piece of activated charcoal to their propagation water to help keep it fresher longer.
Consistent water changes might feel tedious, but this single habit prevents most propagation failures that frustrate beginners.
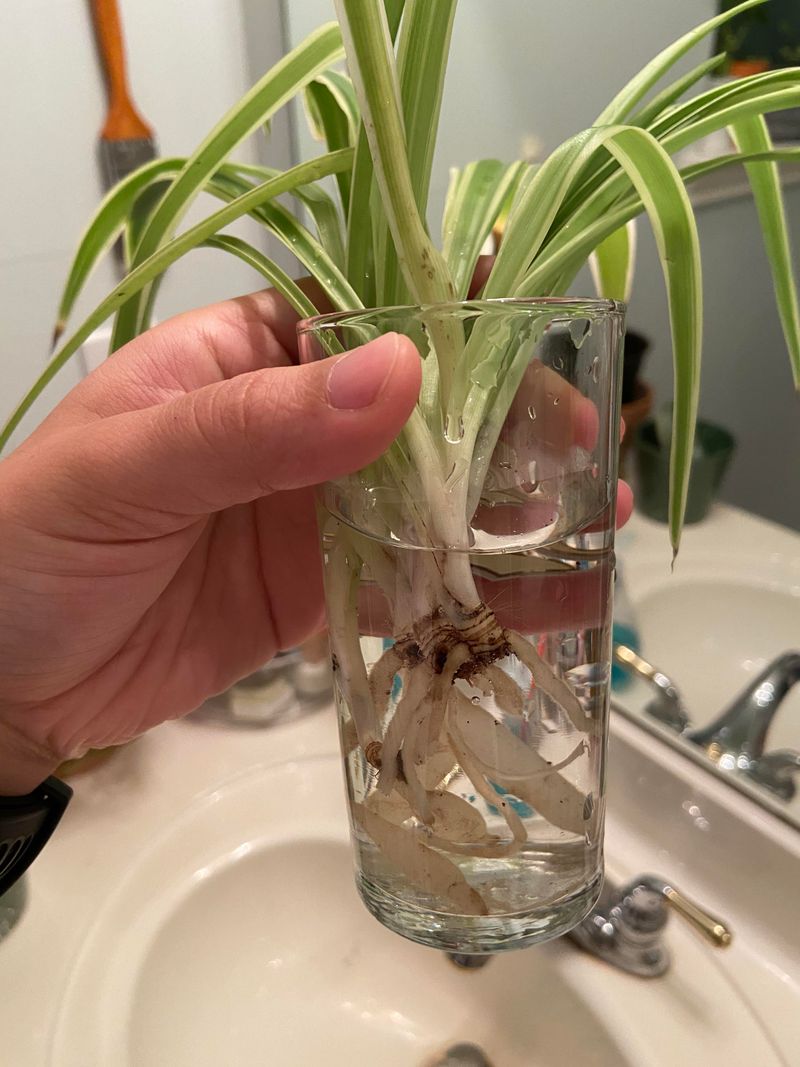
6. Wait For Strong Root Growth
Impatience causes many people to transplant their spider plant babies way too early when they see just a few root tips emerging.
Those first tiny roots aren’t nearly strong enough to support the plantlet in soil, and premature transplanting usually results in a sad, wilted baby that struggles to survive.
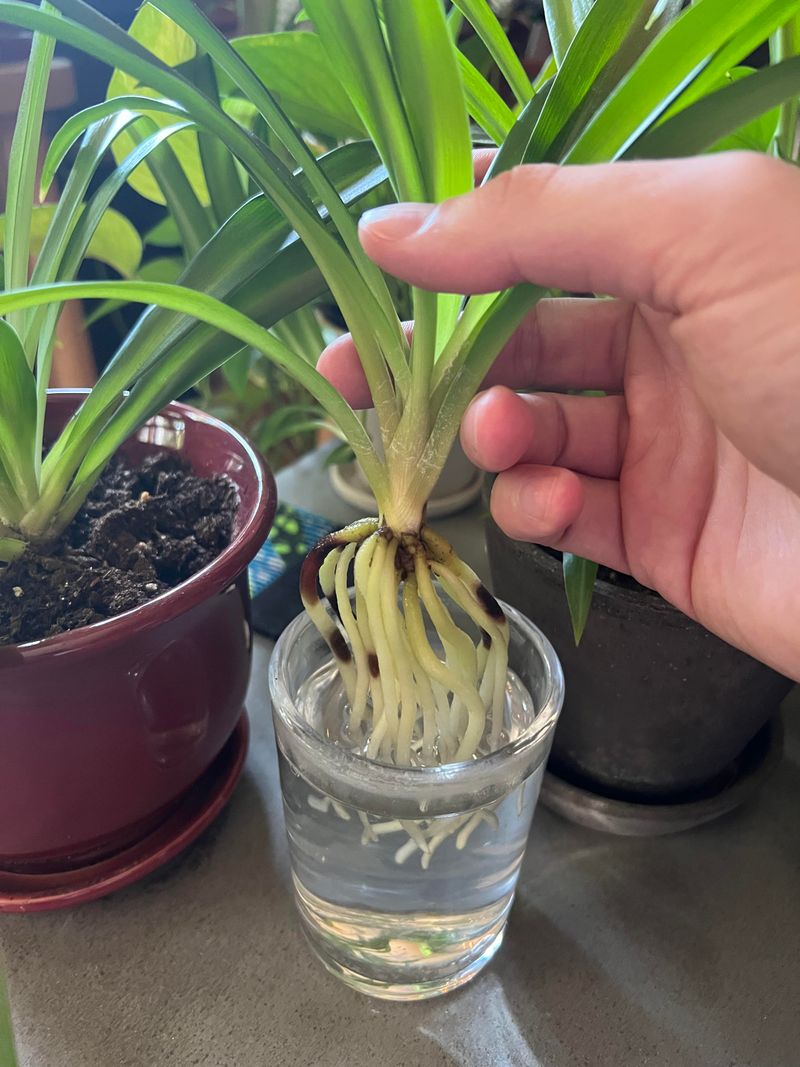
Wait until roots measure at least two to three inches long before even thinking about soil. The root system should look dense and bushy with multiple roots branching out from the base.
California’s bright indoor conditions typically produce roots this size in three to four weeks, though timing varies based on season and specific growing conditions.
Longer roots give your plantlet a much better chance of successfully transitioning to soil. They can immediately start absorbing water and nutrients instead of spending energy trying to grow enough roots to function.
Watch for roots that appear white or cream-colored and feel firm when gently touched.
Brown, mushy roots indicate rot problems that mean starting over with a fresh baby. Some plantlets develop roots faster than others even from the same mother plant, so don’t worry if progress seems uneven across multiple propagation containers.
Each baby works on its own timeline depending on its individual energy reserves and growing conditions.
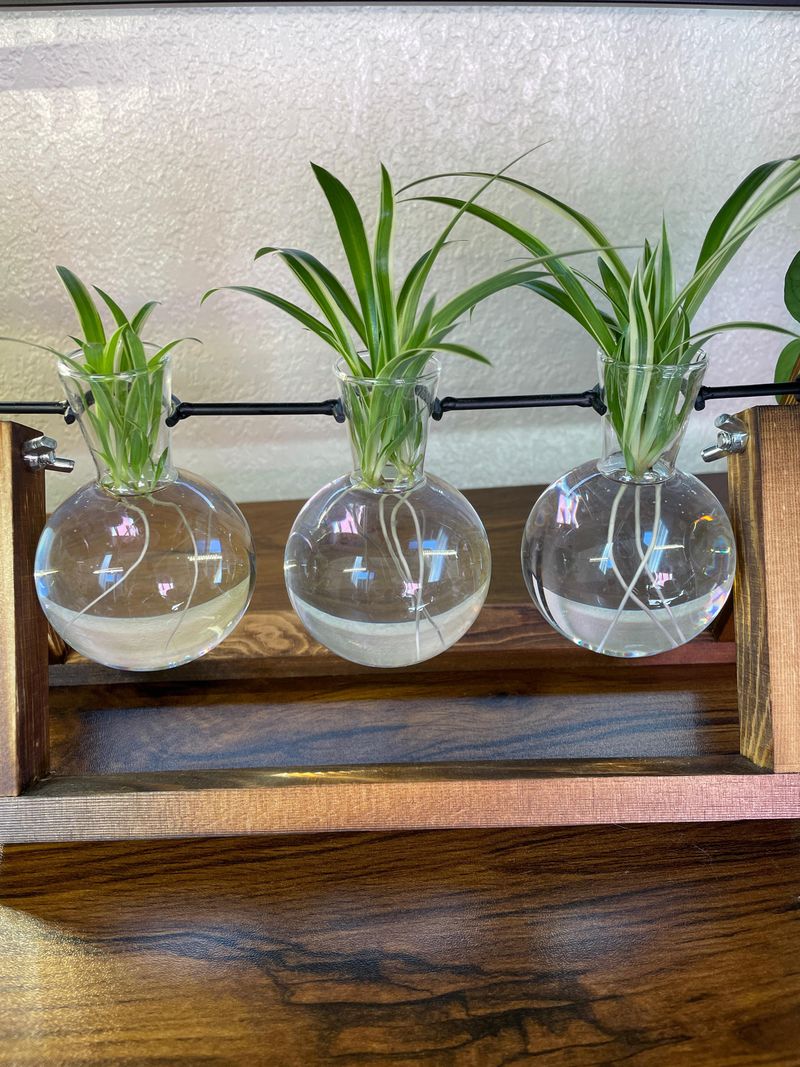
7. Transplant At The Right Time
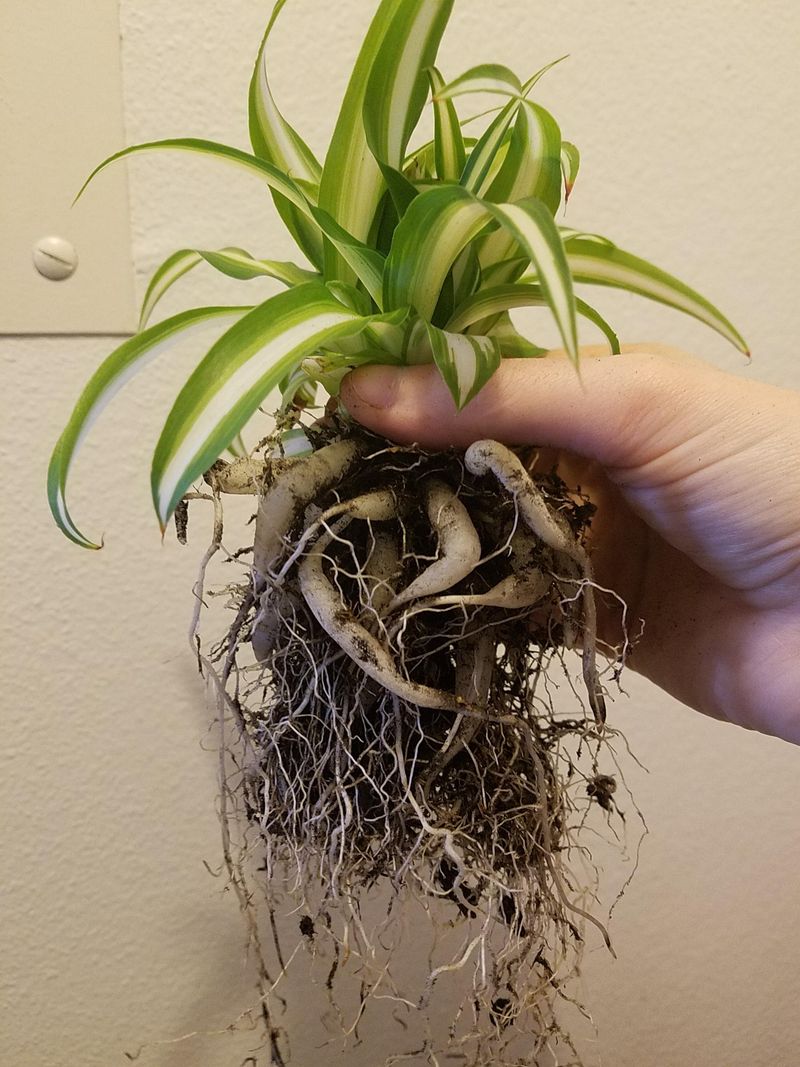
Jumping from water directly into a large pot filled with heavy soil shocks the root system and often kills plantlets that were thriving in water.
Water roots develop differently than soil roots, needing a gentle transition period to adapt to their new growing medium.
Start with a small container only four inches in diameter filled with light, well-draining potting mix. California’s dry indoor air means you want soil that retains some moisture without staying soggy.
Mix regular potting soil with perlite or coarse sand to improve drainage if your mix feels too heavy.
Plant your rooted baby at the same depth it sat in water, keeping the crown above soil level. Water thoroughly after planting and place the pot in the same bright indirect light location where it was propagating.
Expect some initial drooping as roots adjust to soil, which is completely normal.
Keep soil consistently moist but not waterlogged for the first two weeks after transplanting. California’s low humidity means soil dries faster than in other climates, so check moisture daily by poking your finger into the top inch.
Once you see new leaf growth emerging from the center, you’ll know roots have successfully adapted to soil and your propagation project is complete.