This Paver DIY Will Instantly Improve A Muddy Path Between Neighboring Houses
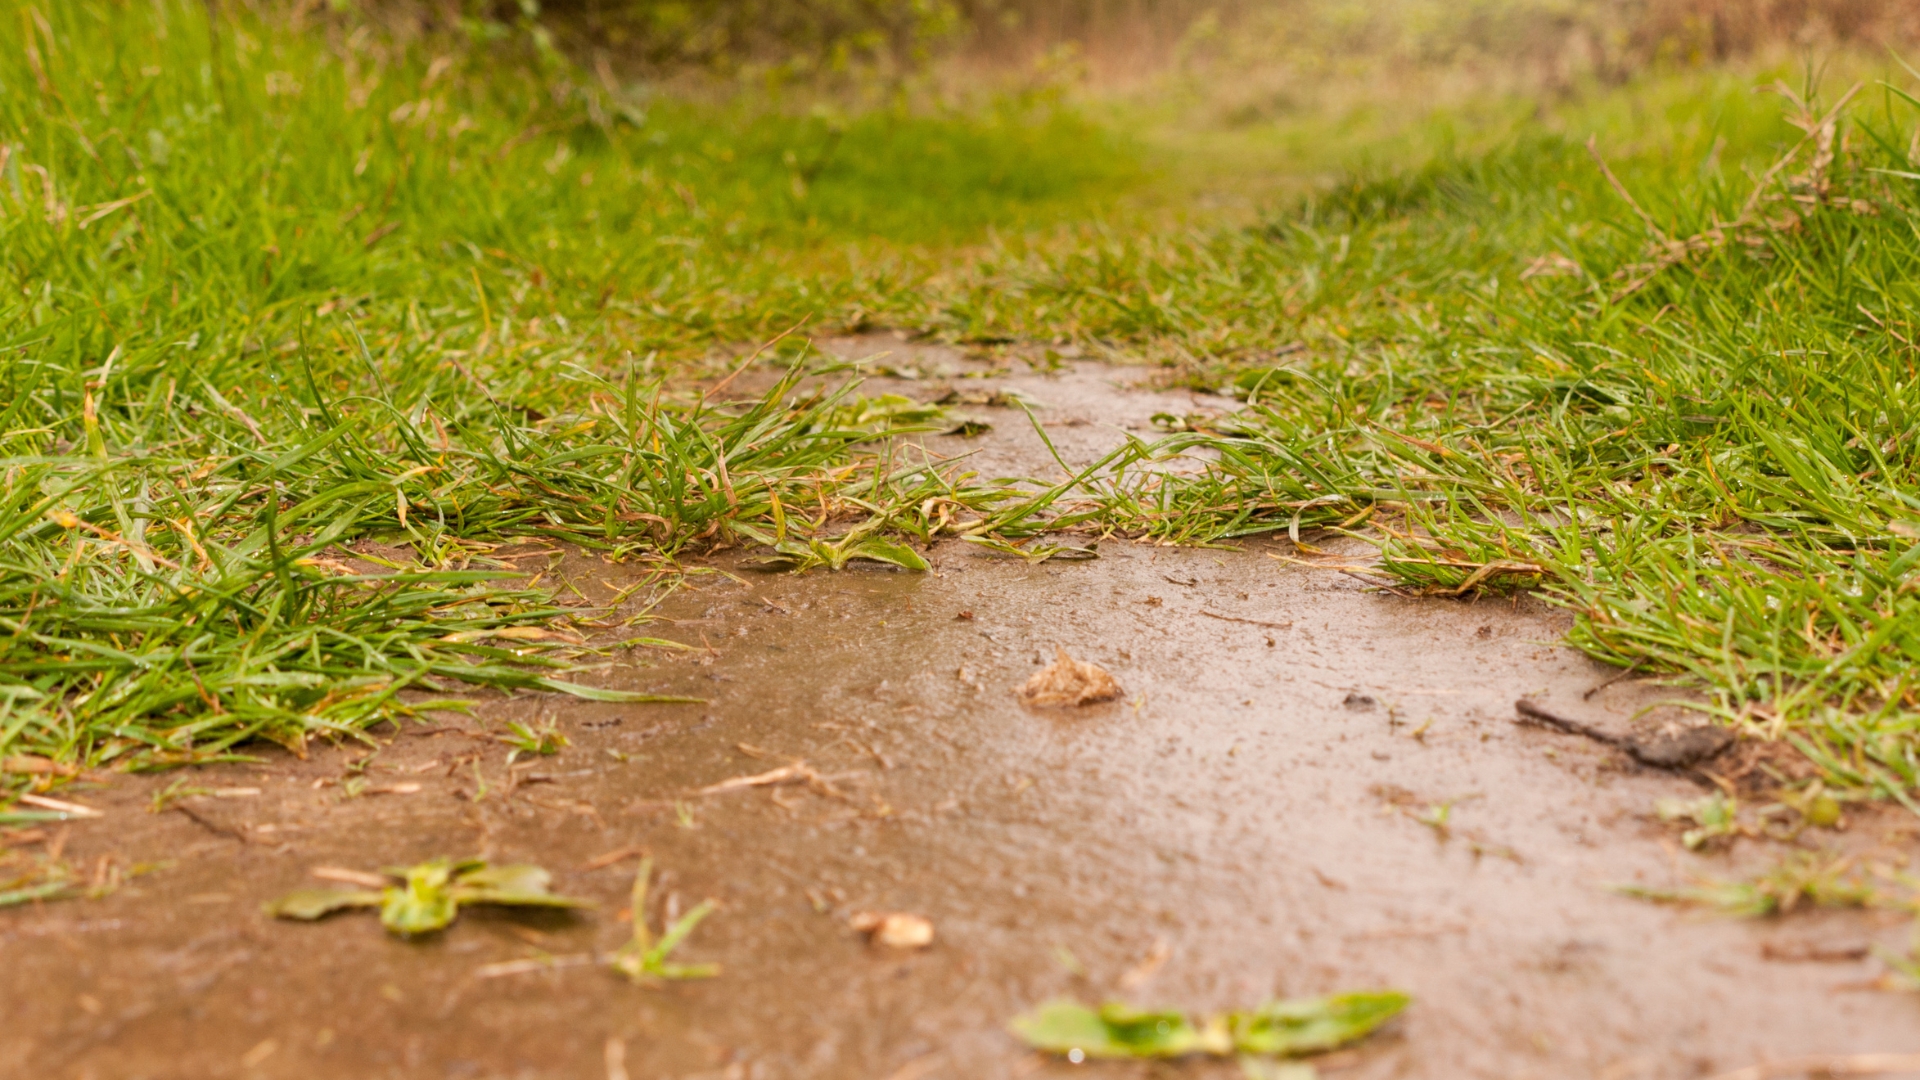
That patch of land between the houses might as well have been a swamp. Every rainy season, it turned into a mud pit, swallowing shoes, tracking dirt inside, and making even the shortest walk a frustrating ordeal.
I threw everything at it, even mulch and some old bricks, but nothing held up for long.
Then I gave pavers a try, and it was like flipping a switch. Suddenly, no more muddy footprints in the house, no more dodging puddles, just a clean, dry path that actually lasts.
After years of frustration, I finally found the answer, and I can’t wait to share it with you!
Gravel Is The Best Drainage Solution!
Pavers were a game-changer for my muddy walkway, giving me a solid, clean path to walk on. But there was still one lingering problem – drainage. Rainwater would pool around the pavers, creating mini puddles and soft spots that threatened to undo all my hard work.
That’s when I realized the missing piece of the puzzle: gravel.
Gravel acts like a natural drainage system, allowing water to filter through instead of collecting on the surface.
When combined with pavers, it prevents erosion, keeps the walkway dry, and adds a polished, professional look. No more puddles, no more shifting pavers – just a durable, beautiful path that stands up to the elements.
First, Take Accurate Measurements

Before jumping into the project, I knew one thing for sure – guesswork wasn’t going to cut it. To create a stable, long-lasting walkway, I had to take accurate measurements first.
I carefully measured the length and width of the path, then calculated how much gravel I’d need to cover the area properly. Having an estimate helped me budget for materials, preventing unnecessary trips to the store or unexpected costs.
But measurements alone weren’t enough. I also called in a professional to assess the drainage situation.
Sometimes, the problem runs deeper than a little mud, and I wanted to be sure I wasn’t missing a bigger issue. With their advice, I had a clearer picture of what was needed and the confidence to move forward without making costly mistakes.
The Type Of Gravel You Use Matters
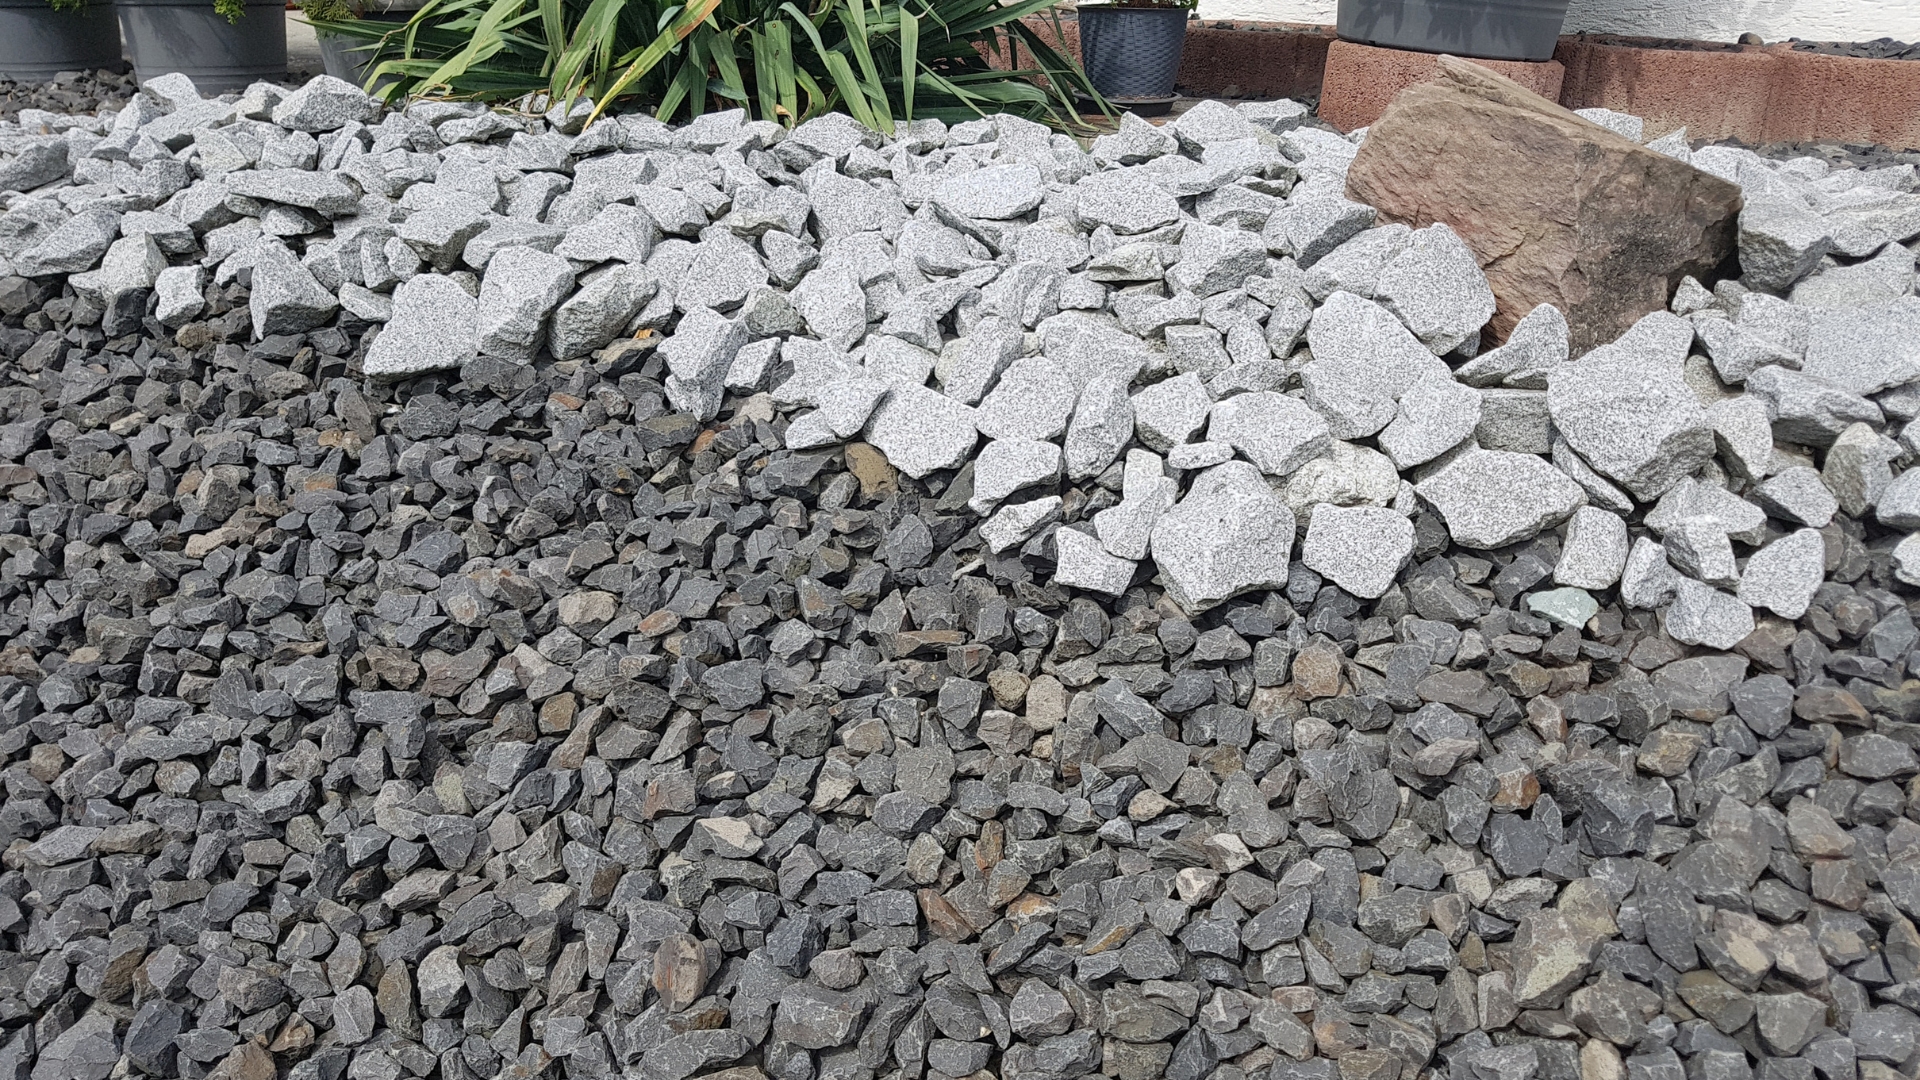
I quickly learned that choosing the right gravel isn’t as simple as grabbing a few bags from the store.
For a sturdy, long-lasting path, two layers are needed. The base layer – made of coarse, crushed stone – should be about an inch thick to provide stability and proper drainage.
On top of that, a decorative layer makes the path both functional and visually appealing. After some research, I found that gravel around 3/8 of an inch is ideal for foot traffic, offering the perfect balance between comfort and durability.
The type of decorative gravel matters, too. Crushed rock is a great choice for high-traffic areas because it locks into place, reducing shifting.
On the other hand, smooth stones feel better underfoot but tend to scatter more easily.
Pea gravel is a popular pick since it’s affordable, easy to find, and blends well into most landscapes. For a more refined look, options like river rock, slate chips, and even glass gravel can elevate the aesthetic – but be prepared to pay a bit more for the upgrade.
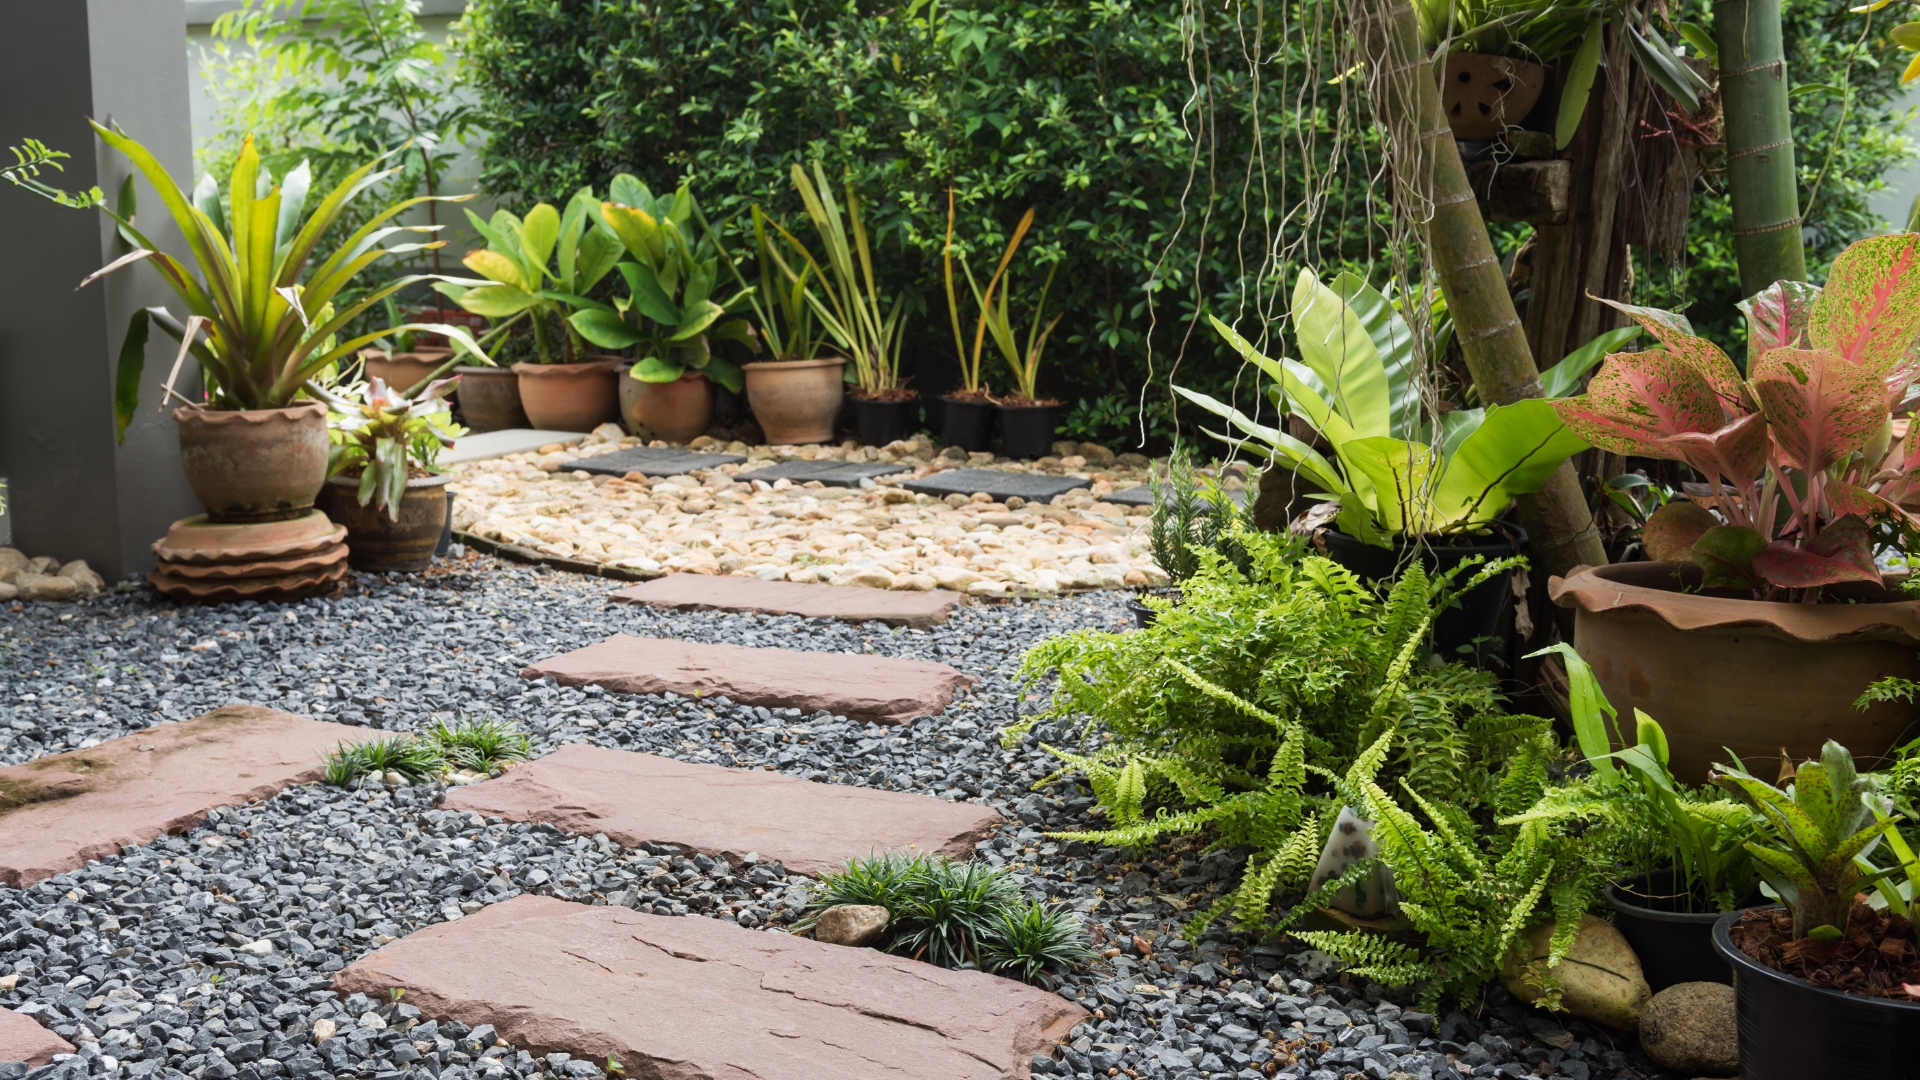
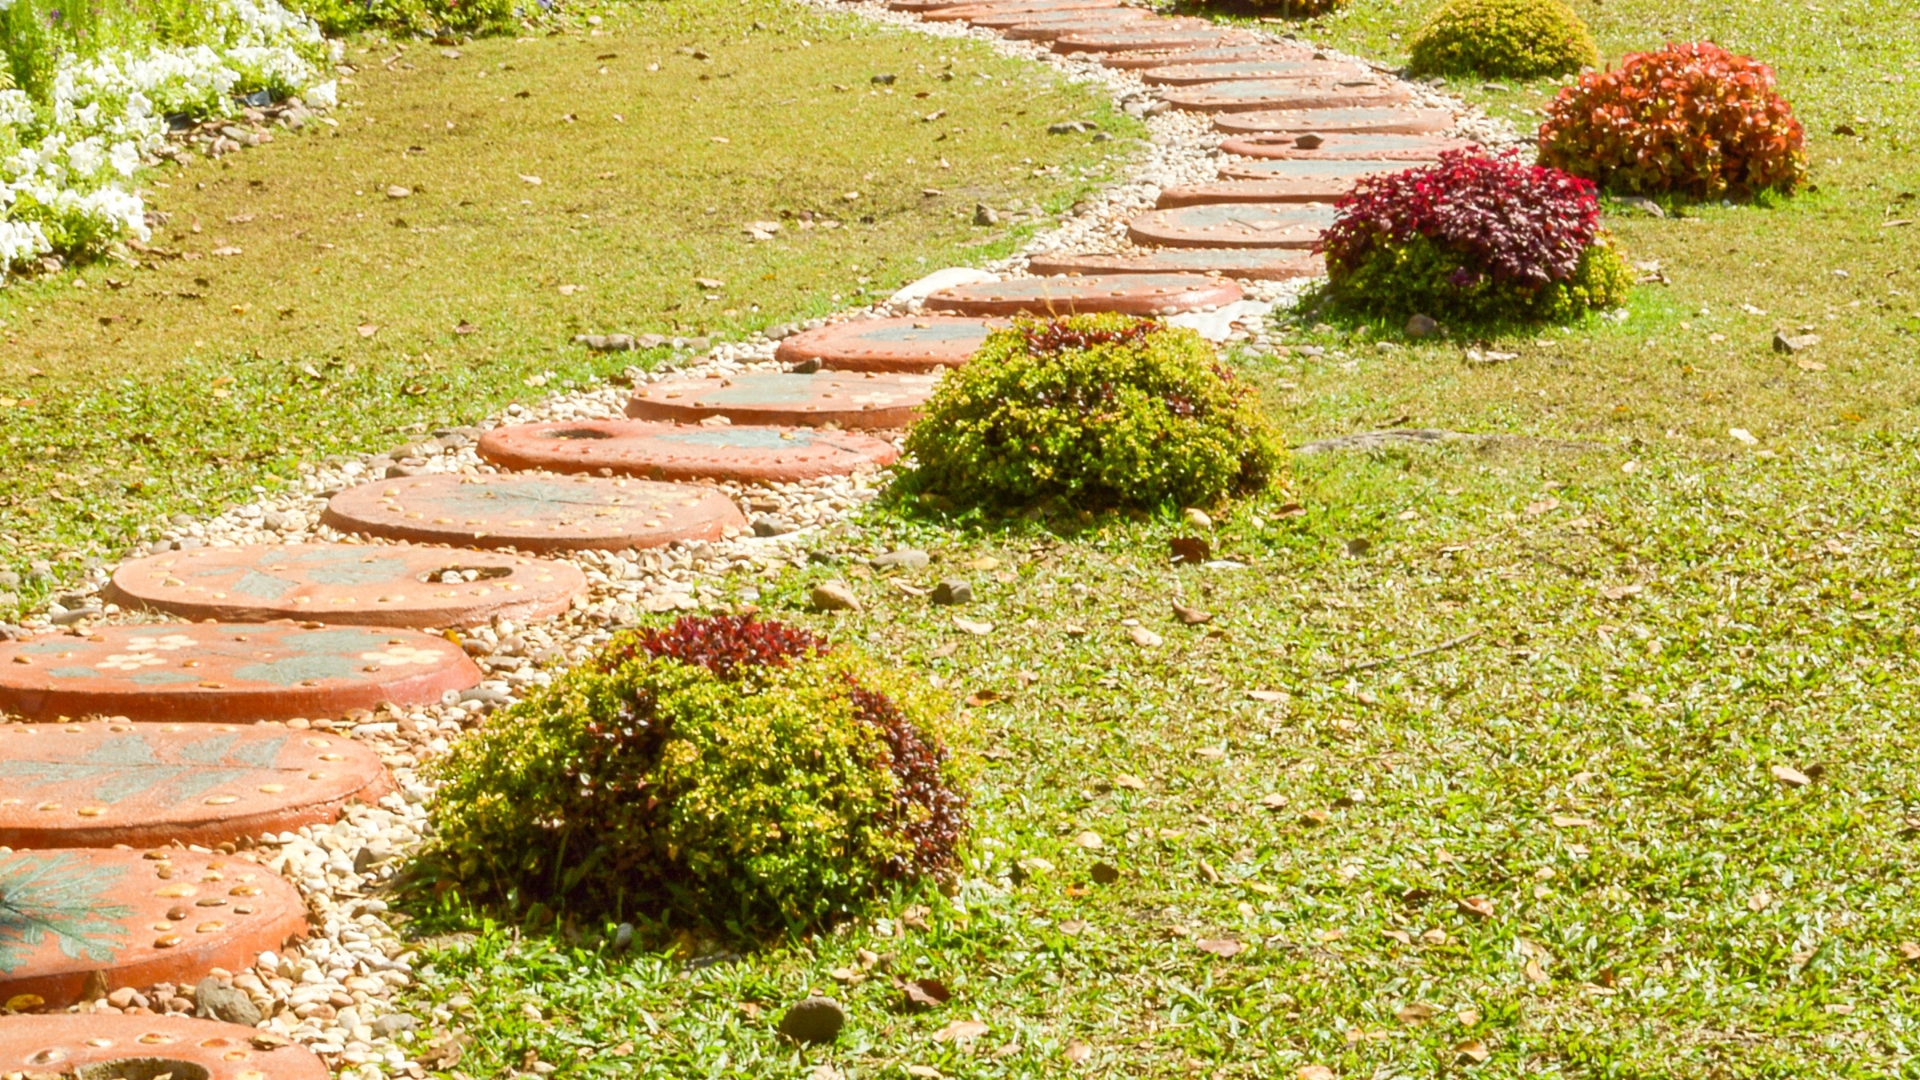
Let’s Build A Mud-Free Patio
Creating a firm, stylish patio is easier than you think, and it doesn’t have to break the bank. If you love a charming, relaxed aesthetic, using mismatched pavers from secondhand sources is a great way to add personality while keeping costs low.
Whether it’s old bricks, salvaged stones, or leftovers from a neighbor’s renovation, a little creativity goes a long way.
Before getting started, gather your tools: a wheelbarrow, a hand tamper, a shovel, a rake, and some lawn chalk or spray paint to mark the area.
Now mark out the area with chalk or spray paint, then dig down about 3 to 4 inches, setting aside the soil for easy cleanup.
Compact the ground with a tamper before laying down a base layer of gravel, which should be watered and tamped for stability.
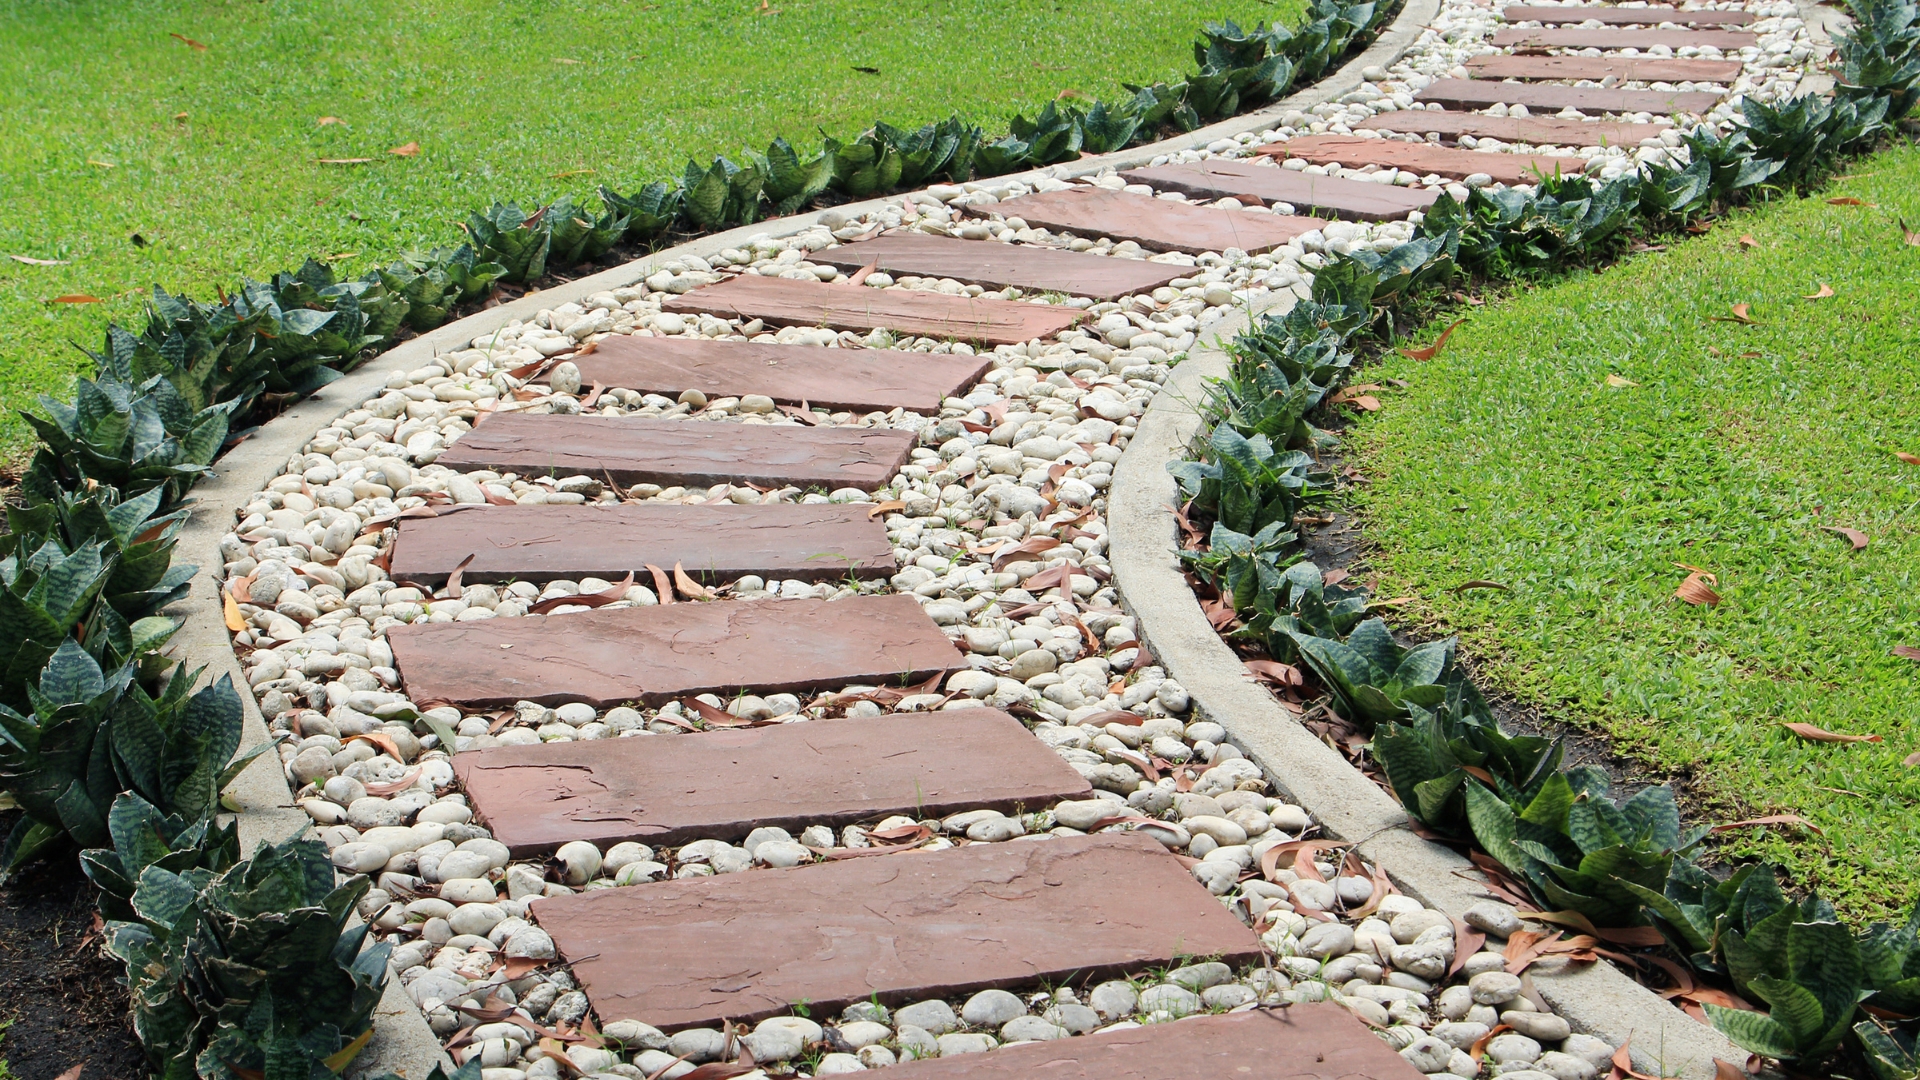
Place the pavers on a thin layer of builder’s sand, install an edging material that suits your style, and top it all off with decorative gravel.
Skip landscape fabric – it eventually surfaces and makes a mess. With the right foundation, your new patio will be both functional and beautiful.
Here’s How To Add The Perfect Finishing Touch
With the hard work done, it’s time for the fun part – adding those final touches that take your project from functional to beautiful.
One of the easiest ways to elevate the look is by choosing an attractive border. If your path is tucked into a garden, simple bricks or natural stone edges will blend seamlessly. If it meets a lawn or patio, metal edging or wooden sleepers create a more polished, defined look.
Beyond edging, small details make a big impact. Consider planting low-growing flowers or ground cover plants along the sides to soften the space and add color.
Solar-powered pathway lights are another great touch, providing a warm glow in the evenings while improving safety.
With just a little extra effort, your finished walkway won’t just be practical – it’ll be a standout feature in your yard.