This Outdoor Seed Trick Works Shockingly Well In Oregon Gardens
Oregon gardeners know the struggle all too well: you want to start seeds early, but indoor space is limited, grow lights are expensive, and those leggy seedlings under the window just aren’t cutting it.
What if there was a way to start your seeds outdoors in the middle of winter, using nothing more than recycled milk jugs, and end up with stronger, healthier plants than you’d ever get indoors?
This milk jug seed-starting trick has been quietly transforming Oregon gardens for years, and once you see how simple it is, you’ll wonder why you ever bothered with complicated indoor setups.
The method works shockingly well here because Oregon’s cool, wet winters are actually perfect for getting seeds started the natural way.
Grab a few empty milk jugs, some potting soil, and your seed packets, because you’re about to discover the easiest, most rewarding way to grow seedlings that are tough, ready for anything, and perfectly suited to your Oregon garden.
1. Why Milk Jugs Create The Perfect Mini Greenhouse
You’ve probably tried starting seeds indoors on a sunny windowsill, only to watch them stretch tall and thin, desperately reaching for more light.
Those weak, spindly seedlings rarely survive the transition outdoors, and it’s frustrating to put in all that effort for disappointing results.
Milk jugs solve this problem in the cleverest way possible.
When you cut a milk jug in half, fill the bottom with soil, plant your seeds, and tape it back together, you create a self-contained mini greenhouse that sits right in your garden. The translucent plastic lets in plenty of light while trapping warmth and moisture inside.
Seeds get the gentle heat they need during the day, and the jug protects them from harsh winds and heavy rain at night.
Oregon’s mild winter temperatures mean your jugs won’t freeze solid for weeks on end like they might in colder climates. Instead, seeds experience natural temperature fluctuations that toughen them up from the very beginning.
The jugs breathe through ventilation holes you create, preventing mold and rot while keeping humidity balanced.
You don’t need electricity, shelving units, or expensive equipment. Just recycle jugs you’d normally toss, and let Oregon’s weather do the work.
Seedlings grow stocky and strong because they’re getting real sunlight and fresh air from day one, not artificial conditions they’ll struggle to adapt to later.
2. How Oregon’s Weather Makes This Method Even Better
Most gardening advice comes from places with brutal winters or scorching summers, but Oregon’s climate is different, and that difference makes milk jug seed starting absolutely shine here.
Our winters are cool but rarely extreme, with temperatures that hover right in the sweet spot for cold-hardy seed germination.
You’re not fighting against the weather; you’re working with it.
Rain is another Oregon advantage that gardeners in drier climates can only dream about. Your milk jugs catch natural rainfall through their ventilation holes, providing consistent moisture without you having to remember daily watering.
Seeds get the dampness they need to germinate, but the jug design prevents waterlogging that would rot them in open trays.
Those gray, cloudy days we get all winter? They’re actually perfect for this method.
Seeds don’t need blazing sunshine to sprout; they need steady, moderate light and cool temperatures. Oregon delivers exactly that, month after month, creating ideal conditions for seeds to wake up slowly and develop strong root systems.
Cold stratification happens naturally when you plant certain seeds in milk jugs during winter. Many native and cold-hardy plants need a period of cold, moist conditions before they’ll germinate.
In other climates, gardeners have to artificially create this by refrigerating seeds. Here, you just set your jugs outside and let January and February do the work for free.
3. Seeds That Perform Best With This Trick
Not every seed loves the milk jug method, so knowing which ones thrive will save you disappointment and set you up for success right from the start.
Cold-hardy vegetables and flowers are your best friends here, especially ones that naturally germinate in cool soil and don’t mind a little chill.
Think of plants that would normally self-seed in your garden and come back year after year.
Leafy greens like lettuce, spinach, arugula, and kale absolutely love milk jug starting in Oregon.
These plants prefer cool weather anyway, and starting them in jugs in late winter means you’ll have sturdy transplants ready to go into the garden weeks before your neighbors even think about planting.
Brassicas such as broccoli, cabbage, and cauliflower also perform beautifully, developing thick stems and deep green leaves.
Hardy annual flowers like calendula, snapdragons, bachelor’s buttons, and sweet peas are perfect candidates. These blooms actually need that cold period to germinate well, and they’ll reward you with earlier, more abundant flowers.
Many perennials, including echinacea, rudbeckia, and native wildflowers, benefit tremendously from winter sowing because it mimics their natural lifecycle.
Avoid heat-loving plants like tomatoes, peppers, basil, and zinnias in milk jugs. These need warm soil to germinate and will just sit there sulking in cold, wet conditions.
Save those for later spring planting using different methods, and focus your milk jugs on the cold-season champions that Oregon weather was made for.
4. Simple Milk Jug Setup Anyone Can Do
If you can use scissors and tape, you can set up milk jugs for seed starting, it really is that straightforward, with no special skills or fancy tools required. Start by collecting clean, empty gallon milk jugs with their caps still attached.
Rinse them out well, but don’t worry about getting every last milk residue; it won’t harm your seeds.
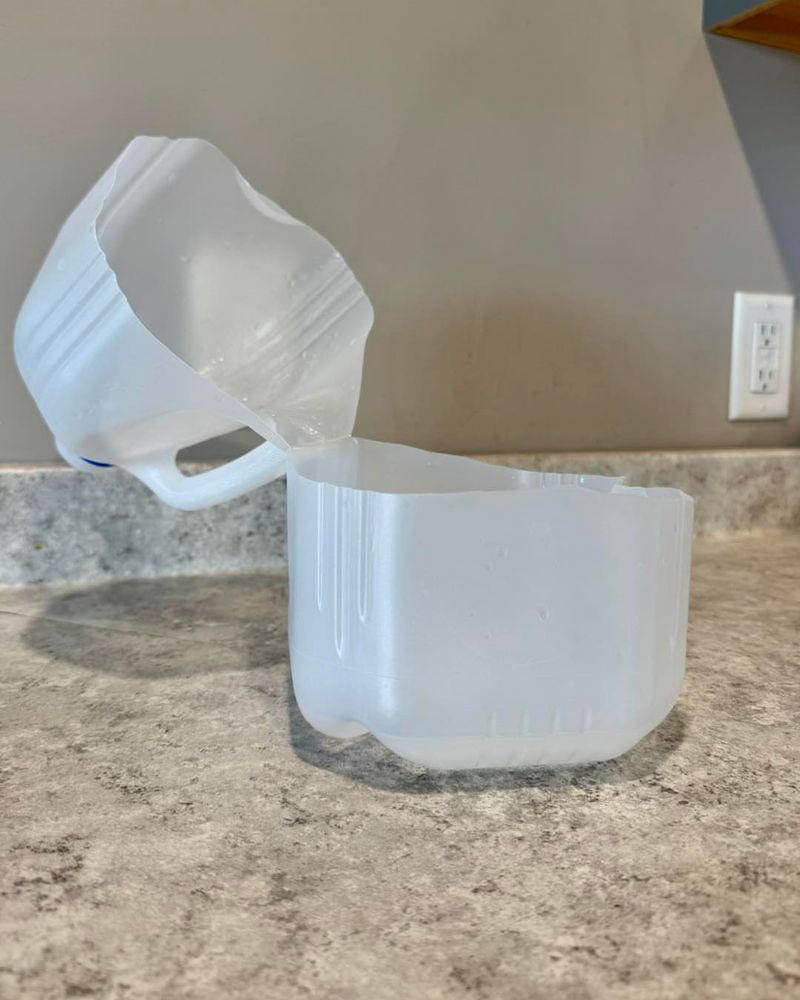
Use a sharp knife or sturdy scissors to cut around the jug about three to four inches up from the bottom, leaving a small section uncut to act as a hinge. This lets you flip the top open and closed easily.
Poke four to six drainage holes in the bottom using a nail or screwdriver, so excess water can escape and roots won’t sit in soggy soil.
Fill the bottom section with three to four inches of moistened potting soil or seed-starting mix. Tap it down gently but don’t pack it hard.
Scatter your seeds on top according to packet directions, usually a bit closer together than you would in the garden, since you’ll thin them later. Lightly cover with more soil if the seed packet recommends it, or leave tiny seeds uncovered.
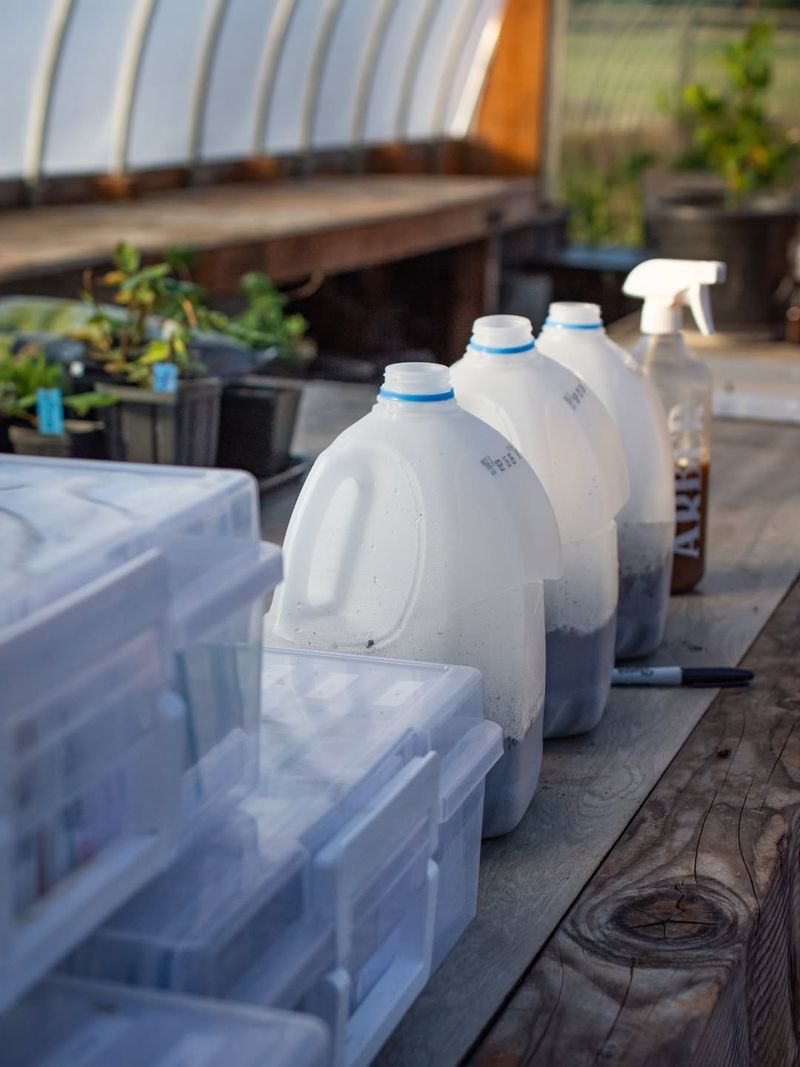
Close the jug by folding the top back down and securing it with duct tape or packing tape all the way around. Leave the cap off or poke several ventilation holes in the top section so air can circulate.
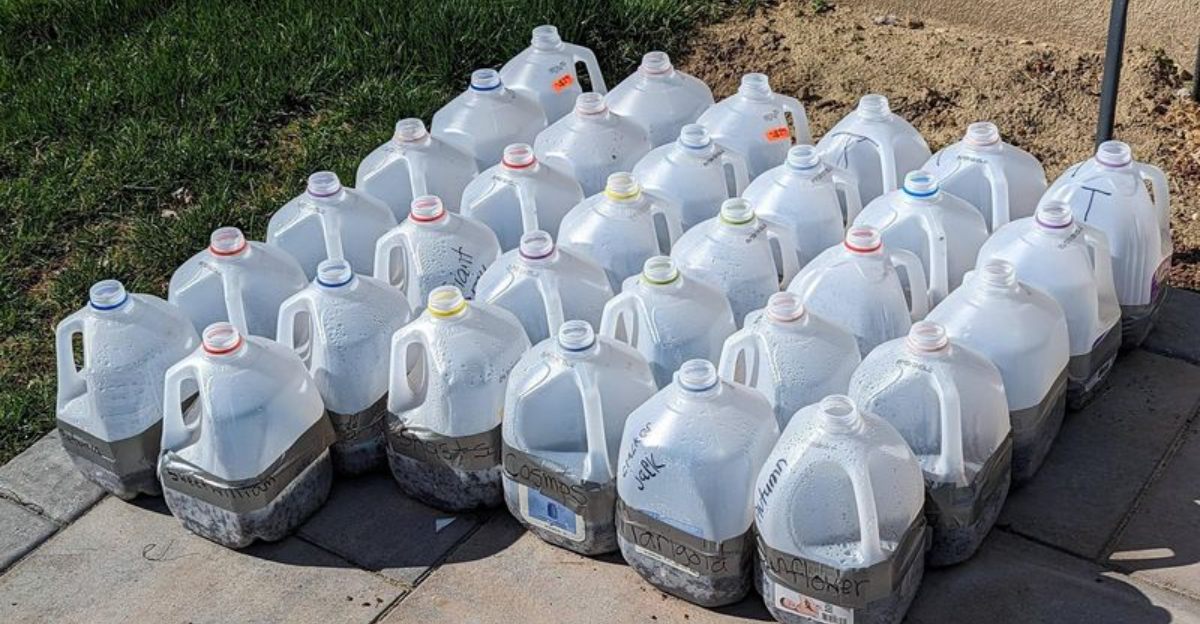
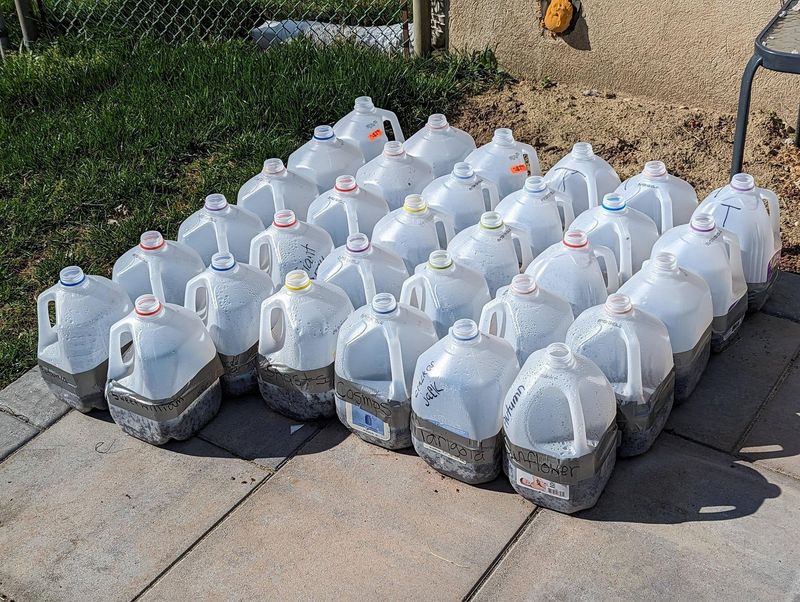
Label each jug with a permanent marker, noting what seeds you planted and the date. That’s it, you’re done and ready to set them outside.
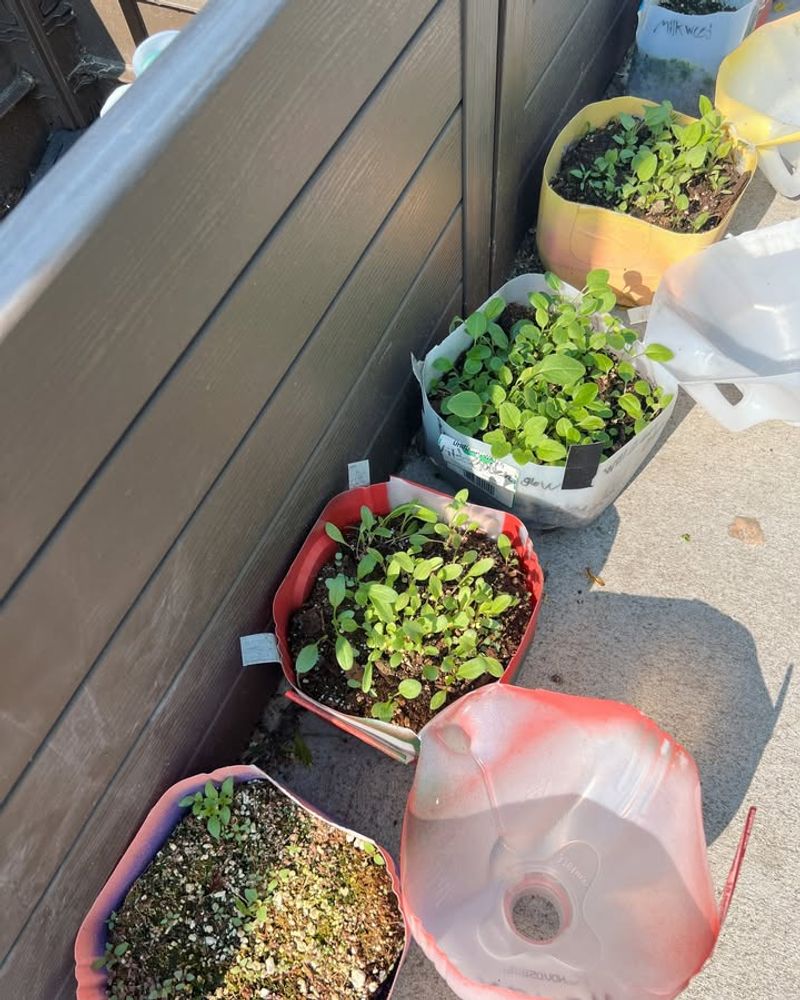
5. Where To Place Jugs For Best Results
Location matters more than you might think when it comes to milk jug seed starting, and choosing the right spot can make the difference between thriving seedlings and disappointing results.
You want a place that gets plenty of natural light but isn’t too exposed to harsh winds that could knock your jugs over or blow them across the yard.
A sheltered corner of your patio, against a south-facing fence, or near the house foundation works beautifully.
Full sun is ideal for most seeds, especially vegetables and sun-loving flowers. In Oregon’s winter, the sun is lower in the sky and less intense, so you don’t have to worry about seedlings overheating inside the jugs like you would in summer.
Even on our cloudiest days, there’s enough diffused light to keep seeds growing steadily.
Avoid placing jugs directly on concrete or pavement if possible, as these surfaces can get surprisingly cold at night and radiate chill into your soil. Set them on bare ground, gravel, or wooden pallets instead.
If you’re worried about slugs or other pests, a low table or raised platform keeps jugs safely out of reach while still getting great light exposure.
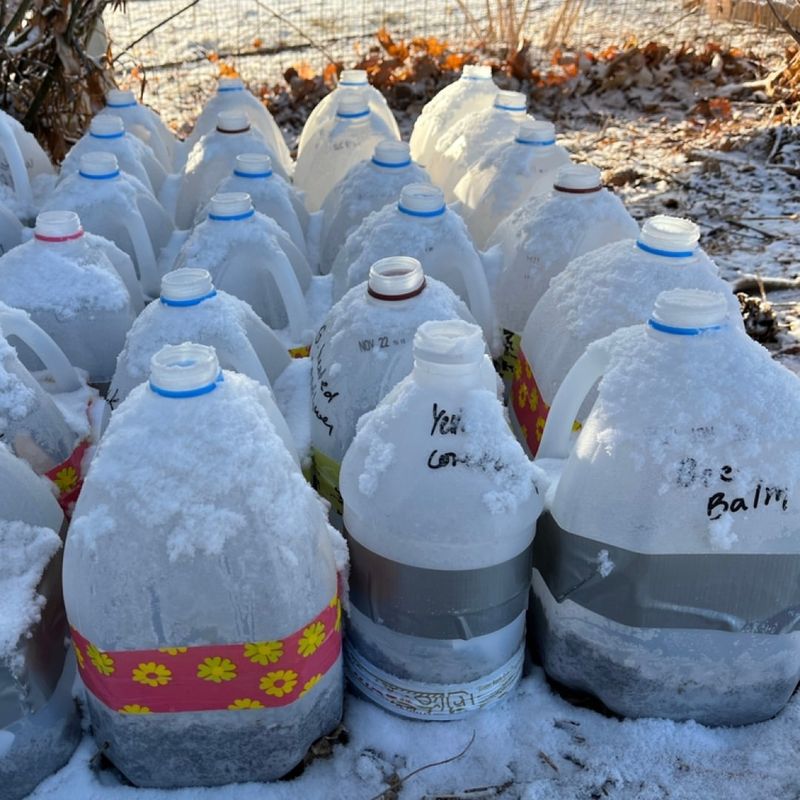
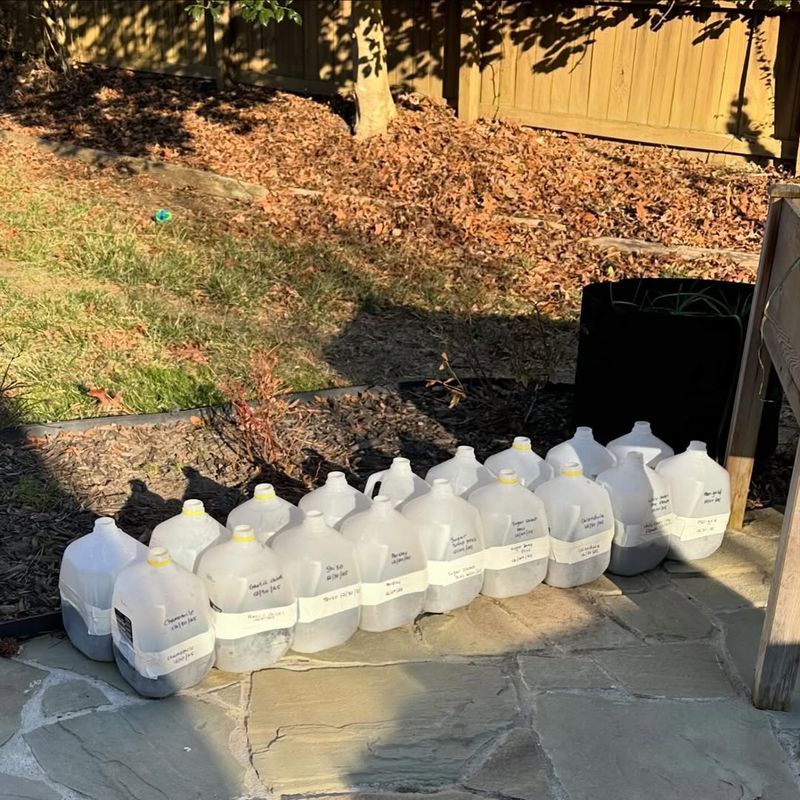
Group your jugs together rather than scattering them all over the yard. Clustering them creates a little microclimate where they shelter each other from wind, and it makes checking on them much easier.
You’ll be more likely to notice when seedlings sprout if they’re all in one convenient spot you pass regularly.
6. Watering Without Overdoing It
One of the biggest advantages of milk jug seed starting in Oregon is that you barely have to water at all, which feels almost too good to be true if you’re used to fussing over indoor seedlings every day.
The jugs trap moisture inside, creating a self-sustaining environment where condensation cycles naturally.
Rain does most of the work for you, seeping through those ventilation holes and keeping soil consistently damp.
Check your jugs every week or two by peeking inside or feeling the weight. If the jug feels light and the soil looks dry when you open it, add a little water with a gentle spray bottle or watering can.
You want the soil moist like a wrung-out sponge, never soaking wet or bone dry. Overwatering is actually more dangerous than underwatering in this setup, since trapped moisture with poor drainage leads to mold and damping off disease.
During particularly rainy stretches in Oregon, you might find your jugs have collected too much water. If you see puddles forming inside or the soil looks swampy, tip the jug gently to drain excess through the bottom holes.
You can also add a few more ventilation holes in the top if condensation is constantly dripping heavily inside.
Once seedlings emerge, they’ll need slightly more consistent moisture, but still far less attention than indoor seedlings. The jug design keeps humidity high around young plants, protecting them from drying winds.
Trust the system, resist the urge to fuss, and let Oregon’s rain do the heavy lifting for you.
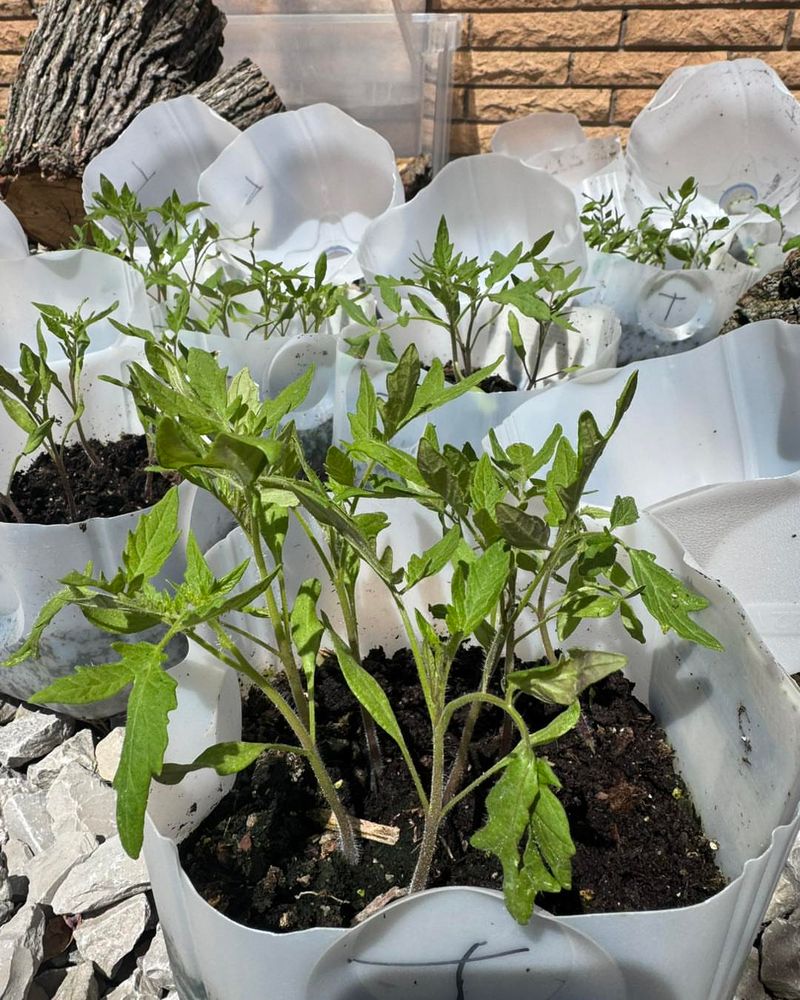
7. When Seedlings Are Ready For The Garden
Knowing when to transplant your milk jug seedlings into the garden is easier than with indoor-grown plants, because these tough little seedlings are already hardened off and ready to face the world.
You’ll typically see germination anywhere from a few weeks to a couple of months after planting, depending on the seeds and weather conditions.
Patience is key here – some seeds take their sweet time waking up, and that’s completely normal.
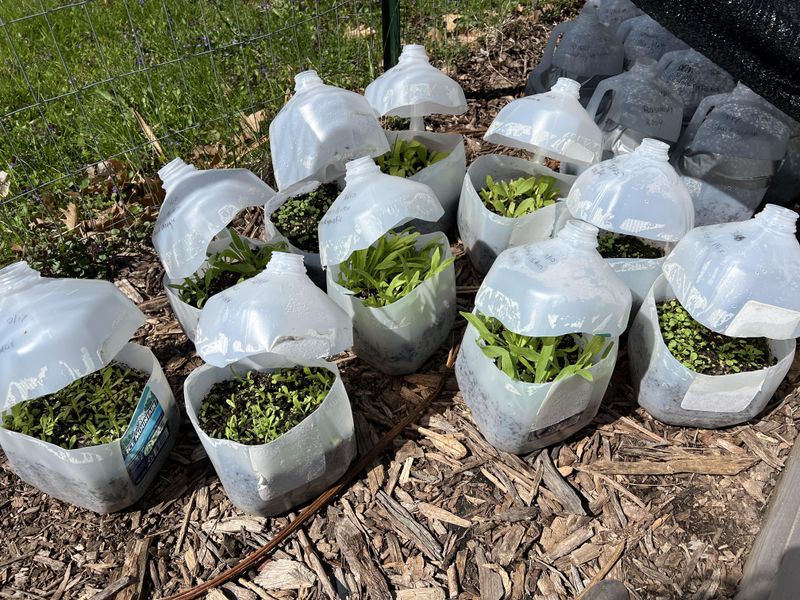
Once seedlings have developed their first set of true leaves (the second set of leaves that appear after the initial seed leaves), they’re getting close to transplant size. Let them grow until they’re two to three inches tall with sturdy stems and healthy green color.
If they’re getting crowded inside the jug, you can thin them by snipping off weaker seedlings with scissors, leaving the strongest ones to continue growing.
In Oregon, you’ll usually transplant milk jug seedlings in early to mid-spring, depending on what you planted and when your garden soil is workable.
Because these seedlings grew outside from the start, they’re already accustomed to wind, temperature swings, and natural light.
You can move them directly into the garden without the week-long hardening-off process that indoor seedlings require.
Open the jug completely and gently remove seedlings with a spoon or your fingers, keeping as much soil around the roots as possible. Plant them at the same depth they were growing in the jug, water them in well, and watch them take off.
They’ll establish faster and stronger than indoor-grown seedlings because they’re already tough and garden-ready.
8. Common Mistakes To Avoid
Even though milk jug seed starting is remarkably forgiving, a few common mistakes can trip up first-timers and lead to frustration instead of success. The biggest error is starting heat-loving seeds too early in jugs.
Tomatoes, peppers, and basil simply won’t germinate in cold soil, no matter how long you wait. Stick with cold-hardy seeds that naturally sprout in cool conditions, and save warm-season crops for later spring planting.
Forgetting to create drainage holes is another problem that leads to waterlogged, rotting seeds. Always poke holes in the bottom before adding soil, and make sure they’re large enough that water can actually escape.
Similarly, skipping ventilation holes in the top or leaving the cap screwed on tight creates a stagnant, overly humid environment where mold thrives and seedlings suffocate.
Planting seeds too deeply is a classic mistake that prevents germination. Many seeds need light to sprout, and even those that don’t should only be covered with a thin layer of soil.
Check your seed packet for specific depth recommendations, and when in doubt, go shallower rather than deeper. Tiny seeds like lettuce and snapdragons often just need to be pressed onto the soil surface, not buried.
Finally, bringing jugs indoors at the first sign of cold weather defeats the whole purpose of this method. These seedlings are meant to experience natural temperature fluctuations, including light frosts.
Babying them indoors creates weak plants that struggle later. Trust the process, leave your jugs outside through winter weather, and watch how tough and resilient your seedlings become.