8 Vegetables You Can Regrow In Water In Your Arizona Home
Some kitchen scraps still have a little life left in them. In many Arizona homes, a few everyday vegetables can begin growing again with nothing more than a small container of water and a bright windowsill.
It’s a simple trick that often surprises people the first time they try it. Instead of tossing those leftover pieces, placing them in water can bring fresh green growth back within days.
Watching that change happen feels oddly satisfying and adds a small touch of greenery indoors. It doesn’t require a garden bed, special tools, or much space either.
With just a little patience and a spot near sunlight, several common vegetables can start producing new growth right inside the home.
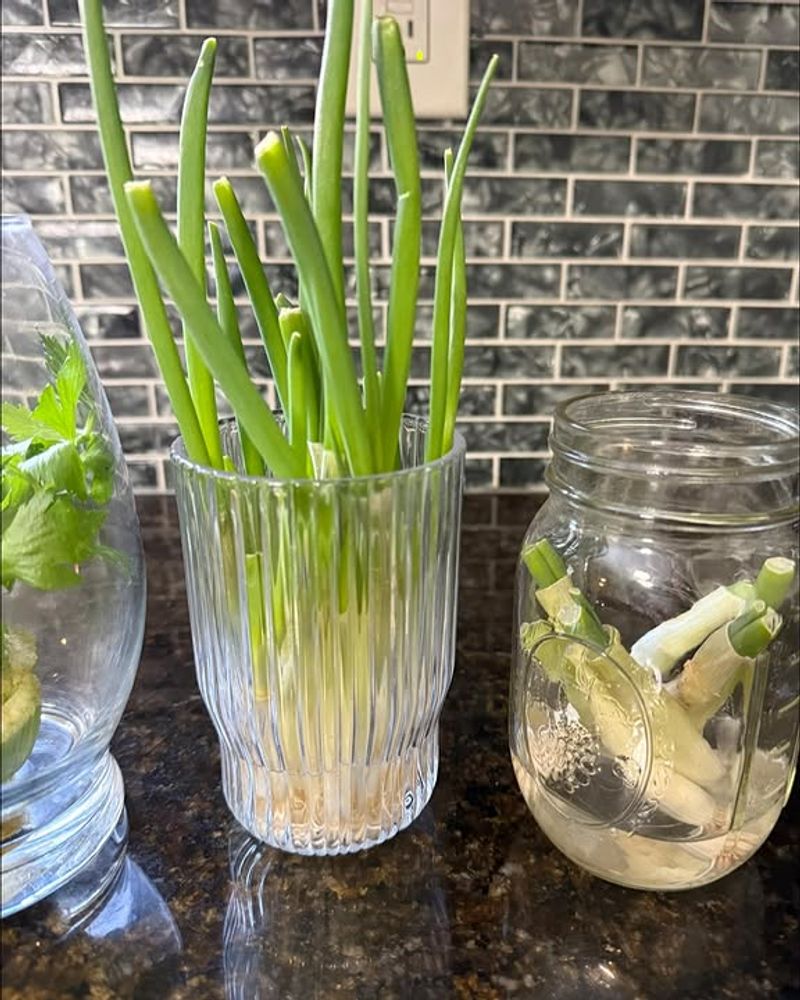
1. Green Onion Regrows Quickly From The Root End In Water
Cut your green onions down to about an inch above the white root end, drop them in a glass with enough water to cover the roots, and watch something almost magical happen within days.
New green shoots push up fast, sometimes visibly taller from one morning to the next.
Arizona’s sunny windows are perfect for this because the roots get warm, consistent light that speeds everything up.
Keep the water level steady so it covers the roots but does not swamp the cut stem. Change it out every two to three days to keep things fresh and prevent any slimy buildup.
A small mason jar or even a repurposed drinking glass works perfectly fine for this.
Within five to seven days you will have bright green shoots tall enough to snip and toss into eggs, tacos, or soups. Snip from the top and leave the roots in the water, and they will keep growing back again and again.
One bunch of green onions from the store can last you weeks this way. Tucson gardeners especially love this trick during summer when stepping outside to tend a garden feels brutal.
It is one of the fastest and most satisfying regrows you will ever try, and it costs absolutely nothing extra.
Just place the jar near a bright window so the shoots get plenty of light each day. If growth slows after a few weeks, you can plant the rooted ends in a small pot of soil to keep them producing longer.
2. Romaine Lettuce Sends Out Fresh Leaves From The Base
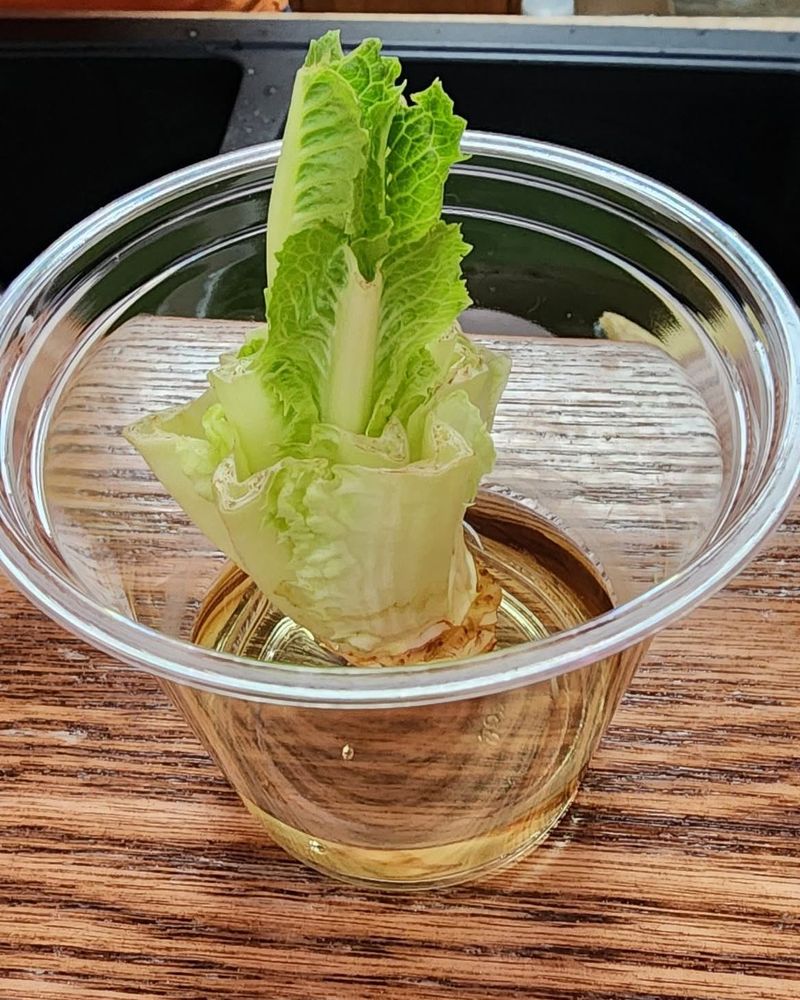
Slice off the leaves of your romaine, leaving about two to three inches of the base intact, set it in a shallow dish with just half an inch of water, and something pretty cool starts happening within a few days.
Tiny new leaves begin pushing out from the very center of that pale stump.
It looks almost like the plant refuses to quit.
Place the dish somewhere it gets good light, a south-facing window in your Arizona home works great. Keep the water level consistent and swap it out every couple of days so it stays clean.
You will start seeing root growth along the bottom of the base too, which is a good sign that the plant is actively working.
After about ten days to two weeks, you will have a small cluster of fresh inner leaves worth harvesting. They are tender, mild, and great for salads or wraps.
Do not expect a full head of lettuce to form, but what does grow is genuinely usable and tasty. Phoenix households with limited counter space find this especially handy because the dish takes up almost no room.
It is a low-effort way to stretch your grocery budget and keep something green and living right on your kitchen counter throughout the year.
3. Celery Stalk Bases Slowly Produce New Inner Growth
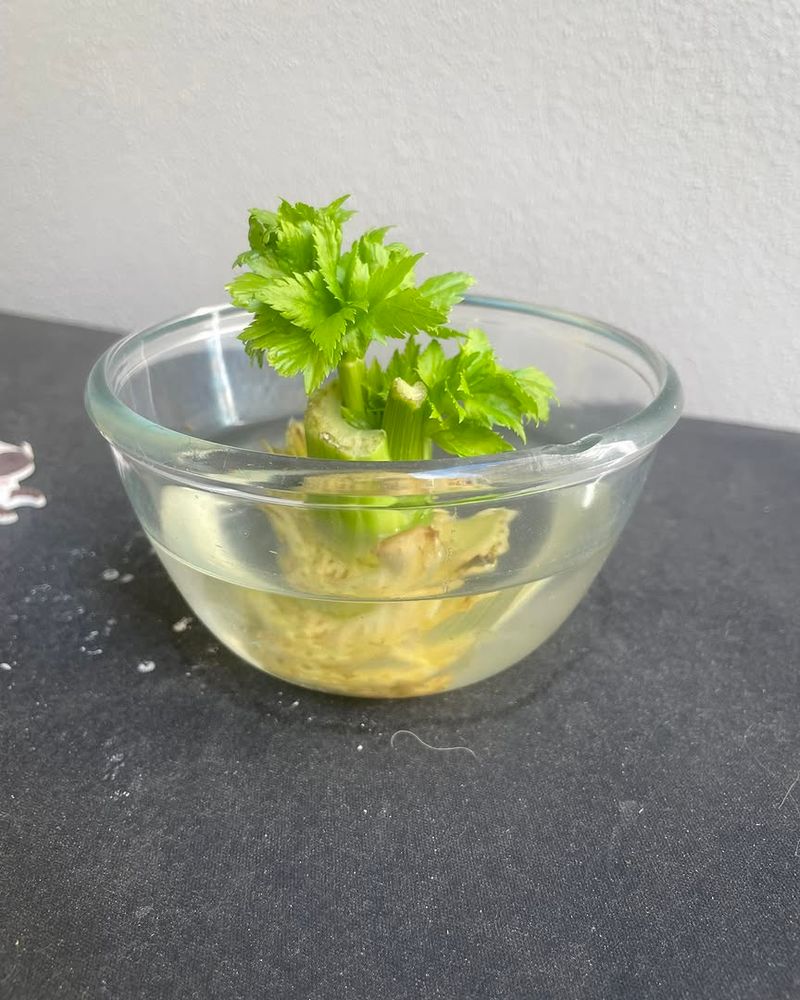
Celery is the slow and steady one in the regrow game, but do not let that put you off. Slice off the bottom two to three inches of a celery bunch and set it cut-side up in a shallow saucer with just enough warm water to cover the base.
It will not do much for the first few days, and that is completely normal.
Around day four or five, small yellowish leaves begin poking up from the very center of the base. They are delicate at first, but they thicken up and turn greener as the days pass.
Arizona’s warm indoor temperatures actually help here, since celery responds well to gentle heat rather than cold drafts.
Change the water every two days and make sure the saucer stays in a bright spot. A windowsill in Scottsdale or Mesa that gets afternoon sun is ideal.
After about a week and a half, you can either keep it in water and harvest the tender inner leaves for cooking or transplant it into a pot of soil for continued growth. The leaves have a strong celery flavor and work beautifully in soups, stews, and stir-fries.
For the amount of effort involved, the payoff is genuinely solid and worth the small amount of counter space it uses.
Keep the base upright and make sure only the bottom sits in water so the center does not start to rot.
4. Bok Choy Forms Fresh Leaves When The Base Sits In Water
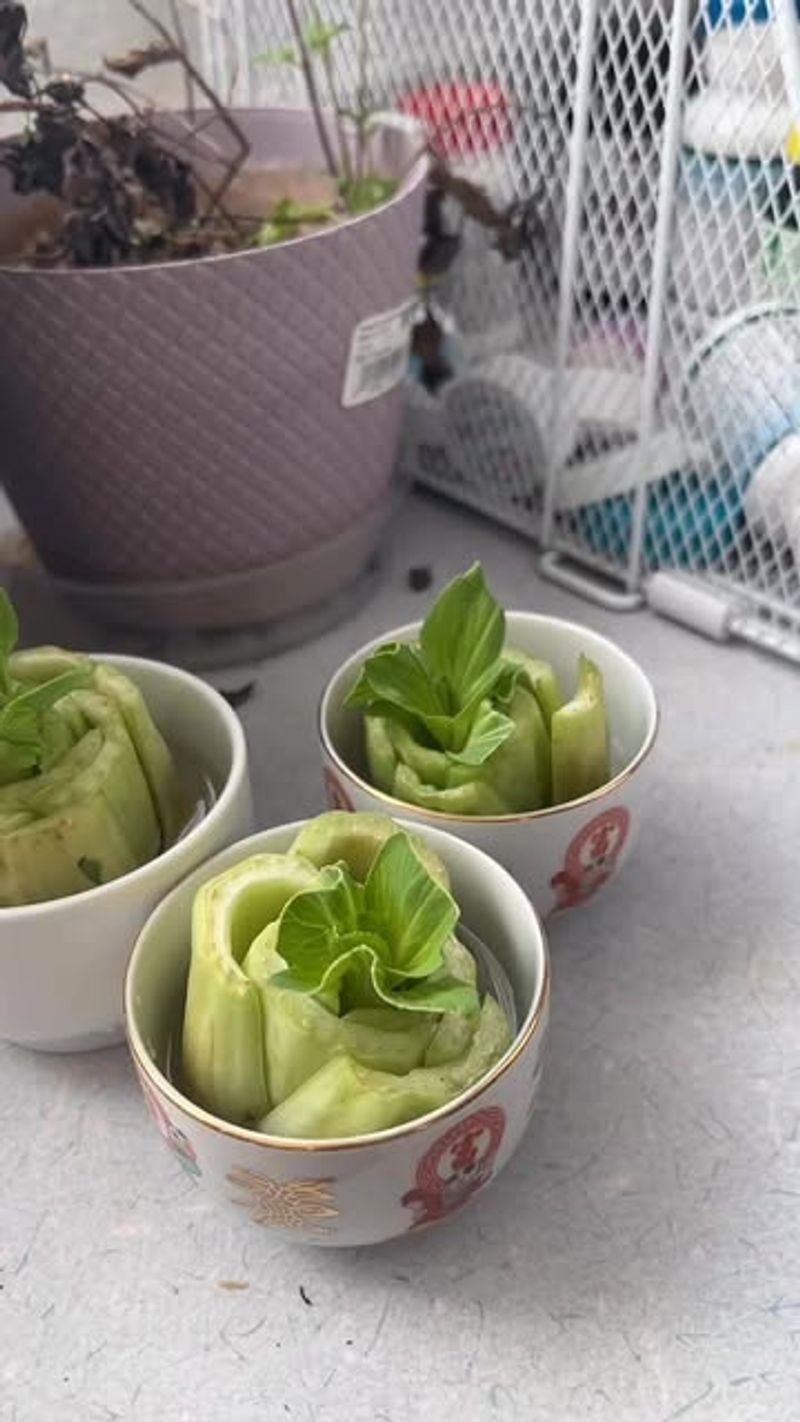
Bok choy is one of those vegetables that surprises people when they first try regrowing it. Slice off the bottom inch or two of the head, set it in a small bowl with about an inch of water, and put it somewhere bright.
Within a week, fresh leaves start curling up from the center in a way that honestly looks a little wild.
Arizona kitchens are well-suited for this because the consistent indoor warmth keeps the regrowth moving at a steady pace. Make sure the cut base is sitting flat and stable in the bowl so it does not tip over.
Replace the water every two to three days and rinse the base gently if you notice any sliminess forming on the cut surface.
The new leaves that emerge are softer and slightly milder than the original bok choy, which makes them great for stir-fries, soups, or even fresh in a salad.
After about ten days to two weeks in water, you can transplant the whole base into a pot with soil if you want it to keep growing into a fuller plant.
Flagstaff residents who grow indoors during the cooler months find bok choy one of the more reliable water regrows available. It is a satisfying project that delivers real, usable greens without any complicated steps involved.
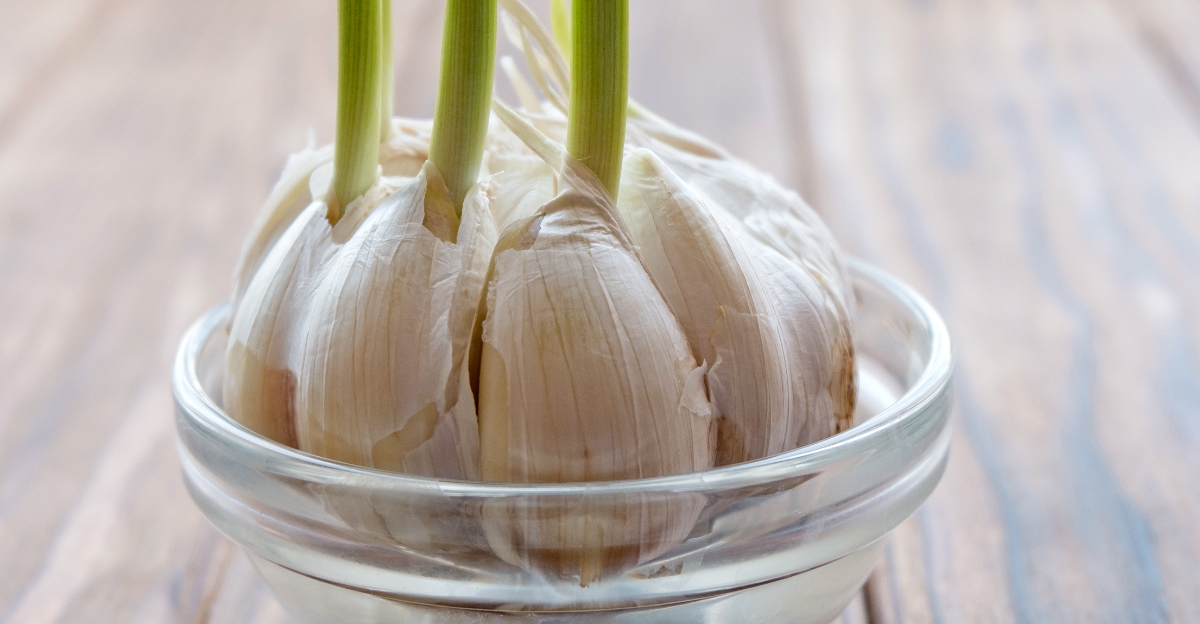
5. Garlic Cloves Sprout Green Shoots On A Sunny Windowsill

Pull a clove away from a head of garlic that has already started sprouting, drop it into a small glass with just enough water to touch the flat bottom of the clove, and set it in a sunny Arizona window.
Those green shoots will keep growing upward at a surprisingly steady pace over the following days.
You are not regrowing a full garlic bulb here, and that is worth being upfront about. What you get are the green garlic shoots, which have a flavor that is lighter and fresher than the raw clove itself.
Chop them up and use them like chives or mild garlic greens in eggs, pasta, dips, or anywhere you want a subtle garlic note without the sharp punch.
Keep just enough water in the glass to touch the base of the clove without submerging it. Too much water and the clove gets waterlogged and soft, which slows things down.
Swap out the water every few days to keep it clean. Arizona’s bright winter sun coming through a south-facing window is genuinely ideal for this because garlic shoots love light and warmth.
In Tempe or Chandler, a kitchen window that gets several hours of direct sun daily will have those shoots growing tall and green within a week. It is a small thing, but having fresh garlic greens on hand changes how you cook.
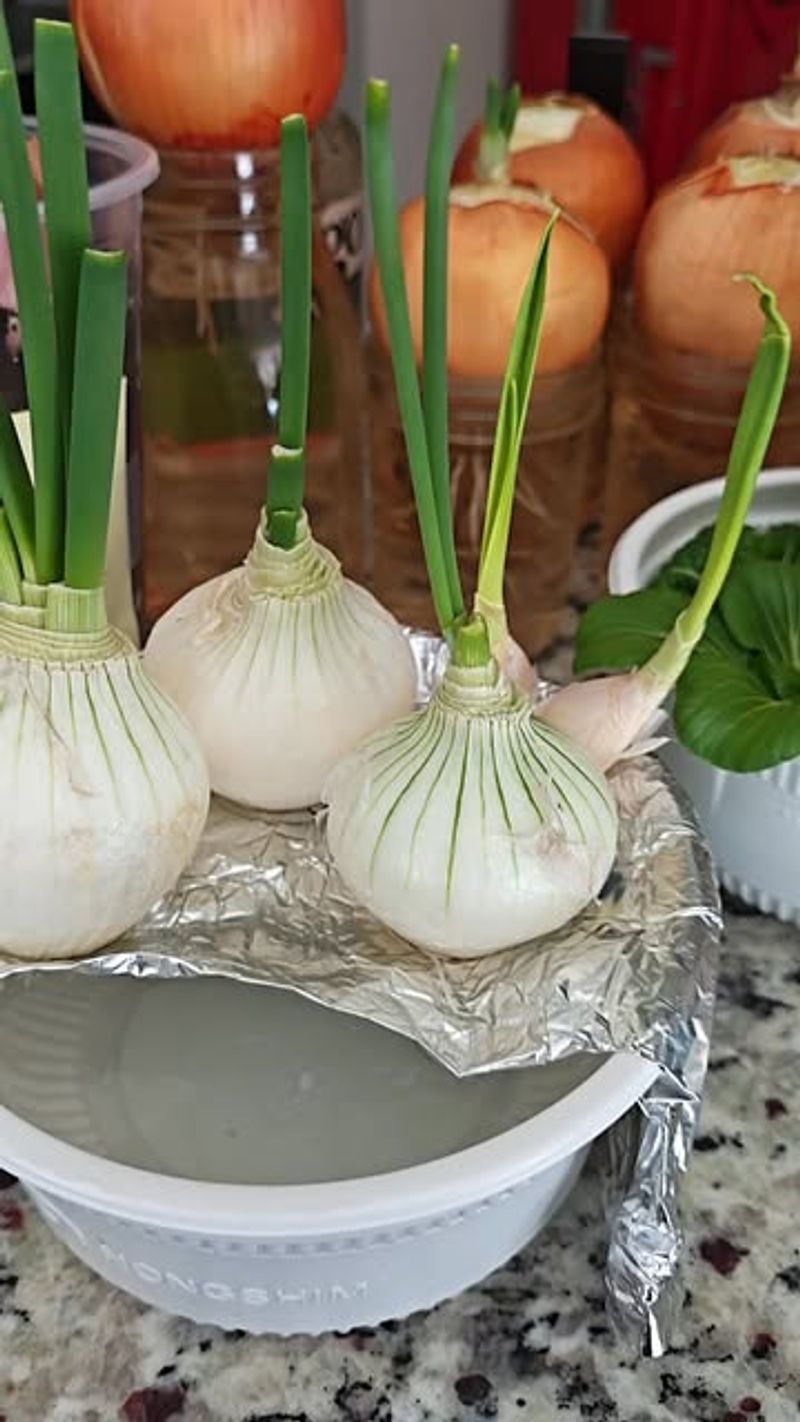
6. Leeks Regrow New Green Tops From The Root Base
Leeks are expensive at the grocery store, which makes regrowing them from scraps feel especially satisfying. After you slice off what you need for cooking, leave about two inches of the white base with the roots still attached.
Stand those bases up in a glass with enough water to cover the roots, and set the whole thing in a bright window.
New green growth starts pushing up from the center within four to six days. Arizona homes with good natural light see faster results because leeks respond well to warmth and consistent sun exposure.
A window that faces east or south in your Tucson or Phoenix home is the sweet spot for this particular regrow.
Change the water every two to three days and keep the roots submerged while the green tops stay above the waterline.
The new growth that comes in is tender and milder than the original leek, with a flavor that works well in soups, egg dishes, and grain bowls.
You will not get a full-size leek from water alone, but you will get several rounds of fresh green tops before the root base starts to wear out. At that point, you can transplant it into soil if you want to push it further.
For a vegetable that costs as much as leeks do, getting even a few extra harvests out of your scraps is a genuine win.
7. Fennel Bulb Bases Push Out Fresh Fronds In Water
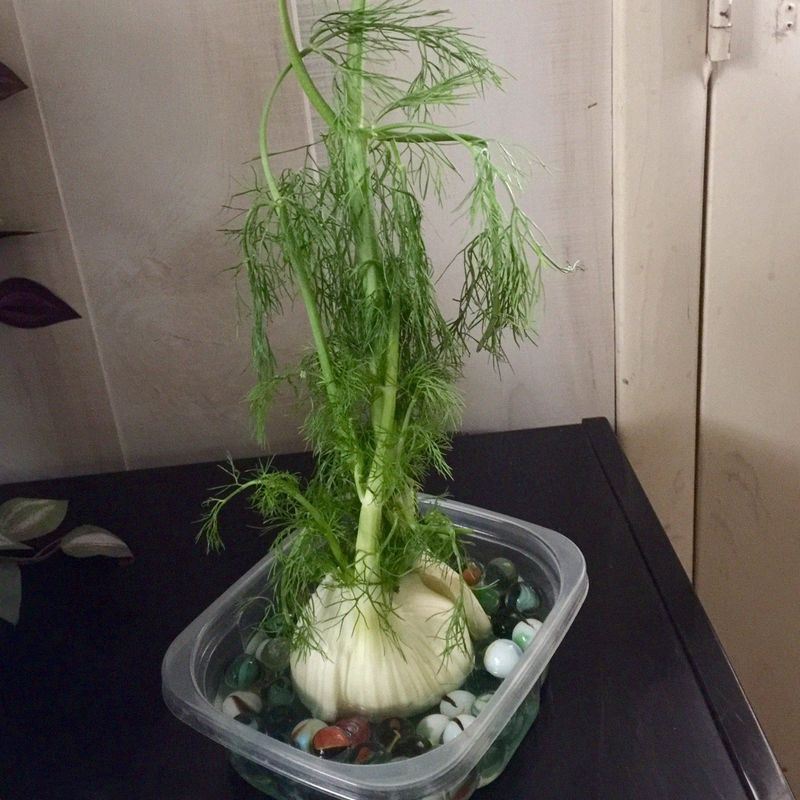
Fennel does not get nearly enough credit in the kitchen scrap regrow world. Slice off the bottom of the fennel bulb, leaving about an inch or two of the base intact, and set it cut-side up in a shallow bowl with just enough water to touch the bottom.
Within a week, feathery green fronds start pushing out from the top in a way that looks almost decorative.
Arizona’s dry indoor air does not bother fennel much as long as the water stays fresh and the light is good. A bright windowsill in a Scottsdale or Gilbert kitchen gets plenty of sun throughout the year, and that consistent light keeps the fronds growing at a steady rate.
Swap the water every two to three days and make sure the base stays stable in the bowl.
The fronds that grow back have a lighter, sweeter anise flavor compared to the original bulb. Chop them up and use them as an herb in pasta, roasted vegetables, fish dishes, or even salads.
They are genuinely useful in the kitchen, not just a novelty. After about two weeks in water, the base can be moved into soil if you want it to continue growing.
For anyone who cooks with fennel regularly, keeping a base going on the counter in your Arizona home means you always have fresh fronds within reach without a second trip to the store.
8. Carrot Tops Produce Feathery Greens When Placed In Water
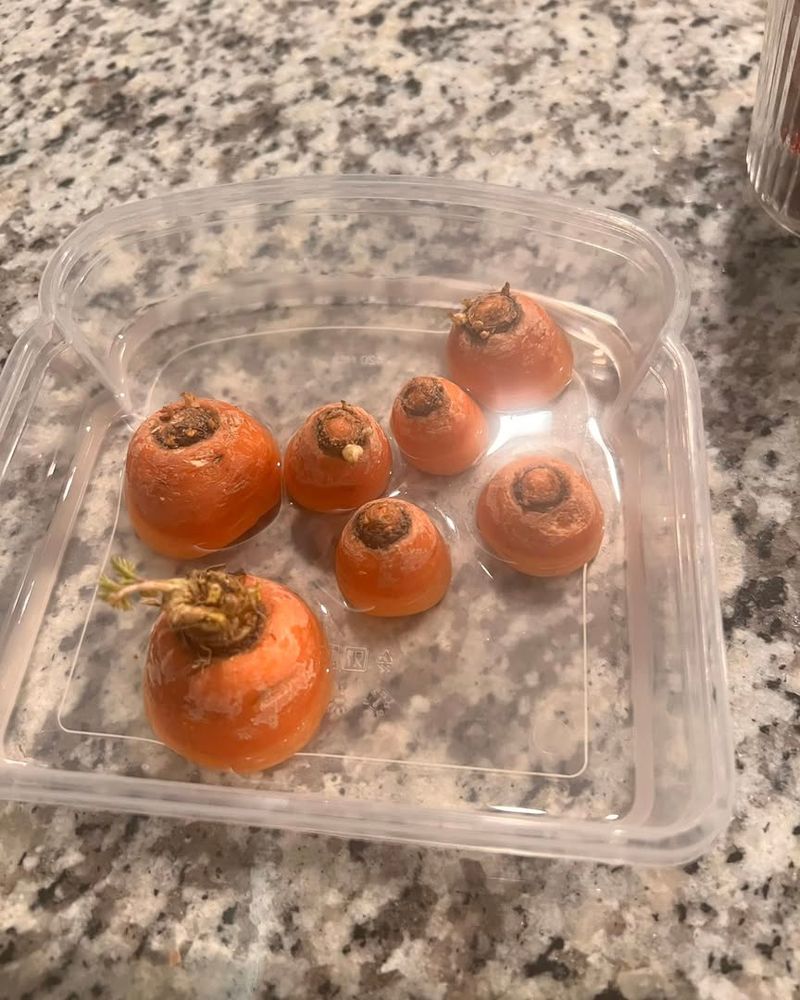
Most people toss carrot tops straight into the trash without a second thought, but those stubby little carrot ends are actually worth keeping.
Slice about an inch off the top of the carrot, keeping the shoulder of the vegetable intact, and set it cut-side down in a shallow dish with just a small amount of water covering the base.
Place it in a sunny Arizona window and check back in a few days.
Bright, feathery green tops start pushing upward from the carrot shoulder within about a week.
They will not produce a new carrot underground, because that requires soil and quite a bit more time, but the leafy greens that grow are edible and genuinely flavorful.
Carrot tops have a slightly bitter, herby taste that works well as a garnish, blended into pesto, or added to vegetable broth for extra depth.
Keep the water shallow and refresh it every couple of days to prevent any mold from forming on the cut surface of the carrot. Arizona’s warm, sun-filled kitchens are actually great for this because the tops respond to warmth and light quickly.
In homes across the Phoenix metro area, this is a fun project to try with kids because the growth is visible and fast enough to hold their attention.
It turns something you would normally throw away into a small, living herb garden sitting right on your counter.