You Can Grow A Fragrant Clove Plant At Home Using This Simple Method

That warm, spicy scent from cloves feels like something you’d expect from a faraway place, not your own home, yet it’s closer than it seems.
Growing a clove plant yourself turns an everyday spice into a living plant with real character and aroma.
With a simple method and a bit of patience, this fragrant plant can become one of those projects that feels surprisingly rewarding from the start.
Why Cloves Can Actually Grow At Home
Many gardeners assume cloves only grow in faraway tropical places, yet growing them at home turns out to be far more doable than most people expect.
Clove trees love warmth and moisture, and growing them in containers makes it easier to control those conditions inside a home.
People who try indoor clove growing often notice that small changes in light and watering matter more than fancy tools or expensive setups.
Container growing keeps things flexible since plants can be moved to warmer spots when temperatures drop without committing to outdoor planting.
Clove plants settle into pots well when drainage is good, soil stays rich, and care stays steady instead of rushed or inconsistent.
Starting with strong seeds or healthy cuttings gives the plant a better beginning and helps avoid frustration later on.
Indoor growing protects young clove plants from rough weather, pests, and sudden changes that can slow growth.
Keeping warmth and humidity consistent helps cloves build healthy roots and fragrant leaves over time.
Growing cloves at home puts control back in your hands, from soil quality to watering rhythm and feeding habits.
Watching a clove plant grow indoors creates a quiet satisfaction that makes the effort feel worthwhile long before harvest.
What You Need Before You Start Planting Cloves
Preparation makes all the difference when starting a clove growing journey, since having the right materials ready saves time and avoids unnecessary frustration later on.
Fresh clove seeds or healthy cuttings form the foundation of the process, and choosing quality sources improves germination and overall plant strength.
Many gardeners prefer organic seeds because they often sprout more reliably and develop richer, more aromatic growth over time.
A well-draining pot with proper drainage holes prevents soggy soil, which can quickly lead to root problems in clove plants.
Choosing a container that is at least twelve inches deep gives roots enough room to spread and settle comfortably.
Terracotta pots are a popular choice because they allow better airflow and help manage moisture more naturally than plastic options.
A high-quality potting mix enriched with organic compost supports strong root development from the very start.
Garden soil should be avoided since it compacts easily and does not provide the airflow cloves need in containers.
Adding perlite or coconut coir keeps the soil light and improves drainage, which helps reduce issues linked to excess moisture.
Gentle watering tools and a mild organic fertilizer make daily care easier and help young clove plants grow steadily without stress.
The Simple Trick That Helps Clove Seeds Sprout
Soaking clove seeds before planting can make a noticeable difference by helping sprouts appear faster and more reliably.
Clove seeds have a hard outer shell that slows water absorption, so soaking them for about twenty four hours helps soften that barrier.
Gardeners who pre soak seeds often notice quicker sprouting and stronger early growth compared to planting dry seeds straight into soil.
Using room temperature water matters because very hot or cold water can shock seeds and reduce their chances of sprouting.
Placing seeds in a shallow dish keeps them fully submerged without needing complicated tools or large amounts of water.
After soaking, draining the water and gently drying the seeds helps prevent excess moisture problems once they are planted.
Lightly scratching the seed coat with fine sandpaper can also help water enter the seed more easily.
This small step copies natural wear that seeds experience over time and can shorten the germination period.
Some growers combine soaking and light scarification when working with older or stubborn seeds that resist moisture.
Warmth encourages sprouting too, so keeping planted seeds in a consistently warm spot helps trigger growth.
A heat mat or a nearby warm surface can provide steady temperatures that support early development.
These simple steps often turn slow clove seeds into eager starters, giving the growing process a smoother beginning.
How Long It Takes Before You See Real Growth
Patience becomes essential when growing cloves because their germination and early growth move much slower than many familiar houseplants.
Clove seeds usually take three to six weeks to sprout, depending on warmth, humidity, and how fresh the seeds were at planting.
Cool indoor conditions can stretch that timeline, while gentle bottom heat often helps speed things along.
Once sprouts emerge, growth stays slow at first as the seedling focuses energy on building a strong root system.
Seeing only a few leaves during the first couple of months can feel discouraging, but this stage is completely normal.
Clove plants put serious effort into root development early, which sets the stage for healthier growth later on.
After a few months, growth becomes more noticeable as the plant settles in and begins forming more leaves.
Steady warmth, bright indirect light, and regular watering support stronger development during this phase.
Clove plants grown from seed take years to mature and produce flowers, so patience really does pay off.
Paying attention to the scent and structure of the foliage helps the process feel rewarding long before harvest.
Knowing the long timeline ahead makes it easier to enjoy each small milestone along the way instead of rushing results.
Where To Keep Your Clove Plant For The Best Scent
Location strongly affects how fragrant a clove plant becomes, so placing it thoughtfully helps bring out the natural oils that give the leaves their warm, spicy scent.
Bright, indirect light provides steady energy for growth while protecting delicate foliage from stress or scorching.
A spot near a sunny window where light stays soft most of the day usually creates the best balance.
Harsh afternoon sun should be avoided because excess heat can dull fragrance and slow essential oil production.
Sheer curtains or positioning the plant a short distance from the window helps filter light without leaving the plant in shade.
Gentle morning sun can also be beneficial, giving the plant an early boost without overwhelming it.
Humidity plays a major role in scent strength, since slightly moist air supports fuller aroma development.
Keeping the plant in naturally humid areas or using a small humidifier nearby helps maintain comfortable moisture levels.
Pebble trays with water add another simple way to raise humidity without much effort.
Temperature consistency matters just as much, because sudden shifts can stress the plant and weaken fragrance.
Placing the plant away from drafts, heating vents, or air conditioning helps it stay calm and stable.
Warm, steady conditions allow clove plants to stay healthy and richly aromatic throughout the year.
Common Mistakes That Stop Cloves From Growing
Overwatering is one of the most common reasons clove plants struggle in containers, since constantly wet soil quickly leads to root rot, poor oxygen flow, and slow, unhealthy growth.
Cloves like evenly moist soil but never soggy conditions, so letting the top inch dry out before watering keeps roots healthy and prevents fungal problems.
Many beginners water too often thinking extra moisture helps, when in reality it suffocates roots and weakens the entire plant over time.
Using containers without drainage holes makes the problem worse because excess water collects at the bottom and creates the perfect environment for harmful bacteria.
Choosing pots with proper drainage and occasionally checking moisture with a finger helps break the habit of watering on a rigid schedule.
Lack of sufficient light is another major issue, causing weak, stretched growth and reducing the plant’s ability to produce fragrant foliage.
Clove plants need several hours of bright, indirect light each day to support strong leaves, steady growth, and overall vitality.
Low humidity can also cause trouble by drying out leaves and slowing development, especially in homes with consistently dry indoor air.
Regular misting, pebble trays, or a nearby humidifier help maintain moisture levels that cloves naturally prefer.
Skipping fertilizer during active growth quietly starves the plant, leading to pale leaves and sluggish progress.
Providing a balanced organic fertilizer every few weeks supports healthier growth and helps clove plants stay vigorous and aromatic year-round.
What A Healthy Clove Plant Looks Like Over Time
Recognizing a healthy clove plant makes it easier to track progress and fine tune care so growth and fragrance stay on the right path over time.
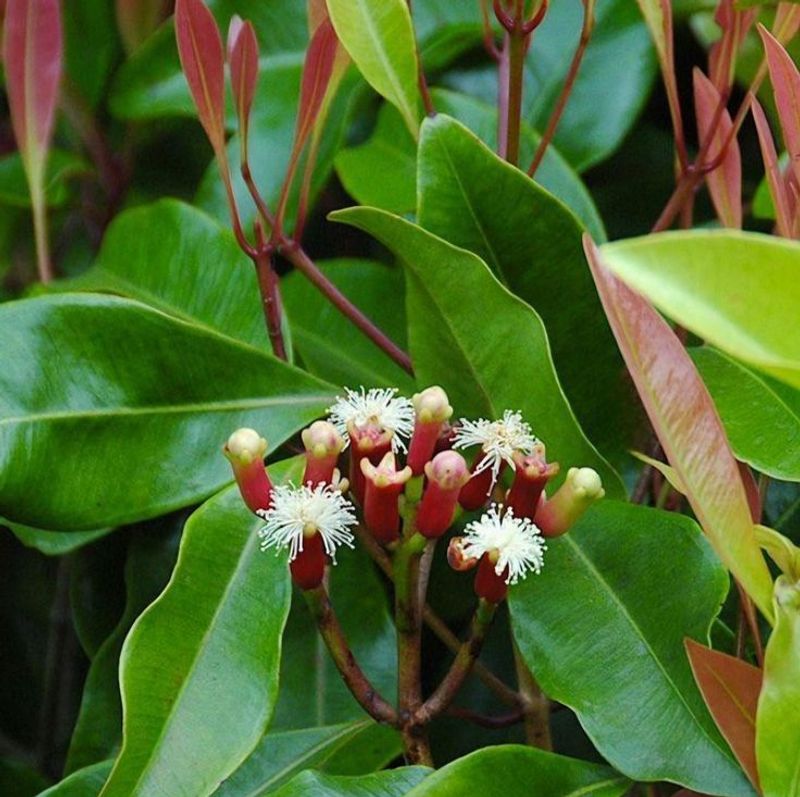
Young clove plants show vibrant green leaves with smooth edges and a slight shine, which usually signals good nutrition and balanced care.
Regular new leaf growth is another positive sign, since it shows the roots are developing well and taking in what the plant needs.
As the plant matures, the stem slowly thickens and takes on a woody feel, which is a natural sign of strength rather than a problem.
Leaves also grow larger and release a noticeable spicy scent when lightly brushed, pointing to healthy oil production.
A well cared for clove plant tends to grow upright instead of leaning, which suggests it is receiving even light throughout the day.
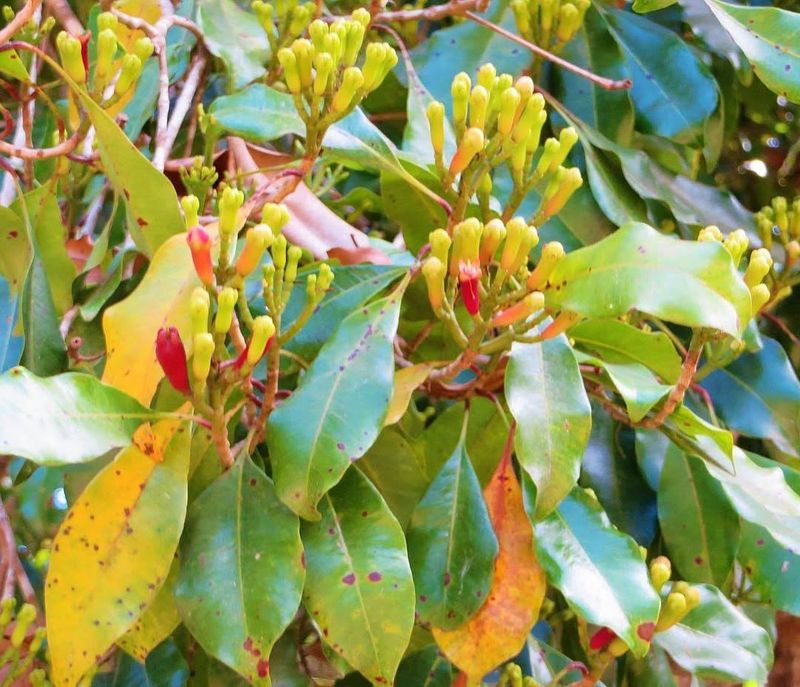
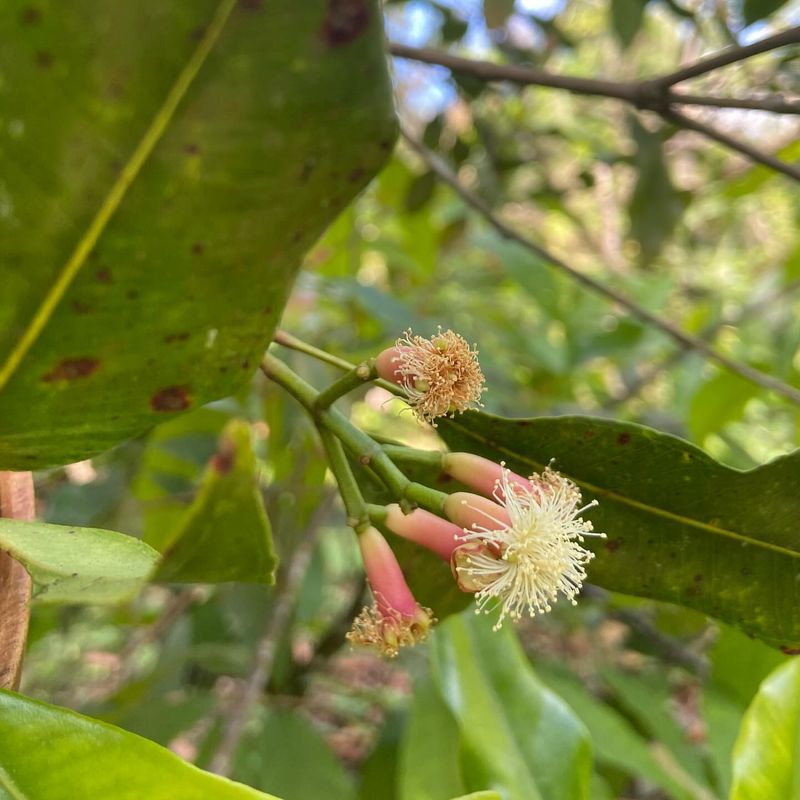
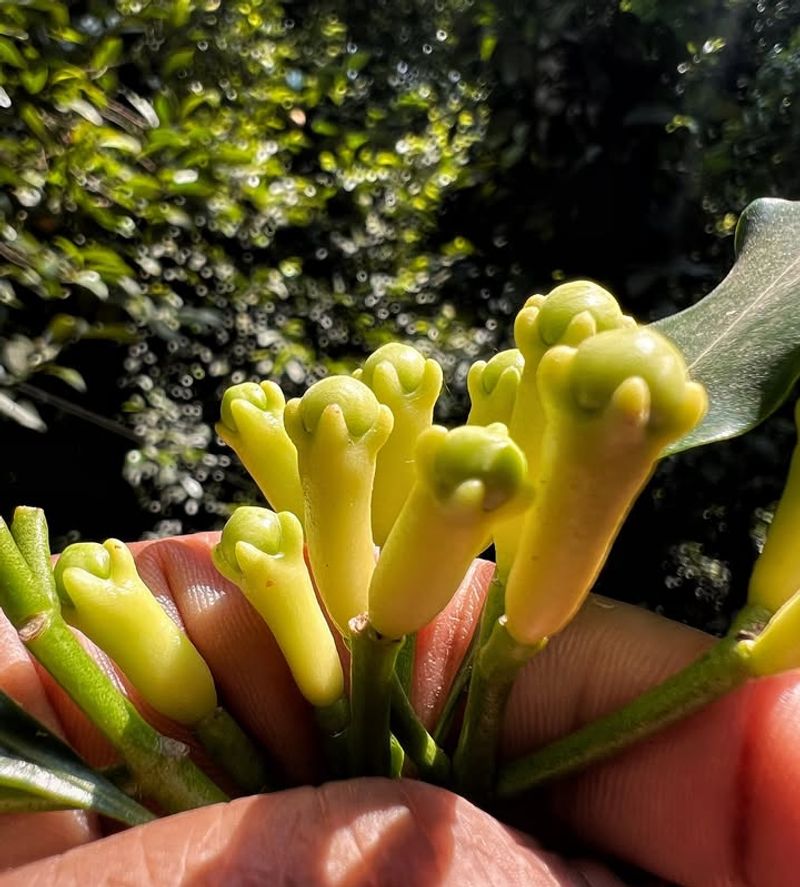
Flower buds only appear on mature plants and start as small green clusters before deepening in color as they develop.
This stage can take years to reach, but it often feels rewarding because it marks a major shift from early growth to maturity.
Leaf color remains one of the easiest health checks, since yellowing or browning usually hints at water, nutrient, or pest issues.
Consistent green leaves, steady growth, and a strong fragrance together signal that the plant is thriving.
Paying attention to these signs regularly helps you adjust care early and keep your clove plant healthy long term.
How To Harvest And Use Your Homegrown Cloves
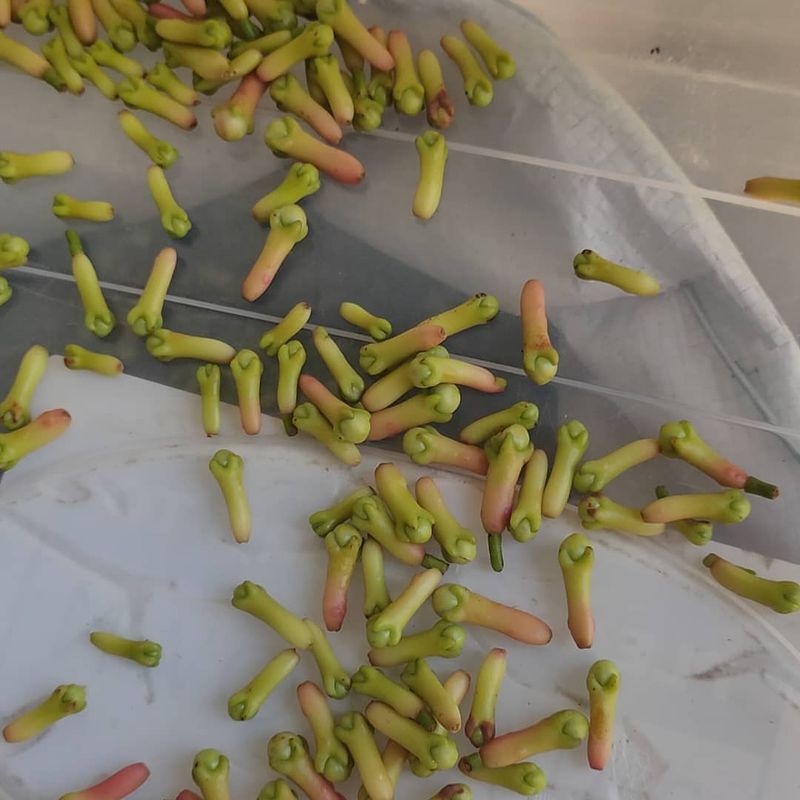
Harvesting cloves at the right moment is what locks in their strongest flavor and fragrance, so understanding when buds are ready makes a noticeable difference.
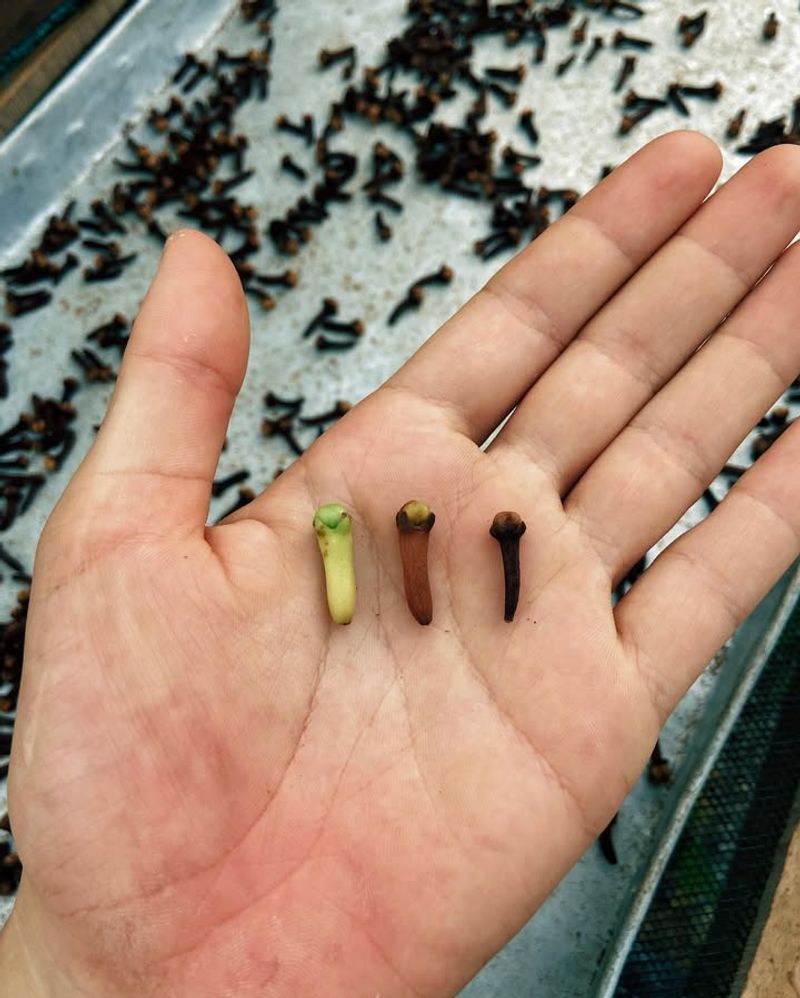
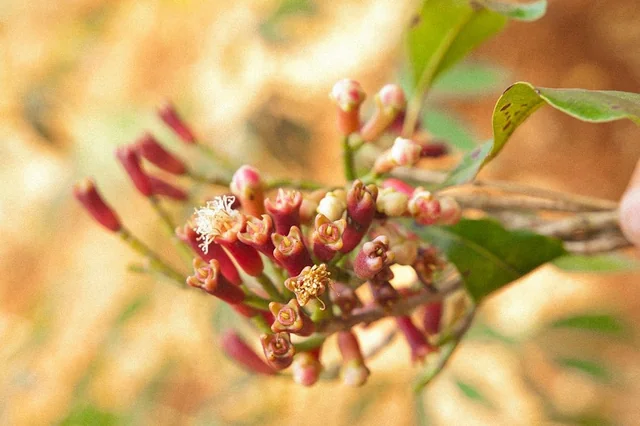
Clove buds are best picked just before they open into flowers, when they look full and slightly reddish brown rather than green.
Careful timing at this stage helps preserve the deep, spicy aroma that makes homegrown cloves feel special.
Using clean, sharp scissors or pruning shears allows you to snip buds without damaging nearby branches or future growth.
Harvesting earlier in the day, once moisture has dried but before heat builds, helps protect the essential oils inside the buds.
Handling the buds gently matters because bruising can lower both flavor strength and overall quality.
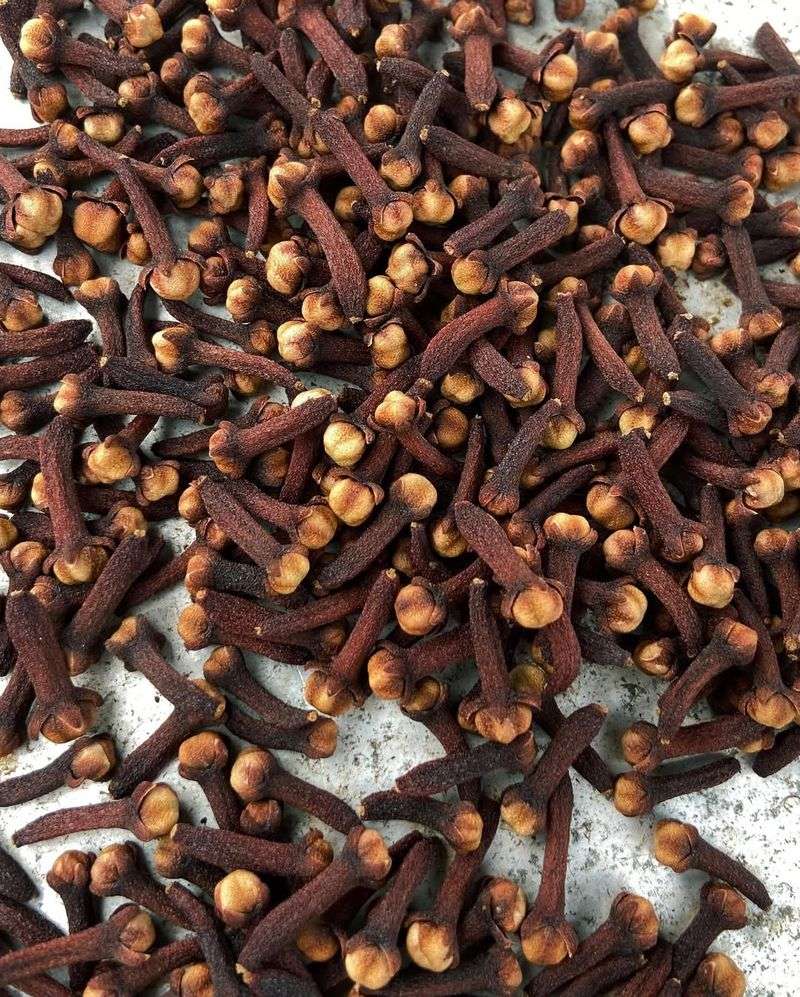
Drying cloves properly is just as important as harvesting, since it determines how long their flavor will last.
Spreading buds in a well ventilated area away from direct sunlight helps them dry evenly without mold issues.
Low temperature dehydrators can also be used to speed things up while still preserving aroma.
Once fully dry, storing cloves in airtight containers keeps moisture and light from dulling their scent.
Homegrown cloves bring rich flavor to cooking, baking, teas, and even home scents, making the slow growing process feel worthwhile.
Grinding cloves fresh right before use releases an intensity that packaged spices rarely match.