20 Smart Ways To Landscape Around Trees With Rocks (And Mistakes To Avoid)
There’s something so satisfying about giving the space around your trees a fresh, polished look with rocks. I remember the first time I tried it—I thought, “How hard could it be?”
Well, let’s just say my first attempt looked more like a random rock pile than a design masterpiece! But eventually I found the right balance between beauty and function. Using rocks around trees can be a total game-changer.
From picking the perfect stones to avoiding rookie mistakes (like suffocating your tree’s roots—oops!), I will help you create a landscape that’s as gorgeous as it is practical.
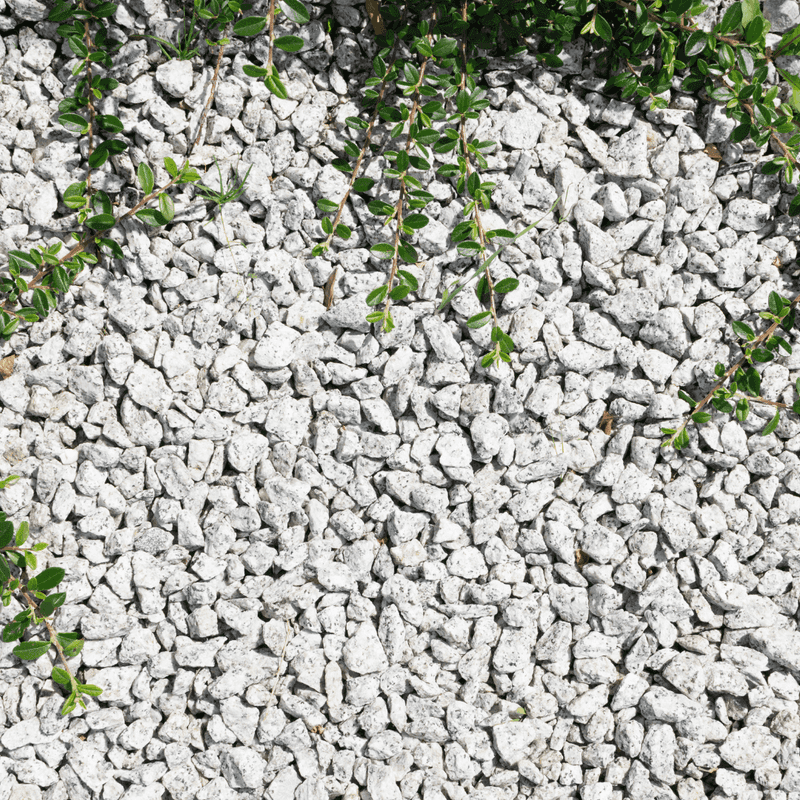
1. Choose The Right Rocks For A Natural Look
When I first started landscaping around my tree, I was overwhelmed by the variety of rocks available. Who knew there was more to it than just picking up a few pebbles?
I quickly learned that choosing the right rocks is essential for a natural look. You want rocks that complement the tree bark and surrounding plants.
Have you considered how the color and texture of the rocks will blend with the tree? Picking the right rocks can make or break the cohesion of your garden. You might just fall in love with your new garden look!
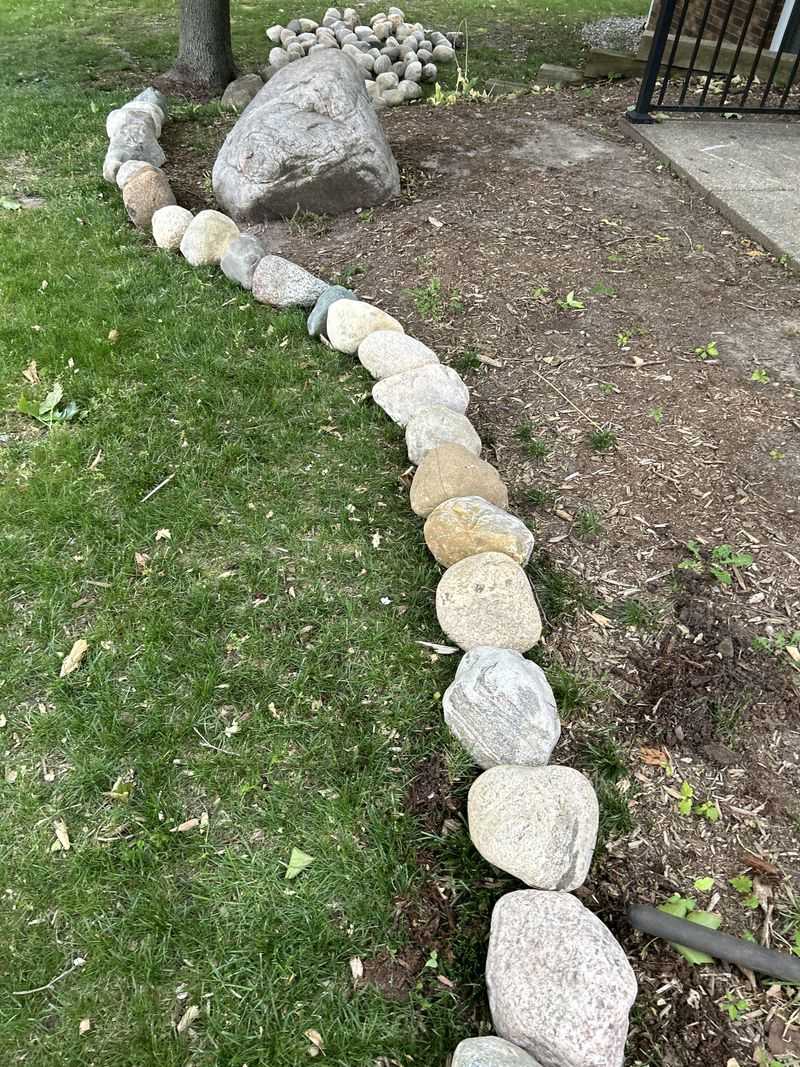
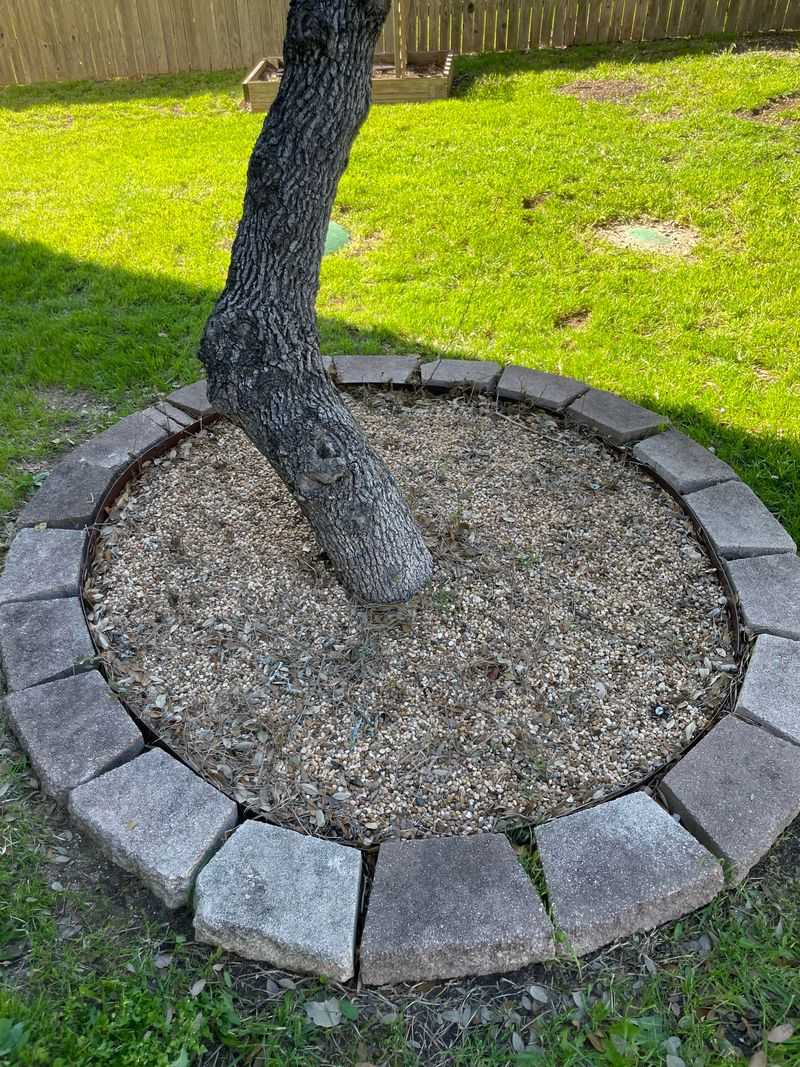
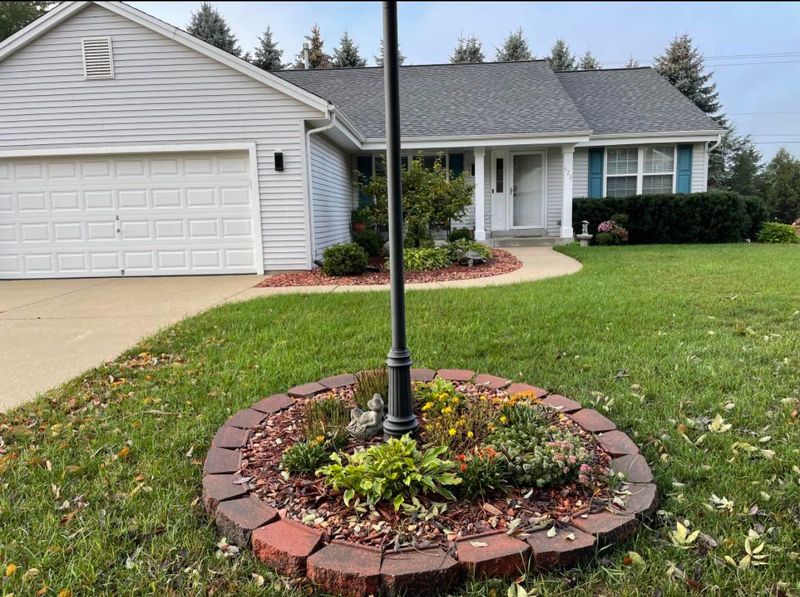
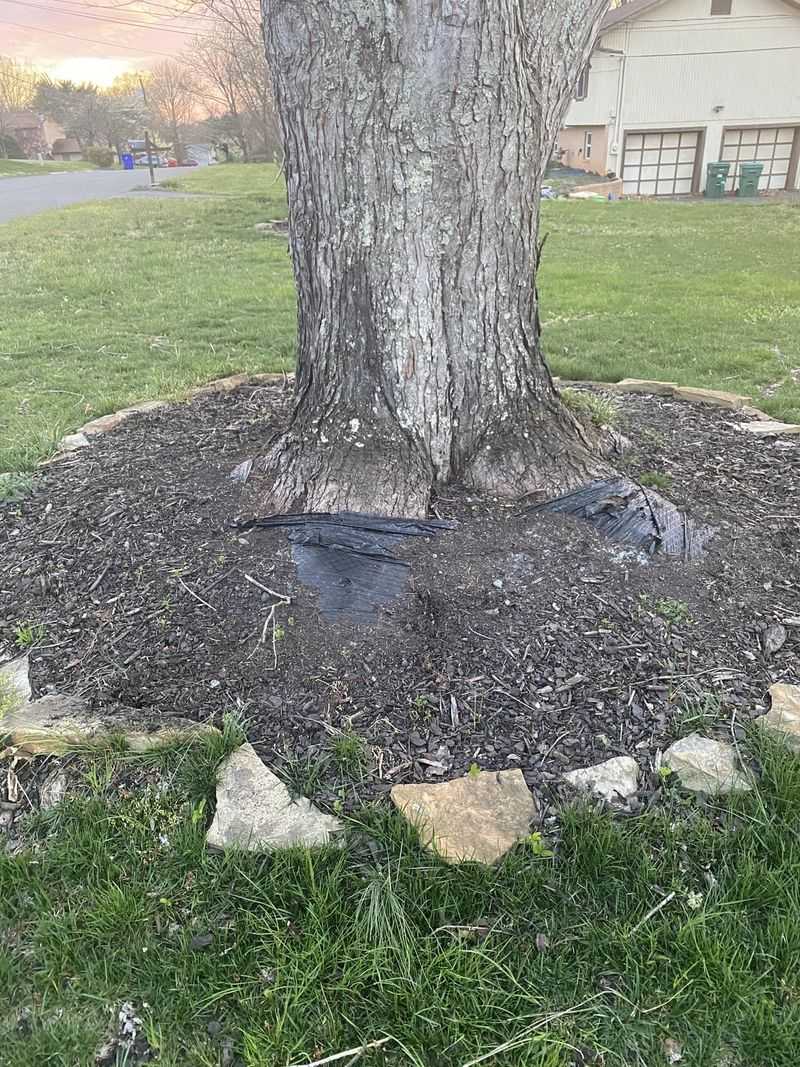
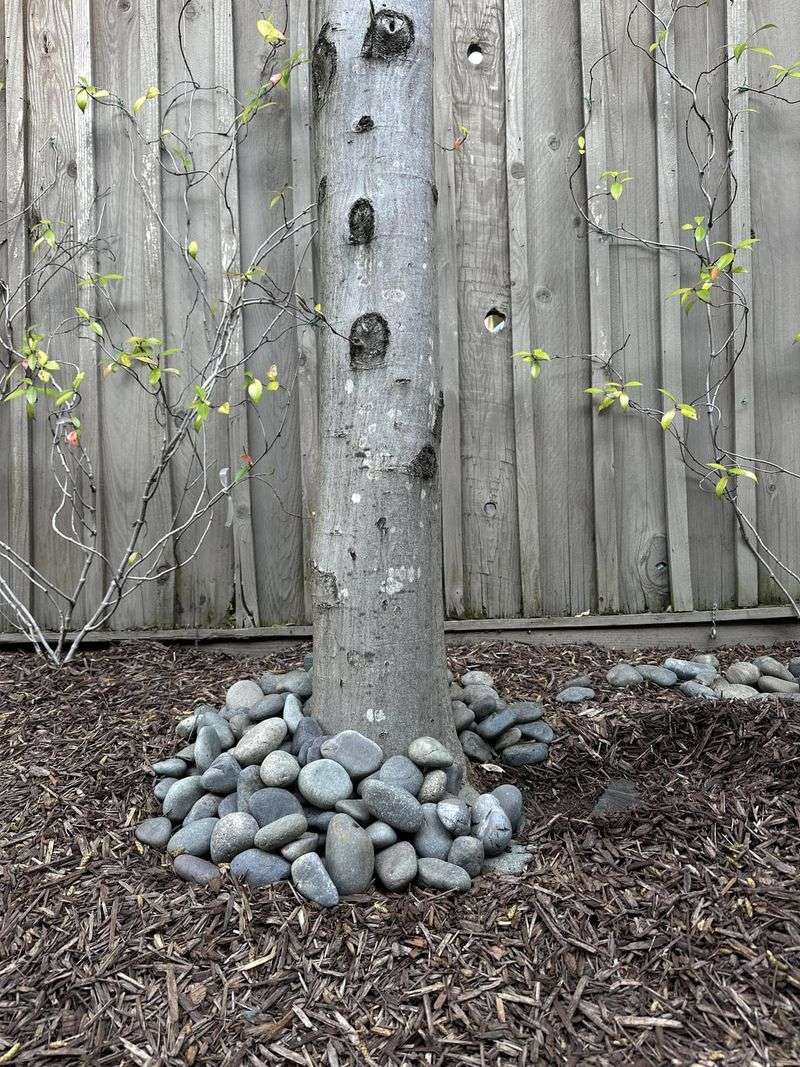
2. Create A Simple Rock Border Around The Tree

Starting with the basics, I found that creating a simple rock border can really highlight the tree and define its space.
The trick is to arrange the stones in a neat circle or oval, leaving enough room for the tree roots to breathe. It’s like giving the tree its own little runway! Placing larger rocks at regular intervals adds interest and keeps the design from looking too uniform.
Who would have thought such a small change could make such a big difference?
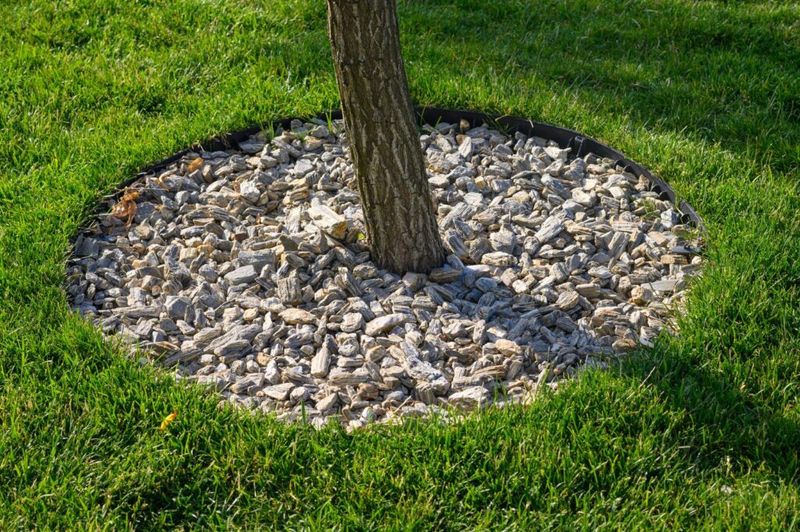
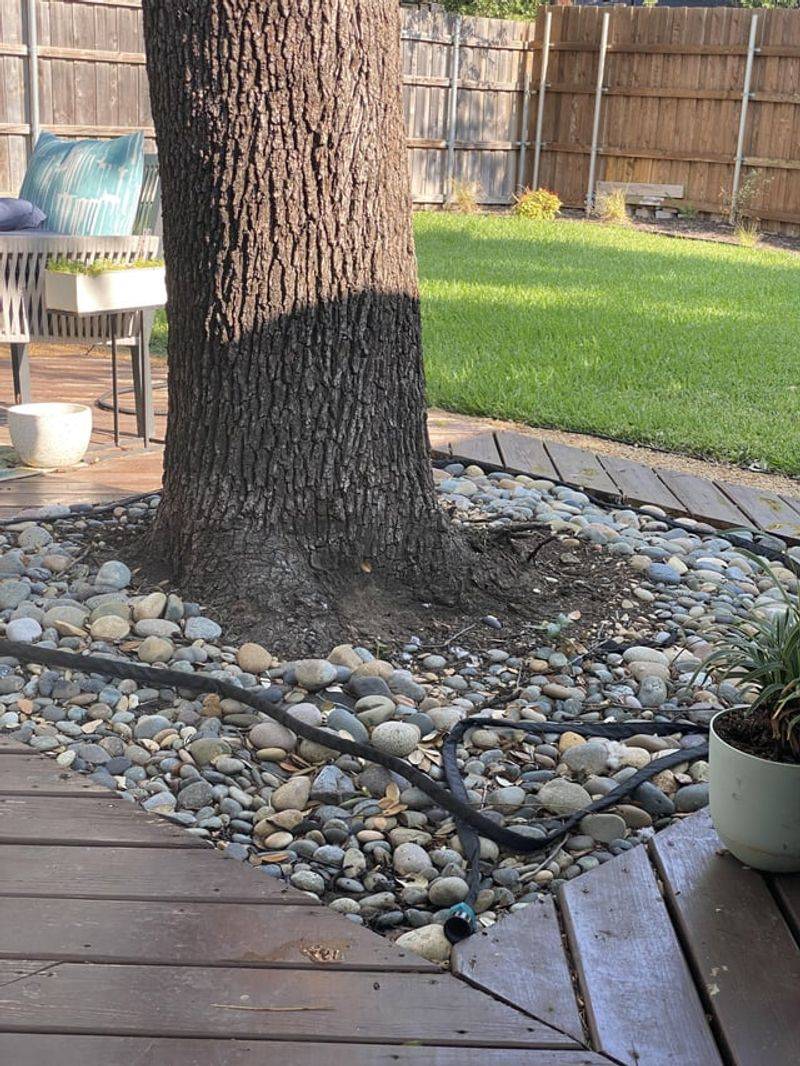
3. Use River Rocks For A Smooth, Modern Finish
For a sleek and modern look, river rocks are my go-to choice. Their smooth surface and uniform shape create a clean appearance that fits perfectly in contemporary landscapes.
Have you ever run your hands over these stones? It’s oddly satisfying! Arranging them in clusters or patterns around the tree can enhance the modern aesthetic.
It’s a simple yet effective way to elevate the look of your garden without going overboard. Plus, they’re great for drainage!
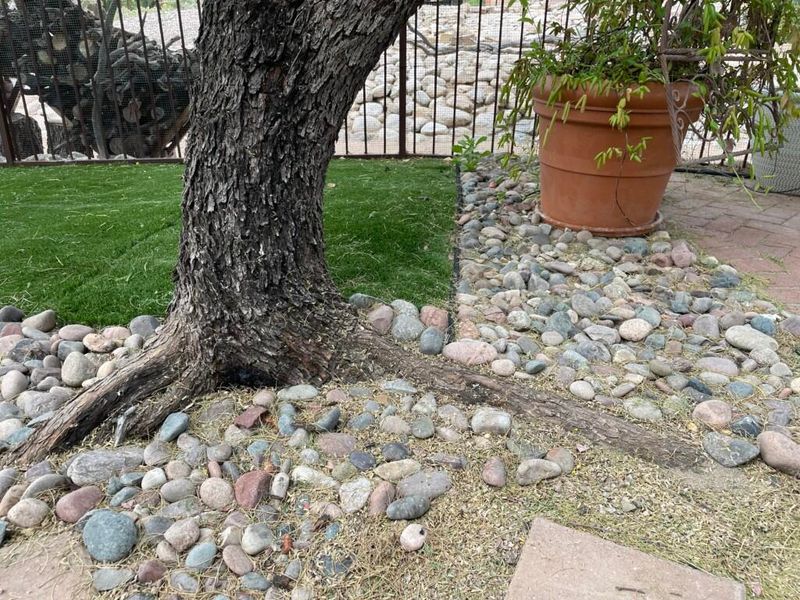
4. Layer Rocks For Depth And Visual Interest
Layering rocks can create an eye-catching design around your tree. By stacking different sizes and shapes, you add depth and interest.
Have you thought about how layering rocks can mimic nature’s randomness? It’s like creating a mini-mountain range in your backyard!
This approach can be a conversation starter with guests who visit your garden. Plus, it allows for easy adjustments if you find a new rock that catches your eye.
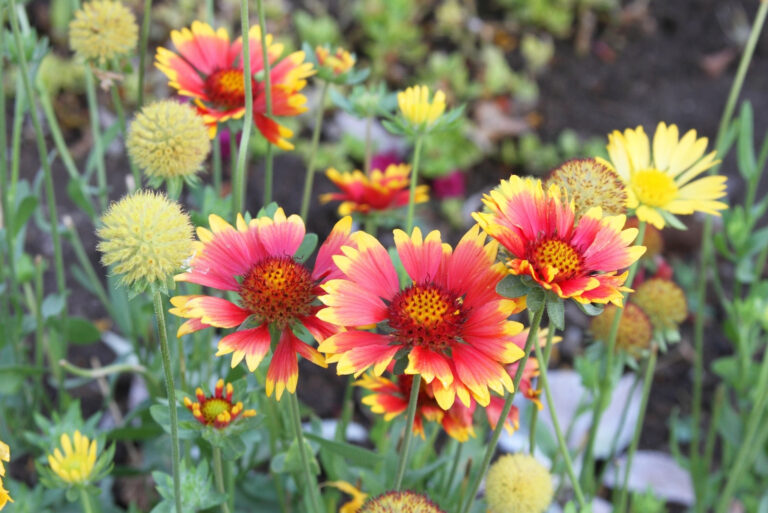
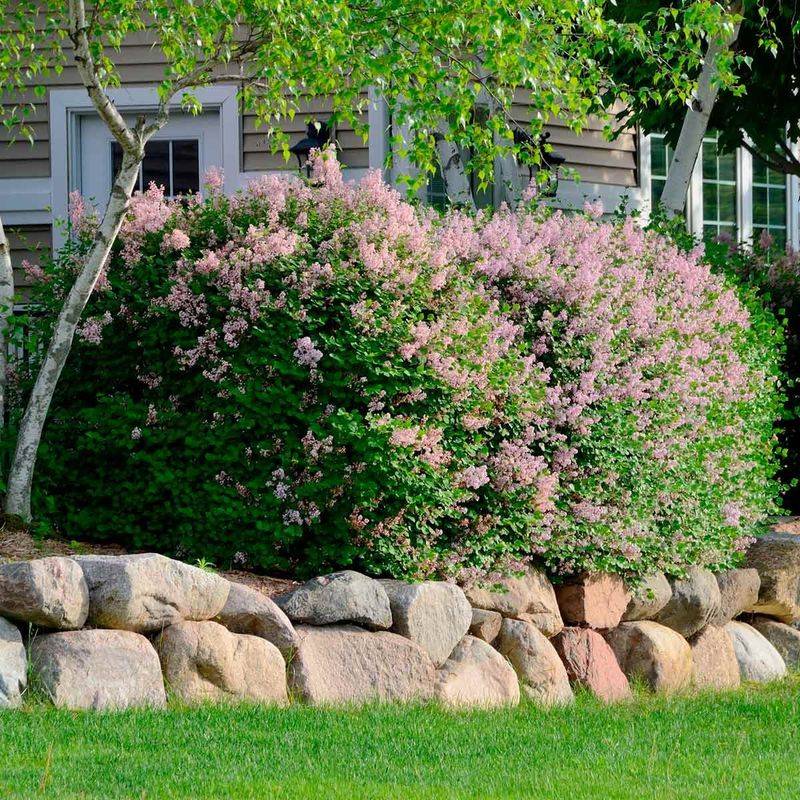
5. Combine Rocks With Drought-Tolerant Plants
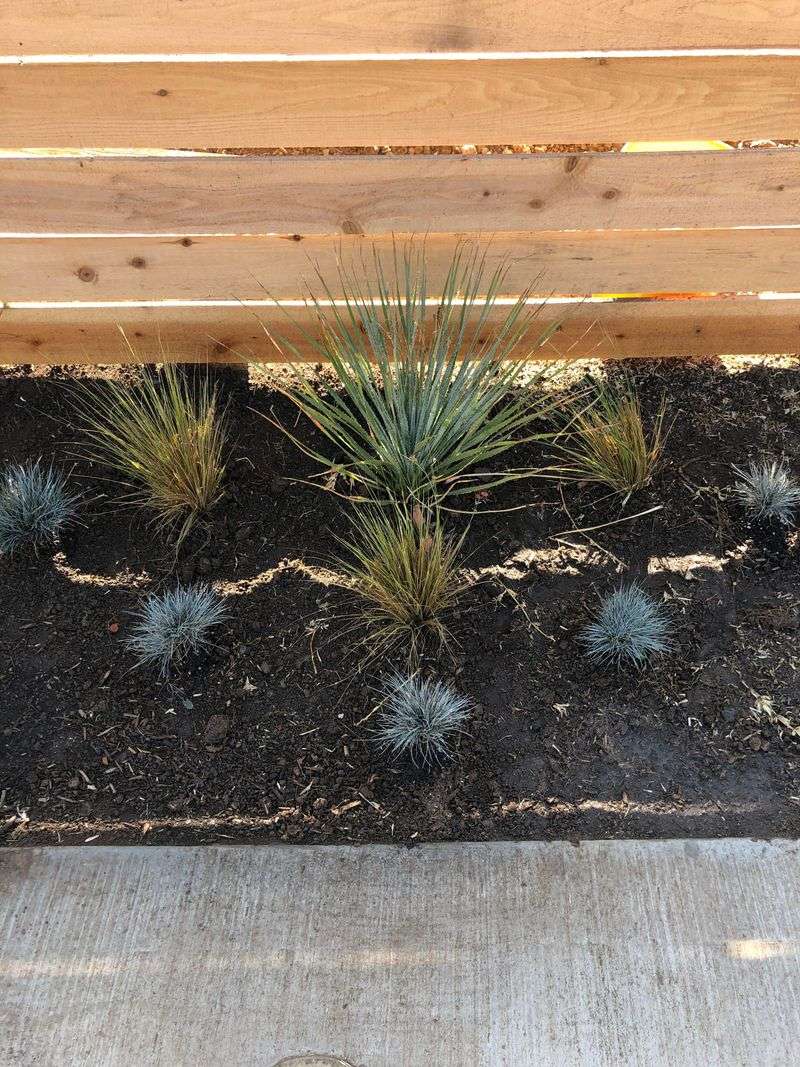
Combining rocks with drought-tolerant plants is a smart way to conserve water while adding life to your garden.
I’ve found that plants like succulents or lavender thrive among rocks and add a splash of greenery without needing much attention. It’s almost like the rocks and plants are best friends, helping each other out!
Placing them strategically around the tree can create a low-maintenance yet beautiful area that’s sure to impress anyone.
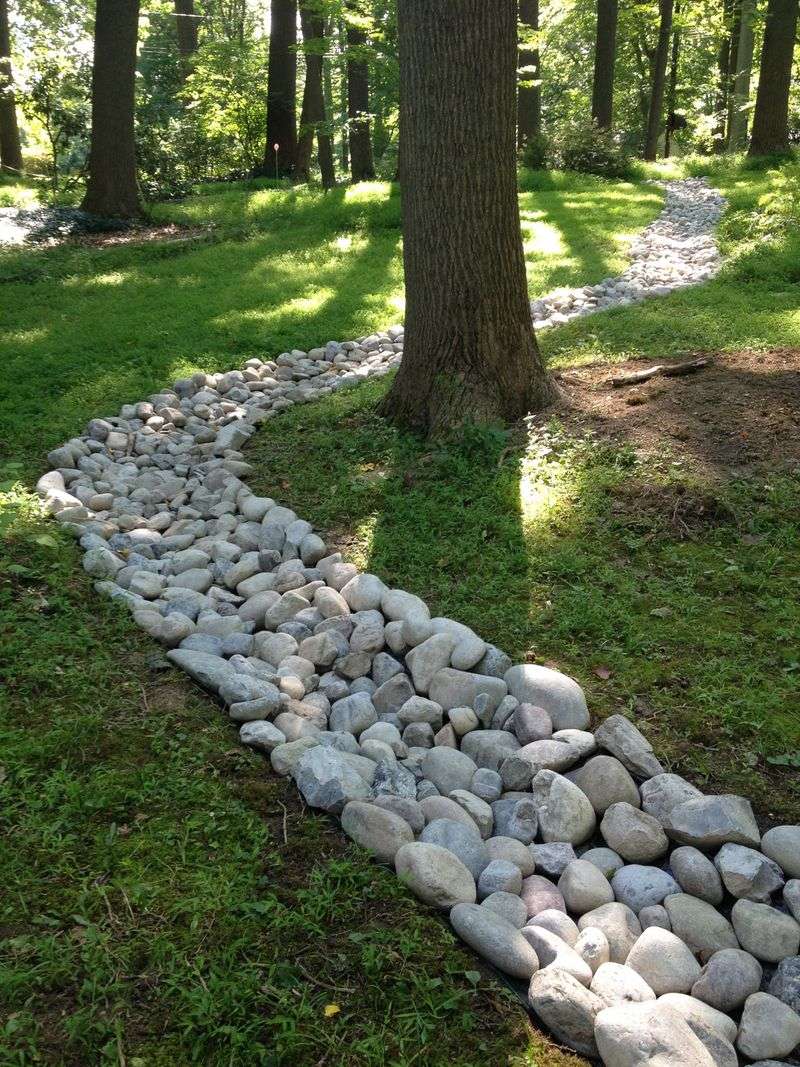
6. Add A Dry Creek Bed Effect For Better Drainage
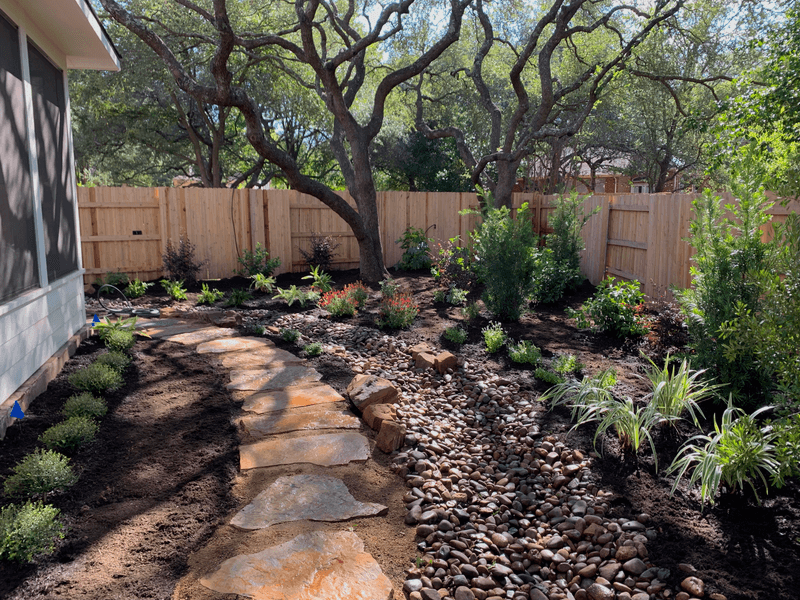
Creating a dry creek bed effect with rocks can be both functional and beautiful. This design not only adds a natural element but also improves drainage around the tree.
Have you ever considered how water flows through your garden? It’s fascinating to see how this arrangement mimics natural creek beds.
By using a variety of rock sizes, you can simulate the gentle flow of water even when it’s dry. It’s a design that’s both practical and pleasing to the eye.
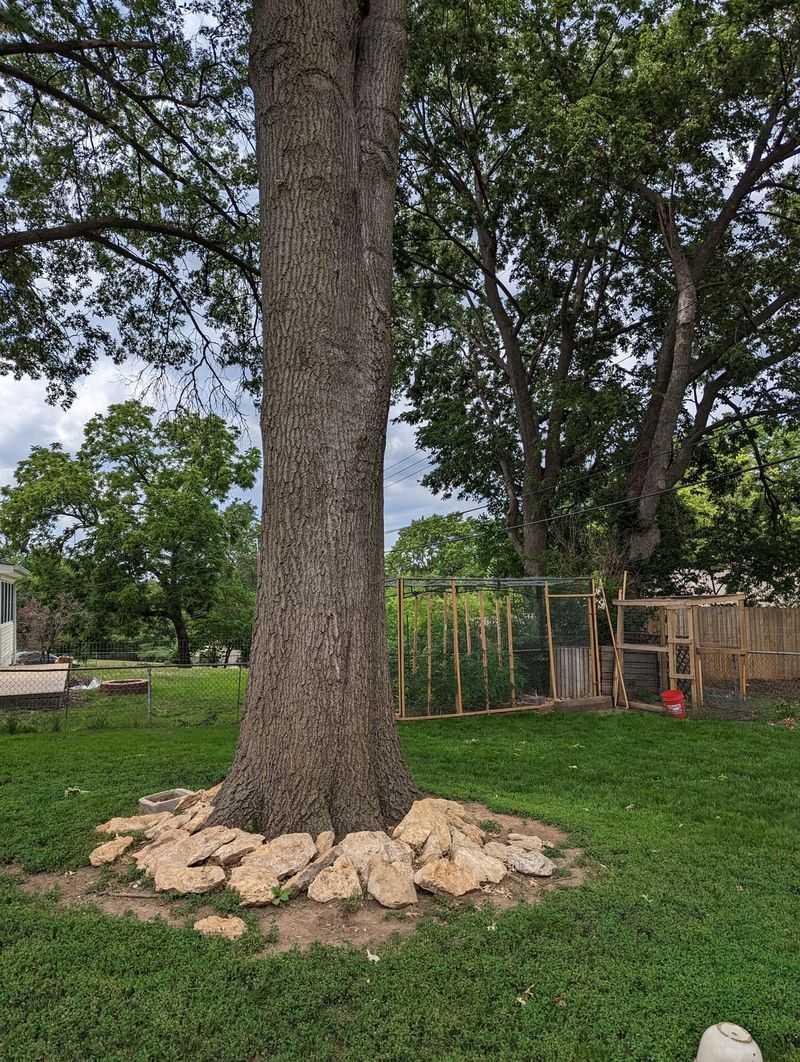
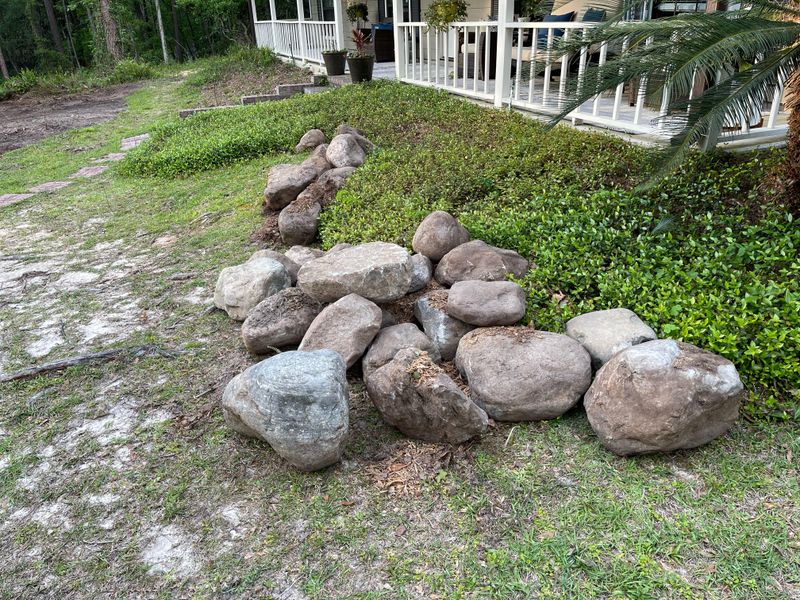
7. Use Large Boulders As Statement Pieces
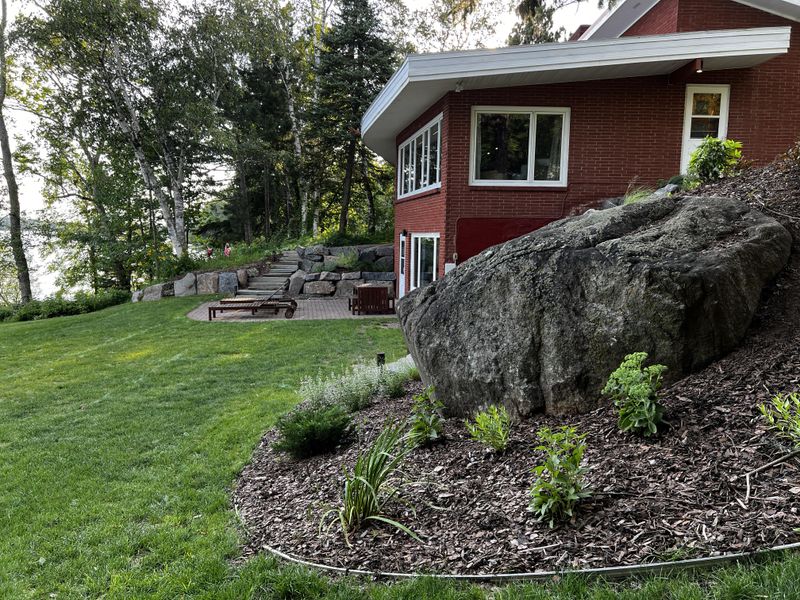
Sometimes, bigger is better. I remember the first time I placed a large boulder near my tree—it was like adding a piece of sculpture to the garden.
Boulders can act as focal points, drawing attention and providing a dramatic contrast to the delicate leaves. Have you tried incorporating a boulder into your design?
It can be a game-changer! Just ensure they’re positioned securely to prevent any roll-aways. Your tree will thank you for this statement!
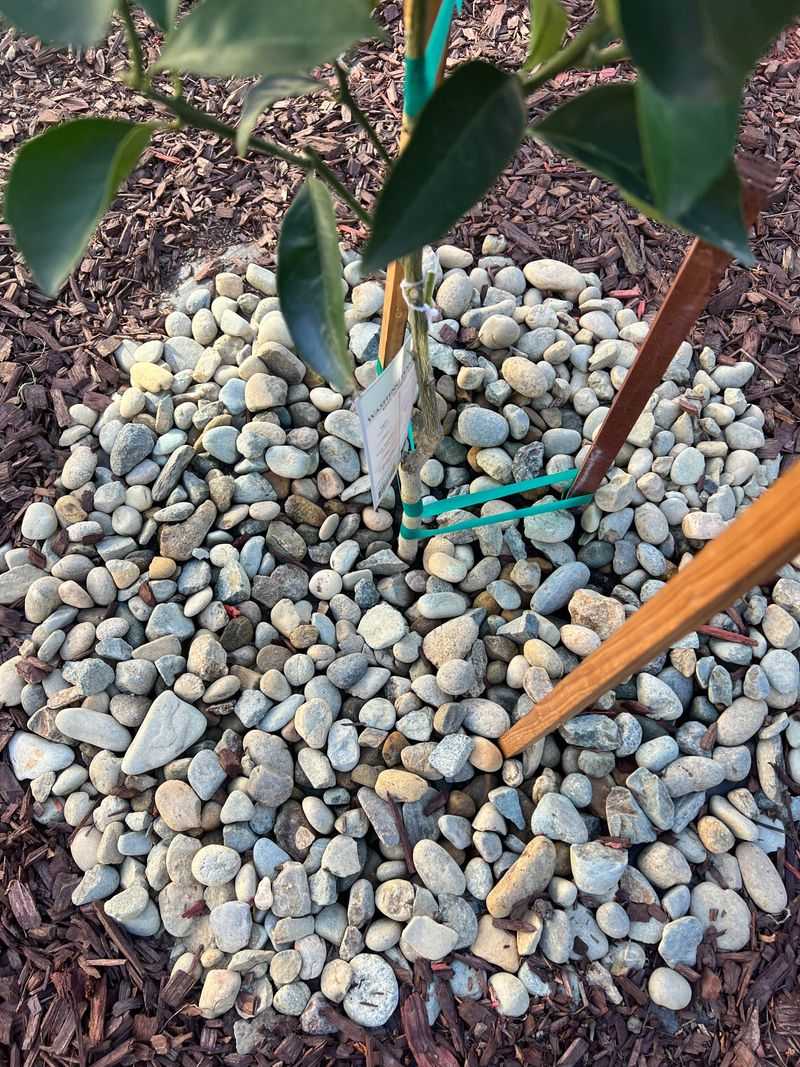
8. Mix Gravel And Stones For A Soft, Natural Transition
Blending gravel with stones offers a soft transition from the tree’s base to the surrounding landscape. This combination can create a natural, fluid look that’s easy on the eyes.
Have you ever thought about how textures interplay in your garden? Mixing gravel and stones can provide a subtle yet effective change in texture, leading the eye naturally from one area to another.
It’s an easy way to enhance the look without making drastic changes.
9. Arrange Rocks In A Circular Or Spiral Pattern
Arranging rocks in a circular or spiral pattern can create an enchanting focal point. This deliberate design draws the eye and adds a touch of whimsy.
Have you ever considered how patterns can influence your garden’s feel? By carefully placing each rock, you can craft a mesmerizing design that’s unlike any other.
It’s an approach that not only pleases the eye but also showcases your creativity and attention to detail.
10. Incorporate Stepping Stones For A Functional Pathway
Integrating stepping stones around your tree can create a functional and beautiful pathway. It’s like inviting your guests to explore your garden up close!
By keeping the stones flush with the rock landscaping, you maintain a seamless design. Have you tried walking through a garden with this setup?
It’s a delightful experience that connects you with nature. Plus, it prevents soil compaction while guiding foot traffic smartly.
11. Use Flat Stones For A Clean, Minimalist Design
Flat stones can give your landscape a clean and minimalist look. By laying them around the tree, you create a sleek and modern aesthetic that’s easy on the eyes.
Have you ever wondered how simplicity can enhance beauty? This approach strips away the clutter, allowing the natural elements to shine.
It’s a design that speaks volumes without saying a word, perfect for anyone who appreciates subtle elegance in their garden.
12. Create A Zen-Inspired Rock Garden Under Trees
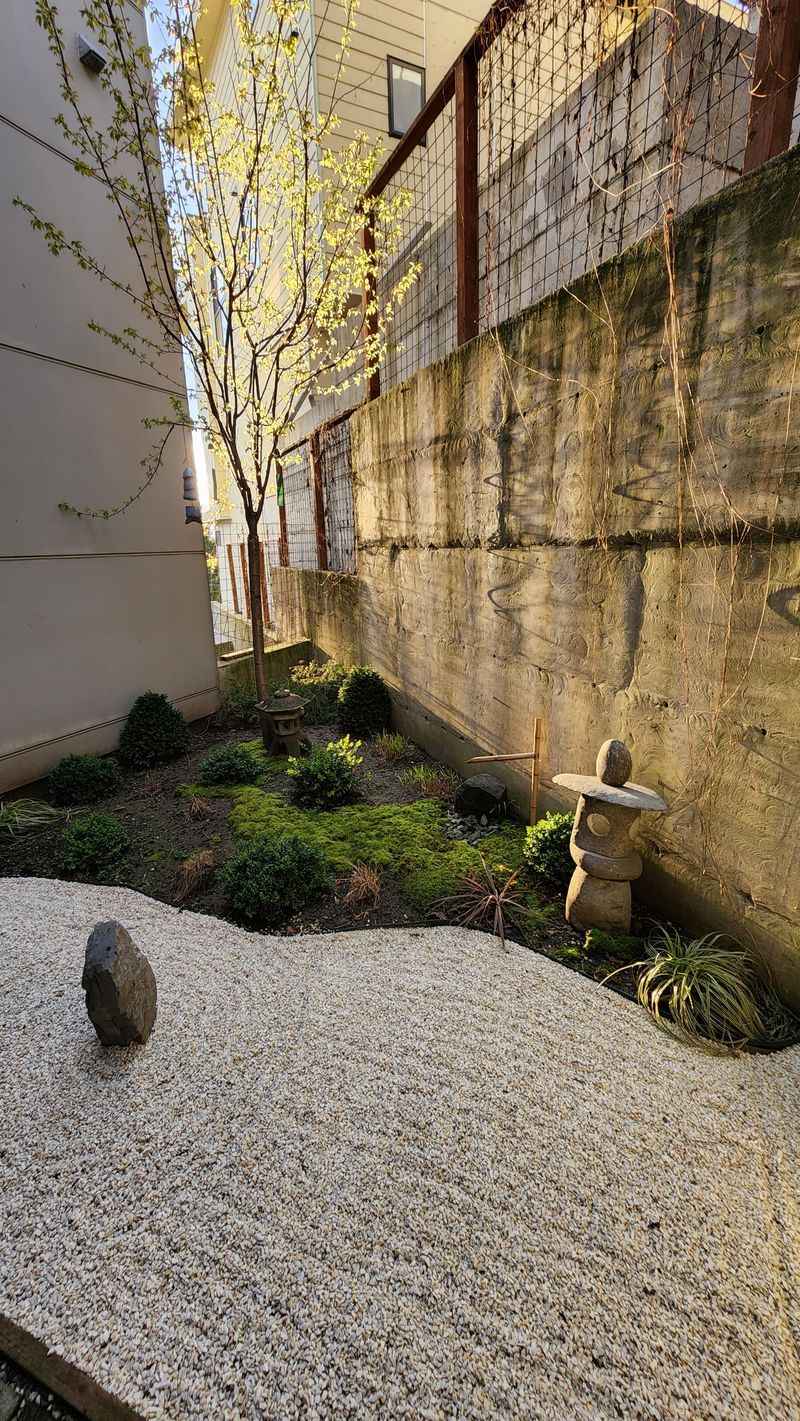
Creating a Zen-inspired garden can transform the area under your tree into a peaceful retreat. I recall the calm I felt when I first raked the gravel into perfect circles around the stones.
It’s a meditative practice that brings tranquility to the garden. Have you ever tried arranging stones with mindfulness? It’s an art form that encourages serenity.
The simplicity of a Zen garden under your tree can be a soothing escape from the daily hustle.
13. Blend Decorative Rocks With Mulch For Texture
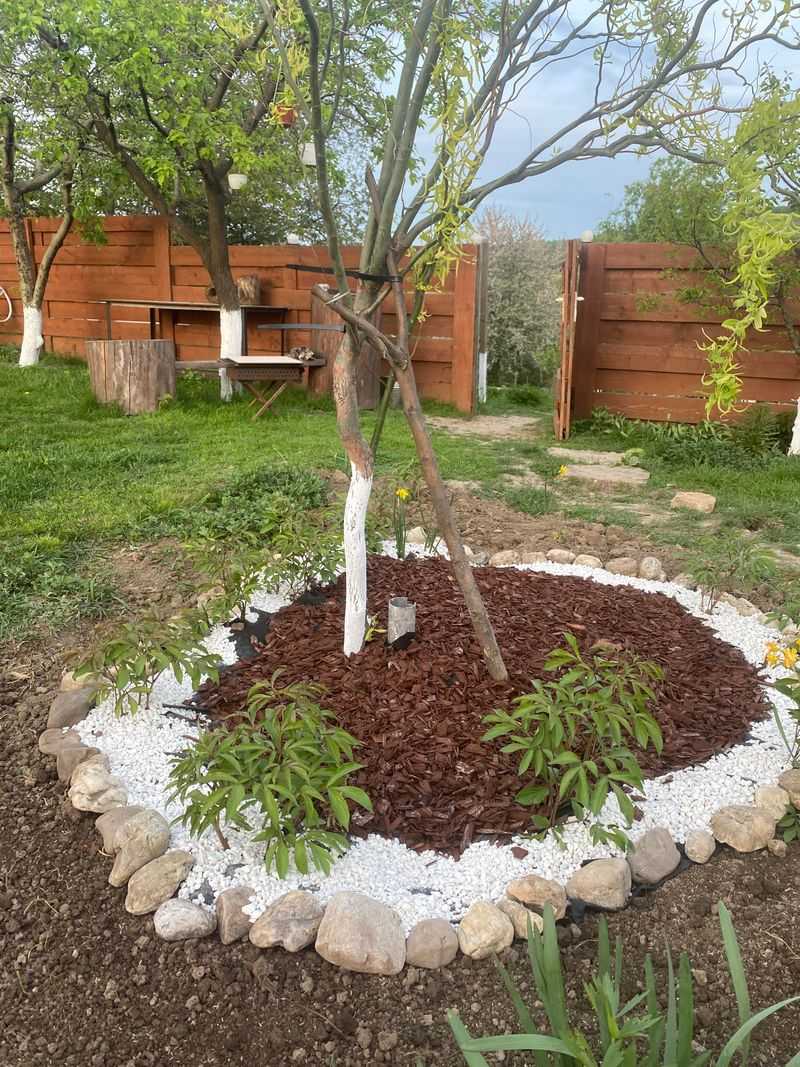
Mixing decorative rocks with mulch can add texture and visual interest to your landscape. This combination not only looks attractive but also helps retain moisture in the soil.
Have you noticed how various materials can enhance a garden’s appeal? The contrast between the rocks and mulch creates a dynamic look that’s both functional and pleasing.
It’s a simple way to boost your garden’s aesthetic while being kind to your plants.
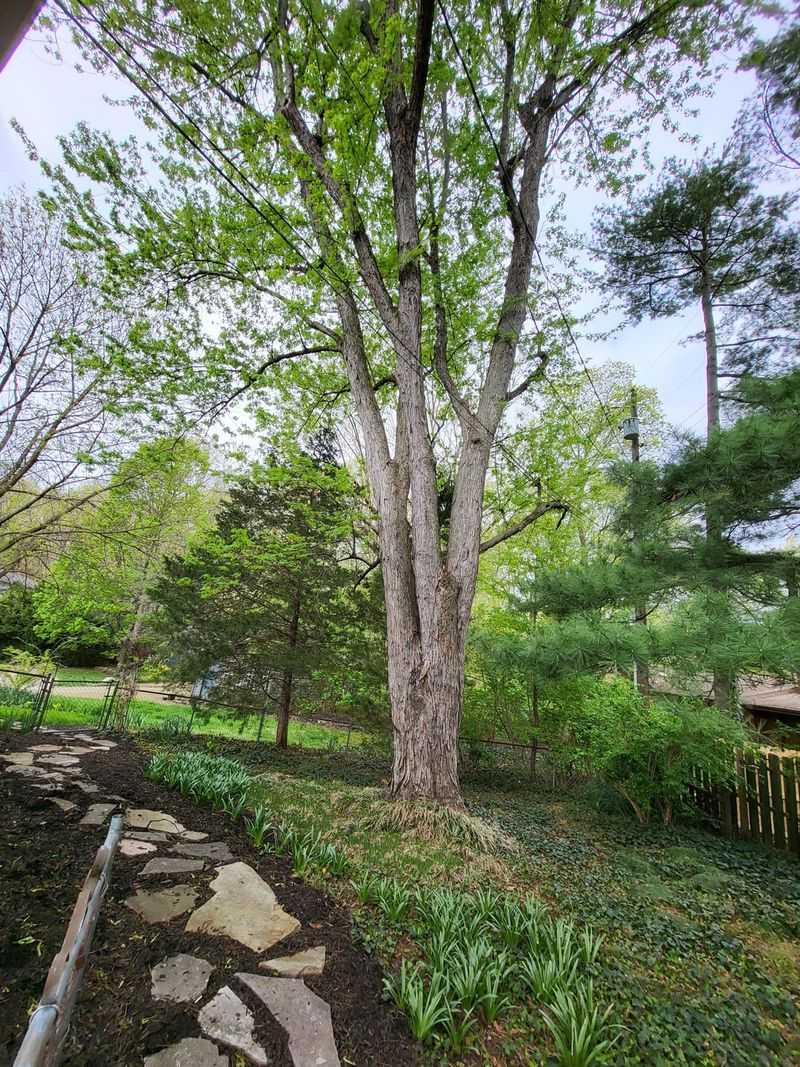
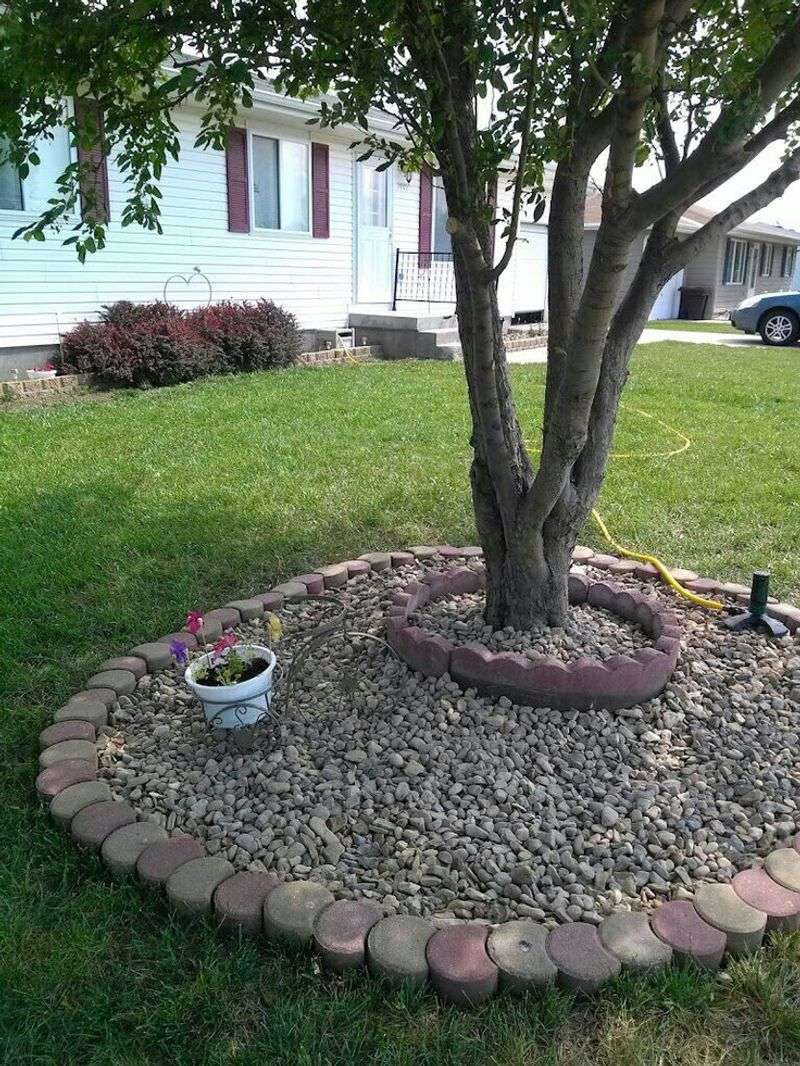
14. Build A Raised Rock Bed For Extra Definition
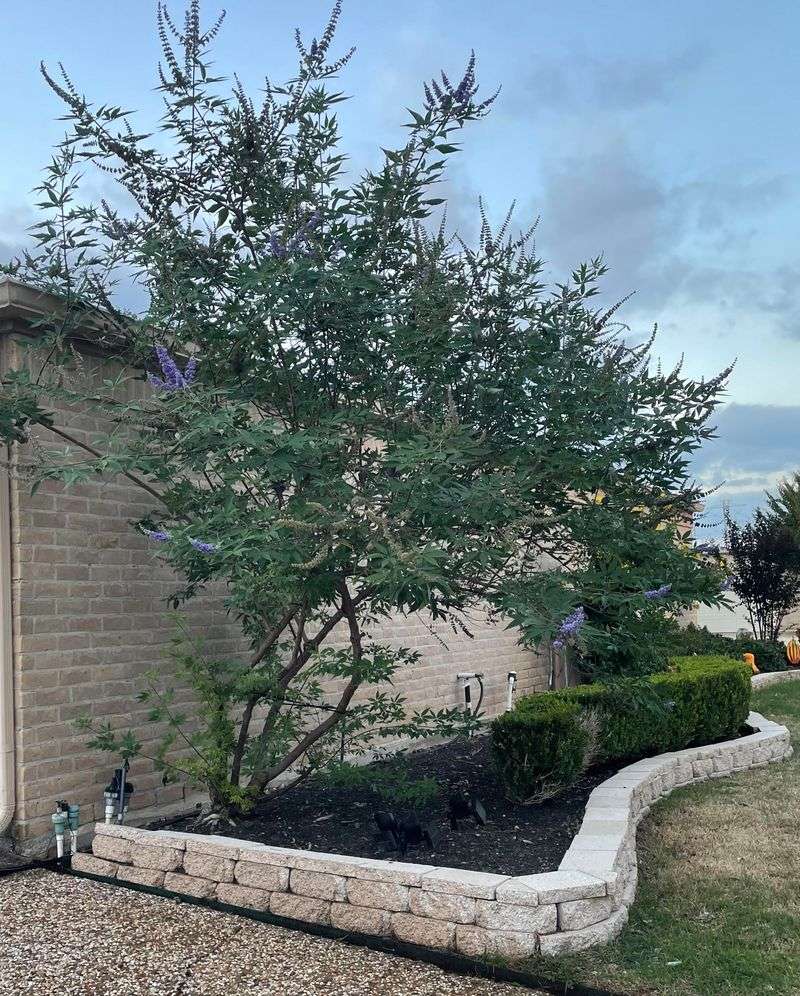
Building a raised rock bed around your tree can add definition and height to your landscape design. This method elevates the tree, making it a central feature in your garden.
Have you thought about how elevation can change perspectives? A raised bed provides a fresh view and adds an element of surprise.
It’s an effective way to frame your tree while offering a unique twist to traditional landscaping.
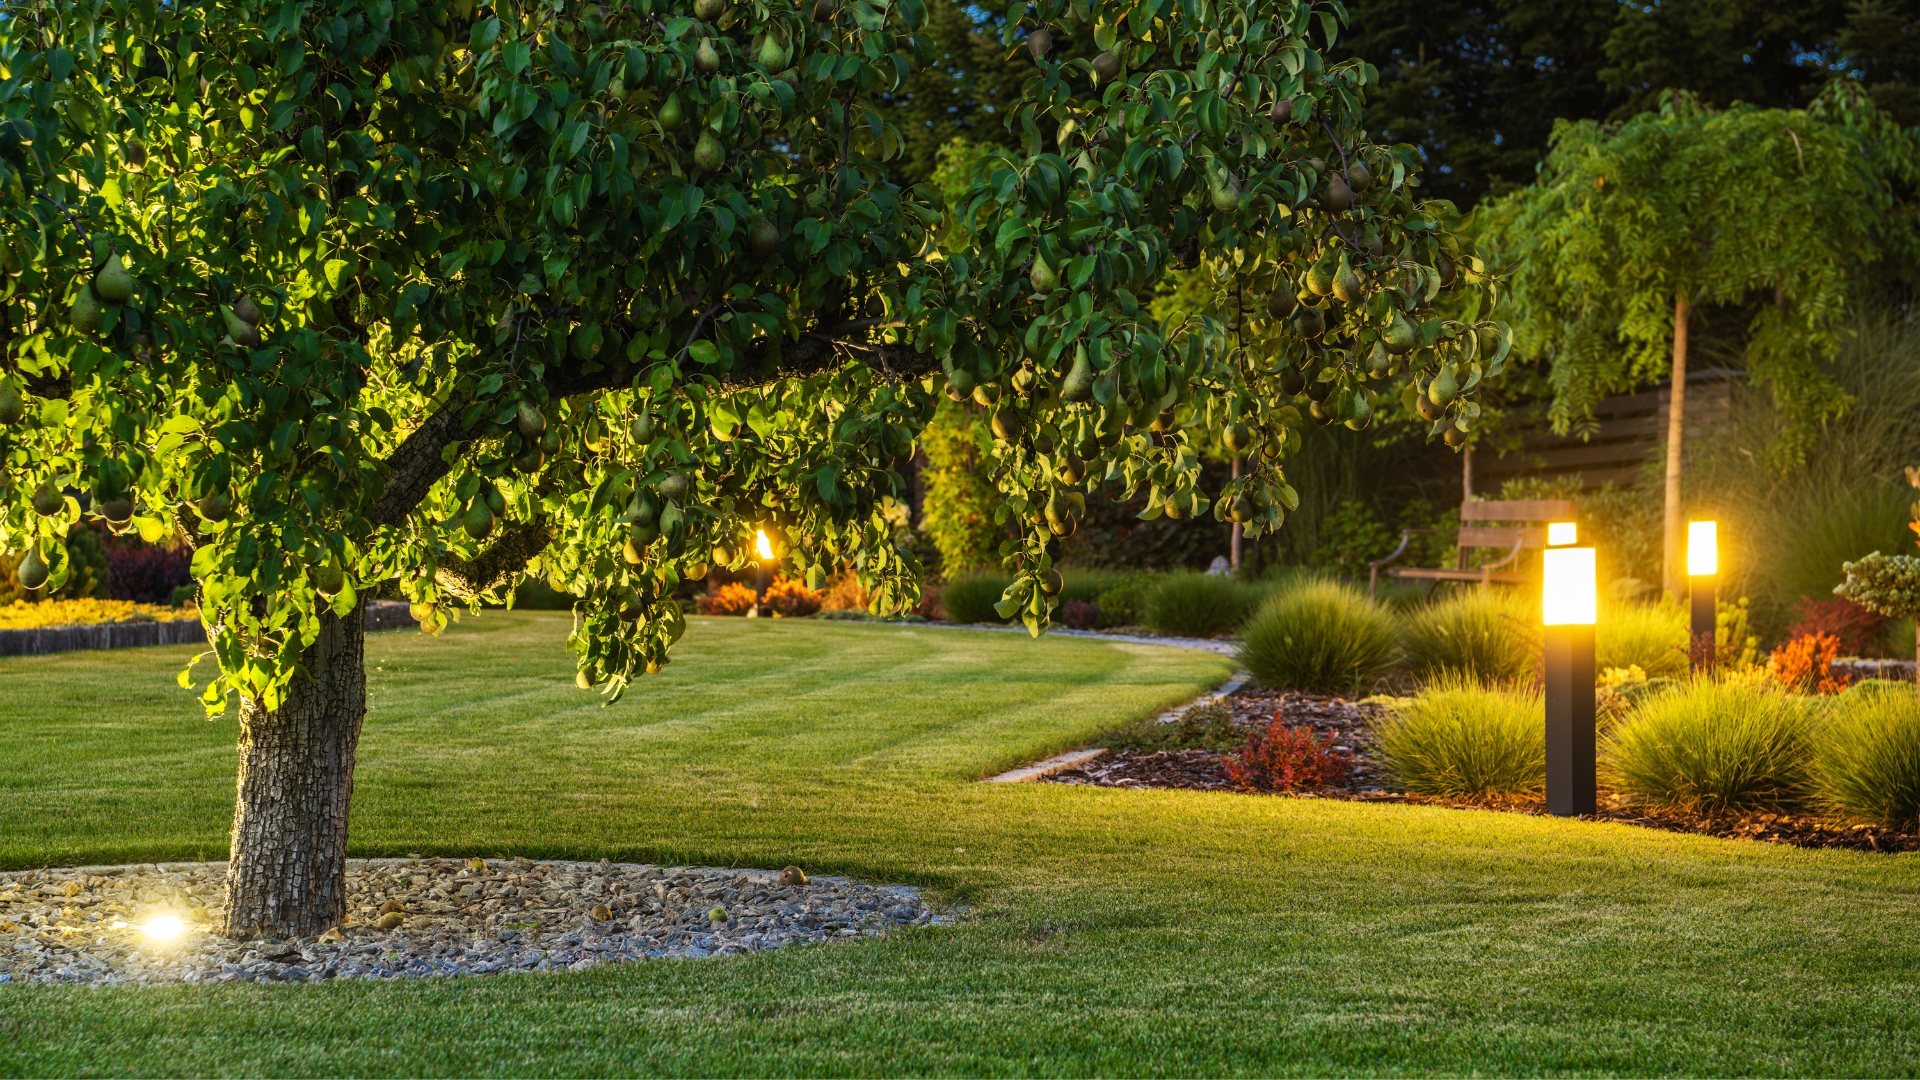
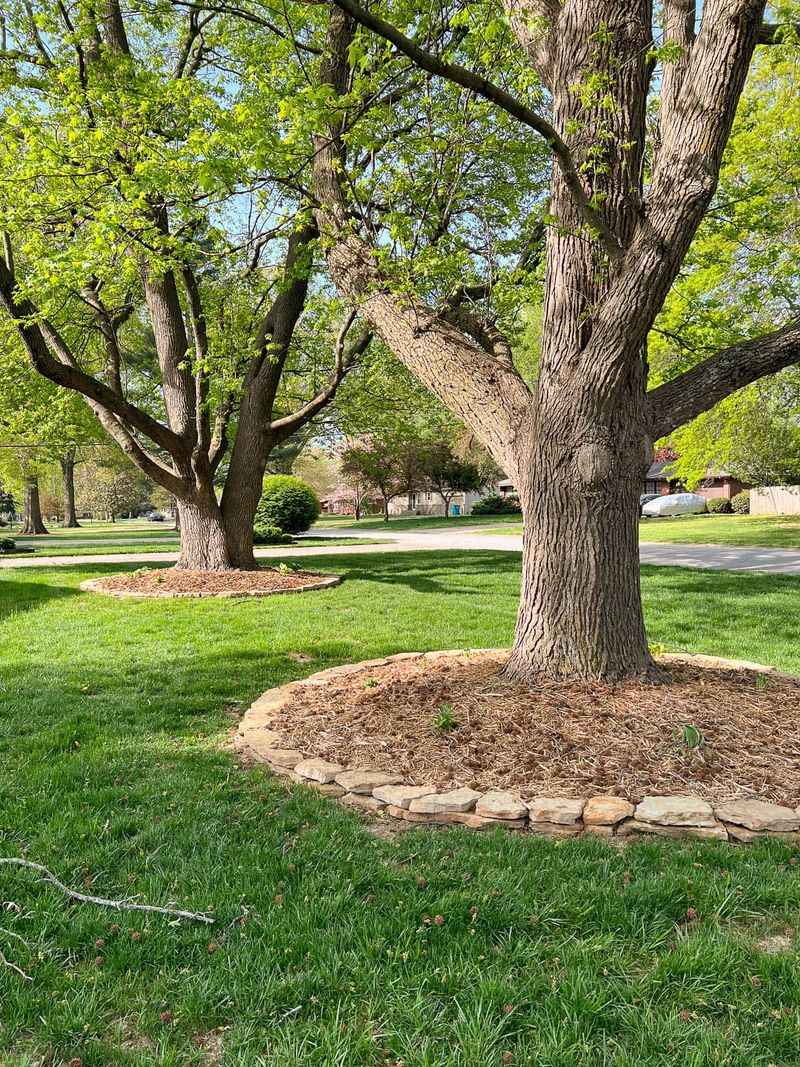
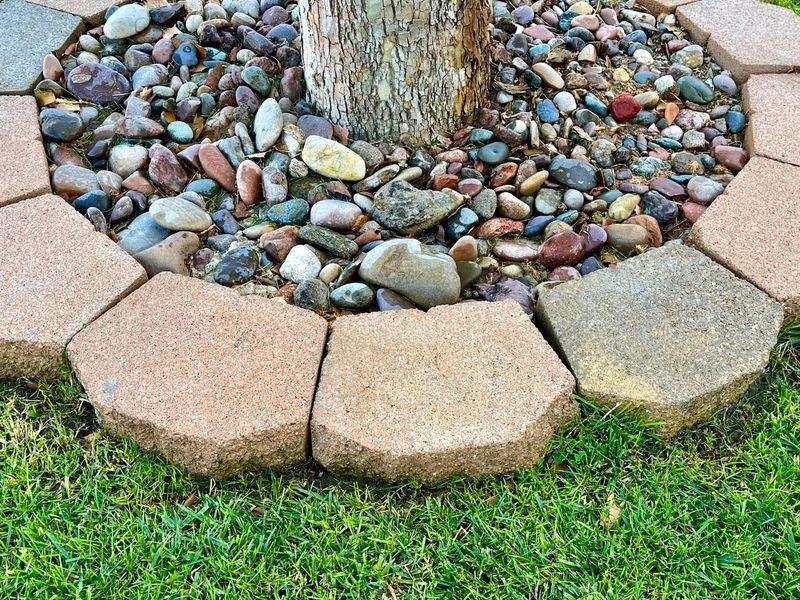
15. Edge With Bricks Or Pebbles For A Finished Look
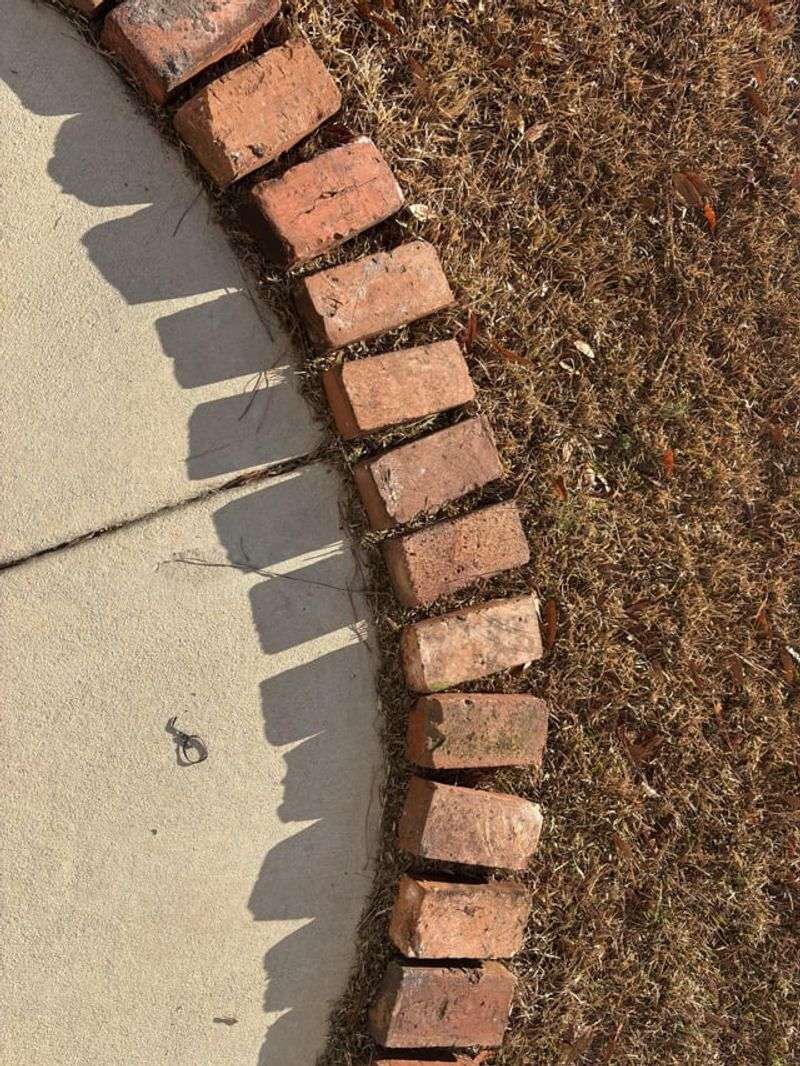
Edging with bricks or pebbles can give your tree a finished and tidy look. This approach defines boundaries and keeps the design looking sharp. Have you ever considered how edging can impact the overall design?
It acts as the punctuation mark in your garden, bringing everything together. By choosing the right materials, you can complement the existing landscape and enhance its beauty.
It’s a finishing touch that makes a big difference!
16. Choose Rock Colors That Complement Your Landscape
Selecting rock colors that complement your landscape can create a harmonious look. The right colors can enhance the tree’s natural beauty and tie the area together.
Have you ever noticed how colors can affect mood and perception? By choosing hues that match your garden’s theme, you create a seamless flow.
It’s all about balance and cohesion, making your garden a delightful place to spend time.
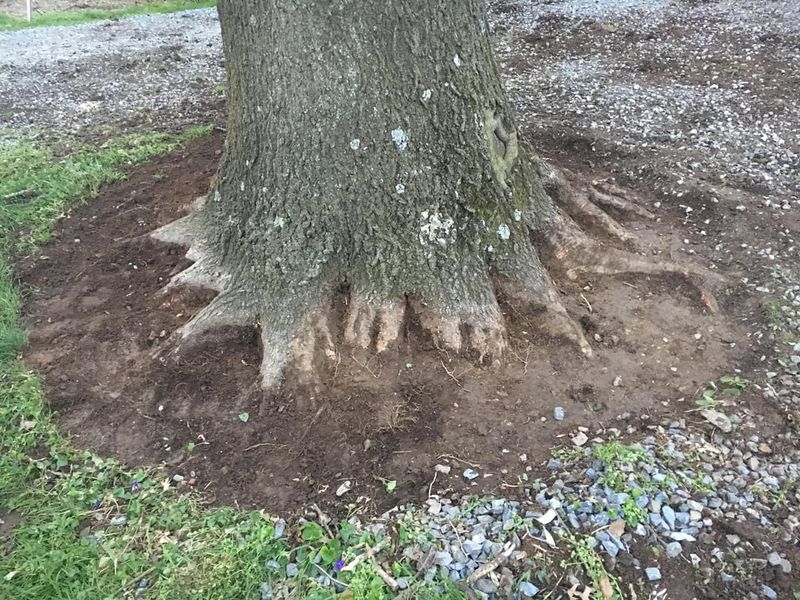
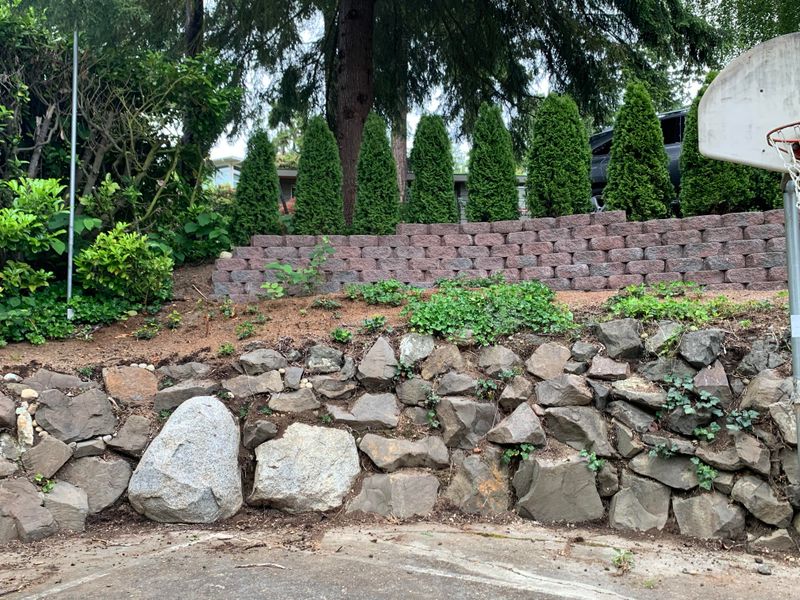
17. Use Rocks To Control Soil Erosion Around Trees
Using rocks to control soil erosion is both a practical and attractive solution. By placing rocks strategically, you can prevent soil from washing away, protecting tree roots.
Have you thought about how erosion can impact your landscape? Rocks act as natural barriers, stabilizing the soil and maintaining the garden’s integrity.
It’s a simple yet effective way to safeguard your landscape’s beauty and health.
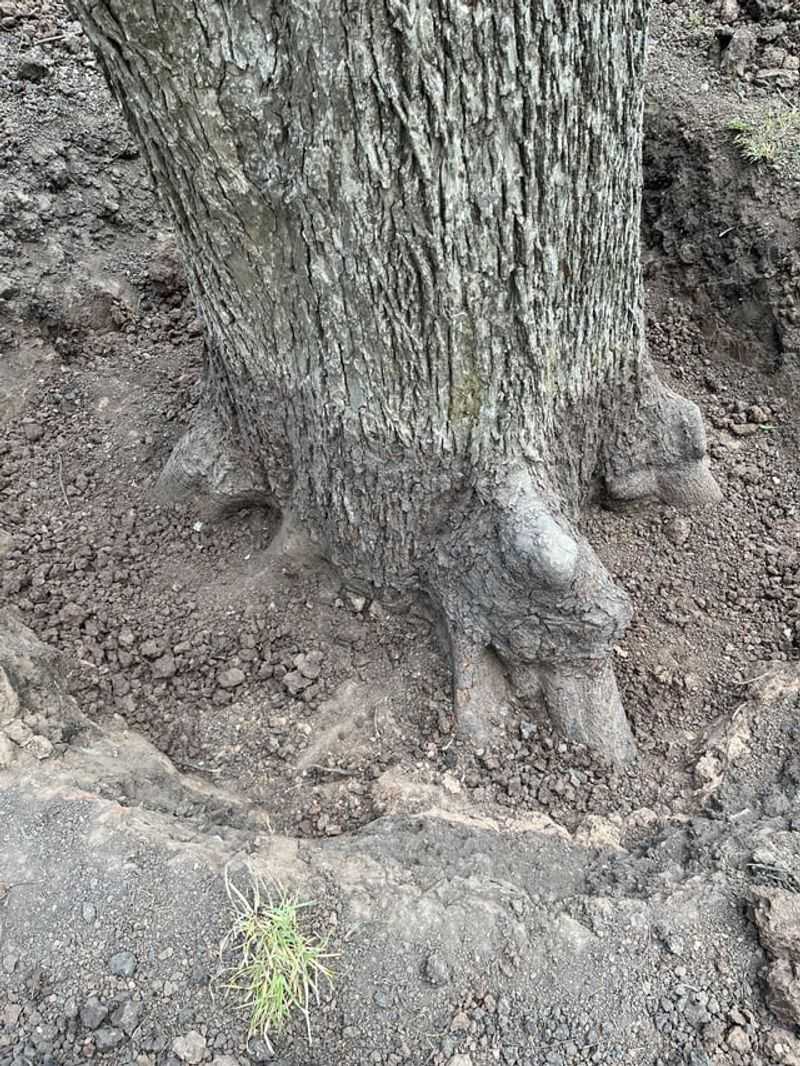
18. Avoid Crowding The Tree Base To Protect Roots
When landscaping with rocks, it’s essential to avoid crowding the tree base. Allowing space for the roots ensures the tree’s health and vitality. Have you considered how roots need room to grow and thrive?
By carefully arranging rocks with enough breathing space, you promote growth and longevity.
This thoughtful design not only looks appealing but also respects the natural needs of the tree.
19. Ensure Proper Drainage When Using Rocks
When I first started using rocks in my garden, I quickly learned the importance of ensuring proper drainage. It’s crucial to prevent water from pooling around the tree base.
Have you examined the flow of water in your garden? By arranging rocks in a way that guides water away, you protect the tree from root rot.
It’s a lesson in balancing beauty with practicality, keeping your garden both attractive and healthy.
20. Use Landscape Fabric Under Rocks To Stop Weeds
Using landscape fabric under rocks is a great way to prevent weeds from taking over. This barrier stops unwanted growth while maintaining the area’s neat appearance.
Have you battled with stubborn weeds before? By placing fabric beneath the rocks, you create a clean slate that’s easy to manage.
It’s a proactive step that saves time and effort in the long run, keeping your garden looking pristine.
21. Leave Space For Tree Growth And Root Expansion
Leaving space for tree growth and root expansion is crucial when planning your rock landscaping. It’s about thinking ahead and allowing the tree room to thrive.
Have you ever considered the long-term effects of your garden design? By providing ample space, you ensure the tree’s health and vitality, preserving the beauty of your landscape for years to come.
It’s a thoughtful approach that pays off in the long run.
22. Avoid Compacting Soil With Heavy Rocks
Ensuring that rocks don’t compact the soil is essential for tree health. Heavy rocks can press down too hard, affecting root growth. Have you thought about how soil health impacts tree vitality?
By placing rocks carefully and avoiding excessive weight, you maintain a healthy environment for the roots.
It’s a balance of aesthetics and practicality, ensuring the tree remains vigorous and robust.
23. Keep Rocks From Shifting Over Time
Keeping rocks from shifting is key to maintaining a stable landscape. Over time, weather and foot traffic can move rocks, disrupting the design.
Have you ever had to fix a shifted rock in your garden? By securing them properly, you prevent this common issue and maintain a tidy appearance.
It’s about creating a lasting design that stands the test of time, requiring little maintenance.
24. Refresh And Maintain Your Rock Landscaping Regularly
Regular maintenance is essential to keep rock landscaping looking fresh. I’ve found that periodically checking and adjusting the rocks can make a world of difference.
Have you scheduled a garden check-up lately? By keeping an eye on the arrangement, you can make small tweaks that enhance the overall appearance.
It’s a simple task that ensures your garden stays inviting and well-kept.
25. Placing Rocks Too Close To The Tree Trunk
Placing rocks too close to the tree trunk can cause issues, such as damaging the bark or impeding growth. Have you ever wondered how proximity affects tree health?
By ensuring there’s a buffer zone, you protect the tree from potential harm. It’s a simple fix that ensures the tree remains healthy and the landscape looks intentional.
Just a little space can make a big difference!
26. Using Rocks That Retain Too Much Heat
Rocks that retain too much heat can cause problems for your tree. Have you considered how heat affects the roots?
By choosing rocks that don’t absorb excessive heat, you prevent stress on the tree. It’s about selecting the right materials that complement the environment.
A thoughtful choice in rocks ensures the tree remains healthy and the landscape harmonious. Have you felt the heat from rocks in the summer sun? It’s something to keep in mind!
27. Ignoring Drainage Needs And Causing Root Rot
Ignoring drainage can lead to root rot, a silent killer of trees. By planning the rock layout to encourage proper water flow, you avoid this pitfall.
Have you checked for standing water around your tree lately? Ensuring that rocks guide water away from the base prevents pooling and protects the roots.
It’s about thinking ahead and making decisions that support the tree’s health and longevity.
28. Overloading The Area With Too Many Large Rocks
Using too many large rocks can overwhelm the area and put stress on the soil and roots. Have you ever been tempted to over-decorate a space?
Balance is key to maintaining an appealing landscape. By using rocks sparingly and thoughtfully, you create an elegant design that doesn’t overpower the tree.
It’s about showcasing the tree, not burying it under a pile of boulders!
29. Neglecting To Secure Rocks In Sloped Areas
Securing rocks on slopes is crucial to prevent shifting. I learned the hard way when a few decorative stones took an unscheduled slide down the hill!
Have you considered how gravity affects your rock placement? By ensuring each rock is stable, you prevent unexpected shifts that can disrupt the landscape.
It’s a lesson in planning and attention to detail that keeps your garden looking pristine.