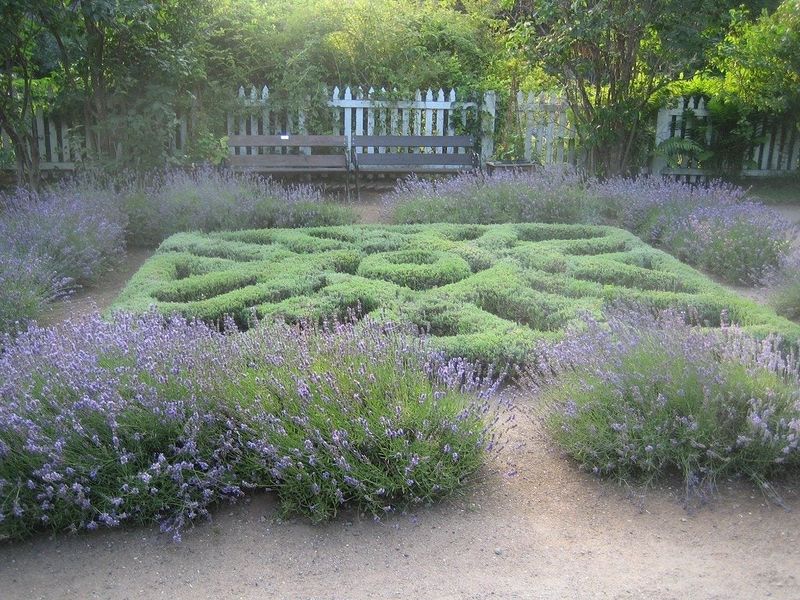
15 Essential Tips For Designing A Knot Garden That’s Both Trendy And Timeless
Knot gardens blend beauty, history, and creativity in one special package. These intricate garden designs use carefully trimmed plants to create patterns that look like woven knots when viewed from above. Dating back to Tudor times, knot gardens have made a comeback for modern gardeners who want something unique in their yards. With a little planning, you can create a knot garden that wows visitors today and will still look amazing years from now.
1. Start With a Simple Pattern
Jumping into a complex design right away might lead to frustration. Begin your knot garden journey with basic patterns like squares, circles, or simple Celtic knots. These foundational designs help you master the techniques before attempting more elaborate ones.
As your confidence grows, you can gradually incorporate more intricate elements. Many expert gardeners confess they wish they’d begun with simpler patterns when they first started out. The skills you develop with basic designs transfer beautifully to more advanced patterns later.
2. Choose the Right Location
Sunlight plays a crucial role in your knot garden’s success. Most traditional plants used in these gardens need at least 6 hours of direct sunlight daily. A flat area works best since it makes maintenance easier and shows off your design properly.
Got a sloped yard? Consider terracing to create a level space. Placing your knot garden where it can be viewed from above—perhaps from a window or raised patio—allows everyone to appreciate the intricate pattern you’ve created.
3. Pick Plants That Hold Their Shape
Plants that maintain crisp edges make your knot garden look sharp year-round. Boxwood remains the classic choice because it’s easy to trim and keeps its shape beautifully. Alternatives include germander, lavender, santolina, and dwarf holly if boxwood isn’t your style.
Look for varieties that grow slowly so you won’t need constant trimming. The plants forming your knot outlines need to maintain clean lines to showcase the pattern properly. Fast-growing varieties might seem appealing initially but will demand much more maintenance in the long run.
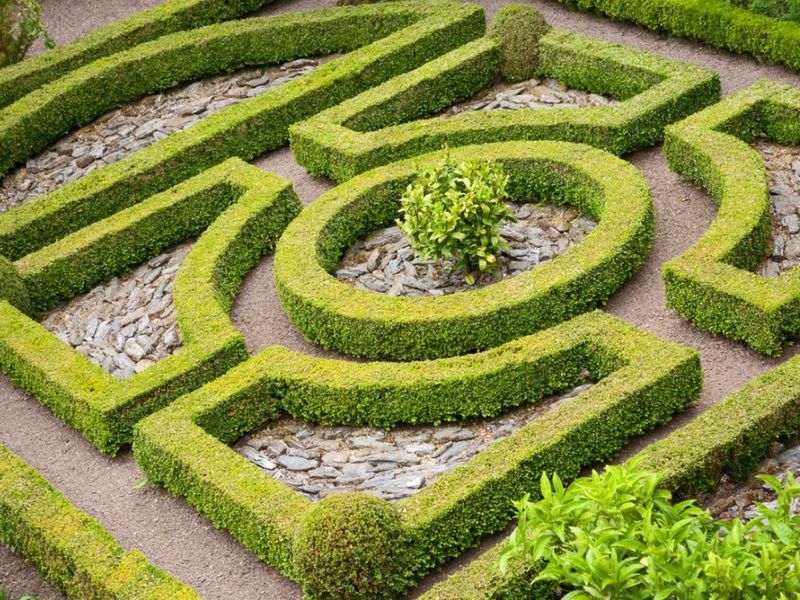
4. Map Your Design on Paper First
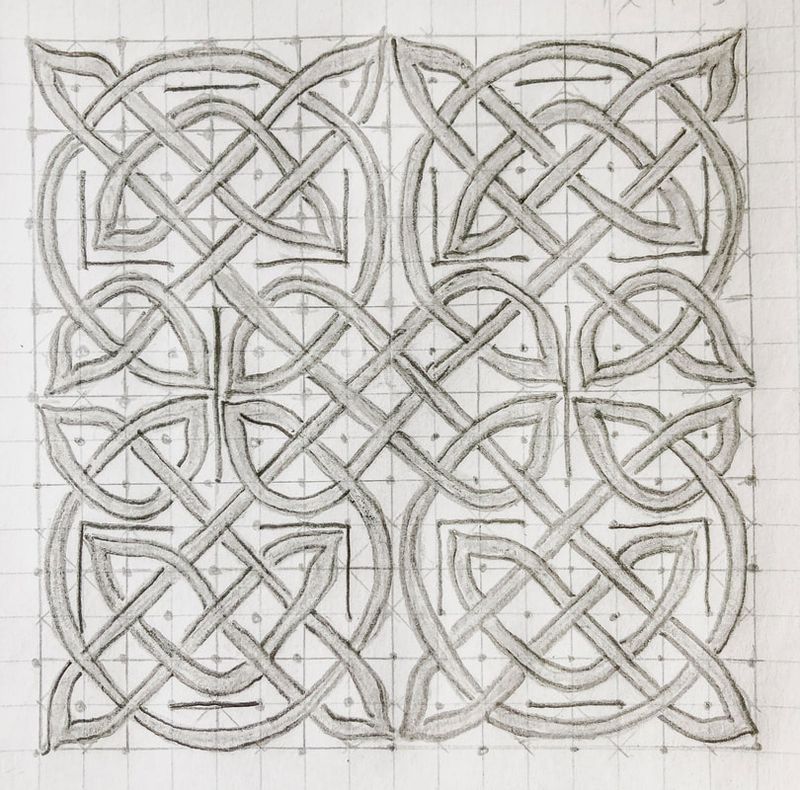
Grabbing a pencil before grabbing a shovel saves countless headaches! Sketch several design options on graph paper where each square represents a specific measurement in your garden. This planning stage helps you visualize the final result and calculate exactly how many plants you’ll need.
Try different patterns until you find one that speaks to you. Historically, knot gardens represented family crests or meaningful symbols. Your design might incorporate elements that have personal significance or simply patterns you find aesthetically pleasing.
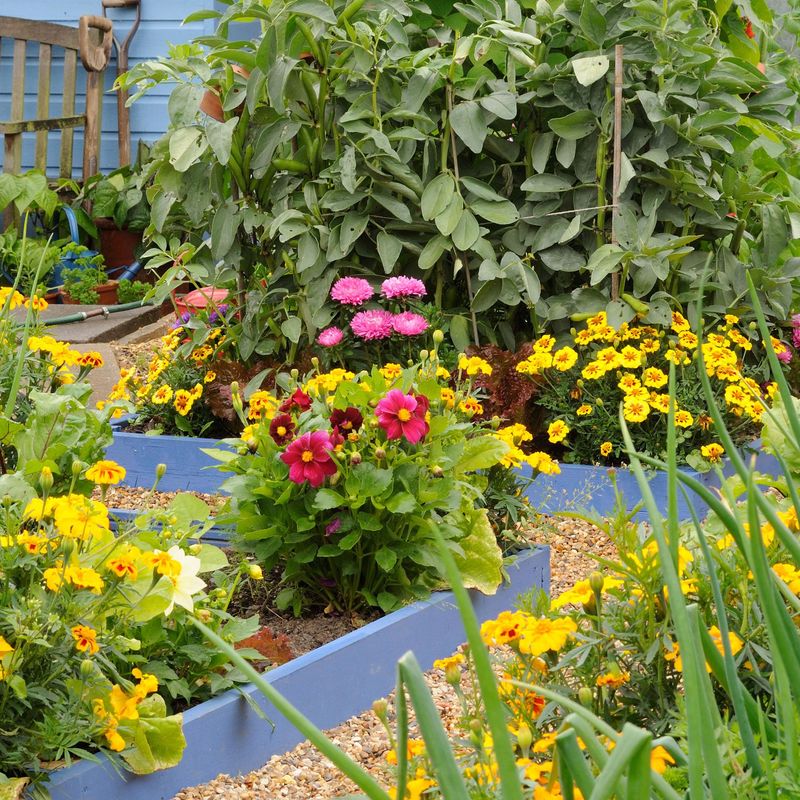
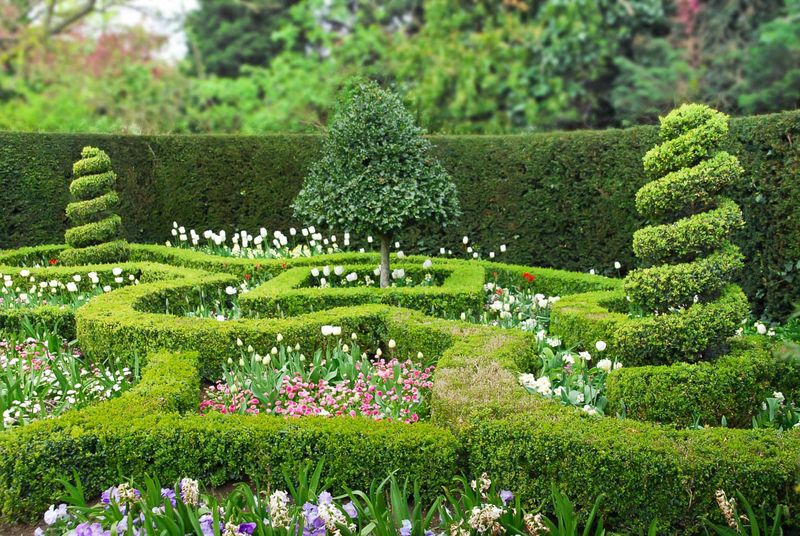
5. Create Contrast With Different Plant Colors
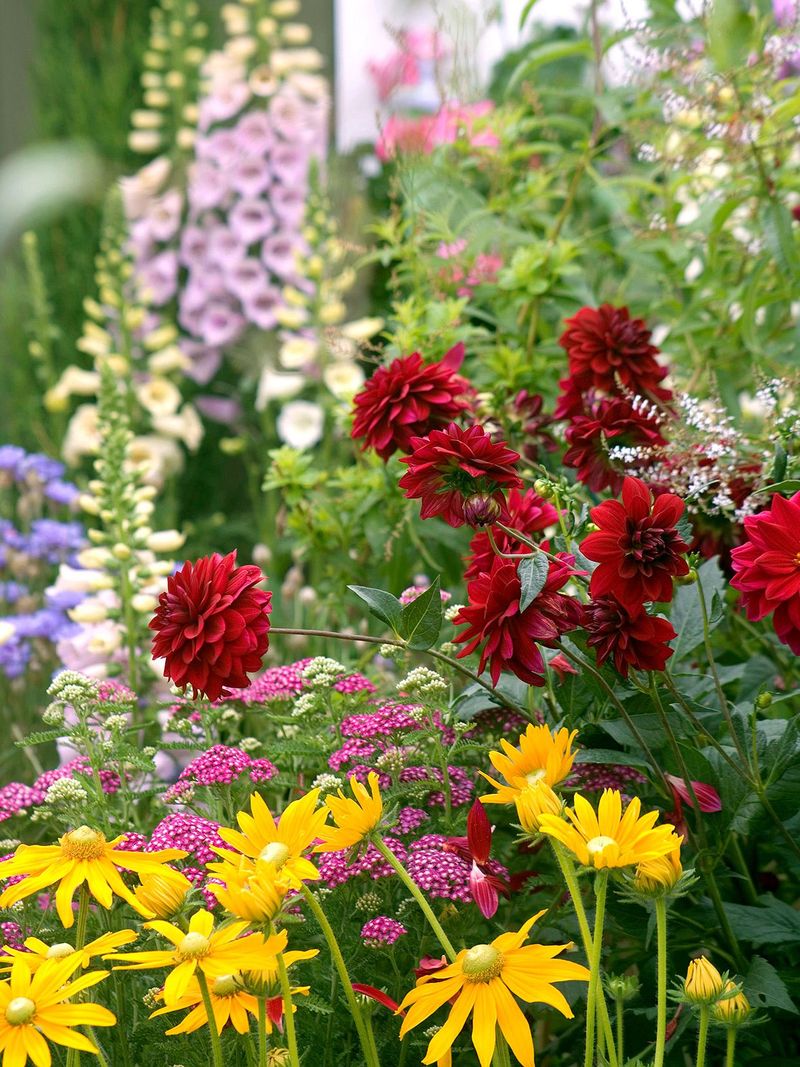
Visual pop comes from playing with different colored foliage. Mixing silver-leaved plants like santolina with dark green boxwood creates stunning definition in your pattern. For seasonal interest, consider lavender for summer purple blooms or winter savory for texture variation.
Color contrast makes your knot pattern visible from a distance. Traditional Tudor knot gardens often used contrasting infill materials like colored gravel or sand between the plant lines. Modern designs might incorporate herbs with varied leaf colors like purple sage alongside bright green thyme.
6. Add Fragrant Herbs for Sensory Appeal
Walking through a knot garden becomes magical when aromatic herbs release their scents with each step. Rosemary, thyme, and sage not only look beautiful but create a sensory experience when brushed against or warmed by the sun.
Medieval knot gardens combined beauty with practicality by incorporating useful culinary and medicinal herbs. Your kitchen will thank you for planting edible varieties! Position the most fragrant herbs along pathways where visitors will naturally brush against them, releasing their wonderful aromas.
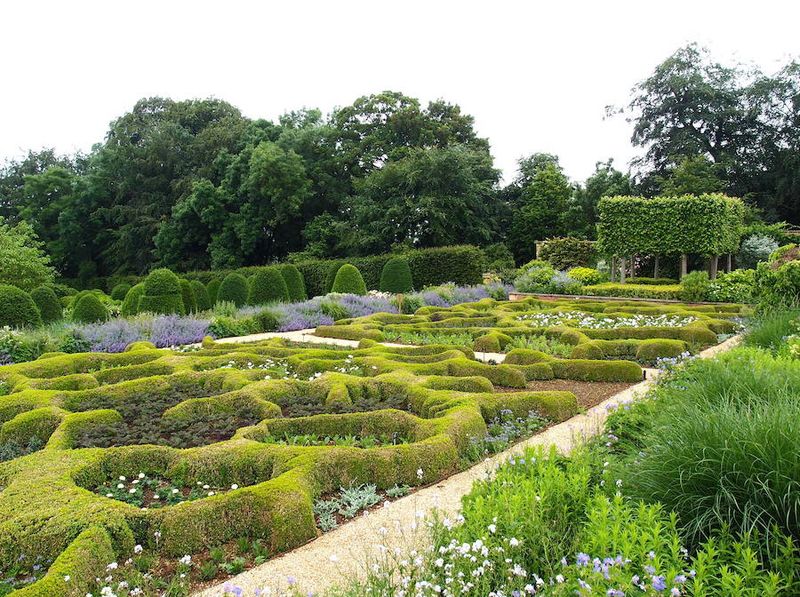
7. Install Proper Edging for Clean Lines
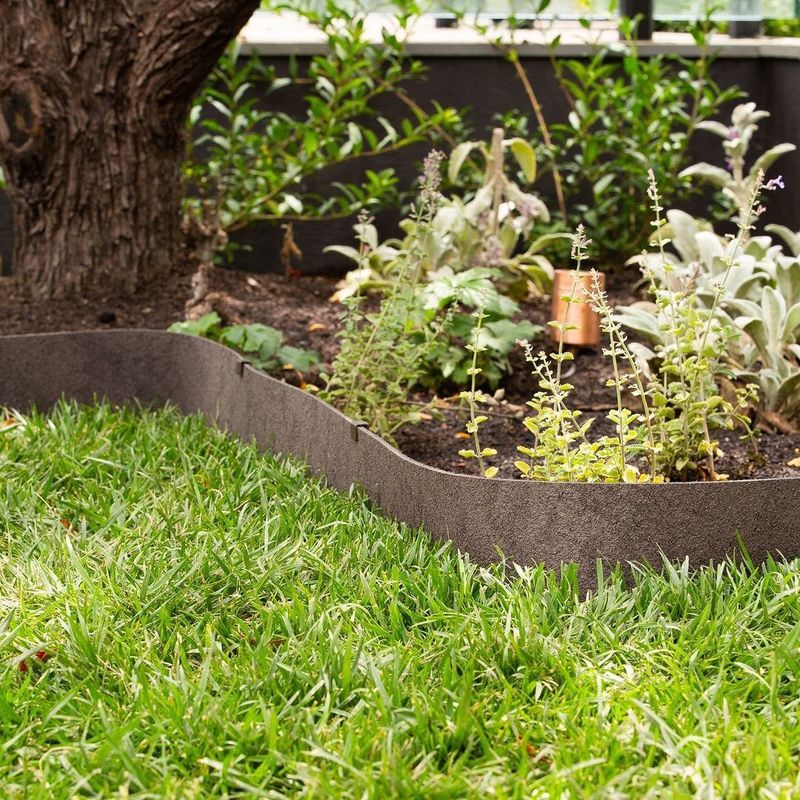
Clean edges make or break a knot garden’s appearance. Installing permanent edging materials like metal strips, brick, or stone helps maintain those crisp lines between different sections of your design. These barriers prevent plants from crossing boundaries and keep gravel or mulch neatly contained.
Professional-looking edging elevates the entire garden. Some gardeners use buried plastic edging for an invisible barrier, while others make the edging a decorative feature with materials that complement their home’s architecture. Whatever you choose, make sure it’s firmly anchored to withstand years of garden maintenance.
8. Maintain Proper Spacing Between Elements
Breathing room matters in knot garden design. Leaving adequate space between the lines of your pattern ensures each element remains distinct as plants mature. Beginners often plant too closely, creating a jumbled look once everything grows in.
Follow the mature width guidelines for your chosen plants and add a little extra space. Pathways between knot sections should be wide enough for comfortable walking and maintenance access. Remember that even slow-growing plants like boxwood will eventually reach their full size—plan for the future, not just how things look at planting time.
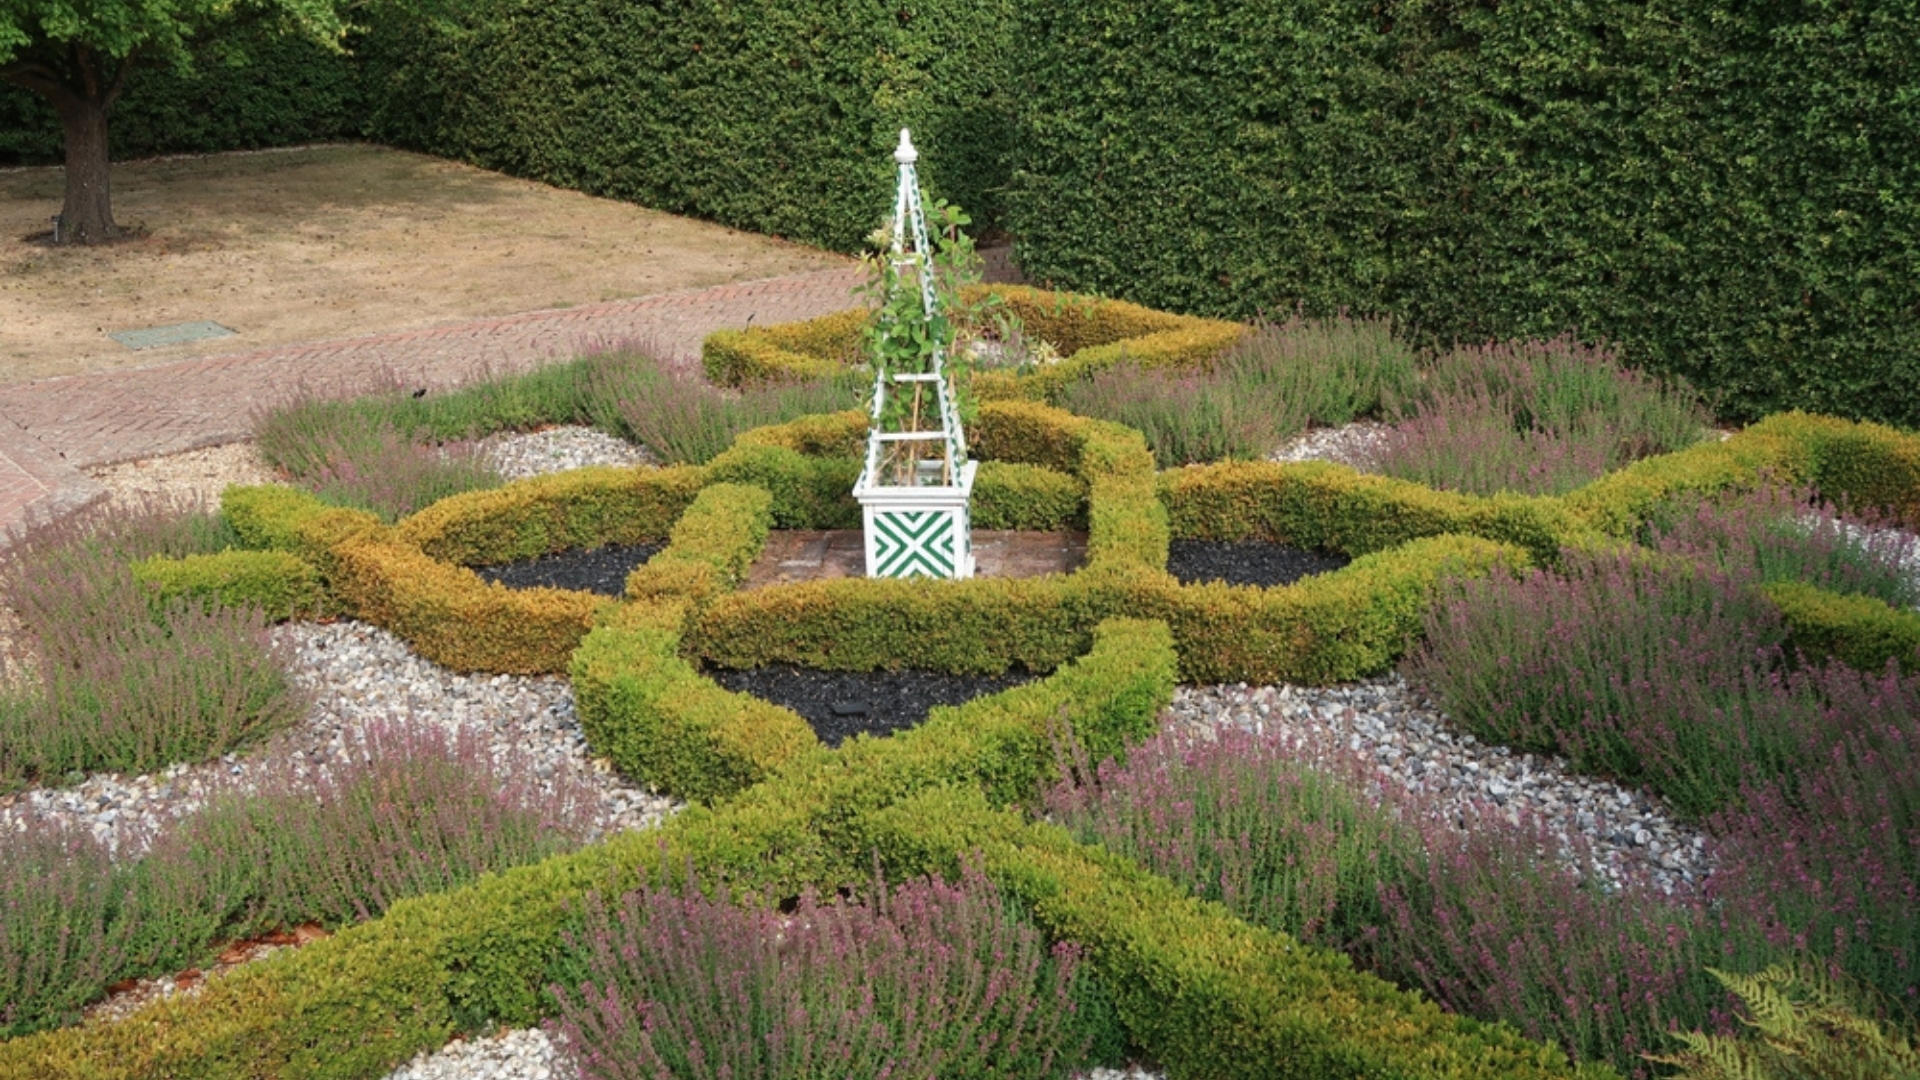
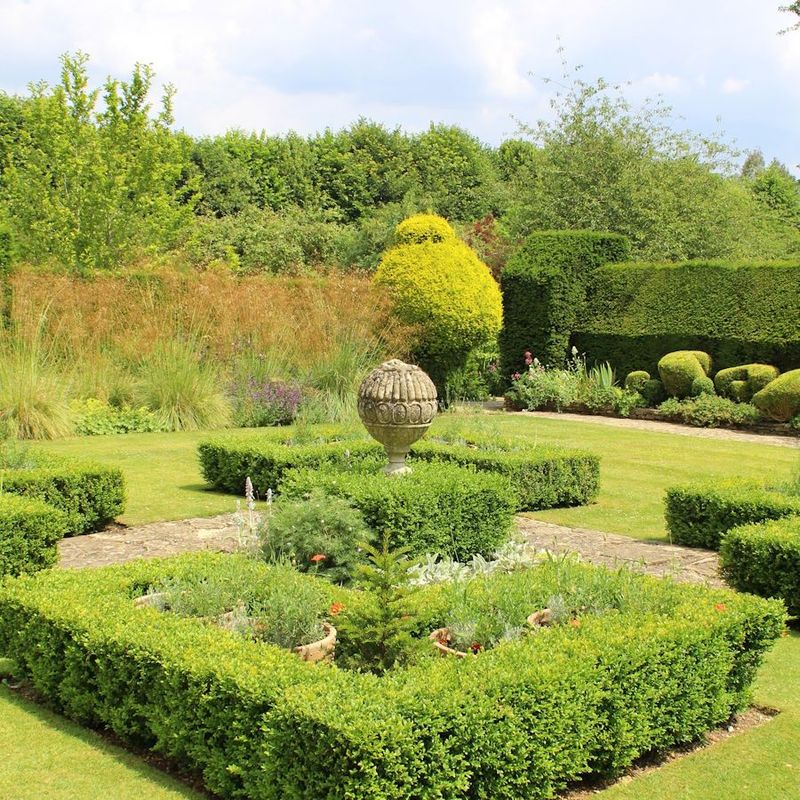
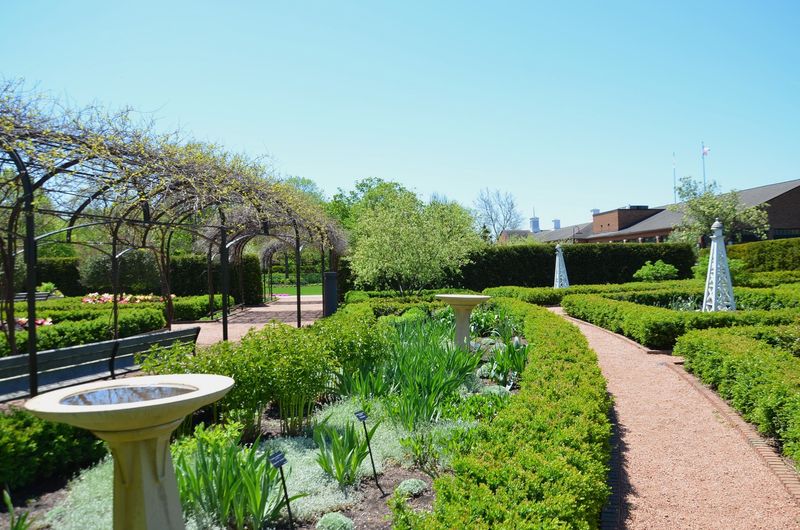
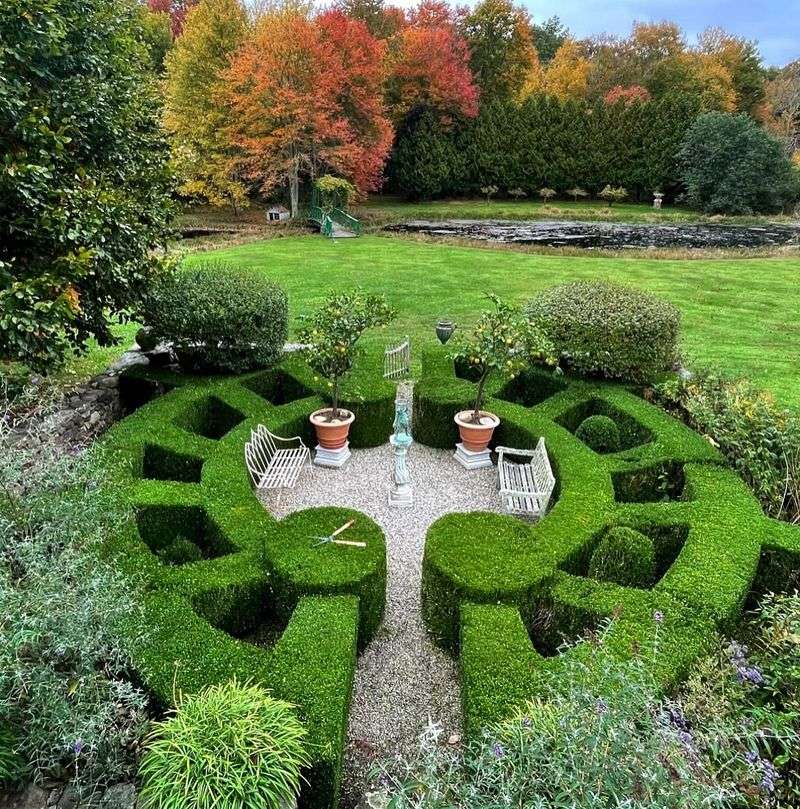
9. Incorporate a Focal Point
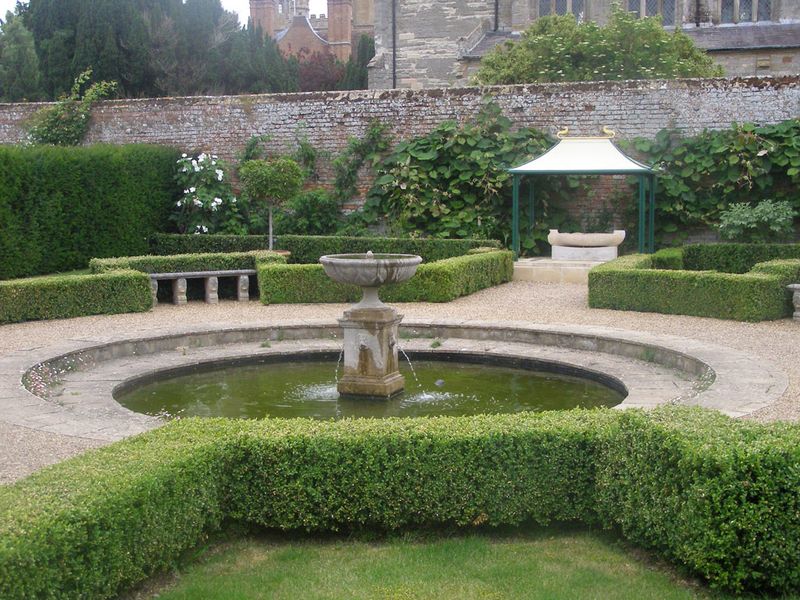
Every great garden tells a story with a standout feature. Place a sundial, birdbath, or small fountain at the center of your knot garden to create a natural focal point. These elements draw the eye and provide a sense of purpose to your design.
Historical knot gardens often featured statuary or topiary as central elements. Modern interpretations might include a specimen plant, a decorative container, or even a small seating area. Whatever you choose, make sure it’s proportional to your garden’s size—too large and it overwhelms, too small and it gets lost in the pattern.
10. Plan for Year-Round Visual Interest
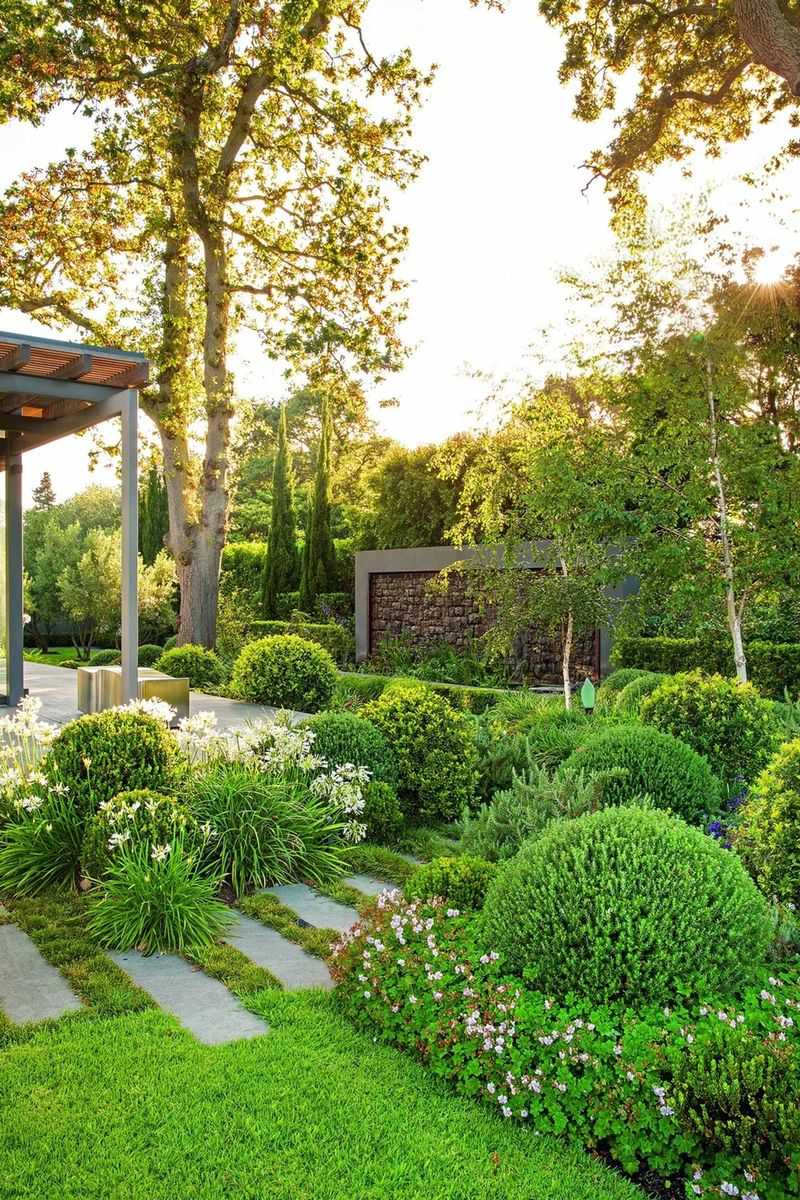
Seasonal changes shouldn’t leave your knot garden looking bare. Evergreen plants form the backbone of a year-round attractive design, while deciduous elements add seasonal flair. Consider how your garden will look during winter months when many plants go dormant.
Structural elements become especially important during off-seasons. Incorporating plants with interesting branch patterns, winter berries, or decorative seedheads ensures your garden remains visually engaging all year. Some gardeners add spring bulbs between the knot outlines for early color before summer-blooming plants take over.
11. Use Quality Soil and Proper Drainage
Strong plants start with good foundations. Before planting your knot garden, improve your soil with quality compost and ensure proper drainage. Plants commonly used in knot gardens, like lavender and santolina, particularly hate having wet feet.
Raised beds might be necessary in areas with heavy clay soil. The extra effort of proper soil preparation pays dividends for years to come. Many traditional knot garden plants originate from Mediterranean regions and prefer slightly alkaline, well-draining conditions—adjust your soil accordingly to give them their best chance of thriving.
12. Invest in Quality Pruning Tools
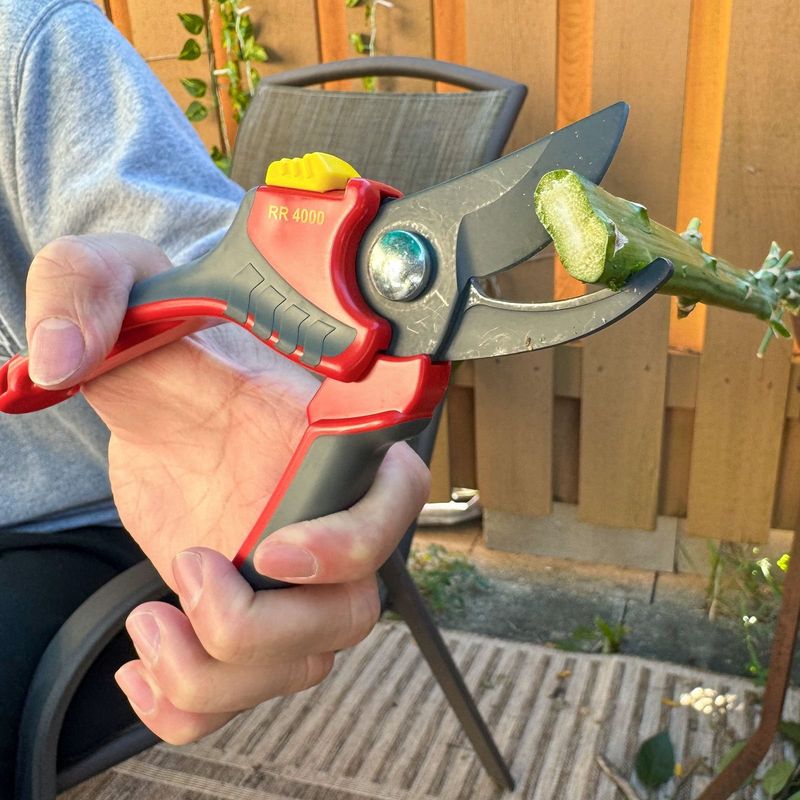
Sharp, precise cuts make maintenance easier and keep plants healthier. Invest in quality pruning shears, hedge trimmers, and topiary scissors to maintain those crisp lines that define a knot garden. Professional-grade tools might cost more initially but last for years with proper care.
Keep a sharpening stone handy and clean your tools after each use. Some gardeners find that battery-powered hedge trimmers work well for larger sections, while hand shears give precision for detailed areas. For perfectly straight lines, some professionals use stretched string as a cutting guide.
13. Establish a Regular Maintenance Schedule
Consistency keeps your knot garden looking sharp. Set up a regular trimming schedule rather than waiting until plants look overgrown. During active growing seasons, you might need to trim every 2-3 weeks to maintain those crisp lines.
Weeding needs equal attention—unwanted plants quickly disrupt your careful pattern. Many experienced knot gardeners perform quick maintenance sessions weekly rather than marathon sessions monthly. A garden journal helps track what works best for your specific plants and climate conditions.
14. Consider Adding Gravel or Decorative Mulch
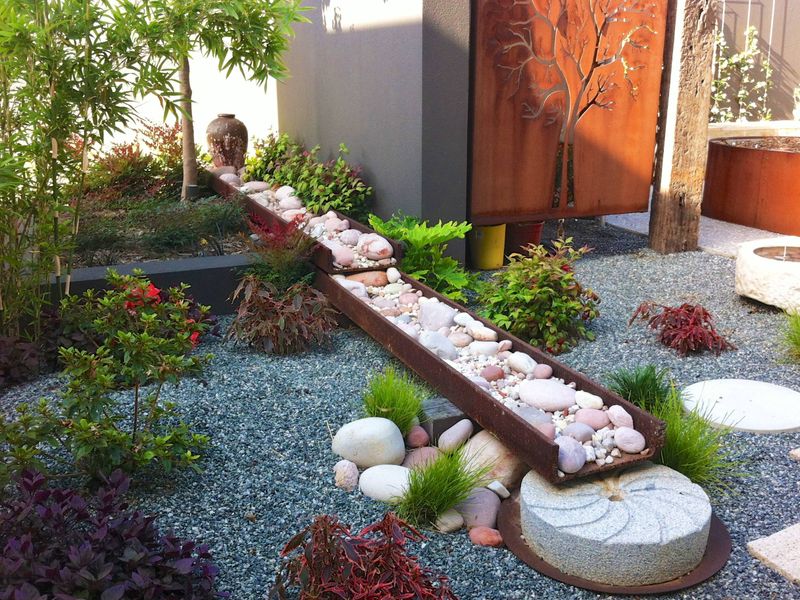
Negative space matters as much as the plants themselves. Filling spaces between your plant outlines with contrasting materials like colored gravel, crushed brick, or decorative mulch makes the pattern pop visually. These materials also suppress weeds and reduce maintenance needs.
Light-colored materials create stronger contrast against green plants. Traditional knot gardens often used different colored sands or gravels to enhance pattern visibility. Modern interpretations might use sustainable materials like crushed seashells, recycled glass, or locally-sourced stone that complements your home’s exterior colors.
15. Blend Historical Elements With Modern Touches
Knot gardens bridge past and present beautifully. Honor their Tudor origins with traditional elements like geometric patterns and herb plantings, while incorporating contemporary features that reflect your personal style. Solar-powered lighting can highlight your design after dark—something Tudor gardeners could only dream about!
Modern materials often make maintenance easier without sacrificing authentic appearance. Weather-resistant labels discreetly placed help identify plants for guests and family members. Some gardeners include QR codes on decorative stakes that link to information about the garden’s design and plant selection.