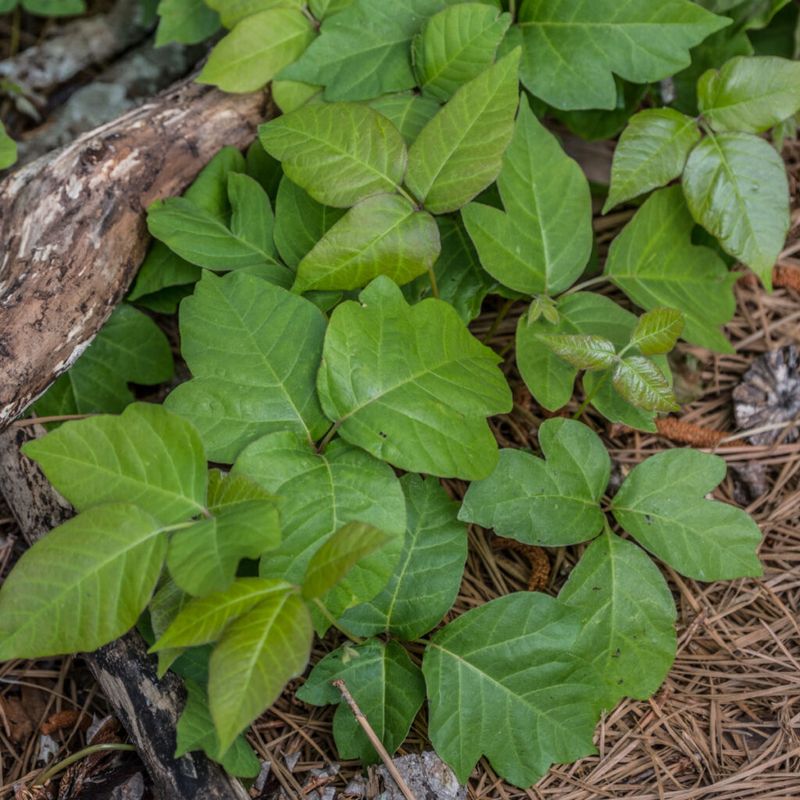
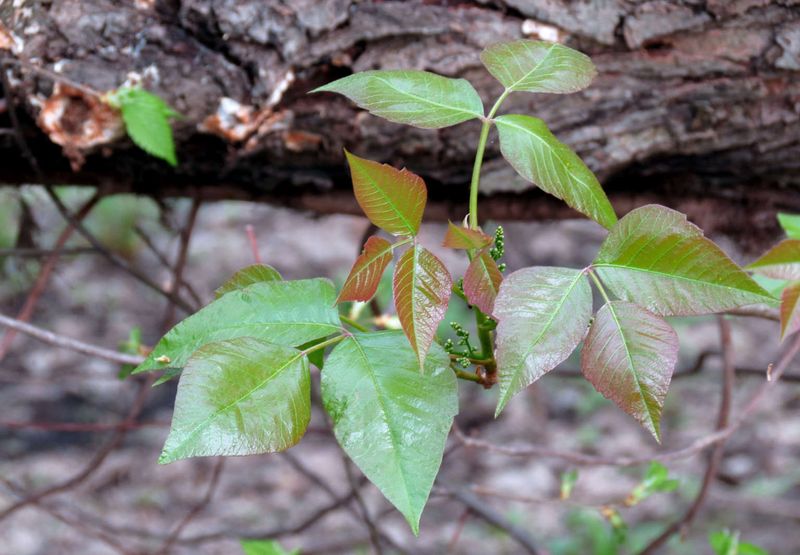
18 Proven Ways To Kill Poison Ivy For Good (Without It Growing Back Again)
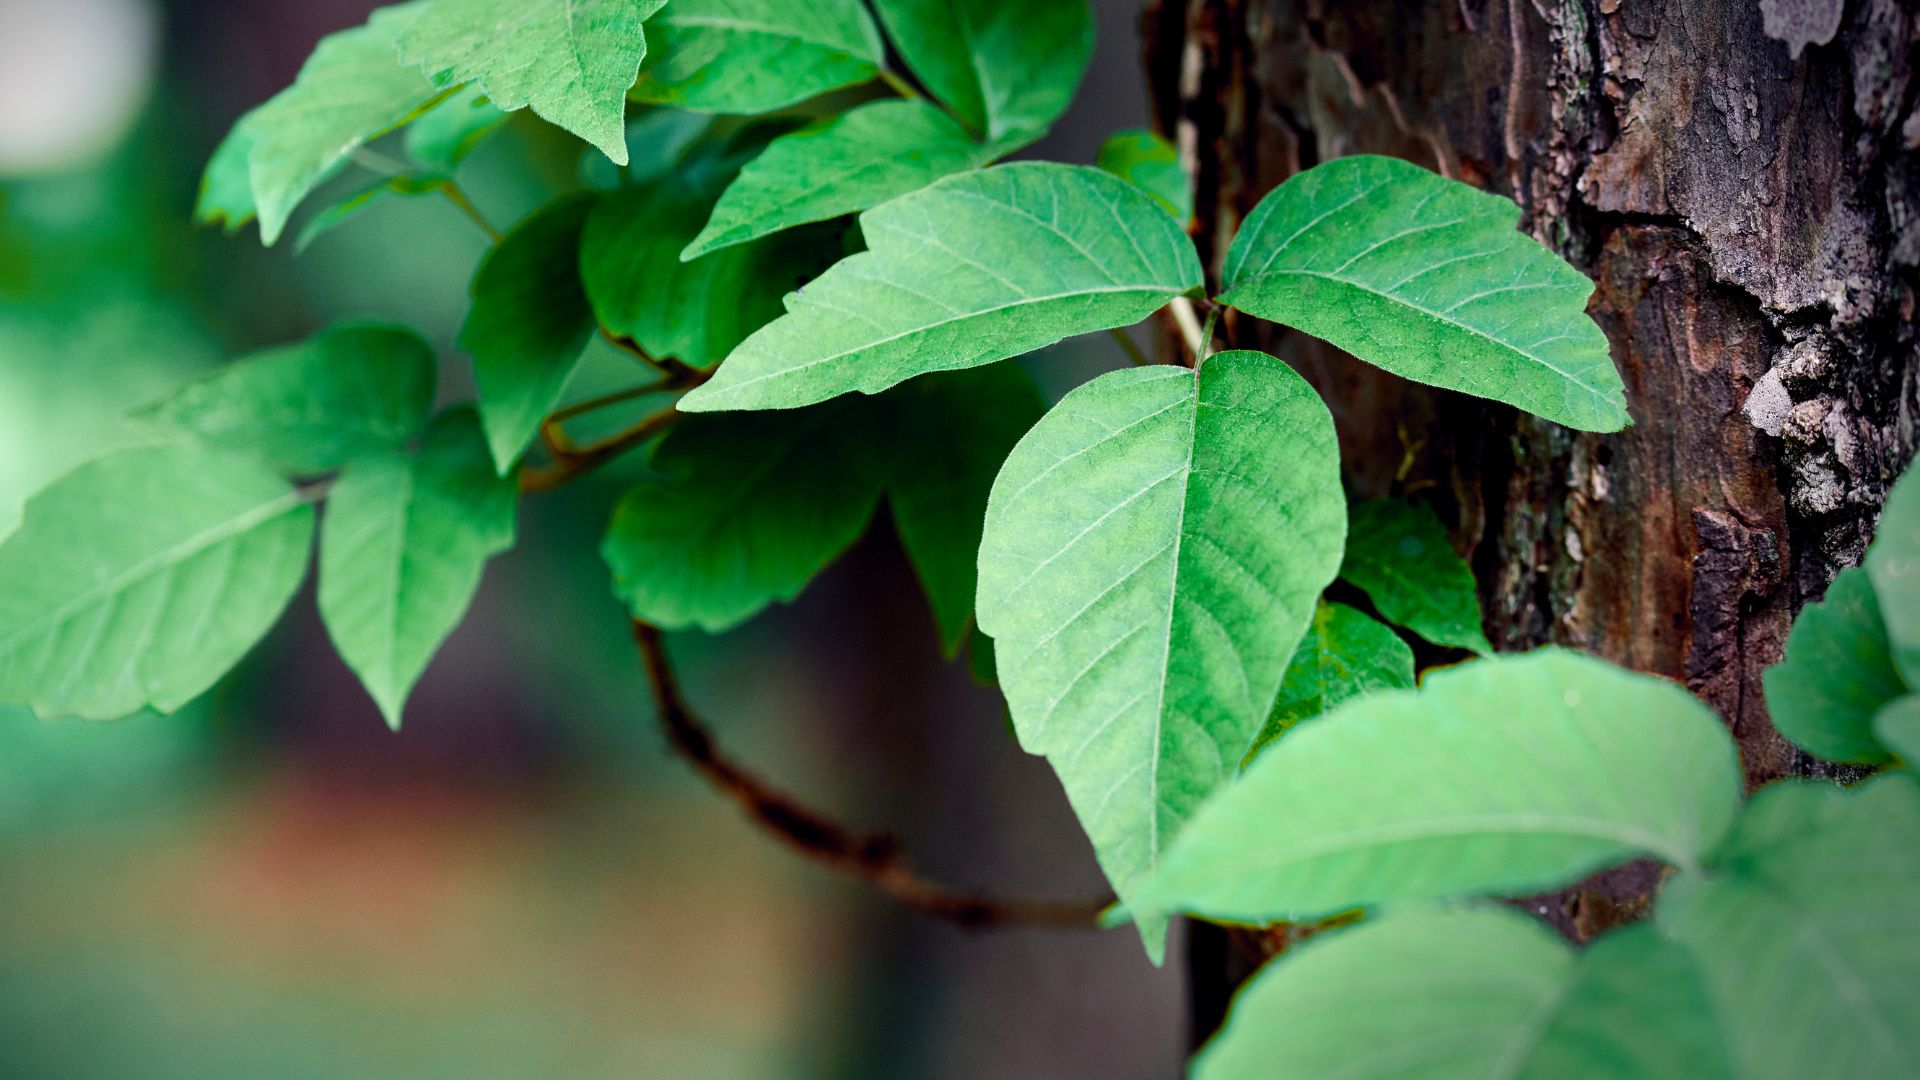
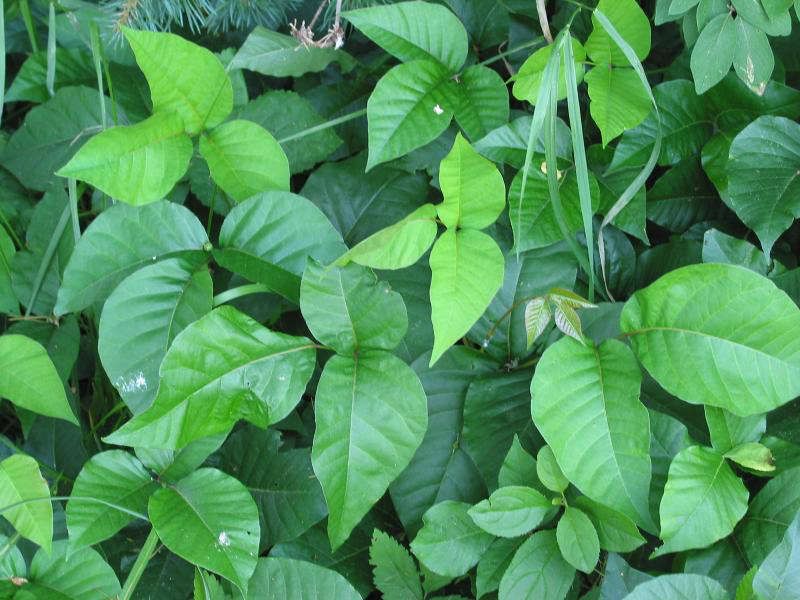
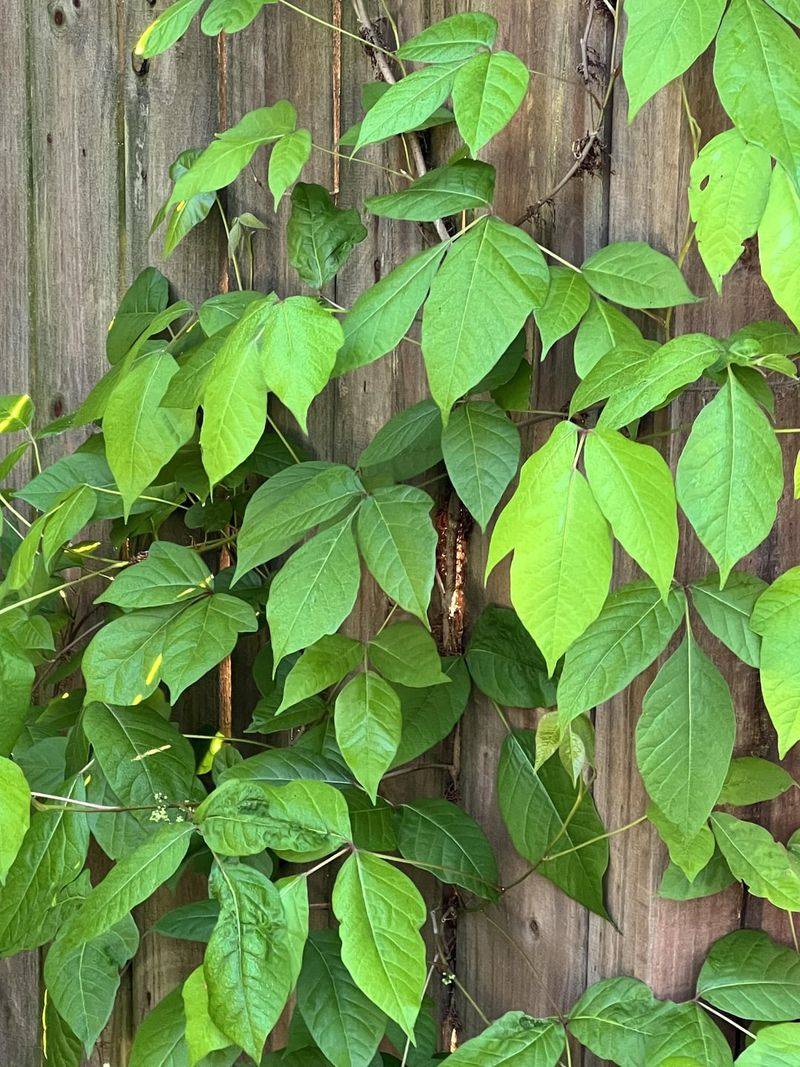
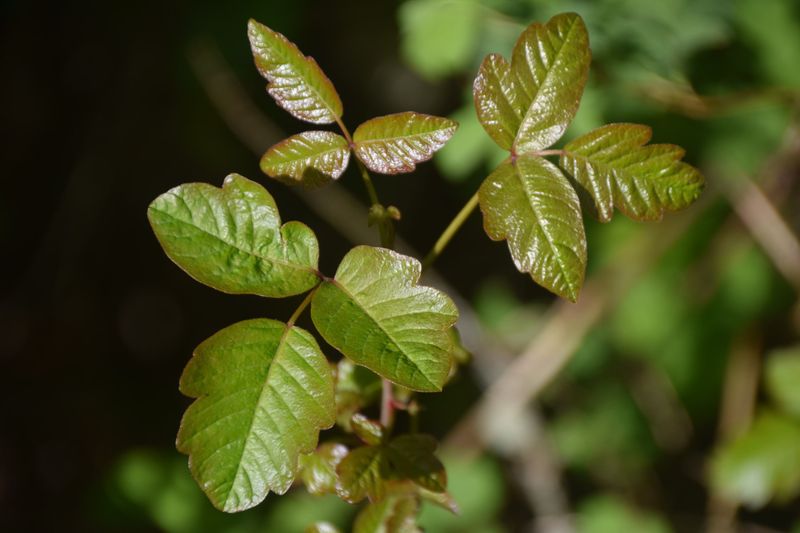
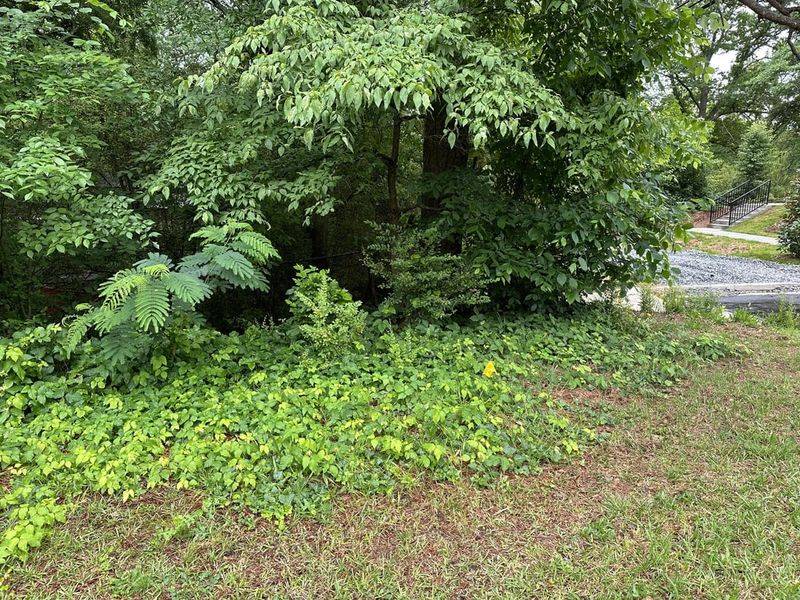
Battling poison ivy in my own yard felt like playing a game of whack-a-mole—just when I thought it was gone, another patch would pop up somewhere new. That burning, itchy rash is enough to make anyone paranoid about every leaf they see.
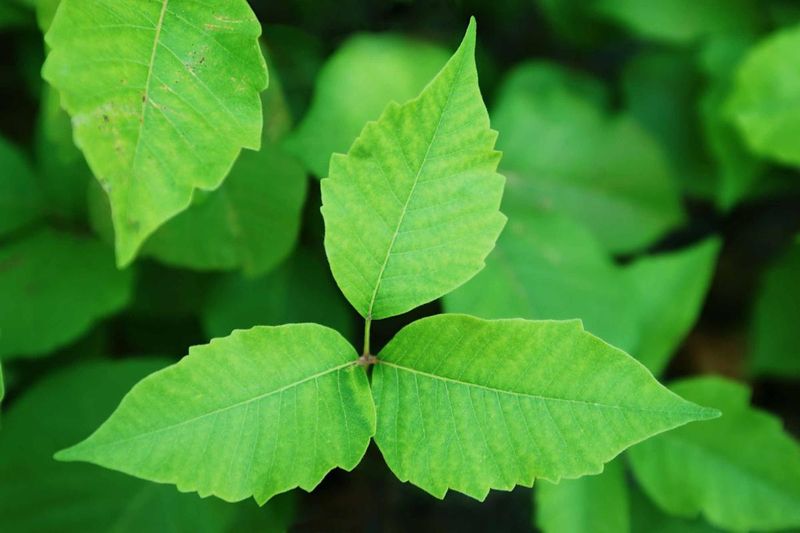
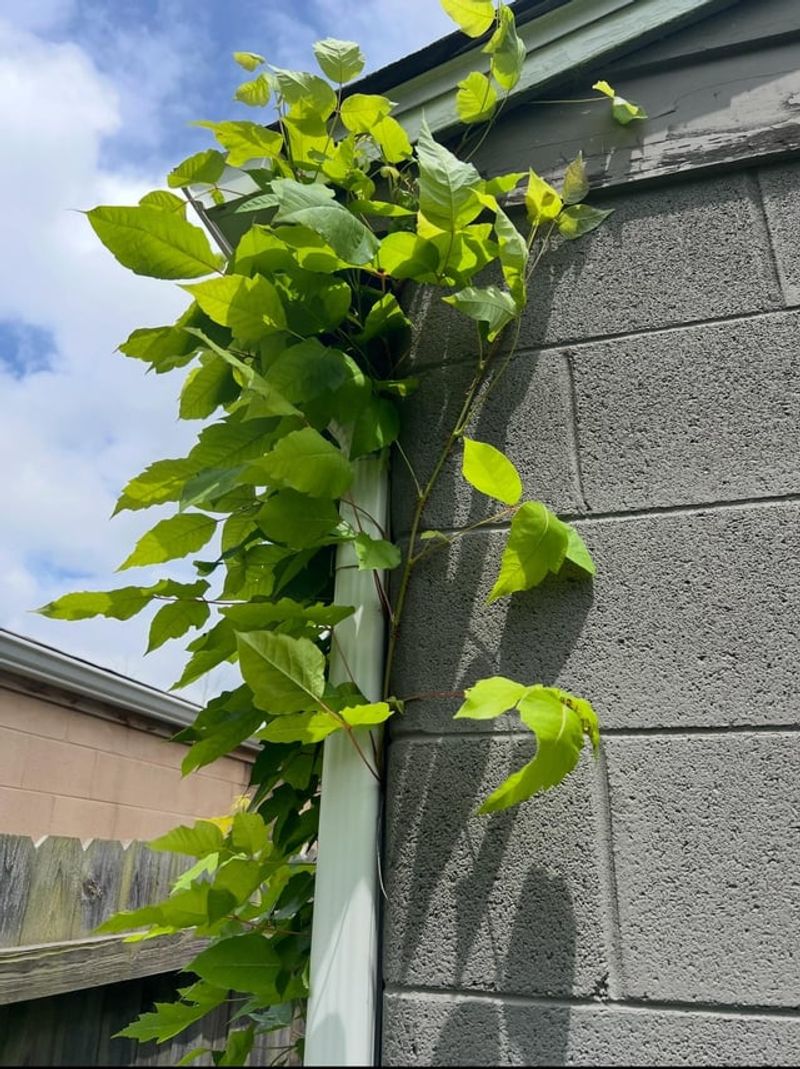
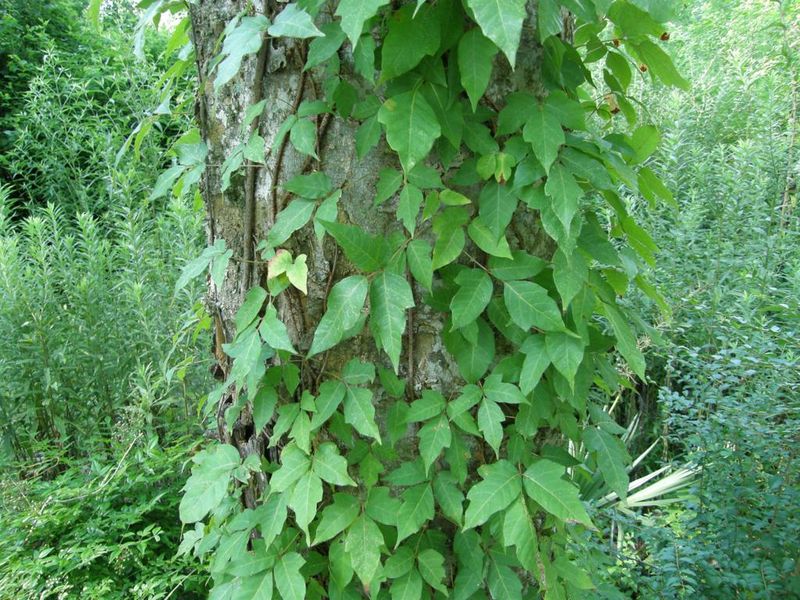
This sneaky plant blends in easily, and it doesn’t give up without a fight, which makes controlling it extra frustrating. But once I learned how it spreads and what actually works to get rid of it, the process became much more manageable.
Whether you’re tackling a few vines or a whole corner of the yard, a steady plan and some patience will go a long way. It’s not an overnight fix, but it is possible to win the war for good.
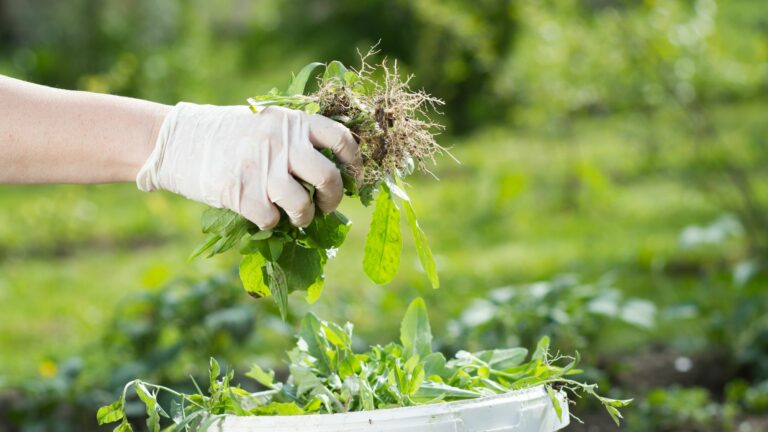
1. Manual Root Removal
Getting your hands dirty (with thick gloves, of course) remains one of the most effective elimination methods. Dig at least 8 inches around and below the plant to capture all the underground root system. Those sneaky lateral roots can extend several feet from the main plant!
Always wear long sleeves, pants, and waterproof gloves when handling these plants. The urushiol oil that causes rashes can remain active on dead plants for up to five years. I learned this lesson the hard way after thinking dead vines were safe to touch.
Dispose of everything in sealed plastic bags, never in compost. The roots are the most critical part – leave even a tiny fragment behind, and you’ll be fighting the same battle next season. Regular monitoring of cleared areas helps catch new sprouts early.
2. Boiling Water Treatment
Boiling water provides a chemical-free way to scald unwanted plants to death. For best results, bring a large pot of water to a rolling boil and carefully pour it directly onto the plant’s base and surrounding soil. The scalding temperature instantly kills the foliage and damages the shallow roots.
You’ll likely need several applications spaced a week apart. Each treatment weakens the plant’s energy reserves until it can no longer regenerate. Keep children and pets away from treated areas until the water cools completely.
This method works best for smaller infestations or individual plants rather than extensive coverage. The main advantage? It’s completely non-toxic and won’t harm the surrounding soil structure or beneficial microorganisms like chemical treatments might.
3. Vinegar Solution Spray
Household vinegar becomes a powerful plant killer when concentrated enough. Mix one gallon of white vinegar with one cup of salt and two tablespoons of dish soap for maximum effectiveness. The acetic acid burns foliage on contact, while salt dehydrates the plant and soap helps the solution stick.
Apply on hot, sunny days when no rain is forecast. The heat amplifies the drying effect, and you’ll see wilting within hours. Multiple applications usually prove necessary, typically 2-3 treatments spaced a week apart. Be strategic with application since this mixture kills any vegetation it contacts.
Using a spray bottle with a focused stream helps target just the unwanted plants. The soil may remain inhospitable to new growth for several months afterward – a bonus for preventing regrowth!
4. Smothering With Cardboard
Cutting off light through smothering effectively starves unwanted plants. Trim all visible poison ivy as close to the ground as possible, then cover the area with thick cardboard, overlapping pieces by at least 6 inches to prevent light penetration. Top with several inches of mulch to hold everything in place.
The cardboard-mulch barrier must remain undisturbed for at least one full growing season. During this time, the plants exhaust their energy trying to reach light and eventually die. The beauty of this method lies in its simplicity and sustainability.
While waiting, the cardboard gradually decomposes, adding organic matter to your soil. When you finally remove the mulch layer, you’ll likely find improved soil underneath. Just check edges periodically – determined shoots sometimes find ways around barriers if not properly secured.
5. Salt Treatment
Common table salt creates a hostile environment that few plants can survive. Mix three pounds of salt with one gallon of water until completely dissolved. Cut the poison ivy stems near the soil line, then immediately apply the salt solution directly to the fresh cuts and surrounding soil area.
The salt disrupts the plant’s water balance through osmosis, essentially dehydrating it from the inside out. Repeated applications over several weeks ensure the salt penetrates deeply enough to reach the entire root system. Remember that rainfall can dilute your treatment, so reapply after heavy precipitation.
Use this method judiciously since salt can sterilize soil for years, preventing any plant growth. It works best for isolated patches in areas where you don’t plan to garden soon, like driveway cracks or fence lines where permanent vegetation control is desirable.
6. Goat Grazing

Nature’s lawn mowers offer an entertaining solution to your poison ivy problems. Unlike humans, goats can consume poison ivy without any adverse reactions – they actually seem to enjoy it! Renting a small herd for a weekend can clear substantial areas without chemicals or backbreaking labor.
The goats eat all parts of the plant, including stems and leaves. Their digestive systems neutralize the urushiol oil completely. Multiple grazing sessions may be necessary for complete elimination, as goats might miss some roots that can regenerate. Temporary fencing keeps the animals contained to your target area.
Many urban areas now have goat rental services specifically for invasive plant control. Beyond effectiveness, watching these eager eaters clear your yard provides quite the neighborhood spectacle – a win for both landscaping and entertainment!
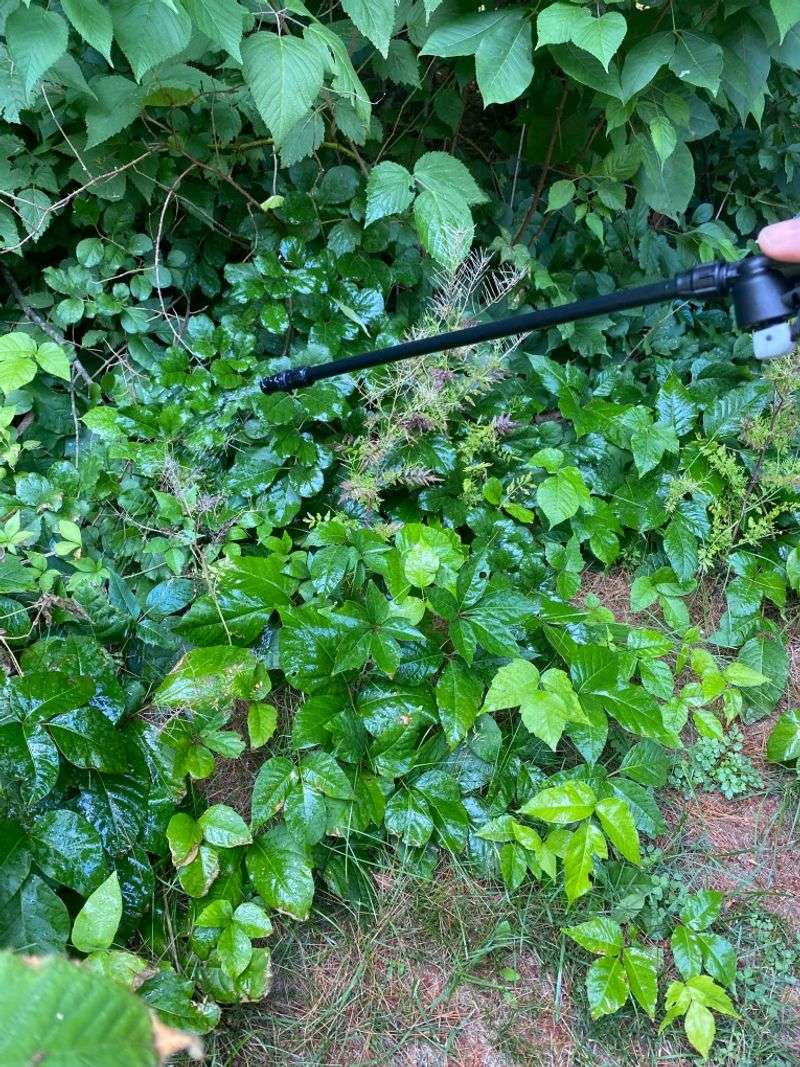
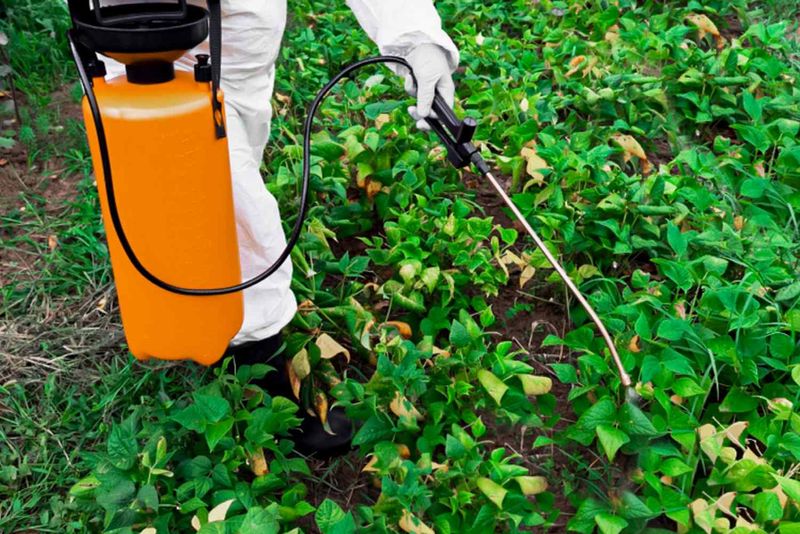
7. Commercial Herbicides
Products containing triclopyr or glyphosate target the entire plant system, including those stubborn roots. Apply directly to leaves using a paintbrush for precise application that minimizes collateral damage to desirable plants. Always choose a windless day to prevent drift onto other vegetation.
Fall application proves most effective as plants naturally direct nutrients to their roots during this season, carrying the herbicide deeper into their system. Follow label directions exactly – more isn’t better and can actually reduce effectiveness. Most commercial options require 2-3 weeks to show results.
Wear appropriate protective gear during application since these chemicals can irritate skin and eyes. The environmental impact varies by product, so research options if you’re concerned about soil health or nearby water sources. Many newer formulations break down relatively quickly after application.
8. Bleach Application
Household bleach delivers a powerful punch against unwanted greenery. Fill a spray bottle with undiluted bleach and thoroughly soak all parts of the plant, focusing particularly on the stems and leaf joints. The chlorine compounds quickly break down plant tissues, causing visible wilting within hours.
Apply during dry weather when no rain is expected for at least 24 hours. The solution needs time to fully penetrate before being washed away. Multiple treatments typically prove necessary, spaced about a week apart, until no new growth appears.
Exercise extreme caution with this method around other plants and soil life. Bleach kills indiscriminately and can temporarily sterilize soil. Wearing eye protection and gloves is non-negotiable – bleach burns are no joke! This approach works best for isolated plants rather than large infestations.
9. Plastic Sheet Suffocation
Black plastic creates a mini greenhouse effect that literally cooks unwanted plants. Cut all visible growth to ground level, then cover the entire area with heavy-duty black plastic sheeting. Secure edges with rocks, bricks, or soil to prevent any light from penetrating underneath.
Summer heat transforms the covered area into an inhospitable environment. Temperatures under the plastic can exceed 140°F on sunny days, effectively cooking any remaining roots and preventing photosynthesis. Leave the plastic in place for at least 4-6 weeks during hot weather.
The method requires patience but demands minimal effort after initial setup. When you remove the plastic, the area should be clear of living poison ivy. Any surviving roots will be weakened and easily removed. Check periodically to ensure the plastic hasn’t torn or shifted.
10. Lemon Juice Concentrate
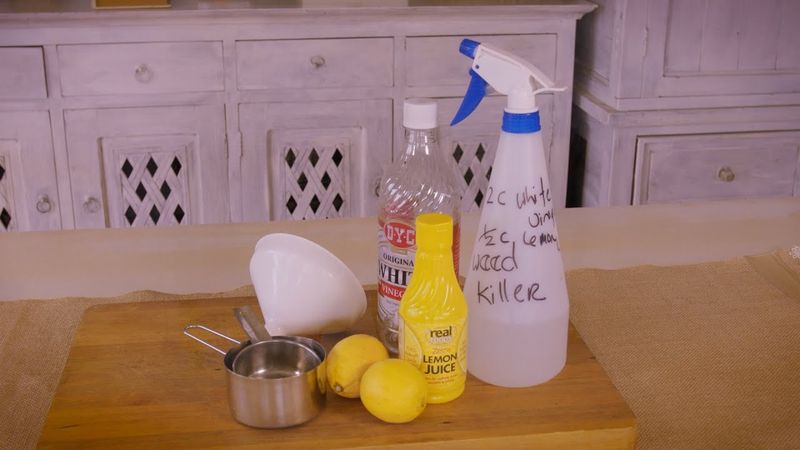
The high acidity of lemon juice makes it surprisingly effective against stubborn plants. Mix one cup of lemon juice concentrate with a tablespoon of dish soap to help it stick to leaves. The citric acid breaks down cell walls while the soap ensures maximum absorption through the waxy leaf surface.
Apply the mixture on bright, sunny days for enhanced effectiveness. The sunlight activates the citric acid, intensifying its burning effect on foliage. Expect to see results within a day or two as leaves brown and wither. Multiple applications will likely be necessary to fully eliminate established plants.
This natural approach appeals to those seeking alternatives to synthetic chemicals. While gentler than commercial herbicides, it still kills most plants it contacts, so apply carefully around desirable vegetation.
11. Borax Solution
This common household cleaner doubles as an effective plant killer. Mix 10 ounces of borax with 4 ounces of warm water until dissolved, then dilute with 2.5 gallons of water. The resulting solution disrupts the plant’s ability to transport nutrients and water, essentially starving it from within.
Pour directly onto the soil around the poison ivy roots and spray any visible foliage until thoroughly wet. The boron compounds persist in soil for months, preventing regrowth. A single thorough application often suffices for smaller plants, while established patches may require follow-up treatments.
Like salt, borax can render soil inhospitable to most plants for an extended period. Use this method in areas where you don’t plan to grow anything else soon. The long-lasting soil sterilization makes it particularly valuable for driveway edges, fence lines, and other boundary areas.
12. Corn Gluten Meal Application
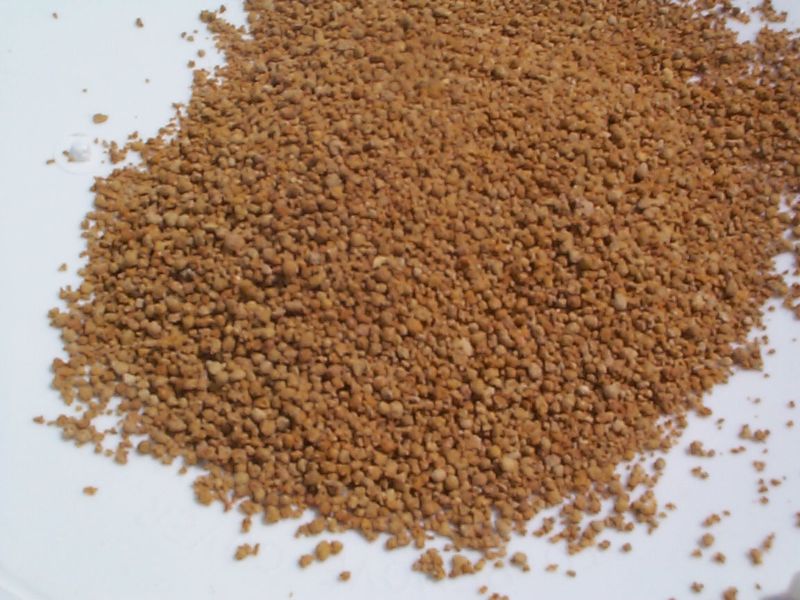
This natural byproduct of corn processing works as a pre-emergent herbicide. Spread corn gluten meal liberally over areas where poison ivy previously grew, using about 20 pounds per 1,000 square feet. The proteins in the meal prevent root formation in germinating seeds.
Apply in early spring before new growth emerges for maximum effectiveness. Water lightly after application, then allow the area to dry completely. The meal forms a barrier that inhibits root development in newly sprouting plants while adding nitrogen to your soil.
This method works best as a preventative measure after you’ve removed established plants. It won’t kill existing poison ivy but effectively stops new seedlings from taking hold. As a bonus, the nitrogen content gradually improves soil fertility, benefiting desired plants you later introduce to the area.
13. Vodka Spray Treatment
The high alcohol content in vodka makes it surprisingly effective at dehydrating leafy plants. Mix one part vodka with two parts water and add a few drops of dish soap to help it stick to the waxy leaf surface. The alcohol rapidly evaporates, pulling moisture from plant tissues.
Apply on hot, sunny days when plants are already stressed for maximum impact. Direct sunlight activates the alcohol, accelerating the dehydration process. You’ll see leaves turn brown and crispy within days as they lose their moisture. This method targets the foliage rather than the roots, so repeated applications become necessary.
Each treatment progressively weakens the plant by depleting its energy reserves. While not as powerful as commercial herbicides, this approach appeals to those seeking household alternatives with minimal environmental impact.
14. Clove Oil Solution
Essential oils offer a fragrant approach to weed control. Mix 5 tablespoons of clove oil with 1 cup of vinegar and 2 tablespoons of dish soap. The eugenol in clove oil disrupts cell membranes while vinegar adds acidity and soap ensures the mixture adheres to leaves. Spray liberally on all plant parts during warm, dry weather.
The strong-smelling solution penetrates the waxy coating of leaves, causing them to yellow and die back within days. Reapplication every 1-2 weeks helps deplete the plant’s energy reserves stored in roots. This aromatic alternative appeals to those concerned about conventional herbicides.
While generally safer than chemical options, the concentrated oils can still irritate skin and eyes, so wear appropriate protection during application. The pleasant smell makes this a more neighborly option for shared boundary areas.
15. Newspaper Layering Method
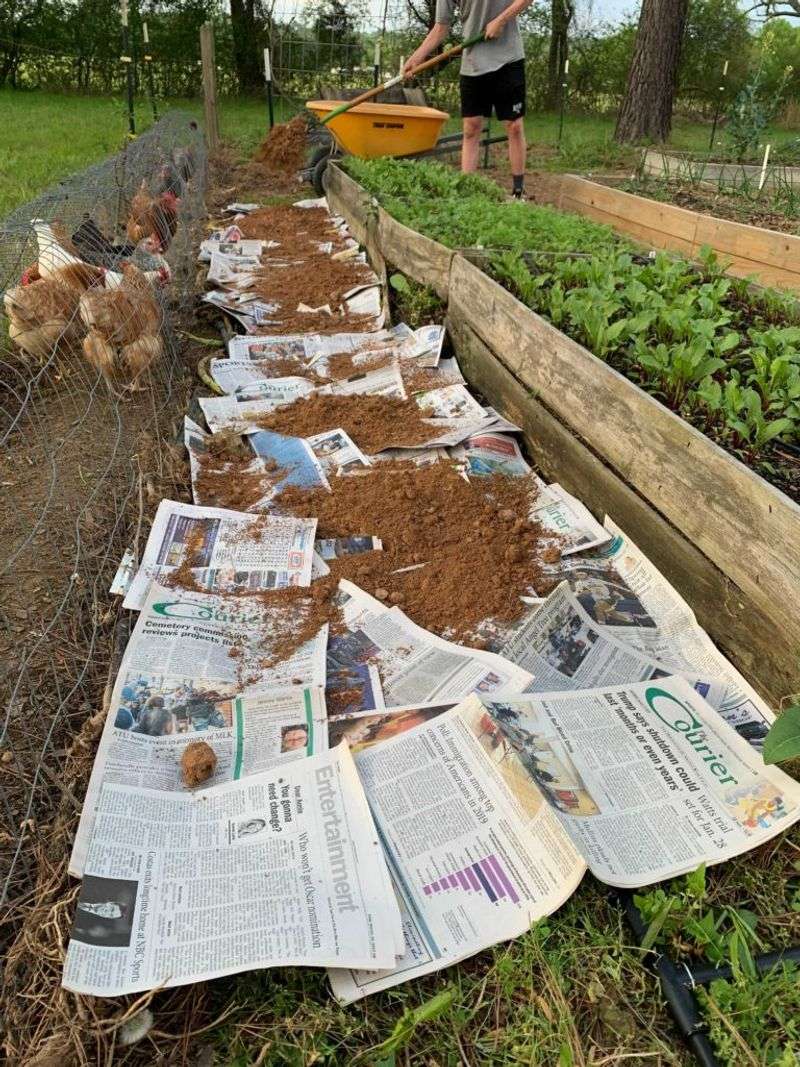
Recycled newspapers provide an eco-friendly smothering option. Cut plants to ground level, then cover the area with newspaper at least 10-12 sheets thick, overlapping edges by several inches. Thoroughly wet the paper to keep it in place, then cover with 3-4 inches of organic mulch like wood chips or straw.
The layered barrier blocks sunlight while allowing water and air to penetrate. Unlike plastic, newspaper gradually decomposes, adding organic matter to the soil. Maintain the mulch layer for at least one full growing season to ensure complete elimination.
This method transforms a problem area into a garden bed without chemicals. When the paper fully breaks down, you’ll have nutrient-rich soil ready for planting. The decomposition process attracts earthworms and beneficial soil organisms that further improve soil structure and fertility.
16. Repeated Mowing Strategy
Constant cutting depletes energy reserves stored in the roots. Set your mower to its lowest setting and cut the area every 2-3 days during active growing seasons. The plant expends energy pushing up new growth, only to lose it repeatedly before it can photosynthesize effectively.
Continue this aggressive schedule throughout the growing season. The constant defoliation eventually exhausts the root system as it depletes stored carbohydrates. This approach requires diligence but involves no chemicals or special equipment beyond your regular lawn mower.
Wear long pants and closed shoes during mowing to avoid contact with plant fragments. Clean your mower thoroughly afterward to prevent spreading plant parts to new areas. This method works particularly well for larger areas where hand-pulling or spot treatments would be impractical.
17. Baking Soda Application

Common baking soda creates an alkaline environment that most plants cannot tolerate. Pour generous amounts directly onto the soil around poison ivy plants and sprinkle it over any visible foliage. When watered in, the sodium bicarbonate disrupts the pH balance that the plant needs to thrive.
Apply during dry weather and water lightly to activate. The powder should dissolve and penetrate the soil rather than wash away. Reapply weekly until no new growth appears, typically requiring 3-5 treatments for complete elimination.
This pantry staple offers a non-toxic alternative that’s safe around children and pets. While less aggressive than some methods, its gentle action makes it suitable for areas near desirable plants. The soil pH eventually normalizes, allowing for future planting once the poison ivy is eliminated.
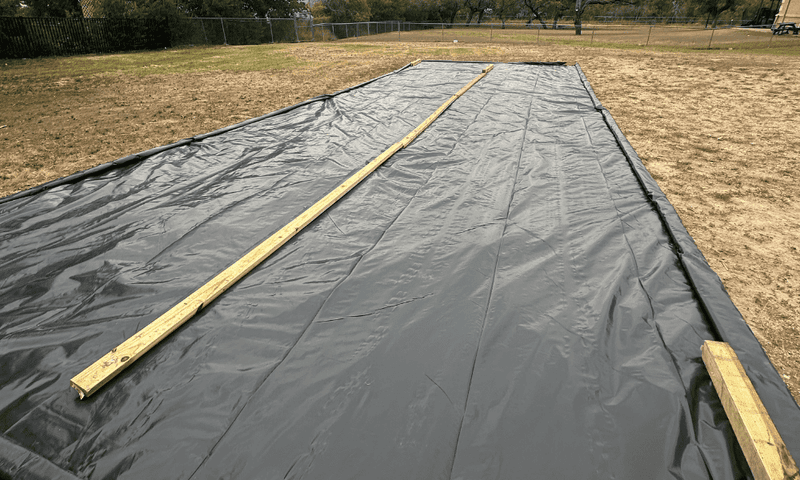
18. Soil Solarization Technique
Harness the sun’s energy to create lethal soil temperatures. Clear the area of all vegetation, then till the soil to bring dormant seeds and roots to the surface. Water thoroughly until completely saturated, then cover with clear plastic sheeting secured tightly at the edges.
Summer sun heats the trapped moisture, raising soil temperatures to 140°F or higher. These extreme conditions kill seeds, roots, and soil pathogens down to about 6 inches deep. Maintain the plastic cover for at least 4-6 weeks during the hottest part of summer.
This method effectively sterilizes the soil without chemicals. When you remove the plastic, you’ll have a clean slate for new plantings. The heat treatment leaves beneficial minerals intact while eliminating most weed seeds and pathogens, giving your new plants a competitive advantage.