15 Steps To Growing Elderberry For Gorgeous Foliage And Edible Berries
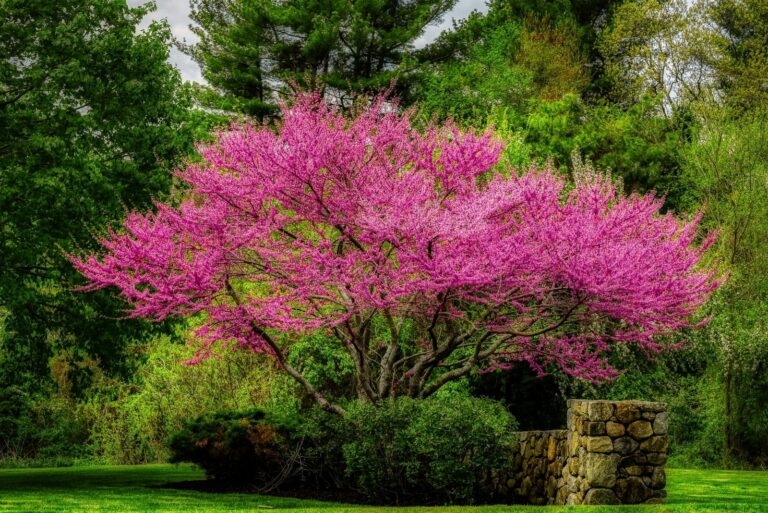
Elderberries have become one of my favorite garden additions—not just for their health perks, but for how pretty they look throughout the seasons.
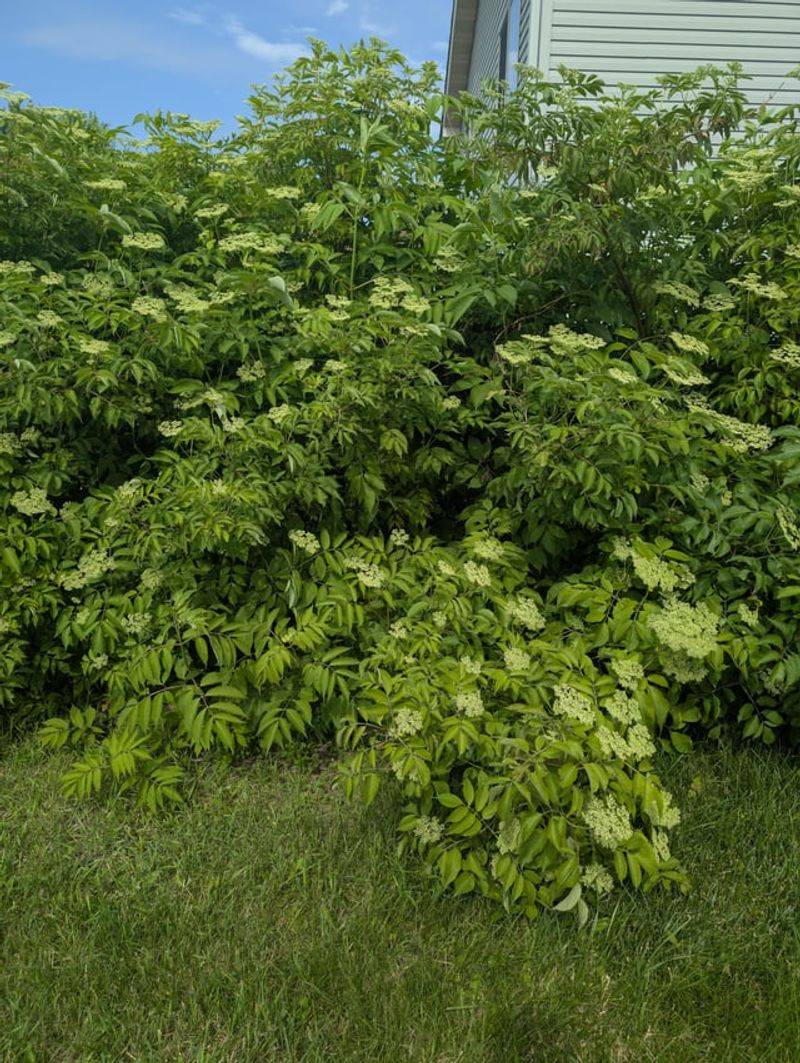
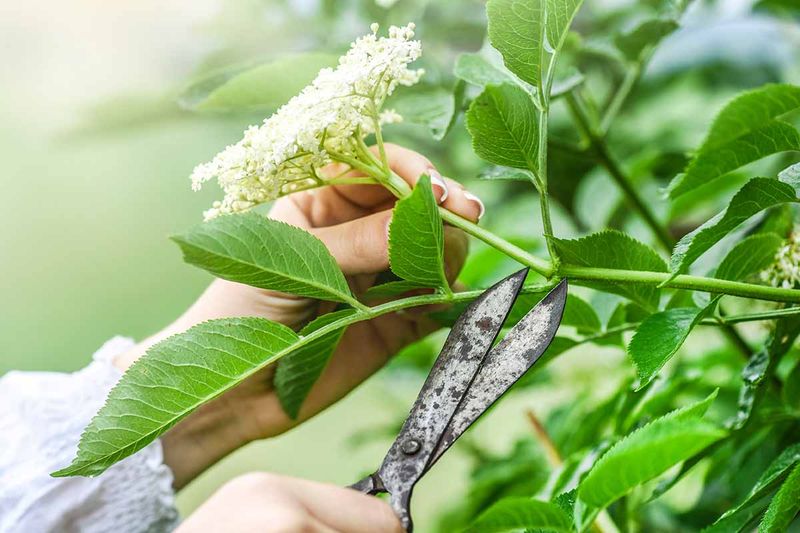
Those lacy flowers in early summer feel like a bonus before the berries even arrive. With just a little planning and care, these shrubs reward you with beauty and bounty year after year.
It’s a win-win whether you’re into homemade syrups or just want something eye-catching near the fence line.
1. Choose The Right Elderberry Variety
American elderberry (Sambucus canadensis) and European elderberry (Sambucus nigra) are the most common varieties for home gardens. American types generally handle colder climates better, while European varieties often have showier flowers.
Consider your growing zone and available space before selecting. Some cultivars like ‘Adams’ and ‘York’ are known for exceptional berry production, while ‘Black Lace’ and ‘Lemony Lace’ are prized for their colorful foliage.
I’ve found that planting at least two different varieties improves pollination and leads to better berry harvests. Most elderberries grow 6-12 feet tall, so factor that into your landscape planning.
2. Find The Perfect Planting Location

Elderberries thrive in spots receiving at least 6 hours of sunlight daily, though they can tolerate partial shade in hotter climates. Full sun exposure promotes better flowering and fruit production while reducing disease problems.
Look for an area with good air circulation but some protection from strong winds that might damage the relatively brittle branches. The plants prefer moist conditions but won’t tolerate standing water.
In my experience, elderberries planted near a water source or in a slightly lower area of the yard perform exceptionally well. Just make sure the soil drains properly after heavy rains to prevent root rot issues.
3. Prepare Soil For Optimal Growth
Rich, loamy soil with plenty of organic matter creates the best foundation for elderberry plants. Before planting, work in several inches of compost or well-rotted manure to improve soil structure and fertility.
Test your soil pH, aiming for a slightly acidic to neutral range between 5.5 and 6.5. If your soil is too alkaline, incorporate some peat moss or sulfur to lower the pH gradually.
Don’t skimp on soil preparation! For my first elderberry plants, I rushed this step and noticed significantly slower growth compared to later plantings where I properly amended the soil. Good preparation pays dividends for years.
4. Plant At The Right Time
Early spring remains the ideal planting time for elderberry, just after the final frost has passed. This timing gives plants a full growing season to establish before facing winter conditions. Fall planting works well in milder climates where harsh winters won’t stress new plantings.
Avoid summer planting when possible, as the heat puts additional stress on newly transplanted shrubs. If you must plant during summer, provide extra water and some afternoon shade protection.
The calendar date matters less than soil temperature. Wait until soil temperatures consistently reach 50°F (10°C) before planting. Rushing to plant in cold soil often delays establishment and can stunt first-year growth.
5. Space Plants Properly
Most elderberry varieties need 6-8 feet between plants to allow for mature growth and good air circulation. Crowded plants compete for resources and create humid conditions that encourage fungal diseases.
Consider your long-term garden design when spacing. These shrubs can reach 12 feet tall and 8 feet wide at maturity, though some compact cultivars stay smaller. Row plantings benefit from 8-10 feet between rows for easy harvest access.
When creating an elderberry hedge, you can plant slightly closer together (about 4-5 feet apart) to form a denser screen. Just be prepared for slightly reduced berry production and more aggressive pruning needs as the plants mature.
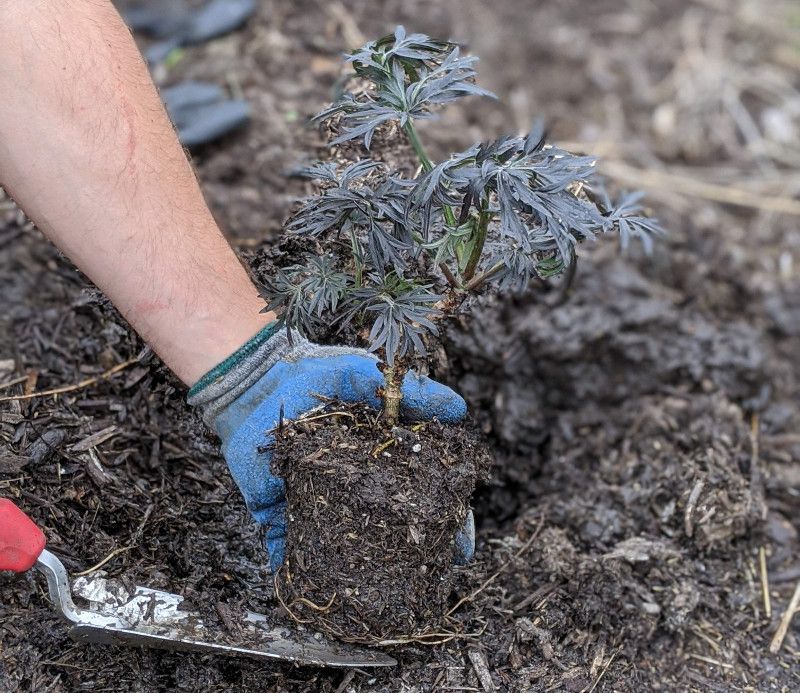
6. Master The Planting Process
Dig a hole twice as wide as the root ball but no deeper than the plant’s original container depth. Too-deep planting leads to stem rot and poor establishment. Score the roots gently if they appear circled or pot-bound.
Position the plant, backfill with soil, and firm gently to eliminate air pockets without compacting. Create a slight basin around the plant to help collect water during initial establishment.
After planting my elderberries, I immediately water thoroughly with about 2-3 gallons per plant, letting it soak in slowly. This crucial step helps settle the soil and ensures good root-to-soil contact for faster establishment.
7. Establish A Smart Watering Routine
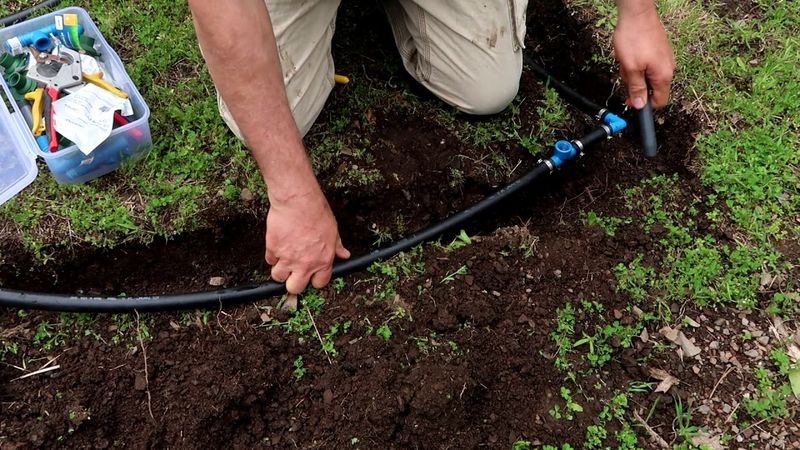
Newly planted elderberries need consistent moisture during their first growing season. Provide about 1-2 inches of water weekly when rainfall is insufficient. Deep, infrequent watering develops stronger root systems than frequent light sprinklings.
Morning watering proves ideal, allowing foliage to dry before evening and reducing disease risk. Consider installing drip irrigation or soaker hoses to deliver water directly to the root zone without wetting the leaves.
After the first year, elderberries become more drought-tolerant but still appreciate regular watering during dry spells. I’ve noticed my established plants need supplemental water primarily during berry development and during extended dry periods.
8. Apply Mulch For Multiple Benefits
Spread 2-3 inches of organic mulch around elderberry plants, keeping it a few inches away from the stems. Wood chips, straw, or shredded leaves work excellently to conserve moisture and suppress weeds.
Mulch moderates soil temperature fluctuations, protecting roots from extreme heat and cold. As organic mulches break down, they gradually add nutrients to the soil, improving its structure over time.
Refreshing the mulch layer annually keeps it working effectively. I typically add a new layer each spring after the soil has warmed. This practice has dramatically reduced my watering needs while keeping the plants healthier throughout summer heat.
9. Fertilize With Purpose
Elderberries benefit from annual fertilization, but timing matters. Apply a balanced organic fertilizer (like 10-10-10) in early spring just as new growth begins. Avoid high-nitrogen formulations that promote excessive leafy growth at the expense of berries.
Compost makes an excellent supplement to commercial fertilizers. Top-dress plants with 1-2 inches of finished compost each spring to slowly release nutrients throughout the growing season.
For established plants showing good growth, I’ve found that compost alone often provides sufficient nutrition. When growth seems sluggish or leaf color appears pale, I add a balanced organic fertilizer following package directions for shrubs.
10. Master Essential Pruning Techniques
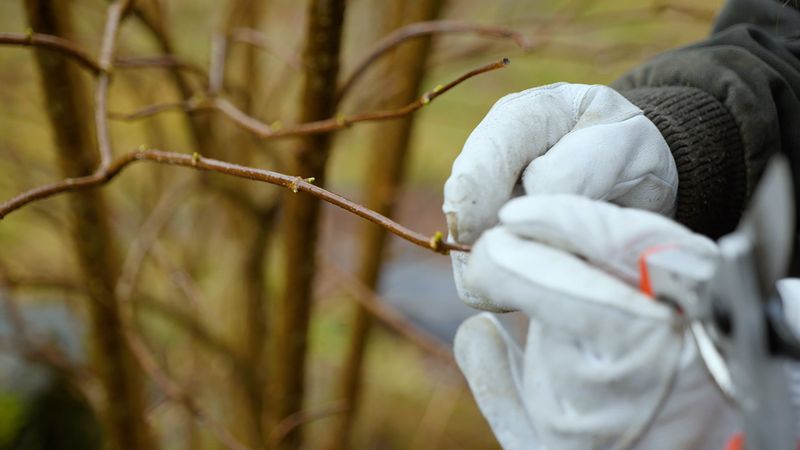
Elderberries require annual pruning to maintain vigor and productivity. Late winter or early spring before new growth emerges is ideal timing. Remove all dead, damaged, or diseased wood first, cutting back to healthy tissue.
Older stems (3+ years) produce fewer berries, so remove several of the oldest canes each year at ground level. This encourages new growth that will bear fruit in subsequent seasons. Maintain 6-8 strong canes per mature plant.
First-year elderberries need minimal pruning beyond removing damaged wood. By year three, establish a regular pruning routine. I mark my oldest canes with garden tape in fall to easily identify them for removal during winter pruning.
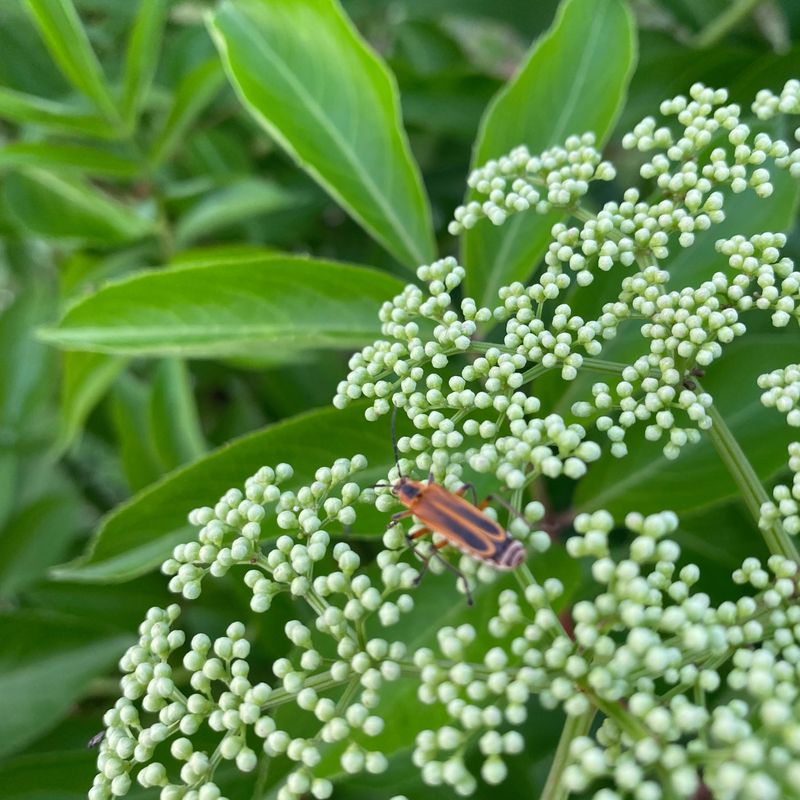
11. Prevent And Manage Common Pests
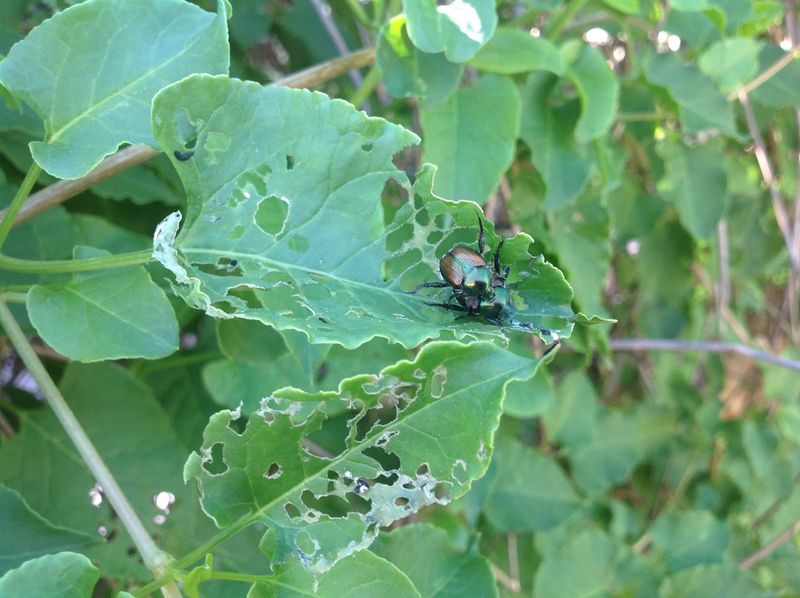
Elder borers and elderberry beetles pose the most common threats to healthy plants. Inspect stems regularly for borer holes and remove affected canes promptly. Beetles feed on leaves, creating distinctive hole patterns that rarely cause serious harm.
Encouraging beneficial insects through companion planting helps maintain natural balance. Herbs like dill, fennel, and yarrow attract predatory insects that feed on elderberry pests.
Japanese beetles sometimes target elderberry foliage. For small infestations, I simply knock them into a bucket of soapy water early in the morning when they’re sluggish. For larger problems, consider organic options like neem oil or pyrethrin sprays.
12. Address Disease Issues Promptly
Powdery mildew appears as white powdery patches on leaves during humid weather. Improving air circulation through proper spacing and pruning helps prevent this common fungal issue. Apply organic fungicides like diluted milk spray at first signs.
Leaf spot diseases create dark spots on foliage and can cause premature leaf drop in severe cases. Remove and destroy affected leaves, avoid overhead watering, and apply organic copper fungicide if problems persist.
Cankers on stems indicate possible fungal infection requiring immediate attention. I’ve saved plants by aggressively pruning out affected areas, cutting well below visible damage into healthy wood, and disinfecting tools between cuts with rubbing alcohol.
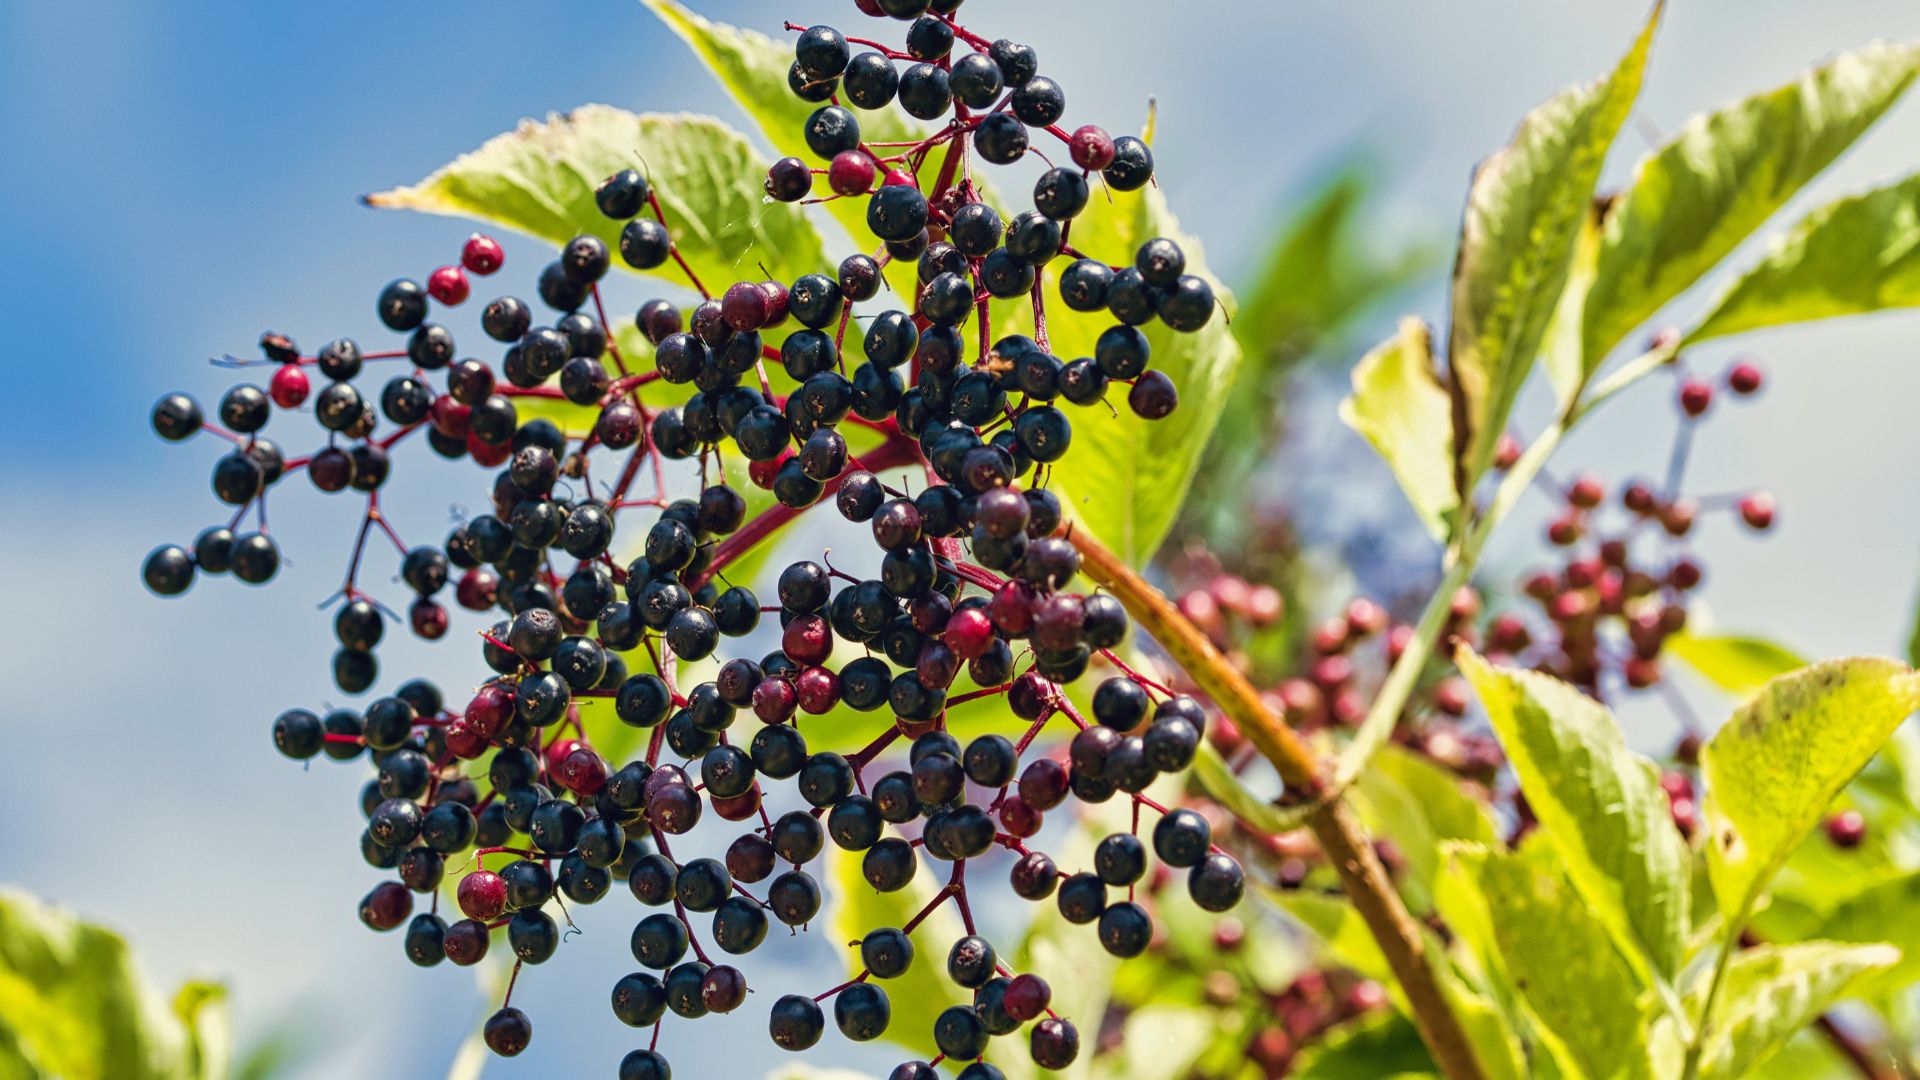
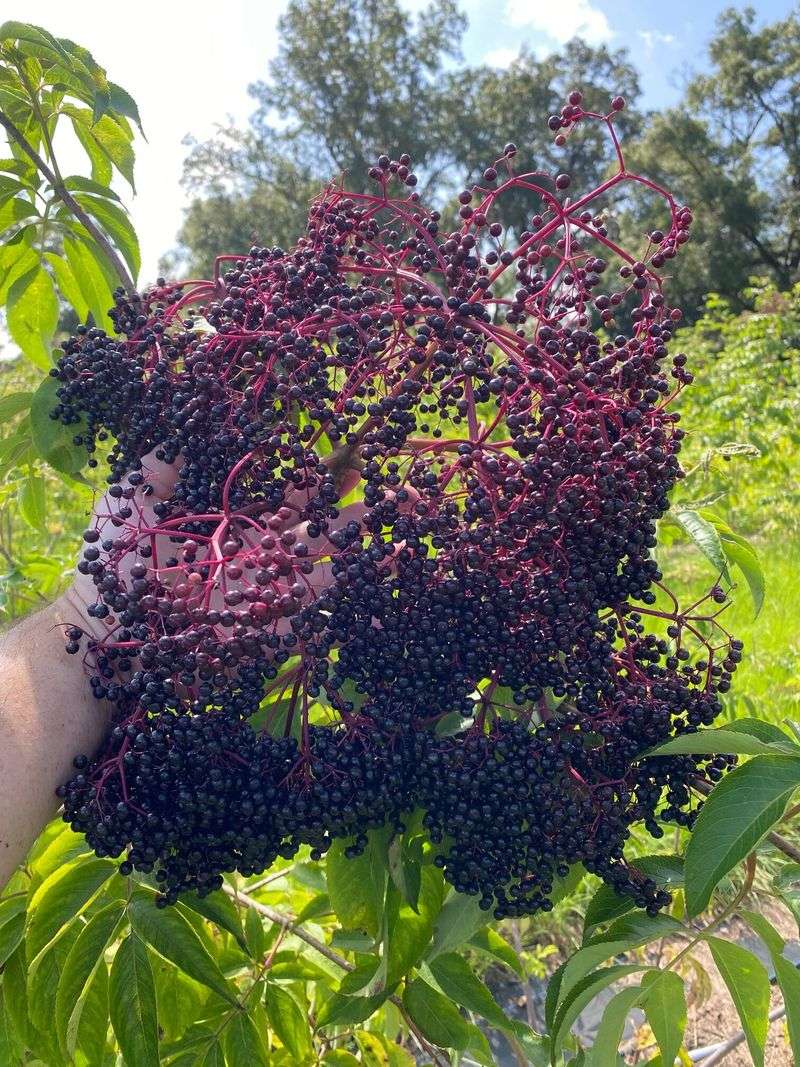
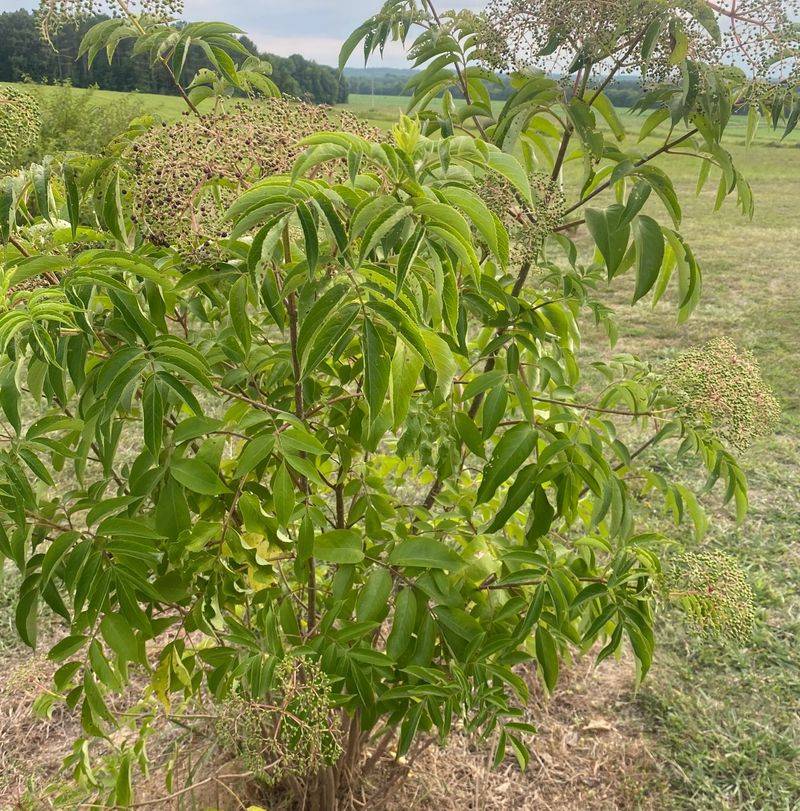
13. Harvest Berries At Peak Ripeness
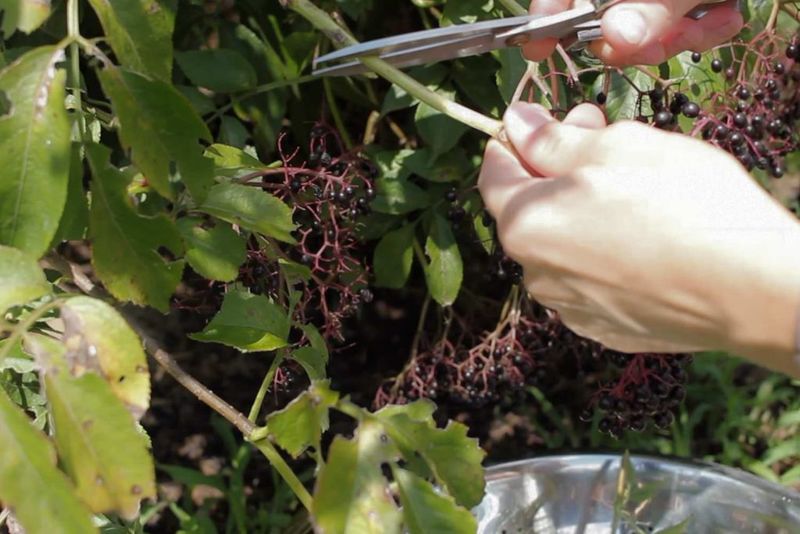
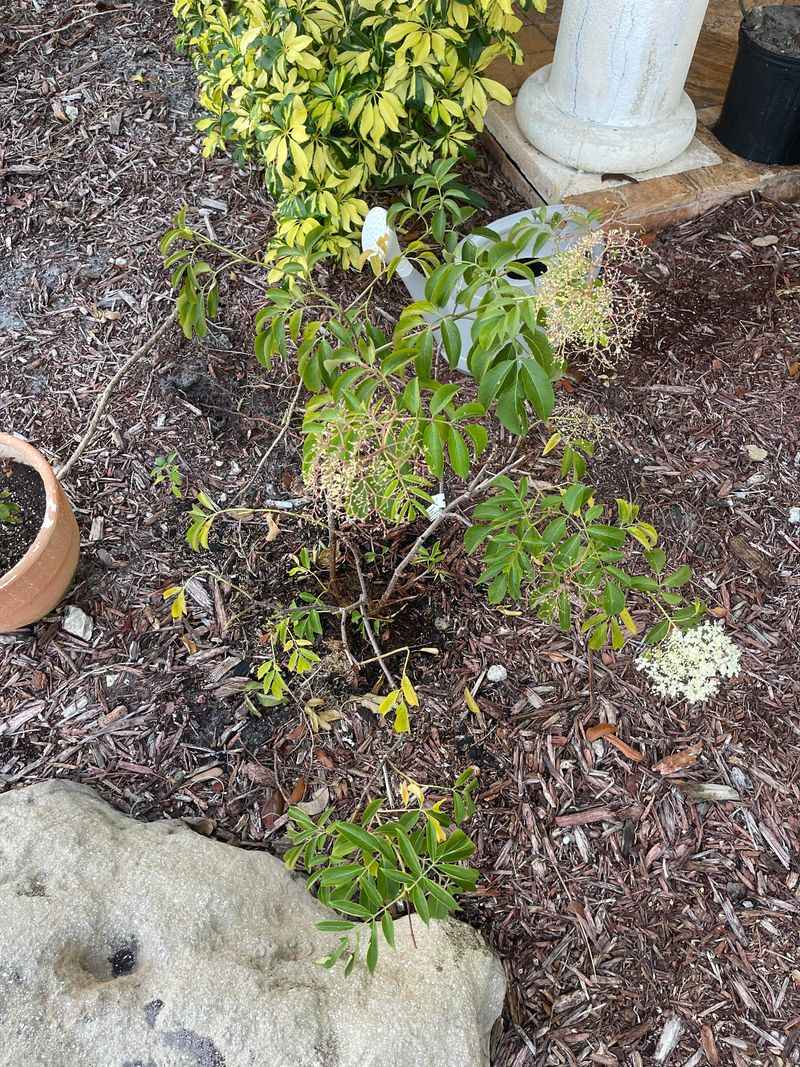
Elderberries typically ripen in late summer to early fall, turning deep purple-black when ready for harvest. The entire umbel (cluster) ripens at roughly the same time, making it easy to harvest by cutting the whole cluster.
Use sharp scissors or pruners to cut clusters, leaving a small portion of stem attached. Harvest on a dry day when berries are fully colored but still firm. Overripe berries quickly attract birds and may begin fermenting on the bush.
Wearing gloves during harvest prevents purple-stained hands. After four years of growing elderberries, I’ve learned to harvest slightly underripe rather than overripe—the berries continue maturing for a day or two after picking and maintain better quality.
14. Process Berries Safely For Consumption
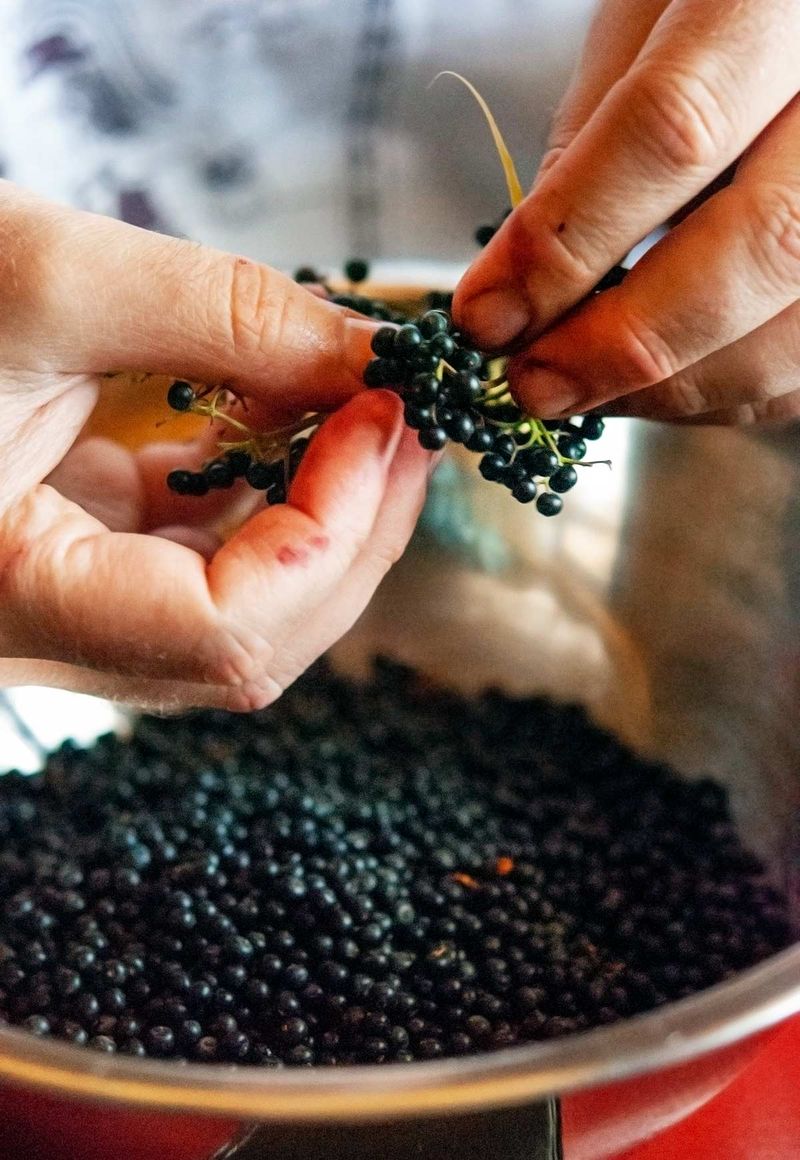
Raw elderberries contain compounds that can cause nausea and digestive upset. Always cook berries thoroughly before consuming. Begin by removing berries from stems using a fork or freezing clusters then shaking off the berries.
Wash berries thoroughly in cool water, removing any remaining stems, unripe berries, and debris. Cooking neutralizes the problematic compounds while preserving beneficial nutrients and antioxidants.
After processing my harvest, I typically freeze a portion of berries for later use. Spread them in a single layer on a baking sheet to freeze individually before transferring to storage containers. This prevents clumping and allows for easy portioning.
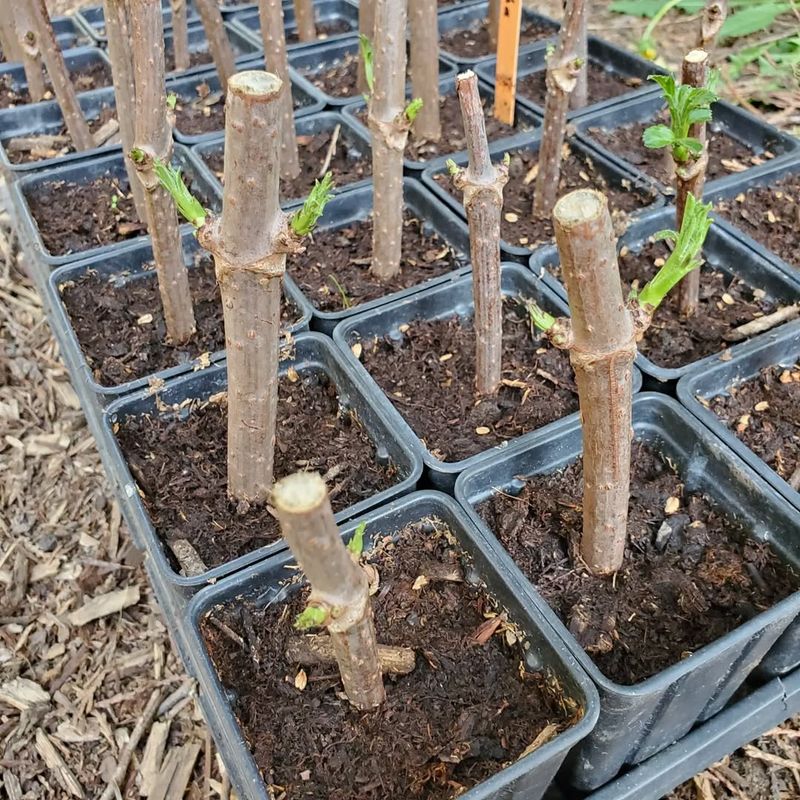
15. Propagate New Plants Successfully
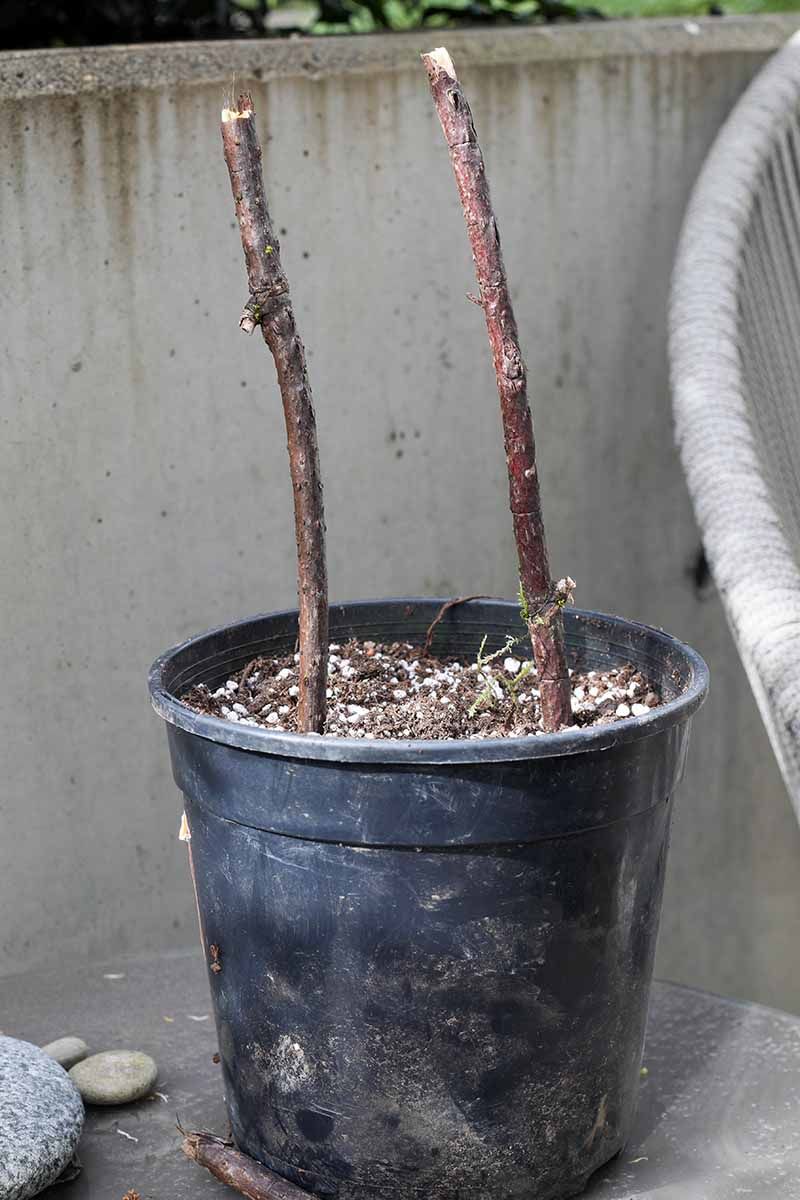
Hardwood cuttings provide the easiest method for propagating elderberry. In late winter, take 8-10 inch cuttings from year-old wood, making clean cuts just below a node. Remove all but the top few buds and plant directly in prepared garden soil.
Keep cuttings consistently moist until established. Success rates typically exceed 80% with this simple method. New plants will produce berries by their second or third year.
For smaller quantities, I’ve had great success rooting cuttings in water first. Place fresh cuttings in a jar of water, changing it every few days until roots develop (usually 2-3 weeks), then transfer to pots with soil to establish before garden planting.