15 Easy DIY Raised Garden Beds You Can Build For Under $50 (And Still Make Them Last)
Raised garden beds can totally transform your veggie-growing game—less bending, fewer weeds, and better soil control. But when you see those price tags on custom builds? Yikes. The good news is, you don’t need a big budget to build something beautiful and durable.
From repurposed wood pallets to galvanized stock tanks, budget-friendly materials are everywhere. Even humble cinder blocks and old bricks can be turned into stylish, functional garden beds with a little creativity and planning.
These fifteen DIY options prove that you don’t need deep pockets to grow deep roots. With just a few tools and smart design choices, you’ll have raised beds that stand the test of time—and look great doing it.
1. Cinder Block Frame With Wooden Base
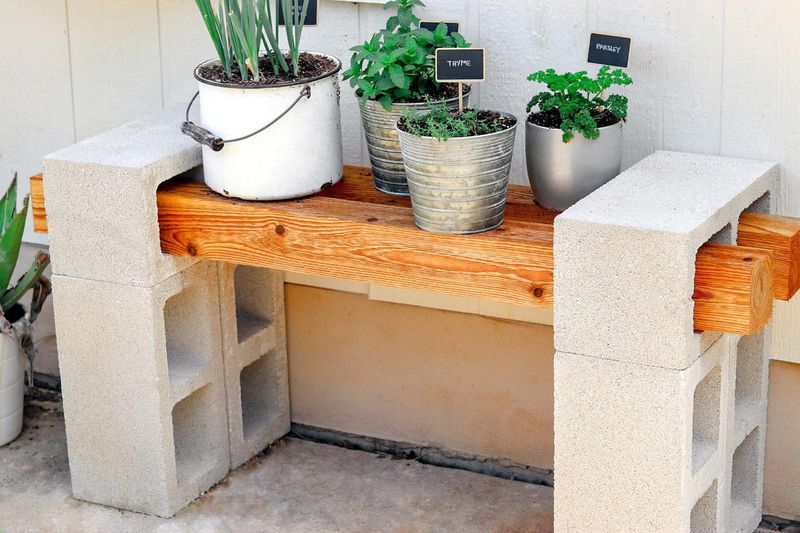
Grab some cinder blocks from your local hardware store for about $1.50 each. You’ll need 10-12 blocks for a standard 4×8 bed. The holes in the blocks create bonus planting spots for herbs or flowers!
Line the bottom with cardboard to suppress weeds, then add a simple frame of 2x4s along the inner bottom edge for additional stability. I’ve had mine for three seasons and the concrete shows zero signs of wear.
Paint the exterior blocks with masonry paint if you want them to look less industrial. The whole project comes in around $30-35 and will literally last decades with zero maintenance.
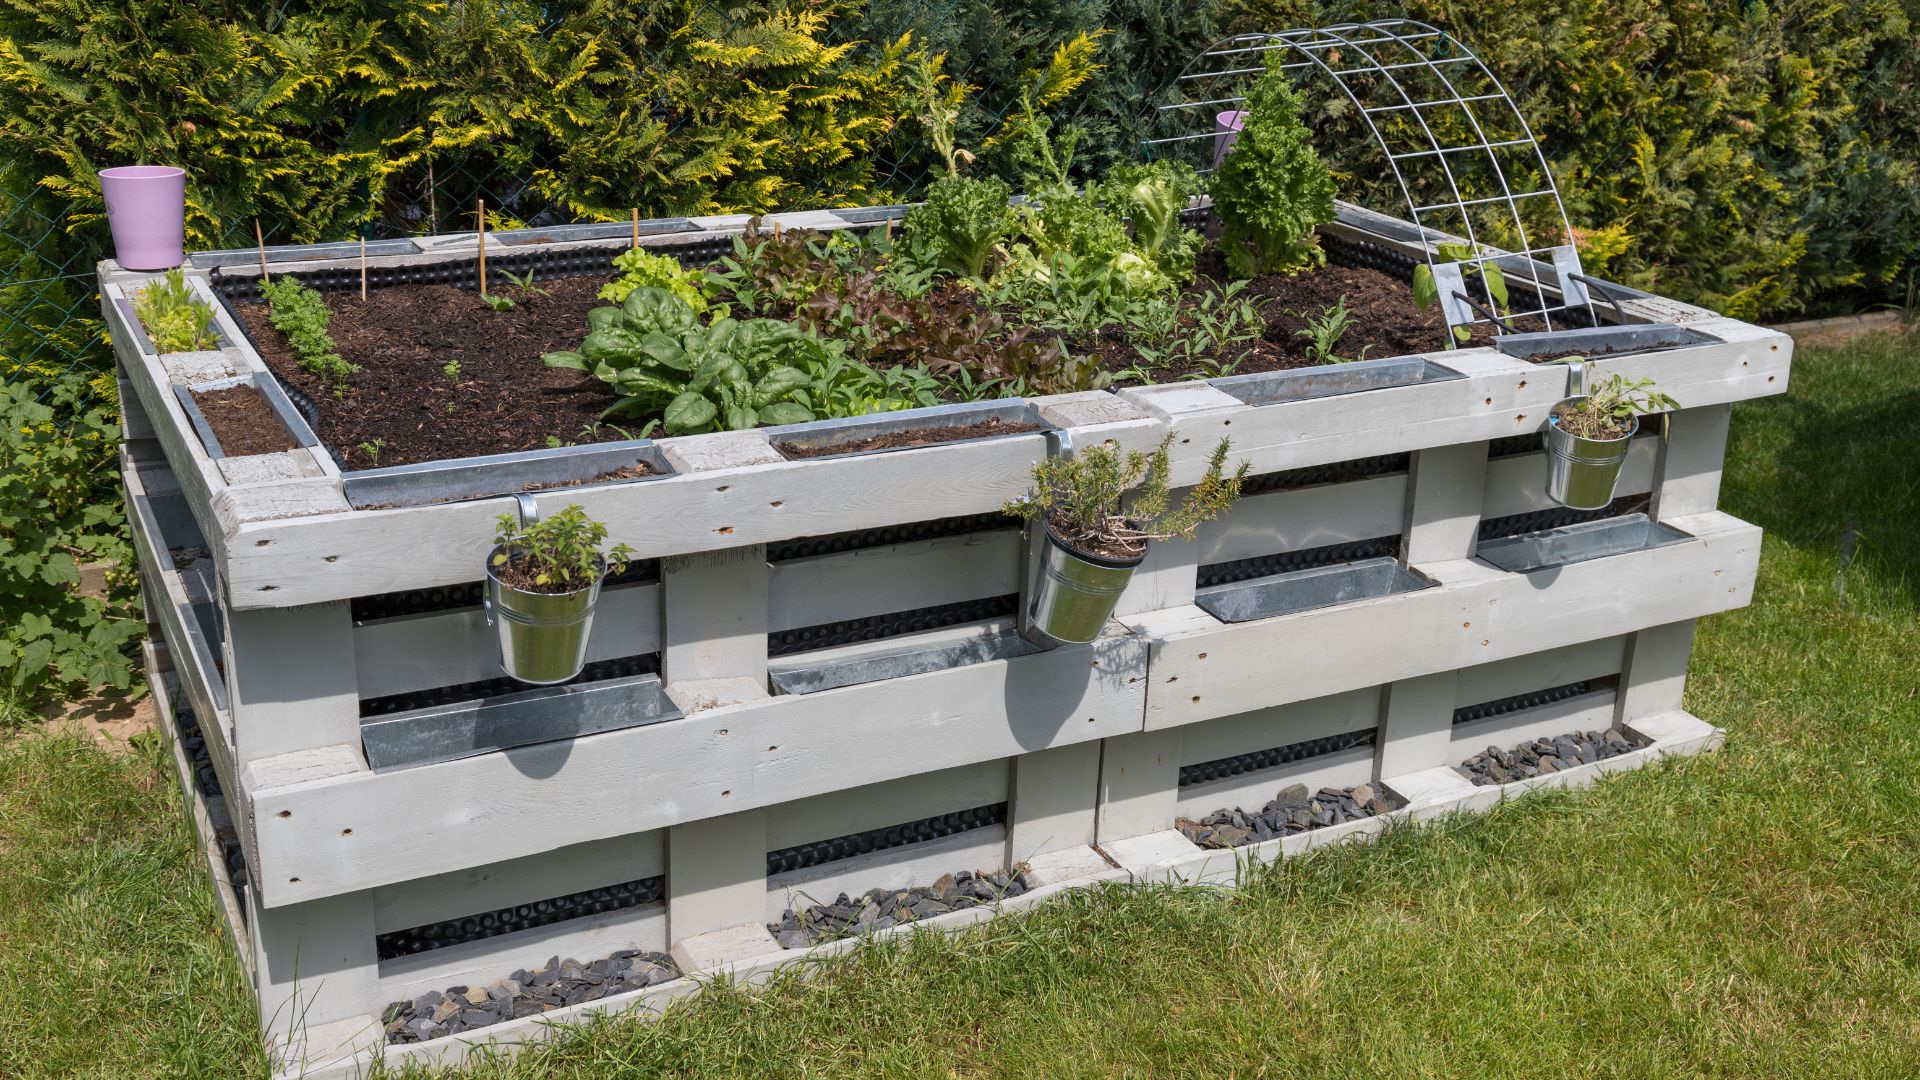
2. Upcycled Pallet Wood Bed
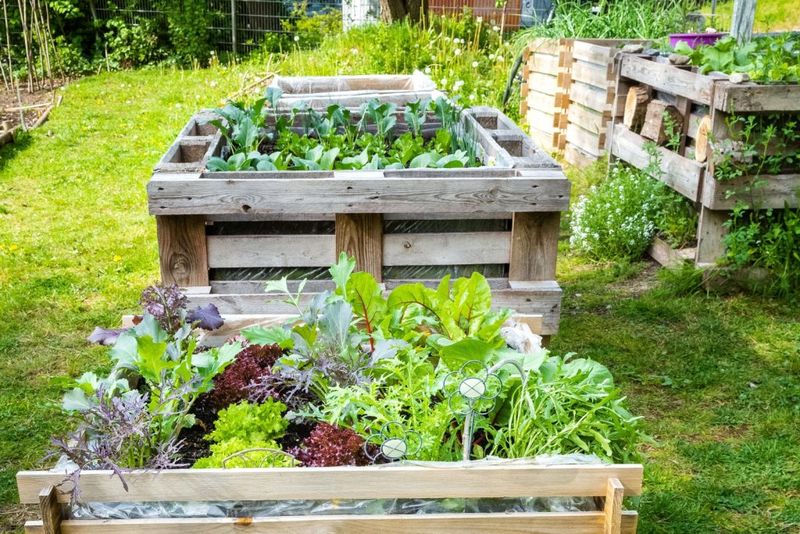
Free pallets are everywhere if you know where to look. Ask at local stores, nurseries, or check online marketplaces. Make sure to select heat-treated (HT) pallets, not chemically treated ones, to keep your veggies safe.
Dismantle the pallets with a pry bar and hammer, then use the boards to build a simple rectangular frame. Sand any rough edges to prevent splinters. Four pallets typically yield enough wood for a decent-sized bed.
Brush on some linseed oil to extend the wood’s life without chemicals. My pallet bed has survived five Minnesota winters with this treatment alone!
3. Galvanized Metal Roofing Sides
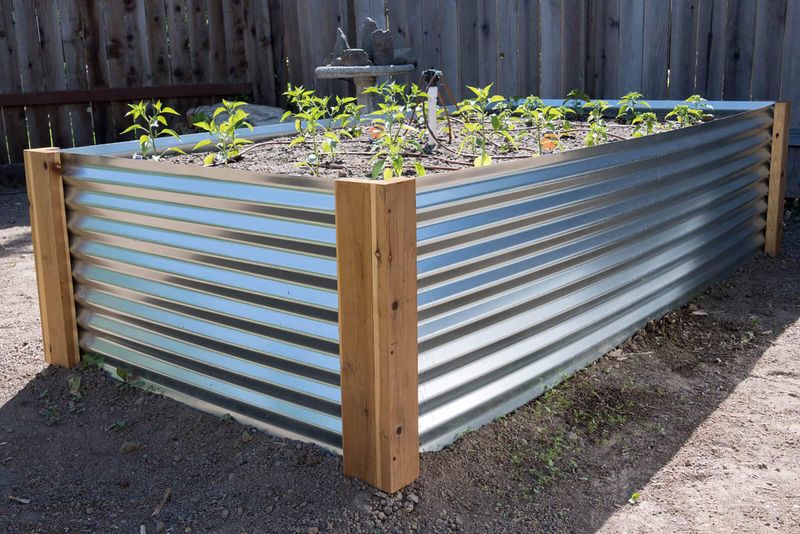
Corrugated metal roofing creates modern-looking beds that reflect heat onto your plants. Find damaged or leftover sheets at contractor supply stores for a fraction of the original price.
Frame the corners with 2×2 lumber posts driven into the ground, then attach the metal sheets with self-tapping screws. The wavy pattern adds structural strength, making thin metal surprisingly rigid when properly supported.
Metal beds warm up quickly in spring—perfect for early planting. Line with cardboard before adding soil to prevent heat transfer that could cook your plants’ roots during summer.
4. Log-Edged Natural Bed
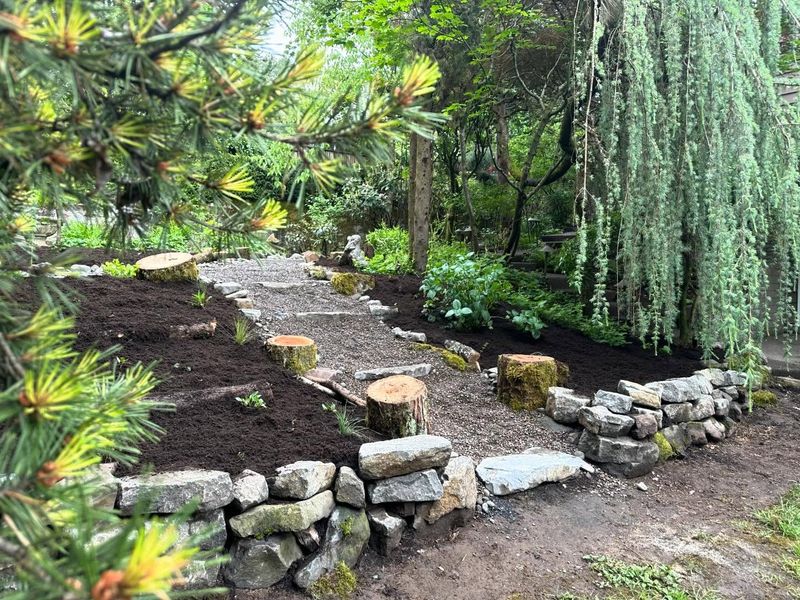
After a storm or tree trimming, free logs are often yours for the hauling. Look for hardwood logs 6-8 inches in diameter and cut them to consistent lengths of about 2 feet each.
Set the logs in a rectangle, stacking them two high and securing with 12-inch landscape spikes driven through pre-drilled holes. Cedar, locust, or oak will resist rot naturally for years without treatment.
The rustic look blends beautifully with natural landscapes. My neighbor built these five years ago using maple logs from our street’s tree trimming, and they’re still solid with beautiful moss growing on the north sides.
5. Concrete Form Tube Minis
Concrete form tubes cost about $8-10 each and make perfect circular mini beds. Buy the 12-inch diameter tubes and cut them into 12-inch tall sections using a handsaw. Three tubes from one $10 form gives you three beds for around $3.30 each.
Place landscape fabric underneath, fill with soil, and you’ve got instant raised beds. These work wonderfully for single tomato plants, pepper plants, or herb clusters.
Group several together for a modern garden look. The cardboard gradually breaks down after 2-3 seasons, but by then your plants will have established their place in the garden.
6. Straw Bale Border Bed
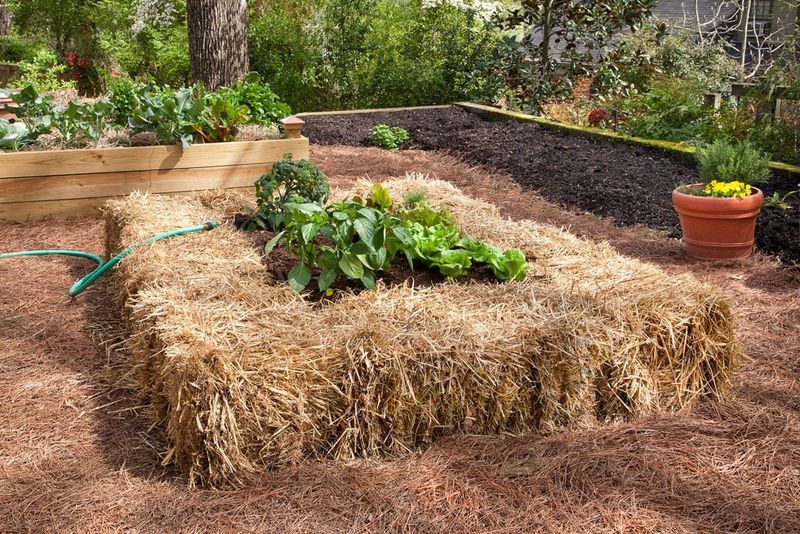
Straw bales typically cost $4-8 each and create instant raised beds with built-in insulation. Arrange them in a rectangle, keeping the strings facing outward to prevent them from rotting too quickly.
Line the inner walls with cardboard or landscape fabric before adding soil. The straw gradually decomposes, adding nutrients to your garden over time.
By fall, the bales will have compacted somewhat but still maintain their shape. After two seasons, the straw becomes amazing compost. I’ve used this method for temporary garden expansions when testing new growing areas.
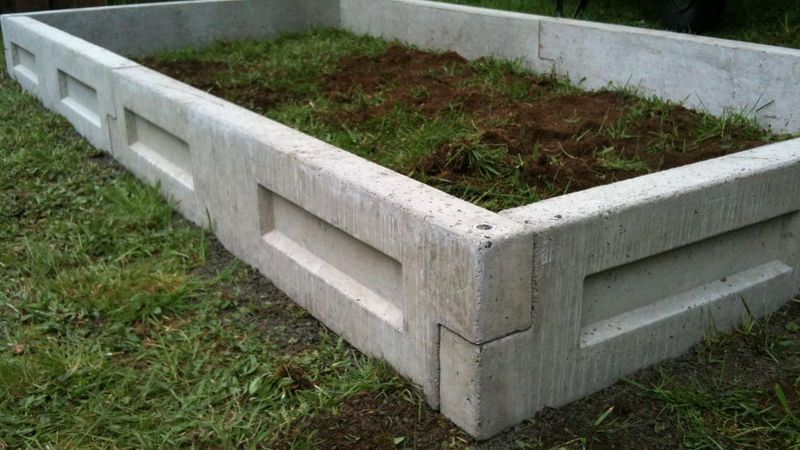
7. Concrete Block Interlocking Bed
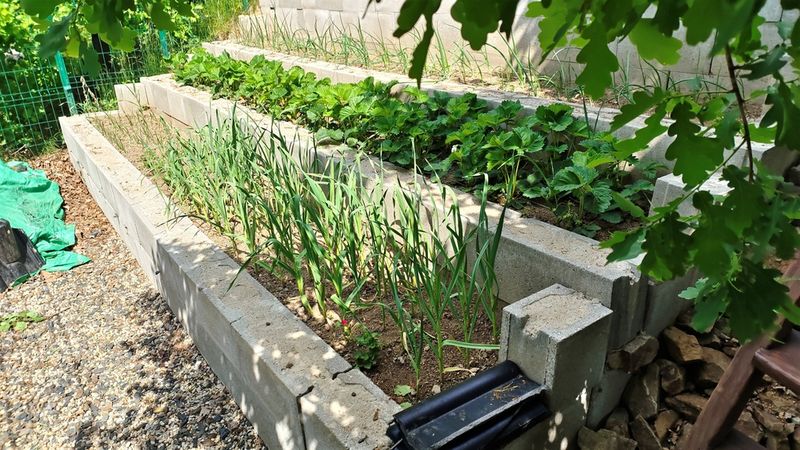
Standard 8x8x16 concrete blocks cost about $1.50-2 each and interlock without mortar. Unlike cinder blocks, these solid blocks don’t have planting holes but create cleaner lines and stack more securely.
Lay the first course, then offset the second course for stability. No tools required—just stack and fill. The weight of the soil keeps everything in place.
For cold climates, these beds absorb heat during the day and release it at night, extending your growing season. My concrete block beds have survived seven years with zero maintenance in zone 5b.
8. Woven Willow Branch Border
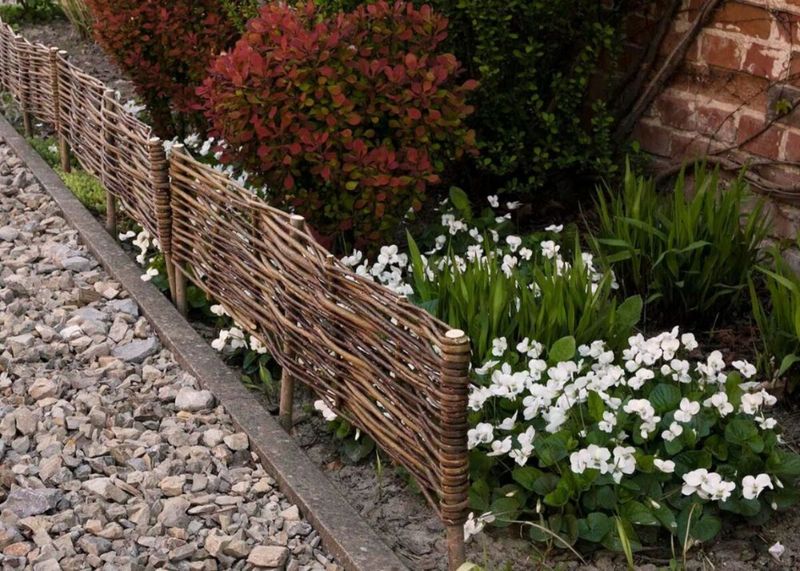
Flexible willow branches create a beautiful, natural woven border for free if you have access to a willow tree. Cut 3-4 foot branches in early spring when they’re most flexible, then push sturdy sticks into the ground as vertical supports.
Weave the willow branches horizontally between the supports, alternating over-under patterns. The tight weave holds soil while allowing excellent drainage and air circulation.
Living willow borders might even root and sprout leaves, creating a living fence. Trim regularly to maintain shape. These won’t last forever but will give you 2-3 seasons of charming, zero-cost garden beds.
9. Brick Dry-Stack Edge
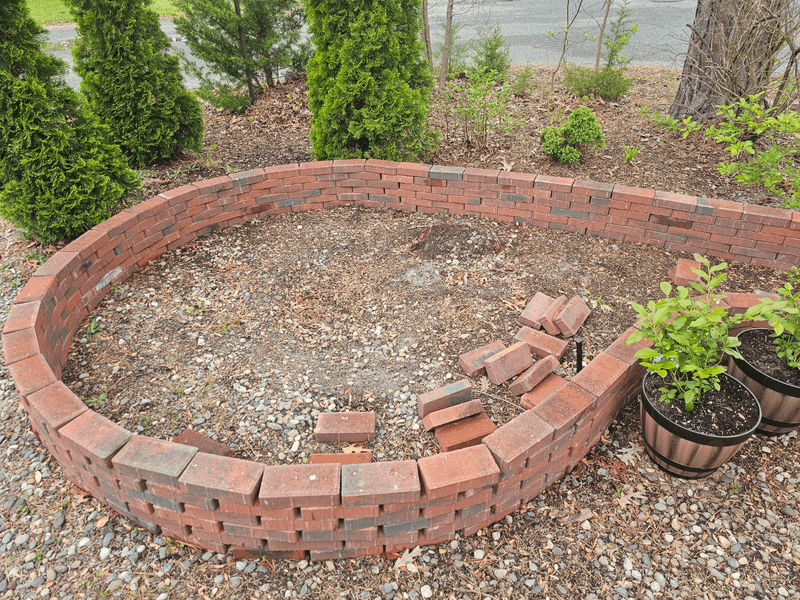
Scour Craigslist or Facebook Marketplace for free or cheap used bricks. People renovating old patios often give them away just to avoid disposal fees. You’ll need about 50-60 bricks for a standard 4×8 bed.
Lay them in a simple running bond pattern two courses high, with no mortar needed. The weight of the bricks and soil keeps everything stable. For extra stability, dig a shallow trench for the bottom course.
Red clay bricks develop beautiful patina over time and blend with any landscape style. Last summer I scored 200 old Chicago bricks for free and built four matching beds that look like they’ve been there for decades.
10. Repurposed Tire Planters
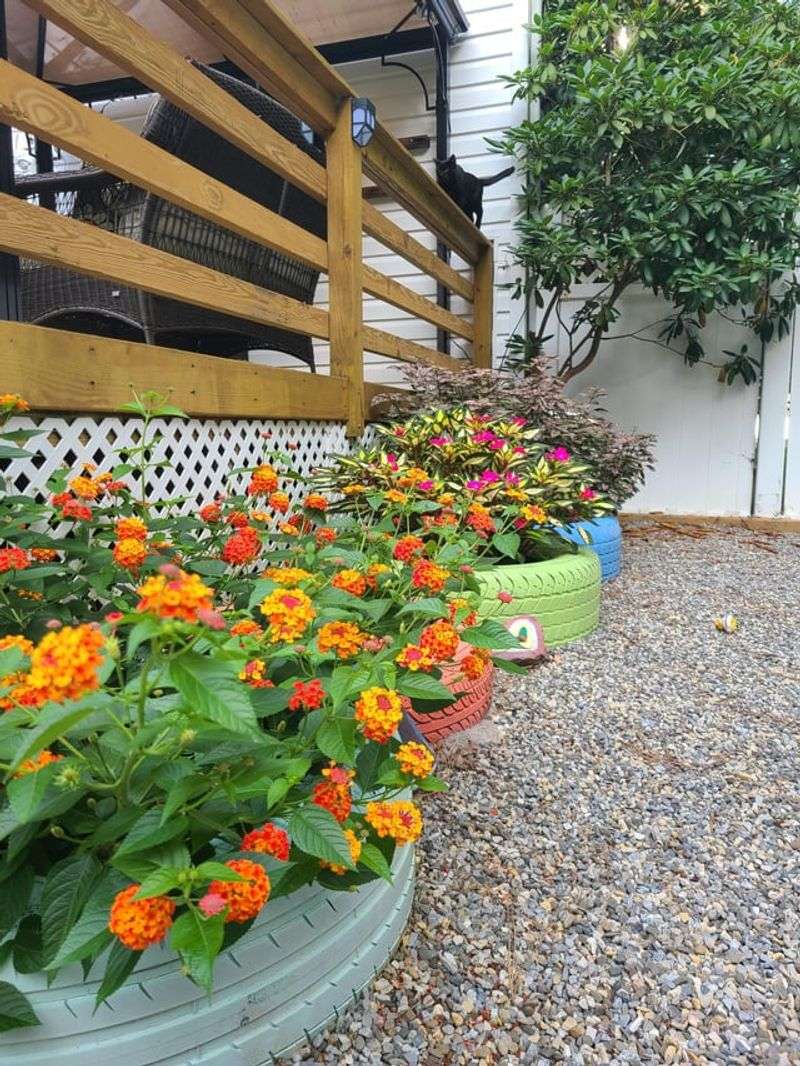
Old tires are often free at auto shops that would otherwise pay for disposal. Flip the tire inside-out by cutting around the outer edge, then turning the rubber wall outward for a flower-like shape.
Stack two tires for additional height, and line with landscape fabric before filling with soil. The rubber insulates plant roots from temperature extremes and prevents water loss.
Paint the outside with exterior latex paint in bright colors for a playful garden feature. Kids love helping with this project. We’ve grown potatoes in tire planters for years—harvesting is as easy as tipping them over!
11. Pine Board Budget Bed
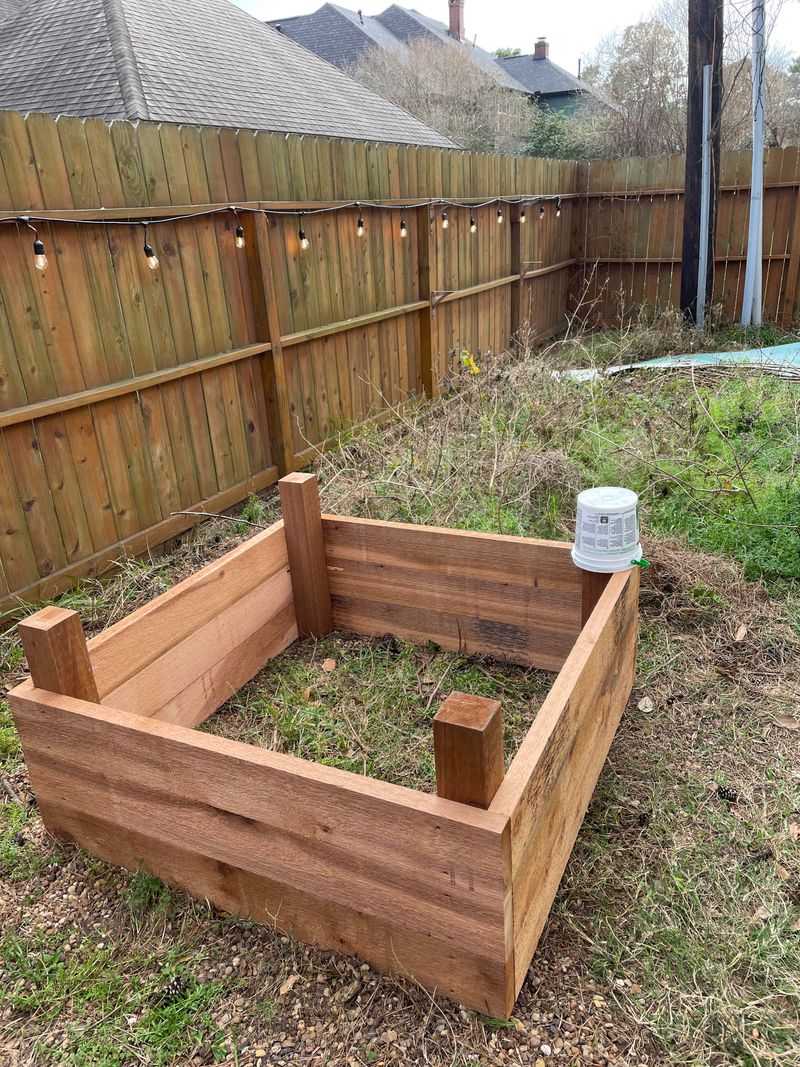
Common pine boards from big box stores make surprisingly affordable beds. Six 1x8x8′ boards cost around $40 total and create a standard 4×8 foot bed that’s 8 inches high.
Cut two boards in half for the ends, then secure the corners with 2×2 posts and deck screws. Apply raw linseed oil (not boiled, which contains chemicals) to extend the wood’s life naturally.
Untreated pine typically lasts 3-5 years before needing replacement. When boards eventually rot, simply replace them individually while keeping the corner posts. I’ve had pine beds last seven years in my partially shaded yard.
12. Livestock Panel Hoop House Bed
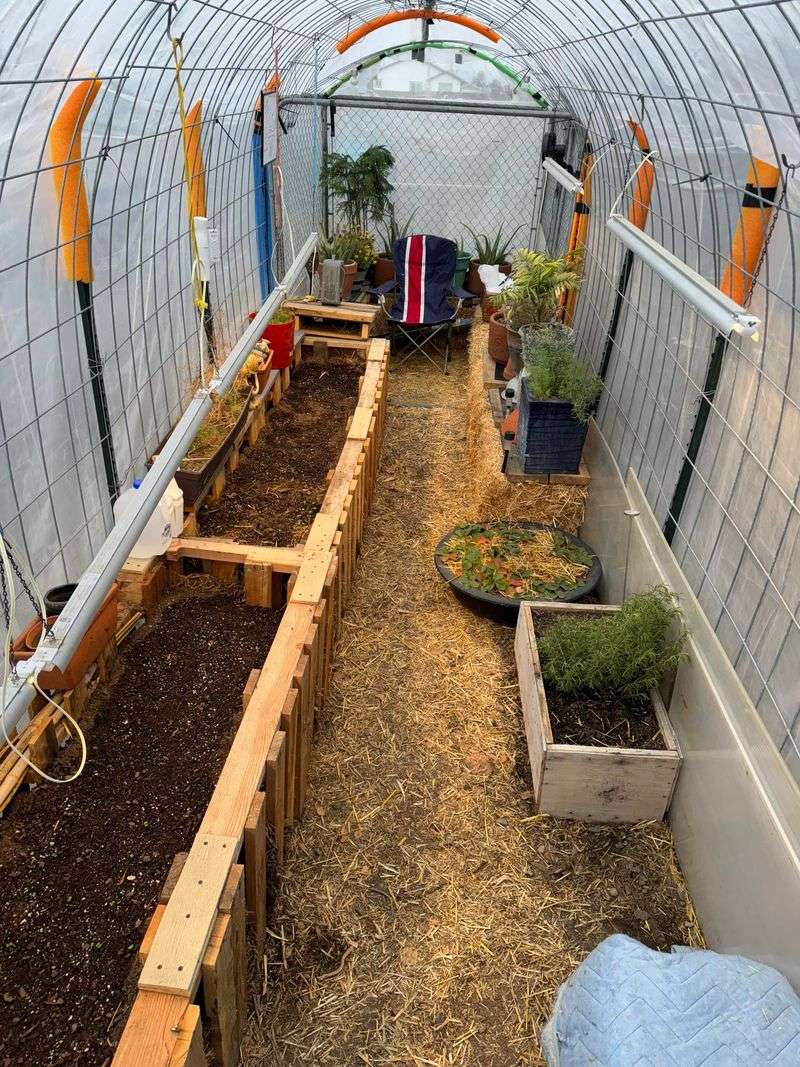
Start with a simple wooden frame using pressure-treated 2×6 lumber for the base. Add a cattle panel (about $20 at farm supply stores) bent into an arch and secured to the frame with U-bolts or heavy-duty staples.
Cover with greenhouse plastic during spring and fall to extend your growing season by weeks. Remove the plastic during summer for full sun exposure.
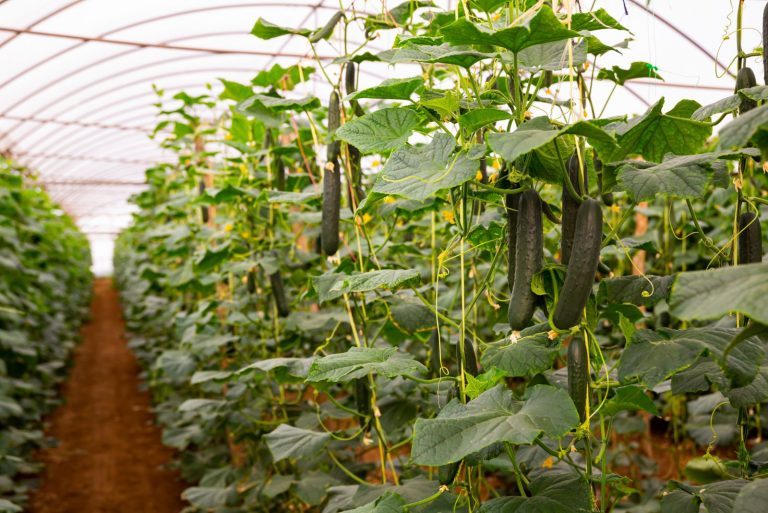
The hoops also provide perfect support for climbing plants like cucumbers and beans. My panel bed has survived four seasons of heavy snow loads without bending, making it the most versatile bed in my garden.
13. Urbanite Concrete Chunk Border

Broken concrete pieces (called “urbanite”) are often free from construction sites or homeowners replacing driveways. Look for relatively flat pieces 2-4 inches thick with at least one straight edge.
Arrange the pieces like a dry-stack stone wall, with larger pieces on the bottom and smaller ones on top. Stagger the joints for stability. The irregular edges create a charming, stone-like appearance at zero cost.
Concrete’s thermal mass extends your growing season by absorbing daytime heat. My urbanite beds warm up two weeks earlier in spring than my wooden beds, giving me a jumpstart on tomatoes every year.
14. Wattle Woven Stick Edging
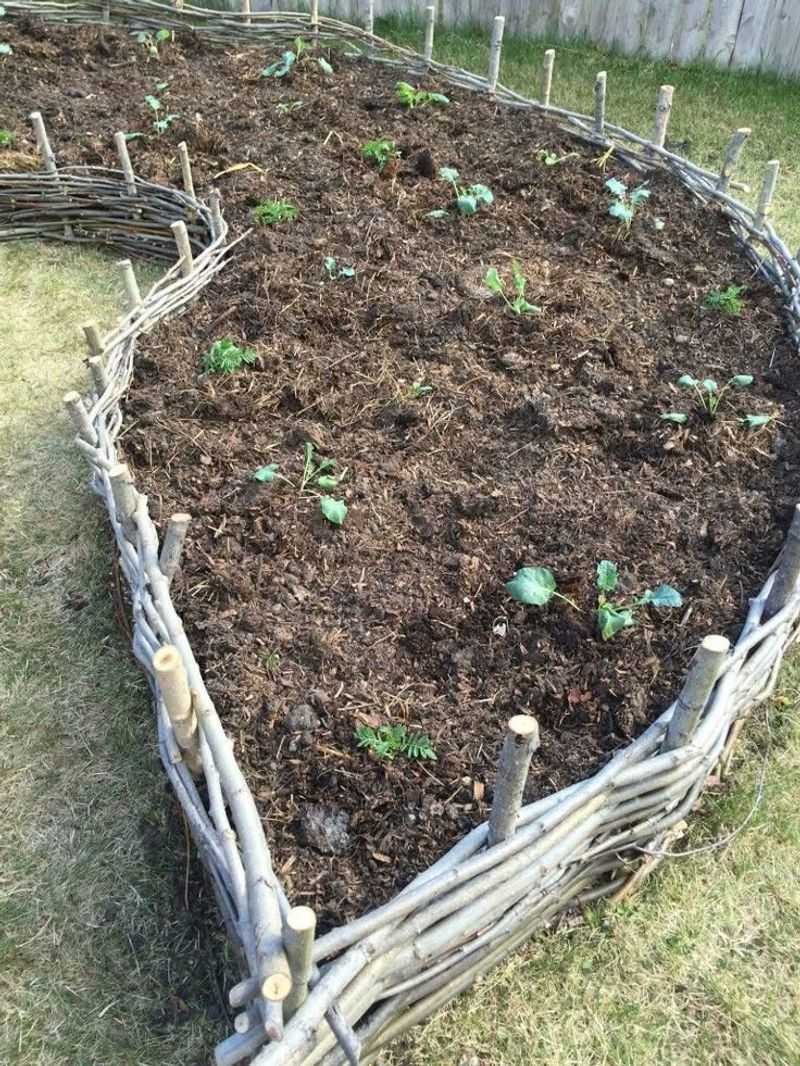
Collect straight branches from yard pruning or woodland cleanup. Pound sturdy sticks into the ground every 12 inches to create a frame, leaving about 12-15 inches above ground.
Weave flexible branches horizontally between the vertical supports, alternating front and back. This ancient technique creates surprisingly strong edges that hold soil effectively while allowing good drainage.
The natural appearance fits perfectly in cottage gardens or woodland settings. My sister’s wattle beds have lasted three years in partial shade. In full sun, expect 1-2 seasons before the branches begin to break down naturally.
15. Gabion Wire Rock-Filled Walls
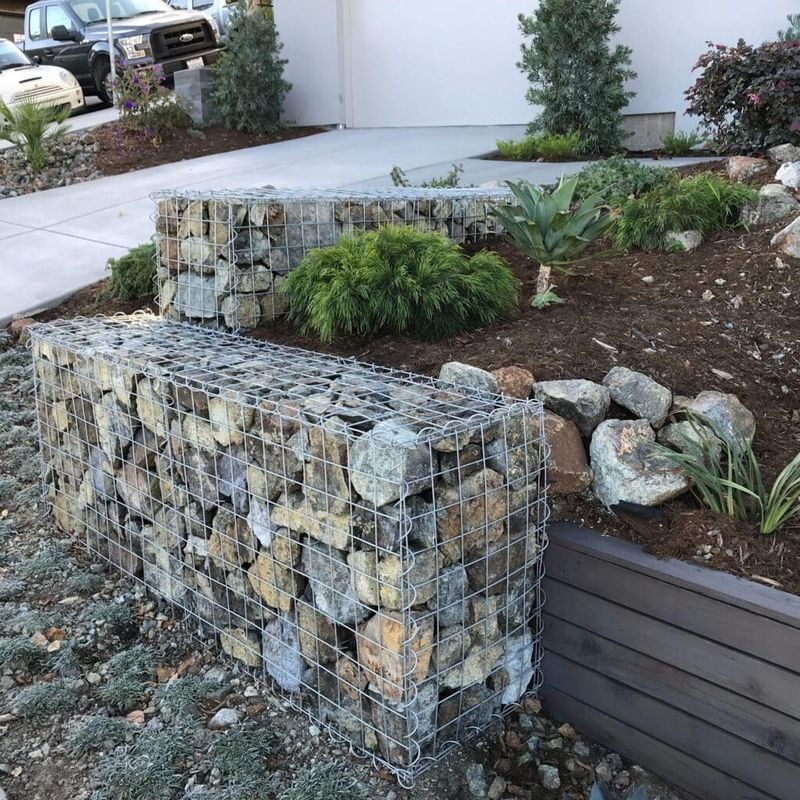
Build frames from welded wire fencing (the kind with 2×4 inch openings), forming them into rectangular “cages” secured with wire ties. Standard 16-foot rolls cost about $20 and make multiple beds.
Fill the wire frames with rocks, broken concrete, or even glass bottles with their necks pointed inward. The gabion technique creates excellent drainage while storing thermal energy that moderates soil temperature.
Line the inside with landscape fabric before adding soil. These industrial-modern beds make a striking design statement. My gabion bed is three years old and has developed beautiful moss between the rocks on the north side.