The Right Way Florida Plant Owners Repot Aloe Vera Without Root Rot
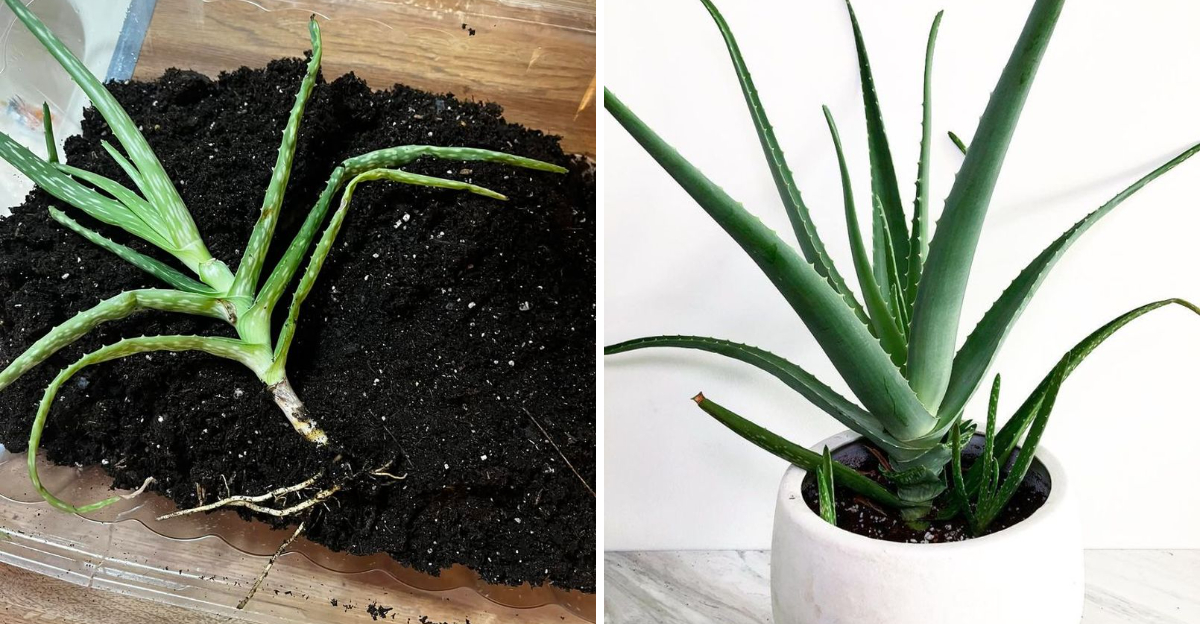
Watching an aloe plant slowly decline is frustrating. One week the leaves look firm and green.
The next week they feel soft, droop over the pot, and never recover. Many Florida plant owners blame pests or sunlight, but the real damage often starts underground.
High humidity, sudden rain, and moisture-trapping soil quietly attack aloe roots after repotting mistakes. Even experienced growers lose plants this way without realizing what went wrong.
Aloe may look strong, but its roots are sensitive to trapped water and poor drainage. Using the right repotting method can save a struggling plant before the damage becomes permanent.
Small changes in pot choice, soil, and watering habits can mean the difference between a plant that collapses and one that thrives for years in Florida’s challenging climate.
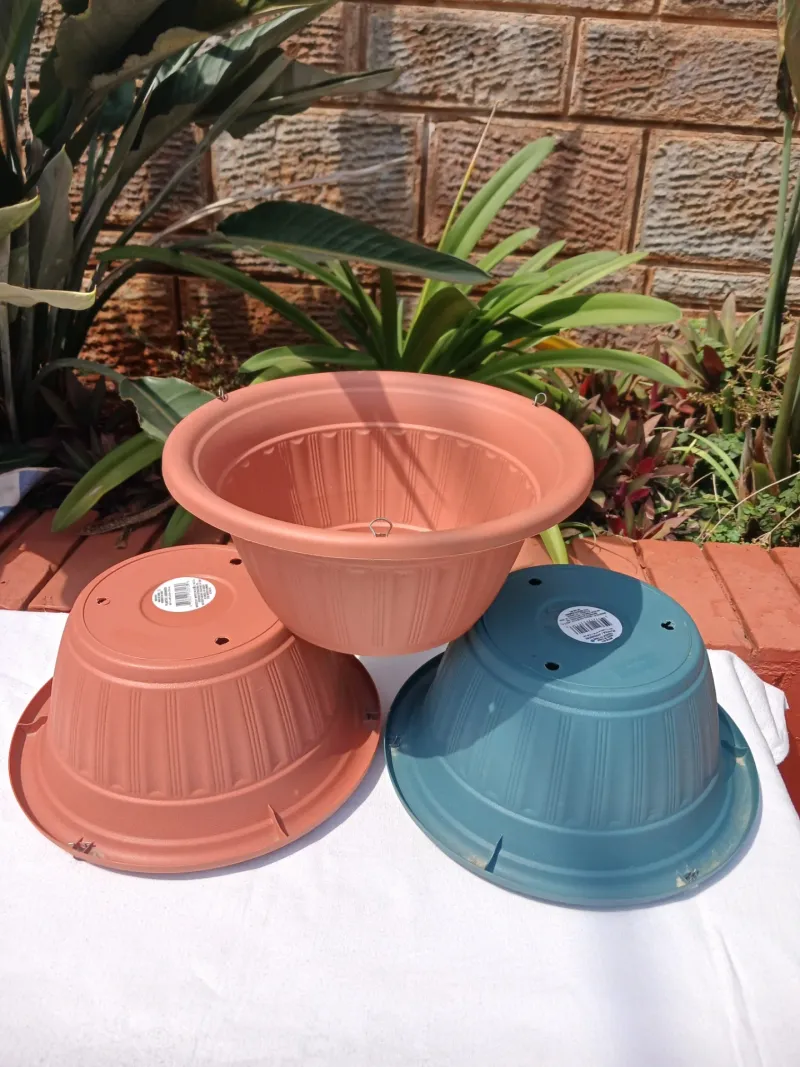
1. Choose The Right Pot Size And Drainage First
When you lift your aloe from its current pot, notice how the roots fill the space. Many Florida plant owners assume bigger is always better, but oversized pots hold excess moisture that encourages rot in our humid climate.
Your new container should be only one to two inches wider than the root ball, giving roots room to expand without creating large pockets of damp soil that stay wet for days.
Drainage holes are strongly recommended in Florida due to frequent rain and high humidity. A single centered hole works, but multiple drainage points allow water to exit faster after summer afternoon storms or accidental overwatering.
Terra cotta pots breathe better than plastic and help wick moisture away from roots, which is especially helpful if you grow aloe on a covered porch in Central Florida where humidity stays high even without rain.
Avoid decorative pots without drainage unless you use them as cachepots with a smaller draining pot nested inside.
In South Florida outdoor settings, water can accumulate quickly during rainy season, and trapped moisture around aloe roots creates the perfect environment for rot to develop.
North Florida growers who bring aloe indoors during winter should also prioritize drainage since indoor air circulation is often lower than outdoor conditions.
Choosing the right pot size and drainage setup is your first defense against root rot. Get this step right, and you have already eliminated one of the most common causes of aloe root rot.
2. Use A Fast-Draining Aloe Soil Mix That Prevents Rot
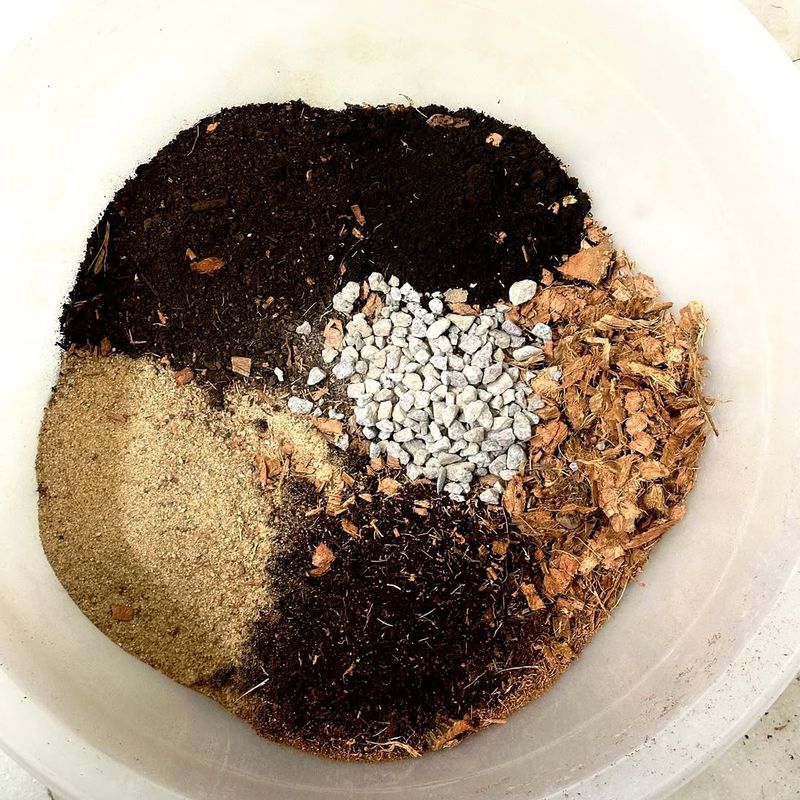
Run your fingers through typical potting soil and notice how it clumps and holds water. That moisture retention works well for ferns and tropicals, but aloe vera needs soil that drains quickly and does not remain waterlogged for extended periods.
In Florida, where afternoon humidity can keep soil damp longer than in dry climates, using regular potting mix is one of the fastest ways to cause root rot after repotting.
A proper aloe soil mix should contain at least fifty percent inorganic material like coarse sand, perlite, or pumice. You can purchase cactus and succulent mix from garden centers, but many Florida growers improve it further by adding extra perlite or horticultural sand to increase drainage.
Your Florida Garden Changes Every Week. Your Plan Should Too.
Gardening in Florida changes quickly throughout the season. Every Friday you’ll receive a simple weekly plan showing exactly what to plant, prune, fertilize, harvest, and protect so you never miss the right timing.
- ✅Know exactly what to plant this week
- ✅Stay ahead of pests and diseases
- ✅Never miss short planting windows
- ✅Simple weekend gardening checklist
- ✅Full archive of every weekly guide
Only $49/year (less than $1 per week)
Friday’s guide goes out soon. Join today to receive this week’s edition.
🟢 Unlock This Week’s Florida Garden Plan
Join 2,000+ Florida gardeners who never wonder what to do next.
When you water this mix, it should absorb quickly and dry out between waterings rather than staying consistently damp.
University of Florida IFAS Extension recommends well-draining media for succulents to prevent waterlogged roots. Avoid mixes with high peat content or moisture-retaining crystals, as these keep roots wet too long in our climate.
South Florida outdoor aloe growers benefit from even grittier mixes since rainfall can saturate pots quickly during summer storms.
Your aloe will show you if the soil drains well. Firm, upright leaves and steady growth mean roots are happy.
Soft, drooping, or yellowing leaves often signal that soil is staying too wet between waterings, which is common when Florida plant owners use standard potting soil instead of a fast-draining succulent mix.
3. Repot When Soil Is Mostly Dry To Avoid Root Damage
Before you even think about removing your aloe from its pot, check the soil moisture level. Press your finger deep into the soil near the edge of the pot and feel for any dampness.
If the soil is very wet or soggy, wait a few days before repotting so roots are easier to handle and inspect.
Slightly dry soil loosens more easily, allowing you to see the full root structure and remove old media that might harbor fungal spores or pests. In Florida, this drying step is especially important because our humidity slows soil drying time compared to arid climates.
Central Florida growers who keep aloe on covered patios may need to bring plants into a drier indoor space for a few days to ensure soil dries completely before repotting.
Repotting when soil is wet increases the risk of root damage and introduces excess moisture into the new pot right from the start. Wet roots are also more fragile and prone to tearing when you try to loosen them from compacted soil.
North Florida plant owners who overwinter aloe indoors should stop watering at least a week before planned repotting to give soil time to dry out fully.
This simple step requires patience, but it protects your aloe from unnecessary stress and rot risk. When you finally tip the pot and the root ball slides out cleanly with loosened soil that falls away easily, you know your timing is right.
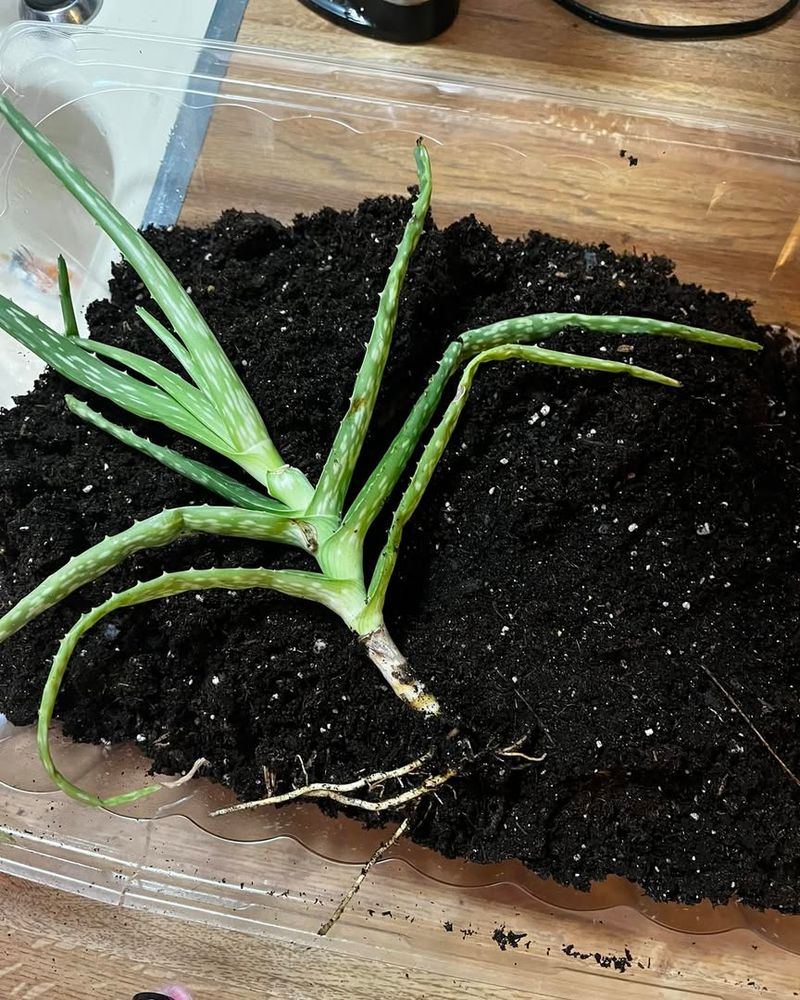
4. Remove Old Soil And Inspect Roots Carefully
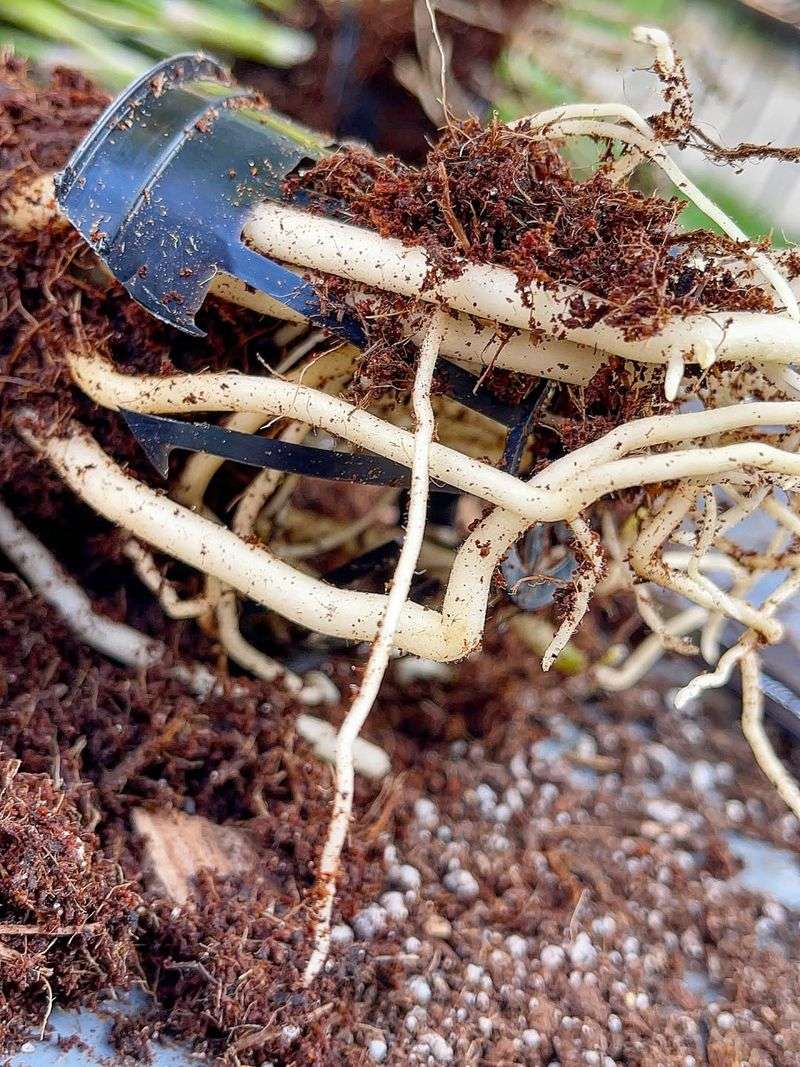
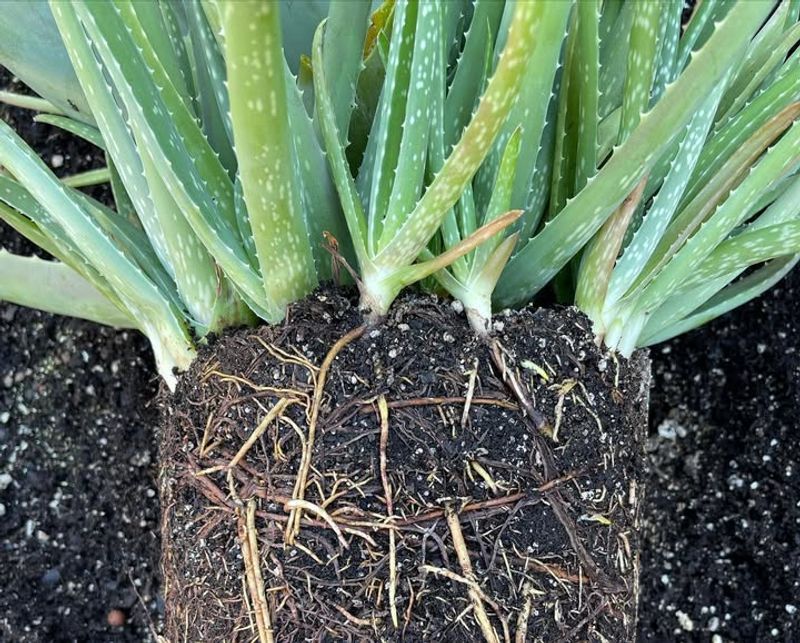
Once your aloe is out of its pot, gently shake and brush away the old soil from the roots. You want to see the full root system so you can identify any brown, mushy, or foul-smelling roots that indicate rot.
Healthy aloe roots are firm, white, or light tan, and resist collapsing when gently bent. Rotted roots feel soft, look dark, and often fall apart when touched.
Warm, humid conditions can allow root rot to develop slowly and go unnoticed until repotting. Even if your aloe looks healthy above soil level, hidden rot can be present in the root zone.
Use your fingers or a soft brush to remove as much old soil as possible without tearing healthy roots. This step also removes any compacted soil pockets that could stay wet in the new pot.
If you find rotted roots, use clean scissors or pruning shears to cut them away completely, making cuts into healthy white tissue. Removing damaged roots prevents rot from spreading in the new pot.
South Florida growers dealing with frequent summer rain should inspect roots especially carefully since outdoor aloe can experience waterlogged conditions even with good drainage.
This inspection step takes time, but it is the only way to know the true health of your aloe. Many Florida plant owners skip this step and replant without looking, only to watch their aloe decline weeks later because rotted roots were never removed.
5. Let Aloe Roots Dry Before Replanting
After you have removed old soil and trimmed any damaged roots, resist the urge to replant immediately. Aloe roots need time to dry and callus over any cuts or tears before being placed in new soil.
This drying period prevents moisture from entering wounded root tissue and causing new rot to develop in the fresh potting mix.
Set your aloe in a shaded, well-ventilated spot for at least 24 to 48 hours. In North Florida during cooler months, roots may need a full two days to dry.
In drier indoor or low-humidity environments, roots may callus faster, while humid summer conditions may require a longer drying period.
You will know roots are ready when cut surfaces look dry and slightly sealed rather than moist or open. This callusing step is commonly recommended in succulent care to reduce the risk of infection and rot after root damage.
Skipping this step is a common cause of post-repotting rot in aloe plants, and it often leads to rot developing within the first few weeks after repotting.
Letting roots dry feels counterintuitive because we are used to replanting quickly, but aloe vera is not a typical houseplant. Giving roots time to heal before introducing them to new soil is one of the most important rot-prevention steps you can take in our humid Florida climate.
6. Position Aloe Correctly And Avoid Burying The Stem

When you place your aloe in the new pot, position it so the base of the stem sits at or slightly above the soil line.
Many Florida plant owners accidentally bury the stem too deep, thinking it will provide extra support, but this traps moisture against the stem and invites rot to start right at the crown where leaves emerge.
Fill around the roots with your fast-draining soil mix, gently pressing to eliminate air pockets without compacting the soil. Leave about half an inch of space between the soil surface and the pot rim to prevent water from spilling over during watering.
The stem should be fully visible, and the lowest leaves should rest just above the soil surface.
If your aloe is top-heavy and tips easily, use a stake or prop it against a wall for a few days until new roots establish. Do not bury the stem deeper to stabilize the plant, as this creates the perfect environment for stem rot in Florida humidity.
Central Florida patio growers should be especially careful about stem depth since covered outdoor areas can trap humid air around the pot.
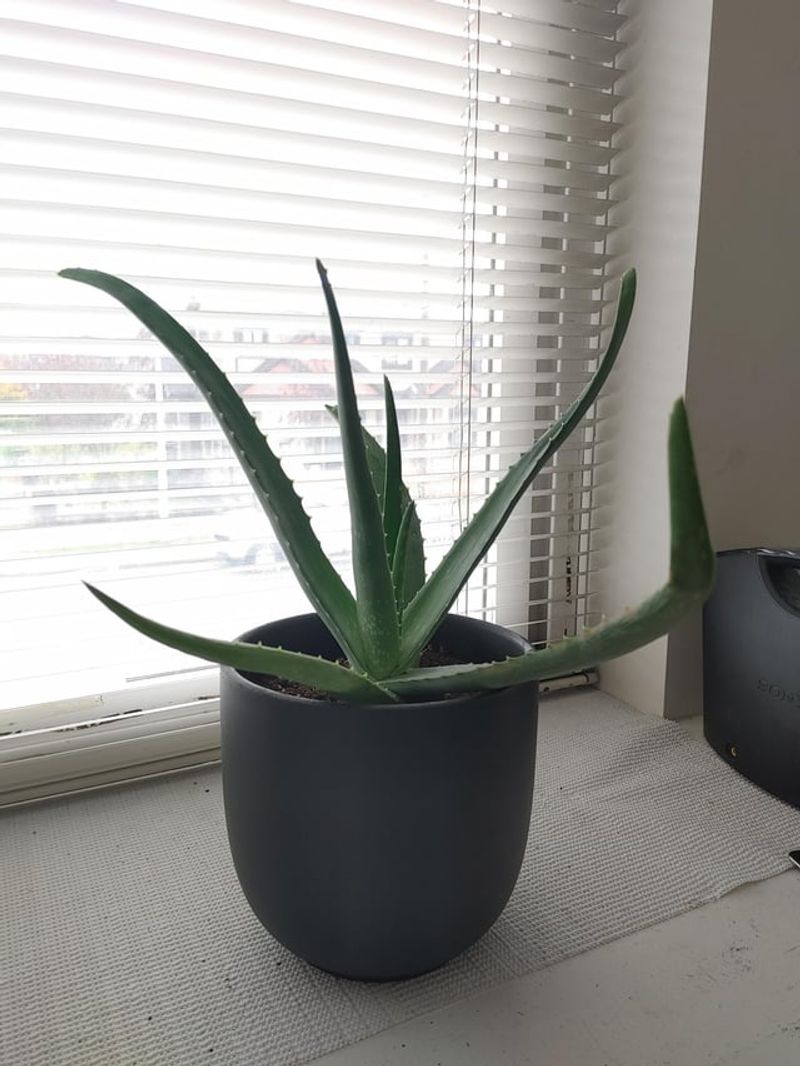
Correct positioning protects the most vulnerable part of your aloe. When the stem stays dry and exposed to air, rot has no opportunity to start.
You will notice your aloe stands more upright and looks healthier when the stem is positioned properly and not buried beneath damp soil.
7. Wait Before Watering After Repotting
After your aloe is settled in its new pot, do not water it right away. This waiting period gives any remaining root wounds time to fully seal and prevents water from entering damaged tissue.
In Florida, where humidity keeps soil from drying quickly, watering too soon after repotting is one of the leading causes of post-repotting root rot.
Wait several days before watering, allowing roots to settle and minor damage to heal before introducing moisture. South Florida growers in humid coastal areas may want to wait a full week, especially during summer when rainfall and humidity are both high.
North Florida plant owners can usually water after three to four days, particularly if aloe is kept indoors in air-conditioned spaces where humidity is lower.
When you do water, water lightly and allow excess water to drain completely rather than saturating the soil. Your aloe is still adjusting to its new environment and does not need heavy watering until roots begin growing into the fresh soil.
University of Florida IFAS Extension guidance on succulents emphasizes allowing soil to dry completely between waterings to prevent root diseases.
Watch your aloe over the next few weeks. Leaves should remain firm and upright, and new growth may appear at the center.
If leaves start to soften or yellow, you may have watered too soon or too heavily. This waiting step requires patience, but it is the final safeguard that keeps your freshly repotted aloe healthy in Florida conditions.