7 Easy Steps To Repot A Peace Lily In Your Florida Home This Spring

Peace lilies might look calm and low-maintenance, but spring is when they quietly demand attention. Ignore repotting too long and you can end up with cramped roots, drooping leaves, slow growth, and fewer blooms.
Florida’s warm indoor temps and longer daylight hours make this the perfect season to refresh the soil, give roots breathing room, and kickstart healthy new growth. The good news is repotting does not have to be messy, stressful, or complicated.
With the right timing and a few simple steps, your peace lily can bounce back fast and look fuller, greener, and stronger in just weeks. A small upgrade now sets the stage for better leaf color, stronger stems, and more flowers later on.
Spring is the reset button your peace lily plant has been waiting for, and doing it right makes all the difference!
1. Size Up The Pot
Finding the right pot makes all the difference when you’re repotting your peace lily in Florida. Your new container should be about two inches wider than the current one, giving roots room to spread without drowning in too much soil.
Bigger isn’t always better because excess soil holds moisture longer, which can cause problems in our humid Florida climate. Check that your chosen pot has drainage holes at the bottom.
Without proper drainage, water sits at the bottom and creates soggy conditions that peace lilies absolutely hate.
If you fall in love with a decorative pot without holes, you can use it as an outer cover and keep your plant in a plastic nursery pot inside.
Material matters more than you might think. Terracotta pots breathe well and help soil dry out between waterings, which works great for Florida homes with air conditioning.
Plastic pots hold moisture longer, so they’re perfect if you tend to forget watering days or keep your home warmer. Weight is another consideration, especially if you move your plants around to catch different light throughout the day.
Ceramic pots look gorgeous but get heavy once filled with soil and water. Lighter plastic options make rearranging easier when you’re chasing that perfect indirect light spot in your Florida living room.
Before you commit to a pot, think about where it will live. A pot that looks small on the shelf might be just right for your plant stand.
Measure your space and bring those numbers with you when shopping.
Your peace lily needs stability, so choose a pot with a wide base that won’t tip over easily, especially important if you have curious pets or kids running around your Florida home.
2. Refresh The Soil
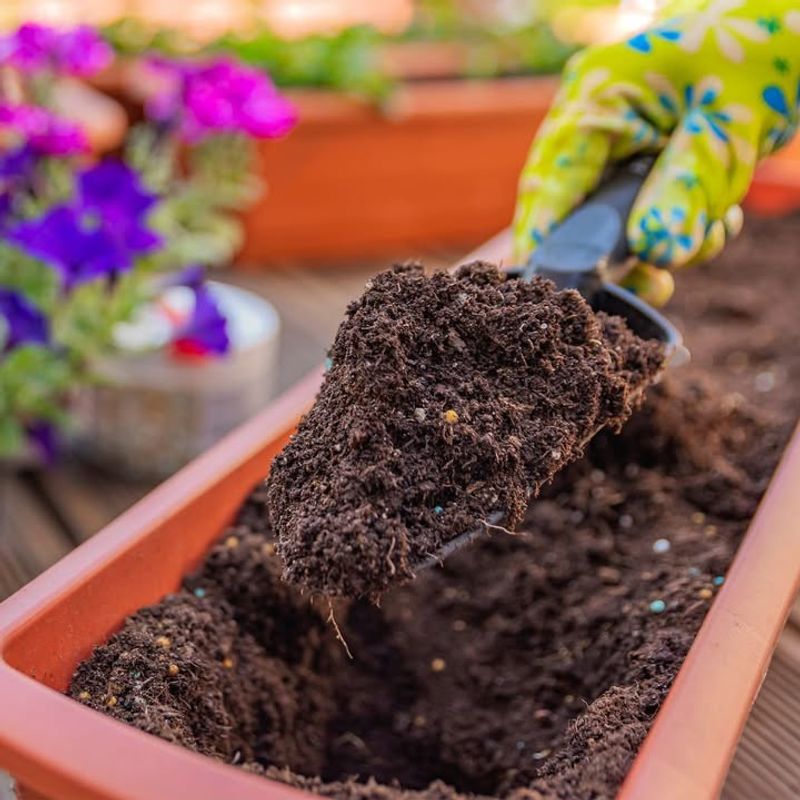
Fresh potting mix gives your peace lily the nutrients it needs to flourish in your Florida home. Regular garden soil won’t work because it’s too dense and doesn’t drain well enough for container plants.
Look for a high-quality indoor potting mix that contains peat moss or coconut coir, which helps retain just the right amount of moisture without getting waterlogged.
Peace lilies appreciate soil that drains well but still holds some water.
You can improve any basic potting mix by adding perlite or vermiculite, which creates air pockets and prevents compaction. Mix about one part perlite to three parts potting soil for ideal results in Florida’s humidity.
Some gardeners like adding a handful of orchid bark to the mix. This creates extra drainage and mimics the natural forest floor conditions where peace lilies originally grew.
The bark also breaks down slowly, adding organic matter over time as your plant grows throughout the spring and summer. Check the pH level if you want to get technical.
Peace lilies prefer slightly acidic soil between 5.8 and 6.5. Most commercial potting mixes fall within this range, but you can test yours with an inexpensive kit from any Florida garden center.
Avoid using old soil from your previous pot. It’s depleted of nutrients and might harbor pests or diseases that could harm your refreshed plant.
Start clean every time you repot. Mix your soil in a large bowl or bucket before you begin, making sure everything is evenly distributed.
Slightly damp soil works better than bone-dry mix because it settles around roots more easily.
Just add a little water and stir until the mixture feels like a wrung-out sponge, perfect for your Florida peace lily’s new home.
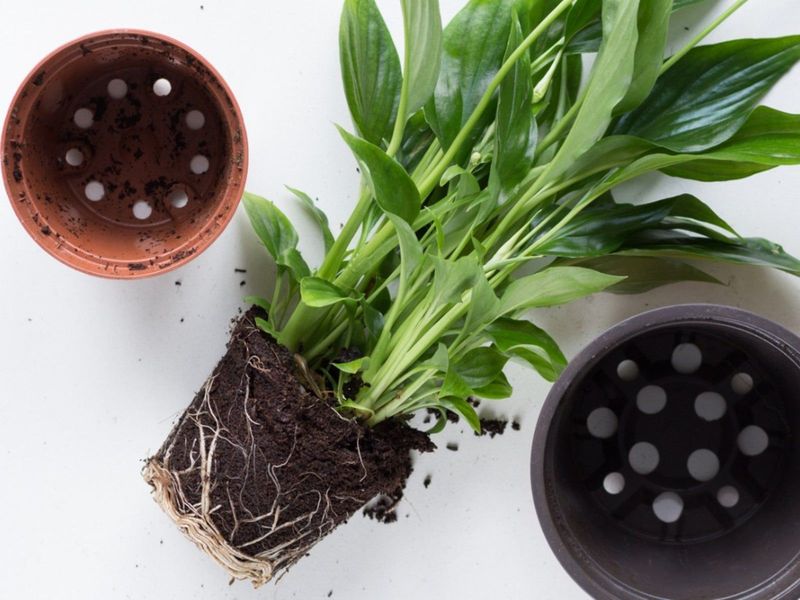
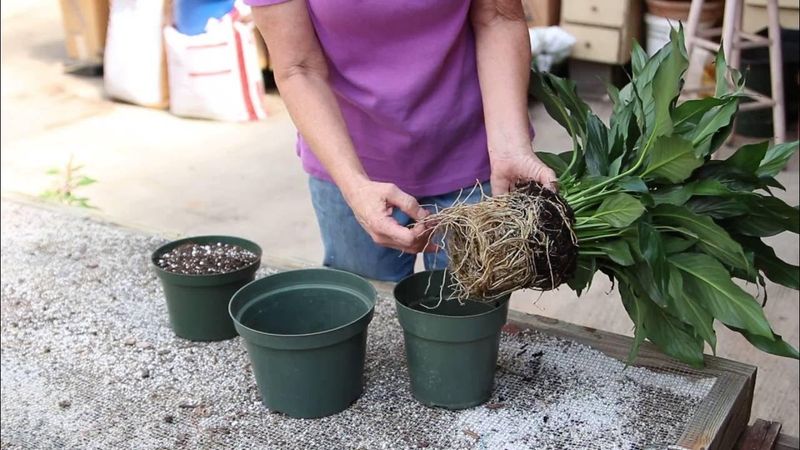
3. Lift The Lily

Getting your peace lily out of its old pot requires a gentle touch and a little patience. Start by watering your plant a day before you plan to repot, which helps the root ball slide out more easily.
Dry soil tends to pull away from pot sides, but overly wet soil makes a muddy mess on your Florida porch or kitchen counter.
Turn the pot on its side and tap the bottom and sides firmly but gently.
This loosens the root ball from the container walls. If your plant has been in the same pot for years, roots might be clinging stubbornly to every surface.
Support the base of the plant with one hand while you tip the pot with the other. The entire root ball should slide out together if you’ve loosened it enough.
Sometimes you need to squeeze flexible plastic pots to break the suction, or run a butter knife around the inside edge of rigid containers. Stubborn plants might need more convincing.
Try gently pulling on the base of the stems while supporting the pot. Never yank on leaves because they tear easily and won’t help you remove the plant anyway.
If nothing works, you might need to sacrifice the old pot by cutting it away with scissors or pruning shears. Once the plant is free, set it on newspaper or an old towel to protect your Florida home’s surfaces.
Take a moment to look at the root system. Healthy roots appear white or light tan, while mushy brown roots indicate past watering issues.
The root ball might be circling the pot’s shape, which is completely normal and exactly why you’re repotting in the first place this spring.
4. Loosen The Roots
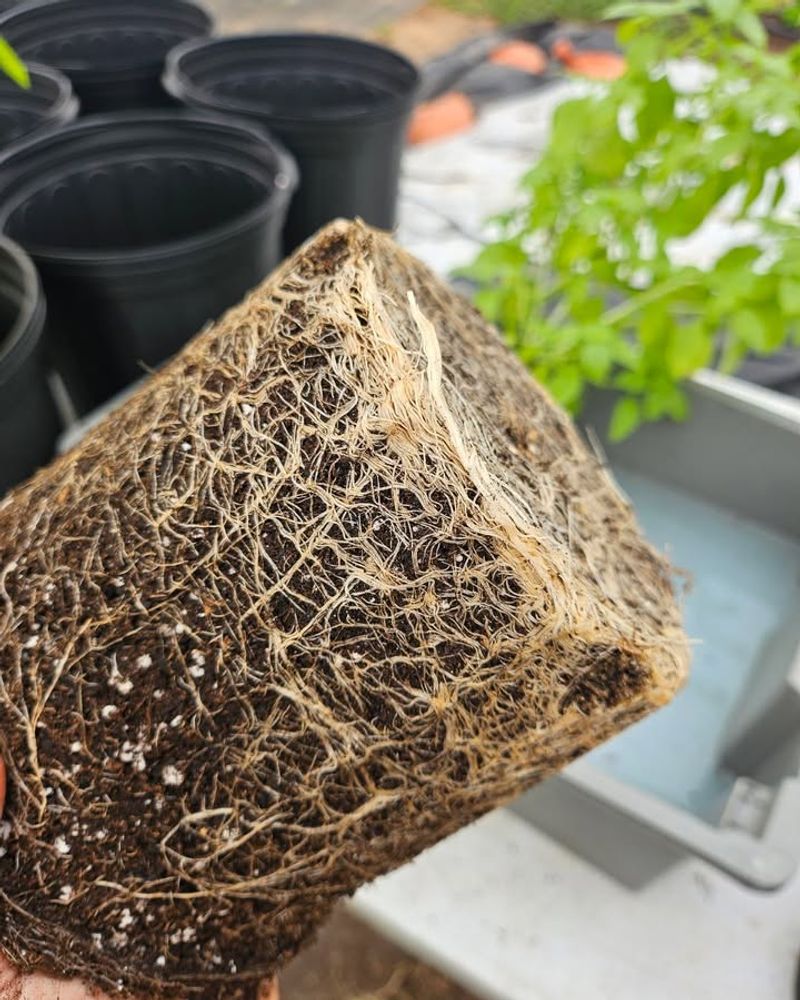
Your peace lily’s roots have been growing in circles, following the shape of the old pot for months or years. Breaking up this pattern helps roots spread into fresh soil and absorb nutrients better.
Use your fingers to gently tease apart the outer layer of roots, working from bottom to top around the entire root ball. Some roots will be wound tightly around the bottom, forming a dense mat.
These need special attention because they won’t straighten out on their own. Carefully unwind them or make a few shallow vertical cuts with clean scissors or a knife.
This might seem harsh, but it actually encourages new root growth in your Florida home’s conditions. Don’t worry about breaking a few roots during this process.
Peace lilies are remarkably tough, and minor root damage heals quickly once the plant settles into its new pot. Focus on loosening the outer inch or two of the root ball rather than disturbing the entire center.
Shake off loose old soil as you work, but leave some clinging to the roots. Removing every bit of old soil shocks the plant unnecessarily.
Your goal is simply to open up the root structure so new roots can grow outward instead of continuing to circle.
Trim away any roots that look brown, mushy, or smell bad.
Healthy roots feel firm and appear light-colored. Use clean, sharp scissors to make neat cuts rather than tearing.
After trimming, the root ball might look smaller, which is perfectly fine. Take your time with this step, especially if you’re working in Florida’s warm spring weather.
Set up in a shaded spot if you’re outside, or work indoors where your plant won’t dry out while you’re handling it.
5. Set The Height
Proper planting depth keeps your peace lily stable and healthy in its new Florida home. Your plant should sit at the same level it was growing before, with the base of the stems just below the pot’s rim.
Planting too deep can cause stem rot, while planting too high leaves roots exposed and vulnerable. Start by adding a few inches of fresh potting mix to the bottom of your new container.
How much you add depends on the size of your root ball and the depth of the new pot. The goal is to position the plant so there’s about an inch of space between the soil surface and the pot’s rim.
Place your peace lily in the center of the pot and hold it at the height you think looks right. Step back and check from different angles.
The plant should look balanced, not leaning to one side or sitting awkwardly high or low. That one-inch gap between soil and rim serves an important purpose in Florida’s climate.
It creates a reservoir that catches water when you irrigate, preventing runoff and giving moisture time to soak into the soil. Without this space, water runs right over the sides and makes a mess on your floor or furniture.
If the plant sits too low, remove it and add more soil to the bottom. If it’s too high, scoop some out.
Getting this right before you fill in around the roots saves you from starting over later. Hold the plant steady at the correct height with one hand while you work.
Check that the plant stands straight when you let go. A crooked peace lily looks odd and might indicate the root ball isn’t sitting flat on the soil base.
Adjust as needed until everything looks level and centered in the new pot.
6. Fill And Firm
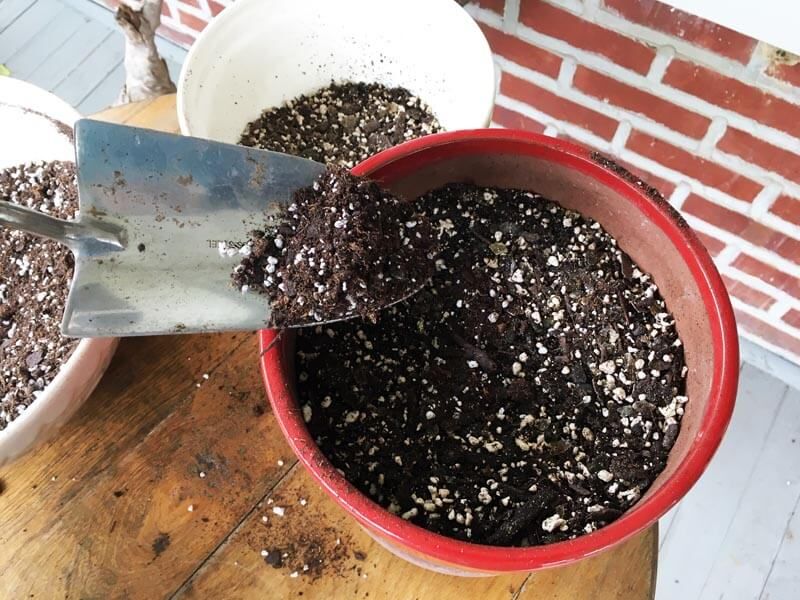
With your peace lily positioned perfectly, it’s time to fill the empty space around the roots with fresh soil. Add potting mix gradually, working it in around all sides of the root ball.
Pour a few handfuls at a time rather than dumping it all at once, which helps prevent air pockets from forming in your Florida plant’s new home. Use your fingers to gently push soil into gaps between the roots and the pot walls.
You want good contact between roots and soil, but you’re not packing it down like concrete. Think of it as tucking the roots into bed rather than burying them under a heavy blanket.
Fill the pot until the soil level reaches the base of the stems, leaving that important one-inch space below the rim. The soil should cover all visible roots without piling up against the stems themselves.
Exposed stems can rot in Florida’s humidity if they stay constantly moist. Tap the pot gently on your work surface a few times.
This settles the soil naturally and reveals any low spots that need more mix. Add soil to these areas until the surface looks even all the way around the plant.
Press down lightly with your fingertips across the entire soil surface. The soil should feel firm but not hard.
If your finger sinks in deeply, add a bit more mix and press again. If the soil feels rock-solid, you’ve compressed it too much and should loosen it up a little.
Some soil will settle after the first watering, which is completely normal. You can always add a thin layer on top later if needed.
Right now, focus on creating a stable base that supports your peace lily while allowing water and air to move through freely in your Florida home’s conditions.
7. Water And Settle
Your peace lily needs a thorough drink right after repotting to help it recover from the stress and settle into its new Florida home. Water slowly and evenly across the entire soil surface, not just in one spot.
Pour until you see water draining from the holes at the bottom, which tells you the soil is saturated all the way through. This initial watering serves several purposes beyond just hydration.
It helps eliminate air pockets in the soil, bringing roots into close contact with the potting mix. It also activates any nutrients in the fresh soil, making them available to your plant right away.
Let excess water drain completely before putting the pot back in its decorative saucer or on its usual surface. Standing water at the bottom can cause the same problems you were trying to avoid by repotting in the first place.
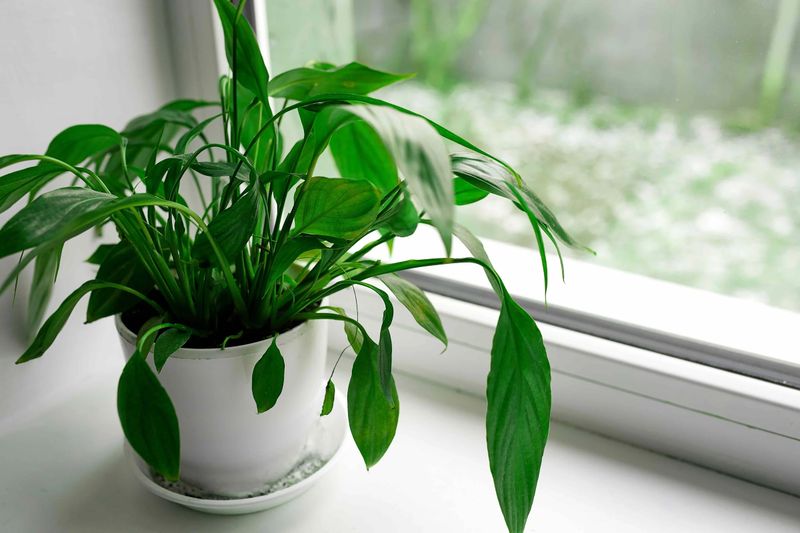
Empty the saucer after about fifteen minutes if water has collected there. Your peace lily might look a little droopy for a few days after repotting, which is perfectly normal.
The plant is adjusting to its new environment and recovering from having its roots disturbed. Keep it in a spot with bright, indirect light and avoid direct Florida sunshine, which can stress it further during this transition period.
Hold off on fertilizing for at least a month after repotting. The fresh potting soil contains enough nutrients to support your plant while it settles in.
Adding fertilizer too soon can overwhelm roots that are still recovering and adapting to their new space. Check the soil moisture every few days by sticking your finger an inch deep into the mix.
Water again when the top inch feels dry. Your peace lily will tell you if it needs water by drooping slightly, and it perks right back up within hours of drinking.
By summer, your refreshed plant should be growing vigorously in its spacious new Florida home.