How To Propagate Rosemary From Cuttings In North Carolina Step By Step
Rosemary is one of those plants that thrives in North Carolina once it gets established, but buying new ones every season adds up fast.
The good news is that rosemary is surprisingly easy to multiply at home, and once you get the hang of it, a single healthy plant can produce enough cuttings to fill your garden beds, supply your kitchen, and still have extras to share with neighbors.
North Carolina’s climate actually works in your favor here. The warm springs and long growing season give cuttings plenty of time to root and grow strong before temperatures shift.
You do not need a greenhouse, special equipment, or any real gardening experience to pull this off successfully. The process comes down to knowing which stems to cut, how to prepare them, and what conditions help roots develop fastest.
Whether you are expanding an existing herb garden or starting fresh, this step by step walkthrough covers everything you need to grow thriving rosemary plants straight from cuttings right in your own yard.
1. Take Cuttings During Warm Active Growth

Timing matters more than most gardeners realize, and in North Carolina, getting this first step right sets the entire propagation process up for success.
Rosemary roots best when the plant is actively pushing out new growth, which typically happens from late spring through early summer.
During this window, the stems are flexible, full of energy, and ready to form roots quickly when given the right conditions.
Softwood or semi-softwood cuttings taken in May through July tend to perform the best in North Carolina’s warm, humid climate. Avoid taking cuttings during the hottest part of summer when the plant may be stressed from heat.
Stressed stems root much more slowly and are more likely to struggle before they ever get started.
Early morning is the best time to snip cuttings because the plant is well-hydrated from the overnight hours. Hydrated stems stay fresh longer and have a higher success rate overall.
If you miss the morning window, keep your cuttings in a small cup of water until you are ready to plant them. Getting the timing right in North Carolina means working with the seasons rather than against them, and rosemary will reward that patience generously.
2. Choose Healthy Non-Flowering Stems
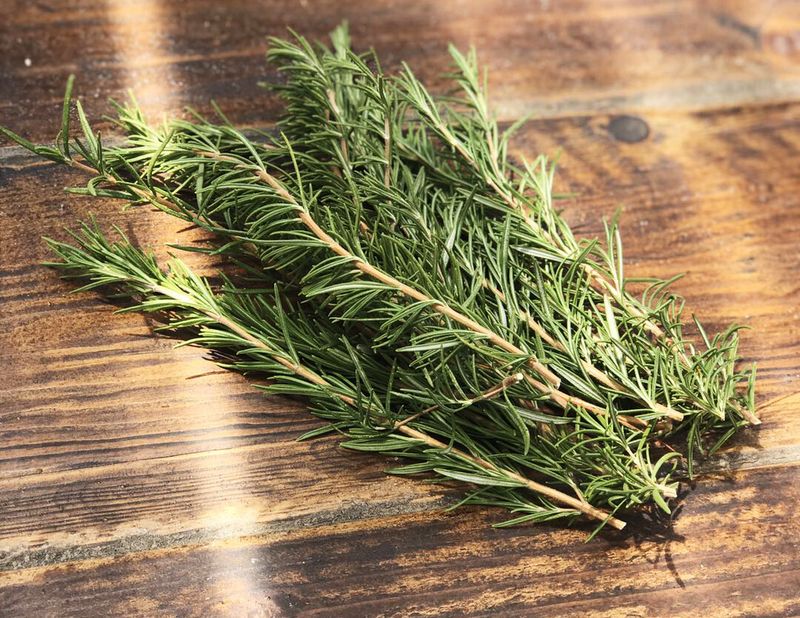
Not every stem on a rosemary plant is a good candidate for propagation, and knowing which ones to pick makes a huge difference in your success rate. The best cuttings come from stems that are green, flexible, and free of any flower buds.
When a stem is blooming, the plant directs most of its energy into producing seeds rather than building roots, which slows down the rooting process significantly.
Look for new growth near the tips of the plant, where the stems are still a bright, fresh green color. Avoid any stems that feel woody, stiff, or show signs of stress like yellowing or brown patches.
Healthy stems snap cleanly rather than bending without breaking, which is a good sign that they are in the right stage for propagation.
In North Carolina gardens, rosemary plants often produce plenty of new growth throughout the warm months, so you will have plenty of options to choose from. Take a few extra cuttings just in case some do not root as expected.
Having backups is always a smart move, especially for a beginner. Picking the strongest, healthiest stems from the start gives your cuttings the best possible foundation for developing into full, thriving rosemary plants you can enjoy for years to come.
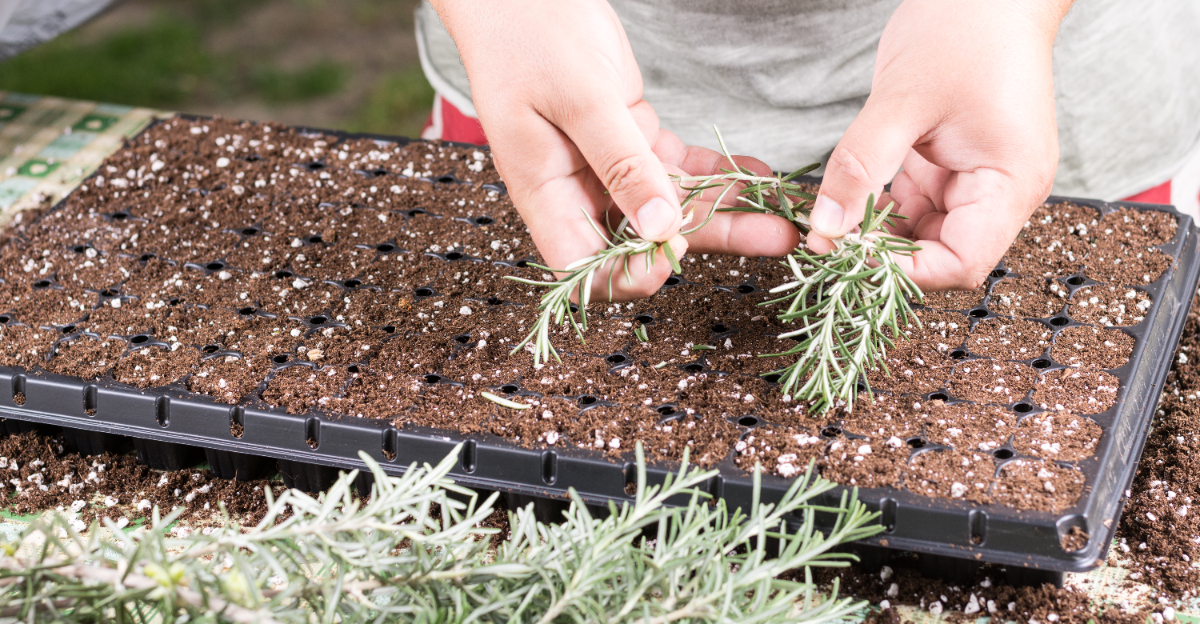
3. Cut 4 To 6 Inch Stem Pieces
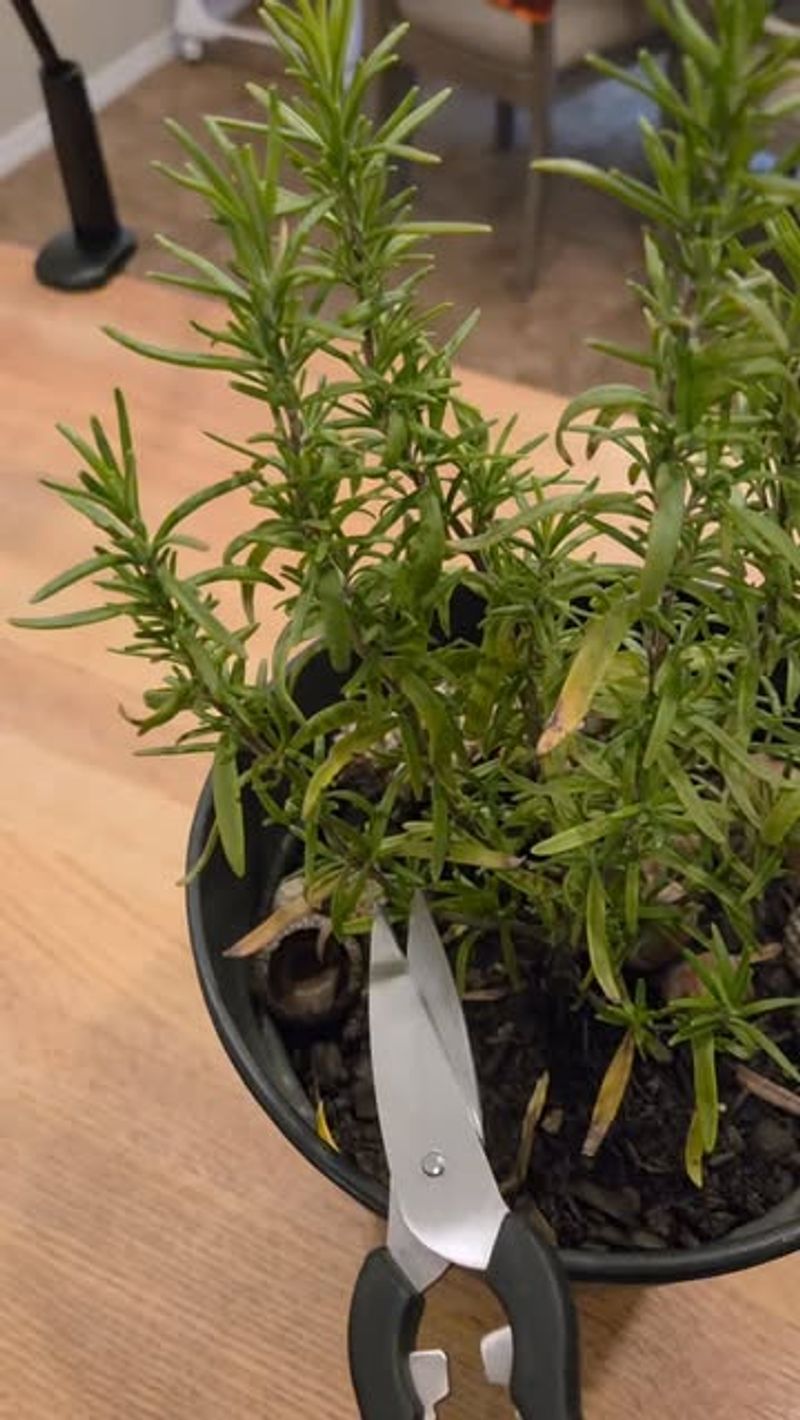
Once you have selected your stems, the next step is making a clean, precise cut that gives each cutting the best chance of rooting successfully.
Aim for pieces that are between four and six inches long, cutting just below a leaf node where the plant’s rooting hormones are naturally concentrated.
A sharp, clean pair of scissors or pruning shears makes all the difference here, so wipe your blades with rubbing alcohol before you start.
A clean cut heals faster and reduces the risk of bacterial issues that can prevent rooting. Jagged or crushed cuts leave the stem vulnerable and slow down the entire process.
Always cut at a slight angle to increase the surface area of the stem that will be in contact with the rooting mix.
Four to six inches is the sweet spot because shorter cuttings do not have enough stored energy to develop roots, while longer ones can dry out before roots form.
North Carolina’s warm climate helps cuttings stay active and growing, but proper length still plays a big role in your results.
After cutting, place each stem immediately into a container of water or wrap them loosely in a damp paper towel if you are not planting right away. Working quickly keeps the stems fresh and ready for the next steps in the process.
4. Strip The Lower Leaves Carefully
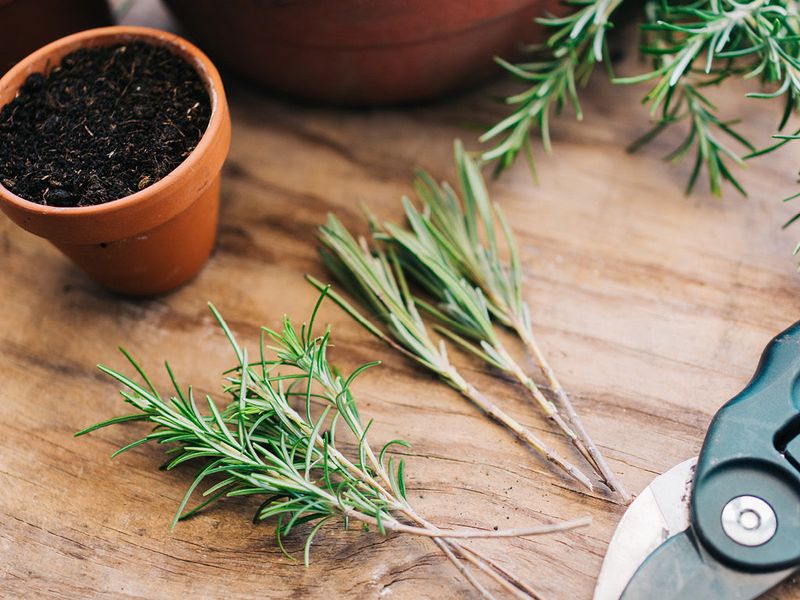
Stripping the lower leaves is one of those small steps that has a surprisingly big impact on your success. Any foliage left below the soil line will rot once it is buried, and that rotting can spread to the stem itself, ruining an otherwise healthy cutting.
Remove leaves from the bottom one to two inches of each stem, leaving only the upper foliage intact to continue photosynthesis.
Use your fingers to gently pinch and slide the leaves downward off the stem, or use clean scissors if the leaves are stubborn. Work carefully so you do not accidentally strip too much or damage the bark of the stem.
The goal is to expose a clean section of stem that can make direct contact with the rooting mix without any organic material in the way.
Gardeners in North Carolina deal with humidity levels that can speed up rot if any leaves are left underground, so this step is especially important in this region. Even a small piece of leaf left on the buried portion of the stem can create problems.
Once the lower section is clean and bare, your cutting is ready for the next stage. Taking a few extra seconds to do this step properly will save you from losing cuttings later and keep your propagation batch moving in the right direction from the very start.
5. Use A Well-Draining Rooting Mix
Rosemary comes from the dry, rocky hillsides of the Mediterranean region, so it has absolutely no tolerance for soggy roots.
Choosing the right rooting mix is one of the most critical decisions you will make in this entire process, especially in North Carolina where summer humidity can already create challenging moisture conditions.
A standard potting mix on its own holds too much water for rosemary cuttings to thrive. The best approach is to blend regular potting mix with extra perlite or coarse sand at roughly a fifty-fifty ratio.
This combination drains quickly, allows air to reach the developing roots, and prevents the stem from sitting in moisture for too long.
You can also use a dedicated seed-starting mix combined with perlite for an even lighter, airier texture that rosemary loves.
Fill small individual pots or a propagation tray with your mix before you insert the cuttings, and water it lightly so it is just barely moist before planting. A mix that is too wet from the start puts cuttings at risk immediately.
North Carolina gardeners should also consider placing a thin layer of sand at the top of the pot to help wick away surface moisture near the stem. Getting the soil composition right from day one creates the kind of environment where rosemary roots thrive and grow with confidence.
6. Dip In Rooting Hormone For Better Results

Rooting hormone is not required to propagate rosemary successfully, but it can noticeably improve your results, especially when working with semi-woody stems that take longer to develop roots on their own.
The hormone contains synthetic auxins that mimic the natural chemicals plants produce to trigger root growth, giving your cuttings a head start in the process. For beginners in North Carolina, it is a smart and affordable tool to have on hand.
Rooting hormone comes in powder, gel, and liquid forms, all of which work well for rosemary. Powder is the most common and easiest to use.
Simply dip the bottom inch of the stripped stem into the powder, tap off any excess, and plant the cutting immediately into your rooting mix.
One important tip is to never dip your cutting directly into the original container of rooting hormone, since this can contaminate the entire supply. Instead, shake a small amount onto a separate piece of paper or into a disposable cup and dip from there.
Discard whatever you do not use. In North Carolina’s warm and active growing season, rosemary cuttings treated with rooting hormone often begin showing signs of root development noticeably faster than untreated ones.
It is a small step that takes only seconds but can make a meaningful difference in how many of your cuttings successfully root and grow into healthy plants.
7. Keep Cuttings In Bright Indirect Light

Light is essential for keeping your cuttings alive and photosynthesizing while roots develop, but too much direct sun at this early stage can work against you.
Before roots form, the cutting cannot absorb water from the soil the way a rooted plant can, so it is much more vulnerable to drying out.
Placing cuttings in harsh direct sunlight, especially during a North Carolina afternoon, can cause them to wilt and struggle before they ever get going.
Bright, indirect light is the sweet spot during propagation. A spot near a window that gets morning sun but is shaded from the intense afternoon rays works perfectly.
A covered porch or a spot under a shade cloth outdoors can also provide ideal conditions during the warmer months in North Carolina.
If you are propagating indoors, a south or east-facing windowsill with a sheer curtain is a great option that provides plenty of brightness without the risk of scorching. Grow lights set a few inches above the cuttings on a timer can also work well if natural light is limited.
Keep a close eye on your cuttings during the first week, since this is when they are most vulnerable. If you notice any wilting, move them to a slightly shadier spot and mist the leaves lightly.
Once roots begin to form, the cuttings will become noticeably more resilient and able to handle more light.
8. Keep Soil Lightly Moist But Never Soggy
Watering rosemary cuttings is a balancing act that trips up even experienced gardeners sometimes. Too little water and the stems dry out before roots can form, but too much water creates the soggy conditions that rosemary absolutely cannot handle.
The goal is to keep the rooting mix feeling slightly damp, like a wrung-out sponge, throughout the entire rooting period.
Check the moisture level every couple of days by pressing your finger about half an inch into the mix. If it feels dry, water lightly until moisture just reaches the bottom of the pot.
If it still feels damp, wait another day before checking again. Using a small watering can with a gentle rose head helps you water slowly and evenly without disturbing the cuttings.
North Carolina summers can be warm and humid, which means indoor cuttings may not need watering as frequently as you might expect because the air itself holds more moisture. Outdoor cuttings in shaded spots may dry out a bit faster depending on wind and temperature.
Overwatering is genuinely the most common reason rosemary cuttings fail, so when in doubt, hold off for a day and check again before adding more water.
Developing a consistent checking routine rather than watering on a fixed schedule is the smartest approach and will keep your cuttings healthy all the way through to rooting.
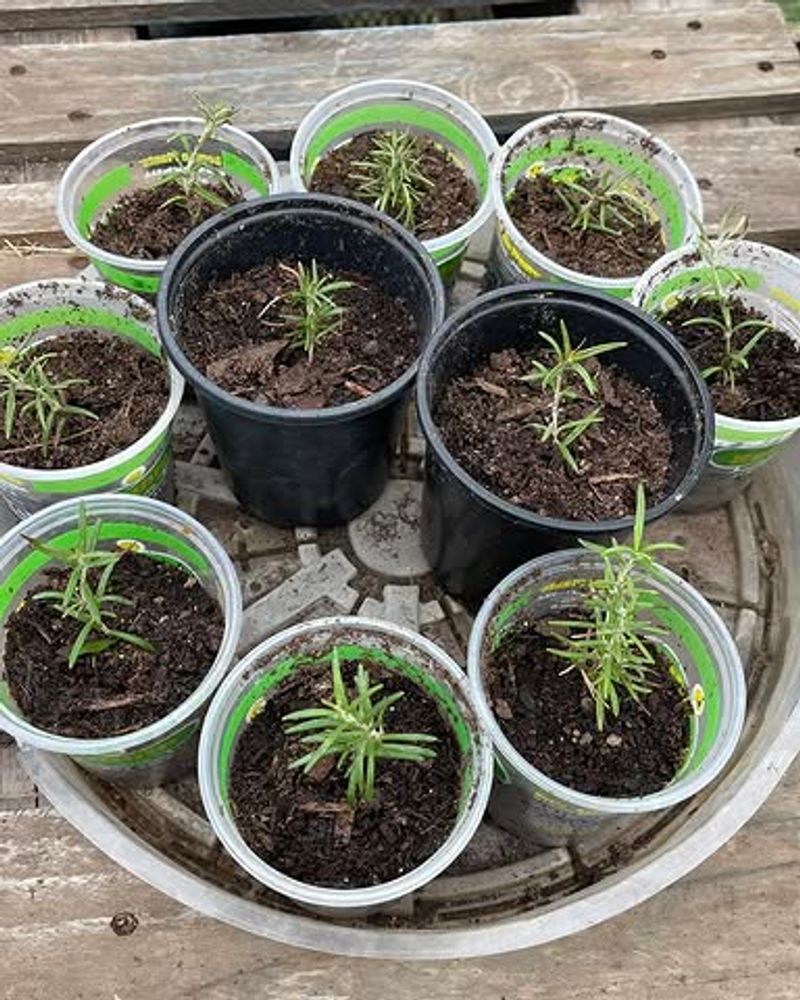
9. Check For Roots After Three To Six Weeks
Patience is genuinely one of the most important ingredients in rosemary propagation, and the waiting period between planting and rooting can feel surprisingly long if you are not prepared for it.
Rosemary cuttings typically take three to six weeks to develop a strong enough root system to be visible or detectable, though North Carolina’s warm growing season can sometimes speed things up a little.
The easiest way to check for roots without disturbing the cutting is to give it a very gentle tug. If you feel resistance, that means roots have anchored into the mix and the cutting is officially rooted.
If it slides out easily, give it more time and replant it gently if it came loose. Avoid checking too frequently since disturbing the cutting repeatedly can slow down root development.
Another good sign that roots are forming is when you notice new leaf growth appearing at the tips of the cutting. New top growth almost always means root activity is happening below the surface, since the plant needs roots to support that kind of energy output.
Some gardeners use clear plastic pots during propagation so they can actually see roots forming along the sides without disturbing the cutting at all, which is a clever trick worth trying.
Once you feel solid resistance during the tug test and see new growth appearing, you are ready for the final and most exciting step of the whole process.
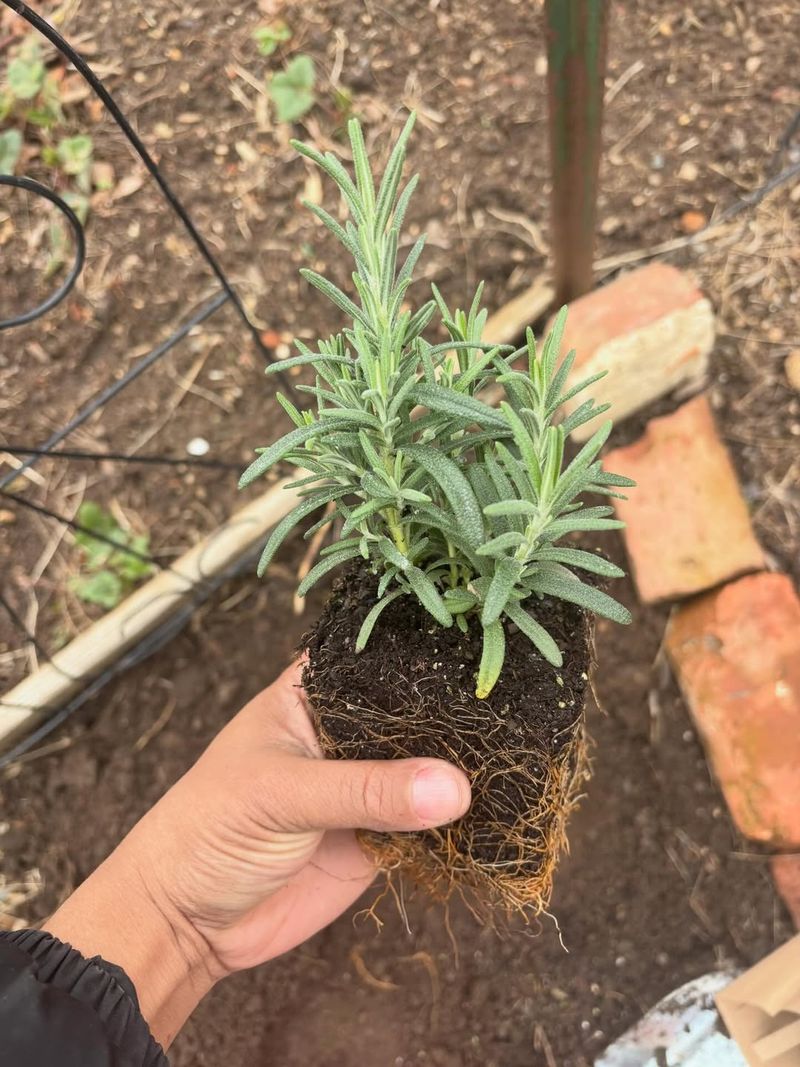
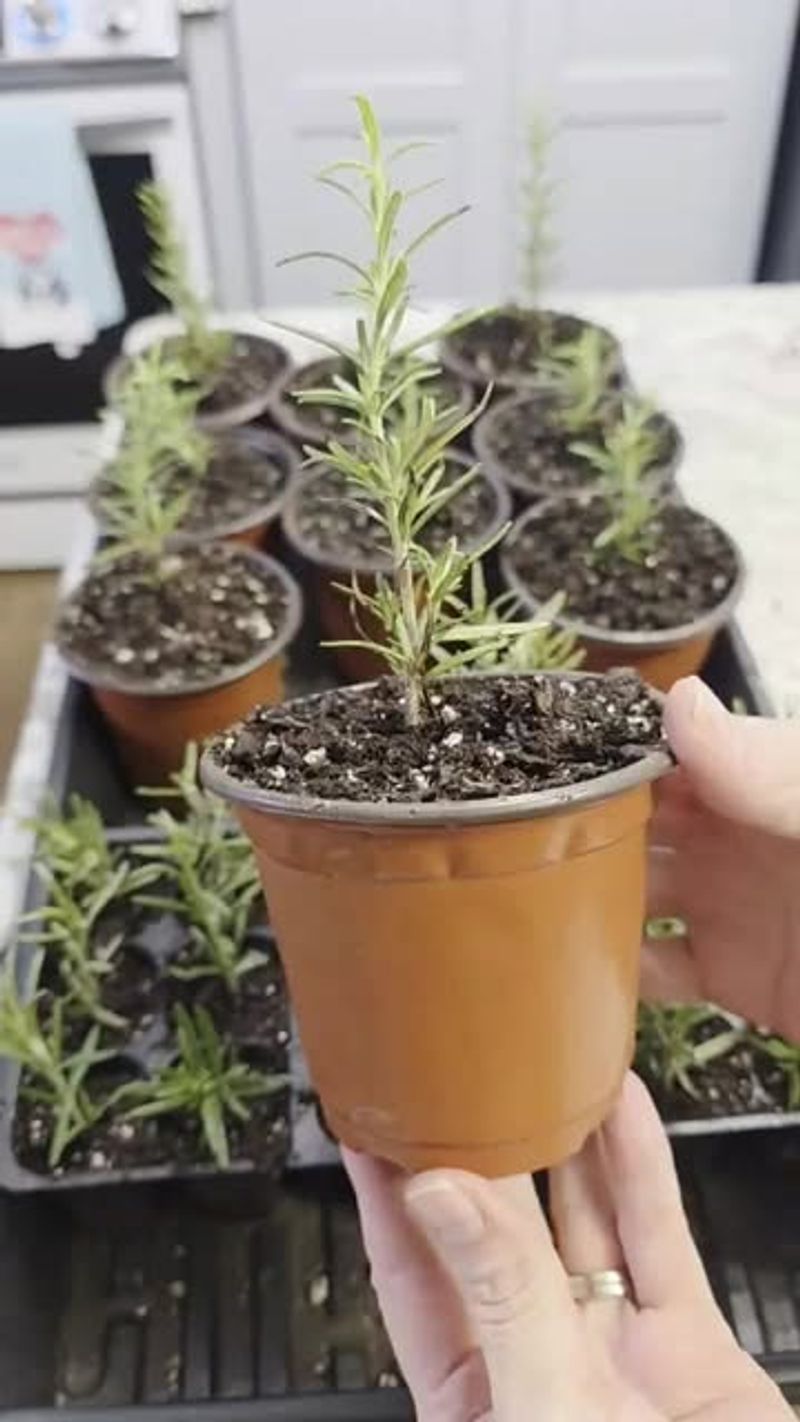
10. Transplant After Strong Roots Have Formed
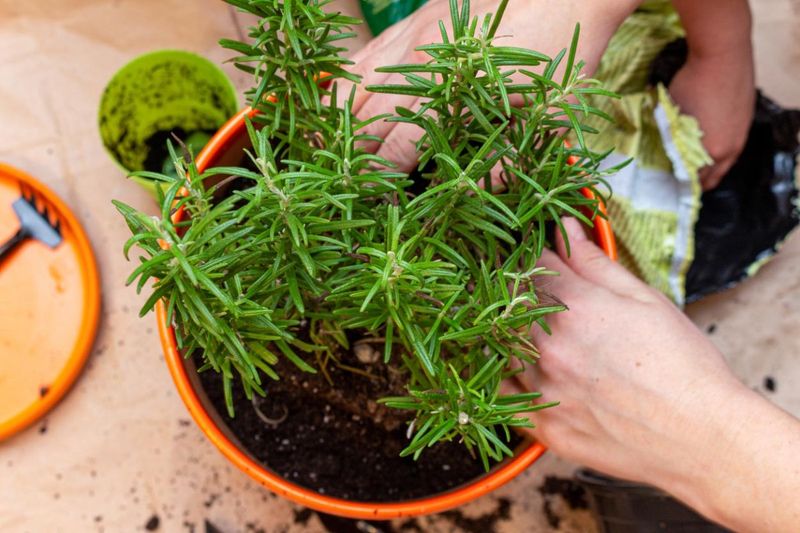
Reaching this final step means your hard work has paid off and you now have rooted rosemary plants ready to grow into full-sized herbs. Transplanting at the right time is key, since moving a cutting too early before roots are truly strong can set it back significantly.
Wait until the roots are at least an inch long and the cutting has produced noticeable new leaf growth before making the move.
For potted plants, move each rooted cutting into its own container filled with well-draining potting mix. Choose a pot that is only slightly larger than the root ball, since oversized containers hold too much moisture and can cause problems for young rosemary plants.
If you plan to plant directly in the garden, choose a spot in your North Carolina yard that gets at least six hours of full sun daily and has excellent drainage.
North Carolina’s climate suits rosemary beautifully once it is established, but young transplants need a little extra protection during their first few weeks outside.
Avoid planting during a heat wave and give new transplants a thorough watering right after planting to help the roots settle into their new home.
Water consistently for the first two weeks, then gradually reduce frequency as the plant establishes itself.
Within one full growing season, your propagated rosemary will be lush, fragrant, and ready to harvest, proving that a few simple steps and a little North Carolina sunshine can go a very long way.