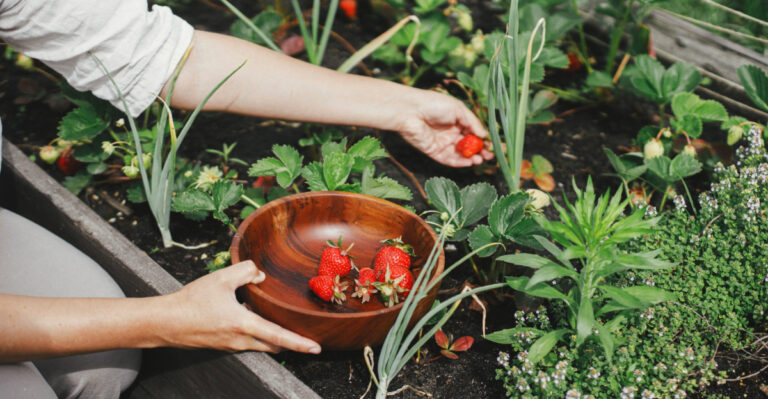
Smart Tricks California Gardeners Should Use To Prevent Weeds In Gravel
Gravel can make a California yard look clean, bright, and low care, but weeds have a funny way of crashing the party. One week the path looks perfect, and the next week little green shoots pop up like they paid rent.
Warm weather, windblown seeds, and quick winter rain can all help weeds settle into gravel faster than many gardeners expect. The problem is not always the gravel itself.
It is often what sits under it, how deep the layer is, and how long tiny sprouts are left alone. Once weeds get comfy, they become much harder to pull.
A few smart habits can save a lot of bending and grumbling later. California gardeners do not need to spend every weekend picking at gravel.
With the right moves, those rocky spaces can stay neat, sharp, and just a little smug about it.
1. Remove Old Weed Roots Before They Come Back

Most people pull the top of a weed and think the job is done. But the real problem is underground.
Many common weeds in our state grow deep, stubborn roots that stay in the soil long after the green part is gone.
If you only remove what you can see, the root will simply sprout again within days. That is why clearing the area properly before laying or refreshing gravel is so important.
Use a hand trowel or a weeding fork to dig down and pull the full root out.
Nutgrass and bindweed are two of the worst offenders in our region. Both spread through underground systems that break apart easily, making partial removal almost pointless.
You need to get every piece out.
After clearing, rake the soil smooth and let it dry out for a day or two before adding any material on top. Dry soil makes it easier to spot any roots you may have missed.
Taking this extra time at the start saves you from constant pulling later.
Think of root removal as the foundation of your entire weed prevention plan. Skipping it means you are building on top of the problem instead of solving it.
Start clean and your gravel area will stay cleaner far longer.
2. Use Landscape Fabric The Right Way

Landscape fabric gets a bad reputation, mostly because people use it the wrong way. When installed correctly, it is one of the most effective barriers you can put between your soil and your gravel.
The key is choosing the right type and installing it with care.
Woven landscape fabric works better than plastic sheeting for most garden areas. It allows water and air to pass through while blocking sunlight from reaching weed seeds below.
Plastic sheeting traps moisture and can cause problems for nearby plants over time.
Before laying the fabric, remove all existing weeds and smooth the soil surface. Overlap each strip of fabric by at least six inches so there are no gaps for weeds to sneak through.
Secure the edges with landscape staples every foot or so.
One mistake many gardeners make is cutting too many holes in the fabric for plants. Every cut is a potential entry point for weeds.
Your California Garden Changes Every Week. Your Plan Should Too.
Gardening in California changes quickly throughout the season. Every Friday you’ll receive a simple weekly plan showing exactly what to plant, prune, fertilize, harvest, and protect so you never miss the right timing.
Keep cuts small and tight around plant stems.
Over time, soil and debris will collect on top of the fabric. This creates a thin growing layer that weeds can use.
Rake your gravel regularly to prevent buildup. With proper care, quality landscape fabric can last for many years and save you a lot of weeding work.
3. Make The Gravel Layer Deep Enough To Block Light

A thin layer of gravel looks nice but does very little to stop weeds. Weed seeds need light to sprout, and if your gravel layer is too shallow, enough light still filters through to get them going.
Depth is everything when it comes to light blocking.
Most experts recommend a gravel layer that is at least three inches deep for effective weed suppression. In hotter parts of our state, going up to four inches can be even more helpful.
The thicker the layer, the harder it is for young seedlings to push through and reach sunlight.
When you first install gravel, it might look like you have plenty down. But gravel settles over time, especially after rain and foot traffic.
What starts as three inches can become two inches within a season.
Check your gravel depth every spring before the warm weather hits. Use a ruler or a stick to poke down and measure.
Add more gravel wherever the layer has thinned out.
Also, keep in mind that smaller gravel particles settle faster and compact more tightly. Coarser gravel holds its depth better over time.
Matching your gravel type to your maintenance schedule will help you keep that protective layer working all year long without constant topping up.
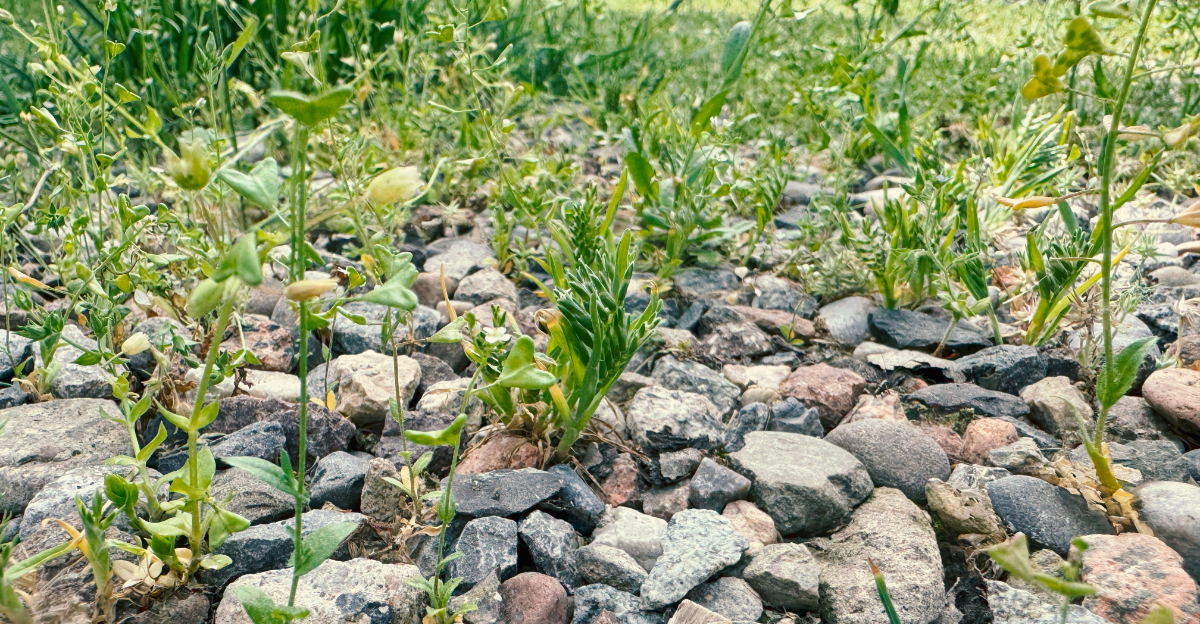
4. Choose Larger Gravel That Doesn’t Trap As Much Soil

Not all gravel is equal when it comes to keeping weeds out. The size and shape of your gravel actually plays a big role in how much soil gets trapped between the stones.
And trapped soil is exactly what weed seeds need to take root.
Fine gravel and decomposed granite look attractive, but their small particles create tight spaces where windblown soil and organic matter collect easily. Over time, a thin layer of growing medium forms right on top, and weeds move right in.
Larger gravel, like river rock or one-and-a-half-inch crushed stone, has bigger gaps between pieces. Soil and debris tend to fall through rather than sitting on top.
This makes it much harder for weed seeds to find a stable place to sprout.
In our state, where dry winds carry a lot of dust and fine particles, this detail matters more than most gardeners realize. Choosing the right gravel size from the start can cut your weeding time significantly.
Rounded river rock is also easier to rake clean, which helps remove any debris before it builds up. Angular crushed stone locks together more tightly, which can limit movement but also holds debris.
Think about your maintenance habits when choosing a gravel type, and pick one that fits how much time you want to spend keeping it clean.
5. Refresh Thin Gravel Spots Before Summer Heat

Spring is the best time to walk your gravel areas and look for spots where the layer has worn down.
Thin patches are like open invitations for weeds, especially as temperatures start to climb and the growing season kicks into high gear.
In our state, summer heat arrives fast and weeds grow aggressively once warm weather sets in. If you wait until summer to deal with bare spots, you will already be fighting a losing battle.
Getting ahead of it in late winter or early spring makes a big difference.
Grab a bag or two of matching gravel and fill in any areas where you can see the landscape fabric or bare soil beneath. Rake the new gravel so it blends evenly with the existing layer.
Aim to restore the depth to at least three inches wherever it has dropped.
Pay extra attention to high-traffic areas like pathways and spots near garden furniture. These areas lose gravel faster due to foot traffic and movement.
They need refreshing more often than low-traffic zones.
Also check around the edges of your gravel beds where material tends to scatter onto lawns or paving.
Pulling it back and topping up those borders keeps the whole area looking neat and functioning well as a weed barrier through the hottest months of the year.
6. Edge Gravel Beds So Weed Seeds Don’t Creep In

One of the sneakiest ways weeds get into gravel is through the edges. Grass runners, groundcovers, and soil-borne weed seeds all move in from the sides, especially where gravel meets lawn or garden beds.
A solid edge is your first line of defense. Metal edging is one of the best options for our climate. It holds its shape in heat, resists rust when coated properly, and creates a clean barrier that is very hard for grass and weeds to cross.
Plastic edging works too, though it can warp in extreme heat over time. Install edging so it sits at least two to three inches deep in the soil. This prevents grass roots from tunneling underneath.
The top of the edging should sit just above the gravel surface to keep material from spilling over.
Check your edging every few months, especially after heavy rain or ground movement. Frost in northern regions can shift edging out of place, and even in warmer parts of the state, soil settling can cause gaps to form.
Another option is using a deep border of mulch or a row of larger stones along the edge to create a physical buffer.
The goal is to break the connection between your gravel bed and the surrounding planting areas.
A well-defined edge is a simple but powerful tool that keeps your gravel zone contained and much easier to manage long term.
7. Watch Cracks, Edges, And Walkway Seams First

Weeds are opportunists. They do not need much space to get started, and the first places they show up are almost always the same: cracks between pavers, the seams where gravel meets concrete, and the tight edges along fences or walls.
These spots are easy to overlook when you are doing a quick visual check of your garden. But they are exactly where weed seeds land, stay sheltered from wind, and find just enough moisture to sprout.
Catching them early in these spots saves a lot of effort later.
Make it a habit to check these areas every week or two during the growing season. A quick walk along your paths and edges only takes a few minutes.
Catching weeds when they are tiny means you can pull them out before roots get deep or seeds form.
For cracks in paving, a narrow weeding tool or even an old kitchen knife works well to scrape out small sprouts. You can also apply a thin layer of polymeric sand to paver joints to seal them off from future growth.
In our warm climate, weeds in these spots can go from sprout to seed producer in just a few weeks. That speed is what makes regular checking so important.
The earlier you catch them, the less chance they have to spread seeds into the rest of your gravel area.
8. Don’t Let One Weed Go To Seed

There is an old saying among gardeners: one year of seeds means seven years of weeds. It sounds dramatic, but it is not far from the truth.
A single weed that goes to seed can drop hundreds of new seeds right into your gravel.
Dandelions, spurge, and oxalis are all common in our state and are incredibly productive seed makers.
If you spot any of these and let them flower and go to seed, you are basically replanting your weed problem all over again. The cycle just keeps going.
The rule is simple: pull any weed you see before it flowers. If it has already flowered, pull it carefully without shaking the seed head.
Place it directly into a bag rather than tossing it on the ground nearby.
Do not compost weeds that have gone to seed unless your compost gets very hot. Most home compost piles do not reach the temperature needed to destroy weed seeds, so they can survive and spread when you use the compost later.
Even one or two weeds that escape your attention each season can multiply into dozens the following year.
Staying consistent is what makes the difference between a gravel area that looks great and one that is constantly fighting back. Check often, pull early, and never let a single weed win the race to seed.