One Hidden Culprit Has Wisconsin Gardeners Digging Up Their Iris Beds
Your irises look fine in June. Healthy fans, strong color, not a single warning sign. Then July arrives, and something shifts underground where you can’t see it.
Something has been working its way through the leaf tissue for weeks. It moves steadily toward the heart of the plant, almost like it knows exactly where it’s headed.
By the time you notice yellowing streaks or a stem that flops for no reason, whatever caused it has already finished its quiet business below the soil line. Wisconsin gardens seem especially familiar with this feeling.
Whatever it is shows up unannounced, works in silence, and only reveals itself once the plant can no longer hide the signs.
If you’ve ever watched a thriving iris bed change seemingly overnight, this is likely why. And once you understand what’s really happening beneath those leaves, you’ll never look at your iris bed the same way again.
Meet The Tiny Pest Behind This July Ritual

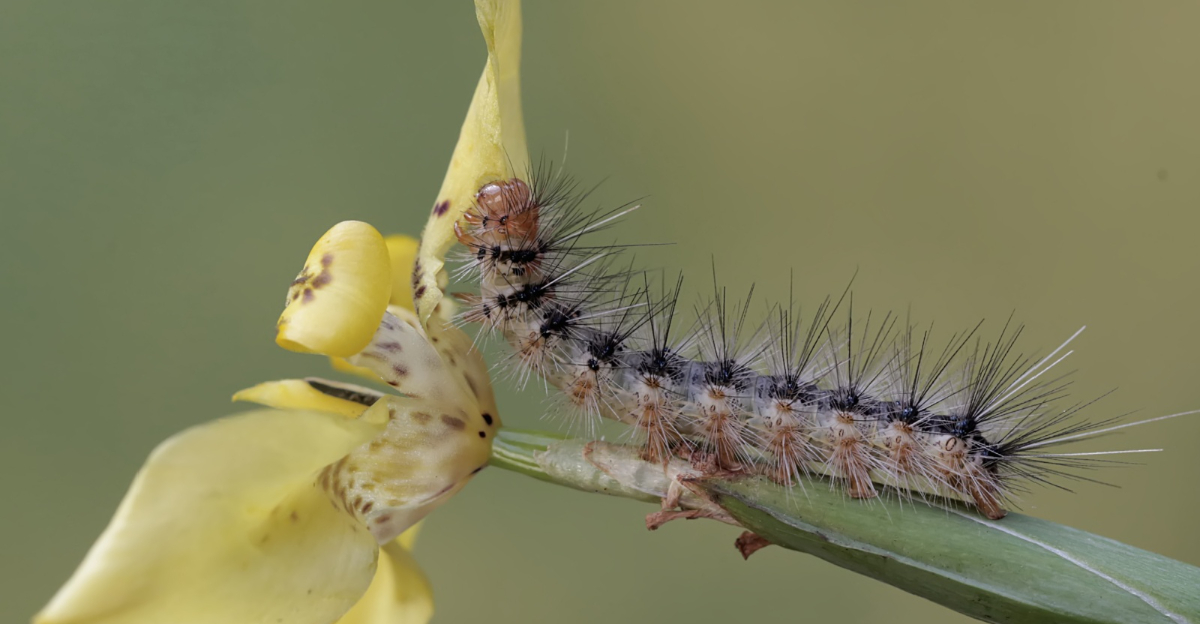
Your iris bed looked perfect in May. Then July arrived, and something changed fast. The iris borer is a moth larva that causes significant damage every summer.
Its scientific name is Macronoctua onusta, but gardeners just call it a serious nuisance. The adult moth lays tiny eggs on old iris leaves every fall. Those eggs make it through winter and hatch in early spring when temperatures warm up.
Newly hatched larvae are so small you can barely spot them. They crawl down leaves and chew right through the leaf tissue to enter the plant.
Once inside, they tunnel downward through the leaf fan toward the rhizome. The journey takes weeks, but the damage builds fast and silently.
By midsummer, the caterpillar reaches the rhizome and starts feeding heavily. At this stage, it can grow up to two inches long and is pink or cream-colored.
Bacterial soft rot often follows the borer inside. That combination can turn firm rhizomes soft and foul-smelling within days.
One borer can seriously damage an entire clump if left unchecked. Neighboring plants are also at risk since moths lay eggs across a wide area.
Wisconsin gardeners commonly encounter this pest each season. Knowing what you’re dealing with is the first step toward managing it each year.
Spotting the borer early gives you a real fighting chance. Stay alert, stay curious, and keep reading to arm yourself with the right knowledge.
How To Spot Iris Borer Damage In The Rhizome

Soft, slimy rhizomes are a red flag you cannot ignore. Something has already been feeding inside for weeks.
The earliest above-ground sign is ragged notching along the leaf edges. Those chew marks appear in spring when larvae first enter the leaves.
Look for water-soaked streaks running down the leaf blades. Those trails show exactly where the borer tunneled through on its way down.
As summer heats up, infested fans begin to yellow and wilt. Pulling on a wilted fan often reveals a mushy base where the larva has been feeding.
Cut open a suspicious rhizome with a clean knife. You may find a fat, pinkish caterpillar curled inside a hollowed-out tunnel.
The smell is another clue. Bacterial rot that follows the borer produces a sharp, unpleasant odor that healthy rhizomes never have.
Soft spots on the surface of a rhizome also signal trouble. Press gently with your finger, and infested areas will feel spongy instead of firm.
Check the base of each leaf fan carefully during your inspection. Frass, which looks like wet sawdust, sometimes collects at the entry point.
Not every damaged rhizome contains a live borer. Sometimes the caterpillar has already moved into the soil to pupate by the time you dig.
Catching the damage early means you can still save part of the clump. Recognizing these signs quickly turns a potential loss into a manageable situation.
Why July Is The Critical Window For Digging

July is not just a good time to act. It is one of the most effective windows for interrupting the borer’s cycle.
By early July, most larvae have reached the rhizome and are feeding at full force. Acting now means catching them before they escape into the soil.
Late July is when mature larvae leave the rhizome and burrow into surrounding soil to pupate. Once they are underground as pupae, you cannot reach them easily.
Those pupae transform into adult moths by late summer. The moths then lay a fresh round of eggs, restarting the whole cycle for next year.
Digging in July interrupts that cycle at its most vulnerable point. You remove the larvae before they get the chance to reproduce.
Waiting until fall means the pest has already completed its mission. The damage is done, the eggs are laid, and your garden pays the price again next spring.
July also gives divided rhizomes enough time to heal before frost. Replanted sections can establish new roots and prepare for a strong spring bloom.
Soil temperatures in July are warm enough to encourage fast healing of cut rhizome surfaces. That recovery speed is a big advantage you do not get in fall.
Think of July as your annual reset button for the iris bed. Miss this window, and you give the borer another full season to spread.
Mark it on your calendar right now. Your irises are counting on you to show up in July.
Steps To Dig Up And Inspect Your Iris Clumps

Grab your garden fork and get ready to do some real detective work. Digging up iris clumps is easier than it sounds.
Start by cutting the leaf fans back to about four to six inches tall. Shorter foliage makes the clumps easier to handle and reduces stress on the plant.
Push your fork into the soil several inches away from the clump edge. Pry upward gently to loosen the root mass without slicing through rhizomes.
Lift the entire clump and set it on a tarp or old newspaper. Shake off excess soil so you can see what you are working with.
Separate the rhizomes by hand or with a clean, sharp knife. Each division should have at least one healthy fan of leaves attached.
Examine every single rhizome closely before deciding what to keep. Look for soft spots, tunnels, foul smells, or visible larvae inside the tissue.
Healthy rhizomes feel firm and look creamy white or light tan when cut. They have no hollow areas and no sign of pest activity.
Set healthy divisions aside in a shaded spot while you finish inspecting. Do not let them sit in direct sun for more than an hour.
Rinse questionable rhizomes with a garden hose to get a clearer look. Sometimes what appears damaged on the outside is actually still viable inside.
Work through the whole bed systematically so nothing gets missed. A thorough inspection now saves you from repeating this process too soon next year.
How To Treat And Discard Infested Rhizomes

Finding a borer inside your rhizome is frustrating, but you are not powerless. You have solid options for handling the mess.
First, remove any visible larvae by hand and drop them into a bucket of soapy water. That stops them from escaping back into your soil.
If only part of a rhizome is damaged, cut away the infected section with a clean blade. Slice back until you reach firm, healthy tissue with no discoloration.
Dust the cut surfaces with powdered sulfur, or consult current extension guidance on diluted bleach solutions for treating cut rhizomes. This step helps prevent bacterial rot from spreading into the healthy portion.
Allow treated rhizomes to dry in the open air for several hours before replanting. A dry, slightly callused surface resists new infection much better than a wet cut.
Rhizomes that are more than half rotted should not be saved. Toss them into a sealed trash bag rather than your compost pile.
Composting infested material risks spreading bacteria and possibly overwintering eggs. Bagged trash is the safest and most responsible disposal method available.
For chemical control, check current local extension recommendations for systemic insecticides labeled for iris borer, applied to the soil in early spring. This targets newly hatched larvae before they enter the leaves.
Spinosad-based sprays are a lower-impact option that many organic gardeners prefer. Apply them to leaf bases in April and May when larvae are still young and vulnerable.
Cleaning up old iris foliage every fall removes egg-laying sites for adult moths. That simple habit can dramatically reduce next season’s borer pressure.
Replant Healthy Divisions For Next Spring’s Bloom

Saving your irises feels incredibly satisfying once the damaged ones are gone. Now comes the rewarding part of this whole process.
Choose a sunny location with well-drained soil for replanting your healthy divisions. Irises need at least six hours of direct sunlight to bloom their best.
Prepare the bed by loosening the soil about ten inches deep. Mix in a low-nitrogen fertilizer to support root development without pushing excessive leafy growth.
Plant each rhizome at a shallow depth, just barely covered by soil. Burying them too deep is one of the most common mistakes new gardeners make.
The top surface of the rhizome should be visible or barely beneath the soil line. Exposure to sunlight actually helps the rhizome stay healthy and firm.
Space divisions about twelve to eighteen inches apart to allow good air circulation. Crowded plantings create conditions where pests and disease spread more easily.
Water the newly planted sections thoroughly right after settling them in. After that first drink, irises prefer drier conditions and rarely need heavy irrigation.
Mulching around the plants helps retain moisture and suppress weeds. Keep mulch away from the rhizome surface itself to prevent rot.
Mark each variety with a label so you remember what blooms where. Come spring, you will be glad you took that extra thirty seconds.
Next April, those healthy rhizomes will push up strong new fans and flower stalks. Fighting the iris borer this July means a spectacular reward is already waiting for you.