How To Get Rid Of Spider Mites On Dusty California Tomato Plants
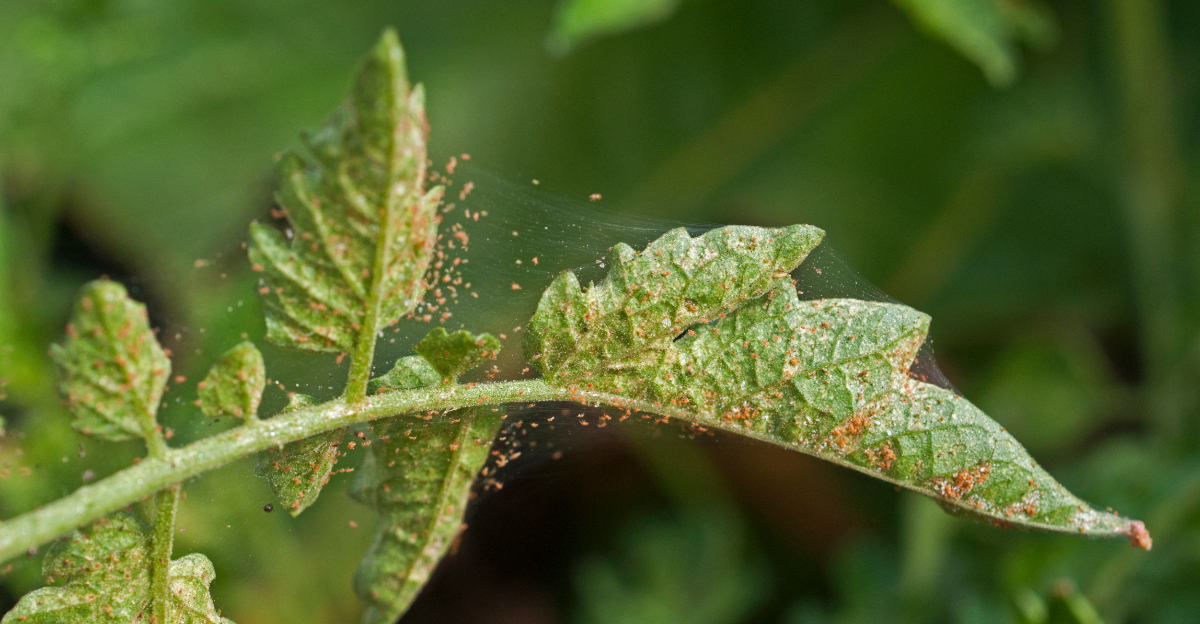
Your tomato plants suddenly look tired, leaves fading, turning patchy, almost like the color drained overnight. Look closer at the stems, and you’ll spot fine, almost invisible threads stretched between the leaves.
California summers, with their dry heat and dusty days, create the perfect setup for this kind of trouble. Gardens starved of rain and soaked in sun become prime ground for something that spreads faster than expected.
One fix rarely solves the whole problem. It usually takes the right timing, a bit of patience, and a few smart moves to turn things around.
Anyone who catches the signs early still has a real shot at saving their harvest before the damage takes hold.
1. Rinse Leaves With A Strong Blast Of Water

Turn on your hose and let the water do the heavy lifting. A strong spray of water is one of the fastest ways to knock spider mites off your tomato plants.
Spider mites cling to leaf surfaces, especially the undersides where they feed and breed. A focused blast disrupts their grip and sends them tumbling to the ground.
Aim the nozzle at a downward angle so water hits the leaf bottoms directly. Few mites manage to climb back up once knocked to the ground.
Do this in the morning so leaves dry before nightfall. Wet foliage left overnight can invite fungal problems you definitely do not want.
Use a nozzle with a jet or strong spray setting for best results. A gentle mist will not cut it when dealing with an active infestation.
Repeat this step every two to three days to keep populations from bouncing back. Consistency is the real key here, not just one big rinse.
Check the undersides of a few leaves after each rinse to see how much progress you’re making. Fewer webs and less movement means the method is working.
A garden hose with adjustable pressure gives you more control than a fixed nozzle. Start firm, but ease up if young leaves start to bruise or tear.
Pairing this method with other treatments makes it even more powerful. Think of the water blast as your opening move in a multi-step plan to restore your garden.
2. Wipe Down Dusty Foliage Before Any Treatment
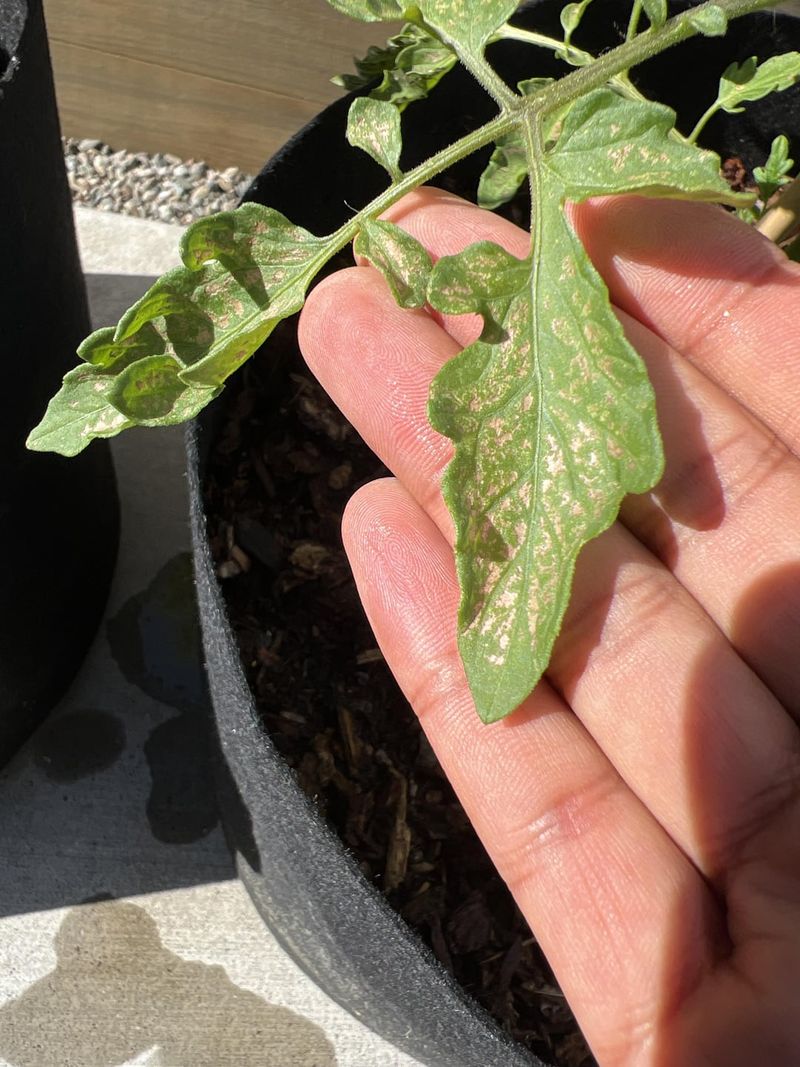
Dust is a spider mite’s best friend, and California gardens get plenty of it. A thick layer of dust on tomato leaves blocks sprays and creates a cozy hideout for mites.
Before applying any treatment, take a damp cloth and gently wipe each leaf. This removes the dusty barrier and exposes the mites to whatever comes next.
Pay special attention to the undersides, where colonies tend to cluster most densely. Skipping this step is like mopping a floor without sweeping first.
Use a soft, lint-free cloth dampened with plain water. Rough materials can scratch leaves, and scratched leaves are more vulnerable to stress and disease.
Work from the base of the plant upward so dislodged dust falls away from treated areas. This keeps contamination moving in one direction and makes your effort count more.
Your California Garden Changes Every Week. Your Plan Should Too.
Gardening in California changes quickly throughout the season. Every Friday you’ll receive a simple weekly plan showing exactly what to plant, prune, fertilize, harvest, and protect so you never miss the right timing.
For large plants, break the job into sections and take your time. Rushing through the wipe-down means missing colonies that will quickly repopulate the whole plant.
Repeat this wipe-down every week or two during dry, dusty stretches, especially if you’re watering with overhead sprinklers. Dust builds back up fast in hot weather, and staying ahead of it keeps every other treatment working at full strength.
Wiping down dusty foliage before any treatment is a step many gardeners skip, but it makes every other method work better. Clean leaves absorb sprays more evenly and give mites fewer places to hide from your next move.
3. Apply Insecticidal Soap To The Undersides Of Leaves
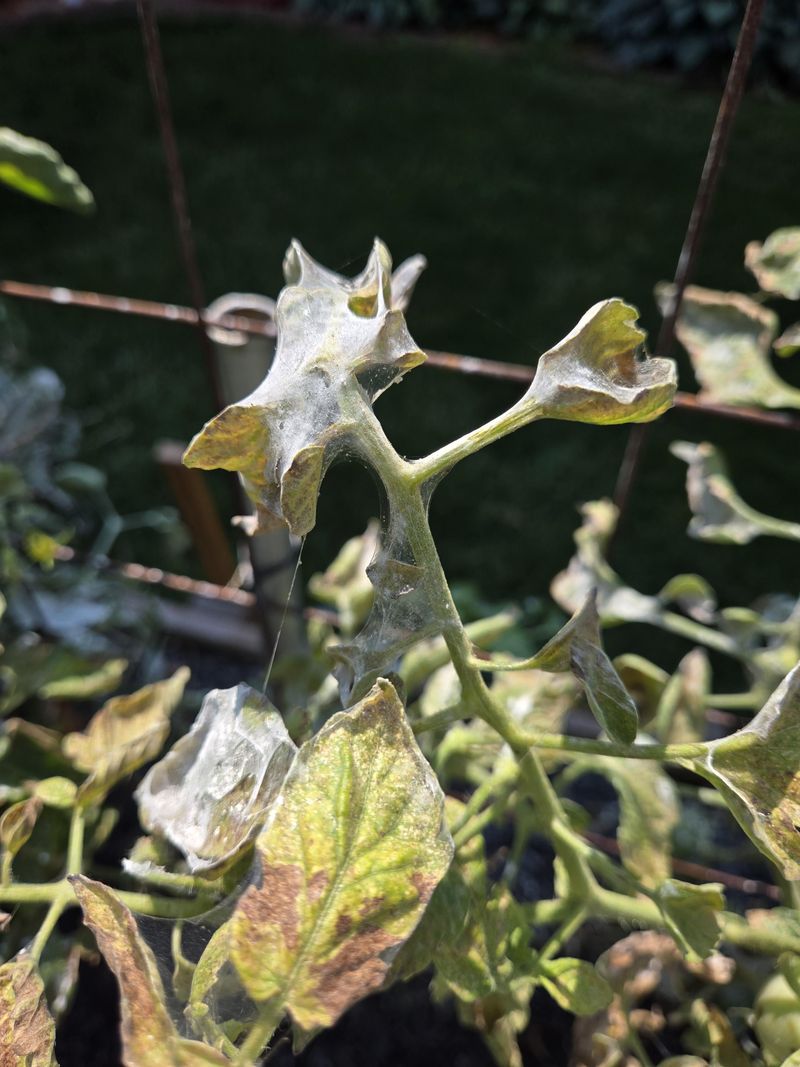
Insecticidal soap is a gardener’s go-to solution against soft-bodied pests. It works by breaking down the outer coating of the mite, causing it to dehydrate quickly.
The key is hitting the undersides of the leaves, where mites live and lay eggs. Spraying only the tops of leaves is a wasted effort that gives mites a free pass.
Mix insecticidal soap concentrate with water according to the label directions. Using too much concentrate can burn your tomato plants, especially in hot California sun.
Apply the solution in the early morning or late afternoon when temperatures are cooler. Spraying in peak heat causes the soap to dry too fast, reducing its contact time with mites.
Make sure every leaf surface gets a thorough, even coat. Thin or patchy coverage leaves colonies intact and allows them to spread back across the plant.
Insecticidal soap breaks down quickly in the environment, making it a safer choice around edible plants. It does not leave harmful residues on your tomatoes, which is a big win.
Test the solution on a single leaf first and wait a day before treating the whole plant. This quick check helps you catch sensitivity issues early, especially on younger or more delicate foliage.
Repeat applications every five to seven days for at least three rounds. One treatment rarely wipes out an entire population, so staying on schedule is what separates success from frustration when battling spider mites on California tomato plants.
4. Introduce Predatory Mites For Natural Control
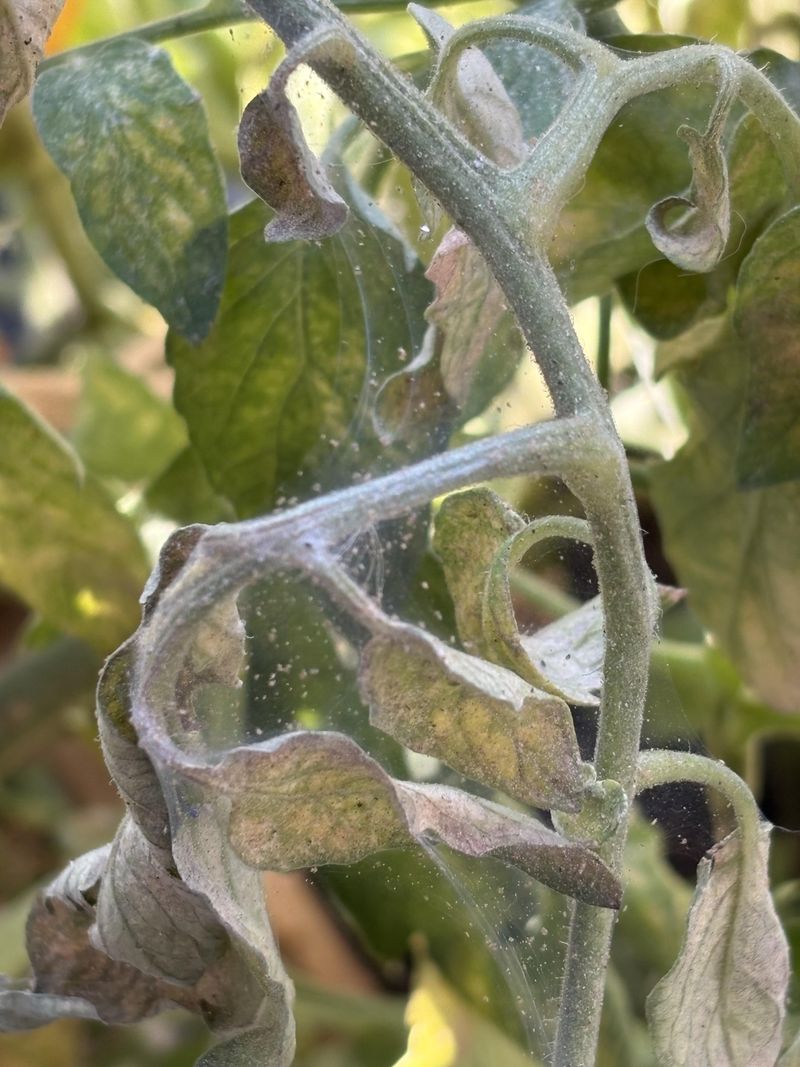
Nature has its own pest control team, and predatory mites are among the best at the job. These beneficial bugs feed on spider mites without harming your plants or produce.
Phytoseiulus persimilis is one of the most popular species used against spider mites. You can order them online or find them at specialty garden centers across the state.
Release them in the early morning or evening when temperatures are mild. Extreme heat can stress predatory mites before they even get a chance to hunt.
Scatter the predatory mites near the most infested areas of your tomato plants. They will spread on their own once they detect prey nearby.
Avoid using chemical pesticides at the same time, as these will wipe out your beneficial allies. The whole strategy depends on letting the predators do their job undisturbed.
Predatory mites work best when spider mite populations are moderate, not overwhelming. If the infestation is severe, knock numbers down first with water or soap before releasing them.
Keep an eye on humidity levels after release, since predatory mites thrive in slightly moist conditions. A light misting near the release site can help them settle in faster during California’s driest stretches.
One major advantage of this approach is that it creates a lasting balance in your garden. Once established, predatory mites can keep future outbreaks in check with little extra effort from you.
5. Spray Neem Oil During Cooler Evening Hours
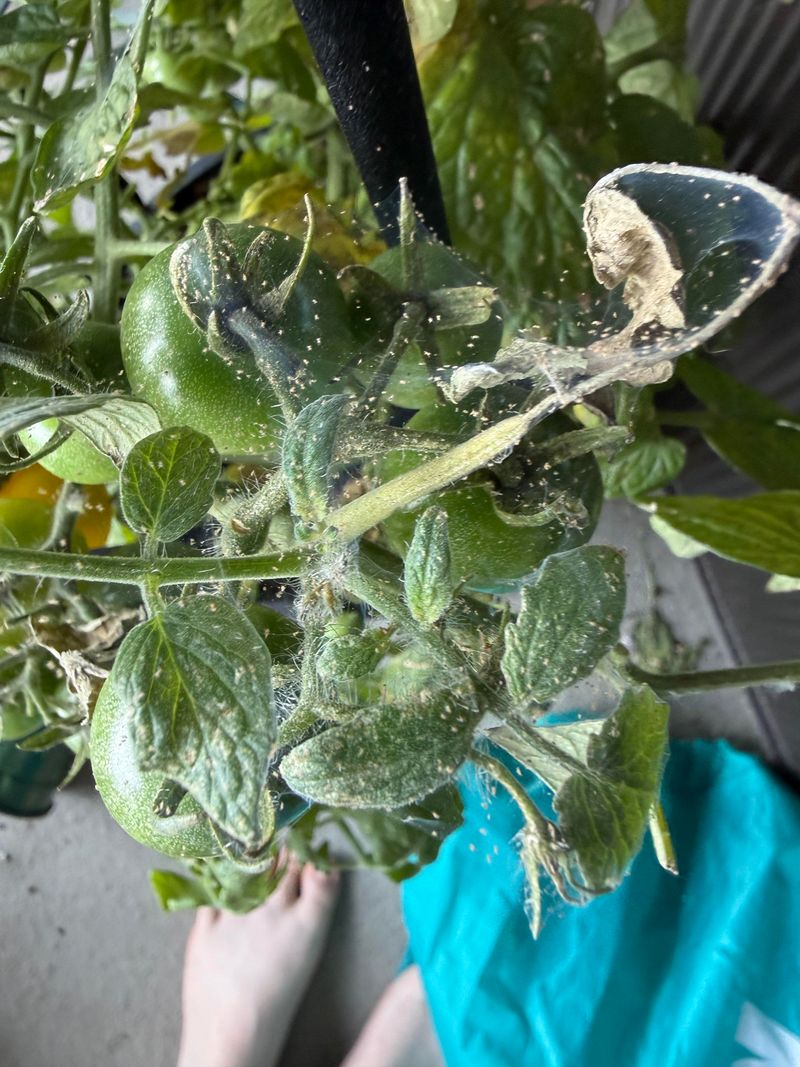
Neem oil has been used in gardens for decades, and for good reason. It disrupts the life cycle of spider mites by interfering with their ability to feed and reproduce.
The best time to spray is during the cooler evening hours, after the sun starts to drop. Applying neem oil in direct midday sun can cause leaf burn, especially on stressed plants.
Mix neem oil with water and a small amount of dish soap to help it emulsify. Without the soap, the oil and water will separate and the spray will not coat leaves evenly.
Shake the sprayer frequently while applying to keep the mixture blended throughout the session. A well-mixed solution sticks to leaves longer and makes contact with more mites.
Focus on the undersides of leaves where mites cluster and reproduce rapidly. Missing those zones means missing the heart of the problem entirely.
Neem oil also has mild antifungal properties, which is a bonus for tomato plants prone to blight. Think of it as a two-for-one treatment in a single spray session.
Allow at least three to four days between applications to avoid overloading your plants. This spacing gives your tomato plants time to recover between treatments.
Spraying neem oil during cooler evening hours on a regular schedule is a reliable organic option. It works especially well for managing spider mites on dusty tomato plants in California gardens.
6. Increase Humidity Around The Plants When Possible

Spider mites struggle in humid conditions. These pests thrive in hot, dry air, which makes California summers feel like a paradise to them.
Raising the moisture level around your tomato plants creates a hostile environment that slows mite reproduction. Even a modest increase in humidity can make a noticeable difference within days.
One easy method is misting the area around your plants with a garden sprayer. You are not trying to soak the soil, just raise the ambient moisture in the air nearby.
Mulching around the base of your tomato plants also helps retain soil moisture. As that moisture evaporates slowly, it adds a subtle but helpful humidity boost to the surrounding air.
Grouping plants closer together can create a microclimate with slightly higher humidity levels. This works especially well in raised beds where you have control over plant spacing.
Avoid overhead watering at night, as that can cause fungal disease to develop on wet foliage. Stick to morning misting so leaves dry out before temperatures cool after sunset.
Increasing humidity is not a standalone fix, but it weakens the mite population enough for other treatments to work better. Pair it with sprays and water blasts, and you are stacking the odds firmly in your favor against these relentless little pests.
7. Remove And Discard Heavily Infested Leaves

Sometimes a leaf is too far gone to save. When you spot foliage covered in webbing, yellowing, and stippling, the best move is to cut it off immediately.
Leaving heavily infested leaves on the plant gives spider mites a breeding ground right next to your healthy growth. One bad leaf can reinfect an entire plant in a matter of days.
Use clean, sharp pruning scissors to remove affected leaves at the stem. Dull or dirty tools can spread mites to clean areas as you work through the plant.
Place removed leaves directly into a sealed plastic bag before moving away from the plant. Shaking or dropping them on the ground just relocates the problem a few feet over.
Do not add infested material to your compost pile. Spider mites can survive and potentially spread from compost back into your garden beds.
Dispose of the sealed bag in your outdoor trash, not your yard waste bin. This keeps the mites contained and out of circulation for good.
After removing damaged foliage, wipe your pruning tools with a disinfecting solution before using them again. This simple habit keeps you from spreading mites to healthy leaves during your next round of pruning.
Removing and discarding heavily infested leaves is one of the most direct steps in getting rid of spider mites. It gives your tomato plants a cleaner slate to recover from the damage already done.
8. Repeat Treatment Every Few Days Until Mites Are Gone
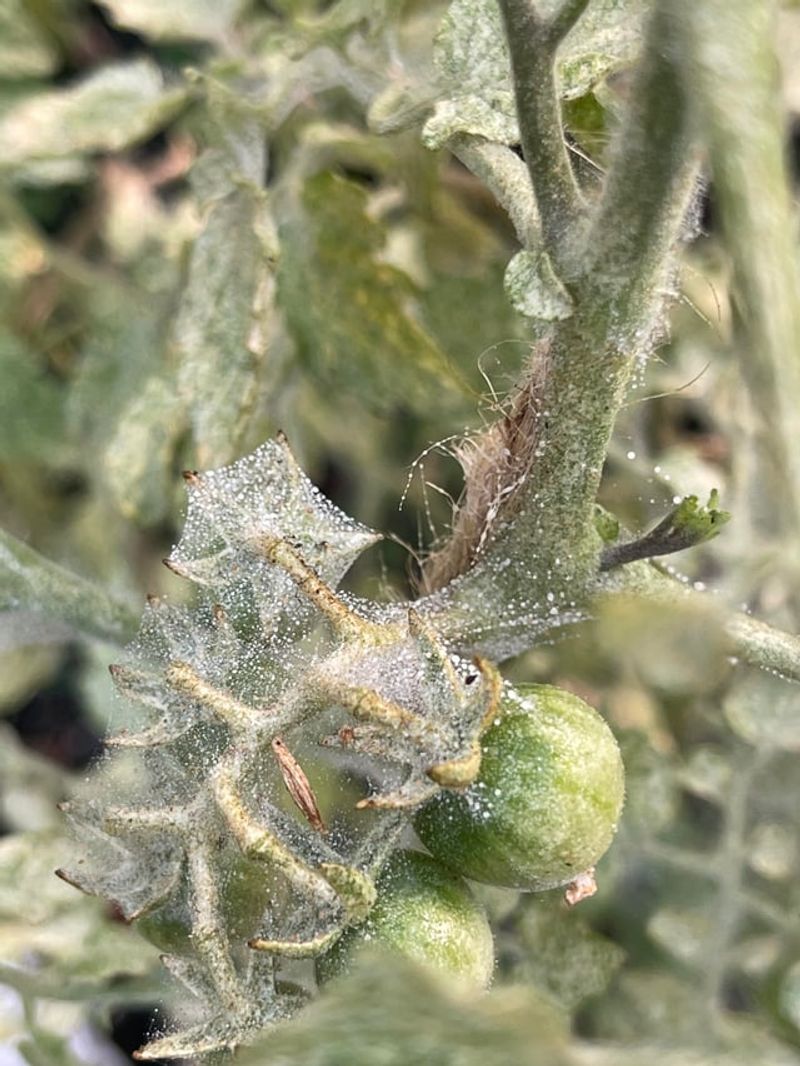
One treatment is rarely enough with spider mites. These pests reproduce at a staggering rate, with new eggs hatching every few days under warm conditions.
A single missed application can allow a recovering colony to explode back to full strength in under a week. Consistency is what actually gets results here, not intensity.
Set a reminder on your phone or mark a physical calendar with your spray days. Treating every three to five days keeps pressure on the population before eggs can hatch into new adults.
Rotate between treatments to prevent mites from adapting to any single method. One session with soap spray, the next with neem oil, and a water blast in between keeps them off balance.
Check the undersides of leaves each time you treat to gauge your progress. If you see fewer mites and less webbing, you are on the right track.
Do not stop treatments the moment things look better. Mite eggs are nearly invisible and can still be present even when adults seem to have disappeared.
Keep going for at least two full weeks after you stop seeing active mites. Staying committed to repeat treatment every few days until mites are gone is a key habit for protecting your California tomato plants from spider mites all season long.