8 Reasons Hydrangea Leaves Have Brown Edges
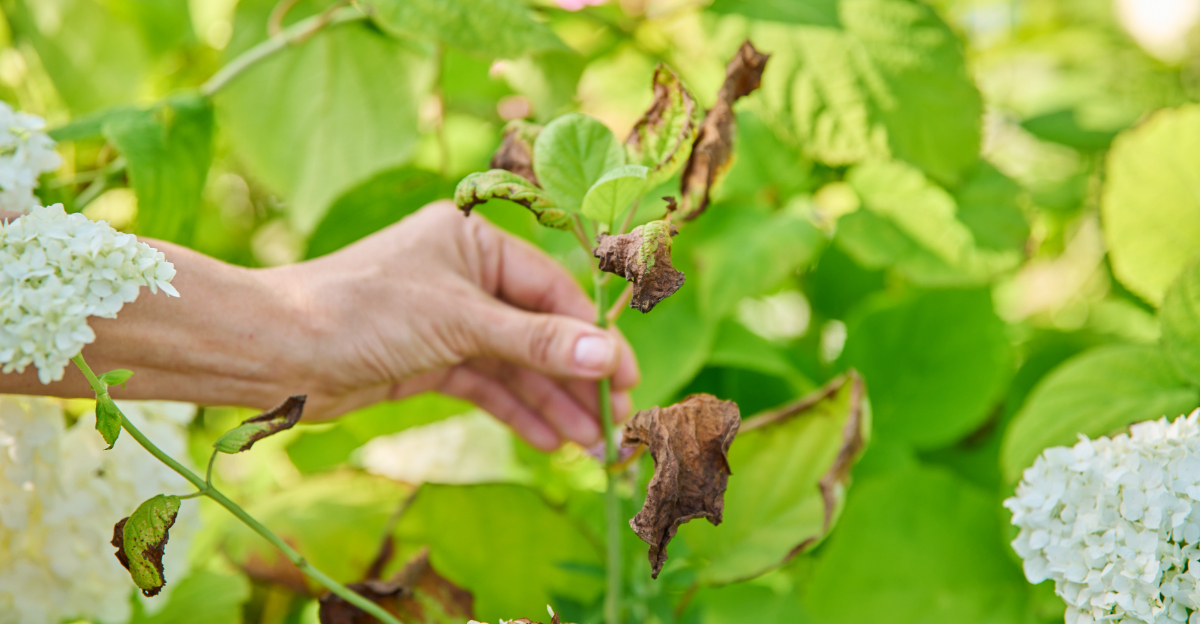
Crispy edges spreading across your hydrangea leaves deceive you into assuming a simple, obvious cause. Because the real trigger hides beneath what you can see, guessing wrong costs you an entire season of growth.
Confusing signs like these frustrate even experienced growers expecting a single, tidy answer. Once you stop guessing, though, everything about your plant’s behavior starts making sense.
That plant absorbs every condition it lives in, and that absorption eventually surfaces along its leaf margins. Stress builds there long before any other part of the plant shows a hint of trouble.
Watering habits often deepen that stress, since opposite mistakes can leave you staring at the exact same warning sign. Everything happening around your hydrangea, weather included, layers directly onto whatever is already straining its roots.
Your hydrangea already told you something is wrong, and what comes next tells you exactly what it’s trying to say.
1. Underwatering Causes Crispy Brown Leaf Margins
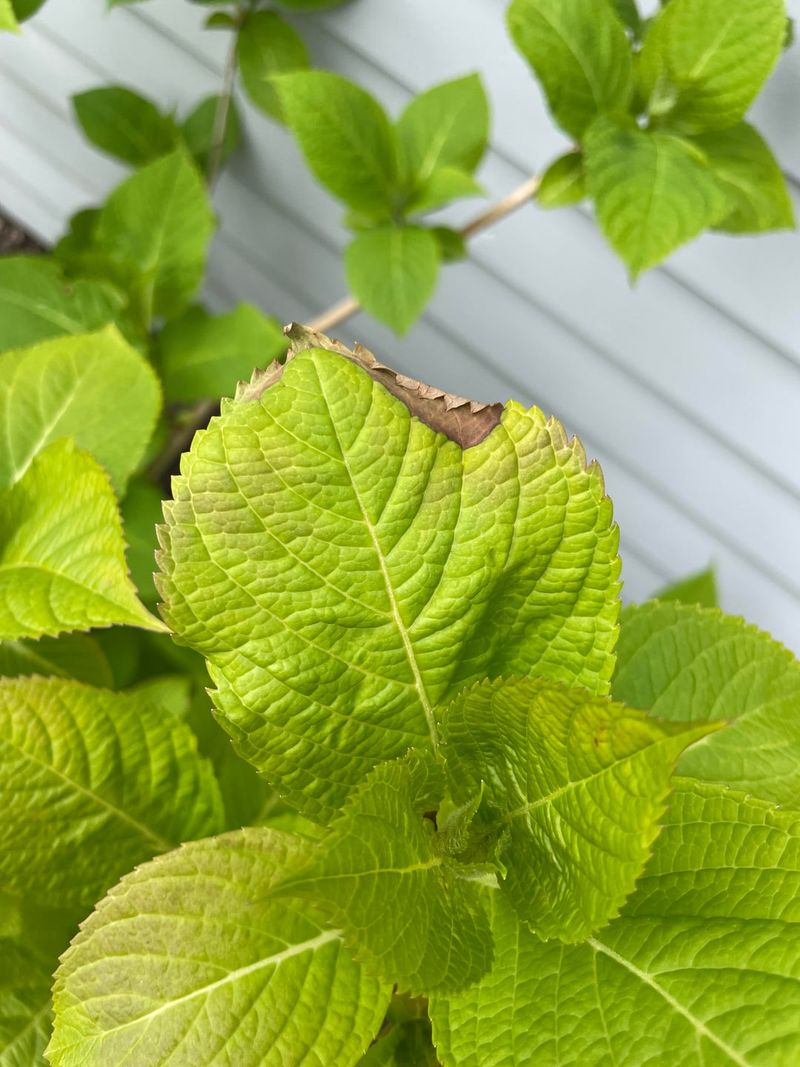
Your hydrangea is thirsty, and it is not being subtle about it. Crispy brown edges on the leaves are one of the clearest signs that the plant is not getting enough water.
Hydrangeas have large leaves that release moisture constantly, so they need consistent hydration to stay healthy. When the soil dries out too fast, the outer edges of the leaves lose water first.
Those margins turn brown, curl slightly, and feel papery to the touch. The center of the leaf usually stays green for a while, which is a helpful clue that dryness is the culprit.
Sandy or fast-draining soils make this problem worse. Water moves through them quickly, leaving roots with little to absorb before the next watering.
Adding a layer of mulch around the base of the plant helps the soil hold moisture longer between waterings. Check the soil before watering by pushing your finger about two inches deep.
If it feels dry at that depth, it is time to water deeply and slowly. Shallow watering only wets the top layer and encourages weak, surface-level roots.
Hydrangeas planted in containers dry out even faster than those in the ground. Pots lose moisture through their sides and bottom, so they need more frequent attention.
Watering deeply two to three times per week during hot weather keeps hydrangea leaves green and full. Consistent care is the simplest fix for this common issue.
2. Overwatering Leads To Root Stress And Browning
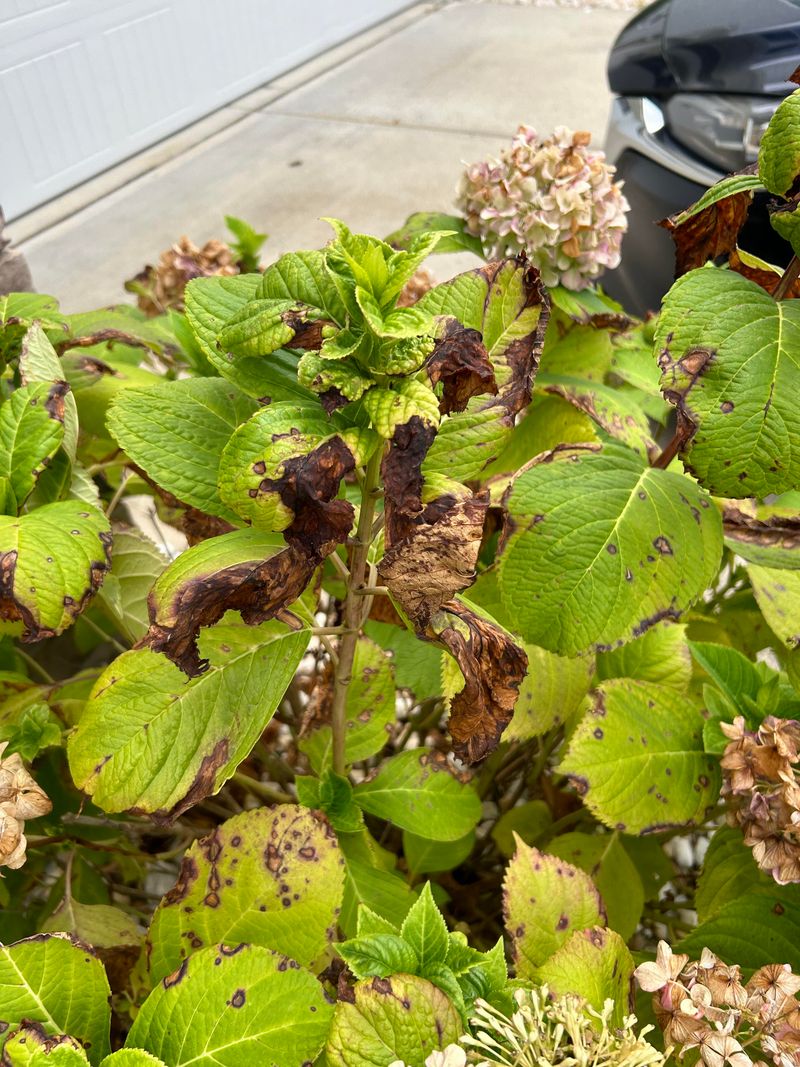
Too much water sounds like a generous gift, but roots do not see it that way. Overwatered hydrangeas sit in soggy soil that suffocates their roots and blocks oxygen flow.
When roots cannot breathe, they struggle to deliver nutrients, and the leaves pay the price with brown, stressed-looking edges. Root rot is the biggest danger with overwatering.
Fungal pathogens thrive in wet conditions and attack weakened roots quickly. Once rot sets in, the plant cannot pull up water effectively, which creates a cruel irony: the leaves look dehydrated even though the soil is soaking wet.
Spotting overwatering can feel tricky because the symptoms look similar to underwatering. The key difference is the soil itself.
If the ground around your hydrangea stays wet for days after rain or watering, drainage is likely the problem. Yellowing leaves mixed with brown edges are another sign pointing toward excess moisture.
Improving drainage is the most important fix. Work compost or coarse sand into heavy clay soil to loosen it up.
Raised beds are a great option if your yard has naturally poor drainage that is hard to change. Cut back on watering and let the top two inches of soil dry out before adding more.
Remove any standing water near the base of the plant right away. Hydrangeas with brown edges from root stress can bounce back once their roots get a chance to recover and breathe again.
3. Too Much Direct Sun Scorches Leaf Edges
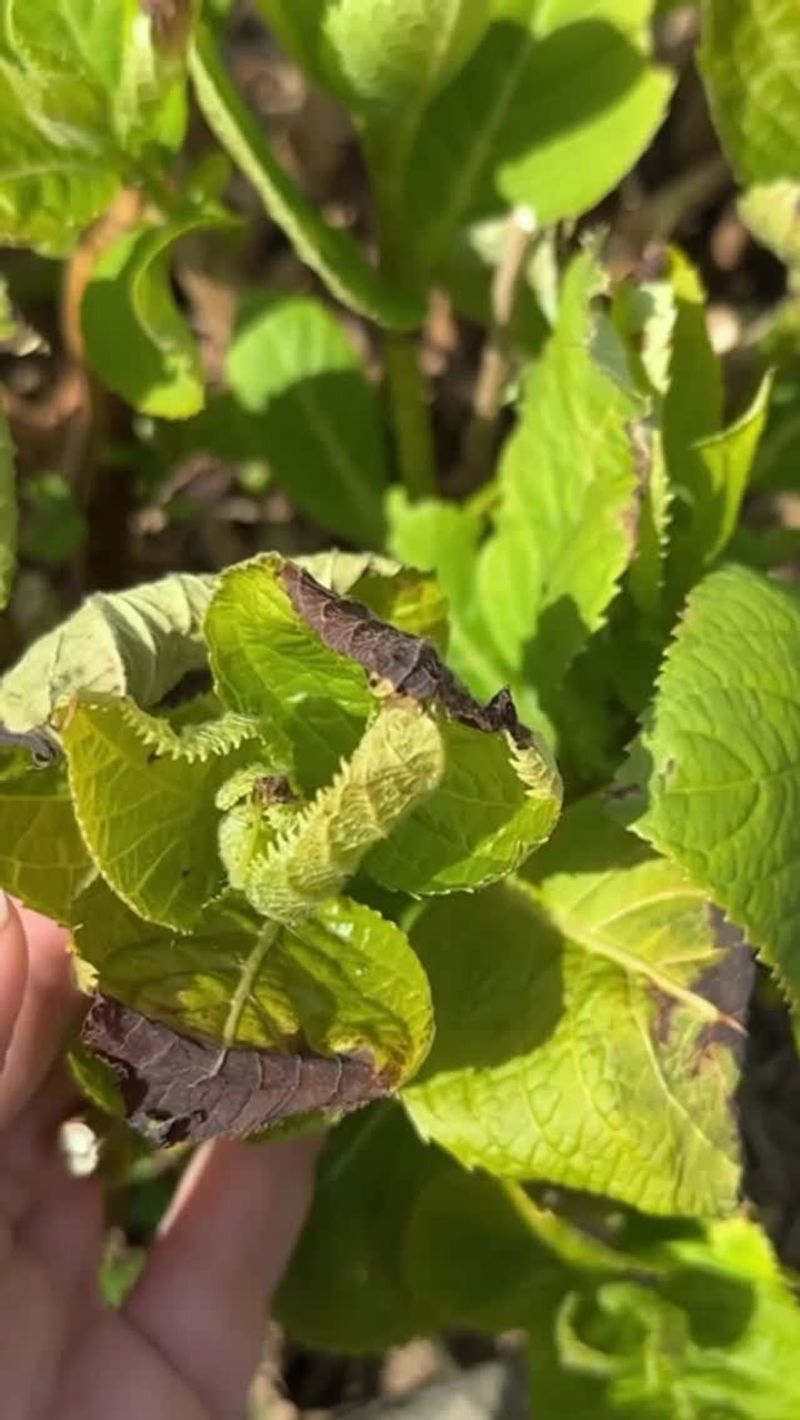
Afternoon sun hits differently in midsummer, and hydrangeas feel every bit of it. These plants prefer morning light with shade during the hottest part of the day.
When they get blasted by intense afternoon sun, the leaf edges scorch and turn brown almost overnight. Sun scorch happens because the leaves lose water faster than the roots can replace it.
The margins are the most exposed and vulnerable parts of the leaf. They dry out first, turning a tan or crispy brown that looks a lot like drought damage but appears even on well-watered plants.
Pale, bleached patches on the leaf surface often appear alongside the brown edges. This combination is a strong indicator of too much direct light.
Moving a potted hydrangea to a shadier spot can show improvement within days as new growth comes in healthier. For hydrangeas planted in the ground, adding shade is the practical solution.
A shade cloth placed over the plant during peak afternoon hours works well in summer. Taller shrubs or a garden fence on the west side of the plant can also block harsh late-day rays.
Choosing the right planting spot from the start saves a lot of trouble. East-facing garden beds that catch morning sun and stay shaded by afternoon are ideal.
Hydrangeas with brown edges from sun exposure often recover fully once they get consistent protection from scorching rays during the hottest hours of the day.
4. Fertilizer Burn Shows Up Along Leaf Margins
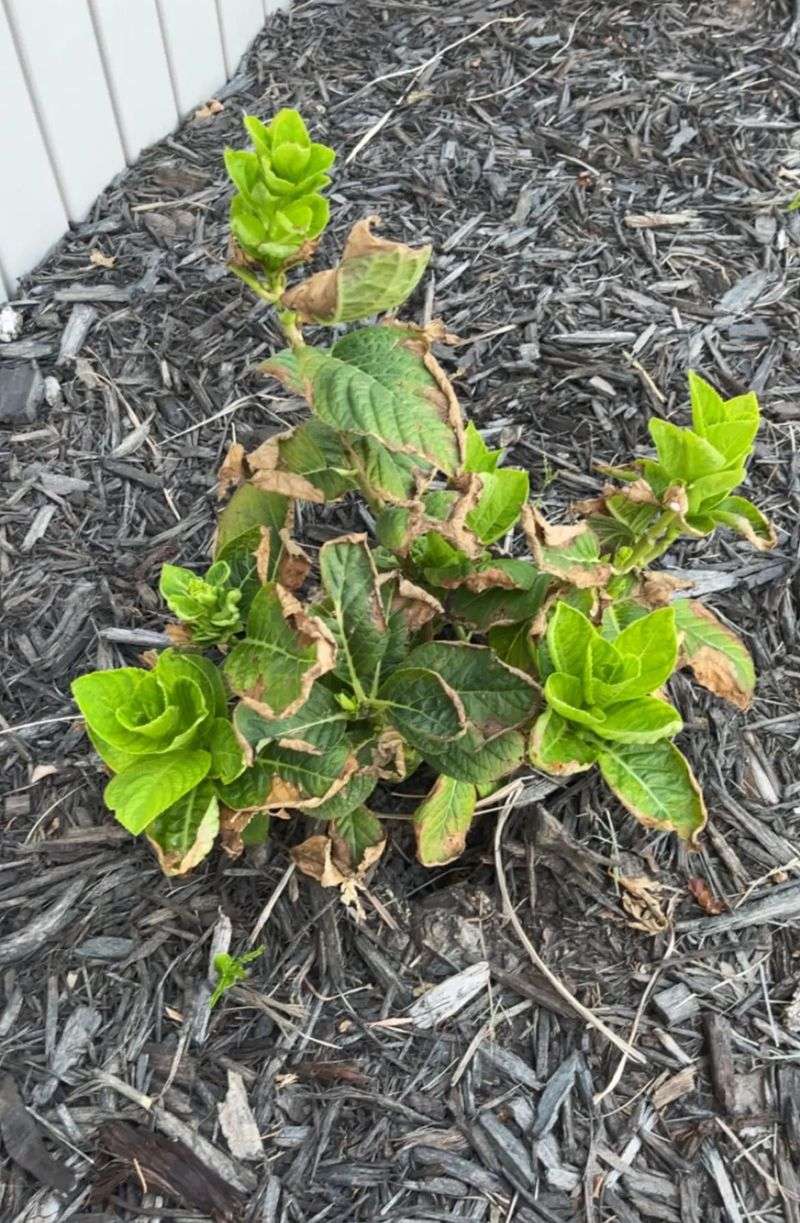
More fertilizer does not always mean more flowers. When you apply too much or do it too close to the roots, the plant reacts with brown leaf margins that look like chemical burns.
Fertilizer burn is one of those mistakes that is easy to make and surprisingly common among enthusiastic gardeners. The problem happens because high concentrations of fertilizer salts pull moisture out of the roots through osmosis.
Instead of feeding the plant, excess fertilizer actually dehydrates it from the inside out. The leaf edges, being the farthest from the root system, show the stress first.
Granular fertilizers are especially risky when they contact the base of the stem or clump near the roots. Always spread granules evenly across the soil surface and keep them away from the trunk.
Water thoroughly after applying to help dilute the concentration and move nutrients deeper into the soil. If you suspect fertilizer burn, flush the soil with deep, slow watering for several days in a row.
This helps wash excess salts away from the root zone. Pulling back on fertilizing for the rest of the season gives the plant time to stabilize without more chemical stress.
A slow-release fertilizer applied once or twice per season is much gentler than frequent liquid feeding. Follow package directions carefully and resist the urge to double up on doses.
Hydrangea leaves with brown edges from fertilizer burn usually recover well once the soil chemistry returns to a healthier balance.
5. Salt Buildup In Soil Affects Leaf Health
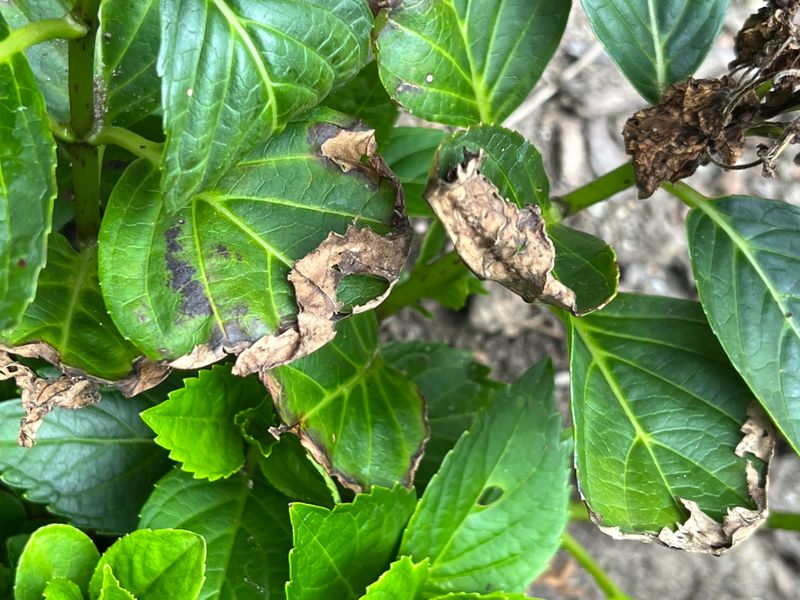
Salt is sneaky, and it builds up in garden soil faster than most people expect. Whether it comes from road de-icers, tap water minerals, or heavy fertilizer use, salt accumulation around hydrangea roots creates serious stress.
The leaves respond with brown, scorched-looking edges that seem to appear out of nowhere. High salt levels in soil interfere with the plant’s ability to absorb water.
The salt draws moisture away from the roots rather than letting the plant take it in. Gardeners sometimes describe this as a plant being surrounded by water it simply cannot drink.
Hydrangeas planted near driveways or sidewalks treated with road salt in winter are especially vulnerable. Spring runoff carries that salt directly into the surrounding soil.
Even one winter of heavy salt exposure can leave lasting damage that shows up in the leaves the following growing season. Flushing the soil with large amounts of clean water helps move salt deeper and away from the root zone.
Do this slowly over several hours to give the water time to push through the soil. Repeating this process two or three times over a few weeks makes a noticeable difference.
Switching to filtered or rainwater for irrigation reduces ongoing mineral buildup from tap water. Using organic mulch helps buffer the soil and improve its ability to process excess salts naturally.
Hydrangea leaves with brown edges caused by salt stress improve steadily once the soil environment becomes cleaner and more balanced.
6. Low Humidity Dries Out Leaf Tips Fast
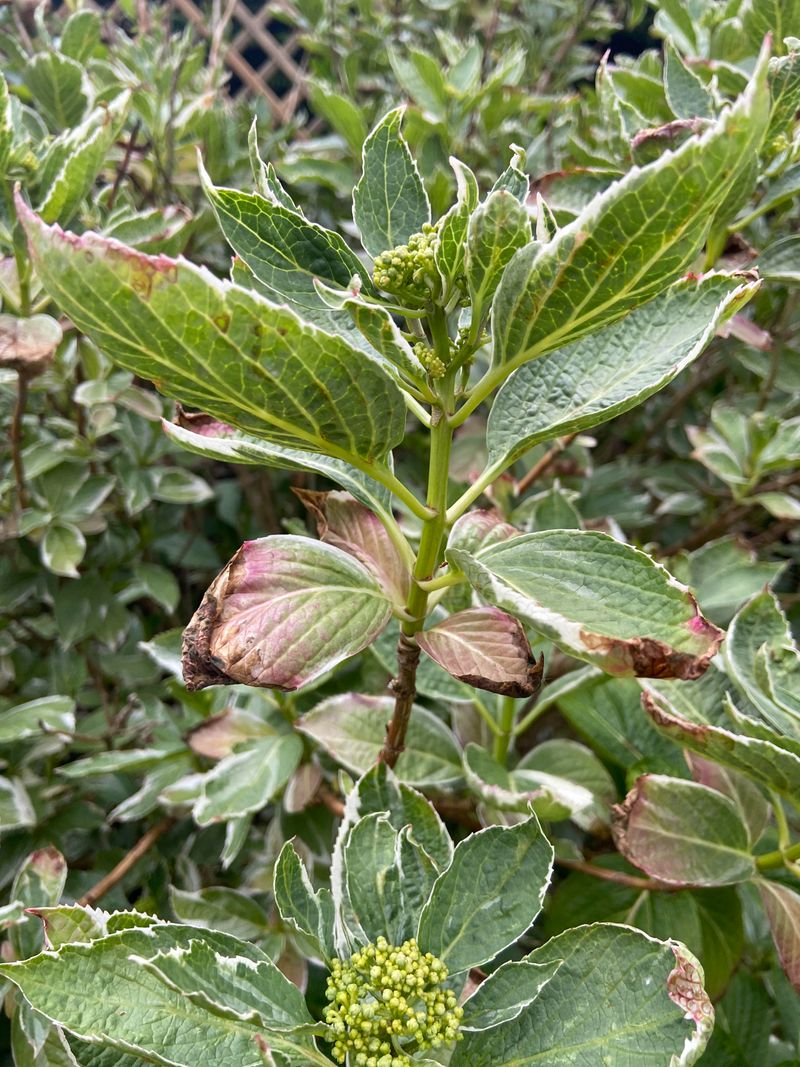
Dry air is invisible, but its effects on hydrangea leaves are impossible to miss. When the humidity around the plant drops too low, the leaf tips and edges begin losing moisture faster than the roots can supply it.
The result is that telltale brown crisping along the margins that spreads inward if conditions stay dry. This issue is especially common during late summer heat waves when both temperatures and dry winds peak.
Indoor hydrangeas near heating vents or air conditioning units face this challenge year-round. Forced air systems strip moisture from the surrounding environment at a surprising rate.
Grouping plants together is a simple and effective way to raise local humidity. Plants release moisture through their leaves, and clustering them creates a small humid microclimate.
This strategy works well for potted hydrangeas kept on a porch or inside the home. A small humidifier placed near indoor hydrangeas can make a significant difference during dry winter months.
For outdoor plants, regular misting in the early morning helps add temporary moisture to the leaf surface. Avoid misting late in the evening since damp leaves overnight can invite fungal problems.
Mulching the soil around outdoor hydrangeas also helps by slowing soil moisture evaporation throughout the day. A two-to-three-inch layer of shredded bark or wood chips works particularly well.
Addressing low humidity promptly keeps hydrangea leaves from developing the brown edges that signal the plant is struggling to stay hydrated in dry conditions.
7. Fungal Leaf Spot Spreads Along The Edges
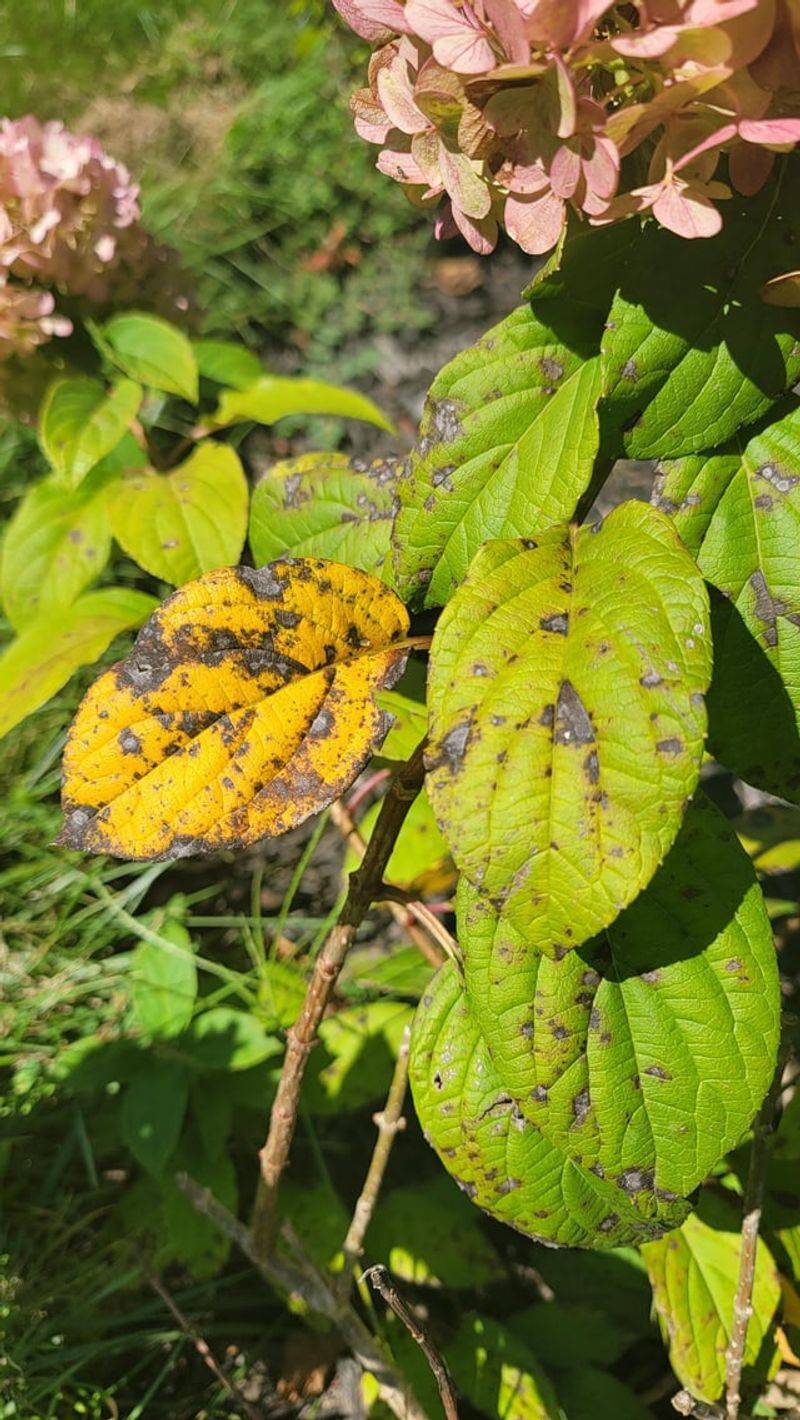
Not every case of brown edges is about water or sunlight. Sometimes a fungus is the troublemaker, quietly spreading across the leaf surface before you notice anything wrong.
Fungal leaf spot diseases target hydrangeas when conditions are warm, wet, and poorly ventilated around the plant. The brown areas caused by fungal infections often have a slightly different look than other types of damage.
You may notice dark brown or reddish-brown spots with defined borders, sometimes surrounded by a yellow halo. These spots tend to appear in irregular patterns rather than evenly along the entire leaf margin.
Cercospora leaf spot and Botrytis blight are two of the most common fungal culprits affecting hydrangeas. Both spread through water splash, which is why overhead watering makes the problem worse.
Switching to drip irrigation or watering at the base of the plant reduces the spread significantly. Remove affected leaves as soon as you spot them to slow the spread to healthy foliage.
Do not add those leaves to a compost pile since fungal spores can survive and spread from there. Bagging and discarding them in the trash is the safer choice.
Applying a copper-based fungicide or neem oil spray in the early stages can help manage the infection. Make sure to coat both the top and underside of the leaves for full coverage.
Hydrangea leaves with brown edges from fungal leaf spot recover more quickly when treatment starts early and infected material is removed right away.
8. Transplant Shock Triggers Temporary Leaf Browning
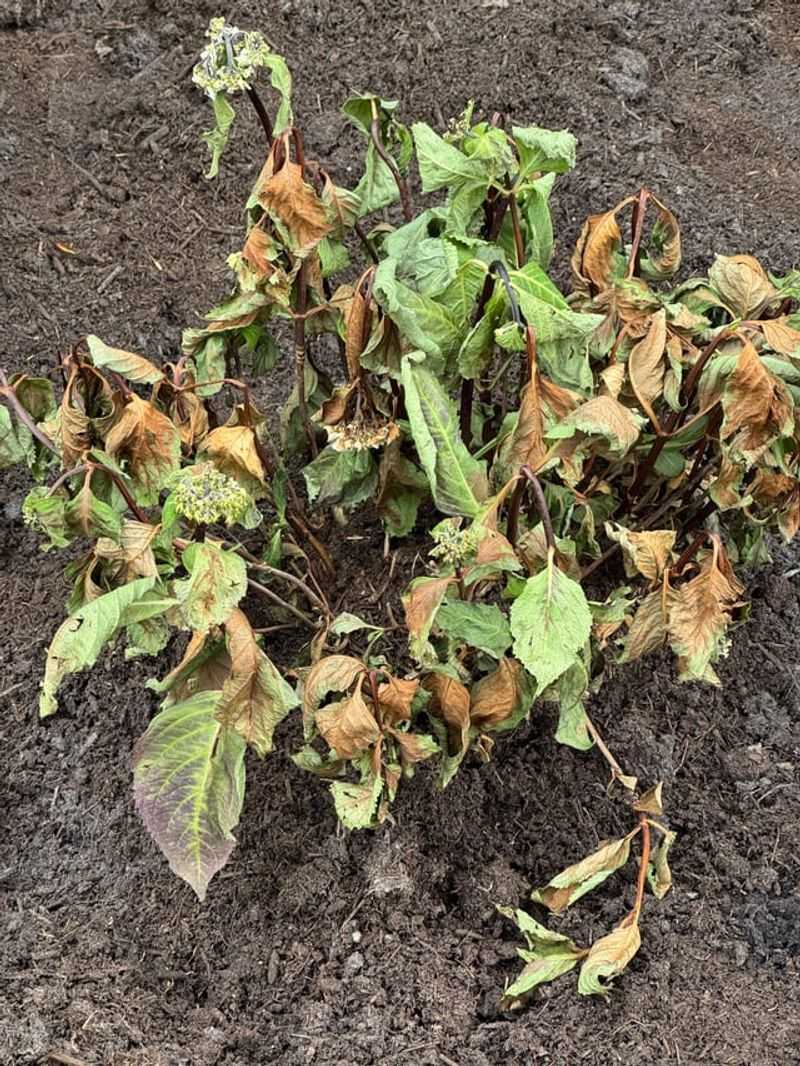
Moving a hydrangea from one spot to another is stressful for the plant, even when done carefully. Transplant shock occurs when roots are disturbed and the plant temporarily loses its ability to absorb water and nutrients efficiently.
Brown edges on the leaves are one of the most common signs that a hydrangea is adjusting to its new home. The timing of a transplant matters a great deal.
Moving hydrangeas during hot summer months gives them the hardest road to recovery. Early spring or fall transplanting, when temperatures are cooler, reduces the stress load significantly and helps roots re-establish faster.
Root damage during the move is the main cause of the browning. Even careful digging can sever fine feeder roots that the plant depends on for water uptake.
The leaves then show the strain as the root system scrambles to rebuild itself in unfamiliar soil. Watering deeply and consistently after transplanting is the single most important thing you can do.
Keep the soil evenly moist for the first four to six weeks while the roots settle in. Avoid fertilizing during this period since extra nutrients can add stress to an already struggling root system.
Trimming back a few of the larger leaves right after transplanting can also help. Fewer leaves mean less demand on the recovering root system.
Hydrangea leaves with brown edges from transplant shock typically improve within a few weeks as the roots establish and the plant finds its footing again.