Coneflower Leaves Turning Brown? 8 Problems To Check First
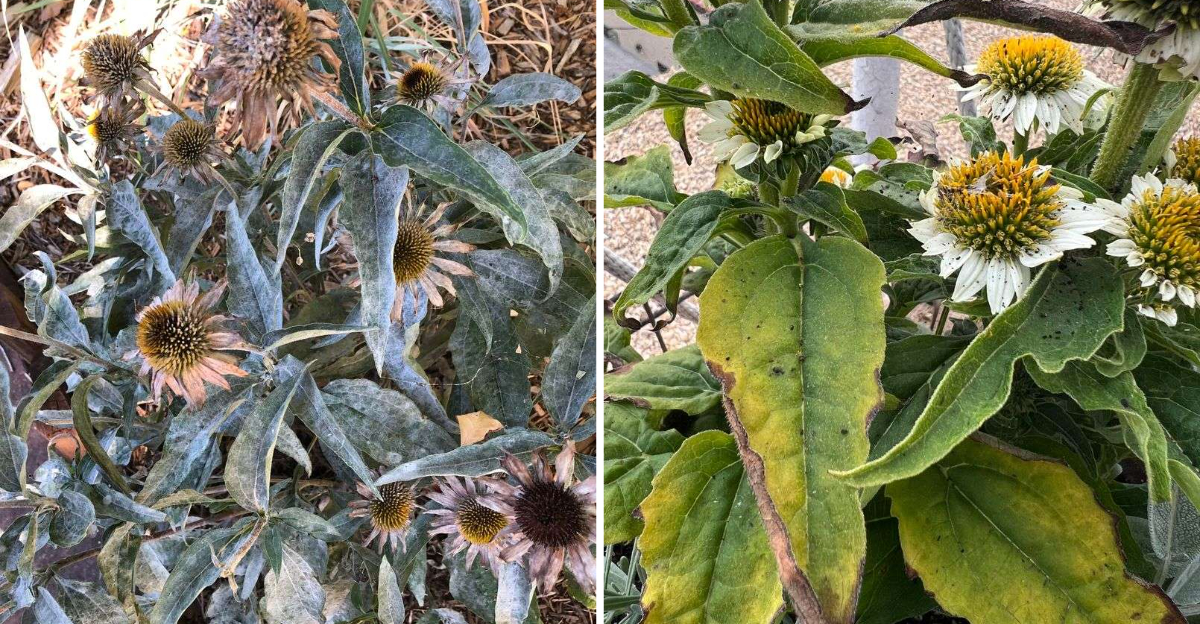
The clump of purple petals looked perfect just days ago, and now the lower leaves are scorched at the edges, crisp and dark like forgotten toast off the grill.
The shift happens fast. Seven days ago the clump was thriving, but now it wears rusty blotches and papery, darkened tips that crack under a fingertip.
The catch is that scorching and yellowing are only ever symptoms, since too little or too much water, hungry insects, crowded roots, and sneaky fungi can all leave nearly the same mark on a leaf.
Each cause still leaves its own signature if you know where to look: flip the leaf over, scratch at the soil, check the crown, and the garden usually tells you exactly what happened.
1. Overwatering And Soggy Soil Around The Roots
Kindness with the hose is the most common mistake gardeners make with these prairie natives. Coneflowers evolved on open grasslands where rain came and went, and the ground drained fast between storms.
When soil stays wet, roots sit without oxygen and slowly lose their ability to drink. Ironically, the leaves then brown at the tips and droop as though the plant were thirsty, which tempts you to water even more.
Look for clues near the base. Mushy stems, a sour smell in the soil, or dark brown roots when you gently dig at the edge of the clump all point to too much moisture.
Test before you water by pushing a finger about two inches into the soil. Dry at that depth means go ahead, damp means wait another day or two.
Heavy clay makes the problem worse because water lingers instead of draining away. Mixing in compost, coarse grit, or planting on a slight mound helps water move through faster.
Check that downspouts, sprinkler heads, and low spots in the yard are not dumping extra water on the bed. Many soggy coneflowers sit right where runoff collects after every storm.
Container plants need drainage holes that actually work, not decorative pots with saucers full of standing water.
Once you cut back on watering, trim the worst browned foliage and let the plant rebuild. Established coneflowers usually bounce back within a few weeks of drier conditions.
2. Drought Stress And Crispy Leaf Edges
Tough as they are, coneflowers still have limits during a long, rainless stretch. Their deep taproots pull moisture from below, but young plants set out this spring have not reached that depth yet.
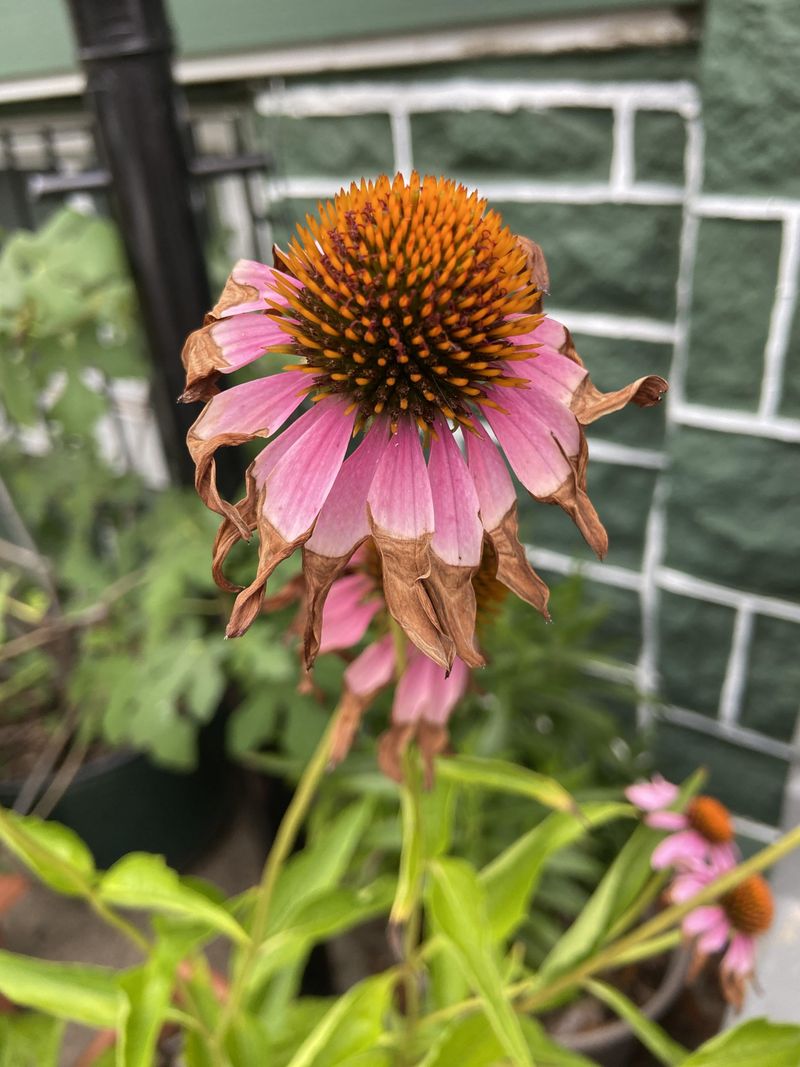
Drought browning has a signature look. Edges turn tan and brittle first, then the crispiness creeps inward while the leaf center stays greenish for a while.
Leaves may also curl upward or fold along the midrib, a trick plants use to shrink the surface losing water to hot air.
Deep, occasional soaking beats a quick daily sprinkle. Aim for about an inch of water at a time, delivered slowly so it sinks down rather than running off the surface.
Morning watering gives foliage time to dry and reduces the fungal trouble that evening watering encourages.
A two-inch layer of shredded bark or leaf mulch keeps soil cooler and holds moisture between rains. Leave a small gap around the crown so the stems stay dry.
Plants growing near driveways, brick walls, or big shrubs face extra competition and reflected heat. Those spots dry out faster than open beds and need more attention in July and August.
Snip off the fully browned leaves for tidiness, but leave anything partly green since it still feeds the roots.
Fun bit of history: prairie coneflowers survived harsh Midwest summers largely because their roots reach several feet down, something a garden plant needs a season or two to develop.
3. Fungal Leaf Spot Diseases Spreading Upward
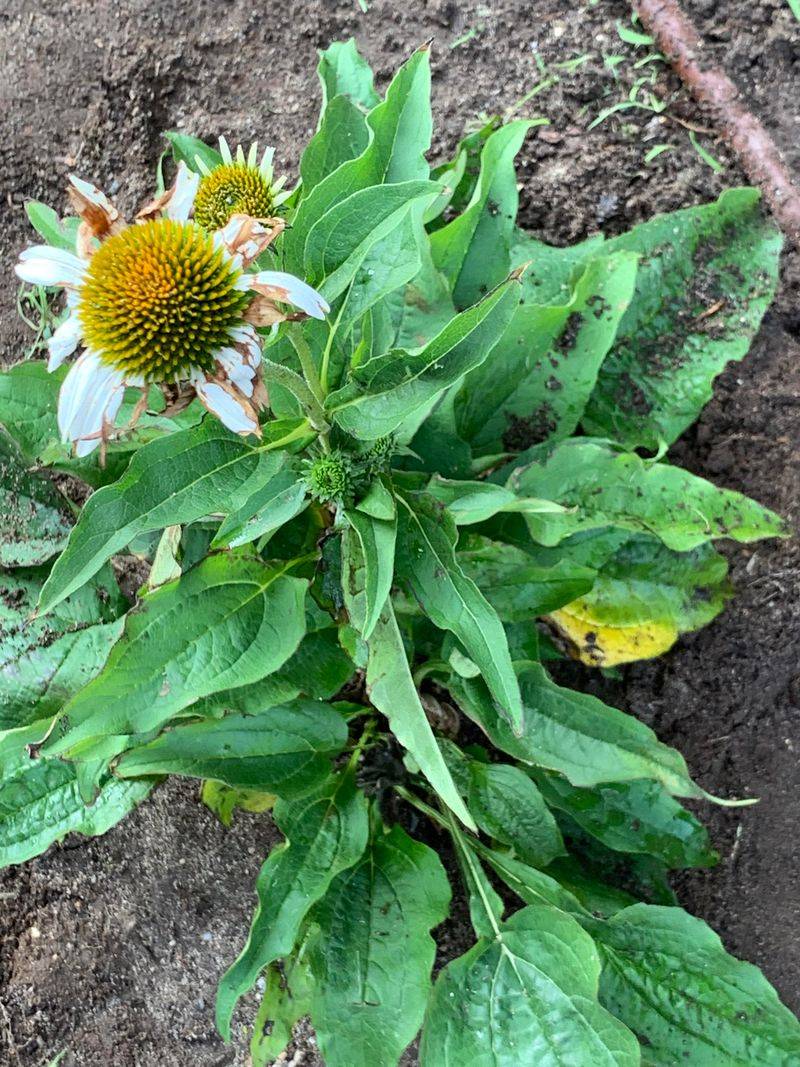
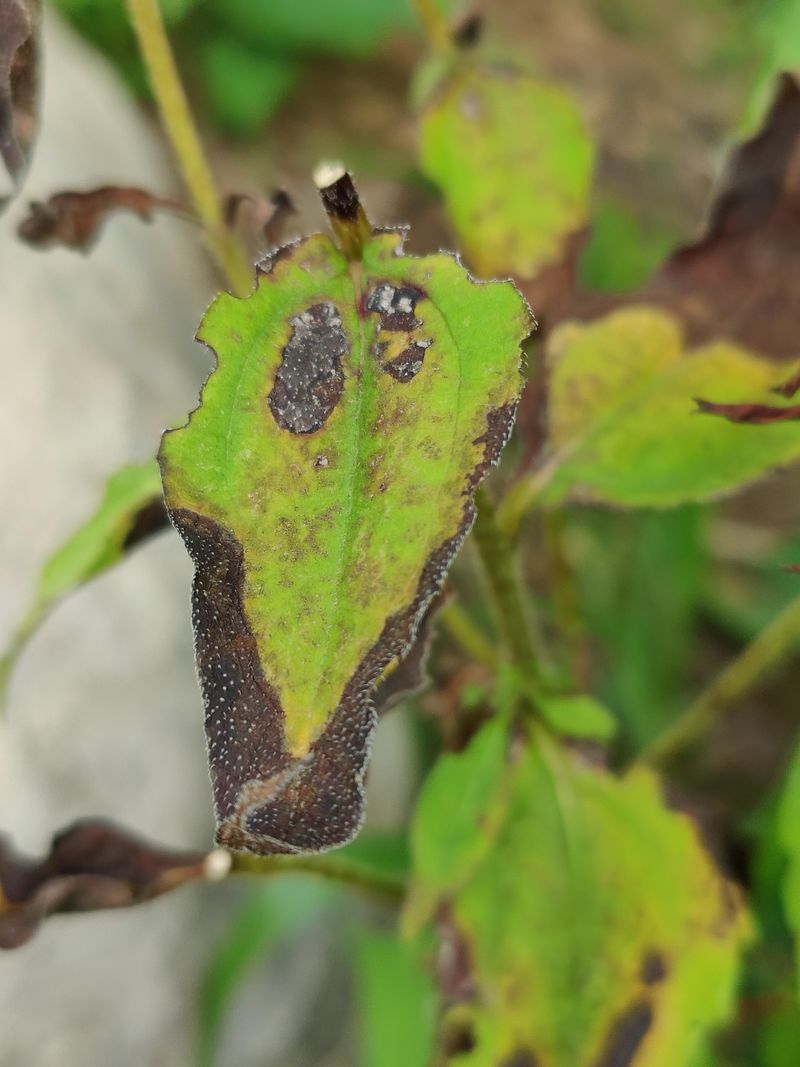
Round brown blotches with pale yellow halos usually mean fungal spores found a comfortable home. Cercospora and Septoria are the usual suspects, and both love warm, humid weather.
Infection almost always begins on the lowest leaves. Rain splashes spores from soil onto foliage, and the damage climbs the stem week by week.
Spots start small and tan, then merge into larger brown patches until whole leaves go papery and drop. Flowers often keep blooming even while the bottom half of the plant looks rough.
Airflow is your best defense. Thin crowded clumps, pull weeds pressing against the stems, and give each plant eighteen to twenty-four inches of elbow room.
Water at soil level with a can or soaker hose instead of overhead spraying. Wet leaves overnight roll out the welcome mat for spores.
Pick off spotted leaves as soon as you notice them and bag them for the trash rather than tossing them in the compost pile.
Clean up all stems and fallen foliage at the end of the season, since spores overwinter happily in the debris.
For stubborn recurring cases, a copper or chlorothalonil fungicide applied early in the season can slow the spread. Read the label and repeat as directed after heavy rain.
The encouraging part is that leaf spot rarely finishes off an established coneflower. It looks unsightly, weakens the clump a little, and usually clears up once the weather turns dry.
4. Powdery Mildew Turning Foliage Gray Then Brown
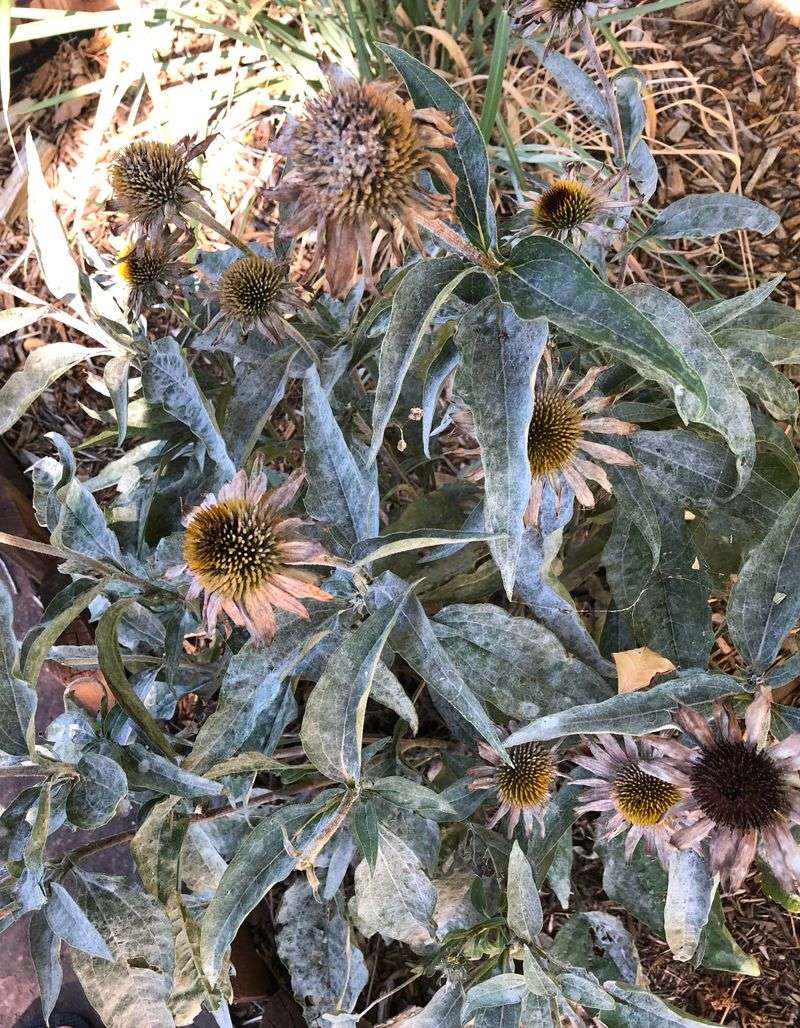
That dusty white film looks like someone spilled flour across the leaves. Powdery mildew shows up in late summer when days are warm and nights turn cool and damp.
Unlike most fungi, this one does not need wet foliage to take hold. High humidity plus poor airflow is enough, which is why crowded borders suffer most.
The white coating steals sugars from leaf cells. Affected foliage yellows, then dries to a dull brown and curls at the edges.
Shade makes everything worse. Coneflowers planted under trees or on the north side of a fence stay damp longer and mildew earlier than those in full sun.
Start by opening up the space. Divide overgrown clumps every three or four years, cut back sprawling neighbors, and remove lower leaves that touch the ground.
A homemade spray of one tablespoon baking soda plus a few drops of dish soap in a gallon of water helps on light cases. Horticultural oil and potassium bicarbonate products work well too.
Timing matters more than strength. Treat at the first white speck rather than waiting until half the plant looks dusted.
Avoid heavy nitrogen fertilizer, since soft new growth is exactly what mildew prefers.
Cut infected stems to the ground in fall and dispose of them away from the garden.
Some newer echinacea varieties carry better resistance, so if mildew visits every single year, swapping in a tougher cultivar saves you a lot of spraying.
5. Aster Yellows And Strange Distorted Growth
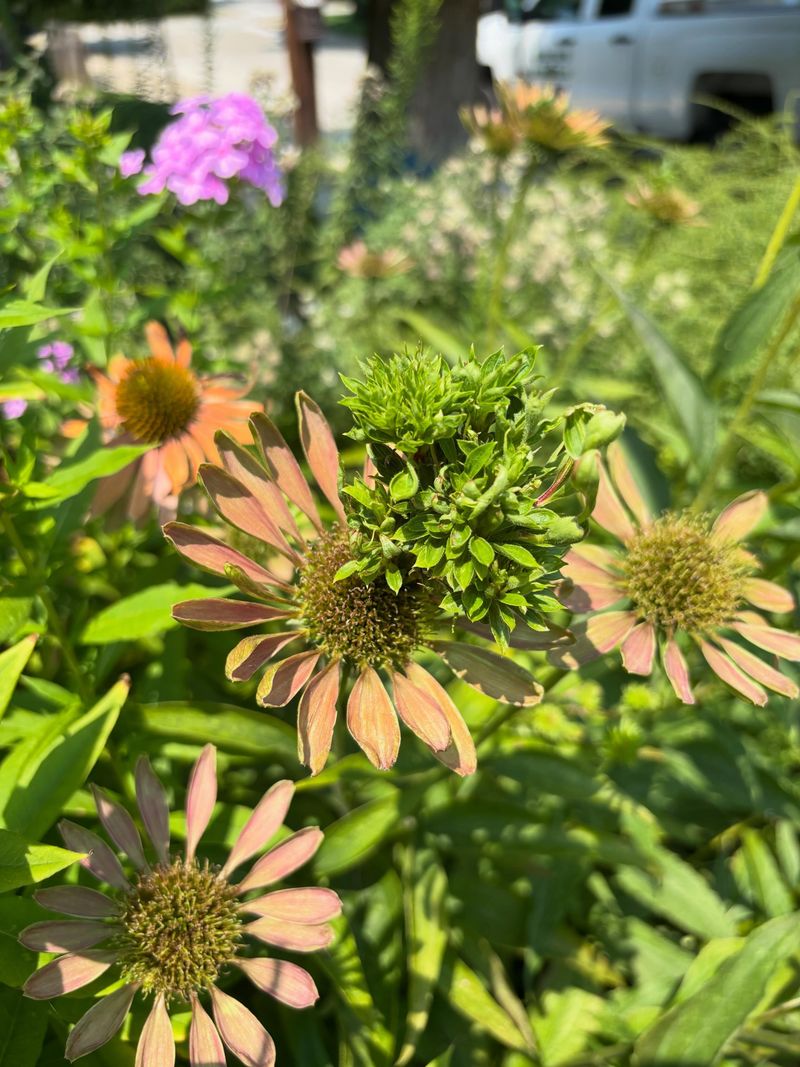
Something looks off, and it is not just the browning. Flower cones sprout weird green tufts, petals turn stubby and pale, and stems grow twisted.
Aster yellows is caused by a phytoplasma, a bacteria-like organism carried from plant to plant by leafhoppers. Once inside, it travels through the sap and scrambles normal growth signals.
Leaves often yellow along the veins first, then brown and shrivel while the plant keeps pushing out deformed shoots.
No spray treats it effectively. Removing the whole plant, roots and all, is the most reliable way to stop leafhoppers from spreading it to healthy neighbors.
Bag the material and put it in the trash. Composting infected tissue risks keeping the problem in your yard.
Watch for weedy hosts nearby, since dandelions, thistle, and wild lettuce harbor the same phytoplasma. Keeping those under control lowers the odds of another outbreak.
Floating row cover over young plants in spring blocks leafhoppers during their most active feeding period, though it is rarely practical for a full border.
Wash tools between plants when you are pruning in an affected bed.
Curious detail: aster yellows infects more than three hundred plant species, including carrots and lettuce, which is why vegetable growers watch for it too.
Do not replant coneflowers in the exact same soil right away if you have lost several. Give the spot a season with something unrelated, like ornamental grasses, while leafhopper numbers drop.
6. Japanese Beetles And Chewing Insect Damage
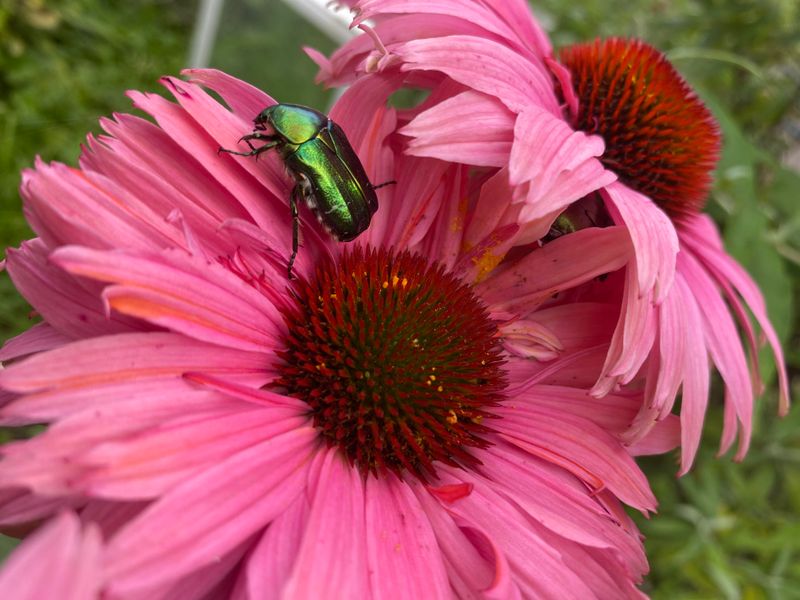
Metallic green backs glinting in July sun mean company has arrived. Japanese beetles cluster on coneflowers and chew the soft tissue between veins, leaving lacy skeletons that brown within days.
Damage looks different from disease. Instead of round spots, you see ragged holes and see-through patches where only the leaf skeleton remains.
Beetles feed in groups because they release a scent that attracts more beetles. One or two quickly becomes twenty.
Hand-picking early in the morning works surprisingly well. Beetles are sluggish before the day warms, so knock them into a bucket of soapy water while they are slow.
Skip the pheromone traps unless you place them far from the garden. Those traps attract far more beetles than they catch, essentially inviting the neighborhood over for dinner.
Neem oil deters feeding on lighter infestations, though it needs reapplication after rain and should go on in the evening to protect bees.
Other chewers cause browning too. Earwigs nibble at night, and sunflower moth larvae tunnel into the cone, causing petals and nearby leaves to brown early.
Check under leaves with a flashlight after dark if damage appears overnight but you see nothing during the day.
Healthy, well-watered plants shrug off moderate chewing. Established clumps handle losing a third of their foliage and still bloom.
Encouraging birds and letting parasitic wasps do their work builds long-term balance in the bed better than any single spray does.
7. Fertilizer Burn And Soil Nutrient Imbalance
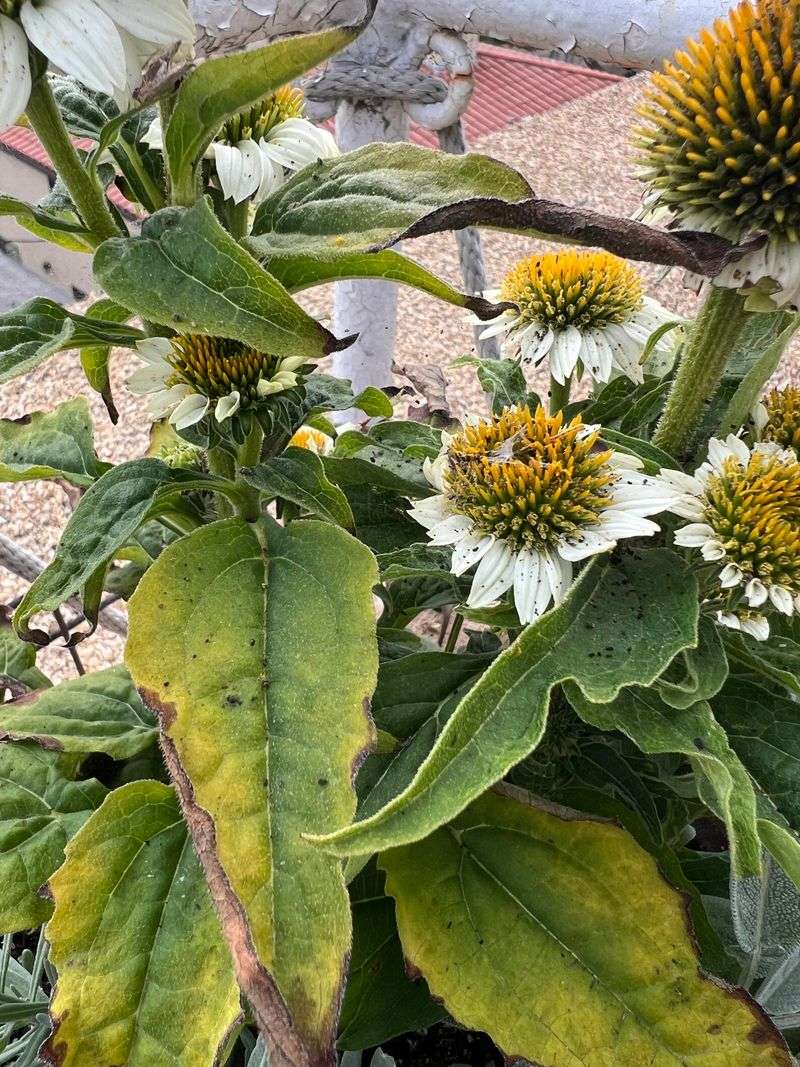
Generosity backfires here. Coneflowers are prairie plants used to lean soil, and a heavy dose of fertilizer often scorches them instead of boosting growth.
Excess salts pull moisture out of roots, producing brown, dry leaf margins that look almost burned. A white crust on the soil surface is another giveaway.
Too much nitrogen brings its own trouble. You get tall floppy stems, fewer flowers, and tender leaves that pests and mildew find irresistible.
If you suspect overfeeding, flush the area with a deep, slow watering to wash salts below the root zone. Repeat once more a few days later.
Hold off on any further feeding for the rest of the season.
Shortages cause browning too, just more slowly. Potassium deficiency shows as browning along leaf edges on older foliage, while magnesium shortage yellows the tissue between veins before it browns.
A basic soil test through your county extension office removes the guesswork for about the price of a bag of mulch.
For most gardens, an inch of finished compost spread around the plants each spring supplies everything coneflowers need. Skip the high-powered lawn fertilizers entirely, since spray drift from a lawn treatment can burn nearby perennials.
Container-grown coneflowers are the exception and appreciate a diluted balanced feed once a month during the growing season.
Keep in mind that soil pH between 6.0 and 7.0 helps roots absorb nutrients properly, so a very acidic bed can cause deficiency symptoms even when nutrients are present.
8. Crown Rot And Crowded Overgrown Clumps
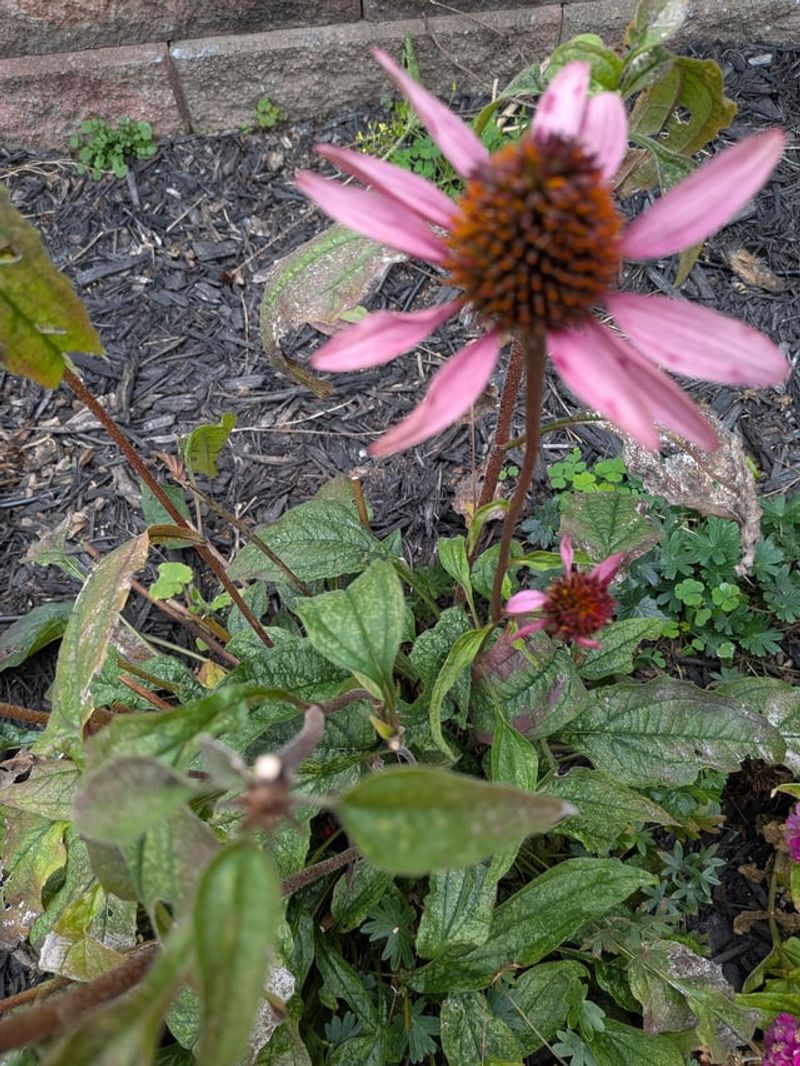
A clump that thrived for five years can suddenly look worn out in the middle. Coneflowers expand outward while the center grows woody, congested, and prone to rot.
Crown rot strikes at the soil line where stems meet roots. Tissue turns soft and dark, water stops moving upward, and entire stems brown from the bottom up.
Mulch piled against the crown is a frequent culprit. So is a plant set too deep at planting time.
Pull mulch back a few inches from the base so the crown breathes and dries after rain. That one adjustment prevents a surprising number of failures.
Dig and divide established clumps every three to four years in early spring or fall. Slice the clump into sections with three to five healthy shoots each, discarding the tired woody center.
Replant divisions at the same depth they grew before, with the crown right at soil level.
Improve drainage in heavy beds by working in compost and coarse sand, or build the bed up a few inches.
Winter is riskier than summer for rot, especially where snow melts and refreezes into standing water. Coarse grit around the crown helps in those spots.
Inspect roots when you divide. Firm, pale roots are good, while brown mushy ones should be trimmed away before replanting.
Divisions often bloom better the following summer than the crowded original did, so what feels like a rescue mission usually ends up being an upgrade for the whole bed.