How to grow fatter, sweeter Oregon garlic next summer – and the one planting mistake to avoid this fall
Garlic is one of those crops that rewards a little fall effort with a lot of summer satisfaction, and the Willamette Valley is genuinely great garlic-growing country. The mild, wet winters and long spring days suit garlic well, and planting in fall gives cloves time to settle in and root before the growing season kicks off.
If you have been putting off planting because you missed some imaginary perfect date, relax – October sits comfortably inside the local window, and there is still plenty of time. The single most important thing to get right this fall has nothing to do with timing and everything to do with where you put the cloves.
October is on time, not a deadline
Garlic planting in the Willamette Valley follows a generous seasonal window that runs from September through mid-November, so October sits right in the middle of it. There is no single date that determines success or failure, and gardeners who plant in late October or even early November are still well within the local range.
The pressure to plant on a specific day is more gardening folklore than practical reality.
Oregon State Extension describes this September-to-mid-November window for west-of-Cascades gardens, with harvest typically falling somewhere between late May and late July the following year. That six-week harvest spread alone tells you how much natural variation is built into the crop.
What matters far more than the exact planting date is whether the site, the soil, and the planting cloves are in good shape when you do put them in the ground.
One thing worth knowing upfront: the guidance here is written for the Willamette Valley and western Oregon, where maritime winters are mild and wet. Gardeners in Central or Eastern Oregon work with different soils, colder winters, and a different frost calendar, and Oregon State Extension provides separate regional planting guides for those areas.
If your garden is east of the Cascades, check the high-desert resources before following the timing and watering advice here.
For Willamette Valley growers, the takeaway is simple. If your bed is ready and your cloves are good, plant now.
If you are reading this in early November, you have not missed your chance. The window is wide enough to accommodate a busy schedule, a rainy week, or a trip to the coast.
Choose cloves for size and flavor potential
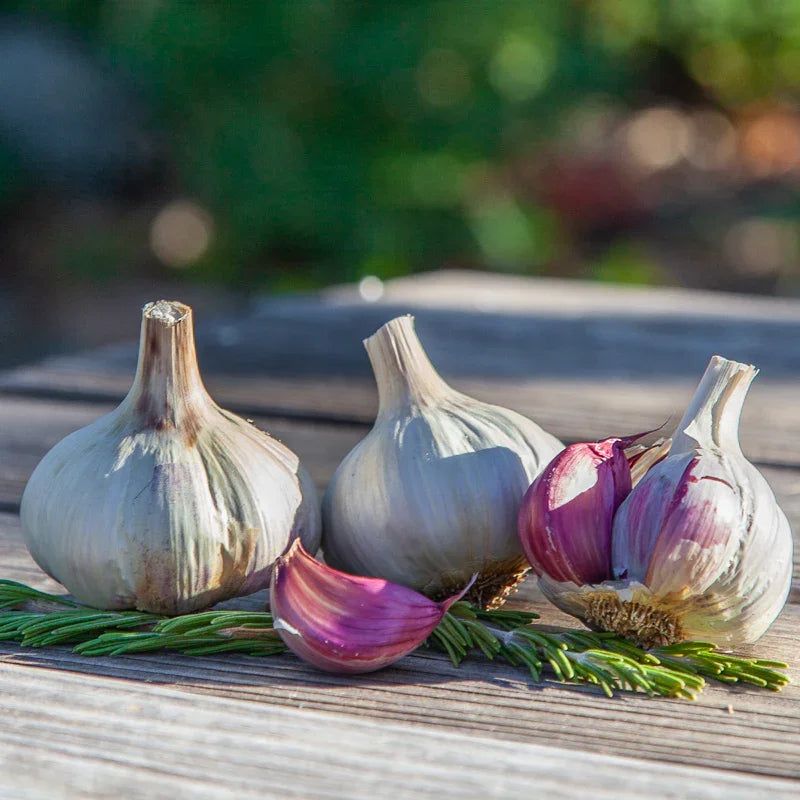
The clove you plant is essentially the seed of the bulb you will harvest, and its size gives you a head start. Larger, heavier planting cloves tend to produce larger bulbs the following summer, while small or damaged cloves are more likely to yield underwhelming results.
Choosing well at the start is one of the most practical things you can do to improve your harvest prospects, even though no clove size guarantees a particular outcome.
Oregon State Extension notes that larger cloves produce larger bulbs, and trials in other western growing regions have found the same general pattern – though results vary among varieties and sites. The honest version of that advice is this: start big, but keep your expectations realistic.
Your Oregon Garden Changes Every Week. Your Plan Should Too.
Gardening in Oregon changes quickly throughout the season. Every Friday you’ll receive a simple weekly plan showing exactly what to plant, prune, fertilize, harvest, and protect so you never miss the right timing.
Growing conditions, variety, and the particular season all play a role in how bulbs turn out.
For planting stock, look for cured garlic cloves from a local nursery, a farmers market vendor, or your own saved harvest. Grocery-store garlic can be tried, but those cloves may have been treated to slow sprouting, which can reduce their vigor in the ground.
They are not guaranteed to fail, but purpose-grown planting stock gives you a more reliable start.
Flavor is a separate question from size, and it is worth thinking through before you buy. Hardneck varieties – Rocambole, Purple Stripe, and Porcelain types are common in the Pacific Northwest – are often described as more complex or pungent, though individual experience varies.
Softneck types tend to be milder and store longer. No planting technique, fertilizer, or timing trick makes garlic sweeter.
Flavor is shaped by the variety you grow and the conditions it grows in, so choose a variety that fits how you actually cook.
The fall mistake to avoid is a soggy bed
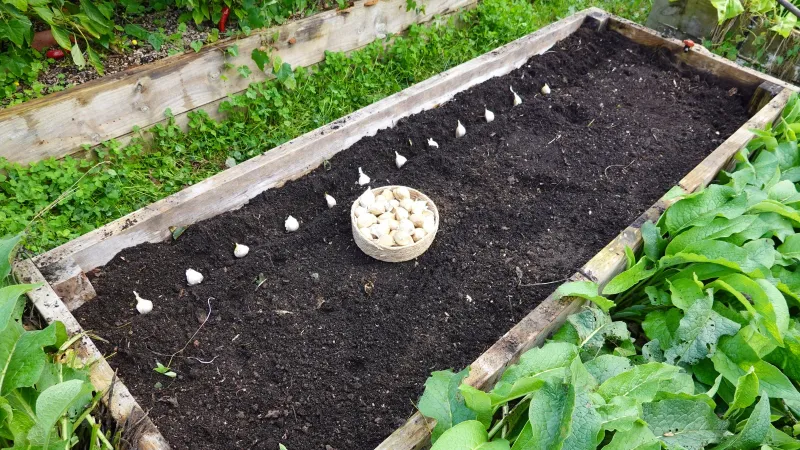
Wet soil is the real risk to fall-planted garlic in the Willamette Valley, not a missed planting date. Cloves sitting in persistently waterlogged ground can rot before they ever get a chance to root, and the problem tends to show up quietly – you may not realize anything went wrong until spring arrives and nothing comes up.
Choosing the right spot before you plant is the most effective prevention.
Oregon State Extension recommends a well-drained site for garlic, and Washington State Extension echoes that caution, warning that excess moisture puts planting cloves at risk of rotting. A bed that drains freely after rain is what you are looking for.
Full sun helps too, both for drainage and for the long growing season garlic needs to bulk up properly.
Clay-heavy soil is not automatically a dealbreaker. The concern is not clay itself but whether that clay stays saturated for extended periods.
A spot that drains within a day or two after heavy rain is workable. A spot where water pools or the soil stays soggy for a week at a time is genuinely risky for garlic.
For gardens with heavy or poorly draining soil, Oregon State Extension suggests building raised beds about 10 to 12 inches high and filling them with well-amended growing mix. Raised beds give you direct control over drainage and make it easy to create the loose, open soil structure garlic roots prefer.
Even a modest raised bed made from lumber or stacked stones can make a heavy-soil garden much more garlic-friendly. If you are working with a flat in-ground bed, amending with compost and avoiding low spots where water collects will help considerably.
Plant each clove point-up with room to grow
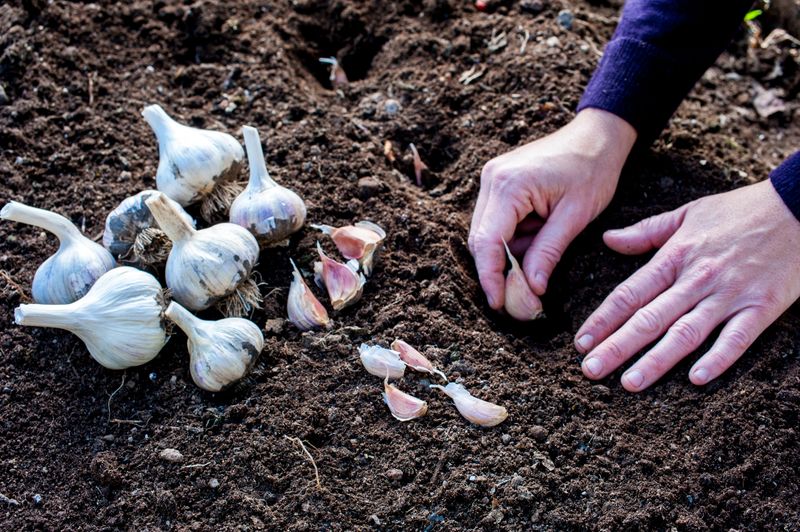
Before you plant, break the bulb apart into individual cloves. Each clove becomes its own plant, and planting an intact bulb will not produce a single large head – it will produce a crowded cluster of stunted plants competing for the same patch of soil.
Separate them gently to keep the papery skin on each clove intact, and set aside any cloves that feel soft, look damaged, or are noticeably smaller than the rest.
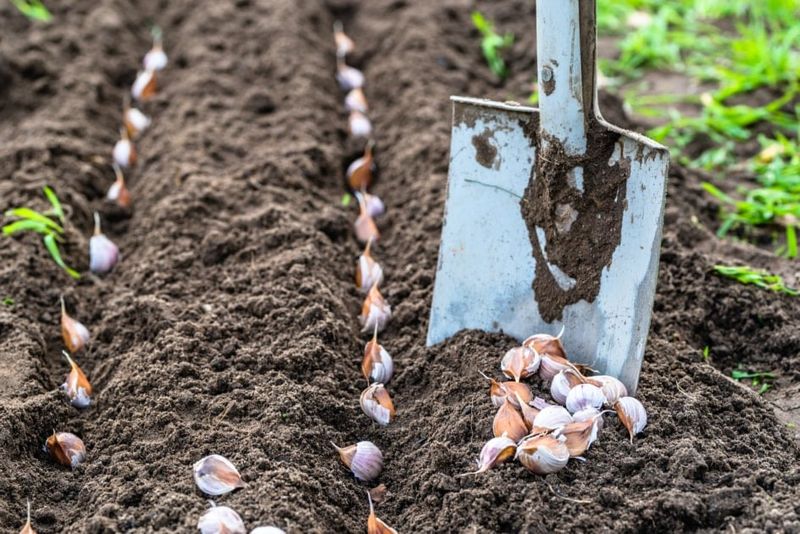
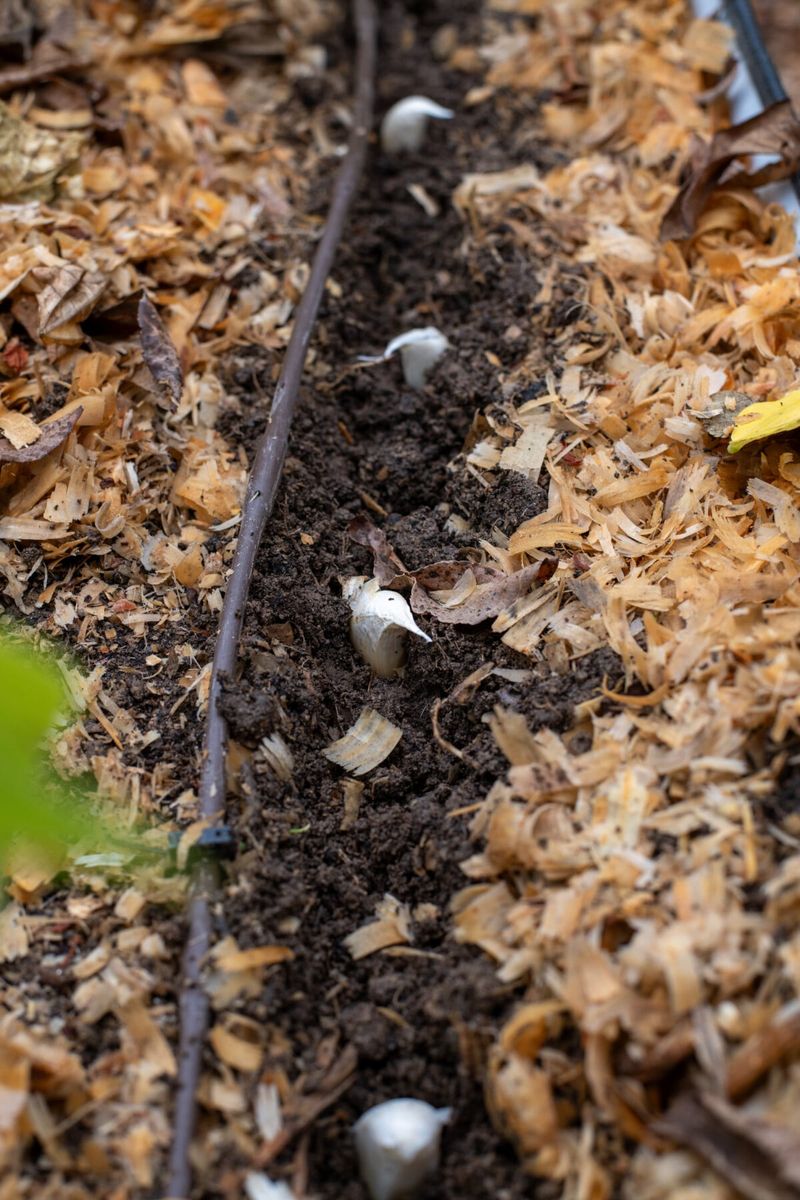
Orientation matters. Place each clove with the pointed tip facing up and the flat basal end facing down.
The shoot grows from the tip, and cloves planted sideways or upside down will still grow, but they have to reorient themselves underground first, which costs energy and can slow establishment. Getting it right from the start is a small detail that makes a real difference.
Oregon State Extension recommends planting about 2 inches deep and spacing cloves roughly 2 to 4 inches apart. The fall guide also suggests 4 inches between cloves as a practical spacing target.
Crowding is worth avoiding: garlic roots spread outward and compete for nutrients and moisture, so giving each clove a little breathing room supports healthier growth over the long season ahead.
After placing the cloves, cover them with soil and firm it gently so there are no large air pockets around the roots. Full sun is important for the whole growing season, so choose a spot that gets at least six hours of direct light daily.
A bed that is sunny in October will likely be shadier by summer if nearby trees or structures block the afternoon sun, so it is worth thinking ahead when you pick your site.
Keep weeds down and let winter rain do its work
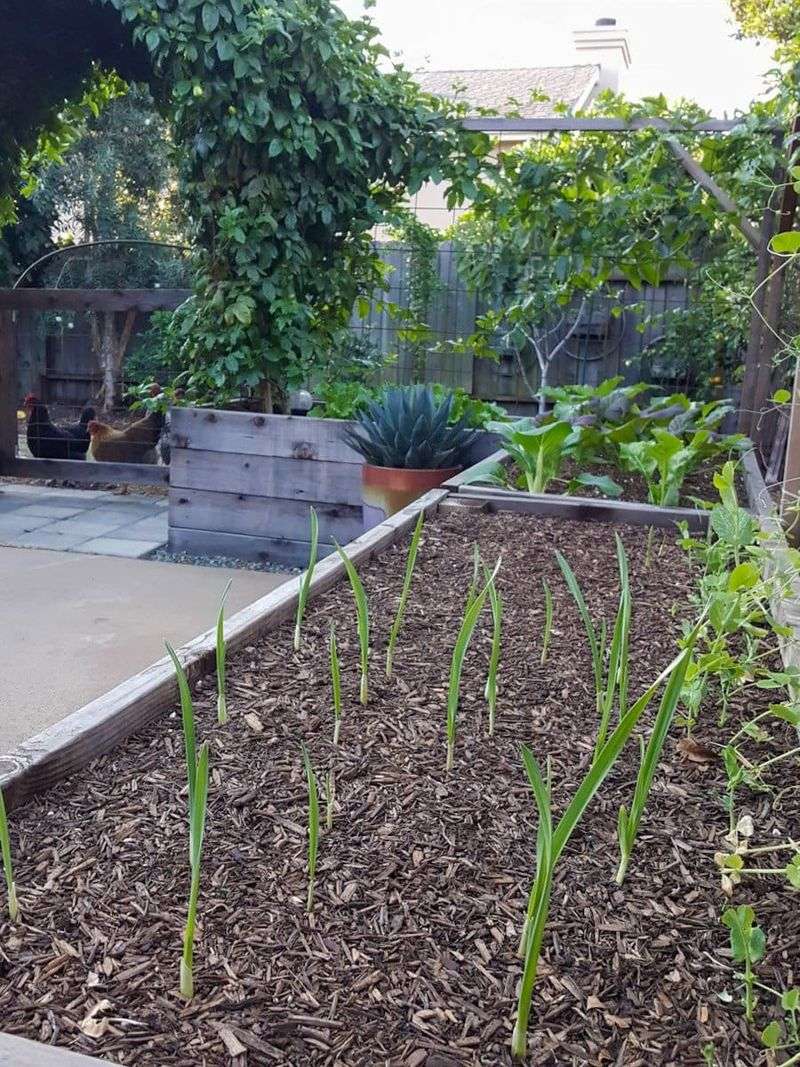
Garlic is a surprisingly poor competitor when weeds move in. Its upright, narrow leaves do not shade the soil the way sprawling plants do, so weeds can get established quickly and start pulling moisture and nutrients away from your crop.
Regular weeding through fall, winter, and into spring is one of the more reliable things you can do to support a good harvest.
A light layer of mulch helps on both fronts. Straw, shredded leaves, or another open-textured material laid over the bed after planting can slow weed germination and help moderate soil temperature through winter.
Oregon State Extension suggests light mulch for garlic beds, and the emphasis on light is deliberate. A thick, heavy mulch layer in a wet Willamette Valley winter can trap moisture against the soil surface and work against the drainage you worked to create.
Match the mulch depth to your site – a well-drained sandy bed might benefit from a bit more, while a heavier soil may need very little.
Watering after fall planting is usually not necessary in the Willamette Valley. The region’s fall and winter rainfall typically supplies enough moisture to keep the soil from drying out, and Oregon State Extension notes that supplemental watering is generally only needed if your soil is very sandy or conditions are unusually dry at planting time.
Routine irrigation through a wet Pacific Northwest winter can make drainage problems worse, not better.
Come spring, water if the soil genuinely dries out between rains, but let the weather guide you rather than a fixed schedule. Garlic does not need to be kept constantly moist – it needs consistent, moderate moisture during the active growing period, with attention to what the soil and the weather are actually doing.
Feed modestly and adjust care as spring arrives
Fertilizer is a support tool for garlic, not a size guarantee. Adding more than the soil needs does not produce bigger bulbs – it can actually cause problems, including lush leaf growth at the expense of bulb development or nutrient imbalances that make other deficiencies worse.
The goal is modest, well-timed feeding that matches what the crop actually needs at each stage.
Oregon State Extension suggests applying fertilizer at planting and then adding nitrogen again in early spring as the plants begin active growth. A lighter application just before bulbs start to swell gives the plants a final push during the period when size is being determined.
Beyond that basic schedule, what your soil actually needs depends on what is already in it. A soil test from your local extension office is the most reliable way to know whether your ground needs amendment and what kind – and any fertilizer or lime application should follow product-specific directions rather than a blanket dose.
Garlic grows best in soil with a pH of at least 6.5, according to Oregon State Extension guidance on nutrient management for western Oregon vegetable gardens. If your soil is significantly more acidic than that, lime may help – but applying lime without knowing your starting pH can shift things further than intended.
Test first, then adjust.
Spring watering follows a similar principle of restraint. Water when the soil is genuinely dry, and taper off around mid-June as the plants approach harvest.
Keeping the soil too wet in late spring can interfere with the final stages of bulb development and make it harder to know when harvest time has arrived. Let the plants and the soil tell you what they need rather than following a rigid calendar.
Use leaf color to guide harvest, then cure the bulbs
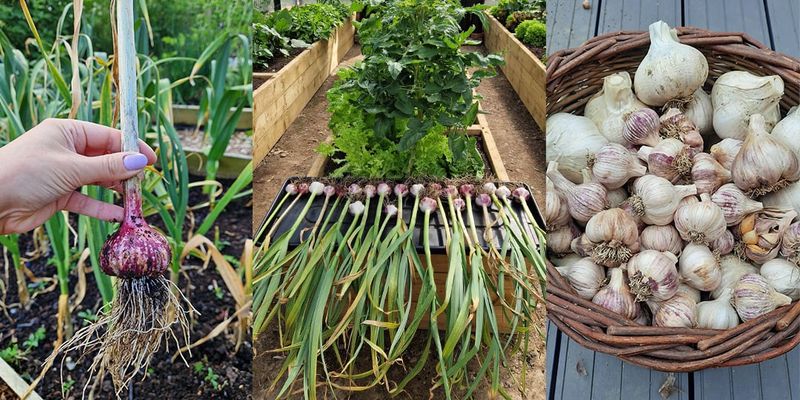
By late spring, your garlic will be sending up tall green shoots and, if you planted a hardneck variety, curling flower stalks called scapes. Removing those scapes when they appear in May or early June can direct more of the plant’s energy toward the bulb rather than the flower head, which may increase bulb size.
It is not a dramatic transformation, but it is a simple, low-effort step that many experienced garlic growers swear by – and the scapes themselves are delicious in stir-fries and pestos, so nothing goes to waste.
Knowing when to harvest takes a little patience and a willingness to pay attention. Oregon State Extension recommends starting to check when roughly half of the plant’s leaves have turned yellow and begun to dry.
Each green leaf on the plant corresponds to a wrapper layer on the finished bulb, so leaving garlic in the ground too long means losing those protective layers, which shortens storage life. Pulling too early means smaller, less developed bulbs.
Rather than relying on a calendar date, pull a test bulb from the edge of the bed and check it. The cloves should be plump and well-defined within the wrapper.
If they look fully formed and the skin is intact, the rest of the bed is likely ready. Harvest timing in the Willamette Valley typically falls somewhere between late May and late July, with plenty of variation depending on the variety and the season.
After harvest, cure the bulbs in a warm, dry, shaded spot with good air circulation for two to three weeks. Hang them in bundles or lay them on a screen – just keep them out of direct sun and away from dampness.
Properly cured garlic stores well for months, and a well-cured bulb from your own garden is one of those small pleasures that makes the whole fall planting effort feel very much worth it.