Ditch The Tiller With These 7 Ways To Prep A Garden Bed By Hand
Picture a loud machine bucking across your yard like an angry pony, spitting dirt into your hair and shoes. Your neighbors peek through the curtains, and your arms buzz for an hour after the engine finally stops.
Now imagine the same patch of ground on a crisp October morning, with only birdsong and your own breathing. The soil smells sweet and earthy, and the falling leaves crunch softly under your boots as you work.
Simple tools in steady hands can turn tired dirt into a fluffy home for next year’s hungry roots. Fall is a sneaky good time for this work, since cooler air keeps you comfortable and the worms busy.
Gardeners have shaped beds by hand for thousands of years, long before anyone bolted an engine onto blades. Their gardens fed families, filled markets, and somehow managed fine without a single pull cord or gas can.
You get exercise, quiet mornings, and healthier soil, plus fewer moments wrestling a machine that refuses to start. My old tiller still sits in the shed, and honestly, the spiders there seem much happier than I was.
1. Cover The Sod With A Cardboard Blanket
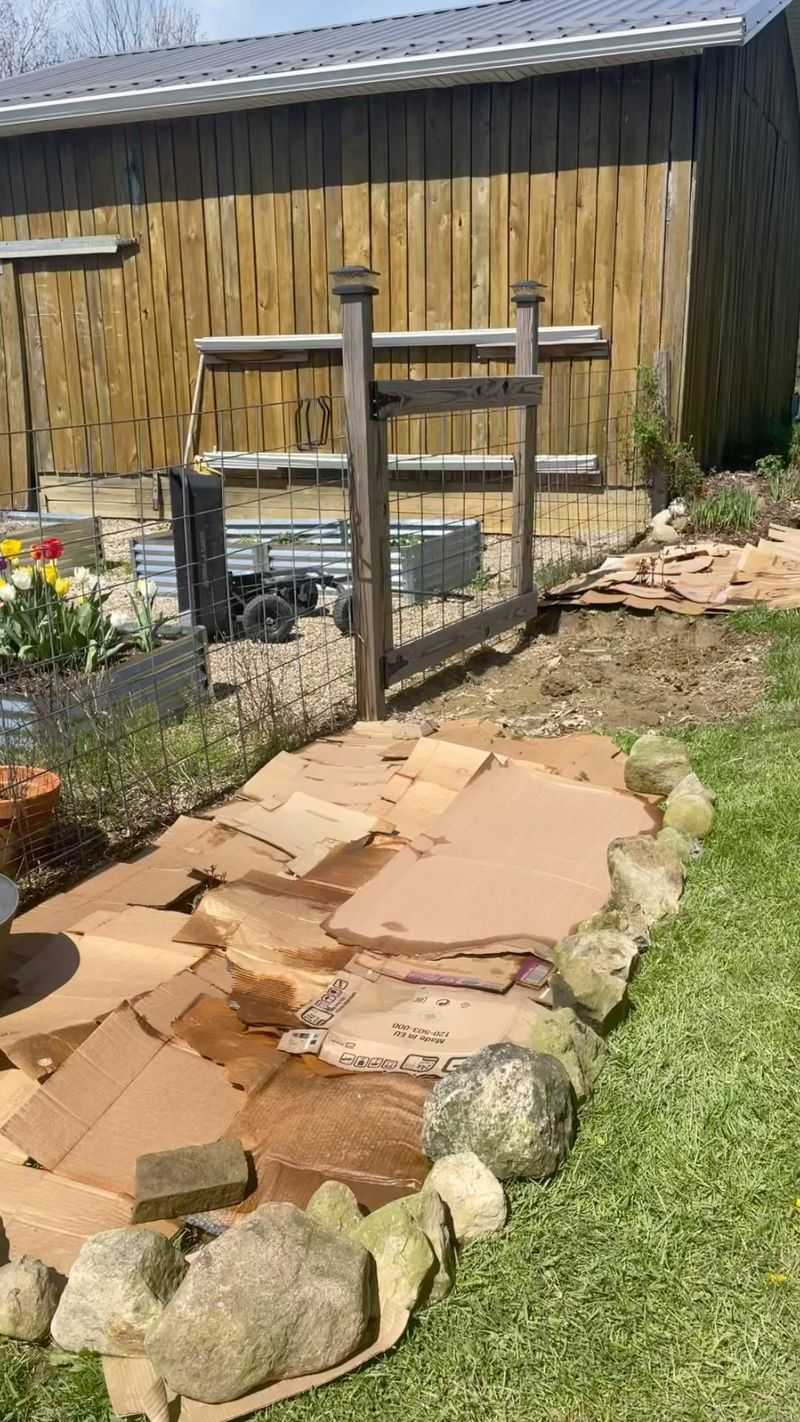
Gardeners often cover weedy lawns with brown boxes in fall, and by April the sod underneath has softened into dark, crumbly soil. Sheet mulching sounds fancy, but it mostly means letting cardboard do the heavy lifting while you relax indoors.
Start by mowing the grass or weeds as short as possible, then leave the clippings right where they fall. Next, peel off all tape and shiny labels from plain cardboard boxes, since plastic bits rarely break down.
Lay the sheets flat across the bed, overlapping each edge by about six inches so sneaky weeds cannot squeeze through. Soak the cardboard with a hose until it feels soggy, which helps it hug the ground and soften faster.
Pile three to four inches of compost, shredded leaves, or wood chips on top to hold everything in place. Early fall is perfect timing, because the layers have all winter to break down while you stay cozy inside.
Underneath the cardboard, the grass runs out of sunlight and slowly fades away with little digging or pulling. Meanwhile, earthworms gather in the dark, damp space and munch the soggy paper into rich, crumbly soil.
Fun fact, worms are drawn to damp cardboard, and gardeners often find them clustered right under a sheet. Their tunnels add air and drainage, giving you many of the perks of tilling without the engine.
Come spring, simply poke a trowel through the softened layers and tuck your seedlings right into the dark mix. Any stubborn cardboard scraps can stay put, since they will finish breaking down while your plants grow tall.
2. Loosen The Ground With A Trusty Broadfork
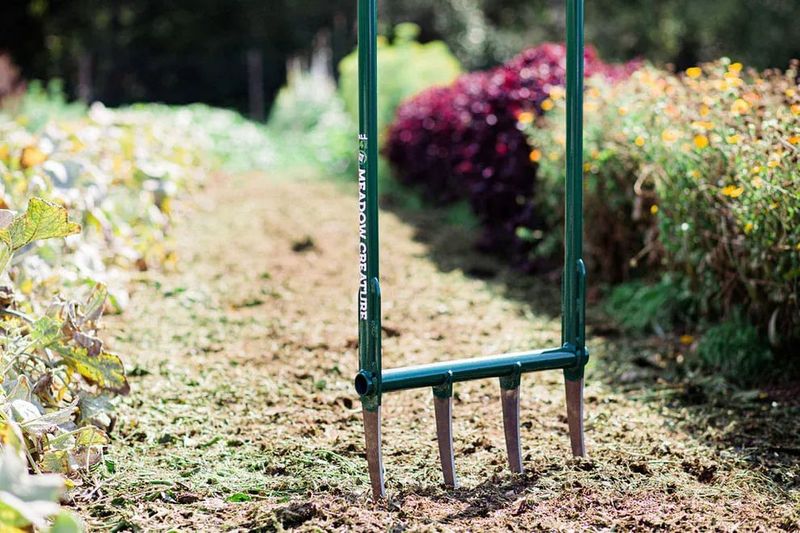
Picture a giant metal fork with two tall handles, and you have the broadfork, a quiet hero of no-till gardens. Some folks call it a U-bar, and once you try one, your back will probably thank you.
Unlike a shovel, it loosens deep soil without flipping the layers upside down or scrambling the underground neighborhood. Fungi, worms, and helpful microbes are disturbed far less, so the soil keeps more of its natural crumbly structure.
To use one, stand on the crossbar and rock your weight gently until the long tines sink into the ground. Then pull the handles back toward you, and you will feel the earth lift and crack open like bread.
Step backward about eight inches and repeat the motion, working slowly in a straight line down the whole bed. Most people find a steady rhythm after a few rows, almost like a slow dance with the garden.
Early October is a sweet spot for broadforking, since the soil is usually moist but not soggy from rain. Wet clay sticks to the tines and packs down, so wait a day or two after a heavy storm.
After loosening, sprinkle an inch of compost over the top and let fall rains wash goodness into the cracks. Those openings act like little highways, carrying water, air, and nutrients down to where roots will travel later.
A good broadfork often costs less than a gas tiller, needs no fuel, and can last for decades with simple care. Just wipe off the mud after each use and hang it somewhere dry, away from the winter dampness.
3. Flip The Soil With Classic Double Digging
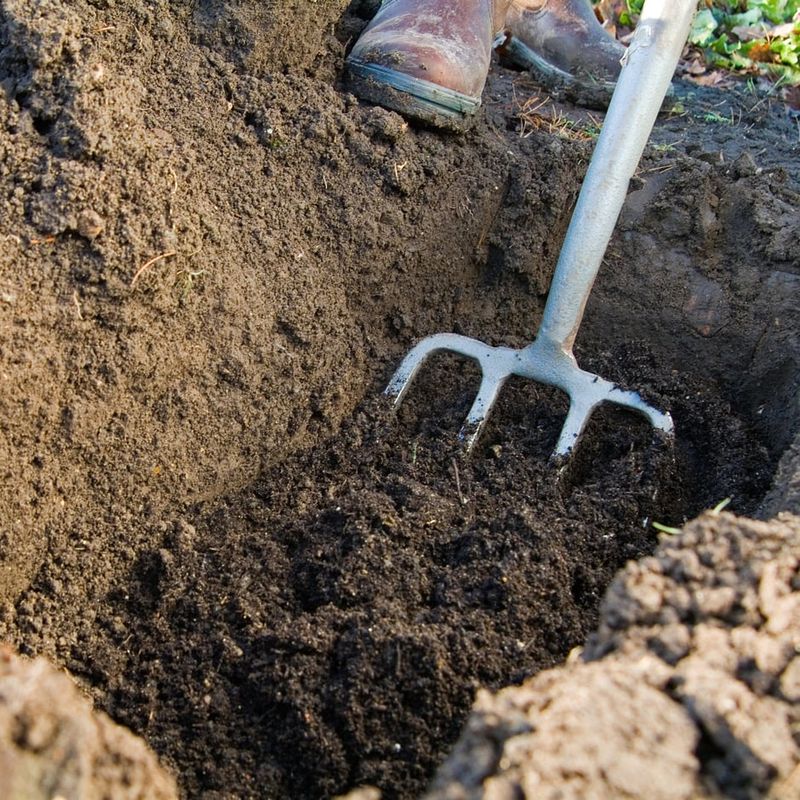
Back in the 1800s, French market gardeners near Paris grew heavy harvests in small plots using deeply worked beds. Double digging builds on that old tradition, and it is a solid workout disguised as a garden chore.
The idea is simple, because you loosen the soil about two shovel blades deep instead of just one. Roots love that extra elbow room, and crops like carrots and parsnips can grow longer and straighter.
First, dig a trench about one foot deep and one foot wide across the end of your bed. Set that topsoil aside in a wheelbarrow, because you will need it again at the very end.
Next, push a digging fork into the bottom of the trench and wiggle it to loosen the hard layer. Toss in a few scoops of compost or shredded fall leaves to feed the deeper soil over the winter.
Now dig a second trench right beside the first, tossing that topsoil forward to fill the trench you finished. Keep moving down the bed this way, and use the saved wheelbarrow soil to fill your final trench.
Honestly, this method is hard work, so tackle one small bed per weekend instead of the whole yard. Cool October afternoons make the job far more pleasant than sweating through it under a blazing July sun.
You may only need to double dig once, since well-tended beds can stay loose for several years. Just avoid stepping on the bed afterward, because your boots can squash all that hard-earned fluffiness right back down.
4. Slice The Weeds With A Sharp Stirrup Hoe
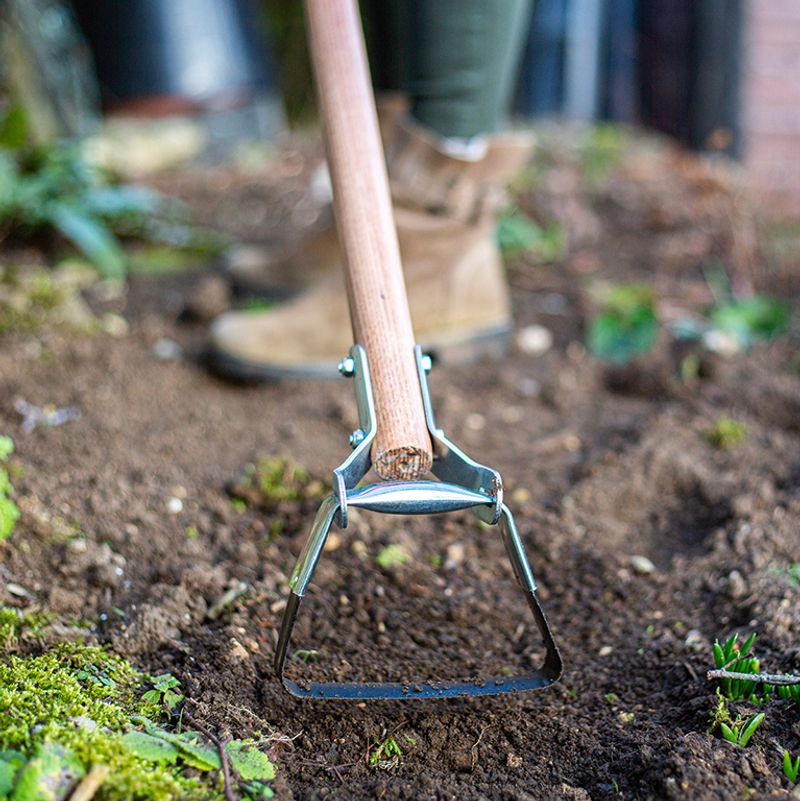
Weeds are pesky little freeloaders, and a stirrup hoe is the friendly bouncer that politely shows them the door. Its looped blade wiggles back and forth, slicing roots just below the surface on both the push and pull.
Gardeners sometimes call it a hula hoe, because using it feels a bit like dancing with a long stick. Silly name aside, it clears a weedy patch much faster than pulling each green intruder by hand on your knees.
Early fall brings a fresh flush of cool-season weeds like chickweed and henbit, which sprout quickly after September rains. Catching them while they are tiny means less work later, since young roots let go with barely a tug.
Pick a dry, sunny afternoon for hoeing, so the sliced weeds shrivel on the surface instead of rerooting. Hold the handle like a broom, standing tall, and skim the blade about half an inch under the dirt.
Going deeper is tempting, but it drags buried weed seeds up toward the light where they happily sprout. Shallow strokes leave those seeds snoozing underground, which means fewer surprise weeds popping up next spring.
Leave the wilted weeds on top as a thin mulch if they have not gone to seed, or rake them into your compost pile. Either way, their leftover nutrients return to the soil instead of heading off to the curb in trash bags.
A quick file across the blade every few weeks keeps it sharp enough to glide through soil like butter. Once you see how fast a bed clears, you might start hoeing just for the satisfying swish.
5. Build The Bed With Lasagna Style Layers
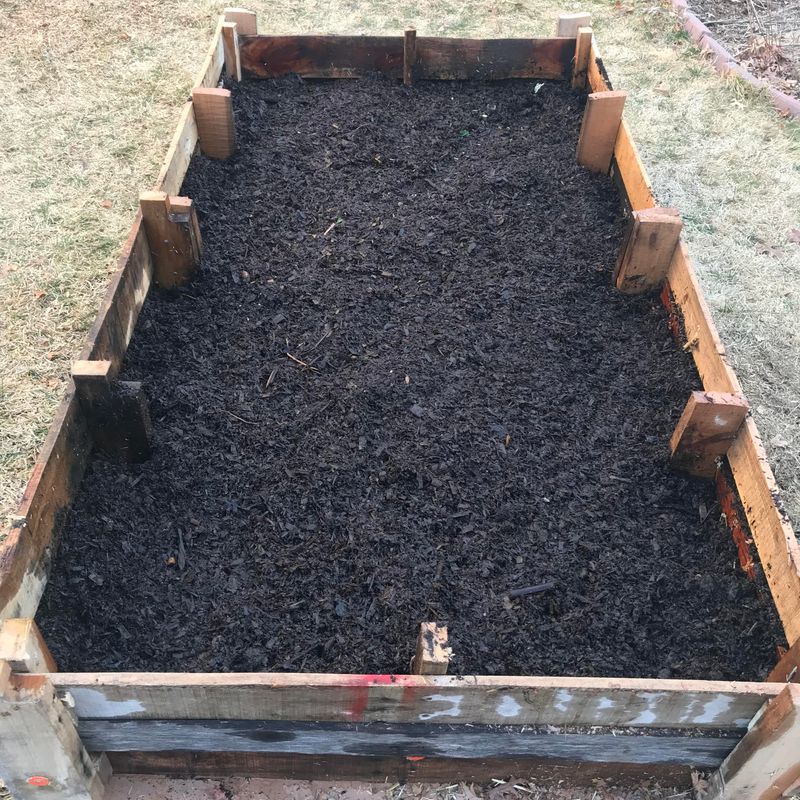
My grandmother called it a compost sandwich, and she built one every autumn with whatever her yard handed her. Today people call it lasagna gardening, and it works just as well now as it did back then.
The method stacks green and brown materials in thin layers right on top of the ground, with no digging needed. Over the winter, those layers slowly melt together into a deep, spongy bed that smells like a forest floor.
October is a great month to start, because fallen leaves, grass clippings, and garden scraps are easy to find. Begin with a layer of newspaper or cardboard to block weeds, then wet it down until it feels soft.
Next, add a few inches of brown materials such as dry leaves, straw, or shredded paper from your recycling bin. Follow that with a thinner layer of greens like kitchen scraps, coffee grounds, or fresh grass clippings.
Keep alternating browns and greens until the pile stands about eighteen inches tall, roughly the height of a chair seat. It will shrink a lot by spring, so do not worry if it looks silly and tall right now.
Aim for roughly twice as many browns as greens, which keeps the pile from turning slimy or smelling funky. Finish with a cozy blanket of compost or shredded leaves on top to keep critters from digging around.
By planting time, the layers become dark, crumbly soil that holds moisture like a sponge and feeds hungry plants. Grandma swore her tomatoes tasted better from those beds, and after trying it myself, I believe her.
6. Smooth The Surface With A Bow Rake
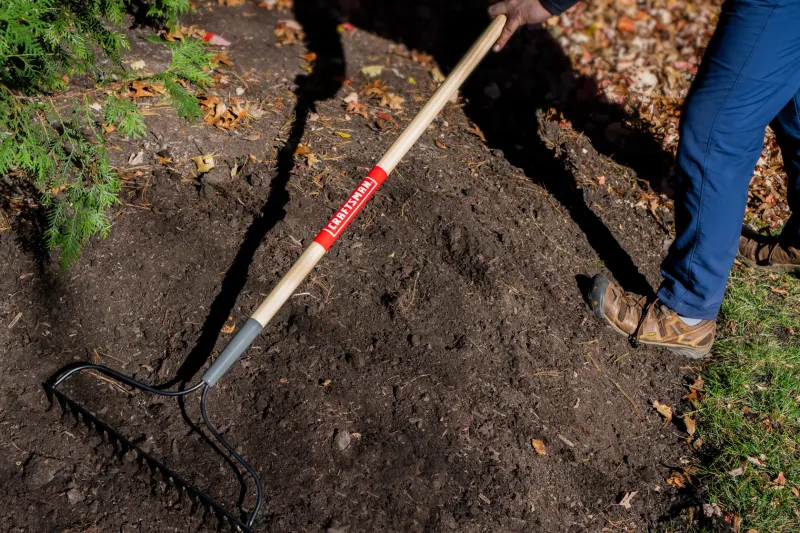
Ever tried planting tiny seeds into lumpy, rocky ground, only to watch half of them wash away in rain? A sturdy bow rake fixes that problem, turning a rough patch into a smooth, welcoming seedbed in a short time.
Unlike the flimsy leaf rake in your garage, a bow rake has short, stiff steel teeth built for real soil. Flip it over, and the flat back edge works like a giant spatula for leveling out the dirt.
Begin by dragging the teeth across the bed to pull out rocks, old roots, and clumps of stubborn grass. Toss the debris into a bucket as you go, and break up any big dirt clods with gentle chops.
Next, rake in different directions, crisscrossing the bed until the top inch of soil looks fine and even. Then flip the rake and gently pull the flat side across the surface to smooth out any small bumps.
In many regions, early to mid fall is a great window for planting garlic and sowing spinach, both of which love a tidy seedbed. Smooth soil lets you plant at an even depth, so seeds tend to sprout closer together instead of trickling up one by one.
You can also use the rake to shape a slight crown, keeping the middle a bit higher than the edges. That gentle hump helps heavy autumn rain drain away, so roots stay happy instead of sitting in puddles.
Here is a fun bonus, since the same rake can pull together heavy piles of fallen leaves to use as mulch on other beds. One sturdy tool, a few relaxed passes, and your bed looks ready for its close-up photo.
7. Feed The Soil With A Fall Cover Crop
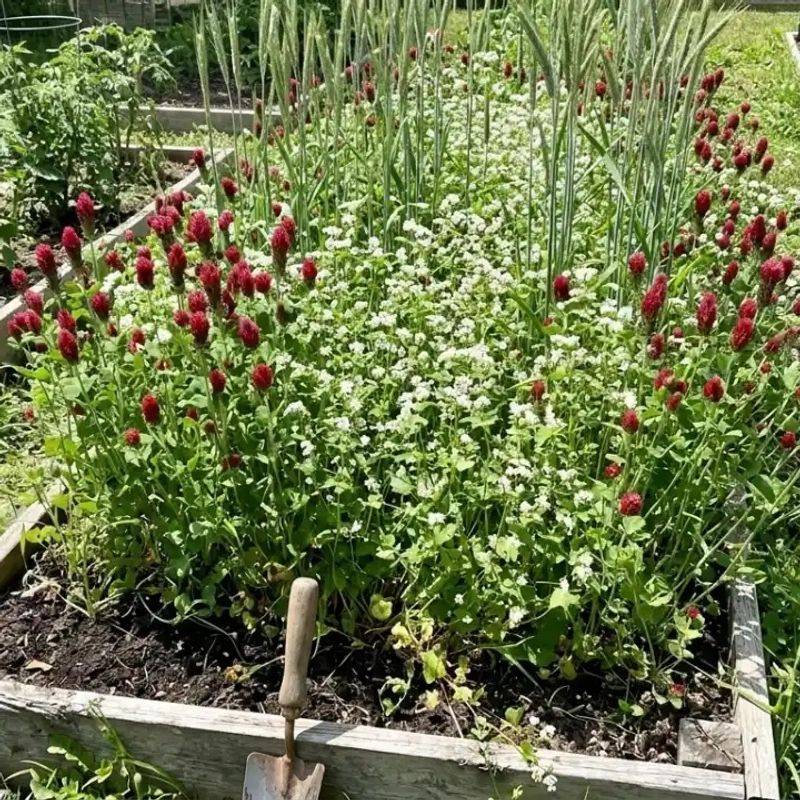
Winter rye roots can reach more than three feet deep, which is like weaving an underground blanket for your soil. Cover crops quietly prep your garden bed all winter long while you sip cocoa and flip through seed catalogs.
These plants are not grown for eating, but for protecting and feeding the soil during the chilly off-season months. Their roots hold dirt in place against winter rain, and their leaves block weeds from moving into bare spots.
Popular choices for fall planting include cereal rye, crimson clover, hairy vetch, and oats, all easy to find online. Clover and vetch work with soil bacteria to capture nitrogen from the air and store it in their roots for next year’s crops.
In many regions, early fall is a good time to sow, giving seeds several weeks to sprout before the first hard frost arrives. Just rake the bed lightly, scatter seeds by hand, and rake again so they settle into the soil.
Water the area if the weather turns dry, and watch for a fuzzy green carpet within one to two weeks. Birds may snack on a few seeds, so a light layer of straw on top can help protect them.
In spring, cut the plants down with garden shears or a sharp hand sickle a few weeks before planting. Leave the trimmed stems on the surface as mulch, or cover them with a tarp to speed their breakdown.
The roots stay underground and slowly break down, leaving behind tiny channels that help water and air move freely. It feels a little like cheating, since the plants do most of the hard work while you rest.