8 November Canna Lily Tasks Georgia Gardeners Should Do Before Winter Arrives
A seed tucked inside an ancient walnut-shell rattle from Argentina sprouted after roughly six hundred years of waiting. That stubborn seed belongs to a tropical beauty many of us grow for its huge leaves and fiery summer blooms.
Its relatives still light up mailbox beds and backyard ponds across Georgia with bold, banana-like foliage and flowers.
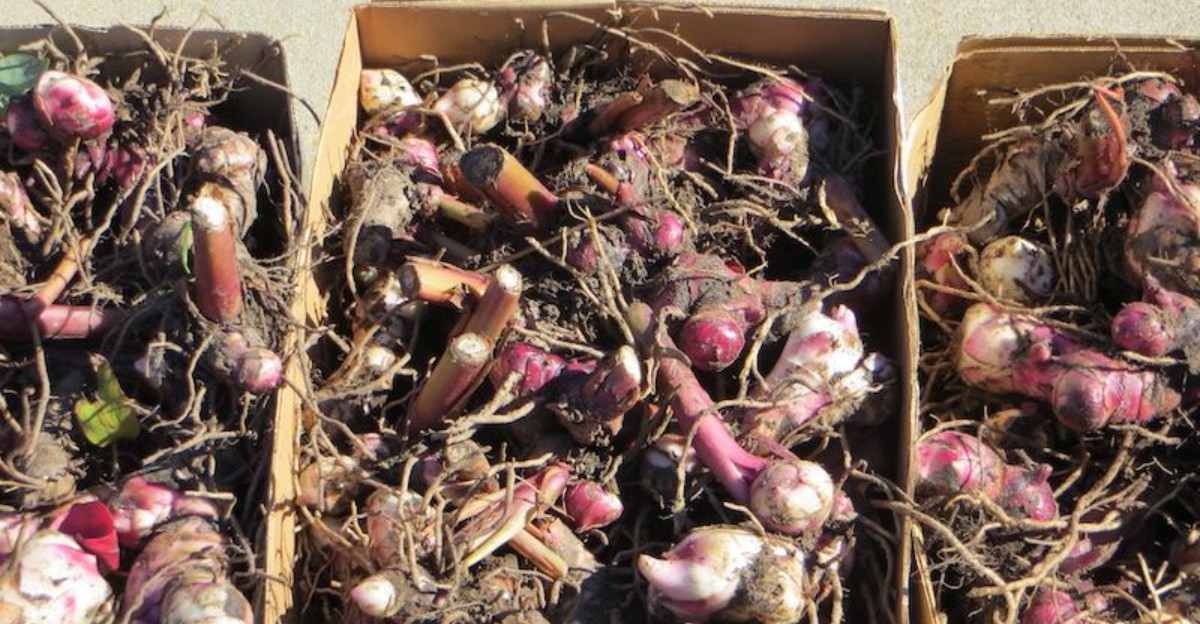
Underneath all that drama sits a thick, knobby rhizome that quietly stores energy for the next growing season.
I have to admit that I ignored mine one autumn and paid for it with mushy roots by spring. You might notice the plants looking tired right now, and that slump is actually a helpful signal.
Winter in Georgia can mean a mild coastal breeze or a hard mountain freeze, depending on your zip code. Knowing how to respond to those changing conditions can make all the difference when these tropical beauties return next summer.
1. Watch For The First Frost To Blacken Canna Leaves
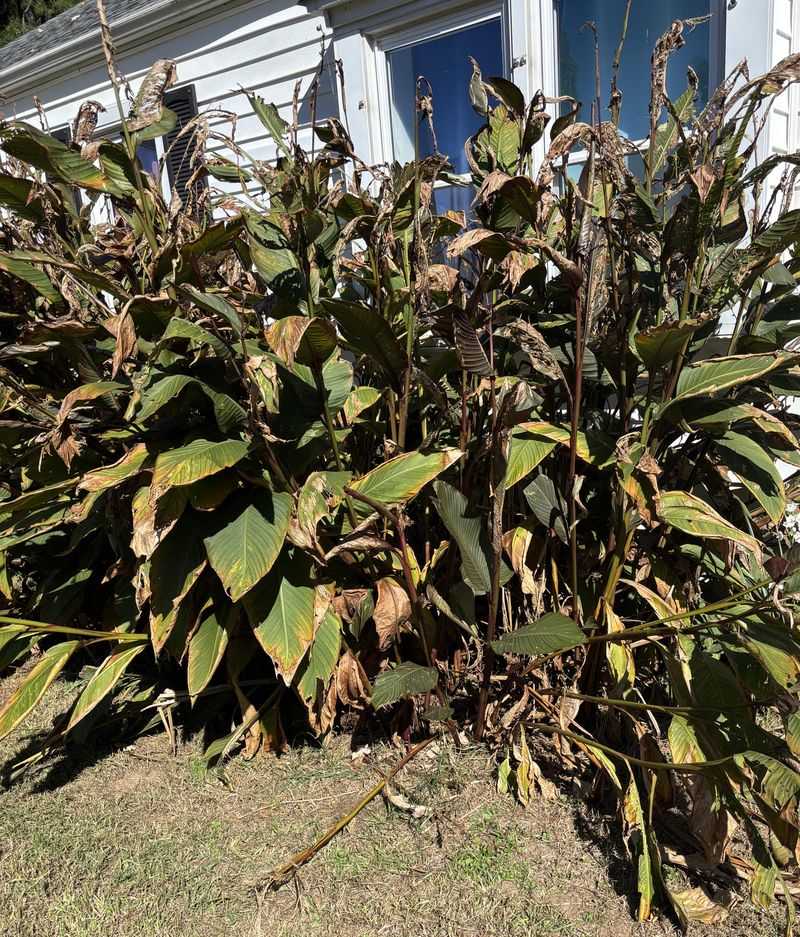
Nothing announces the end of canna season quite like waking up to leaves that look scorched and slumped overnight. That first light frost turns the giant paddles dark and floppy, and it is a welcome sight.
I used to panic when it happened, but now I treat it like a polite note from the plant. The foliage has finished its job, and the rhizomes below have soaked up the energy they need.
Digging or cutting too early can leave you with smaller, weaker rhizomes that struggle to sprout next spring. Those leaves keep feeding the roots through autumn, so letting them work until frost really does pay off.
First frost dates swing widely, arriving around late October in the mountains and late November near the coast.
Your local county Extension office can share average dates, which helps you plan chores without guessing.
Keep an eye on weather apps for nights dipping near freezing, especially in low spots where cold air settles. Frost pockets often hit sooner than the forecast suggests, so a quick morning walk tells you more than numbers.
Personally, I jot the date in a garden notebook each year, and the pattern has become surprisingly useful.
After a few seasons, you start to see which beds blacken first and which ones hold color longer.
Once the leaves have darkened, wait a day or two before trimming so the plants settle into rest. Patience here costs nothing, and your cannas will reward you with sturdy shoots when warm weather returns.
2. Cut Canna Stalks Down To A Few Inches
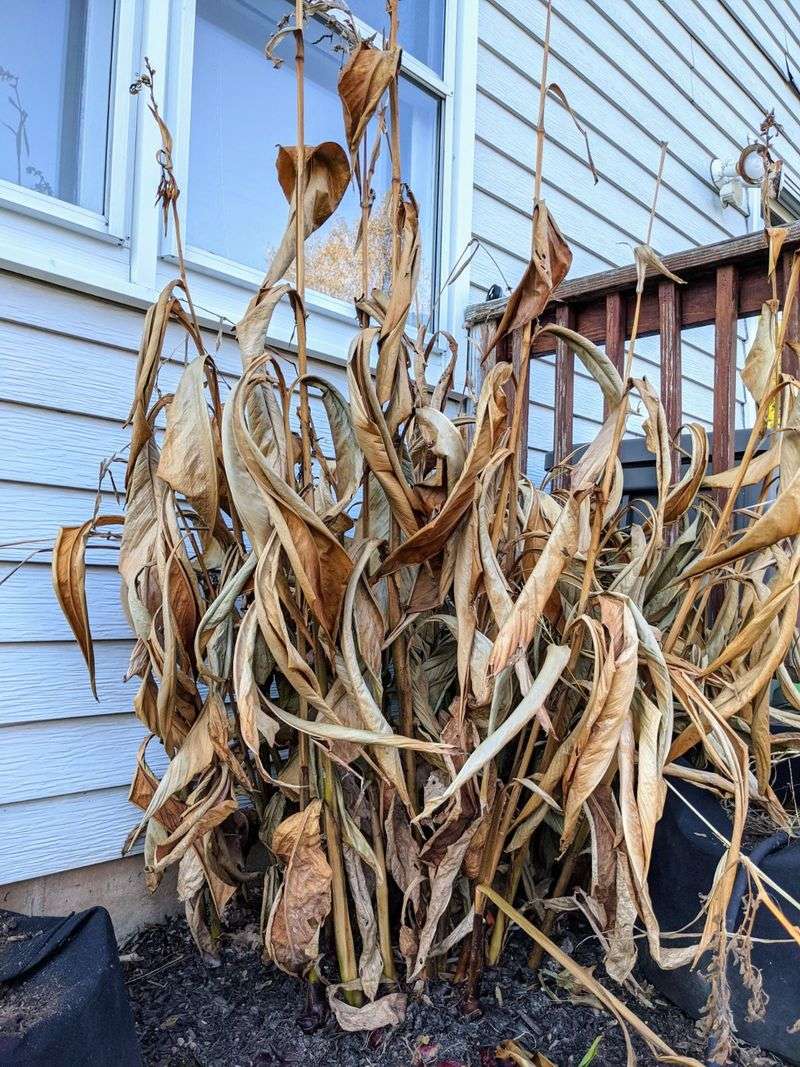
A frosted canna stalk flops over like a wet umbrella, and leaving it there does your garden no favors. Grab clean, sharp pruners and cut each stalk down to roughly two to four inches above soil.
I like leaving a short stub because it marks exactly where each clump sits during the bare winter months. Those little markers save me from stabbing rhizomes with a shovel when I plant bulbs nearby.
Clean cuts matter more than you might expect, since ragged tears can invite rot into the remaining stems.
Wipe your blades with a household disinfectant between clumps if any plants showed rust or odd streaks.
Old canna stalks are bulky and juicy, so they break down slowly in a compost pile. Chop them into smaller pieces first, or bag them up if you noticed disease earlier in summer.
Trimming helps whether your cannas stay in the ground or come up for indoor storage this winter. Gardeners leaving plants in place get a tidy surface for mulch, while diggers get easier access to roots.
You may notice a slightly sour smell from the cut stems, which is normal for these water-filled plants. Wear gloves if you like, because the sap can stain hands and leave pruners sticky for days.
Once the bed looks neat, step back and admire how much brighter the garden feels without the soggy mess. A tidy patch also lets winter sun warm the soil, which helps keep the area drier.
3. Clear Away Leaves Where Canna Leaf Rollers Hide
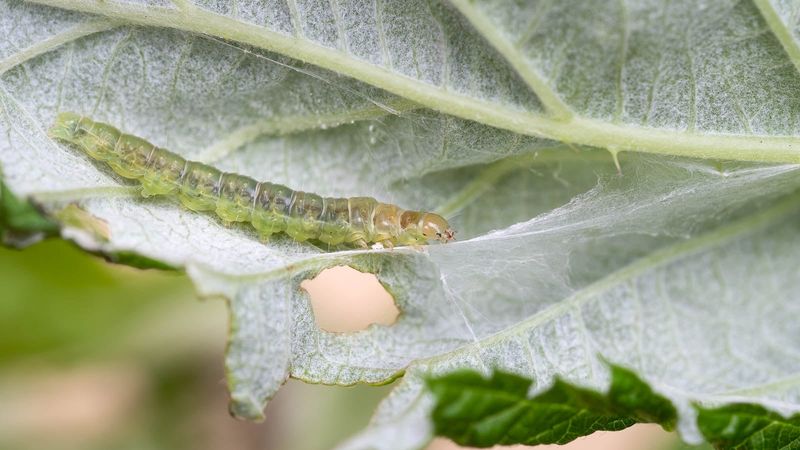
Canna leaf rollers can survive winter in protected plant debris or other sheltered locations, so removing infested foliage may help reduce their numbers the following season.
Those pests, the larvae of a small moth named Geshna cannalis, glue leaves shut and chew ragged holes.
If your leaves looked rolled up like cigars last summer, you already know how ugly the damage gets. Clearing away old leaves this season removes many overwintering larvae before they ever get a chance to emerge.
University extension specialists in the Southeast recommend this fall cleanup as a simple way to reduce next year’s damage. Unroll a few leaves before tossing them, and you might spot the pale green caterpillars tucked inside.
I find this weirdly satisfying, almost like a treasure hunt where the prize is healthier plants next summer. Rake up every scrap of foliage around the clump, since fallen leaves can shelter larvae just as well.
Bag the debris and put it out with the trash instead of adding it to your compost pile. Home compost rarely heats up enough to handle pests reliably, so tossing infested leaves is the safer move.
Japanese beetles and slugs also enjoy cannas, but leaf rollers are the pest that benefits most from messy beds. A clean bed in winter means fewer rolled leaves when fresh shoots unfurl again in spring.
Next year, watch for the first sealed leaf and simply pinch it open or snip it off early. Small actions like this keep your cannas looking glossy and bold without reaching for sprays at all.
4. Pile Thick Pine Straw Mulch Over In-Ground Cannas
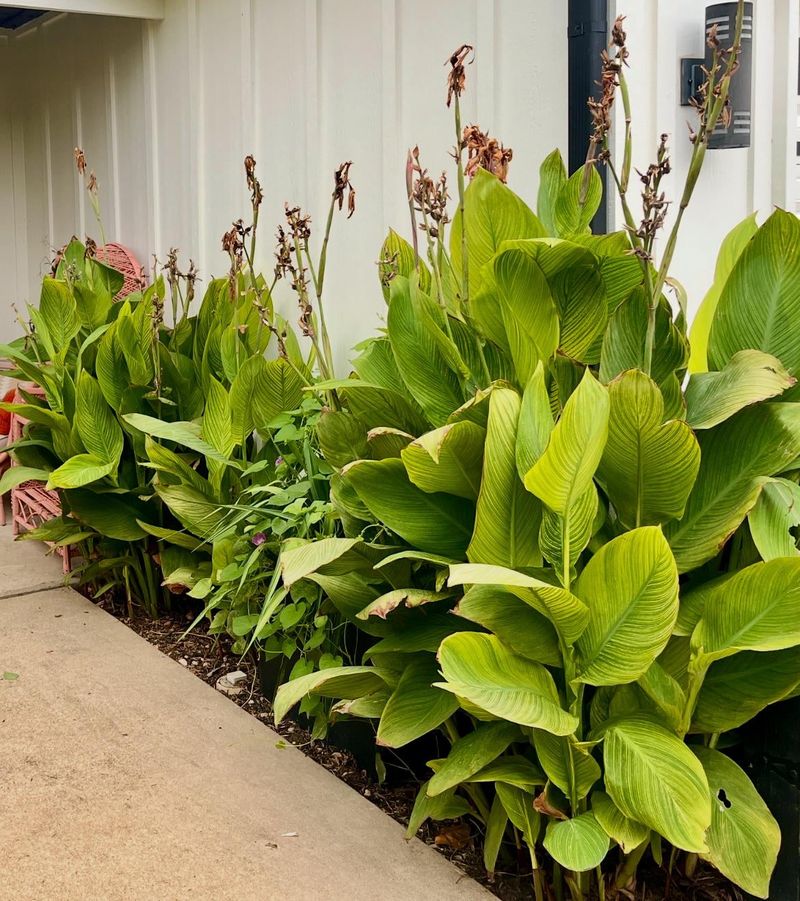
Cannas are tougher than their tropical looks suggest, staying reliably hardy in the ground across USDA zones 8 through 11. Much of middle and south Georgia falls in zones 8a through 9a, so lifting rhizomes there is often optional.
A thick blanket of mulch acts like a cozy quilt, buffering the rhizomes against occasional hard freezes.
Spread six to ten inches of pine straw or shredded leaves over each trimmed clump right after cutting.
I love pine straw for this job because it stays fluffy and lets water drain through easily. It also looks tidy in the landscape, which matters when your canna bed sits beside the front walk.
Drainage is the real secret, since soggy winter soil causes far more rot than cold temperatures often do. If your bed holds puddles after rain, consider lifting the rhizomes or improving the soil next spring.
Gardeners in zone 7b around Atlanta can often leave cannas in place, although a harsh winter may cause losses. Heavy mulch gives you a fair chance, and many metro gardens see their clumps return year after year.
Avoid piling mulch until the stalks are cut, because wet leafy stems trapped underneath can encourage mold. Check the layer after big storms, and fluff it back into place if wind or animals scatter it.
When spring warms up, pull the mulch back gradually so the soil heats and new shoots find sunlight. Seeing those first green spears poke through feels like a reward for a few minutes of autumn effort.
5. Dig Up Canna Rhizomes With A Garden Fork In North Georgia
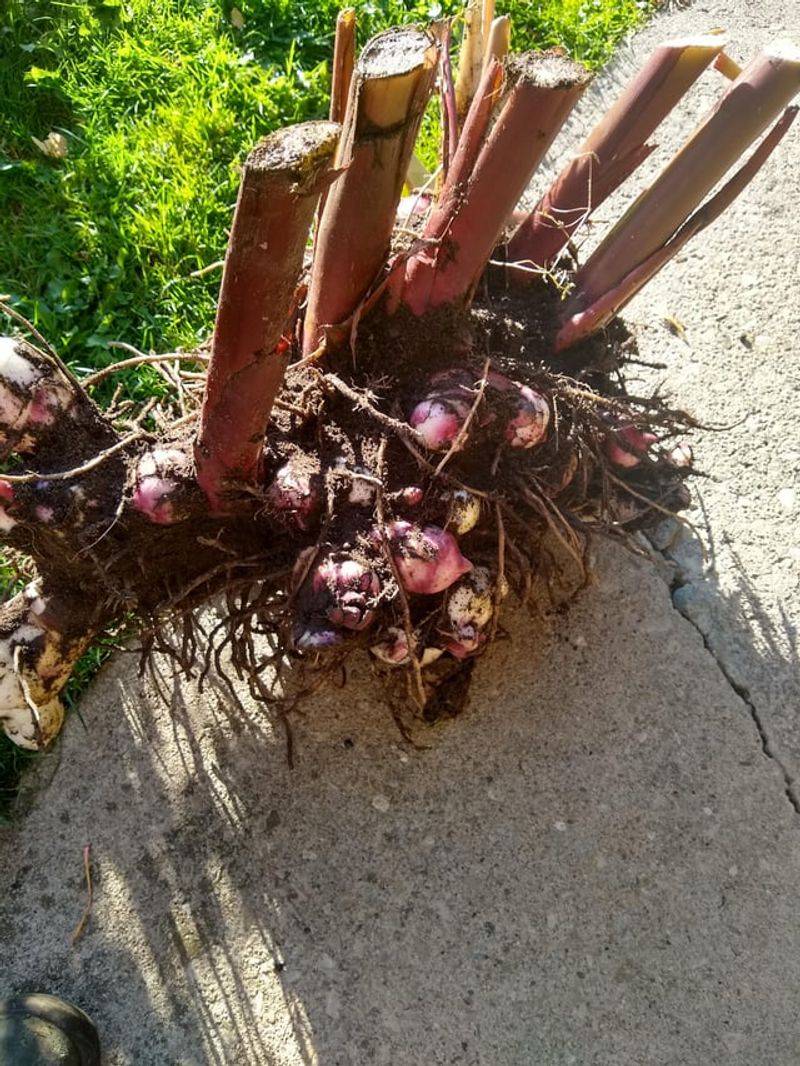
Up in the north Georgia mountains, winter soil can freeze deep enough to turn juicy rhizomes into mush.
Gardeners in zones 6b and 7a usually have better luck lifting their cannas and storing them indoors.
A garden fork beats a shovel here, because its tines slide around rhizomes instead of slicing straight through them. I learned that lesson the hard way after cutting a prized clump of orange cannas cleanly in half.
Start by pushing the fork into the soil about a foot away from the trimmed stalks. Work slowly around the clump, rocking the handle gently to loosen the roots without tearing the knobby rhizomes.
Once the soil feels loose, lift the whole mass from underneath rather than yanking on the stubby stems. Older clumps can be surprisingly heavy, so ask a friend to help if the cluster refuses to budge.
Timing matters, so aim to dig within a week or two after frost darkens the leaves. Waiting too long risks a hard freeze, which can damage rhizomes that are packed with water.
Shake off loose soil gently, but avoid banging the clump against rocks or tools to knock dirt free. Bruised rhizomes are more likely to rot later, and a few minutes of care prevents that disappointment.
Label each clump with its color or variety name before moving on to the next one in the bed. Trust me, by spring every brown rhizome looks identical, and you will thank yourself for writing notes.
6. Let Freshly Dug Canna Rhizomes Dry And Cure
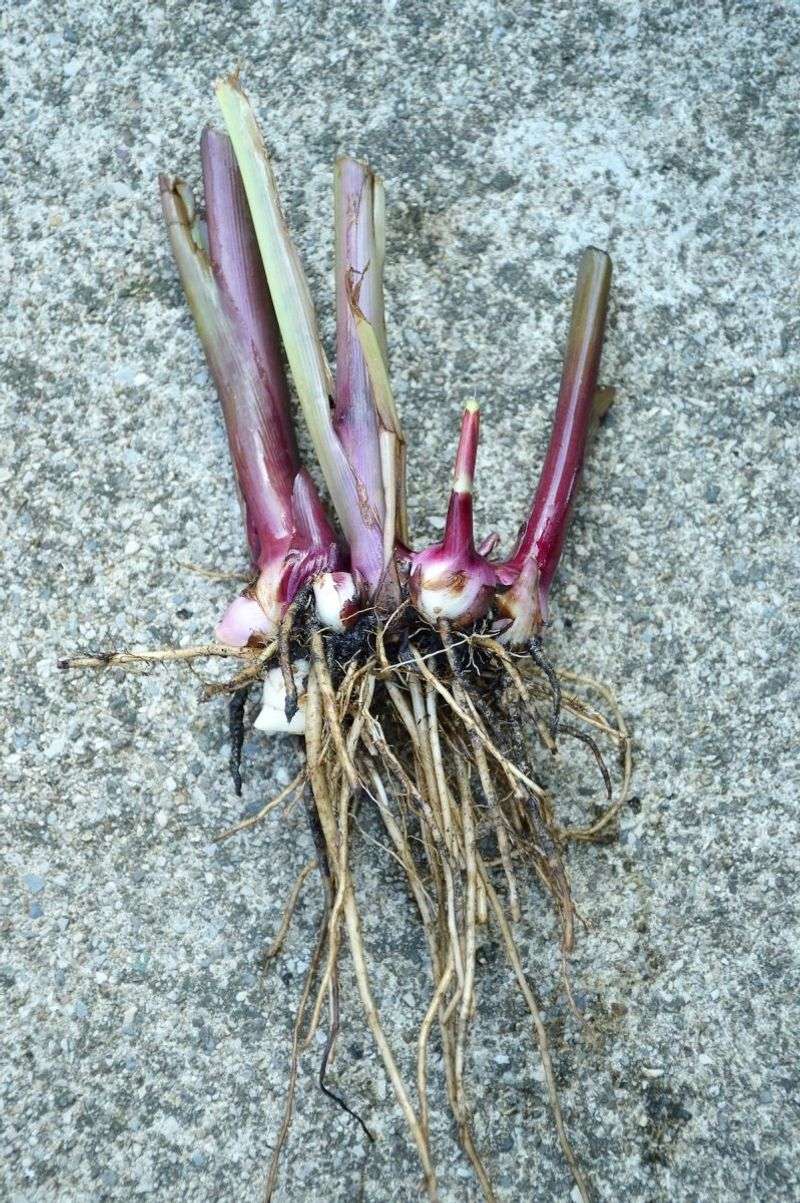
Freshly dug rhizomes are a bit like wet swimmers, and they need time to dry off before getting tucked away. Curing builds a firmer outer skin and helps small wounds seal, which lowers the chance of rot in storage.
Rinse away clinging soil with a gentle stream from the hose if your ground is heavy red clay.
Georgia clay sticks like glue, and leaving thick clumps on can trap moisture against the rhizomes all winter.
Next, spread the rhizomes in a single layer in a shaded, airy spot that stays above freezing. An unheated garage or covered porch works well, as long as hot sun does not bake them.
Most sources suggest letting them dry for several days, often around one week, until the surface feels firm. I flip mine halfway through so every side gets air, which seems to prevent soft patches from forming.
Lay the rhizomes on newspaper or cardboard, which absorbs extra moisture and makes cleanup much easier afterward. Avoid stacking them in piles, because touching surfaces stay damp and can develop mold surprisingly fast.
You will know curing is finished when the rhizomes feel dry and slightly leathery instead of cool and damp.
They should still feel firm when squeezed, since shriveled pieces may have lost too much stored moisture.
This quiet waiting step seems boring, yet it often decides whether your collection survives the winter in good shape. Give it the time it needs, and you will open healthier rhizomes when planting season rolls around again.
7. Divide Crowded Canna Clumps And Check For Rot
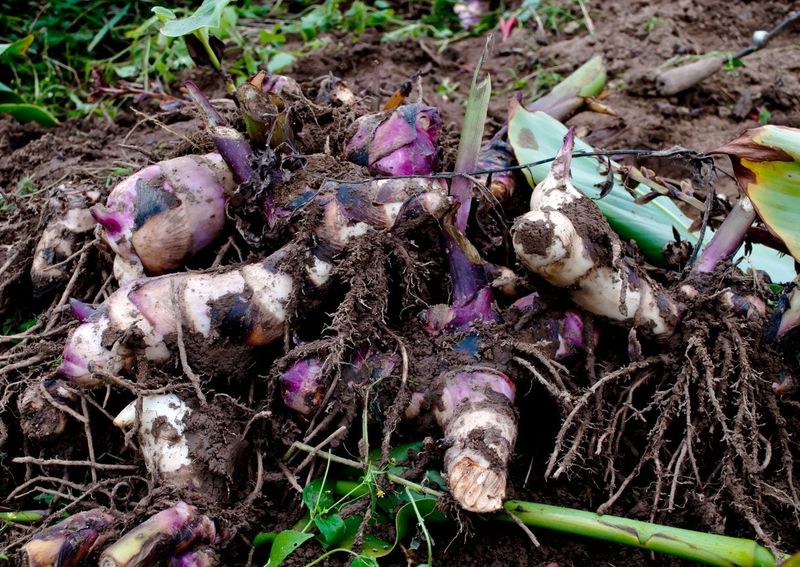
Canna clumps multiply so eagerly underground that a single rhizome can become a crowded tangle within a few seasons. Fall is a handy time to split them, since everything is already out of the ground and clean.
Look for the pointed pinkish buds, often called eyes, which mark where new shoots will grow next spring.
Each division should have at least two or three eyes to grow into a healthy plant next season.
Use a sharp, clean knife and cut through the narrow joints where sections connect, like snapping apart sausage links. Let the fresh cuts dry for a day or two so they form a protective callus before storage.
While you work, squeeze every piece gently and sniff for any sour odor that signals hidden rot. Trim away small soft areas with your knife, cutting back until you reach firm, pale tissue underneath.
Rhizomes that feel spongy throughout should go in the trash, because rot spreads quickly in closed boxes. Watch leaves next summer for yellow streaks or mottling, since canna viruses can travel inside infected rhizomes.
I have to admit that tossing a favorite variety stings, yet protecting the rest of the collection matters more. Clean your knife with disinfectant between plants so you do not carry problems from one clump to another.
Extra divisions make wonderful gifts for gardening friends, who usually welcome a free splash of summer color. Sharing also keeps your storage boxes manageable, which leaves room for the plumpest and healthiest rhizomes you dug.
8. Pack Canna Rhizomes In Peat Moss For Cool Storage
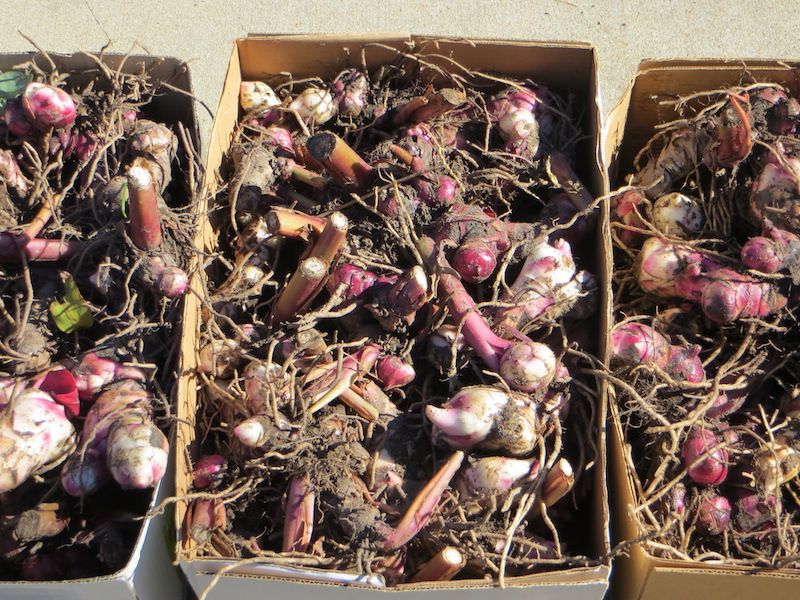
Storage boxes work like a winter bedroom for your cannas, where cool, steady conditions keep them sleeping soundly. Aim for temperatures around 40 to 50 degrees Fahrenheit, which prevents freezing and discourages early sprouting.
Cardboard boxes or plastic bins with air holes work well, as long as extra moisture can escape.
Nestle the rhizomes in slightly damp peat moss or vermiculite so they do not touch one another.
I keep mine in a basement corner, but an insulated garage or cool closet can work just as nicely. Avoid spots near furnaces or water heaters, where warmth and dry air can shrivel rhizomes before spring.
Container cannas are even easier, since you can cut back the foliage and roll the pot into shelter. Stop watering for winter, letting the soil stay mostly dry while the rhizomes rest inside their pot.
Check your stored rhizomes about once a month, which only takes a few minutes with a flashlight. Lightly mist any that look wrinkled, and remove pieces that turn soft before rot spreads to neighbors.
Around late winter, you may notice tiny shoots appearing, which hints that spring planting is not far away. Most Georgia gardeners replant after the last frost passes, once the soil warms near 60 degrees.
Opening that box and finding plump, healthy rhizomes feels like greeting old friends after a long trip.
Those sturdy knobs will soon become towering leaves and blazing flowers again in your summer garden.