Don’t Toss Your Mums In California: 11 Steps That Bring Them Back Bushier Next Fall
Japan’s imperial family has used a golden sixteen-petal flower as its official seal for many centuries. Every autumn, that same flower lands in grocery store carts across California for a few dollars a pot.
Most shoppers treat those cheerful pots like party balloons and toss them once the petals turn brown. Yet the plant is a tough perennial, and mild winters here let its roots rest instead of freezing.
I have to admit that I once dumped three fading pots into the green bin without a second thought. You might notice the same plants sprouting fresh shoots by late winter if you leave them in the ground.
The trick is a handful of easy habits spread across the year, starting right after blooms fade. So why buy new pots every fall when your old ones can return fuller in California sunshine?
1. Check The Tag For Hardy Garden Mums
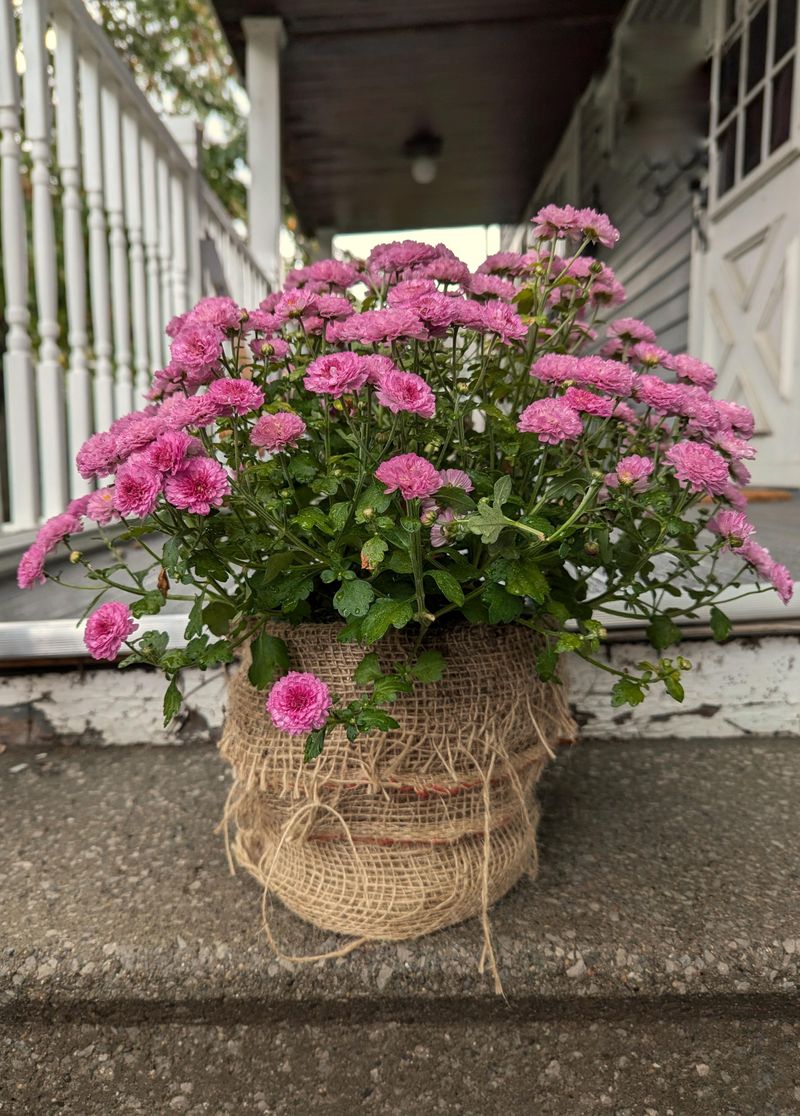
That foil-wrapped pot from the supermarket might be a florist mum, bred mostly for one big indoor show. Garden mums come from the same species, Chrysanthemum x morifolium, but breeders selected them for outdoor toughness and spreading roots.
Personally, I flip over every plant tag before buying, because the label usually tells you which type you have. Look for words like hardy or perennial, and skip pots that only promise color for indoor decorating.
Garden mums are rated for USDA zones 5 through 9, and much of the state falls nicely inside that range. Warmer coastal pockets reach zone 10, where many growers still report steady regrowth with a little extra summer care.
What surprises me most is that florist types often return here too, since our winters rarely freeze the ground. Their roots are shallower, though, so they need more patience and may take a season to fill out properly.
Remove any decorative foil before you do anything else, since it traps water and keeps roots sitting in puddles. Poke a finger into the soil and check for white, healthy roots instead of a dark, mushy tangle.
Healthy roots mean the plant has real energy stored for next year, even if the flowers look tired right now. Plants with soft, smelly roots are better off in the compost pile, and that is perfectly fine.
A quick check like this saves you months of babysitting a pot that had little chance from the start. Once you know your type, the rest of these steps make much more sense and feel far less mysterious.
2. Plant Your Fading Mums In A Sunny Garden Bed

Mums sitting on a porch in plastic pots are living on borrowed time, because those tiny containers dry fast. Moving them into the ground right after bloom gives roots a roomy home and cooler soil through the warm months.
In most of California, fall and early winter planting works well because seasonal rains help settle the soil. I like how the plants quietly build roots during the cool season while you hardly notice anything happening above.
Pick a spot with at least six hours of direct sun, since shade leads to floppy stems and fewer buds. In hot inland valleys, a bit of afternoon shade helps flowers last longer and keeps leaves from scorching.
Mums need loose, well-drained soil, and heavy clay that stays soggy can lead to root rot over winter. Mix in a few inches of compost before planting, which improves drainage in clay and holds moisture in sand.
Set the plant at the same depth it grew in the pot, and gently loosen any circling roots first. Space plants about eighteen to twenty-four inches apart so air moves freely between them as they spread next year.
Avoid spots near porch lights or streetlights, because mums set buds based on long nights and darkness matters. Extra light at night can delay flowering, which surprises plenty of gardeners who planted next to a lamp post.
Water the new planting deeply right away, then let the top inch of soil dry slightly before watering again. You will be amazed how much happier the plant looks once its feet are in real garden soil.
3. Cut Faded Mum Stems Down After The Blooms Brown
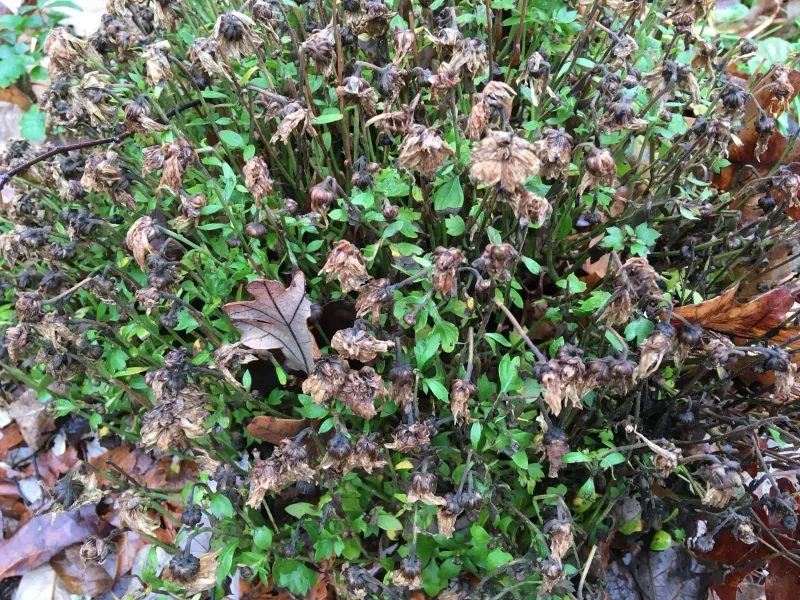
Brown, crispy flower heads look sad, yet the plant underneath is often busy sending up fresh shoots near the base. Those tiny green rosettes at soil level are next year’s plant, and they are your signal to grab the pruners.
Once flowering ends, cut the old stems down to about four to six inches above the ground. In frosty mountain areas, some gardeners leave stems standing until spring to protect the crown from harsh cold.
Most lowland gardens here see light frost or none, so cutting back in late fall or winter works fine. I prefer cutting early because it lets sunlight reach those new basal shoots and keeps the bed looking tidy.
Use clean, sharp pruners and make straight cuts, which heal faster than ragged tears from dull blades. Wipe the blades with a household disinfectant between plants if any leaves showed spots or powdery coating this season.
Rake away fallen leaves and old petals from around the base, since debris can shelter pests and fungal spores. Clean ground also helps you spot slugs and snails, which love chewing tender new shoots in damp weather.
Toss healthy clippings into your compost, but bag up anything that looks moldy or rusty instead. Diseased material can carry problems straight back into the garden if your compost pile does not heat up much.
You might feel nervous chopping a plant down to stubs, but mums handle it with no fuss at all. Within a few weeks, the base often looks greener and fuller than the tall stems ever did.
4. Spread Mulch Around Mum Roots For Winter

Shallow roots are both a blessing and a weakness, since they spread quickly but sit close to the surface. A blanket of mulch keeps those roots steadier and shields them from sudden temperature swings during chilly winter nights.
Spread two to three inches of shredded bark or chopped leaves around the plant after you finish cutting back. Keep the mulch a couple of inches away from the crown, because piling it against stems invites rot.
In colder spots like the Sierra foothills, mulch helps prevent frost heave, when freezing soil pushes plants upward. Coastal and southern gardeners benefit too, since mulch holds moisture during dry, windy spells that sometimes hit in winter.
I love how a mulched bed stays damp days longer than bare soil after a winter storm. Fewer weeds pop up as well, which means less time kneeling in the mud pulling tiny invaders.
Potted mums need different care because their roots sit exposed on every side of the container. Group pots together against a sheltered wall, or slip them into the ground if a hard freeze is forecast.
Water through winter only when the soil dries out, since cool weather slows the plant down a lot. Soggy soil in cold months causes more trouble than a little dryness, so check with your finger first.
Mulch slowly breaks down too, adding organic matter that feeds soil life and improves structure over time. By spring, you will have healthier soil without lifting a shovel, which feels like a nice bonus.
5. Divide Crowded Mum Clumps In Early Spring

Old mum clumps have a funny habit of growing outward while the center turns woody and stops producing much. A hollow middle with a ring of shoots is a clear sign the plant is asking to be divided.
Most experts suggest dividing mums every two or three years, once new shoots appear in early spring. In mild areas, that often means February or March, when soil is workable and growth is just starting.
Dig around the whole clump with a spade, then lift it gently and shake off some of the soil. You will see many small rooted shoots, and each one can become a brand new plant this year.
Pull or cut those outer pieces apart, keeping a few healthy shoots and a good chunk of roots together. Toss the tough woody center, since it rarely blooms well and takes up space that younger growth can use.
Replant divisions about eighteen inches apart in compost-enriched soil, and water them in thoroughly right after planting. Keep the soil lightly moist for a few weeks while the roots settle in and start reaching outward.
Personally, I think dividing is the most rewarding step, because one tired plant can turn into five vigorous ones. Extra divisions make great gifts for friends, and sharing plants is how many gardeners build their collections over time.
Rooted cuttings work too, if you snip four-inch shoot tips in spring and set them into moist potting mix. They usually root within a few weeks and often bloom that same fall, which still amazes me every time.
6. Feed Mums With Balanced Fertilizer In Spring
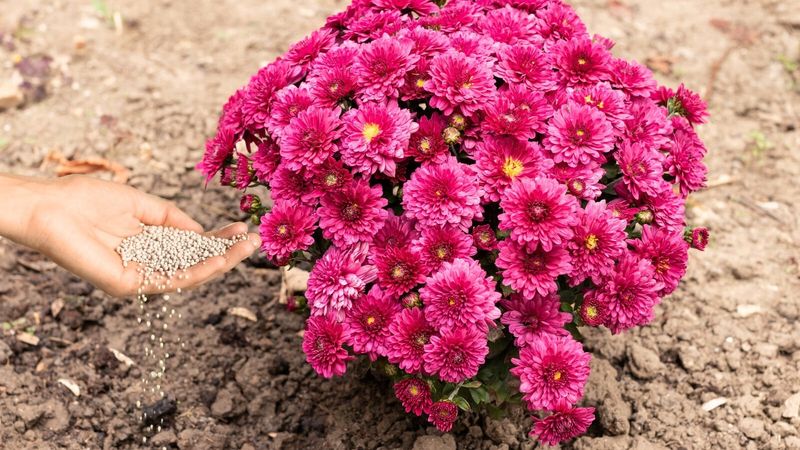
Hungry plants show it, and mums with pale yellow leaves in spring are usually begging for a decent meal. Mums are known as heavy feeders, so steady nutrition during spring growth sets the stage for a full fall show.
Start feeding when new shoots are a few inches tall, using a balanced fertilizer like 10-10-10 or similar. Follow the label rate carefully, because extra fertilizer can burn roots and does not make plants grow any faster.
A slow-release granular product scratched into the soil surface lasts several weeks and is easy for busy gardeners. Liquid feeds work faster, though you will need to apply them more often, usually every two to three weeks.
I like mixing compost into the top layer of soil too, because it feeds plants gently over many months. Compost also helps soil hold water, which matters a lot during long dry stretches between spring and fall.
Stop fertilizing once flower buds start to form, which usually happens in late summer as nights grow longer. Too much nitrogen at that stage pushes leafy growth and can leave you with fewer flowers than you hoped.
Water before and after feeding, since fertilizer on dry roots can cause stress and leaf burn in hot weather. Container mums lose nutrients faster through drainage holes, so they often need feeding a bit more frequently than garden plants.
Watch the leaves for clues, since deep green foliage usually means your feeding schedule is working nicely. If growth looks lush but floppy, ease back a little and let the plant firm up before buds arrive.
7. Pinch Mum Shoot Tips For Bushier Plants
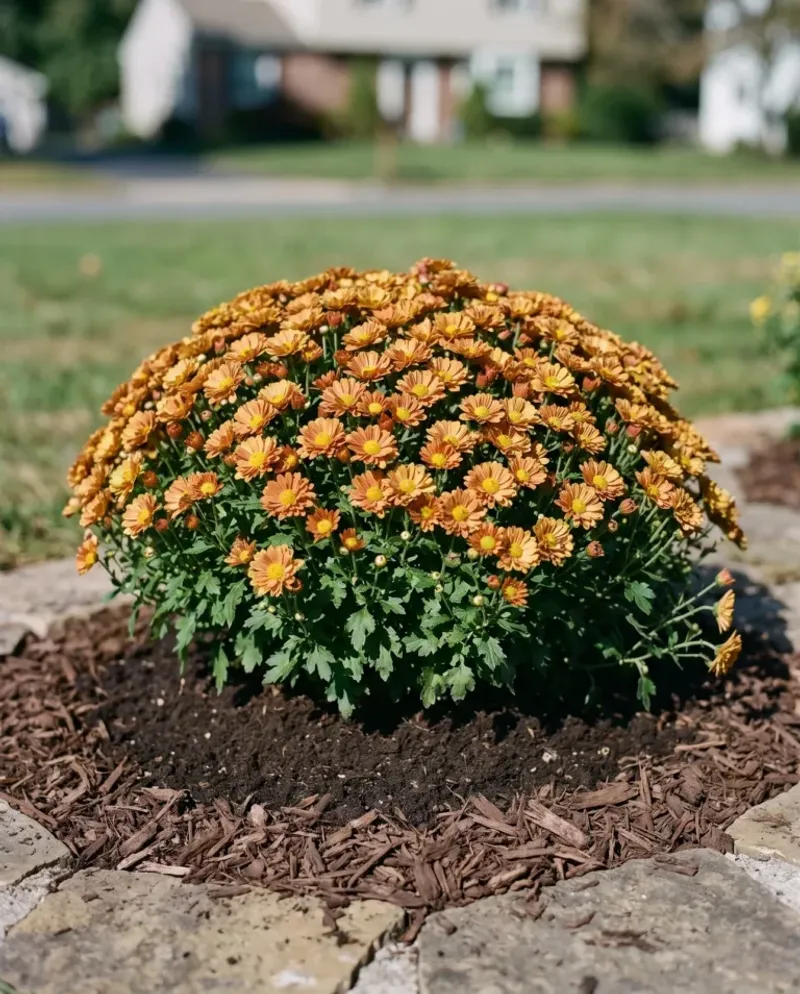
One small pinch can turn a single lanky stem into two or three branches, and the math adds up fast. Pinching is the main secret behind those dome-shaped mums you see stacked outside garden centers each fall.
Start when new shoots reach about six inches tall, removing the top inch just above a set of leaves. Your thumb and fingernail work fine for soft stems, while small snips handle anything thicker or tougher.
Each pinch tells the plant to send out side shoots from the leaf joints below the cut. More side shoots mean more branch tips, and every tip has a chance to carry flower buds later on.
Repeat the pinch every two to four weeks, whenever new branches grow another five or six inches. I keep a reminder on my phone, because it is easy to forget once summer gets busy.
Try to pinch evenly around the plant so it grows into a rounded shape instead of a lopsided mound. Stand back now and then to look at the outline, which helps you spot stems that need attention.
Those pinched-off tips can become new plants if you stick them into damp potting mix in a shady spot. Many root within two or three weeks, giving you free extras to tuck into bare corners of the garden.
You might feel guilty removing healthy growth, but the plant responds with denser leaves and stronger stems. Bushier plants also hold their flowers upright better, so you will need less staking when buds get heavy.
8. Stop Pinching Mums By Early July
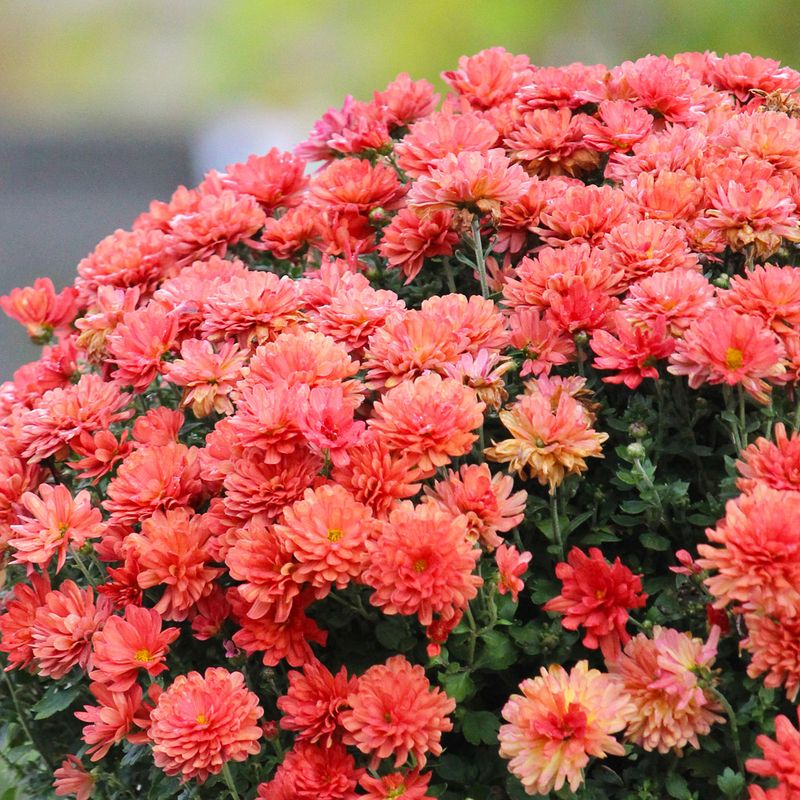
Timing matters more than technique here, because one late pinch can snip away the buds you waited months for. Mums are short-day plants, which means they start forming flower buds as nights stretch longer after midsummer.
Most extension guides recommend wrapping up pinching around early to mid-July, depending on your variety and local climate. A common rule is to finish by the Fourth of July, which is easy to remember during summer barbecues.
In very warm regions, some growers pinch a little later to push blooms into cooler fall weather. I suggest sticking with early July unless you know your variety blooms late, since guessing wrong delays flowers.
After your final pinch, the plant shifts its energy into building stems strong enough to carry heavy blooms. You will notice growth slowing at the tips, and that is exactly what should happen at this stage.
Resist the urge to tidy up random long stems in August, even if one sticks out awkwardly. Those stems may already hold tiny buds, which look like small green beads tucked between the top leaves.
Variety labels often list bloom season as early, mid, or late, and that detail helps fine-tune your schedule. Early bloomers need an earlier stop date, while late types can handle pinching a little closer to mid-July.
Mark the date on a calendar now, since summer has a sneaky way of rushing past. Honestly, stopping on time feels harder than pinching, but the fall payoff makes that patience worth every bit.
9. Water Mums Deeply At The Soil Line
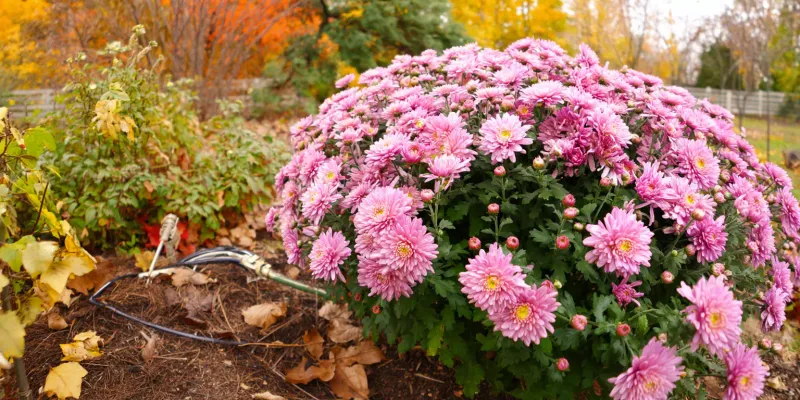
Droopy mum leaves on a hot afternoon can look alarming, yet they often perk up once evening cools things. Shallow roots dry out quickly, so mums need steadier moisture than plants with deep taproots ever do.
Water deeply about once or twice a week in summer, soaking the soil several inches down each time. Inland gardens may need more frequent watering during heat waves, while foggy coastal yards often need much less.
Aim the hose or drip line at the base of the plant instead of spraying the leaves from above. Wet foliage stays damp longer, and that encourages powdery mildew and other leaf problems to settle in.
Morning watering works best because leaves dry quickly and roots stock up before the hottest part of the day. I like drip irrigation for mums, since it delivers water slowly and wastes very little to runoff.
Before watering, push a finger an inch or two into the soil to check moisture where roots live. If it still feels cool and damp, wait another day, because soggy soil can lead to root rot.
Containers dry out much faster than garden beds and may need water daily during hot midsummer spells. Bigger pots hold more soil and moisture, so upgrading a crowded container can ease your watering chores.
Mums that go thirsty while setting buds may produce fewer or smaller flowers when fall finally arrives. Water-wise habits matter here too, since many local water districts encourage efficient irrigation during dry years.
10. Watch Mum Leaves For Aphids And Mildew
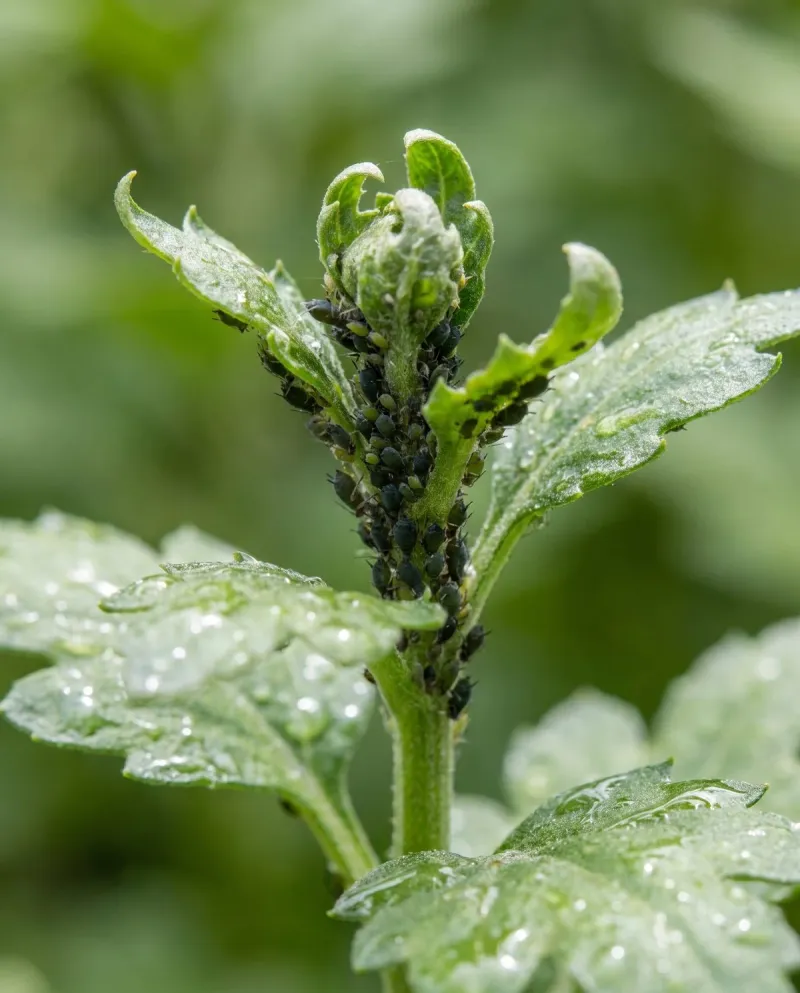
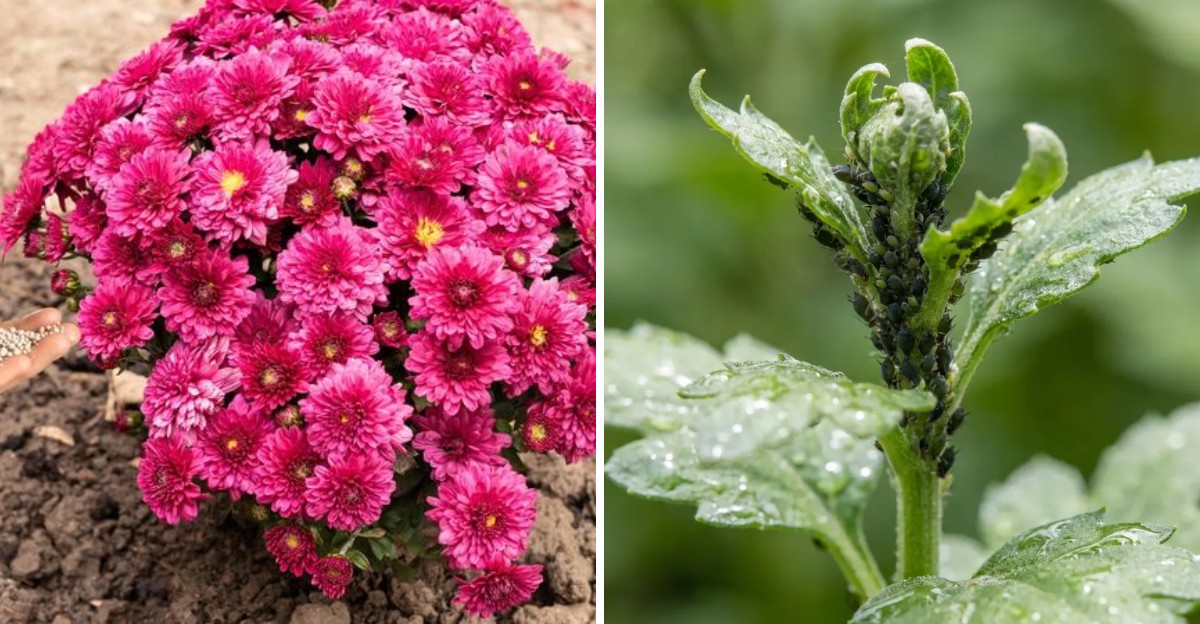
Tiny green aphids clustered on fresh mum tips can multiply surprisingly fast once spring weather warms up. Catching them early is far easier than fighting a full colony, so I check new growth during weekly strolls.
A strong spray of water knocks many aphids off, and ladybugs often arrive to finish the job. Insecticidal soap is another gentle option, though it needs direct contact and repeat applications to work well.
Spider mites show up during hot, dusty weather, leaving speckled leaves and fine webbing on the undersides. Rinsing foliage now and then and keeping plants well watered helps, since stressed plants attract more mites.
Powdery mildew looks like white flour dusted across leaves, and it often appears in late summer or fall. Good spacing and sunny locations reduce mildew, and removing badly affected leaves slows its spread across the plant.
Chrysanthemum white rust is a more serious disease that federal and state plant health agencies track closely. Look for pale spots on top of leaves with whitish bumps underneath, and contact your county agricultural office if found.
Slugs and snails love chewing tender spring shoots, especially after rain or heavy watering in shady spots. Hand-picking at night with a flashlight works well, and iron phosphate baits are a common lower-toxicity choice.
Healthy, well-fed mums usually shrug off minor pest visits without much drama or any lasting damage to speak of. Your sharp eyes matter more than any spray bottle, so make leaf checks part of your weekly routine.
11. Welcome Back A Fuller Mum Display Next Fall

Fat buds swelling in late summer are the payoff for months of pinching and patient watering through the heat. Most garden mums open in September through November, filling beds with color right when summer annuals fade out.
Snip off faded blooms as they brown, which keeps the plant tidy and may encourage a few more flowers. I like bringing fresh cut stems indoors too, since mums last a long time in a vase.
Tall varieties sometimes lean under heavy flower loads, so a simple ring support or short stakes can help. Set supports early, before stems flop, because forcing a sprawling plant upright later can snap branches.
Mums contain pyrethrins and other compounds, and the ASPCA lists them as toxic to dogs, cats, and horses. Nibbling can cause drooling, vomiting, or skin irritation, so keep pots out of reach of curious chewers.
Most pets ignore mums because of their bitter taste, but puppies and bored cats sometimes test anything new. Call your veterinarian if you suspect your pet ate a large amount, just to stay on the safe side.
Take photos of your plants each fall, since comparing seasons shows how much bushier they grow over time. Jot notes about bloom dates and pinching schedules too, which makes next year’s planning so much easier.
You might find yourself skipping the store displays altogether once your own clumps start filling the garden. Watching a rescued grocery store mum return bigger than before is one of my favorite gardening joys.