7 Fig Pruning Cuts to Make Before Winter Wrapping in New York (and 3 to Avoid)
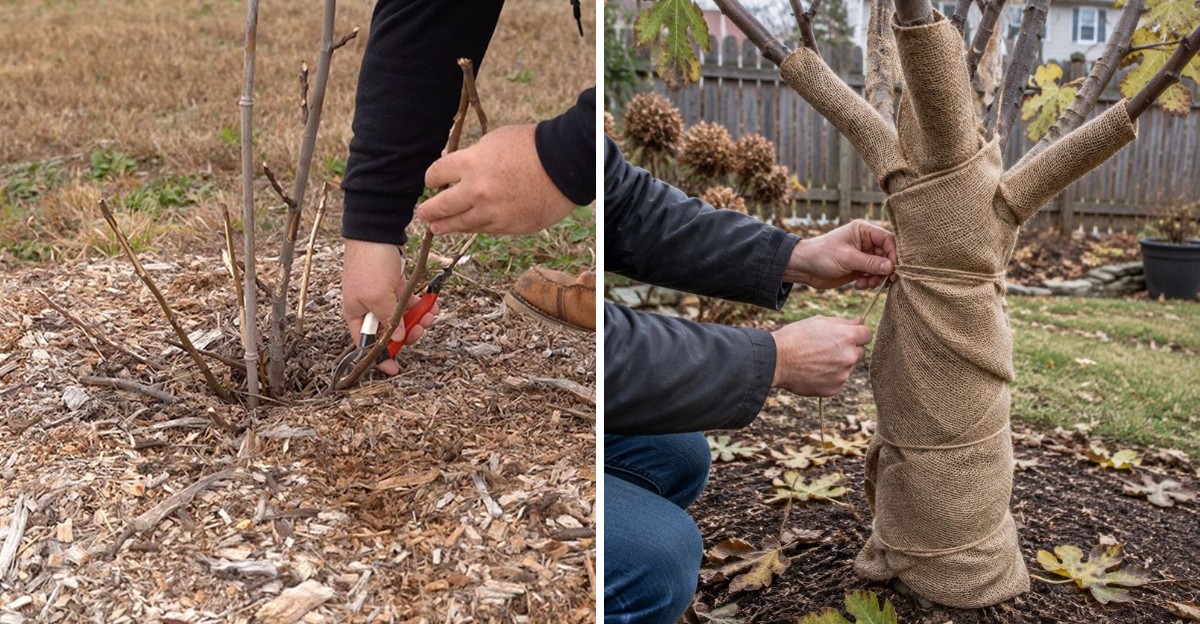
For generations, Italian American families in Brooklyn have hidden Mediterranean trees under burlap and upside-down buckets every winter.
Those lumpy wrapped shapes look odd in November, yet they protect a sweet summer treasure from bitter New York cold.
Many fig trees can handle temperatures in the upper teens before their branches suffer serious winter injury. Their roots often survive even colder snaps, so a stubborn plant can regrow from the ground after a brutal season.
What surprises many gardeners is how much the wrapping job depends on pruning choices made a few weeks earlier. A few smart snips can make the bundle tidier and the tree healthier.
Still, a few overeager autumn cuts can quietly rob next summer of its earliest fruit. Which branches deserve your pruners now, and which ones should wait patiently under their wrap until spring?
1. Pick Off Hard Green Figs That Won’t Ripen
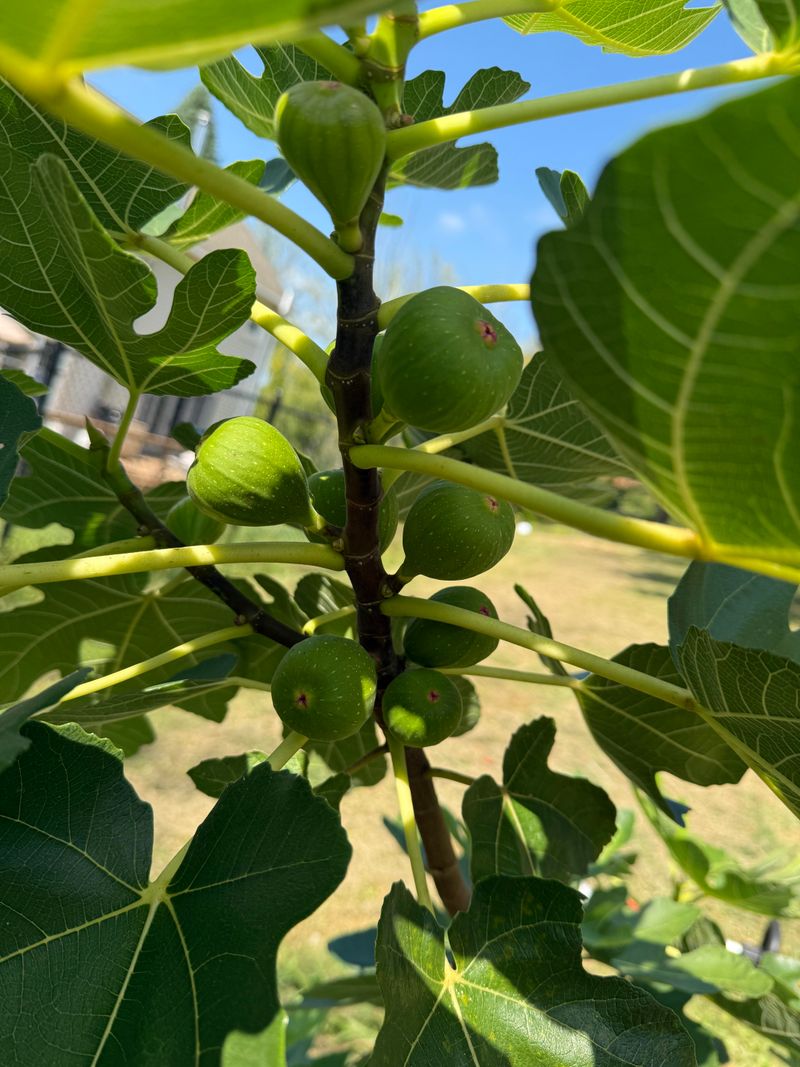
Those stubborn green figs clinging on in late October look hopeful, but most of them simply will not ripen. I used to leave them out of pure optimism, and I paid for it with mushy brown lumps in spring.
Figs need warm days to finish sweetening, and shortening autumn days in New York stop that process cold. Once frost arrives, the hard little fruits soften into mush that stays tucked against the branches all winter.
Wrapped inside burlap or a cage of leaves, that mush can invite mold and rot onto healthy wood. Mice and insects also notice sugary leftovers, and you hardly want visitors chewing under your careful wrapping.
Grab each green fig gently and twist, or snip the short stem with clean pruners close to the branch. Wear gloves, because the milky sap can irritate skin and leave sticky spots on your hands.
Tiny embryo figs at the very branch tips are a different story, and some growers leave them alone. Those pea-sized buds occasionally survive winter and swell into an early breba crop the following summer.
Anything bigger than a marble but still firm and green is usually headed for the compost pile. Toss them there rather than leaving them on the ground, where they can attract critters near your trunk.
Honestly, picking off unripe fruit feels a little sad after a long season of watching them grow. Your tree rests cleaner, though, and next year’s harvest gets a fresher, healthier start under the wrap.
2. Strip The Last Fig Leaves Before Wrapping
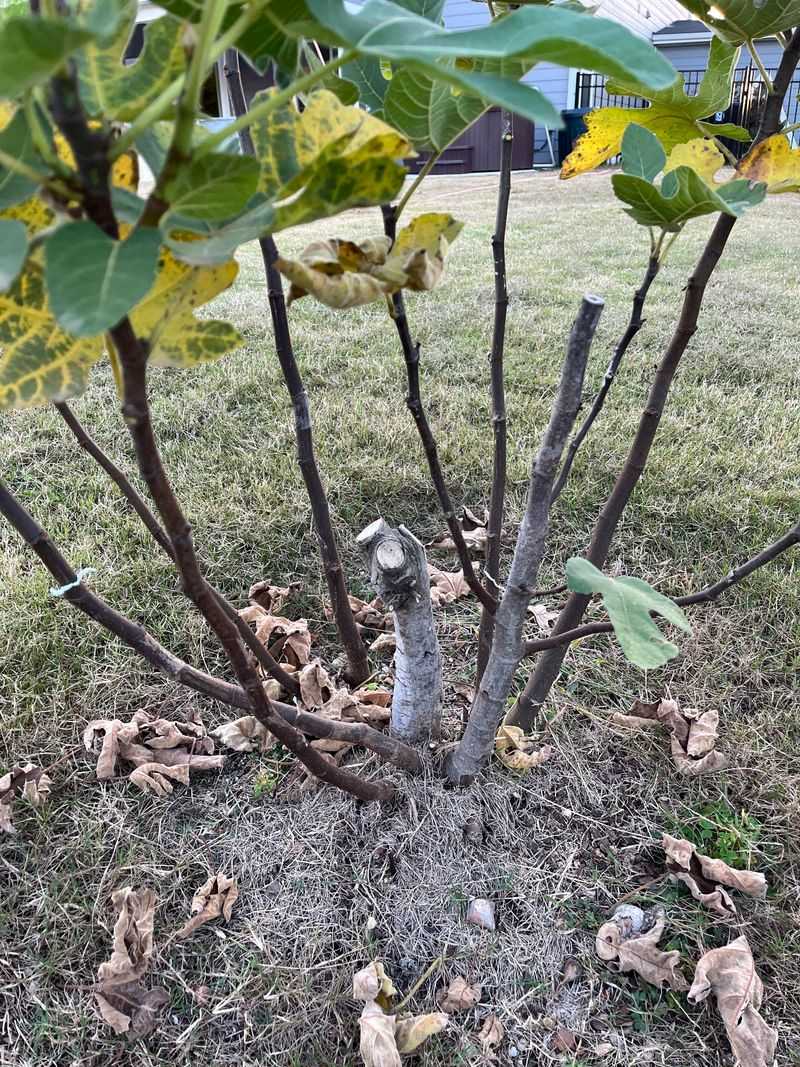
Fig leaves can stretch wider than a dinner plate, and they make a soggy mess inside winter wrapping. I love their sandpaper texture in summer, but by November they feel like wet cardboard in my hands.
Most leaves drop naturally after the first hard frost, which is a handy signal that dormancy has begun. Waiting for that frost helps, because wrapping a tree still in active growth can cause stress and trouble.
A few stubborn leaves usually hang on, though, especially on the upper branches facing the afternoon sun. Snip or pull those leftovers before you start bundling, since trapped foliage holds moisture against the bark.
Damp leaves pressed against wood create a cozy home for fungal rot during the long gray months. Cut each leaf stem a little above the bud so you avoid tearing the bark or nicking next year’s growth.
Rake up every fallen leaf under the tree as well, because old foliage can shelter pests over winter. Large tough leaves break down faster when you shred them with a mower before composting them in your bin.
Some gardeners actually stuff dry oak leaves or straw around bundled figs as extra insulation inside the wrap. Dry and fluffy material works nicely there, which is very different from limp fig leaves still attached.
A bare tree looks a little lonely, I admit, but it wraps far more snugly and evenly. Your burlap will sit closer to the branches, and the whole bundle will shed rain much better.
3. Snip Brittle Gray Fig Wood Back To Living Tissue
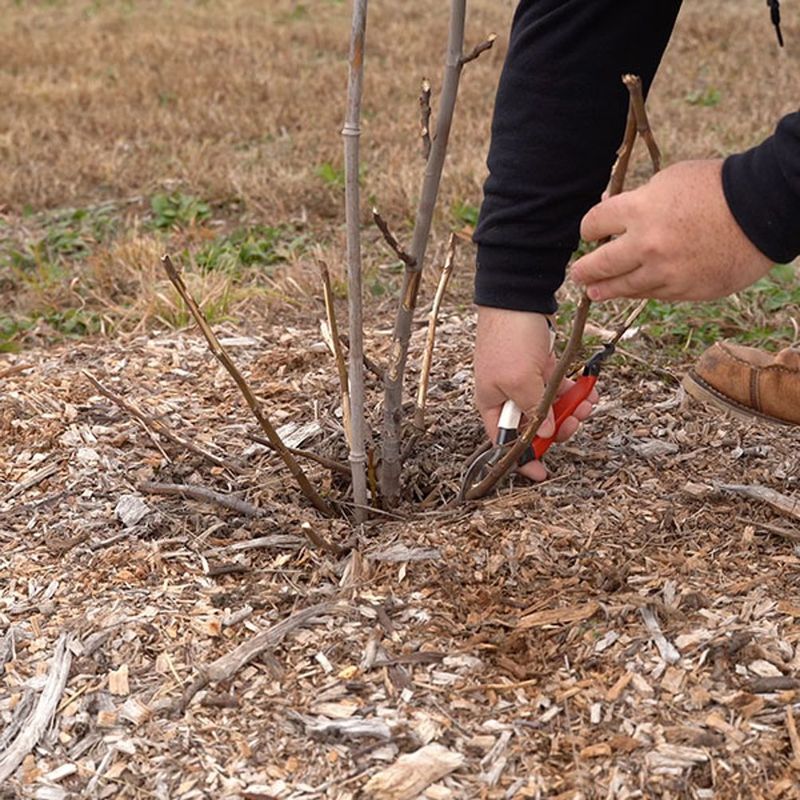
A quick scratch with your thumbnail tells you more about a fig branch than any fancy garden gadget. Green and moist underneath the bark means living wood, while brown and dry means that section is finished.
Lifeless wood is one of the few things you can safely remove at nearly any time of year. Cutting it before wrapping simply means you are not insulating sticks that offer nothing to the tree.
Fig wood that froze last winter often looks gray and shriveled, with bark that peels away easily. Branches like that snap with a dry crack instead of bending, which makes them easy to spot.
Follow the brittle section down until you reach healthy green tissue, then cut just above a bud. Angle the cut slightly so rain slides off rather than pooling on the fresh wound all winter.
Brittle sticks also poke holes through burlap and frost cloth, letting cold wind slip inside your wrap. I learned that the hard way when a jagged branch tore my wrapping during a January nor’easter.
When you feel unsure about a twig, leave it for now and check again once spring buds swell. Figs leaf out late, so patience in spring often reveals living wood you nearly removed by mistake.
Wipe your pruner blades with a household disinfectant between trees so you avoid spreading problems around the yard. Sharp, clean blades make smoother cuts, and smooth cuts seal over much faster than ragged ones.
4. Cut Away Cracked Or Cankered Fig Branches
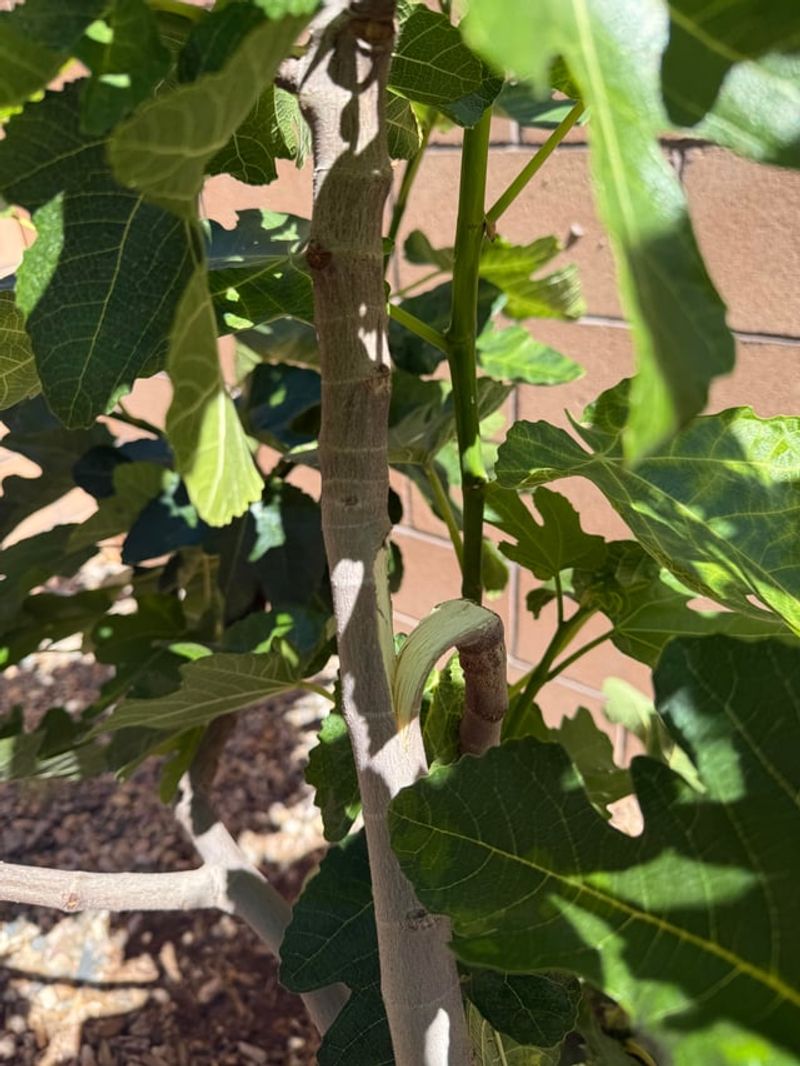
Summer thunderstorms and curious squirrels can leave fig branches split or scraped by the end of the season. I like to walk around my tree slowly in fall, looking at every limb like a detective.
Cracked branches tend to break further under the weight of snow, even inside a sturdy winter wrap. Torn bark also gives fungi and boring insects an easy doorway into the heart of the wood.
Watch for sunken, darkened patches called cankers, which can girdle a branch and starve everything above them. Fig canker problems are less common in home gardens, but a suspicious spot still deserves a closer look.
Cut several inches below any canker into clean, healthy wood so you remove the whole infected area. Bag those pieces and put them in the trash instead of tossing them onto your compost pile.
Disinfect your blades after each cut on a diseased limb, since tools can carry spores to clean wood. A spray bottle of diluted bleach or a disinfecting wipe in your pocket makes this step painless.
Small scrapes on otherwise sturdy branches usually heal on their own and can stay on the tree. Save your pruners for limbs that are split deeply or hanging by a thin strip of bark.
Gardeners across New York often find that a careful fall inspection prevents ugly surprises when the wrap comes off. Honestly, few garden moments feel better than unwrapping a healthy tree on a mild April afternoon.
5. Thin Out Fig Branches That Cross And Rub
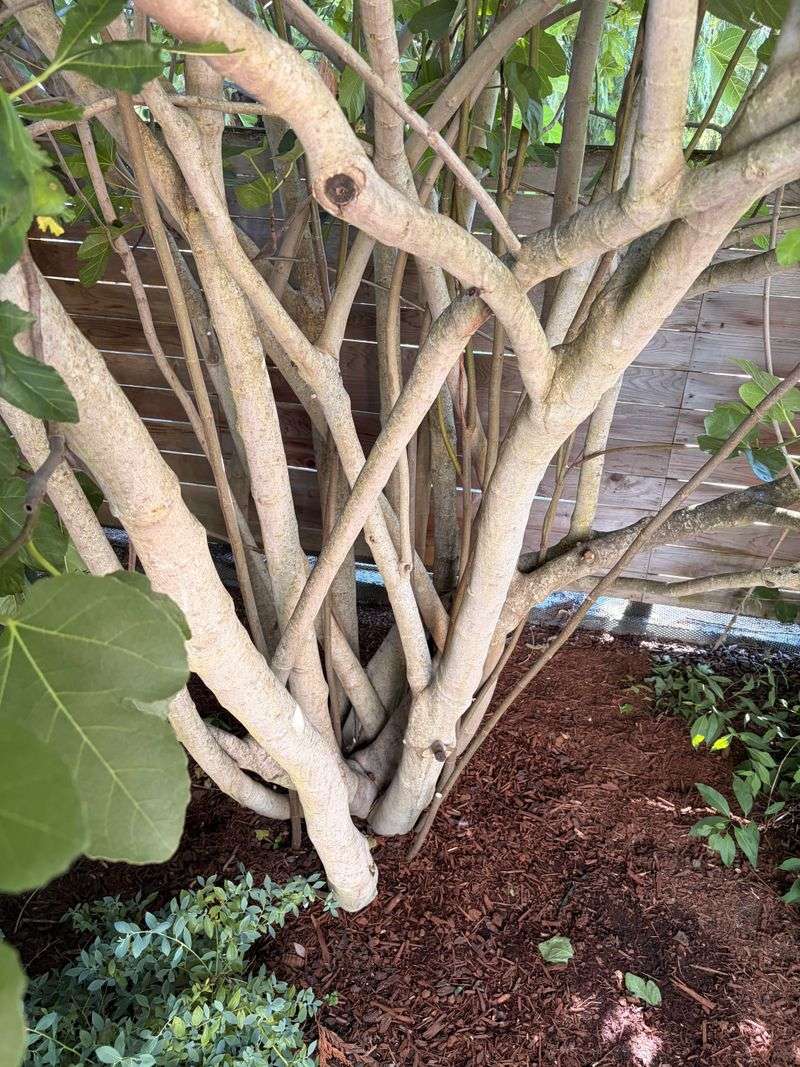
Two fig branches rubbing together in the wind sound harmless, but they slowly sand each other raw. Once the bark wears through, you have an open wound that invites rot right where you cannot see.
Bundling a tree for winter squeezes branches even closer, so small rubbing problems get worse under wrap. Fixing them now is far easier than discovering scarred, weeping bark once the burlap comes off in spring.
Look for limbs growing inward toward the center, along with pairs that touch or nearly touch. Choose the weaker or worse-placed branch of each pair, and keep the one with better outward direction.
Remove the unwanted branch back to its point of origin with one clean thinning cut near the collar. Thinning cuts open the canopy without triggering the bushy regrowth that heading cuts often cause the following spring.
Better airflow inside the canopy also means leaves dry faster next summer, which helps reduce fungal trouble. Fig rust, for example, enjoys humid, crowded growth, so a more open shape gives it fewer chances.
I try to limit myself to a handful of these cuts each fall, saving bigger decisions for spring. A few well-chosen snips make a dramatic difference without stressing a tree heading into its winter rest.
Step back after each cut and look at the overall shape before reaching for the next branch. Your future self will appreciate a tidy, open tree that fits neatly inside its winter coat.
6. Pull Unwanted Fig Suckers From The Base
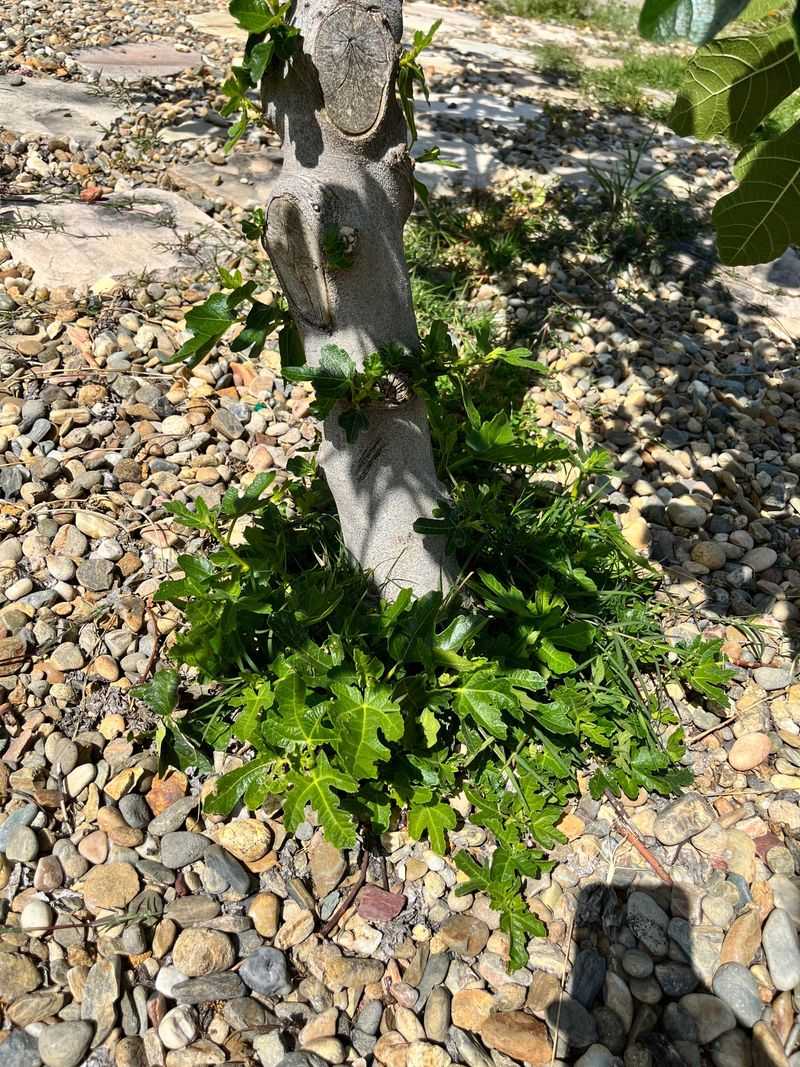
Fig trees love sending up shoots from their roots, and some summers it feels like they multiply overnight. A neglected tree can end up with a dozen suckers, turning a tidy trunk into a small leafy thicket.
Suckers pull water and stored energy away from the main branches you are trying to protect. They also crowd the base, making it harder to wrap the trunk snugly or mound soil around it.
Cut them at ground level or slightly below the soil surface, right where they emerge from the roots. Brushing a little soil aside first gives your pruners cleaner access and slows fast regrowth next season.
Cold-climate growers have a clever twist on this rule, and I think it makes plenty of sense. Many keep two or three healthy suckers as backup trunks in case harsh cold damages the main stems.
Upstate gardeners in particular often grow figs as multi-stem bushes, since bending and burying flexible stems is easier. Bushy figs recover faster after a rough winter because new shoots rise quickly from well-established roots.
So decide on your tree form first, then remove only the suckers that fall outside that plan. Thin, spindly shoots and ones growing at awkward angles are usually the first to go in my yard.
Healthy suckers you remove can sometimes be dug up with roots and potted as brand new fig plants. Friends and neighbors rarely say no to a free fig, so your pruning chore might become a gift.
7. Lightly Shorten Long Fig Branches For Easier Wrapping
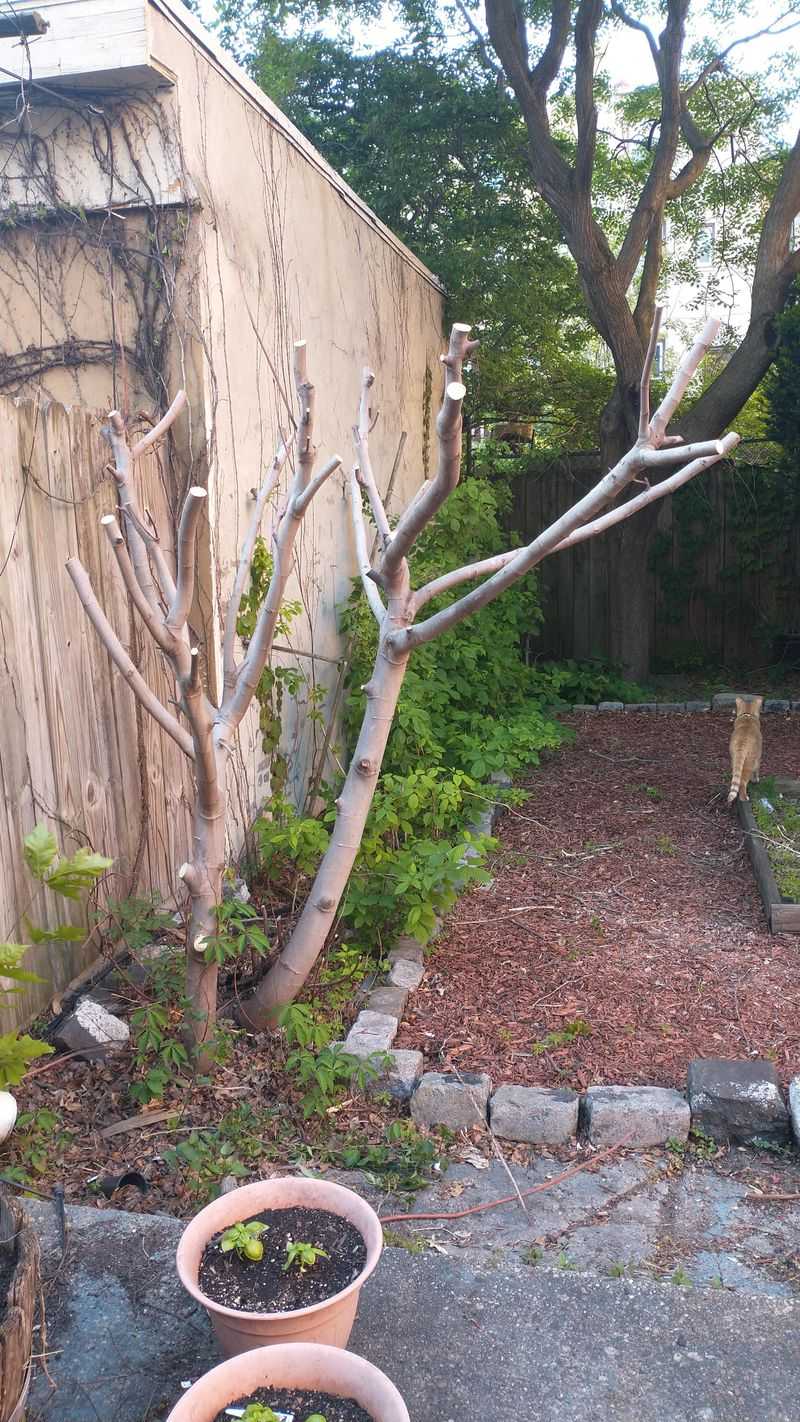
Trying to hug an eight-foot fig into a burlap tube can feel like wrestling an octopus in mittens. Long, floppy branches poke out everywhere, and the whole bundle ends up lopsided and loose by the end.
A few light heading cuts on the longest stems can make that wrapping job much more manageable. Trim only enough so the branches gather neatly together into a slim, upright column for winter.
Make each cut about a quarter inch above an outward-facing bud, using sharp bypass pruners for clean results. Remove a few inches to a foot, rather than chopping whole branches down to stubby little sticks.
Remember that breba figs form on the previous season’s wood, so every tip you trim now removes potential early fruit. Main-crop figs grow on new shoots, which is why light trimming still leaves plenty of fruit ahead.
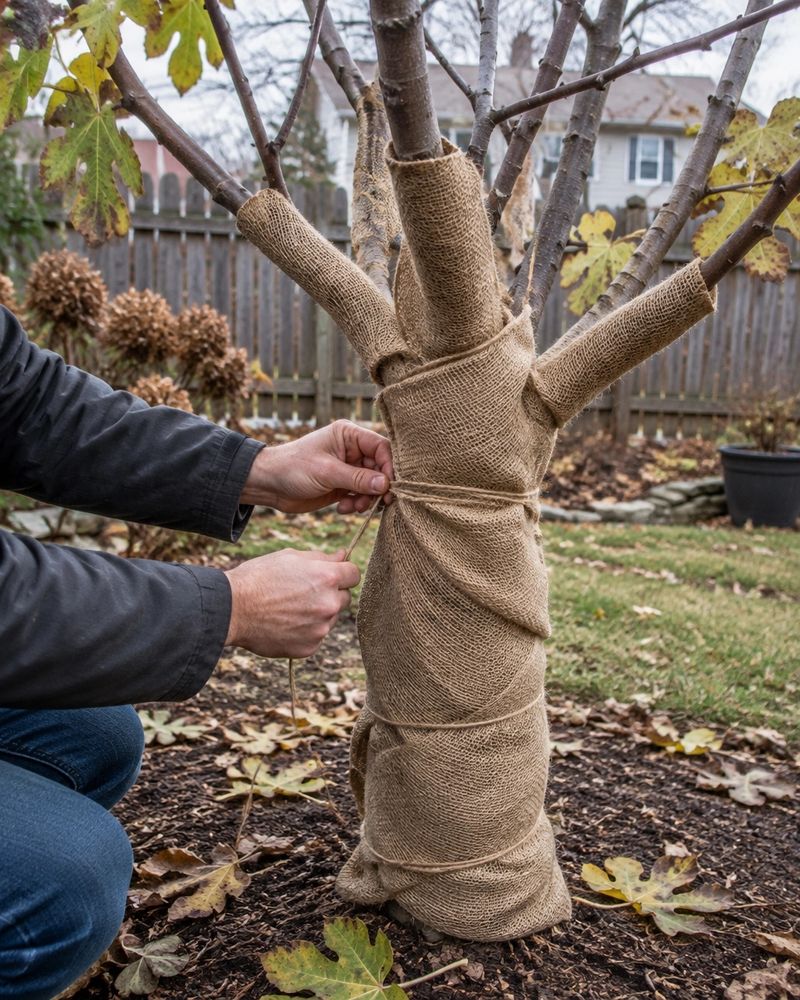
Before cutting at all, try gently bending flexible branches inward and tying them loosely with soft twine. Young fig wood bends surprisingly well, and many growers in New York wrap tall trees without trimming much.
Older, stiffer limbs can crack if you force them, so those are better candidates for a careful trim. Work slowly and tie as you go, checking each branch for stress before pulling the next one in.
I find a compact, slightly shaggy column far more satisfying than a perfectly sculpted tree under the burlap. Nobody sees the shape all winter anyway, and the tree will happily fill out again next summer.
8. Avoid Heavy Fall Pruning That Removes Next Year’s Breba Wood
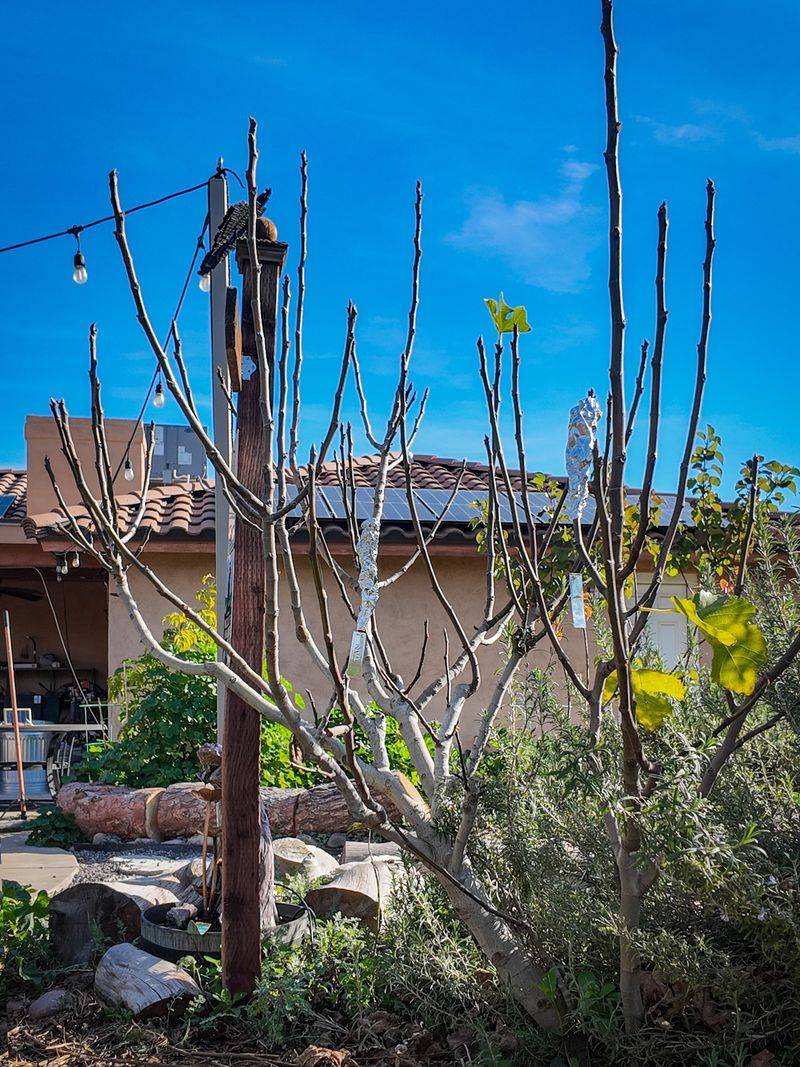
Grabbing a saw and cutting your fig in half before winter is tempting, especially when it towers overhead. I get the urge every October, but big fall cuts usually create more problems than they solve.
Removing more than about one-third of the canopy at once can stress a tree heading into cold weather. Fresh, large wounds have little time to seal before freezing temperatures arrive, leaving them open to injury.
Heavy cuts also remove the wood where next summer’s breba figs would have formed, shrinking your early harvest. Some varieties, like Desert King, rely heavily on that breba crop for their main fruit production.
Major shaping usually works best in late winter or early spring, once the worst cold has passed. At that point, you can also see which branches suffered winter damage before deciding what to remove.
Waiting until the wrap comes off also stops you from trimming healthy wood and then losing more to frost. Double losses like that can leave a fig looking sadly bare for a whole growing season.
When a tree is truly too tall to wrap, reduce it gradually over two or three years instead. Spreading the work out keeps the tree vigorous and still leaves you some tasty fruit each summer.
Patience feels hard with pruners in hand, but your fig will reward that restraint with a bigger harvest. Think of fall as tidying season and spring as the real time for reshaping your tree.
9. Skip Flush Cuts That Remove The Fig Branch Collar
Look closely where a fig branch meets the trunk, and you will spot a slightly swollen ring of bark. That modest bump, called the branch collar, is one of the smartest features a tree owns.
Cells in the collar help form callus tissue that gradually seals over a pruning wound after you cut. Trees also build a natural chemical barrier there, which slows decay from spreading into the main trunk.
A flush cut slices right through that collar, leaving a larger wound that heals slowly and poorly. Old-school advice once favored flush cuts, but tree researchers have shown they invite more internal decay.
Instead, cut just outside the collar, angling slightly away from the trunk so the ring stays intact. The finished wound should look like a small neat circle rather than a long stretched oval on the trunk.
For thicker limbs, use a three-cut method so the branch weight does not tear bark down the trunk. Undercut first, then remove most of the limb farther out, and finally trim the short piece at the collar.
Skip the wound paint, too, since research shows tree sealers often trap moisture instead of helping healing. Figs ooze sticky latex sap from fresh cuts, and the collar handles the slow healing work afterward.
I find it oddly satisfying to watch a proper cut close into a tidy donut of bark. Give your fig that small courtesy before winter, and it will thank you with stronger wood.
10. Avoid Leaving Bare Stubs On Fig Branches
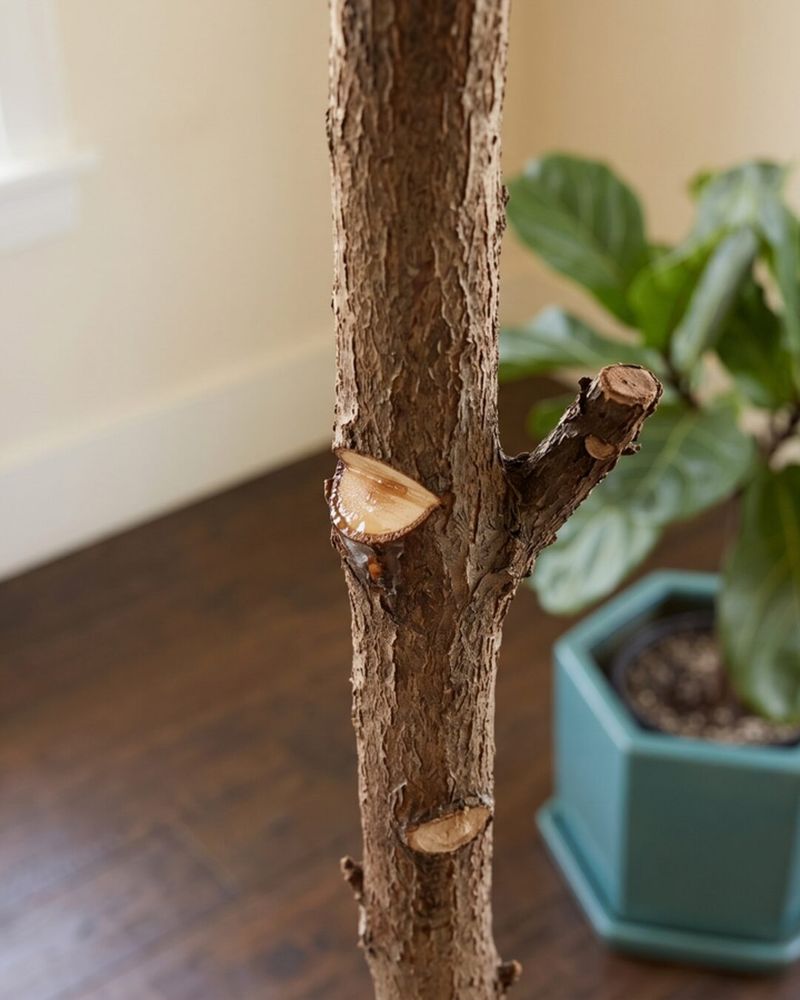
Short leftover stubs look like tiny coat hooks sticking out of your fig, and they cause sneaky trouble. Snag one with burlap while wrapping, and you will understand quickly why careful gardeners avoid them.
A stub has no bud or side branch feeding it, so the tree slowly abandons that piece of wood. Without living tissue nearby, the wound cannot close over, and rot gets a comfortable entry point.
Decay fungi and boring insects love these withered little stumps, especially inside a damp, dark winter wrap. Over time, that trouble can creep back into the healthy branch and weaken it from within.
Every cut should end just above a healthy bud or at a junction where another branch begins nearby. Those spots have active tissue ready to grow over the wound and seal it properly over time.
Cutting about a quarter inch above a bud leaves just enough wood to protect it from drying out. Cutting much farther out creates a mini stub, while cutting too close can damage the bud itself.
Old stubs from past pruning jobs or storm breaks deserve attention before you bundle the tree this fall. Trim them back neatly to the collar or nearest bud so the tree can finally heal those spots.
Fig lovers across New York have protected these trees for generations, and clean cuts are part of that tradition. A little extra care with your pruners now pays off in sweet, sun-warmed figs next summer.