Alocasia Black Velvet Care: Everything You Need To Know
Hailing from the rainforests of South Asia, the Alocasia Black Velvet, or should I say little queen, has captured the hearts of many plant growers around the world!
I’m not sure which of the two names better describes this amazing plant.
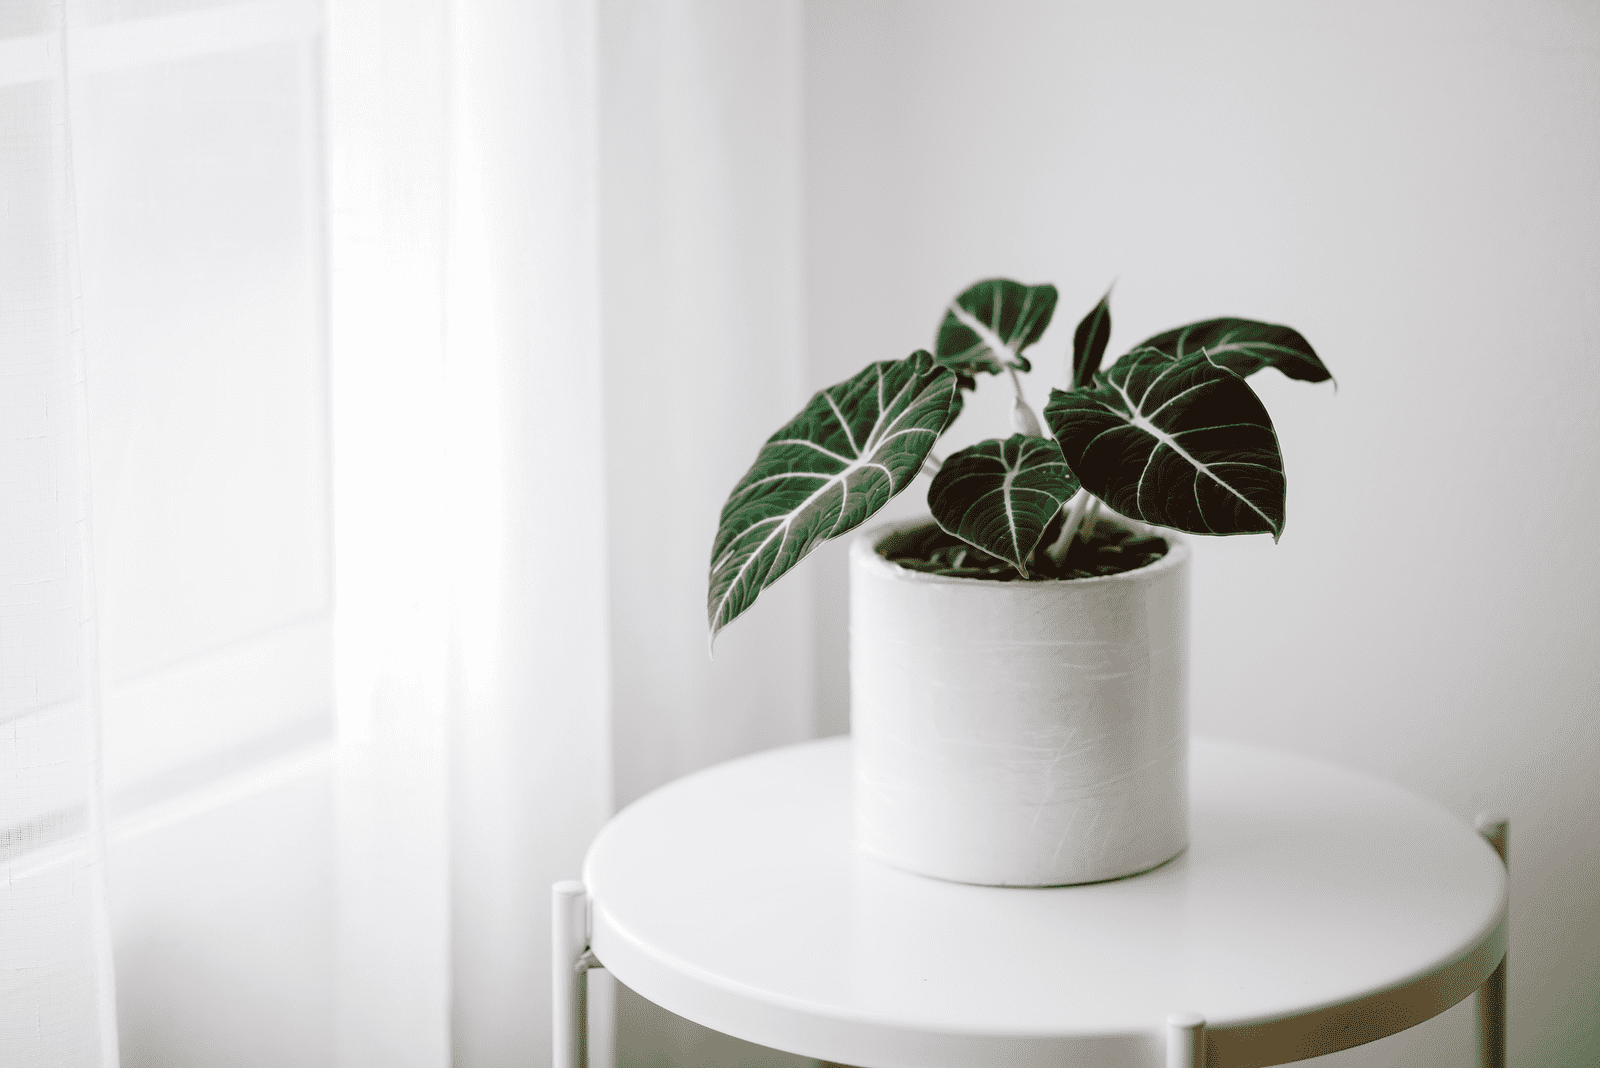
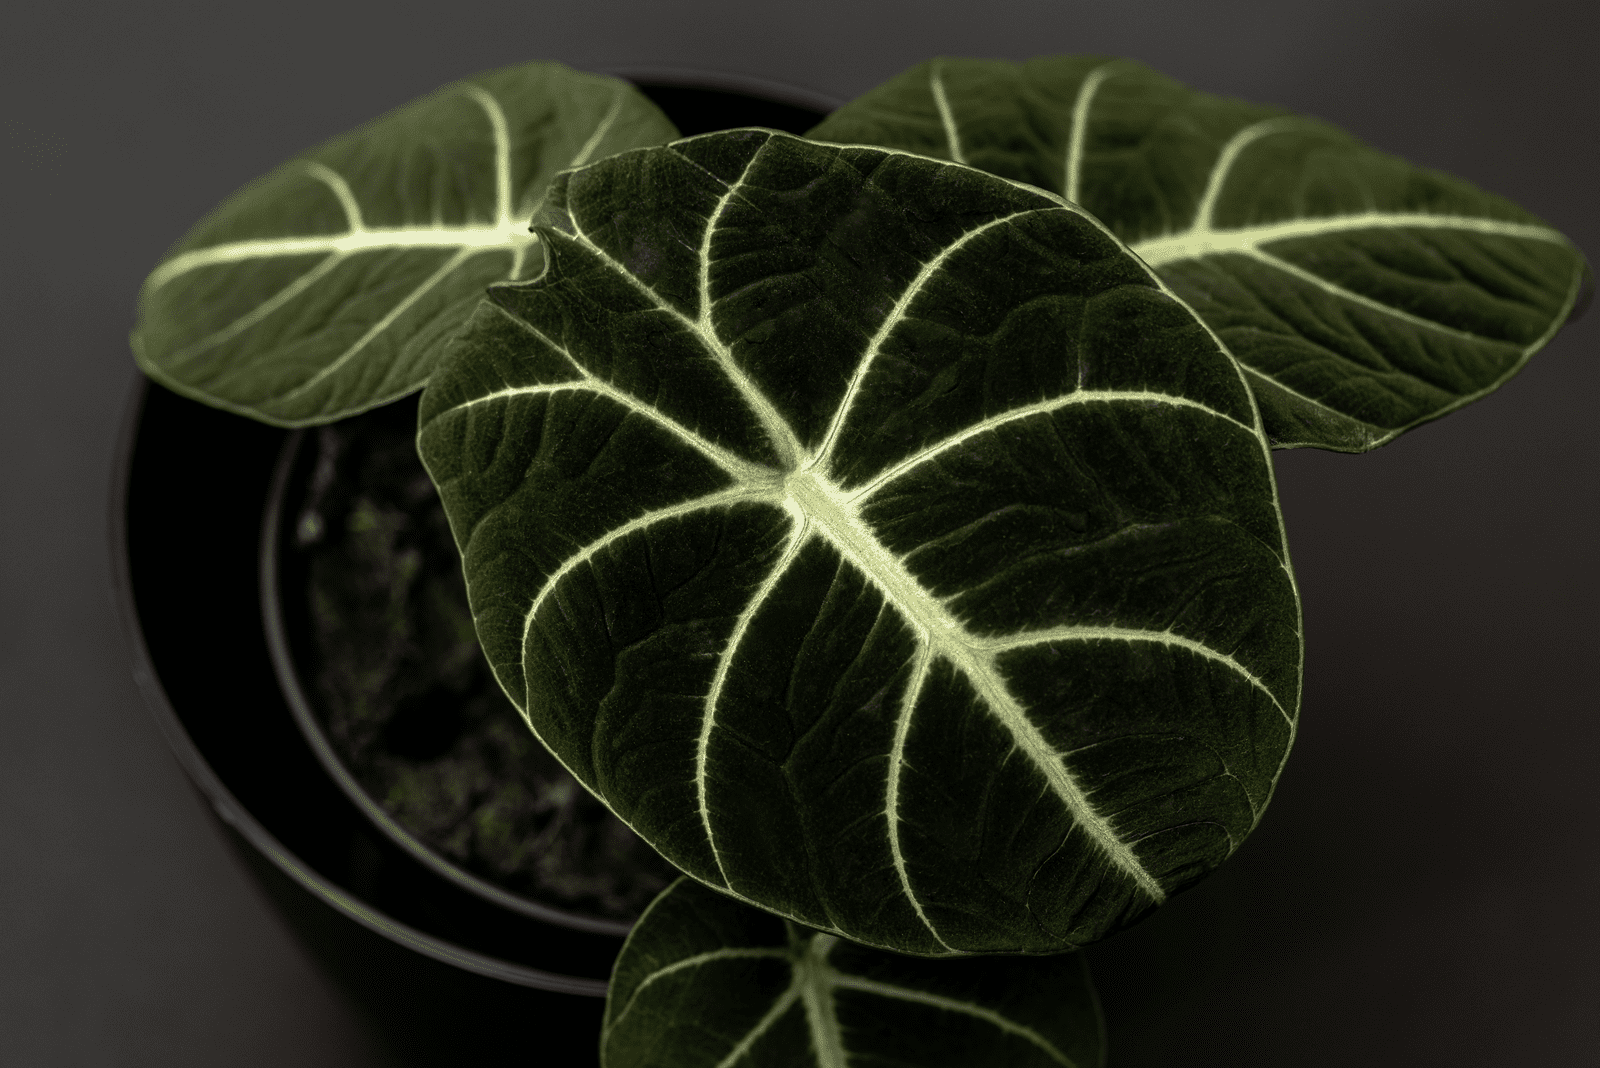
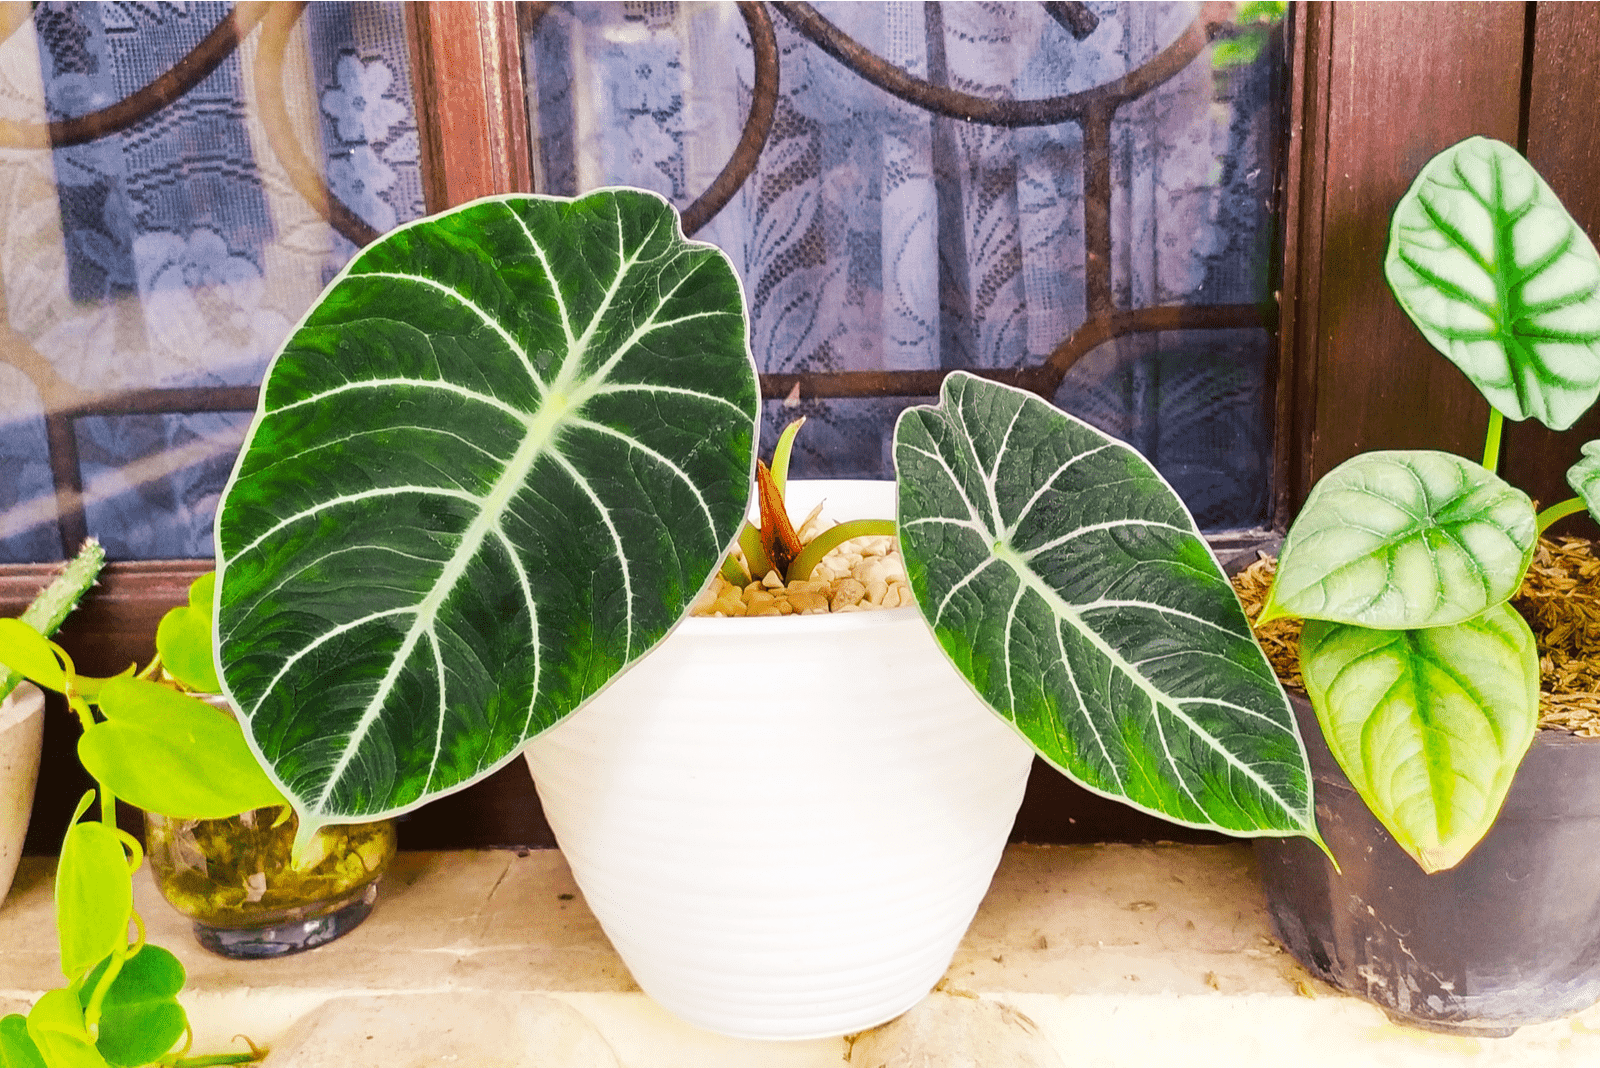
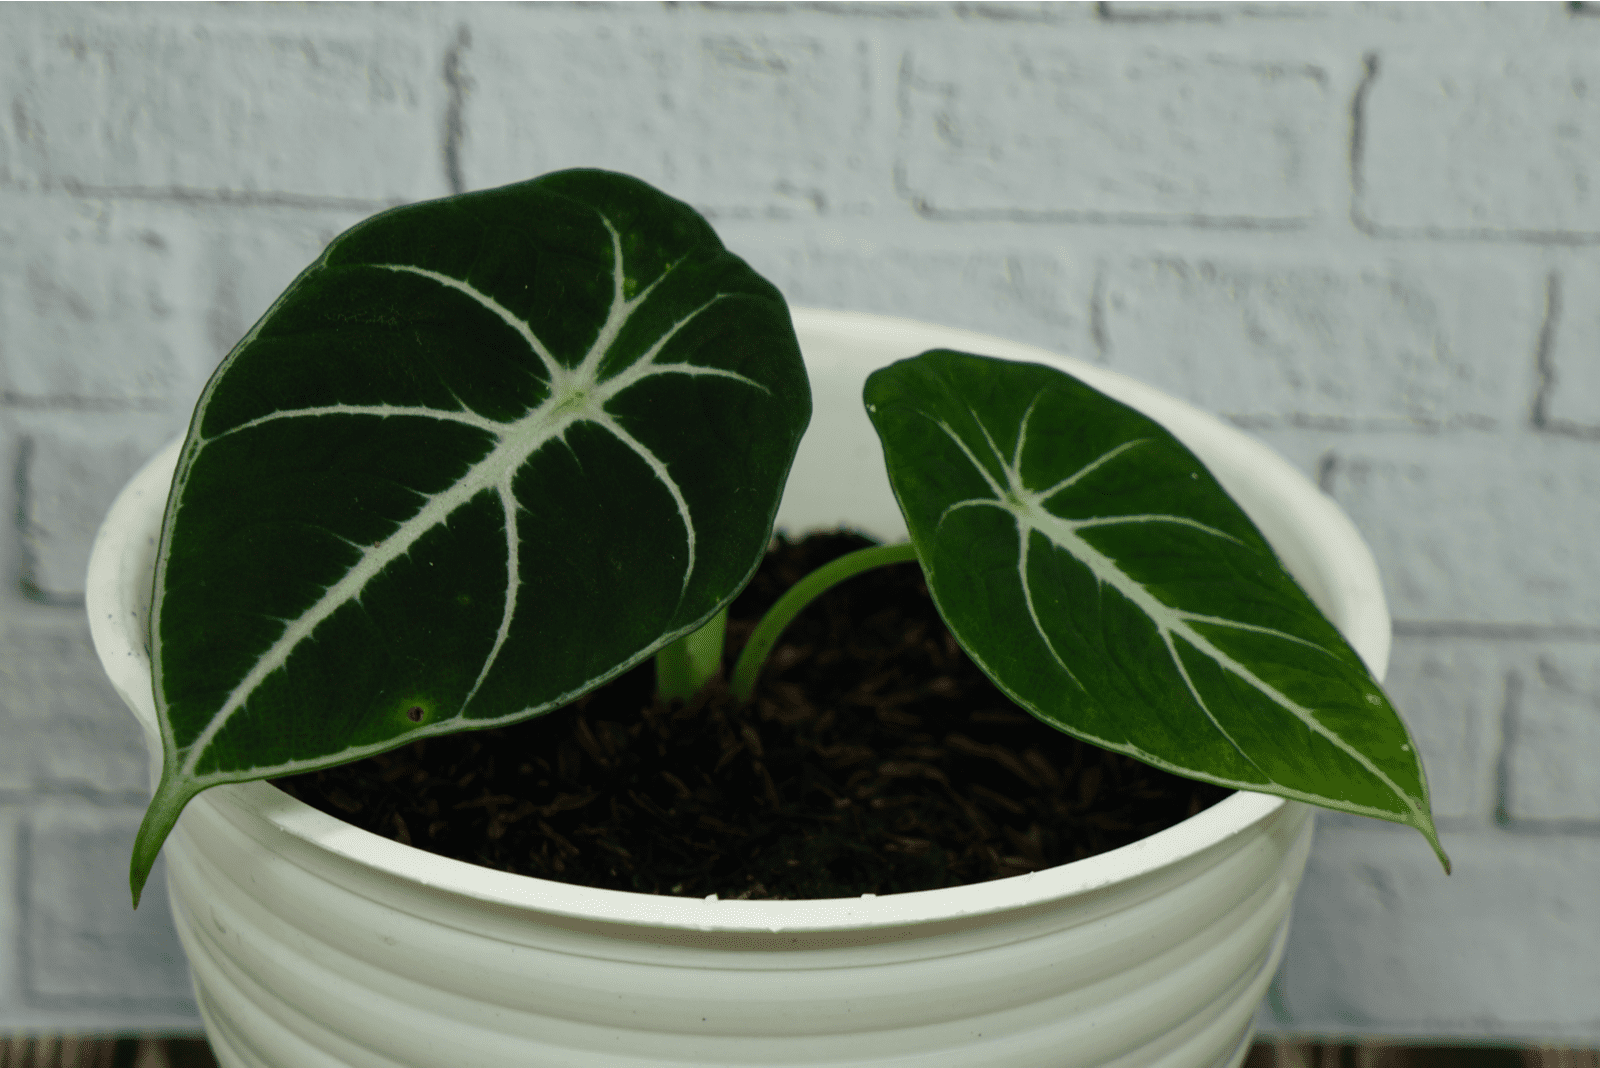
Dark foliage and whitish-silver veins are the most striking features of the little queen.
The leaves are heart-shaped, wide, and have a velvety appearance with a rigid texture. They grow to a length of six inches and a width of two and a half inches.
In the shadows beneath the jungle canopy, light is absorbed by the dark leaves and reflected by its whitish veins.
You need an in depth guide to Alocasia black velvet care in order to maintain its beauty. I have covered everything you need to know and more, so read on to find out how to help your little queen thrive!
Before we move on, here is some basic info about this gorgeous plant:
[table id=201 /]Let’s get started!
Alocasia Black Velvet Care
The beautiful Alocasia black velvet is a dwarf variety of the well-known jewel alocasia.
Plants from the Alocasia genus are easy to care for, which is why so many beginners choose them as their first plants.
However, there are still some things important to pay attention to, especially when it comes to watering.
I have a few care tips and tricks for your elephant ear plant.
Let’s find out everything!
Light Requirements
All plants, including Alocasias, have different tolerance to light levels.
For example, some plants may grow well in low light even if they require bright indirect light.
However, that is not the case with the Alocasia black velvet.
If you don’t ensure bright indirect light for your Alocasia, it will droop and its growth rate will significantly decrease.
On the other hand, your Alocasia is also sensitive to direct sunlight, so choosing the perfect location for placing it can be tricky.
Certain spots in your home may seem ideal for your Alocasia, but if the light level isn’t adequate you’ll end up facing many issues.
Where To Place A Little Queen
If you want to place your Alocasia near a south-facing window, it will likely receive too much direct light.
However, placing sheer curtains will prevent direct sunlight reaching your Alocasia, and it will still receive enough light at the same time.
If you choose a west-facing window, there are also some things to take into consideration.
Your Alocasia will receive enough bright light in a west-facing window, but you must also bear in mind that the temperatures will significantly increase during the strong afternoon sun.
If you decide to place your Alocasia there, make sure it’s a few feet away from the window.
I highly recommend an east-facing window so you don’t have to worry about direct sun or low light. When placed in an east-facing window, the little queen will receive enough bright light.
One more thing – don’t place your Alocasia in a north-facing window as it won’t get enough light.
Temperature Requirements
Black velvet Alocasias prefer temperatures between 50 and 80 degrees Fahrenheit.
These plants grow faster in higher temperatures, so slightly above 80 degrees Fahrenheit shouldn’t cause any real trouble.
If you grow your Alocasia reginula outdoors, don’t panic if the temperature rises because as long as the spot has enough shade it will grow just fine.
However, once the season is over you should bring the plant inside. If you live in USDA growing zone 10, this Alocasia is hardy in that zone, so it will grow perfectly even outdoors.
Hot and cold drafts, as well as temperatures below 50 degrees Fahrenheit, will also harm your Alocasia.
Humidity Requirements
This Alocasia plant enjoys high humidity levels, and while some plants that share this feature may thrive in lower humidity, this jewel can’t withstand anything lower than 40%.
40% is the minimum, but the ideal humidity for this Alocasia plant is between 60 to 75%.
That’s pretty high, but I have some great tips and tricks for increasing humidity.
Here are the best methods for increasing humidity:
Terrarium
I mentioned that the black velvet is a dwarf variety of the jewel alocasia, which means it will fit perfectly in terrariums.
How does this method work? The glass walls trap the moisture created by water evaporation from the soil.
I usually think of terrariums as mini-greenhouses. The great thing about terrariums is that they both increase humidity and look amazing.
Create Microclimate
If you grow other Alocasia plants, such as Alocasia odora variegata, Alocasia purple sword, or Alocasia amazonica, you can place them next to each other to create a microclimate.
Any other tropical plant will also look great next to a black velvet. Transpiration from one plant supplies humidity to the other plants.
In this way, you imitate the tropical conditions the plants originate from.
In other words, you create a microclimate similar to the climate in their native habitat.
Move To Rooms With Naturally High Humidity
Many beginner growers don’t know that placing plants in a kitchen or bathroom is actually a great way to ensure they get enough humidity.
The water evaporates, which creates a humid environment for your precious black velvet alocasia.
This plant is also great for bathroom decoration.
Use A Humidity Tray
A humidity tray, also known as a pebble tray or gravel tray, is a simple way of increasing humidity – and you must admit it also looks great!
Placing a tray below the Alocasia’s pot and adding a few pebbles and some water will help your plant get more humidity.
There’s one catch with the pebble tray; you absolutely must keep the roots of the little queen away from the water or they’ll rot!
Use A Humidifier
If you want to be 100% sure that the humidity is high enough, you can use a humidifier.
When compared to other methods, humidifiers aren’t cheap, but it’s the safest way because it monitors the humidity levels.
Placing humidifiers too close to the plant may dry the leaves out, so I recommend keeping it a few feet away.
Misting
You can increase humidity using a simple method known as misting.
However, though this method will increase humidity, it won’t stay high for long.
Therefore, you’ll need to mist the leaves regularly to maintain adequate humidity levels.
How And When To Water An Alocasia Reginula
You can cheat a little bit with humidity, light, or temperature, but there’s one thing you should be extremely careful about; Alocasia plants are particularly sensitive to overwatering.
Actually, you can kill almost every houseplant by overwatering it. Still, it definitely takes less time for a black velvet to die due to excess water.
Overwatering isn’t just pouring too much water onto a plant, but watering the soil so frequently that it gets waterlogged.
This results in the soil becoming a perfect place for fungi, which attack the roots and cause a dangerous disease called root rot.
You may also be dealing with underwatering, which is also dangerous.
Here are the signs your black velvet alocasia is either receiving too much or not enough water.
[table id=202 /]To help you avoid any issues, here are some tips for watering:
Watering Schedule
I wish I could tell you exactly when to water your Alocasia, but there’s no ideal watering schedule so you need to rely on yourself.
There are certain things that can help you determine if it’s time for watering, though.
Always check the little queen’s soil before adding even a drop of water. The easiest way to tell if your Alocasia needs water is by sticking your finger in its soil.
The soil should be dry about 2 inches below the soil line. Never leave an Alocasia’s soil to dry entirely.
You can also lift the container and delay watering if the pot is too heavy.
Another way to check moisture is by observing the soil color – darker soil means it has enough water.
Water more frequently during the growing season because temperatures are higher. Be careful with watering during winter because your Alocasia enters dormancy.
How To Water A Black Velvet Plant
The way you water your black velvet is also very important.
Before I tell you which method to apply, I recommend using lukewarm and filtered water as Alocasias are sensitive to salts.
The first method is by watering thoroughly from above. The goal is to water the soil until you notice water coming from the drainage holes. Leave your Alocasia to dry for a few hours.
You can also water your Alocasia black velvet from the bottom. Bottom watering is a very common method, but it takes some time.
Fill your sink halfway with water and place the black velvet’s pot in it. Wait a few minutes and then take your plant out.
This method is perfect if you are afraid of overwatering as the soil will receive enough moisture, but excess water won’t remain in the soil unless you leave it in water for too long.
Soil
The potting mix your black velvet needs should contain both well-draining materials and some materials that retain water well.
Although it may sound complicated, it will be easy once you learn the materials that improve drainage and water retention.
Materials such as perlite, orchid bark, and coarse sand will make well-draining soil, which is exactly what your Alocasia needs.
There are a few combinations that will make the soil suitable for an Alocasia black velvet.
You can mix one part orchid bark, perlite, and standard potting soil for a great option.
Another great combination is 1/4 coco coir, 1/4 perlite, 1/4 orchid bark, and 1/4 coarse sand.
Soil mix for aroid plants also works great for this Alocasia variety.
The last combination is 1/2 potting soil and 1/2 succulent mix.
Pro tip: Add worm castings to the potting mix to improve fertility.
Fertilizer
The little queen isn’t a heavy feeder, so if you use fertilizer, apply it only during the growing season.
You can skip fertilizing if you provide your black velvet with fertile soil.
If you decide to feed your black velvet, you can use a balanced fertilizer diluted to half strength (if it’s all-purpose).
Overfertilization may burn the velvety leaves, so it’s better not to feed at all than risk burning your plant.
A rule of thumb is to fertilize once a month during the growing season. Avoid fertilizing during the winter months as your black velvet isn’t growing, so it doesn’t need much energy.
Pruning
The Alocasia black velvet isn’t fussy about pruning, you just need to do it when the leaves are dead or completely discolored.
You’ll notice that new growth develops from the center of your black velvet. When new growth occurs, older leaves frequently fall off.
To check if a leaf has come loose from the plant, gently pull on it, but not too hard or you risk tearing it.
Instead, cut closely to the black velvet’s base after sanitizing your cutting equipment with isopropyl alcohol.
Repotting
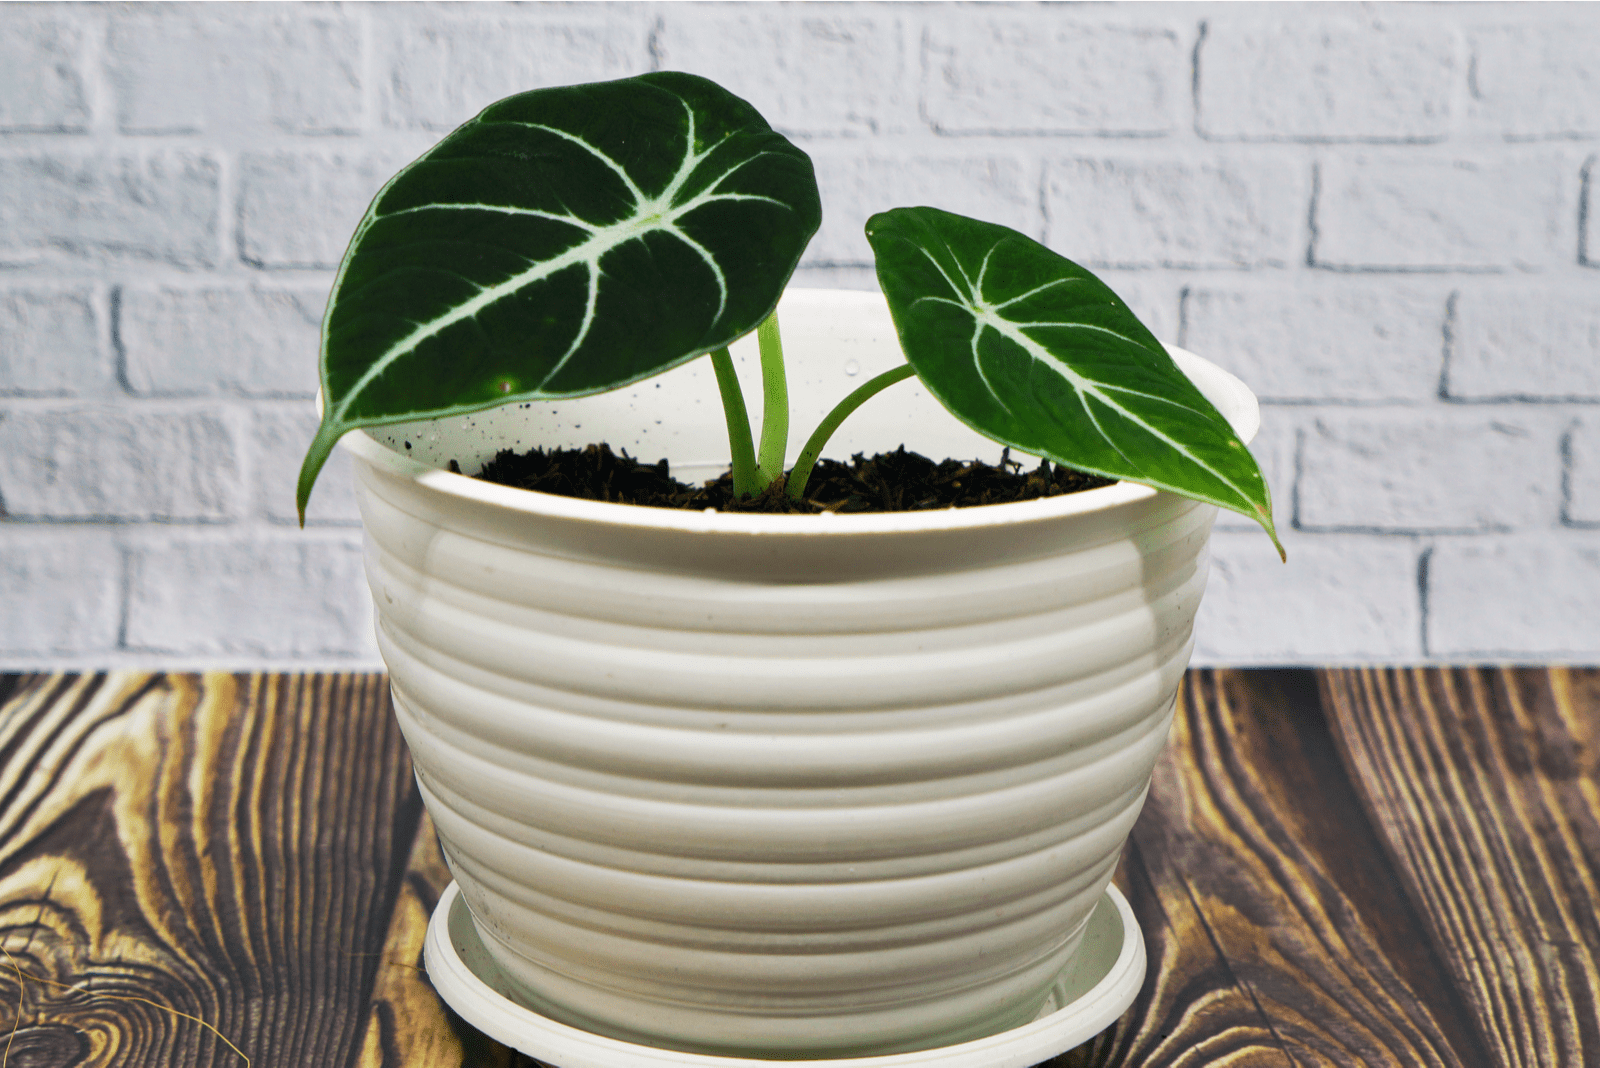
An interesting thing about black velvet alocasia plants is that they actually like being a little rootbound, and won’t grow well in larger pots.
I mentioned that the elephant ear plant is sensitive to overwatering, and leaving too much soil around the plant will retain more water than your black velvet can tolerate.
This Alocasia variety has small roots which rot easily.
You can wait a year or two before moving your black velvet to a larger pot.
I always repot my Alocasia black velvet in spring at the beginning of the growing season. Additionally, I clip and remove the offsets emerging from the black velvet’s base.
When purchasing a new pot, make sure it has drainage holes and that it’s not much bigger than the previous one (about 2 inches larger).
Now that you know the basics of repotting, let’s find out how to do it!
How To Repot An Elephant Ear In 7 Simple Steps
Follow the procedure below, and repotting shouldn’t be a problem!
1. Remove your Alocasia black velvet from its pot.
2. Remove as much soil from the root system as you can until all the roots are visible.
3. Carefully inspect the roots. If you notice any damaged roots, remove them with sanitized shears or scissors.
4. Fill the new pot with a proper soil mix that includes the ingredients in the section above.
5. Place your Alocasia in the center and add more soil.
6. Water the plant and place it in bright indirect light.
Cleaning
When we dust our homes, we often skip our plants.
What if I told you that you could clean your Alocasia black velvet and make its dark green leaves even prettier?
Many suggest using products made specifically for cleaning plant leaves, but I wouldn’t if I were you. Water will do wonders (as always).
Feel free to spray the leaves with water, but let them dry well.
How To Propagate An Alocasia Black Velvet Plant
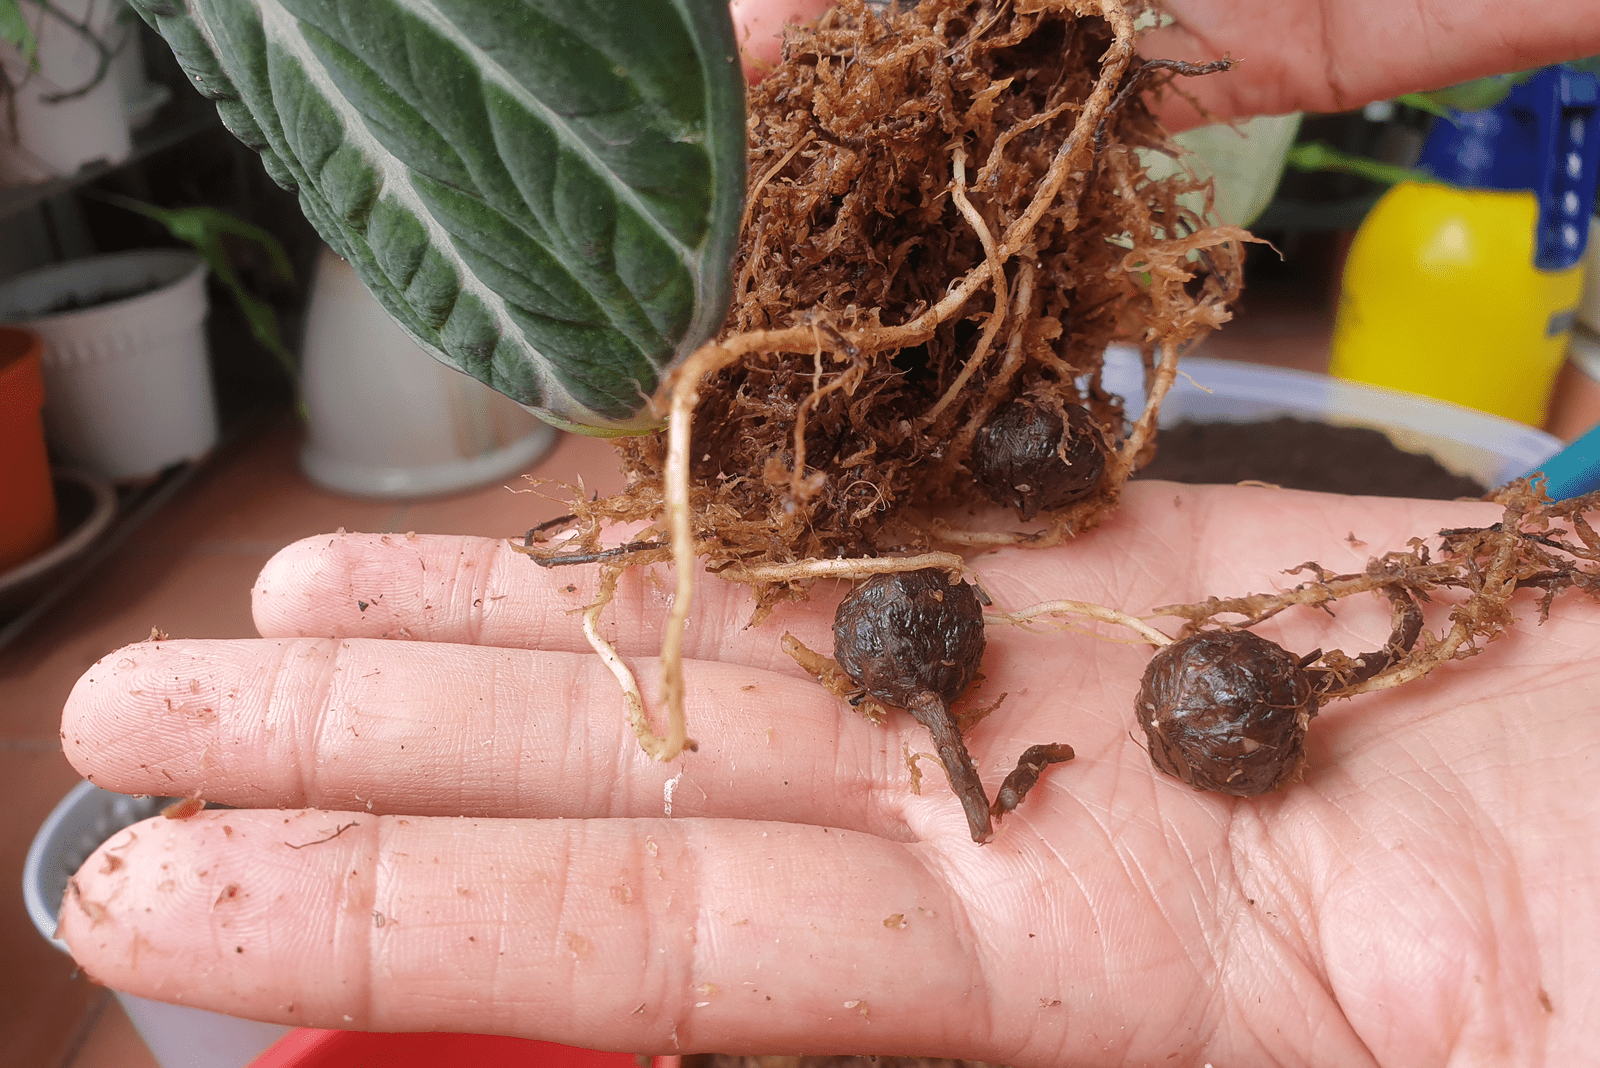
The black velvet plant is easy to propagate. I mainly propagate my Alocasia by offsets, but you can propagate it by rhizome division and have the same success.
The black velvet can also be propagated from seeds, though it may be quite challenging as the seeds need to be pollinated if you want them to produce a viable berry.
Feel free to try this propagation method if you like a challenge, but keep in mind that you’ll need to plant the seeds as soon as possible after soaking them.
Now, let’s look at the easier way to propagate your black velvet.
By Offsets
First, you’ll need to remove the offsets, which are plant daughters that sprout from rhizomes. Cut it at the mother plant’s base with a sanitized knife.
Put the offset in a tiny pot with soil similar to the back velvet’s.
Moist soil is your friend now; a new plant will develop roots quickly if it has enough moisture (not too much, of course).
Repot your new black velvet after it develops roots and then continue with usual care. New leaves will start showing in no time!
By Rhizome Division
Before you start dividing rhizomes, you’ll need to remove your black velvet from its pot.
The next step is to remove enough soil to expose the rhizomes.
Now that you can see the rhizomes, it’s time for division.
Separate the rhizomes and make sure each part has a plantlet.
Plant the sections in the potting mix described above. Place the pot in a humid room with indirect sunlight.
The rhizomes should sprout soon if the soil is moist enough, and when you notice the sprouts you should continue with usual watering habits and plant care.
Common Issues
Although very hardy, the Alocasia reginula is not immune to pests and diseases.
It is also an indoor plant, which means that it can be affected by similar issues as other houseplants, such as leaf discoloration.
Pests like spider mites or mealybugs – and diseases like Leaf Spot – may most frequently occur, usually followed by discoloration of the leaves.
However, leaves may also change color due to light, humidity, or watering issues.
Let’s look at these issues and how to fix them!
Pests
A pest infestation is frequently an indication of stress. As you fight the pests, you should examine the plant’s surroundings and daily care routine and make any necessary adjustments.
Spider mites and mealybugs are the most prevalent intruders. They can establish themselves on a black velvet that is ailing from low humidity because these pests prefer a dry environment.
You can use a mild liquid dish soap and water solution to eliminate these pests.
Diseases
Leaf Spot is one of the most common diseases that affects the black velvet. The fungi responsible for this disease thrive in soggy soil.
Cut off the damaged Alocasia leaves and dispose of them safely.
To avoid more problems, improve airflow and water with extreme caution.
Alocasia Black Velvet Leaves Turning Yellow Or Brown
The color of your black velvet plant’s leaves will undoubtedly change if it is receiving either insufficient or excessive light.
Too little light may be the problem if you notice pale or browning leaves or leaf tips.
Another factor may be watering issues. If you are overwatering your black velvet, it will display yellowing leaves due to root rot.
If you are underwatering, the black velvet’s leaves lack nutrients and you will see them turning yellow.
If everything has been done correctly, the problem could be the temperature.
Your plant may be experiencing continuous temperature changes, excessive heat, or cold.
Leaves Curling
If your Alocasia black velvet’s leaves begin to curl, one of the possible causes may be overwatering because fungus and other infections are drawn to soggy soil.
With no access to nutrients or water, rotten roots can cause the black velvet’s leaves to become dehydrated and eventually curl.
Another cause may be underwatering; when elephant ears lack water, the leaves curl as they try to store some moisture for later.
Wrapping Up
Care guides for plants have always been my favorite thing because they were very helpful when I was a beginner grower.
I want to help plant growers now, especially beginners. Although Alocasia black velvet care may not seem demanding, it can go wrong if you don’t follow the rules.
With time, you’ll master gardening skills and know exactly how to maintain the amazing dark green leaves with fascinating white veins of the Alocasia black velvet.
Good luck and until next time!
Like this post? Share or pin it for later!