Can Spider Mites Live Without Plants? All The Answers Here!

If you are a plant owner, you have probably dealt with various pest infestations… Trust me, I know the struggle!
One of the most common pest infestation problems is a spider mite infestation.
The Tetranychidae family, which has roughly 1,200 species, includes spider mites. They belong to the class of Acari (mites). Spider mites typically reside on the undersides of plant leaves where they create protective silk webs.
They harm plants by feeding off their nutrients. Spider mites feed on hundreds of different plant types!
Have you ever wondered if spider mites can live without plant hosts, or do they solely rely on stealing their nutrients?
Let’s find out!
Seriously, Can Spider Mites Live Without Plants?
These tiny annoyances affect plants in the garden far more often than houseplants, but nonetheless, both are prone to spider mites infestation. Spider mites infestation is worse in gardens because they can easily spread to other nearby plants, lawns, and even trees.
An interesting thing about spider mites is that they are quite picky about their environment, which means they prefer specific conditions with regard to humidity and temperature. Thus, they are not “food-driven”.
I mean, sure, their primary goal is to steal your plant’s nutrients; however, they won’t attack any old plant. They actually search for plants surrounded by dry and hot air, though they can also infest plants in humid environments.
They also don’t mind getting a little dirty as they prefer dusty conditions — this is when the fertility of these insects is at the highest point and they breed the most. It sounds like dusty conditions are similar to dimmed light and soft music for these little creatures!
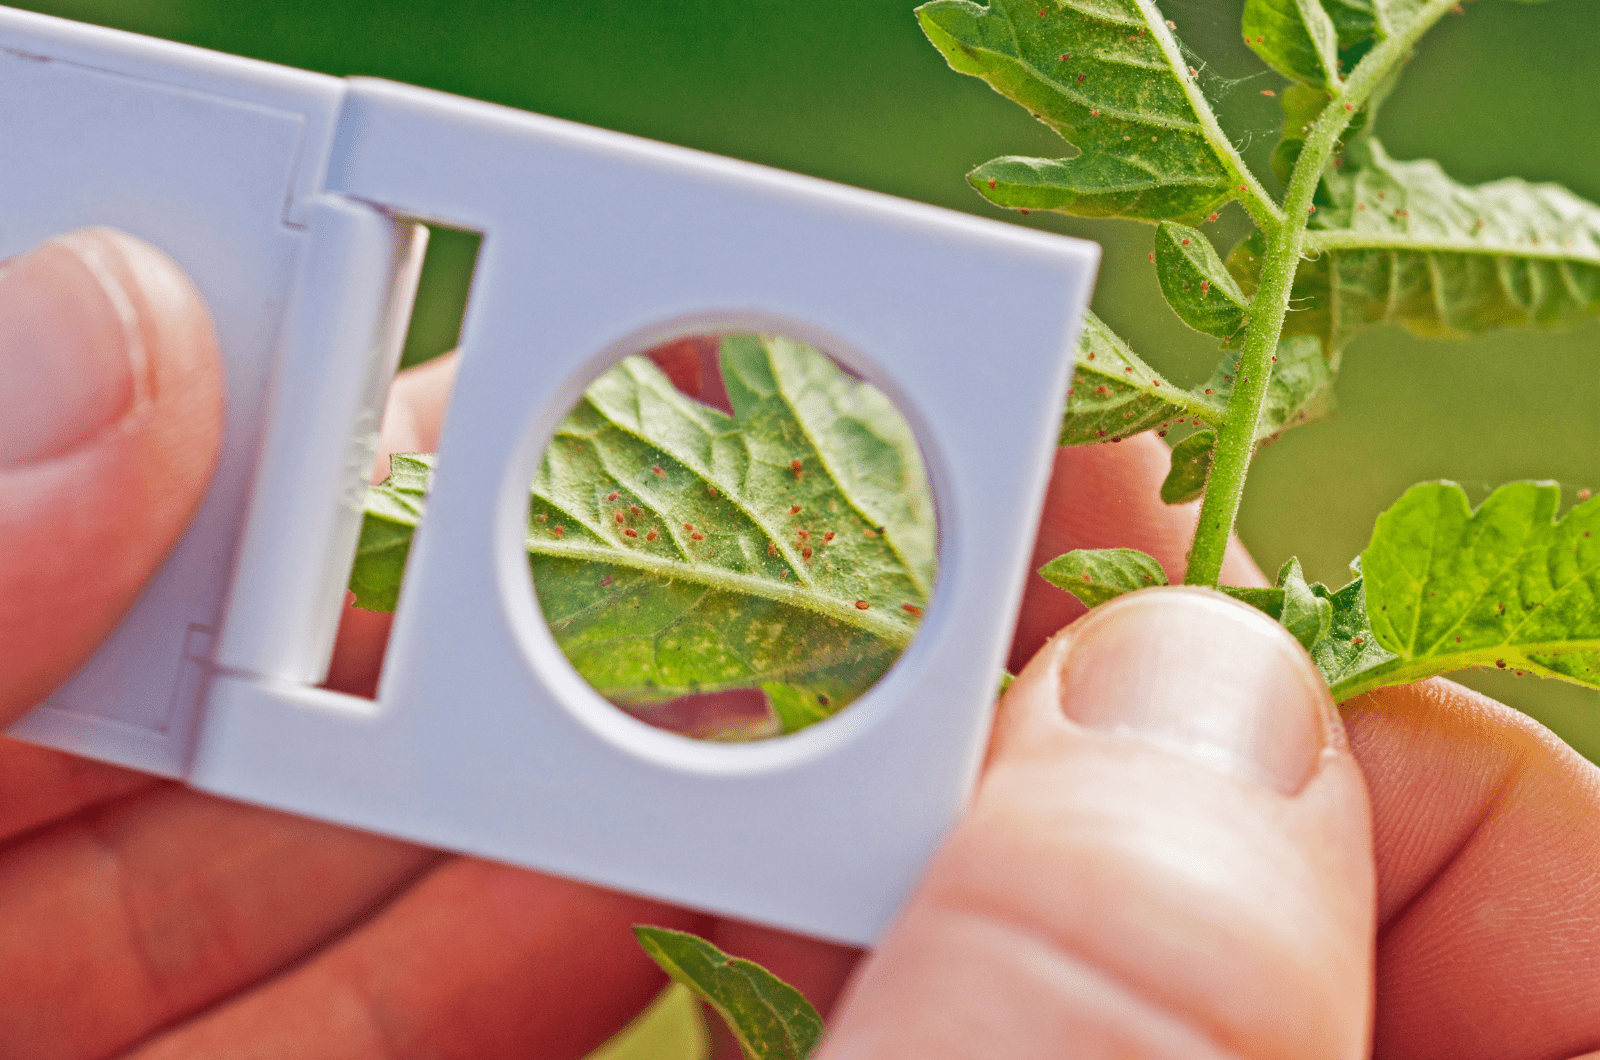
Spider mites are almost invisible to the naked eye (they are only about 1/20 inch long!), and are easily transmitted by pets and humans. You might even have spider mites on your clothing without realizing it!
However, it’s harder for them to spread between indoor plants because they prefer specific conditions.
The question is, will these tiny creatures die if they don’t find a plant to feed on?
Well, the answer is yes — spider mites can survive approximately 11 days without plants, and this is only if they find themselves in optimal environmental conditions. Otherwise, they die in the first three to five days (female spider mites can live a few days longer than male ones).
So no, adult spider mites can’t live without plants because plants are their food source, and without them they would simply starve to death.
The story changes with spider mites’ eggs, however, which can survive even longer without plants as a food source. But once they hatch, they will die quickly because there is no food to give them energy for growth and development!
Spider mites and their eggs may hibernate through the winter, and will survive even the harshest winter conditions outside. Therefore, if you had serious issues with spider mites during the summer, don’t think that you got rid of them because the winter season starts — they are most likely hiding and asleep!
But hey, if you keep your indoor and outdoor plants happy and healthy, you won’t have to worry about spider mites attacking them because they usually prefer those that are already in bad condition.
What Are Spider Mites?
Now let’s find out a thing or two about spider mites!
Spider mites, even though they literally have spider in the name, are not spiders. They belong to the Arachnid family, which also includes scorpions, ticks, and spiders — so they are kind of like spider cousins!
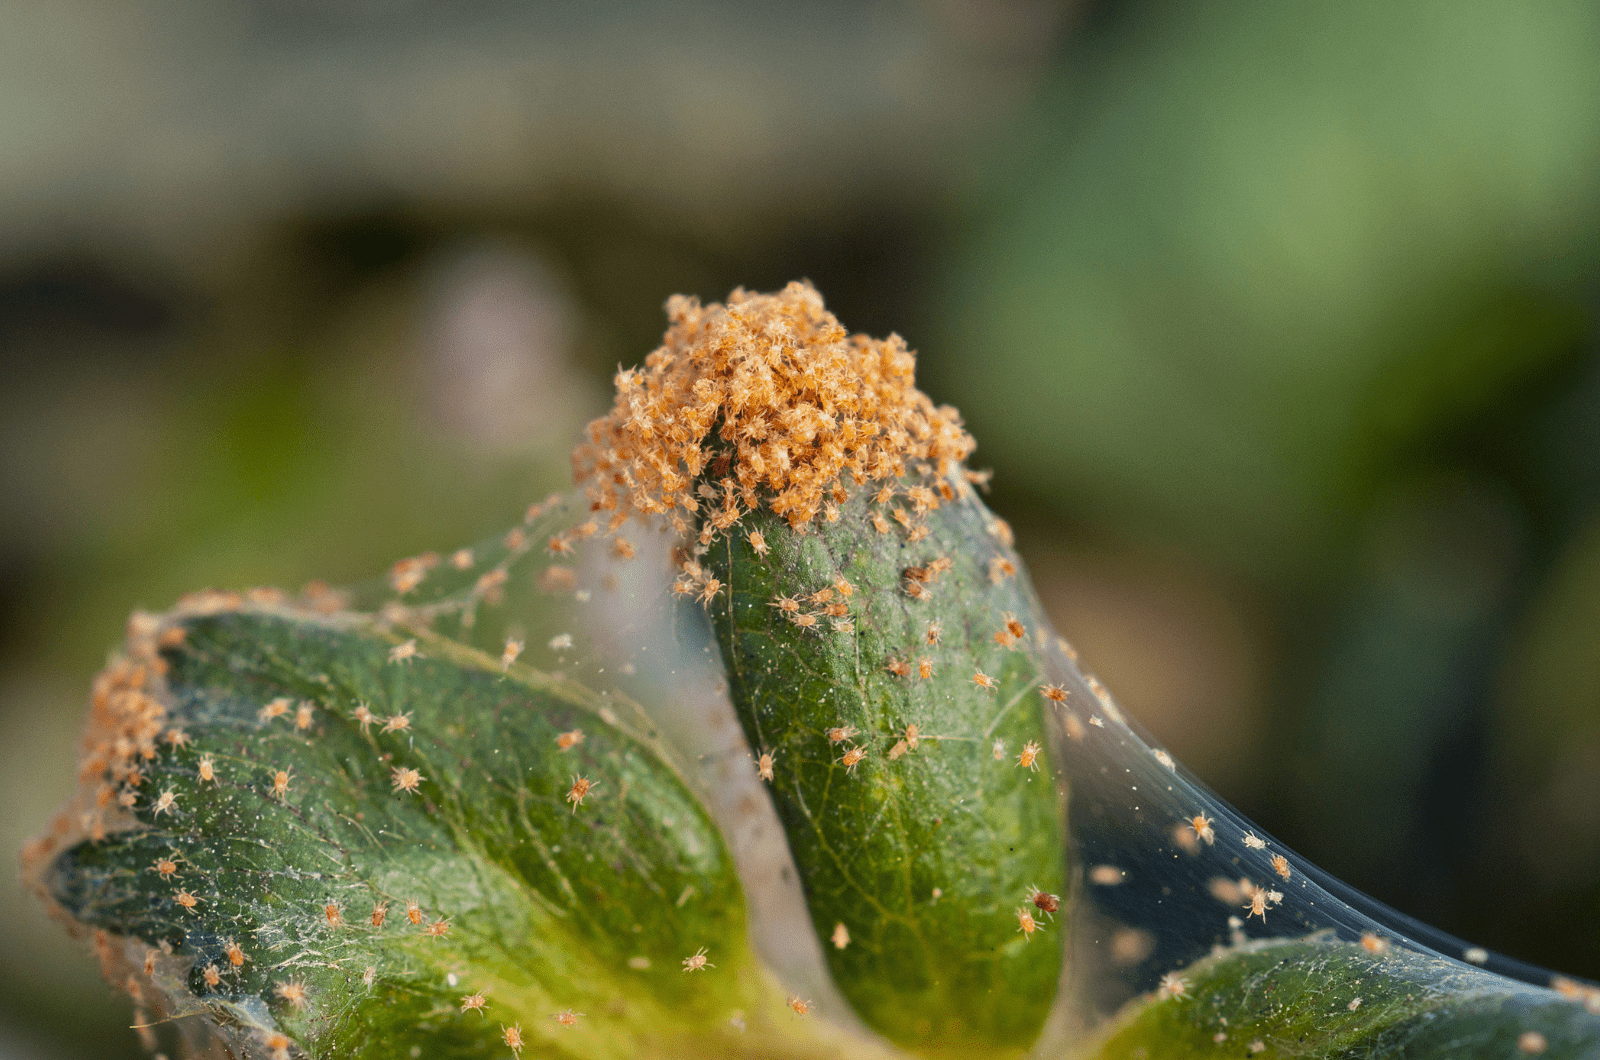
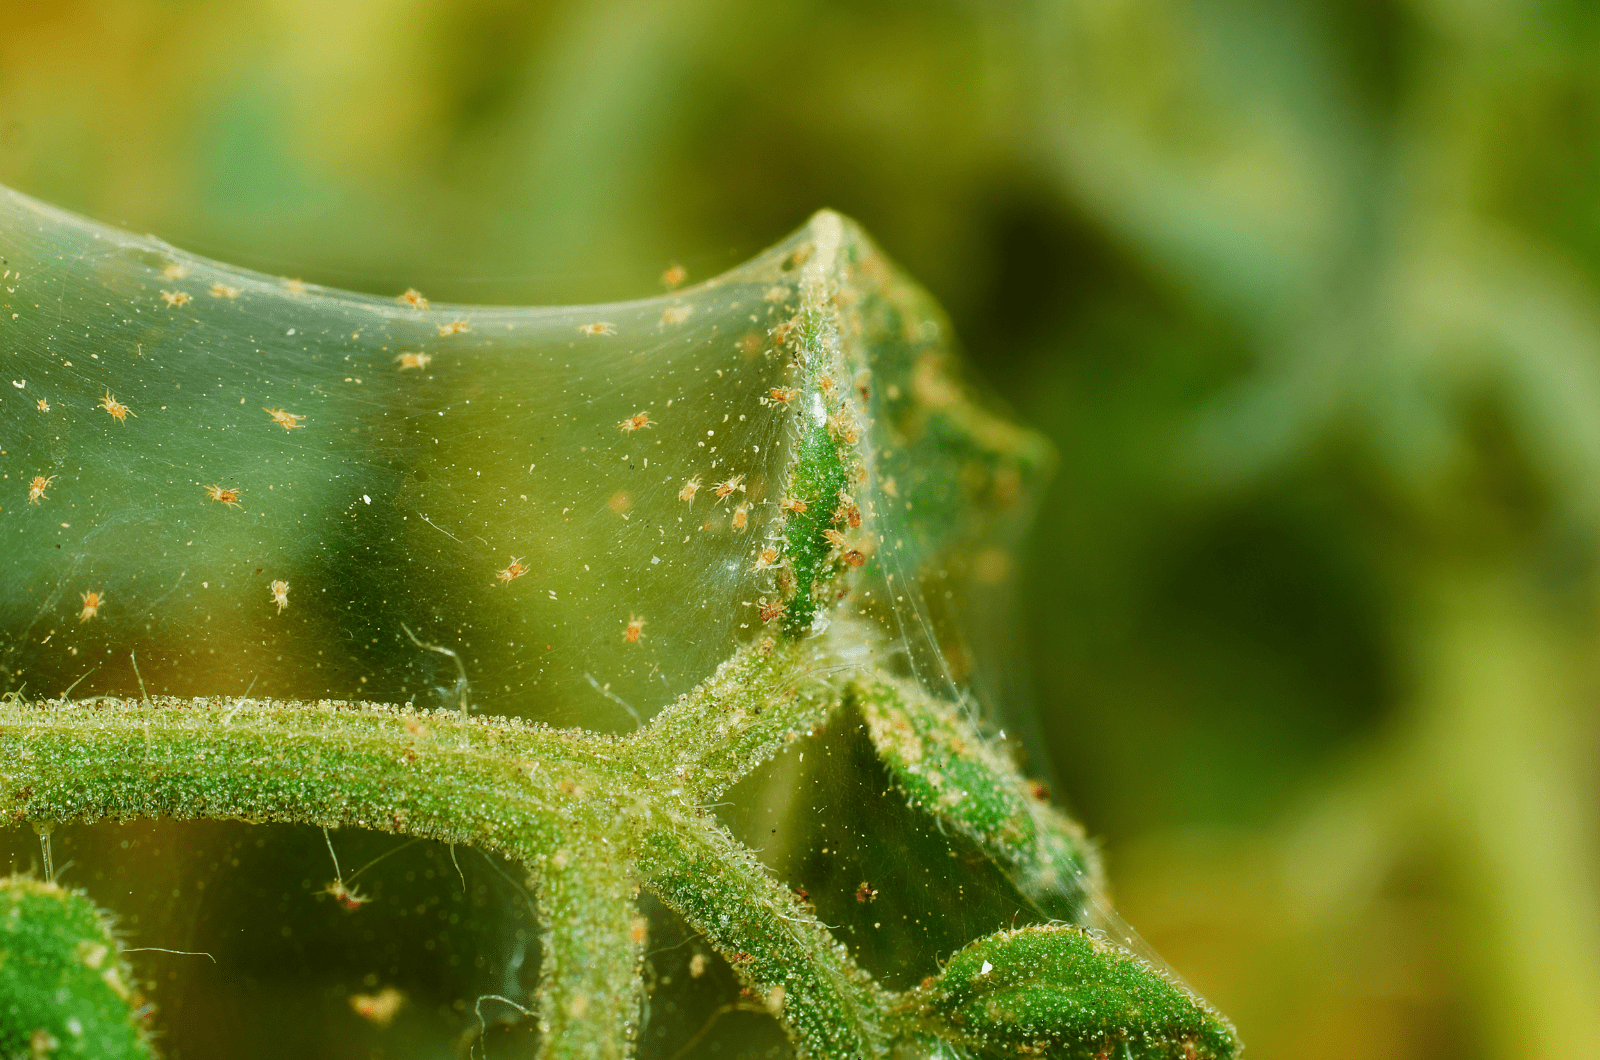
These little creatures produce tiny silky webs that they use to attach to plants. If the infestation is severe, then the entire plant will be covered in these tiny webs.
Once you see any kind of webbing on your plants, examine it and look for spider mites. They usually hide on the undersides of leaves, where they settle in and steal the plant’s nutrients without you even realizing it!
What Do Spider Mites Look Like?
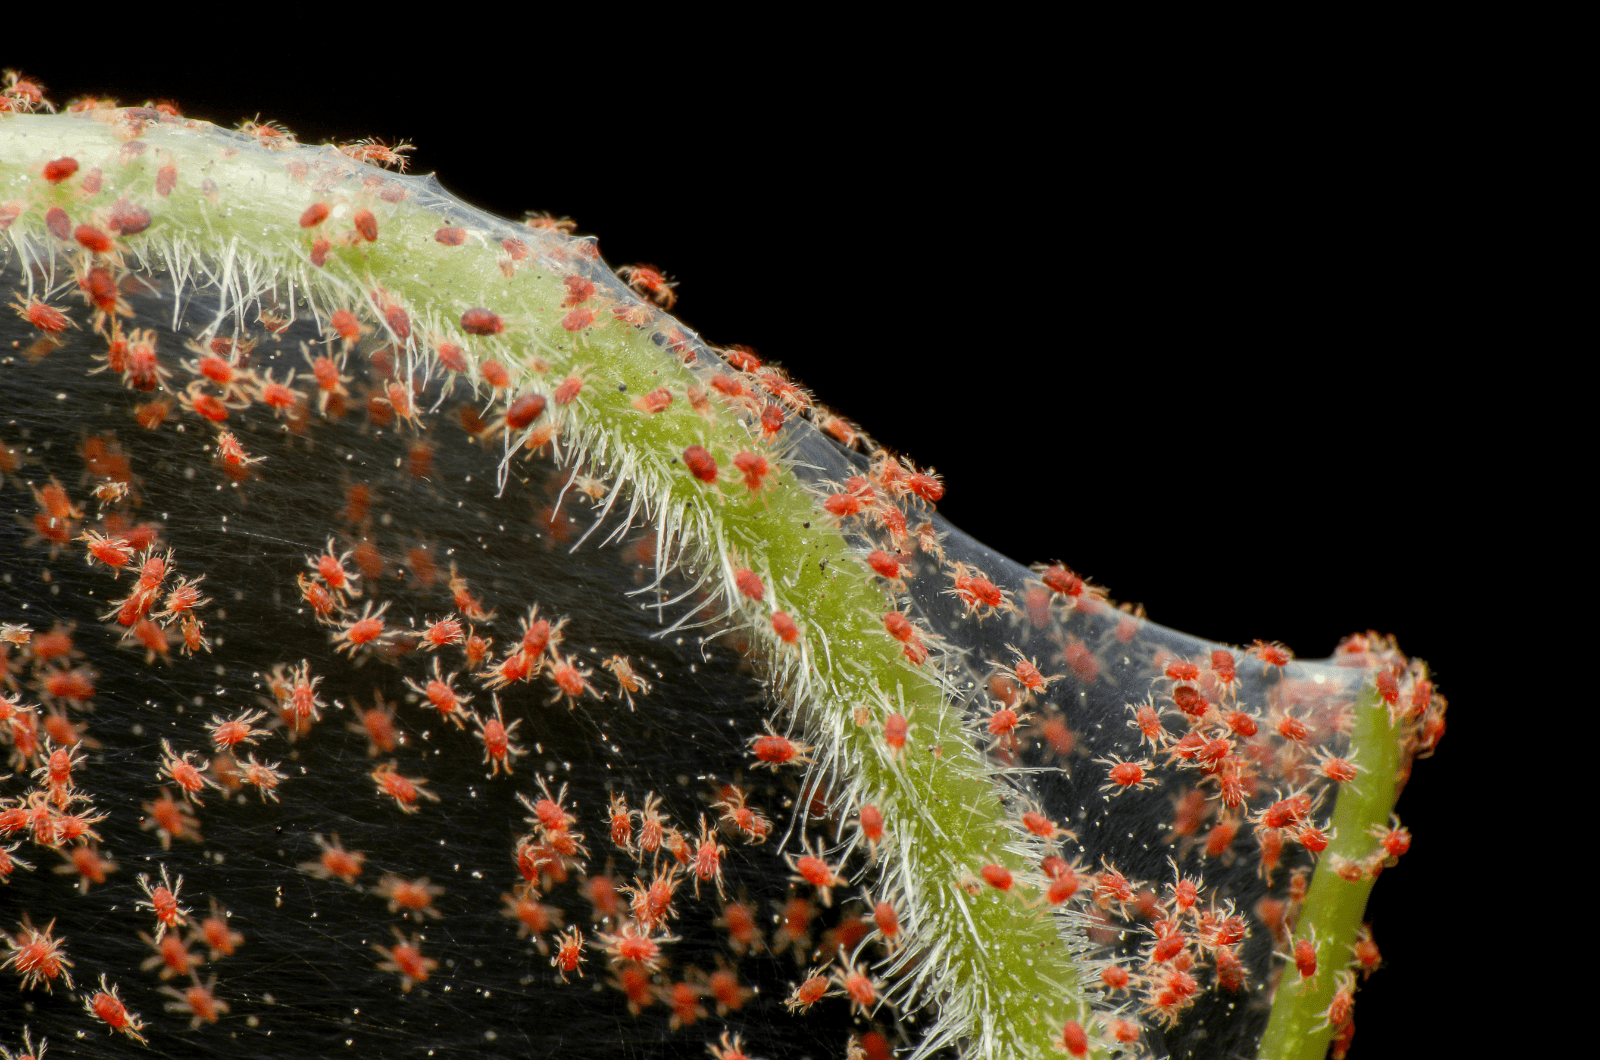
Adult spider mites have 4 pairs of legs and a mouth with 2 fangs known as chelicerae, which they use to chew into plant cells. Depending on what they eat, their bodies will have different colors.
They usually have a mild brown, darkish brown, or black appearance, though their legs may have a lighter brown color. They can vary from a yellow color to green and pink.
Immature spider mites look similar — they have oval-shaped bodies varying from brown to reddish, however, they are a lot smaller!
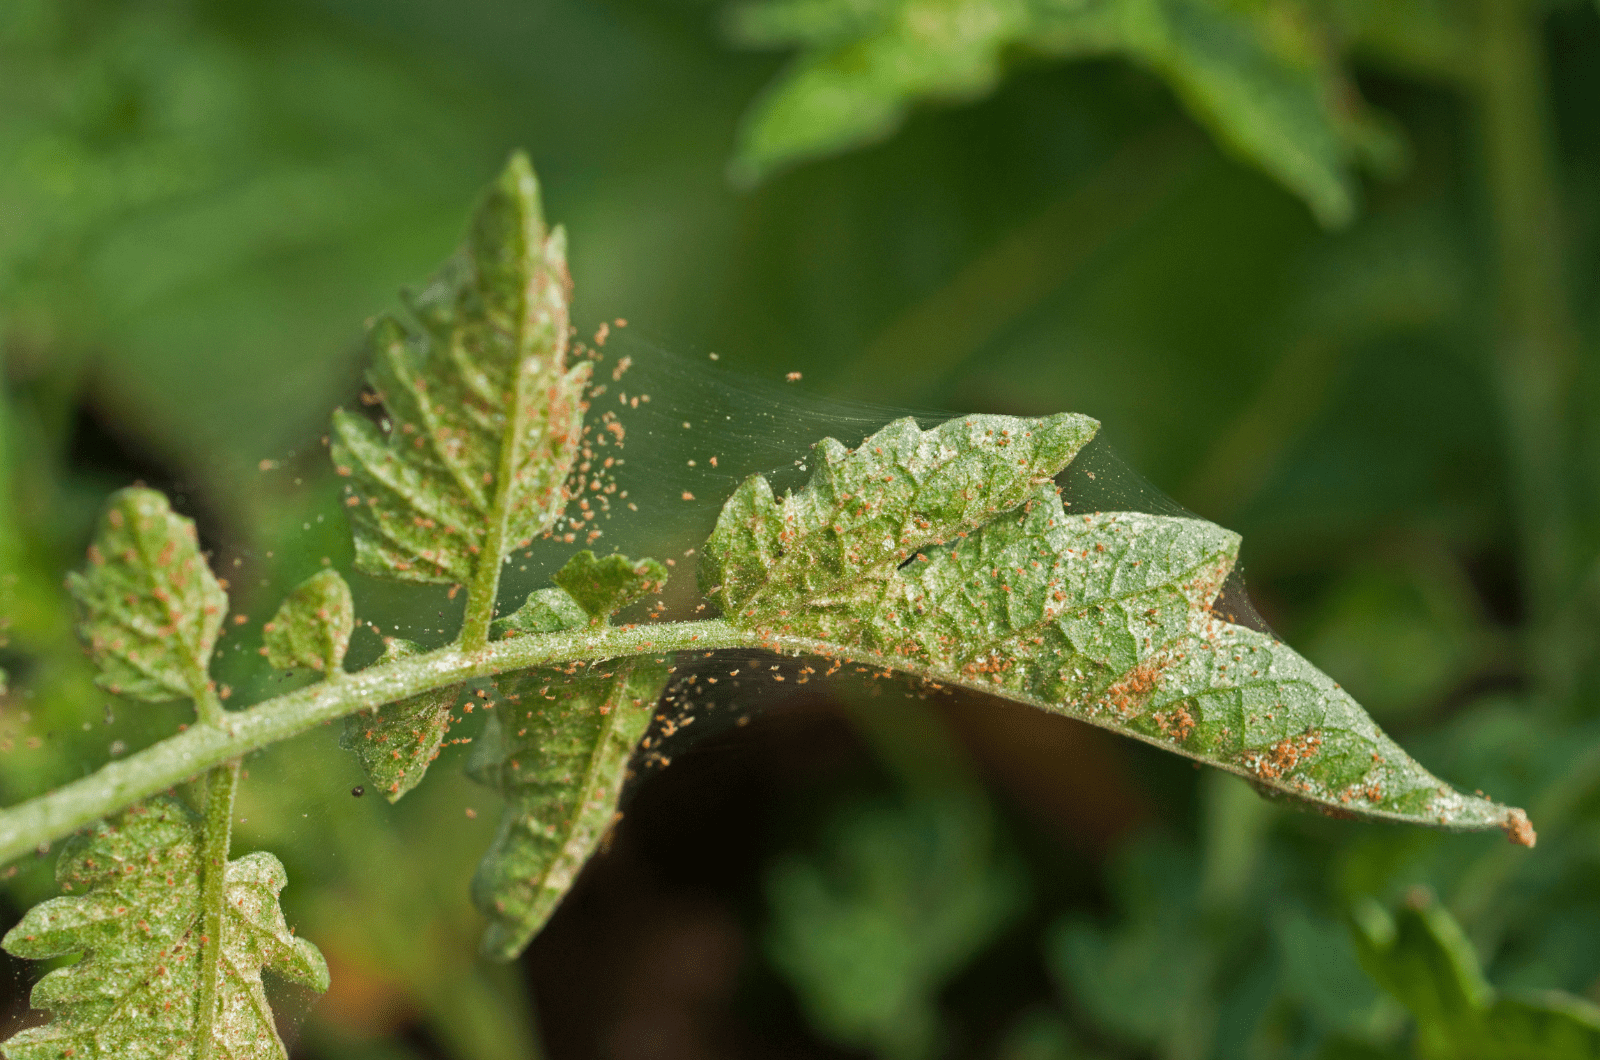
While on the underside of leaves, mites stay in colonies and feed by penetrating leaf tissue and sucking up plant juices. Light spots that resemble feeding marks appear on the leaves in case of spider mite infestation.
The leaves may turn yellow, dry out, and eventually fall off, which are the obvious signs of spider mites infestation, in addition to tiny webs appearing all over the plant.
In fact, the whole plant will eventually deteriorate because of the spider mites’ webs covering the leaves with fine silk, which gathers dust and has a muddy impression.
What Is Their Preferred Habitat?
Particularly when their natural predators have been eliminated by insecticides, hot, dry climates are where spider mites are most prevalent. There are numerous species widespread in North America that prey on the majority of plant-feeding mites.
Even though they prefer growing in dry conditions, some predatory mites can live in humid zones as well — however, when they are found in areas with high humidity levels, their fertility rate significantly drops, as do the chances of the eggs hatch.
However, when they are growing and reproducing in optimal conditions (with temperatures around 80 degrees Fahrenheit), spider mites can easily adapt to the pesticide or miticide that you are using, which is why you should switch between pesticides if you are dealing with an infested plant for a long period of time.
You can often find them invading green plants and trees, usually where there are higher levels of phosphorus, nitrogen, and carbohydrates.
Due to their high population density and prolific nature, severe infestations frequently develop undetected before plants exhibit any harm or distress.
They can be seen establishing their colonies indoors in hydroponic gardens, greenhouses, and commercial fields with drip watering systems, which don’t routinely wash them from the underside of the leaves.
Fine webbing frequently accompanies large spider mite populations. Strawberries, melons, beans, tomatoes, eggplant, decorative flowers, trees, and the majority of houseplants (especially Spider Plants) are among the numerous host plants that suffer from spider mite damage.
What Is The Spider Mite Life Cycle?
Spider mites can usually live for around 2 to 4 weeks. Female spider mites can lay almost 20 eggs in a day, which can add up to over a hundred eggs in their life!
The life cycle of spider mites consists of:
1. Egg
2. Larvae
3. Protonymph
4. Deutonymph
5. Adult
Egg Stage
As we mentioned, female spider mites lay around 20 eggs a day. They settle in on the underside of leaves and continuously lay eggs there, which can lead to up to 100 eggs in just two weeks!
What’s interesting is that the eggs that aren’t fertilized by a male spider mite will hatch as males, while the eggs that are fertilized will hatch as females.
There is usually a 3:1 ratio for females and males.
Larvae Stage
Once they hatch, the spider mites are in their larvae stage. As they hatch on a plant, which is their primary food source, they will start eating and developing from the second they are born.
These tiny little creatures have three sets of legs that they use to move around the plant and start eating, which affects the color of their bodies. They get two distinct dark spots on their backs as their pigment naturally darkens.
Protonymph Stage
After the larvae stage, there are two nymphal instars known as the protonymph and deutonymph. Each of these has 4 pairs of prolegs. Depending on the temperature, the larval and nymphal stages each last one to three days.
The nymphochrysalis or protochrysalis (between the larva and protonymph), deutochrysalis (between the two nymph stages), and teliochrysalis between the deutonymph and adult stages) are non-feeding resting stages.
During this resting period, they use less energy so that they can expand to have two more legs and the ability to spin webs.
Deutonymph Stage
This is when they enter the deutochrysalis stage — that is, between the two nymph stages.
During the deutonymph stage, the tiny spider mites are still inactive, continue to grow, and reach intermediate size. During this stage their hardened exterior sheds, which allows them to grow bigger.
They will soon start eating and contributing to the building of a protective silk web.
Adult Stage
After they get their rest and grow bigger, the spider mites are finally fully mature!
Their color in the adult stage depends on the type of plant that they have been feeding on — it can vary between brown, reddish, and black.
This is when the female spider mites begin to lay eggs and male spider mites begin to fertilize them.
The eggs can hatch in as little as three days, and be sexually mature by day five. With a total growth span of 14 days, the transition from the larva to the adult stage can take as little as 10 days.
What Do Spider Mites Eat?
We know that these little pests absolutely love eating plants… but have you ever wondered what exactly they’re searching for?
Scientists have discovered that over 300 different plant species are eaten by spider mites, and maybe even more because these little creatures are widely distributed!
As we already mentioned, spider mites usually settle on the underside of leaves, which is where they puncture the plant cells and tissue to eat the juice that comes out. This sap contains lots of nutrients, like nitrogenous compounds and inorganic salts, which are beneficial to the tiny pests.
They even drink up all the chlorophyll in the leaves!
They will make tiny holes in the leaves bit by bit, then eventually spread to the entire plant!
Signs Of Spider Mites Infestation
We have already spoken about how yellowing of the leaves are obvious signs of spider mites infestation, but it isn’t always a sign of pest infestation — it can also be a symptom of overwatering.
This is why you must also look for other signs of pest infestation. Some signs of spider mites infestation include:
• Yellow spots on the leaves or total leaf discoloration
• Sandy texture on the leaves
• Fading leaves or leaves losing their vibrancy
• White silk webs or threadings under the leaves and stems
I recommend you check weekly to see if these little annoyances have infested your indoor plants, and especially your outdoor plants. The best way to keep spider mites away from your plants is by removing them before they even get the chance to spread in the first place.
Some Common Spider Mites Varieties
The two most common Spider mites varieties are the Two-spotted spider mite, also known as Tetranychus urticae, and the Spruce spider mite.
Two-spotted Spider Mite
The Two-spotted Spider mite, also called “warm-season” mites, have been found in over 180 plants, including weeds, houseplants, decorative plants, and field crops.
Female Two-spotted spider mites settle in the soil during the winter season and become active in April and May, which is when they start invading the plant. You can often find a spider mites egg in the soil as they spend so much time there.
Similarly to regular spider mites, the females can lay about 20 eggs a day, so it only takes about 20 days to set up a whole generation of these little creatures, and if the temperature and humidity are optimal, it can take just a few days!
The nymphs and adults have two greenish patches on white bodies in the summer. Overwintering females, however, typically turn a reddish-orange color and can be confused with other mite species.
Spruce Spider Mite
The Spruce Spider mite is known as the “cool-season” mite, and can be found in various types of conifers like arborvitae, pines, spruces, and junipers.
These mites spend their winter in the egg stage attached to small branches, and hatch in March and April. If the temperature in the summer surpasses 86 degrees Fahrenheit, the female Spruce spider mite will go dormant and lay eggs.
These eggs hatch in the fall once the temperature starts to cool down, hence, cool season mites.
Conifers frequently respond slowly to this mite feeding on it. Even though the damage may have happened the previous fall and spring, the yellowing and bronzing of the needles might not become obvious until the temperatures start rising.
How To Get Rid Of Spider Mites

The most important thing is to act quickly once you spot a spider mites infestation. If you notice a tiny yellow spot on your plant’s leaves, immediately examine it and search for tiny webs.
Luckily, getting rid of spider mites isn’t hard, especially with a mild infestation. Plants that have been invaded for a longer period of time may be a little tougher to deal with, but it’s always possible to save them!
There are various strategies for removing spider mites. You have the choice of chemical control or biological control. You can adjust a few factors at home to eliminate spider eggs.
1. Use Neem Oil
Neem oil is a great way to get rid of spider mites and other pests like fungus gnats, aphids, or thrips, according to several gardeners and growers.
This is an organic method of spider mite control that won’t cause any harm to your plant or its delicate roots (sometimes pesticides can cause more harm than good!).
Azadirachtin, the poisonous component of neem oil, disorients spider mites and other pests and causes them to lose the ability to consume and reproduce.
Eggs gradually lose their ability to develop into larvae and pass away. You eradicate the entire colony like this.
Many plant gardeners criticize the failure of neem oil to control their spider mite problems, but you must use it correctly in order to get the best of neem oil, otherwise you’ll end up with more spider mites than before!
For optimal effects, neem oil should be used before the plant becomes infested. Neem oil therefore acts as comprehensive pest prevention. It can be used twice each month.
I advise you buy neem oil derived from agricultural products because it is more organic than neem oil used for medicinal purposes.
Before using neem oil, always water the plant and the surrounding soil.
1 liter of water can be mixed with 1/2 teaspoon of agricultural neem oil and 1 teaspoon of insecticidal soap. Never alter the recommended quantities of ingredients because doing so could harm your plant.
Spraying the impacted regions will work best in the early morning or late evening because warmer temperatures will warm the oil and eventually burn your plant.
In my opinion, neem oil is one of the best forms of pest control. This horticultural oil can be used as a fungicide and also as a preventative measure!
Also read: Copper Fungicide Vs Neem Oil: What’s The Better Option?
2. Dry Out The Soil
As it prevents their eggs from drying out before hatching, spider mites prefer moist soil — and of course we can take advantage of this! If you spot eggs in the soil, let it totally dry out.
Unfortunately, only plants that can survive dry soil or dry circumstances can benefit from this method. You shouldn’t dry out the soil of plants that like their substrate to be constantly moist. The same thing applies to plants growing in soggy soil.
How does this lack of water work? The spider eggs require water to hatch. They won’t be able to hatch if you deprive them of water for a long time, and eventually perish.
Because it can be used to interfere with the life cycles of other nuisances like millipedes or springtails, this is the best method to get rid of pests. The spider mites eat these organisms, so when you kill a springtail or a millipede you are also killing the food source for the mites.
3. Apply Insecticidal Soap
Pesticides should be avoided as they can harm plants. Chemical remedies are sometimes necessary, however, and in this situation I advise using insecticides formulated specifically for spider mites.
They won’t harm the soil or your plant in any way. Horticultural oils or insecticidal soap both work well as spider mite pesticides.
They are most effective against adult spider mites, so I advise adding an additional solution for eggs and the other stages of the life cycle before adulthood.
Combine one teaspoon of mild liquid detergent and one liter of lukewarm water, then spray it over the leaves.
4. Try Rubbing Alcohol
I don’t simply use rubbing alcohol to get rid of spider mites, I use it for various other pests too. Even though most indoor plants aren’t troublesome, you still need to have a strategy in place in case pests decide to pay you a visit.
Rubbing alcohol stands out as a solution as it is simple to use and has a high death rate. You only need a cotton bud or paper towel – simply dip it in the rubbing alcohol and use it to gently rub the leaves.
Don’t forget to rub the undersides of the leaves.
For the soil, combine 3 parts water and 1 part rubbing alcohol. This rubbing alcohol mixture should be put in a spray bottle and applied to the soil.
5. Insect Poison
There are many different insect repellents available. They are employed to eliminate spider eggs and destroy spider mites. Their function is to separate the materials and eliminate the insects. You can apply them to either the spider web or egg sac.
Buy insecticide, shake it up, then pour 32 oz. of it into a shower bottle. This amount can cover 200–300 square feet. Spray this mixture anywhere you see insects, spider webs, egg sacs, or eggs.
The insects will die the moment they come into contact with this mixture.
6. Hydrogen Peroxide
Hydrogen peroxide alters the pH of the potting soil to kill spider mites. In addition, the larvae and eggs die as a result of the hydrogen peroxide fizzing.
Always dilute hydrogen peroxide with water before applying it to the soil.
Only use 3% hydrogen peroxide with 97% water. Put it in a spray bottle and use it to treat your potting soil.
Keep in mind that you may need to repeat the procedure a few times before all of the mites and their eggs are removed. Soak the soil in a solution of water and pure hydrogen peroxide.
You can prune the plant’s affected areas, but make sure to always sanitize your pruning tools.
7. Imidacloprid
I advise using crystalline, granular insecticides that contain imidacloprid. Apply this pesticide to the contaminated soil first, then wet the crystals to activate the poison.
A systemic pesticide can also be used, but make sure it contains imidacloprid. The amazing thing about this combination is that it will have an impact on both the soil-dwelling spider eggs and the spider eggs on the plant leaves.
Spider mites have the interesting property that they won’t stay on the plant for very long. Even if they do, imidacloprid will make sure it is brief and that they won’t return.
Imidacloprid has the additional benefit of preventing the development of any other insect on the leaves or blossoms of all your plants.
Use imidacloprid with caution – if you don’t follow the directions on the packaging your plant can suffer.
8. Try Some DIY Remedies

Due to a variety of factors, buying pesticides isn’t always possible. They can also be quite expensive. Fortunately, there are several DIY solutions.
The first is Castile soap, which has fatty acids that suffocate the spider mites. The spiders suffocate, dehydrate, and die when you apply the soap.
It’s simple to use and make, just combine 1 tsp of liquid soap with warm water. Spray the mixture over the soil of your indoor plants.
Castile soap can also be applied all over the entire plant by rubbing it with a sponge dipped in the mixture.
Soaking the entire plant in the mixture until the spider mites and their eggs are gone is a great way to use Castile soap. Repeat this a few times until you see improvement in the plant.
Using Castile soap has the following benefits:
• Pollinators, beneficial insects, animals, and children are all safe around it.
• Other pests like aphids, thrips, mealybugs, and whiteflies can all be killed by it.
Combine rosemary oil with lukewarm water and sprinkle it on the soil to eliminate spider mites naturally. I also frequently use apple cider vinegar.
9. Bacillus Thuringiensis Israelensis
Bacillus Thuringiensis Israelensis, also referred to as BTI bacteria, is a soil-dwelling bacterium. Instead of attacking spider eggs, this bacteria targets the larvae.
The insect infestation will disappear in a few weeks because the larvae won’t be able to grow into adults.
This is a moist method of treating plant soil. To protect your plant roots, always dilute it with water and use it on the soil.
10. Take Advantage Of Natural Predators
Spider mites are also subject to biological control. In nature, there are always larger animals that feed on smaller animals (kill or be killed, right?).
Natural predators that feed on these little creatures include:
• Predatory mites
• The ladybug
• Lacewings
In order to attract these helpful insects, you will need to create the right habitat. Reduce your use of insecticides and stop applying mulch for flowers and flowerbeds as these insects hate excess amounts of all three.
Natural predators are also available for purchase online or in marketplaces. They can be applied to a variety of plants and are fully safe for both people and animals.
How To Prevent A Spider Mite Infestation
The best way to get rid of spider mites is by not having them in the first place!
I know this might sound silly, but preventative measures are the key to protecting this plant from pest infestation. Also remember that a spider mite infestation is also likely to occur in plants that are happy and healthy.
Therefore, check out these tips and tricks for preventing spider mite infestation:
• Keep the soil moist and be consistent while watering – spiders hate dry soil.
• To fight off spider mites, you can grow a variety of outside plants in your gardens, such as chives or chrysanthemums.
• To avoid issues, keep new plants separate from older ones for a while.
• Use a humidifier to maintain ideal humidity level.
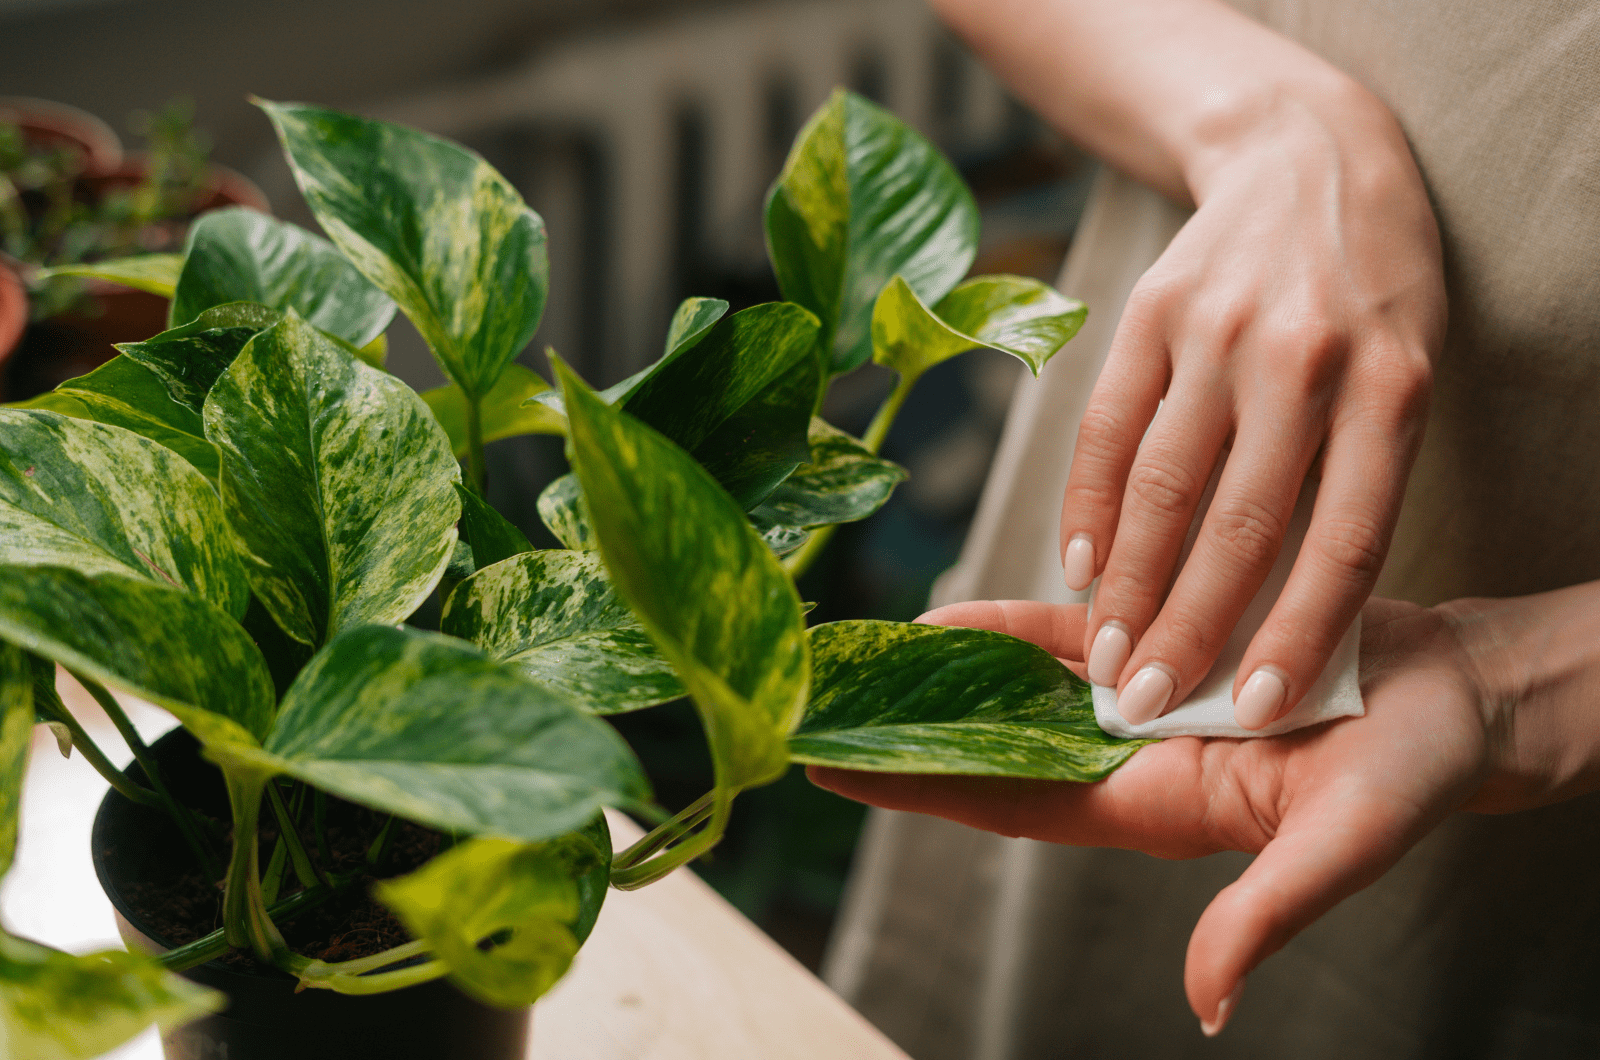
• Dust the leaves and clean the plants on a regular basis.
• A strong stream of water can remove a few spider mites.
• Examine your plant every 7 to 10 days and look at the underside of leaves as well!
• Regular leaf misting can aid in the prevention of spider mites.
• Neem oil should be used as a preventative measure as it keeps mites and other harmful insects away. Every two weeks, spray the leaves and stems.
• You should never let your plants become dehydrated.
To Sum Up

Now you know the answer to the famous question, “Can spider mites live without plants?”.
Just like humans wouldn’t survive very long without food, the same thing goes for these tiny insects. Without food access, they don’t stand a chance.
If you don’t grow any plants in your home, then you don’t have to worry about spider mites. However, if you are a plant-enthusiast, be aware that these creatures can pop up at any time — especially if you live in a region with a hot and dry climate!
They are super tiny and almost invisible to the naked eye (you might need a magnifying glass in order to spot them), but they do leave silky white webs all over the plant.
If you notice any of these signs on your plant, immediately start pest control treatment. The quicker you get rid of them, the safer your plant will be!
Keep your plants happy and healthy!
Until next time!
Like this post? Share or pin it for later!