17 Common Reasons Your Tomato Leaves Are Turning Yellow (And What To Do About It)
Growing tomatoes always starts off with so much promise—those green leaves, tiny blossoms, and dreams of juicy summer harvests. But then one day, you spot yellow leaves, and suddenly you’re spiraling into garden panic mode (been there more than once!).
It’s easy to feel like you’ve done something terribly wrong, but yellowing leaves are actually your plant’s way of waving a little flag for help. The good news? It’s often something you can fix once you know what to look for.
Whether it’s a nutrient issue, watering mistake, or pesky pest problem, understanding what’s going on is the first step to getting those tomatoes back on track. Let’s figure it out together.
1. Nitrogen Deficiency
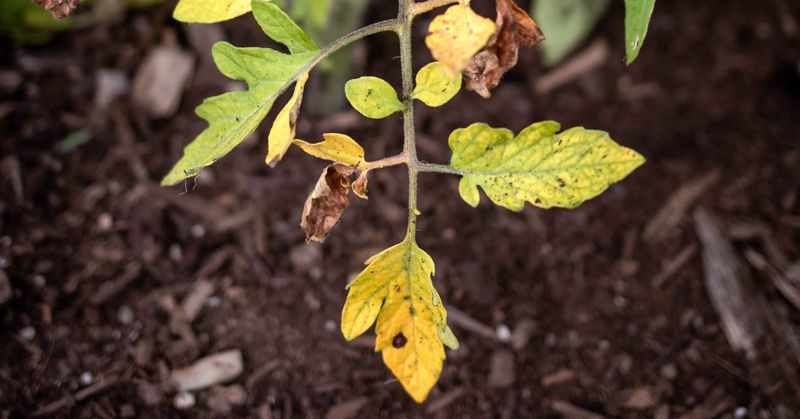
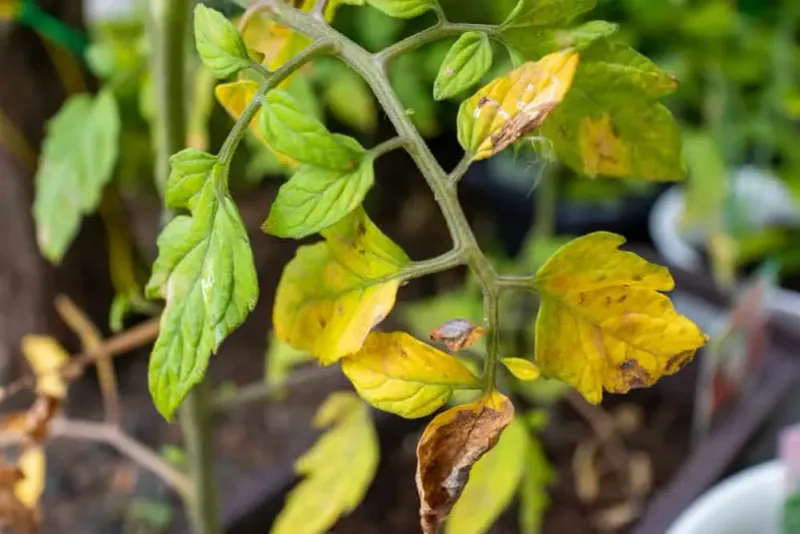
The older, lower leaves turn pale yellow first while the rest of the plant stays green. This happens because nitrogen is mobile in plants and moves from older growth to feed new leaves when supplies run low.
I learned this lesson when my container tomatoes started yellowing despite regular watering. Adding a balanced organic fertilizer with higher nitrogen content brought them back within two weeks.
For a quick fix, apply a nitrogen-rich fertilizer or work some compost into the soil around your plants. Water thoroughly afterward to help nutrients reach the roots without burning them.
2. Overwatering
Soggy soil suffocates roots, preventing them from taking up nutrients properly. The result? Yellowing leaves that look limp and may develop brown spots if the problem continues.
Last summer, I noticed my tomatoes yellowing after a week of daily rain. The soil stayed wet constantly, and the plants couldn’t breathe properly.
Cut back on watering immediately and let the soil dry out until it’s just barely moist a couple inches down. For container plants, ensure proper drainage holes and consider adding perlite to improve soil structure. Water deeply but less frequently.
3. Underwatering
Water-stressed tomatoes develop yellowing that starts at leaf edges before moving inward. The leaves often feel crispy rather than soft, and the soil pulls away from the container edges.
During a heatwave, my patio tomatoes went from perky to partially yellow in just two days when I missed my watering schedule. The soil had completely dried out.
Set a consistent watering schedule based on your climate. In hot weather, container plants may need daily watering. Apply water at the base rather than overhead, and consider using mulch to retain moisture and regulate soil temperature.
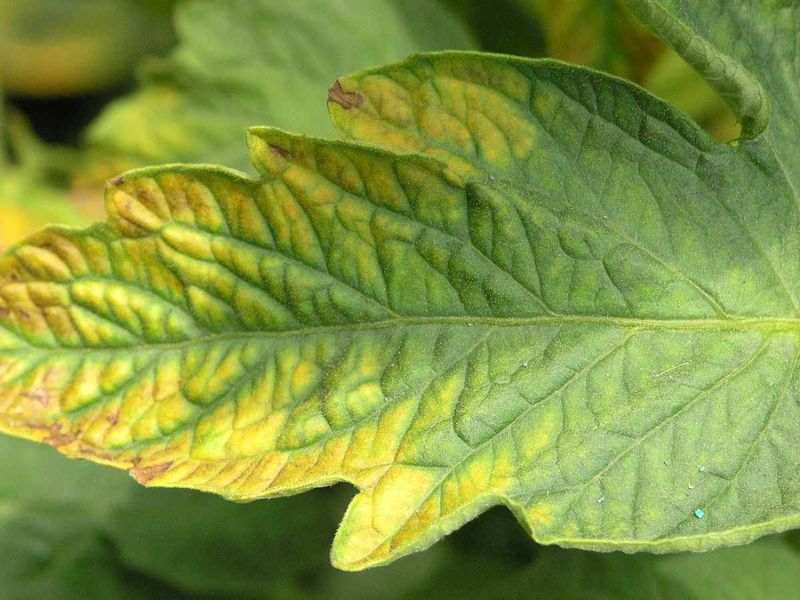
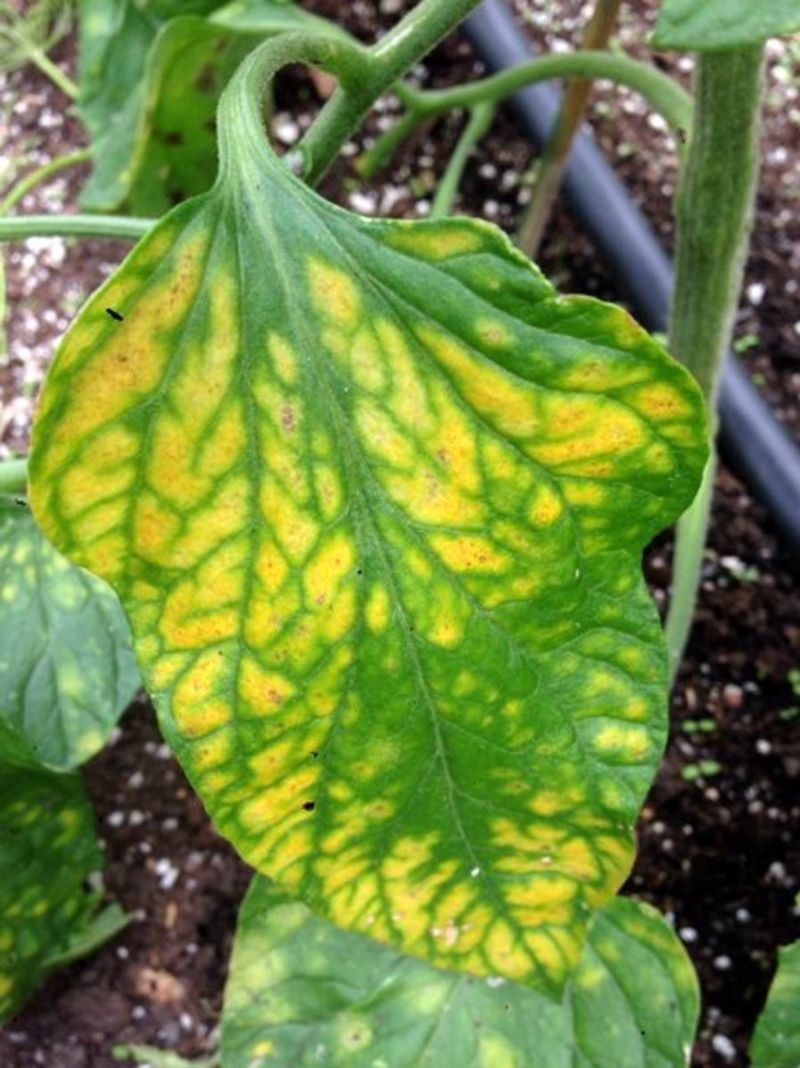
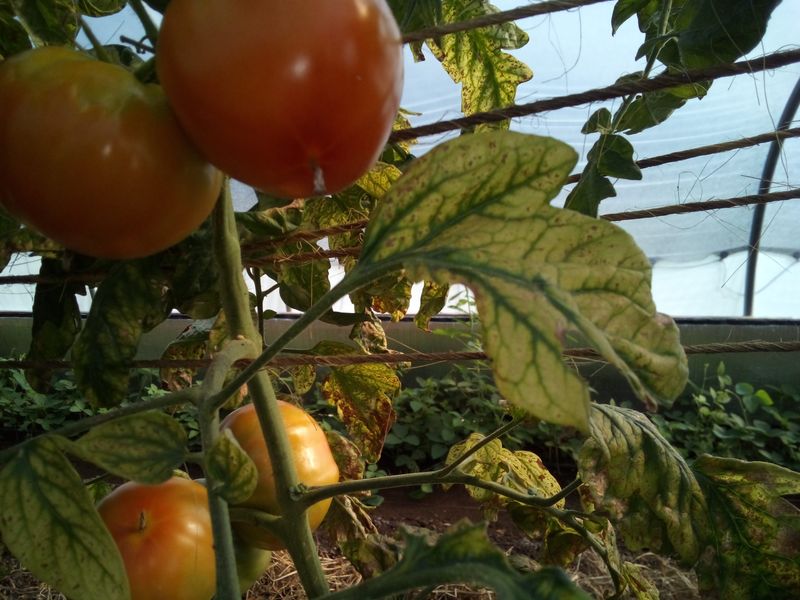
4. Magnesium Deficiency
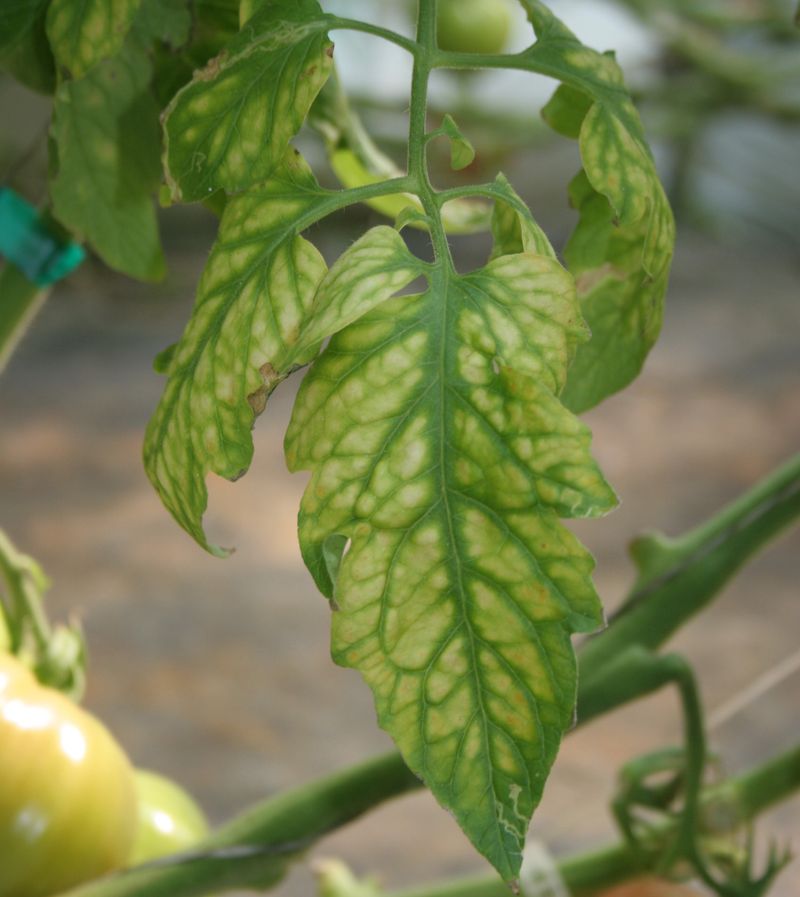
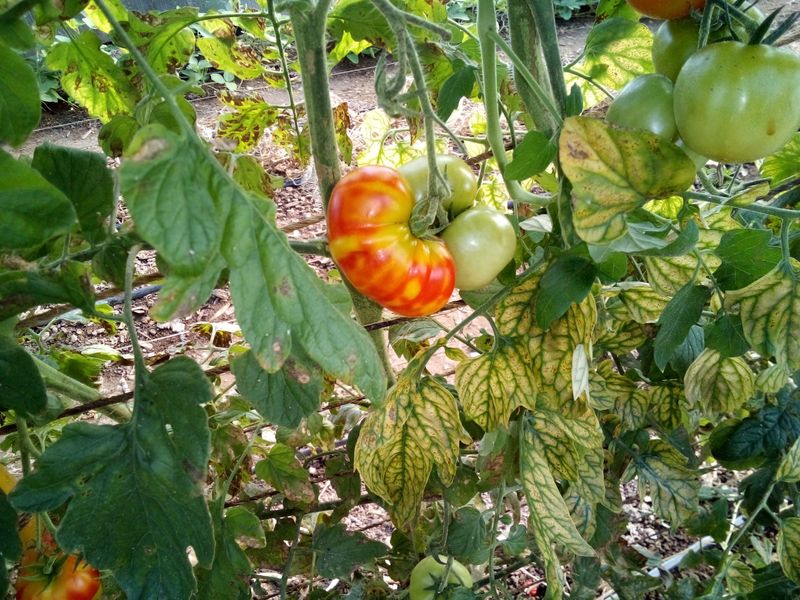
Yellow patches appear between the leaf veins while the veins themselves stay green, creating a marbled effect. This distinctive pattern usually starts on older leaves and works its way up the plant.
The first time I saw this issue, I mistakenly thought it was a disease. After some research, I discovered the simple solution that transformed my plants within days.
Apply Epsom salts (magnesium sulfate) either as a soil amendment or foliar spray. Mix one tablespoon per gallon of water and apply every two weeks. For a long-term fix, add dolomitic lime to the soil before planting next season.
5. Potassium Deficiency
The edges of leaves turn bright yellow, then brown, while the area around the veins stays green. Fruits may ripen unevenly, and plants become more susceptible to drought and disease.
When my tomatoes developed this issue, I noticed their fruit production slowed considerably. Adding a potassium-rich amendment made a remarkable difference in both leaf color and fruit yield.
Work wood ash (if your soil isn’t already alkaline) or a potassium-rich fertilizer into the soil. Banana peels buried near the roots provide a slow-release potassium boost. Seaweed extracts also work well as a foliar spray for quick absorption.
6. Phosphorus Deficiency
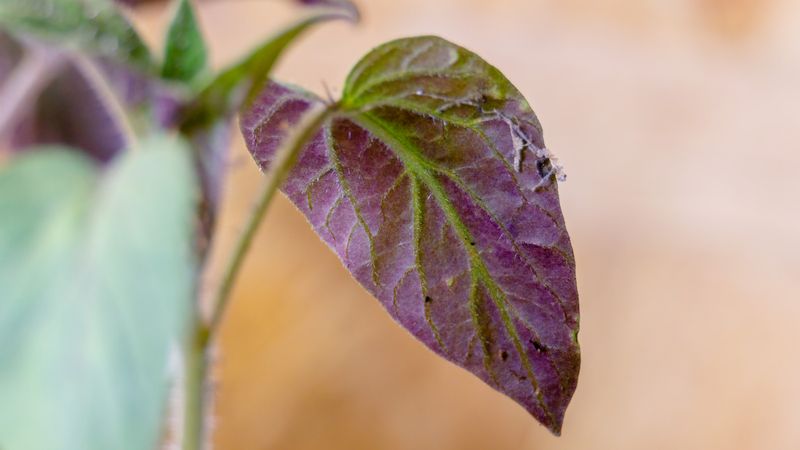
Leaves develop a purplish tint on their undersides while turning yellowish-green on top. Growth becomes stunted, and stems may take on a purple hue. Cold soil often triggers this issue, even when phosphorus is present.
During an unusually cool spring, my tomato seedlings showed these symptoms despite proper fertilizing. Once temperatures warmed, they recovered without additional treatment.
Add bone meal or rock phosphate to the soil for a slow-release solution. For quicker results, use a balanced fertilizer with higher phosphorus content. Warming the soil with black plastic mulch early in the season can prevent this problem altogether.
7. Pest Infestation
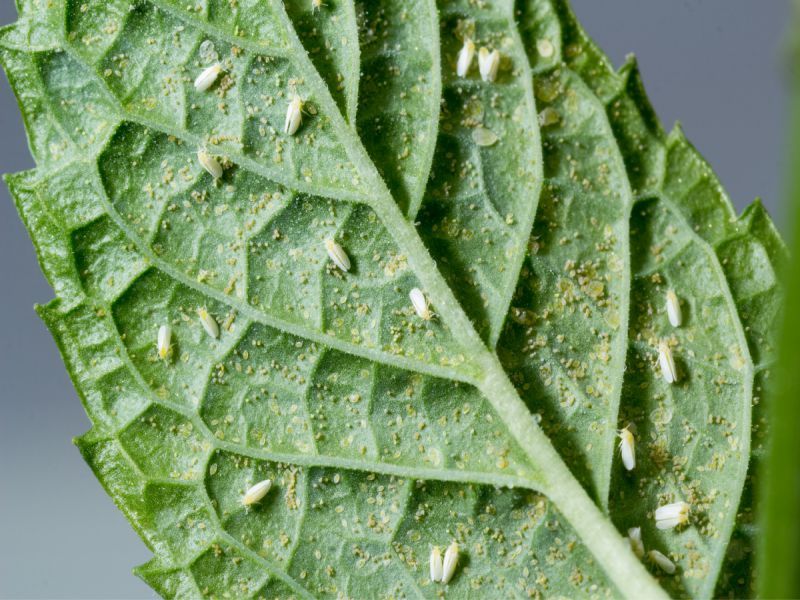
Tiny sap-sucking insects like aphids, whiteflies, and spider mites drain nutrients from leaves, causing yellow spots or generalized yellowing. Check the undersides of leaves for these nearly invisible culprits.
I once discovered a whitefly infestation only after noticing a cloud of tiny white insects when I shook the plant. The leaves had been yellowing for days before I identified the real problem.
Spray affected plants with insecticidal soap or neem oil solution, being sure to coat leaf undersides where pests hide. Introduce beneficial insects like ladybugs for natural control. For severe infestations, remove and destroy the most damaged leaves.
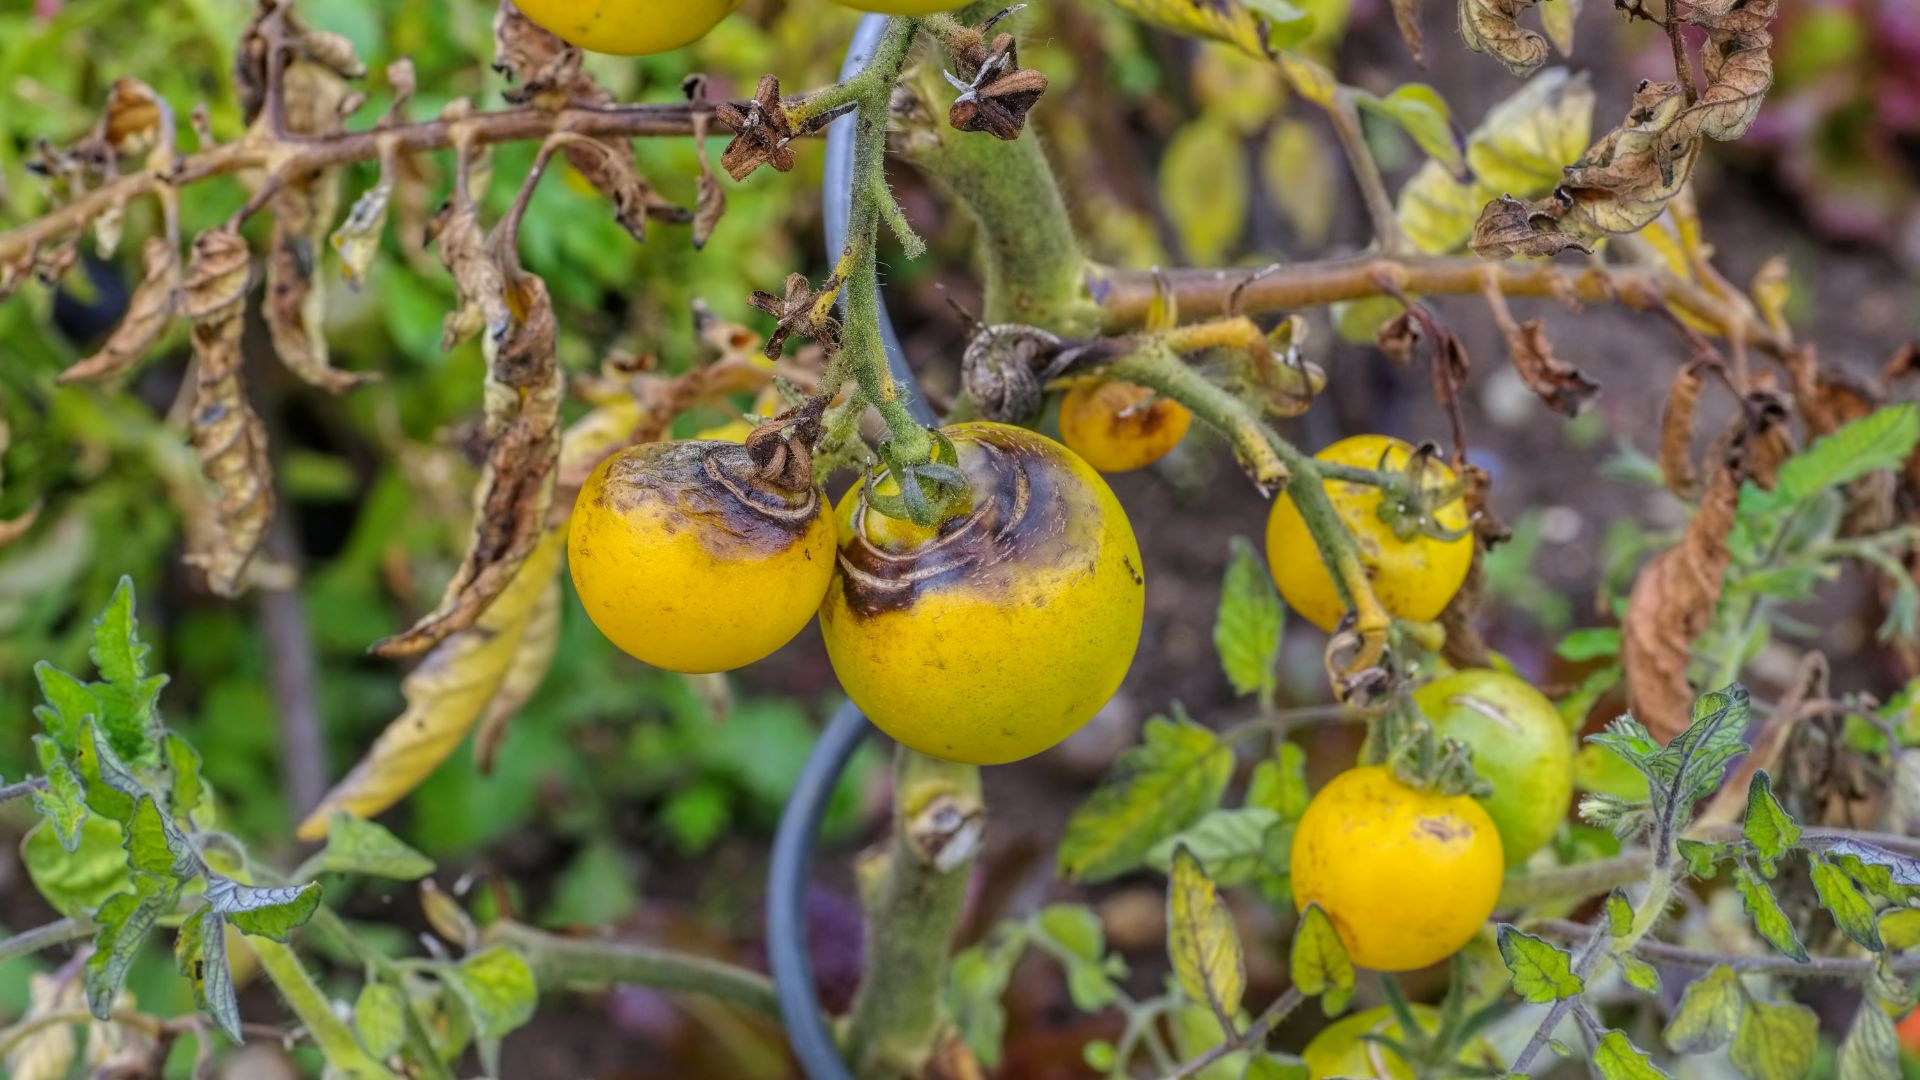
8. Fungal Diseases
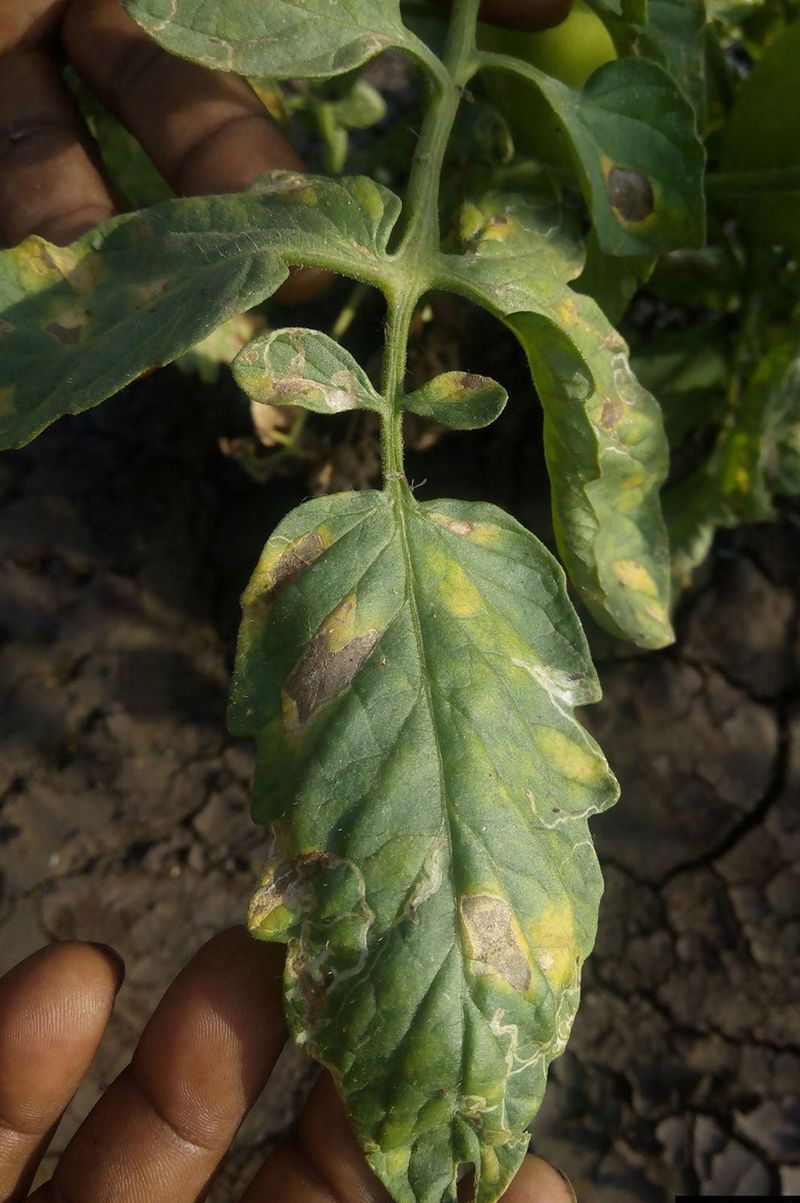
Yellow spots that grow and merge often indicate fungal problems like early blight or septoria leaf spot. These diseases typically start on lower leaves and move upward, sometimes accompanied by dark spots or lesions.
The first time I encountered early blight, I ignored the initial yellow spots, thinking it was just normal aging. Within weeks, half my plants were affected and production dropped dramatically.
Remove affected leaves immediately and dispose of them in the trash, not compost. Improve air circulation by pruning and proper spacing. Apply an organic fungicide like copper or sulfur spray. Next season, rotate crops and use disease-resistant varieties.
9. Bacterial Infections
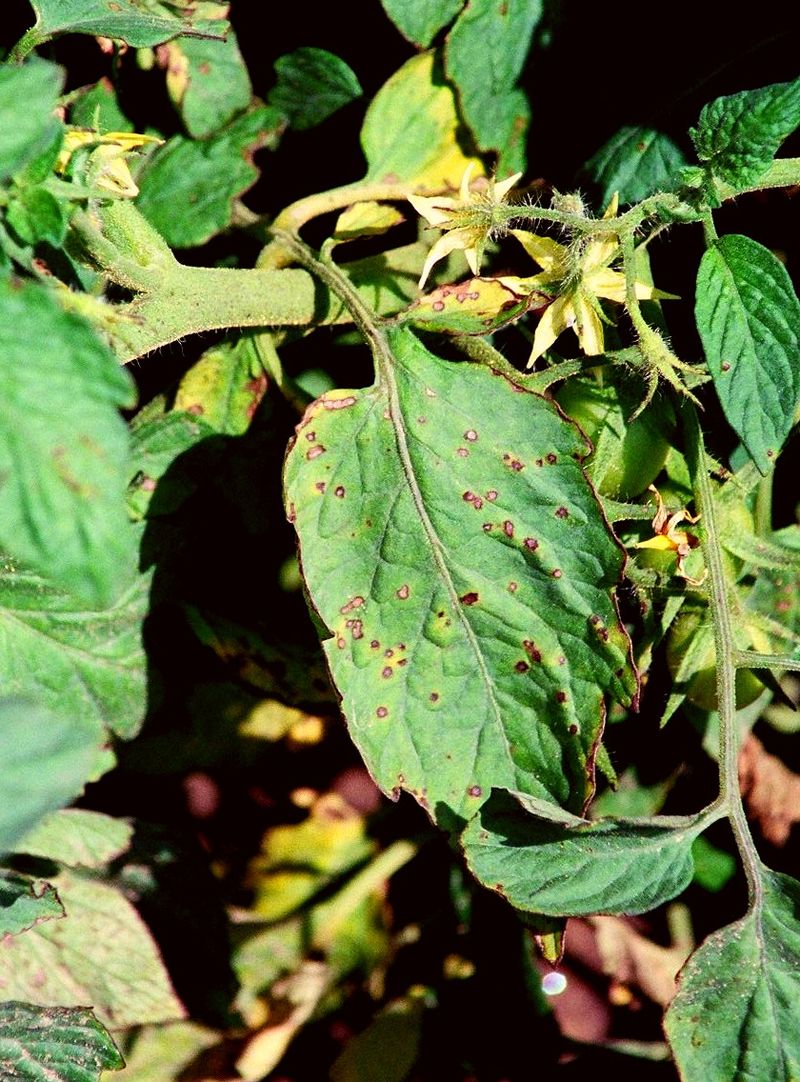
Bacterial spot or speck causes small, dark lesions surrounded by yellow halos on leaves. Unlike fungal diseases, these spots often appear water-soaked and may have angular edges following leaf veins.
One particularly wet season, my entire tomato patch developed these symptoms after heavy splashing rains. I salvaged the crop by acting quickly with proper management techniques.
Avoid working with plants when they’re wet to prevent spreading bacteria. Remove infected leaves and apply copper-based bactericides. For future prevention, use drip irrigation instead of overhead watering, mulch to prevent soil splash, and choose resistant varieties.
10. Viral Infections
Mottled yellow patterns, stunted growth, and twisted or curled leaves often signal tomato viruses like mosaic virus or yellow leaf curl virus. These patterns look distinctly different from nutrient deficiencies, with more random distribution.
I once brought home a discount tomato plant that seemed slightly off-color. Within weeks, the yellowing pattern had spread to neighboring plants through garden tools I hadn’t sanitized.
Unfortunately, there’s no cure for viral infections. Remove and destroy affected plants completely to prevent spread. Disinfect all gardening tools with a 10% bleach solution between plants. Control insect vectors like aphids and thrips, and purchase certified disease-free seedlings.
11. Herbicide Damage
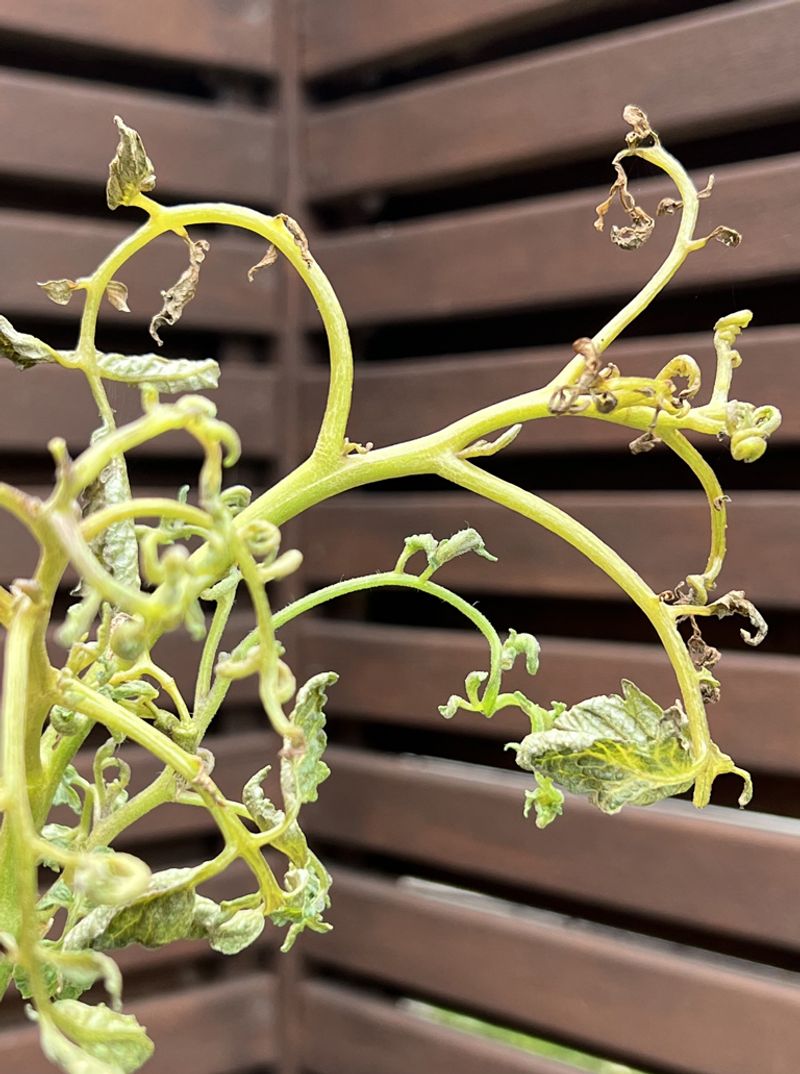
Unexpected yellowing, especially with unusual twisting or cupping of leaves, might indicate herbicide drift from nearby lawns or gardens. The damage often appears suddenly across multiple plants.
After my neighbor sprayed his lawn on a windy day, my tomatoes developed bizarre yellowing and twisted growth overnight. I recognized the symptoms from my farming days – classic growth regulator herbicide exposure.
There’s no treatment except time and proper care. Remove the most damaged leaves and provide optimal growing conditions. Protect future plants with physical barriers like garden fabric when neighbors spray, and have friendly conversations about herbicide use near your garden.
12. Soil pH Problems
Tomatoes prefer slightly acidic soil with pH between 6.0-6.8. When soil is too alkaline or too acidic, nutrient availability is compromised, causing yellowing that resembles deficiencies even when nutrients are present.
My tomatoes struggled for years in my garden until I tested the soil and discovered it was nearly pH 8.0. Adjusting it made a world of difference in plant health and productivity.
Test your soil pH with an inexpensive kit. To lower pH (make more acidic), add sulfur or peat moss. To raise pH (make more alkaline), add lime. Make adjustments gradually, as dramatic changes can shock plants and release too many nutrients at once.
13. Temperature Stress
Prolonged exposure to temperatures above 95°F or below 50°F causes yellowing as plants struggle to perform normal functions. Cold-stressed leaves often show purplish undersides along with yellowing.
During an unexpected late spring cold snap, my newly planted tomatoes developed yellow leaves overnight. I covered them with row covers for the next week, and new growth emerged healthy.
Protect plants from cold with row covers, water walls, or cloches. For heat stress, provide afternoon shade with shade cloth, maintain consistent moisture, and mulch heavily to regulate soil temperature. Avoid fertilizing stressed plants until normal growing conditions return.
14. Root Damage
Damaged roots from cultivation, pests, or disease limit water and nutrient uptake, causing yellowing that resembles both nutrient deficiency and drought stress. Plants may wilt despite adequate soil moisture.
I once accidentally sliced through some roots while weeding around my prized heirloom tomatoes. Within days, several branches showed yellowing despite perfect care otherwise.
Be gentle when working around established plants. Create a no-dig zone extending at least 12 inches from the stem. For container plants, avoid disturbing roots during transplanting. If root damage occurs, prune back some foliage to reduce the plant’s water needs while it recovers.
15. Iron Deficiency
The youngest leaves turn yellow while their veins remain distinctly green, creating a fine, lacy pattern unlike magnesium deficiency which affects older leaves first. Plants may appear stunted with reduced fruit production.
I struggled with this issue in my container garden until I realized my city water was highly alkaline, making iron unavailable to my plants despite using good potting mix.
Apply chelated iron as a foliar spray for immediate results. For long-term correction, acidify your soil slightly with coffee grounds or peat moss to increase iron availability. Avoid excessive phosphorus fertilizer which can bind with iron, making it unavailable to plants.
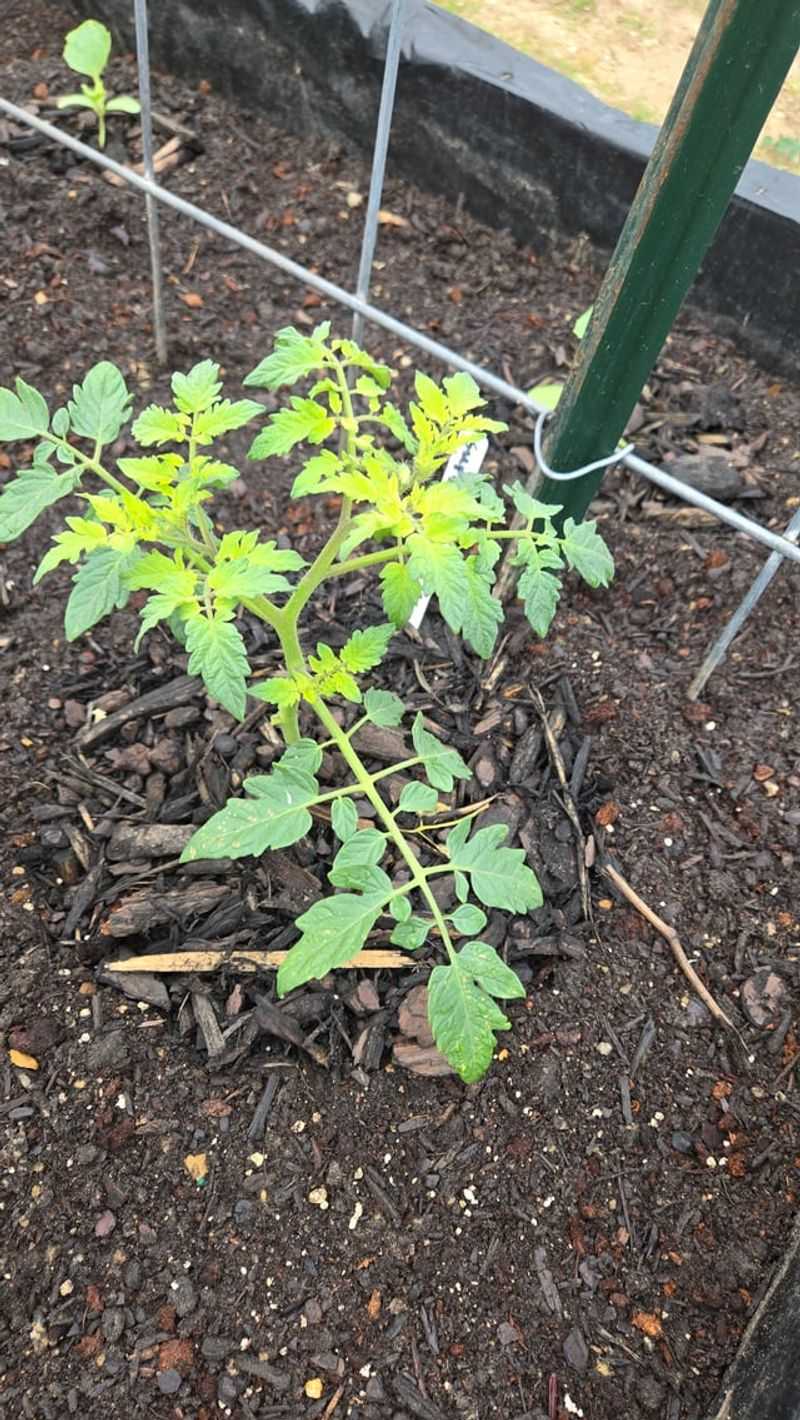
16. Transplant Shock
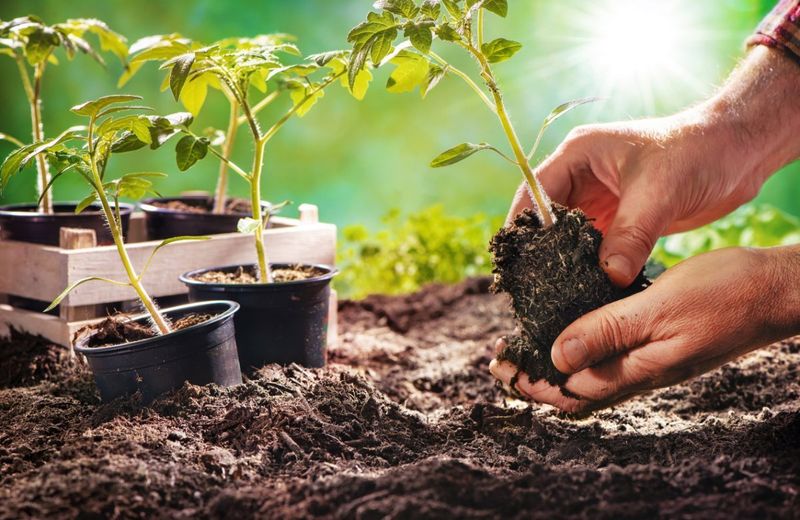
Newly transplanted tomatoes often develop yellow leaves as they adjust to their new environment. This temporary reaction happens when roots are disturbed or environmental conditions change dramatically.
The first time I grew tomatoes from seed, I was alarmed when several leaves yellowed after moving plants to the garden. I almost pulled them out, but patience proved worthwhile as they recovered completely.
Provide gentle care during the adjustment period. Water consistently but don’t overdo it. Protect new transplants from harsh sun and wind for the first week. Remove only severely yellowed leaves, as the plant may reabsorb nutrients from mildly affected ones during recovery.
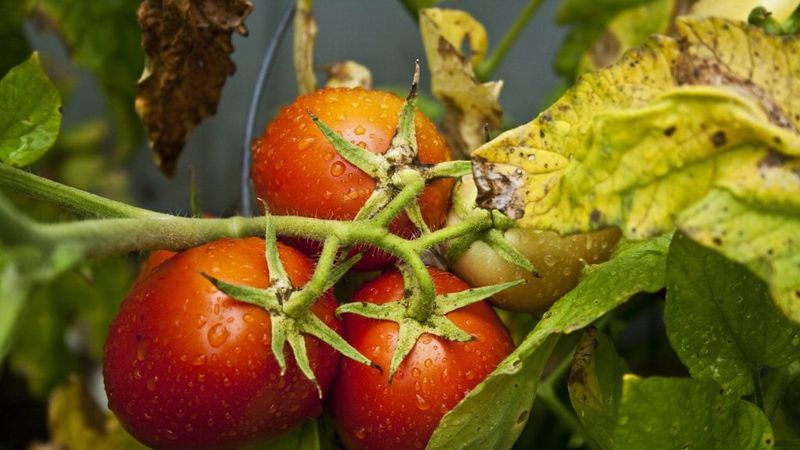
17. Natural Aging
Lower leaves naturally yellow and die as the plant matures, especially during fruiting. This normal process allows the plant to redirect energy to fruit production and upper growth. The yellowing appears in a consistent pattern from bottom to top.
When I first started growing tomatoes, I panicked seeing lower leaves yellow. An experienced gardener neighbor laughed and explained this was actually a good sign of a maturing, productive plant.
Remove yellowed leaves neatly at the stem to improve air circulation and prevent disease. Don’t confuse natural aging with disease or deficiency – aging affects only the lowest leaves in sequence, while problems cause random or patterned yellowing throughout the plant.