20 Essential Iris Care Tips For Healthy Blooms All Season Long
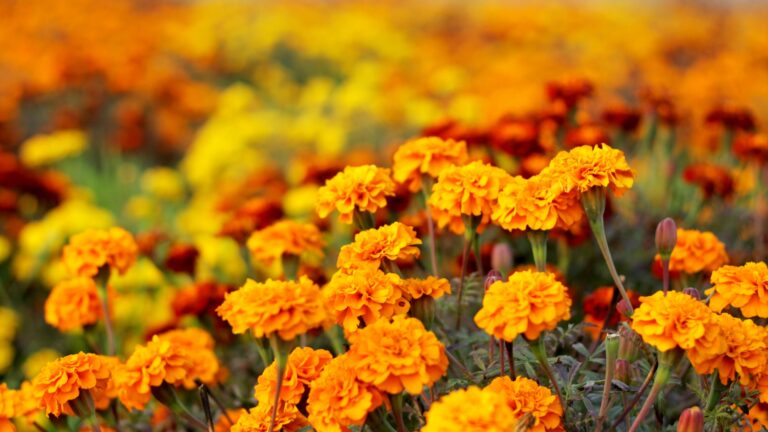
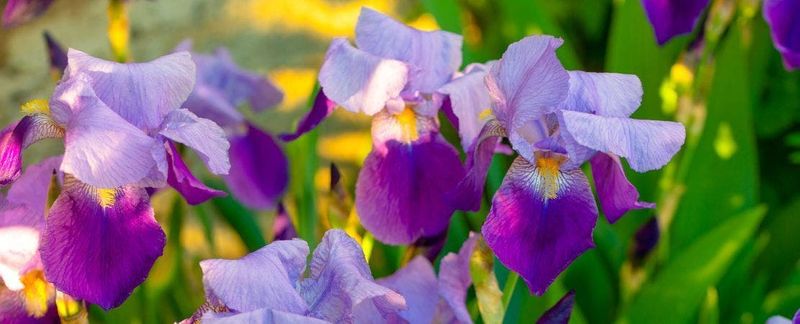
Irises bring such striking beauty to the garden with their tall, elegant blooms and bold, sword-like leaves. They have a way of stealing the spotlight, especially in spring and early summer. I still get excited every year when those first buds start to open.
These hardy perennials really shine when you give them the right care. I’ve learned that a little attention goes a long way—things like proper spacing, sunlight, and knowing when to divide make a huge difference. And once they’re happy, they’ll reward you with blooms that stop you in your tracks.
Whether you’re growing bearded, Siberian, or Japanese irises, these twenty tips are here to help. They’re simple, practical things I’ve picked up over the years to keep my irises healthy and blooming strong. With a bit of know-how, your garden can be full of stunning irises season after season.
1. Pick The Perfect Planting Spot
Irises crave sunshine to produce their spectacular blooms. Most varieties need at least 6 hours of direct sunlight daily, though some can tolerate partial shade in hotter climates. I’ve noticed my irises in morning sun with afternoon shade still bloom beautifully in our scorching summers.
Good air circulation prevents disease, so avoid crowding them against other plants or structures. The right location dramatically affects bloom quality and quantity – irises planted in too much shade often produce lush foliage but disappoint with few flowers.
Well-draining soil is absolutely crucial. Irises hate wet feet and will quickly rot if planted in soggy areas. Before planting, check your garden’s drainage by digging a test hole and filling it with water – it should drain within a few hours.
2. Master Proper Planting Depth
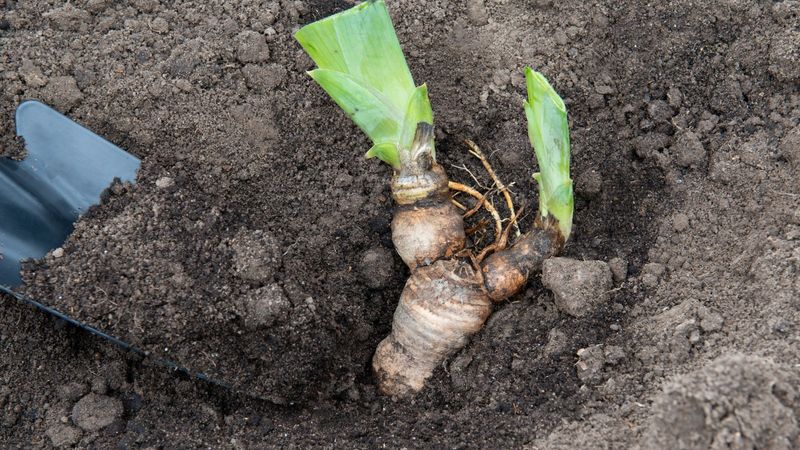
Planting depth makes or breaks iris success. Bearded iris rhizomes should sit partially exposed on the soil surface, with just the top showing above ground. Covering them completely invites rot and disease that can destroy your plants before they have a chance to establish.
Different iris types have varying depth requirements. While bearded varieties need that partial exposure, Siberian and Japanese irises should be planted with the crown just at soil level. Louisiana irises prefer being planted slightly deeper, about an inch below the surface.
Depth mistakes often show up as poor blooming or plant health. Years ago, I buried some bearded iris rhizomes completely and wondered why they never bloomed. Once replanted correctly, they flourished the very next season with gorgeous purple flowers.
3. Space Plants Generously
Irises need elbow room to thrive. Plant rhizomes 12-24 inches apart, depending on the variety. Bearded irises typically need more space than smaller Siberian types. This spacing might look sparse initially, but patience pays off as they grow.
Adequate spacing prevents competition for nutrients and reduces disease pressure. When plants crowd together, air circulation diminishes, creating the perfect environment for fungal problems like leaf spot. The damp, shaded conditions between crowded plants become disease breeding grounds.
Last spring, I separated a clump of overcrowded irises that had stopped blooming. After replanting with proper spacing, they rewarded me with twice as many flowers. The plants also developed stronger stems that stood up better to wind and rain than when they were competing with neighbors.
4. Water Wisely, Not Wildly
Newly planted irises need consistent moisture until established, typically for about two weeks. After that, these drought-tolerant plants prefer to dry out between waterings. Overwatering causes more iris deaths than underwatering ever will.
During active growth in spring and fall, provide about an inch of water weekly if rainfall is insufficient. Summer dormancy requires less frequent watering – just enough to prevent complete drying out. Winter typically requires no supplemental water in most regions.
The finger test works perfectly for irises. Stick your finger two inches into the soil near the rhizome – if it feels dry at that depth, it’s time to water. Always water at the soil level rather than overhead to keep foliage dry and disease-free. Your irises will thank you with robust health and abundant blooms.
5. Feed With The Right Fertilizer
Irises aren’t heavy feeders, but they do appreciate a specific nutrient balance. Look for low-nitrogen fertilizers with higher phosphorus content – something like a 5-10-10 formula works well. Too much nitrogen produces lush foliage at the expense of flowers.
Timing matters tremendously with iris feeding. Apply fertilizer in early spring as new growth emerges and again about a month after blooming ends. Avoid fertilizing during the hottest summer months when many iris varieties go dormant, as this can stress the plants.
For years I made the mistake of using standard all-purpose fertilizer on my irises. When I switched to a bloom-boosting formula lower in nitrogen, my flower count nearly doubled. A light hand works best – sprinkle fertilizer around plants about 6 inches from the rhizome, never directly on it.
6. Prevent Rhizome Rot
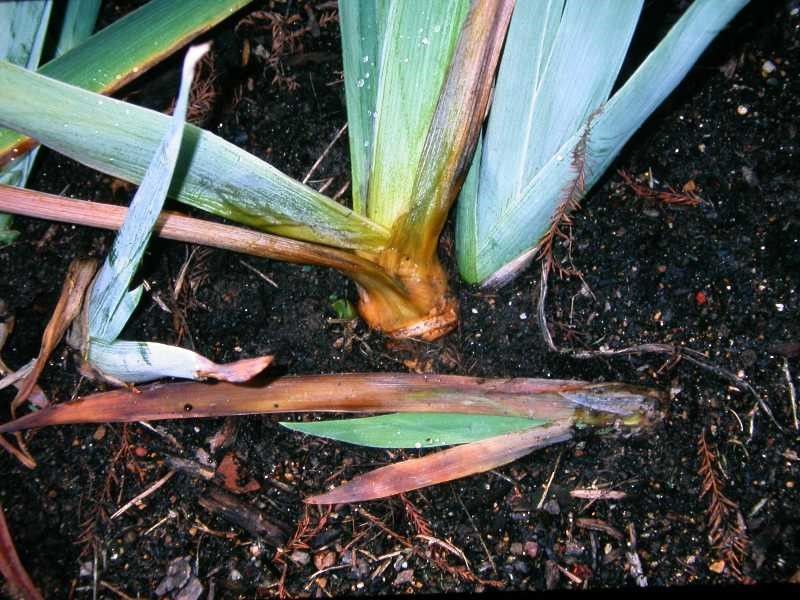
Rhizome rot strikes fear in iris growers because it can quickly destroy entire plantings. Prevention starts with proper planting – rhizomes should rest partly above soil level where sun and air can reach them. This exposure helps keep them dry and disease-free.
Good drainage saves iris lives. If your soil holds water, create raised beds or mounds for planting. Remove any mulch directly touching the rhizomes, especially in humid climates or during rainy seasons. Organic materials hold moisture against rhizomes, creating perfect conditions for rot.
Spotting rot early makes all the difference. Watch for soft, mushy rhizomes or foliage that yellows and collapses from the base. When discovered, immediately cut away affected portions with a clean, sharp knife until only firm, healthy tissue remains. Then dust the cuts with sulfur to prevent further infection.
7. Banish Iris Borers
Iris borers rank among the most destructive iris pests. These caterpillars hatch in spring from eggs laid on old foliage, then tunnel through leaves down into rhizomes. The damage creates entry points for bacterial rot that can destroy plants.
Fall cleanup provides your best defense. Removing and destroying all old foliage after first frost eliminates most eggs before they hatch. In spring, inspect leaf fans weekly for tiny pinholes or water-soaked streaks that signal borer activity. Squish any borers found or cut away affected leaves.
Beneficial nematodes offer an effective organic control option. Applied to soil in spring, these microscopic organisms hunt down and kill borers. I’ve had great success using them in my garden after losing several prized varieties to borers.
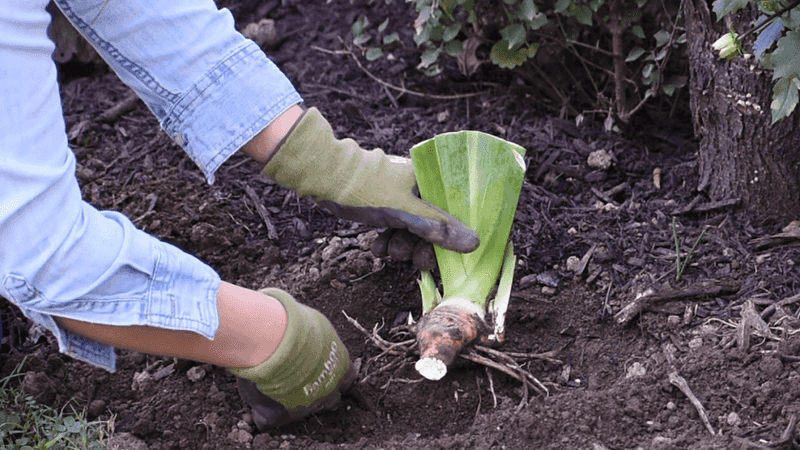
8. Divide Overcrowded Clumps
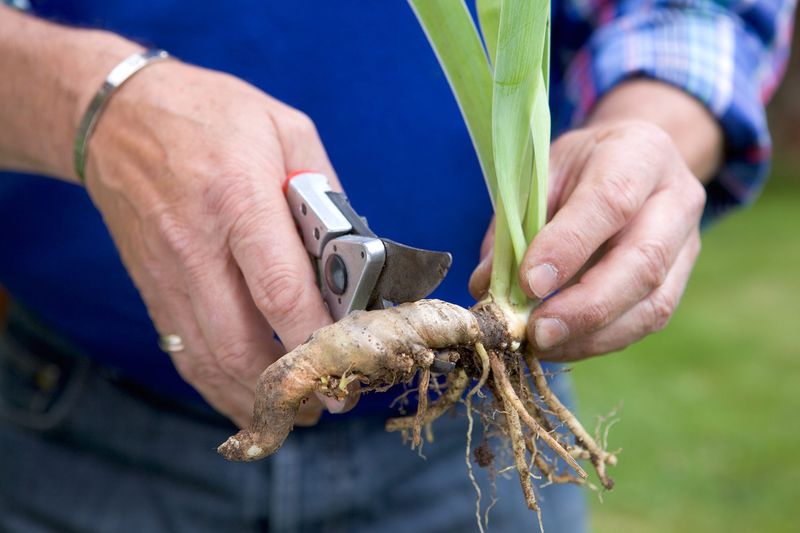
Irises need dividing every 3-5 years when flowering diminishes or clumps become congested. The center of old clumps often becomes woody and unproductive while the vigorous outer edges continue growing outward. This natural growth pattern eventually leads to overcrowding.
Four to six weeks after flowering provides the ideal division window. Lift entire clumps carefully with a garden fork, then rinse soil from the rhizomes. Look for firm, healthy sections with good leaf fans and cut them free from older, woody centers using a sharp knife.
Each division should include one healthy fan of leaves with about 2-3 inches of rhizome attached. Trim the leaves to about 6 inches tall in a fan shape to reduce water loss while the divisions establish new roots. Let cut surfaces dry for a few hours before replanting to prevent rot problems.
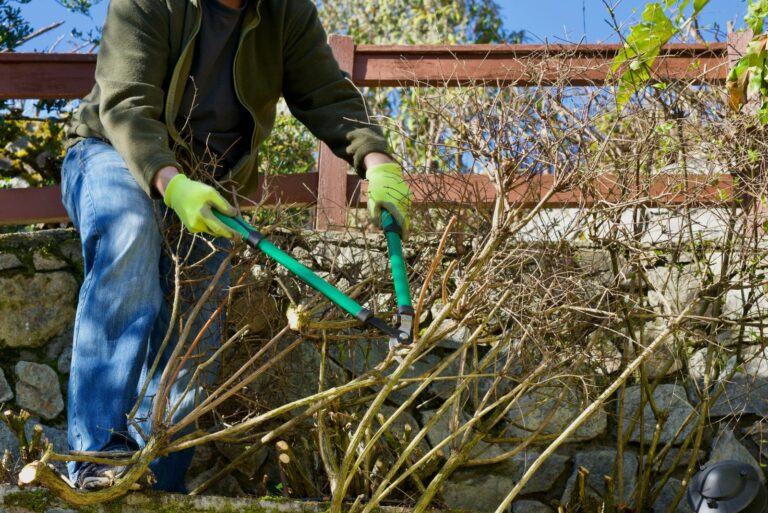
9. Tackle Fall Cleanup Thoroughly
Fall cleanup dramatically impacts next year’s iris health. Once foliage begins yellowing after first frost, cut it back to about 6 inches above ground level. This removes hiding places for pests and disease pathogens that would otherwise overwinter on the plants.
Remove all debris from around iris beds completely. Unlike other perennials, irises don’t benefit from leaving foliage in place over winter. Old leaves harbor iris borer eggs and fungal spores that cause leaf spot. The cleaner your fall garden, the healthier your spring irises.
Some gardeners make the mistake of cutting irises back too early while foliage is still green. The plants need this time to store energy in their rhizomes for next year’s growth. Wait until leaves yellow naturally before trimming. I’ve found that thorough fall cleanup reduces spring problems by at least 75% in my iris beds.
10. Manage Mulch Mindfully
Mulching around irises requires special consideration unlike other garden plants. Traditional deep mulch creates too much moisture retention around rhizomes, leading to rot problems. A light touch works best – if you must mulch, use just a thin layer kept away from the rhizomes themselves.
Gravel or pea stone makes excellent iris mulch, especially for bearded varieties. These materials drain quickly and reflect heat back to the rhizomes, helping prevent rot while suppressing weeds. Organic mulches like bark should be used sparingly and kept at least an inch away from rhizomes.
In my garden’s heavy clay soil, a ring of pea gravel around each iris clump has virtually eliminated rot issues. The gravel creates a dry zone directly around the plants while still allowing me to use organic mulch in the pathways between. This combination keeps weeds down without compromising rhizome health.
11. Practice Smart Deadheading
Deadheading spent iris blooms keeps gardens looking tidy and prevents seed formation that drains plant energy. Cut individual flower stems at their base once all buds on that stem have finished blooming. Don’t just remove the faded flower – take the entire stem down to where it emerges from the fan of leaves.
Many irises produce secondary bloom stalks if the main ones are promptly removed. These bonus blooms extend the display season by a week or more. Use clean, sharp scissors or pruners for deadheading to prevent disease transmission between plants.
Leave the green fans of foliage intact when deadheading. The leaves continue photosynthesizing throughout summer, storing energy in the rhizomes for next year’s growth and flowering. The only exception is when leaves show disease – these should be removed completely regardless of the season.
12. Control Competing Weeds
Weeds compete directly with irises for nutrients, water, and light. Their removal should be a regular part of iris care, especially during the active growing season. Hand pulling works best around rhizomes where chemical herbicides might damage your prized plants.
Be particularly vigilant about removing grassy weeds. Their root systems intertwine with iris rhizomes, making later separation nearly impossible without damaging your plants. Catching these invaders early saves tremendous work later.
Creating a weed barrier around newly planted irises gives them a competitive advantage. A layer of newspaper topped with appropriate mulch keeps most weeds at bay while plants establish. I check my iris beds weekly during growing season, pulling any weeds while they’re small.
13. Provide Winter Protection
Winter protection needs vary dramatically by climate and iris type. In zones 3-5, newly planted rhizomes benefit from light protection their first winter. A loose layer of pine needles or straw applied after the ground freezes helps prevent frost heaving that can push rhizomes out of the ground.
Avoid heavy, moisture-retaining materials like wet leaves that can cause rot. Whatever winter protection you apply should be removed promptly in early spring as new growth emerges. Leaving it in place too long creates damp conditions favorable to fungal diseases.
Established iris plantings in most zones need minimal winter protection. Their natural dormancy prepares them for cold weather. Container-grown irises face greater risk, as pots offer less insulation than ground soil.
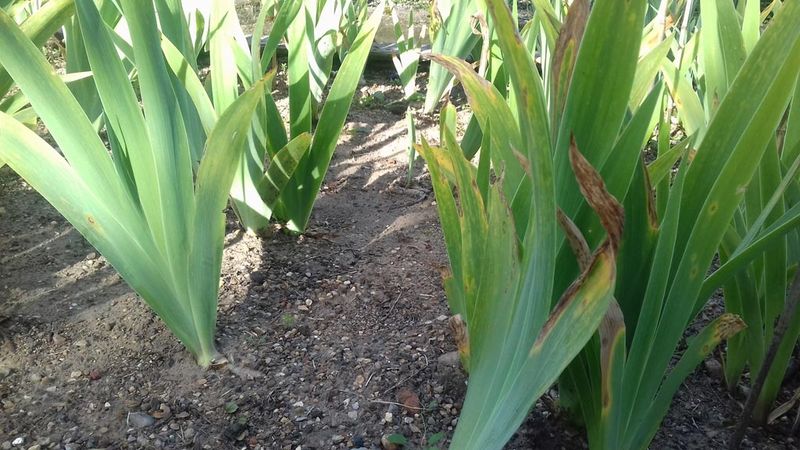
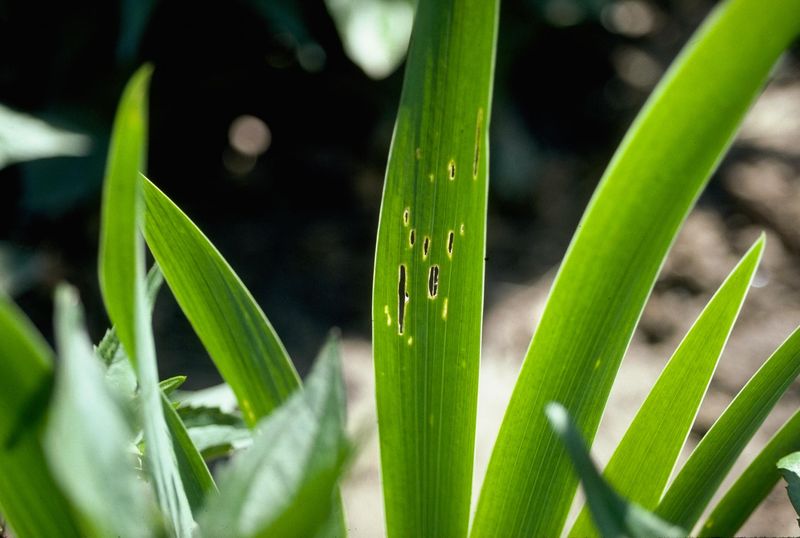
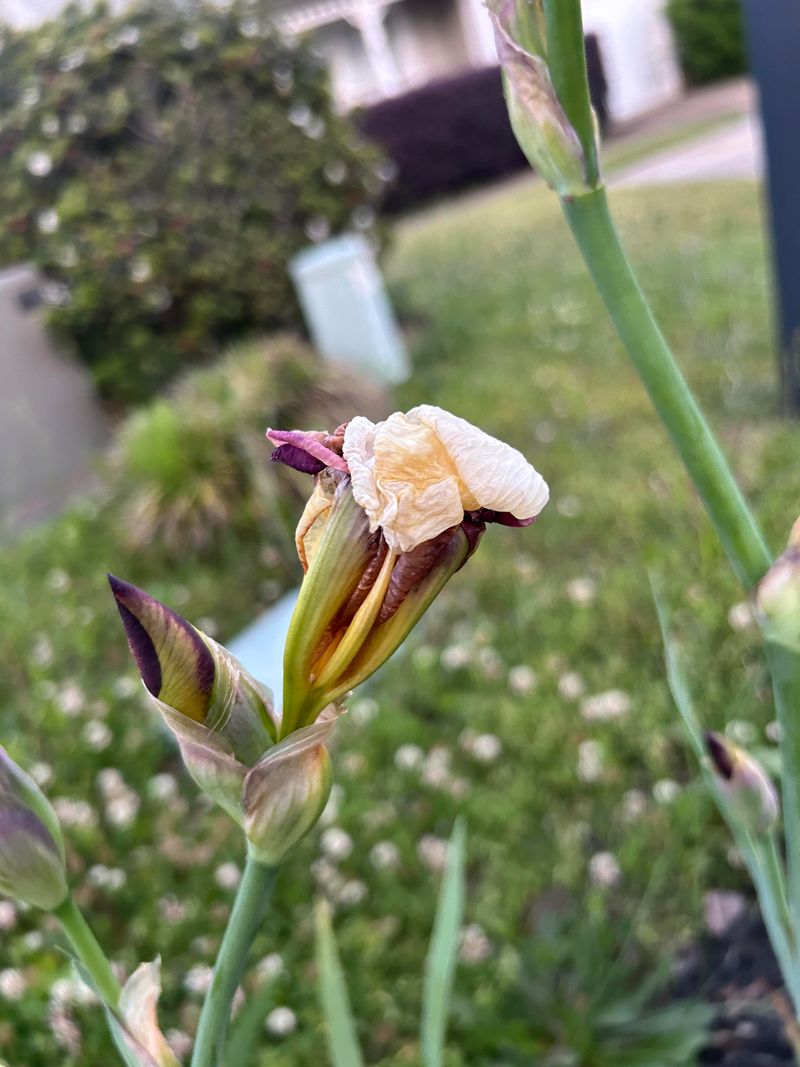
14. Identify And Treat Leaf Spot
Leaf spot diseases create unsightly brown or purple spots on iris foliage, eventually causing entire leaves to yellow and die back prematurely. These fungal problems spread rapidly in wet conditions, especially when foliage remains wet overnight. Proper spacing and morning watering help prevent outbreaks.
Treatment begins with sanitation. Remove and destroy affected leaves immediately – don’t compost them. If many leaves show symptoms, a copper fungicide or sulfur spray applied according to package directions can help control the spread. Always spray in dry weather when leaves can dry quickly after application.
My iris collection suffered a leaf spot outbreak after an unusually rainy spring. I removed all affected leaves and improved air circulation by thinning nearby plants. Then I applied a copper fungicide at 10-day intervals for a month. By midsummer, new growth emerged and the plants bloomed normally the following year.
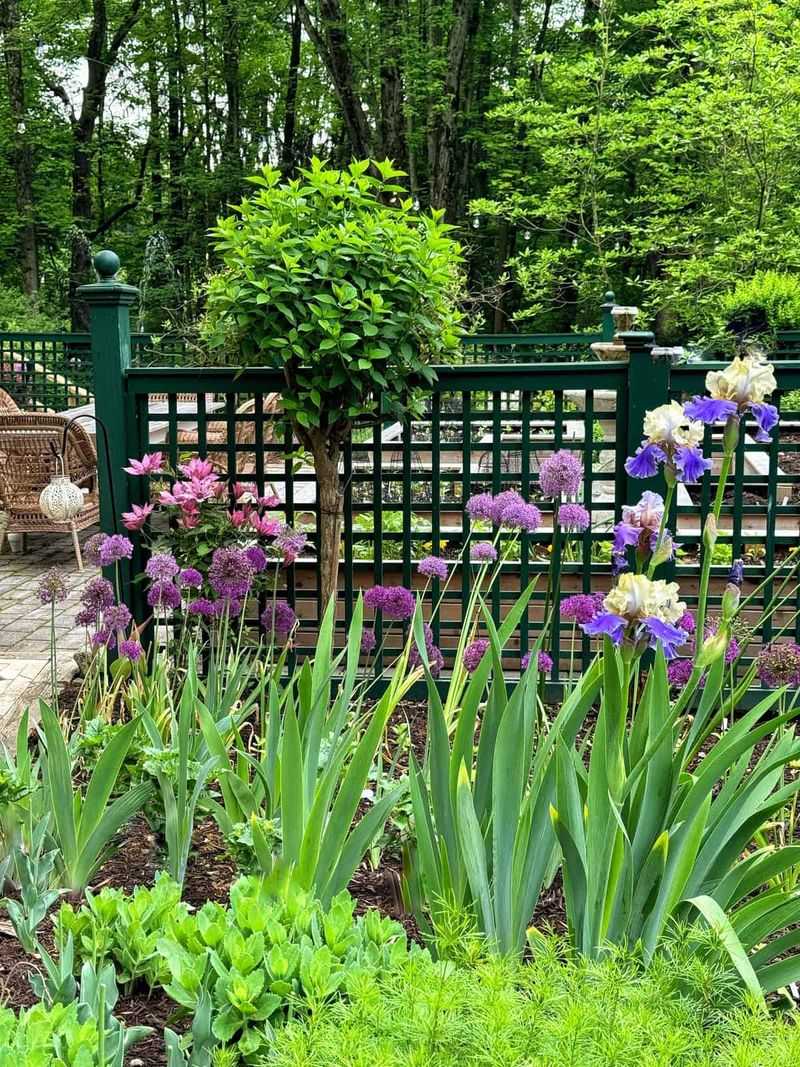
15. Select Companion Plants Wisely
Choosing the right companions enhances iris displays while maximizing garden space. Low-growing plants like creeping phlox, dianthus, or catmint make perfect neighbors, providing ground cover that suppresses weeds without competing for sun or nutrients.
Avoid aggressive spreaders like mint or aggressive groundcovers that might overrun iris plantings. Similarly, tall plants that cast shade can reduce blooming. When planning combinations, consider bloom times – plants that flower just before or after irises extend the garden’s season of interest.
Color coordination makes a difference in the overall garden effect. My favorite combination pairs purple irises with the chartreuse flowers of lady’s mantle. Companions with different foliage textures also create visual interest during non-blooming periods.
16. Extend Bloom Season With Variety
Strategically selecting different iris types dramatically extends the flowering season. Early dwarf bearded varieties begin the show in mid-spring, followed by intermediate bearded and then the tall bearded irises. Siberian and Japanese types typically bloom after the bearded season ends.
Reblooming varieties offer another dimension to the iris calendar. These special cultivars produce a second flush of flowers in late summer or fall after their spring display. ‘Immortality’ and ‘Autumn Tryst’ are reliable rebloomers in many climates that provide welcome color when other perennials have finished.
Within each iris class, choose early, mid-season, and late-blooming cultivars to stretch the display. By combining various types and bloom times, you can enjoy iris flowers for up to eight weeks rather than the typical two-week show.
17. Protect From Wind Damage
Tall bearded irises with their majestic blooms often struggle in windy locations. Their top-heavy flowers and relatively shallow root systems make them vulnerable to toppling in strong gusts. Strategic placement can help – planting them near structures or sturdier plants provides natural windbreaks.
Staking offers protection for varieties with particularly tall or heavy blooms. Place stakes early in the season when bloom stalks first emerge, positioning them on the windward side. Soft plant ties secure stalks without damaging them. Avoid tight bindings that can restrict growth or cause stems to snap.
After a windstorm destroyed half my iris display one May, I started using decorative metal grid supports. Placed over emerging foliage in early spring, these grids allow stems to grow through the openings while providing invisible support.
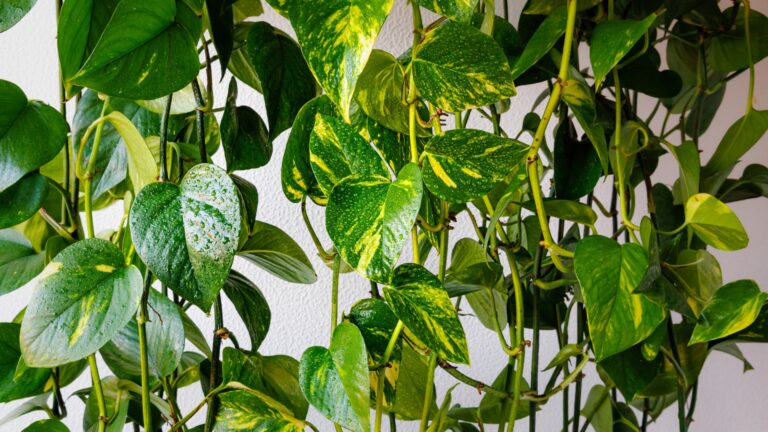
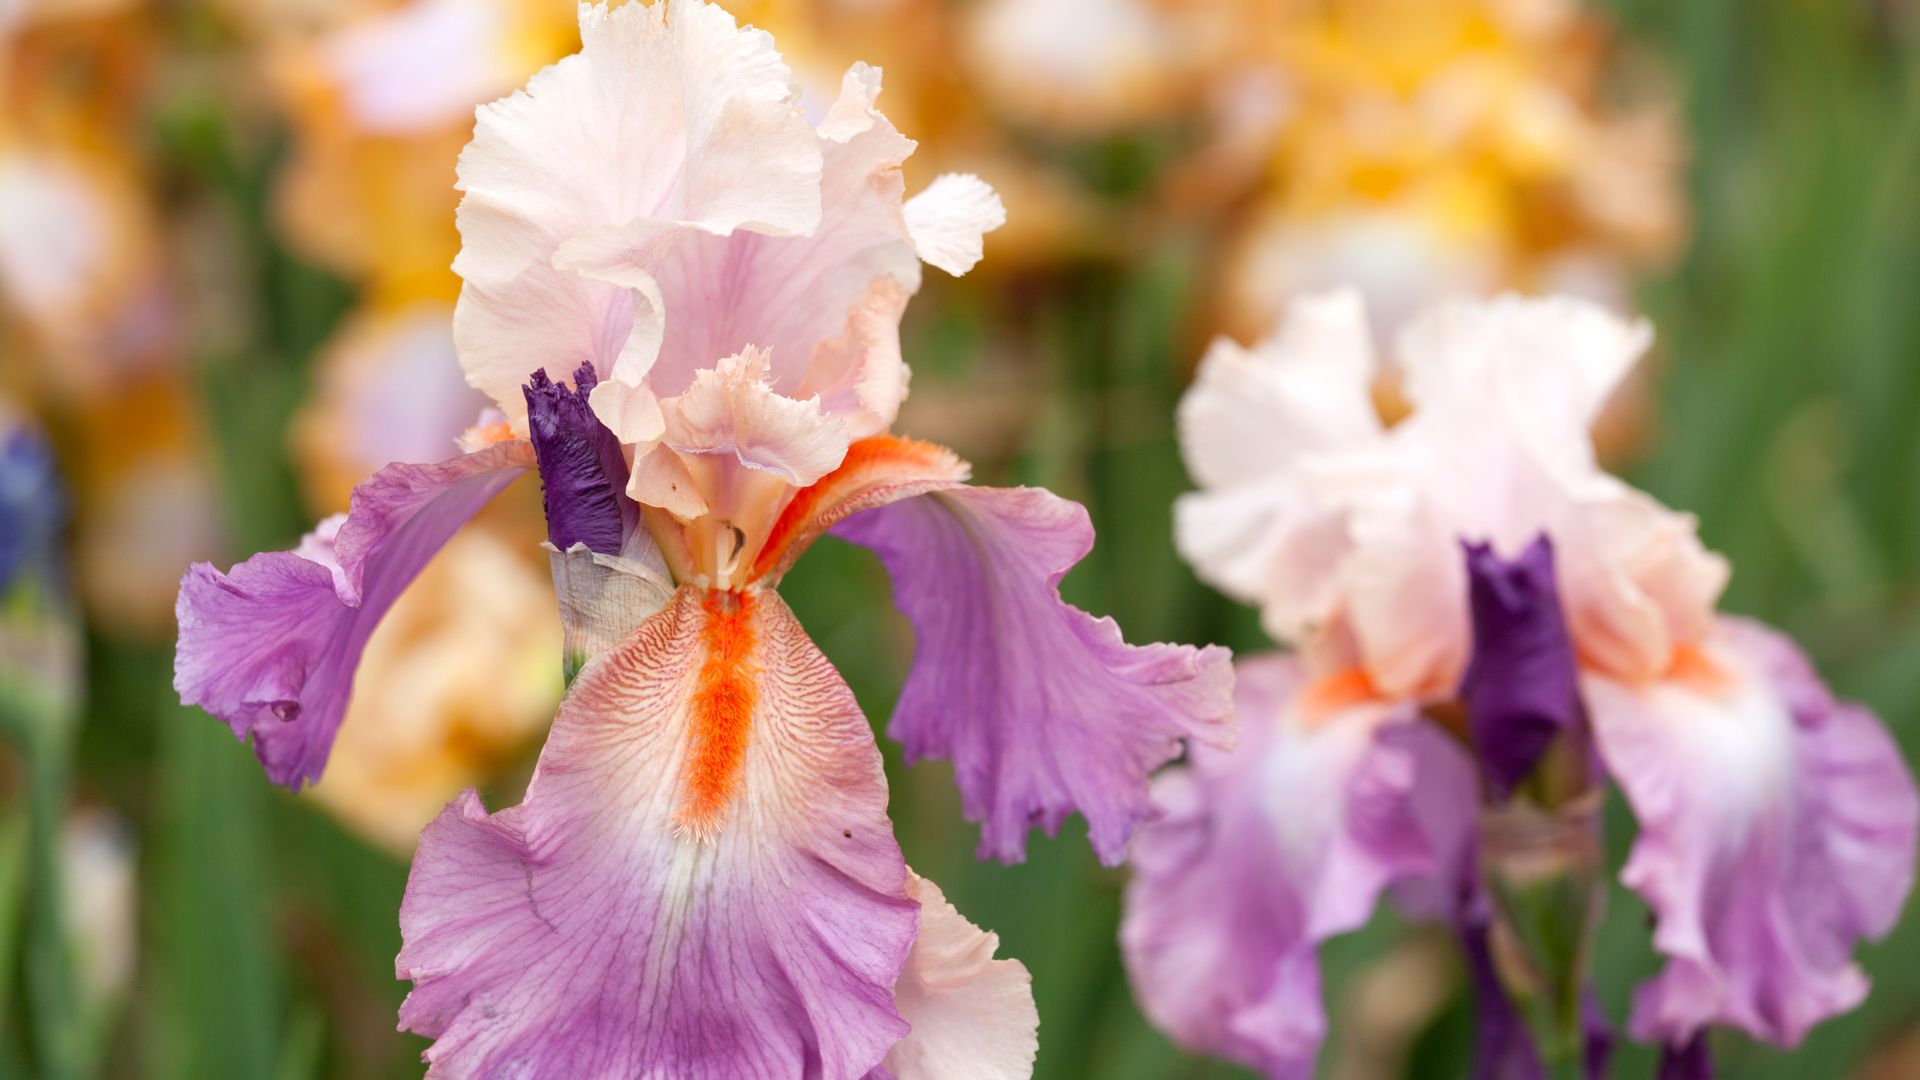
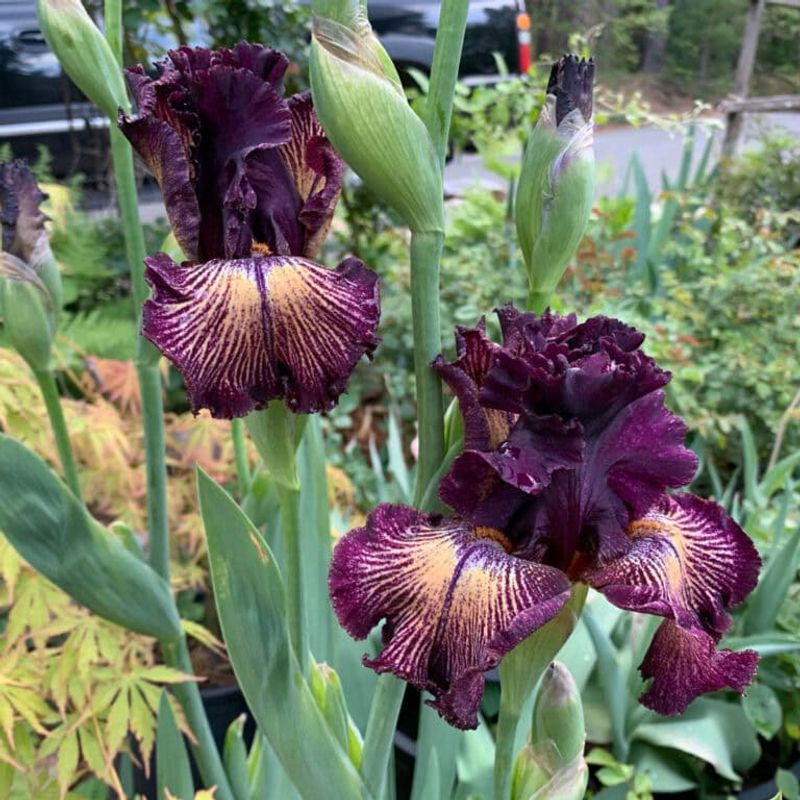
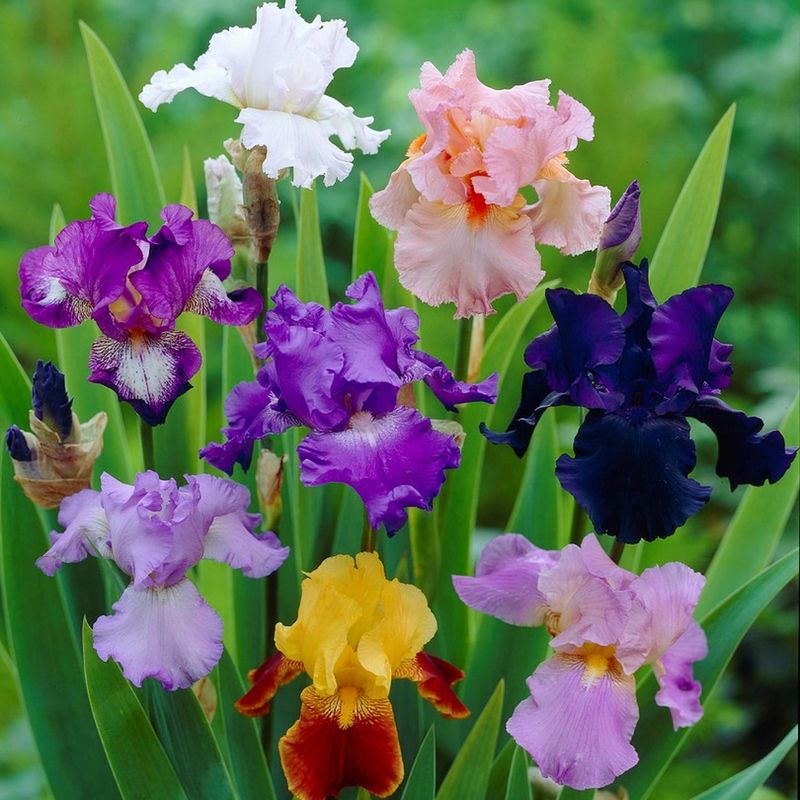
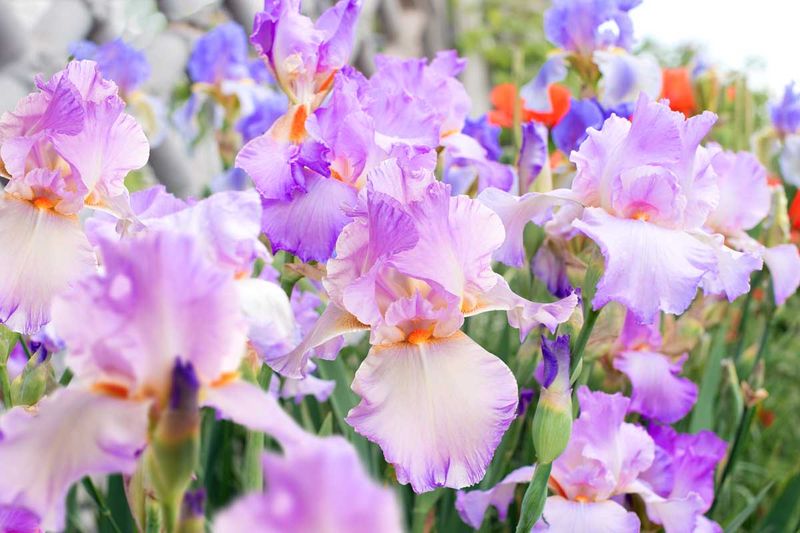
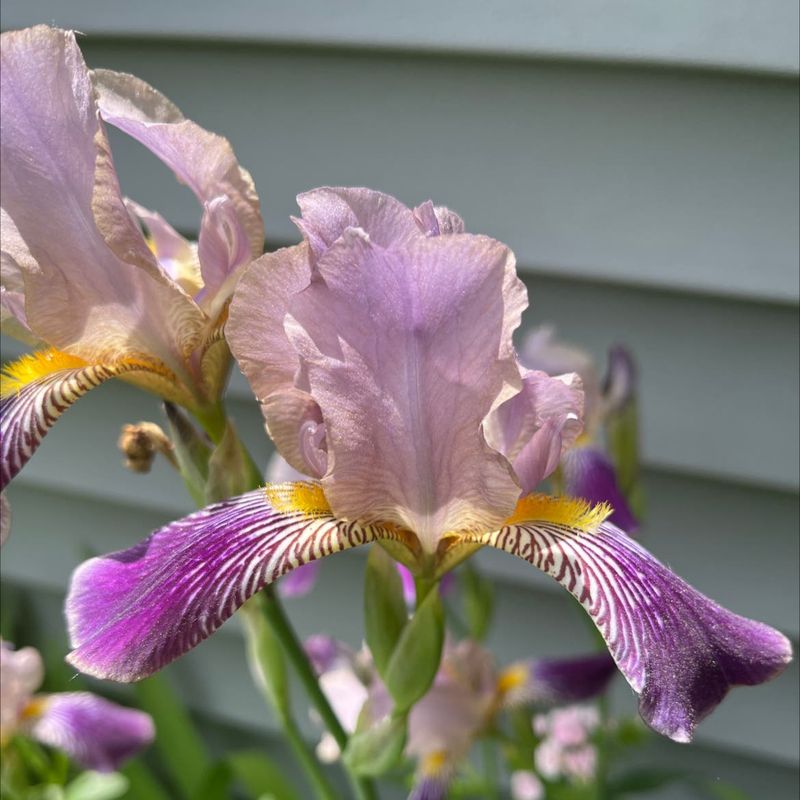
18. Understand Different Iris Types
Bearded irises, with their distinctive fuzzy “beards” on the falls (lower petals), represent just one branch of the iris family. These sun-lovers with thick rhizomes prefer drier conditions and excellent drainage. Their cousins generally prefer more moisture.
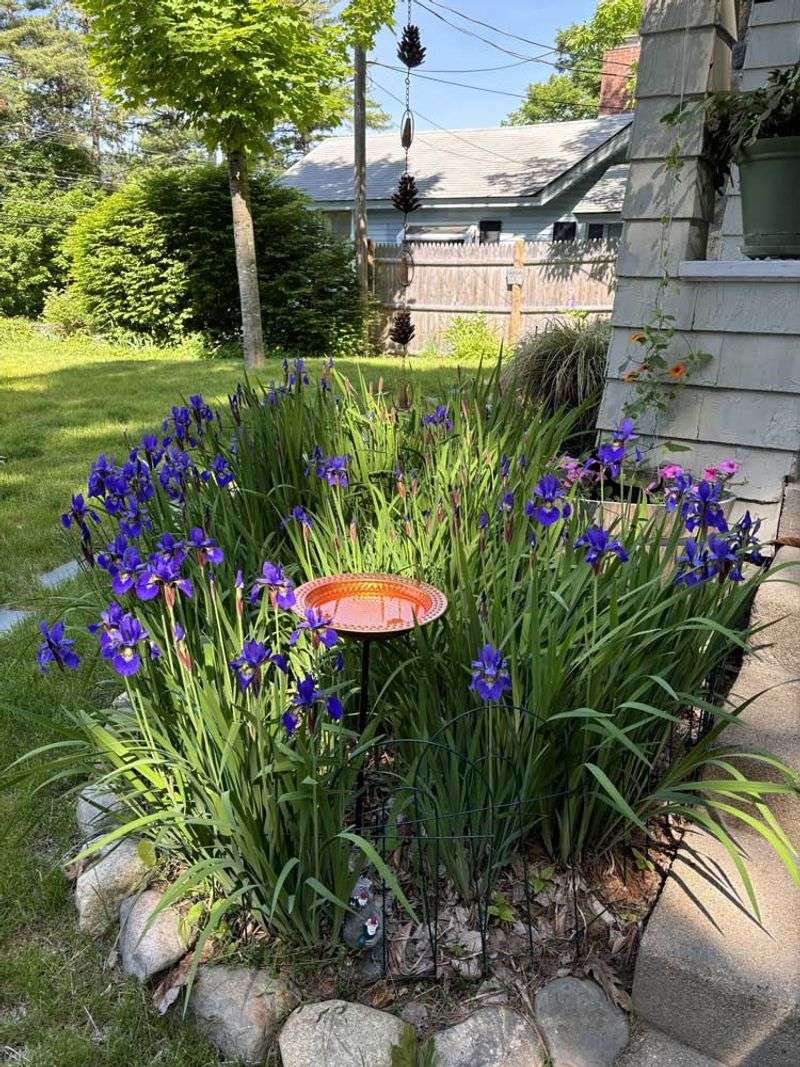
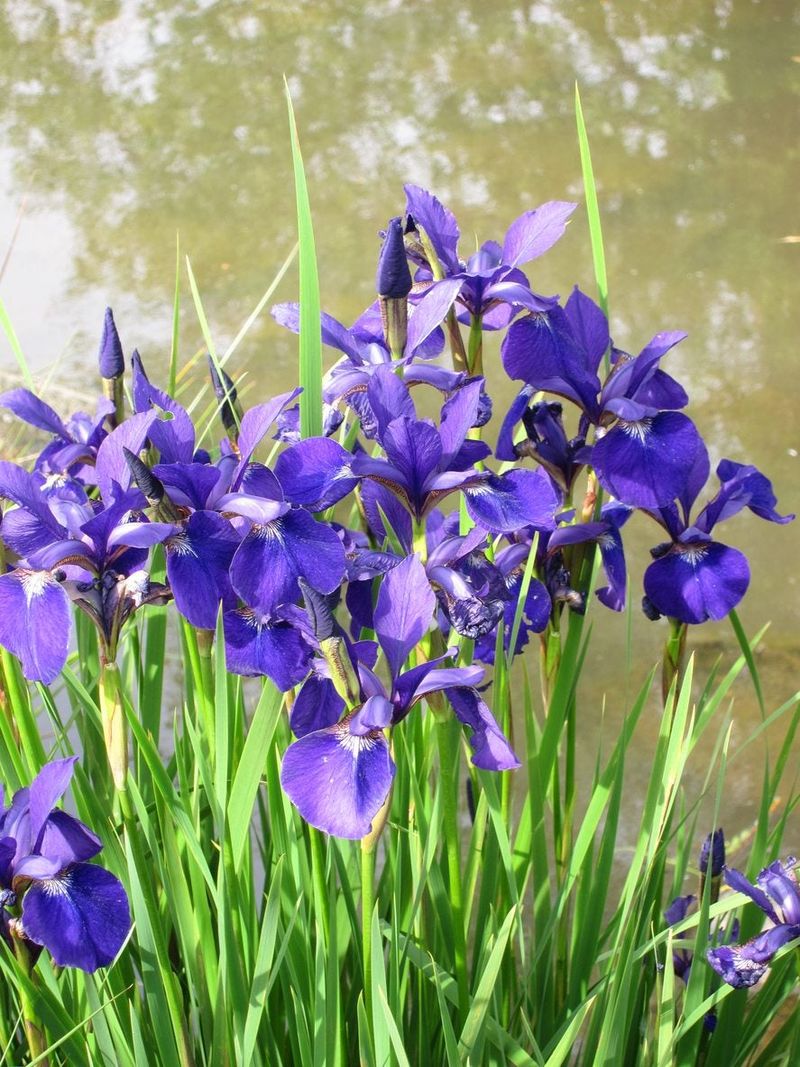
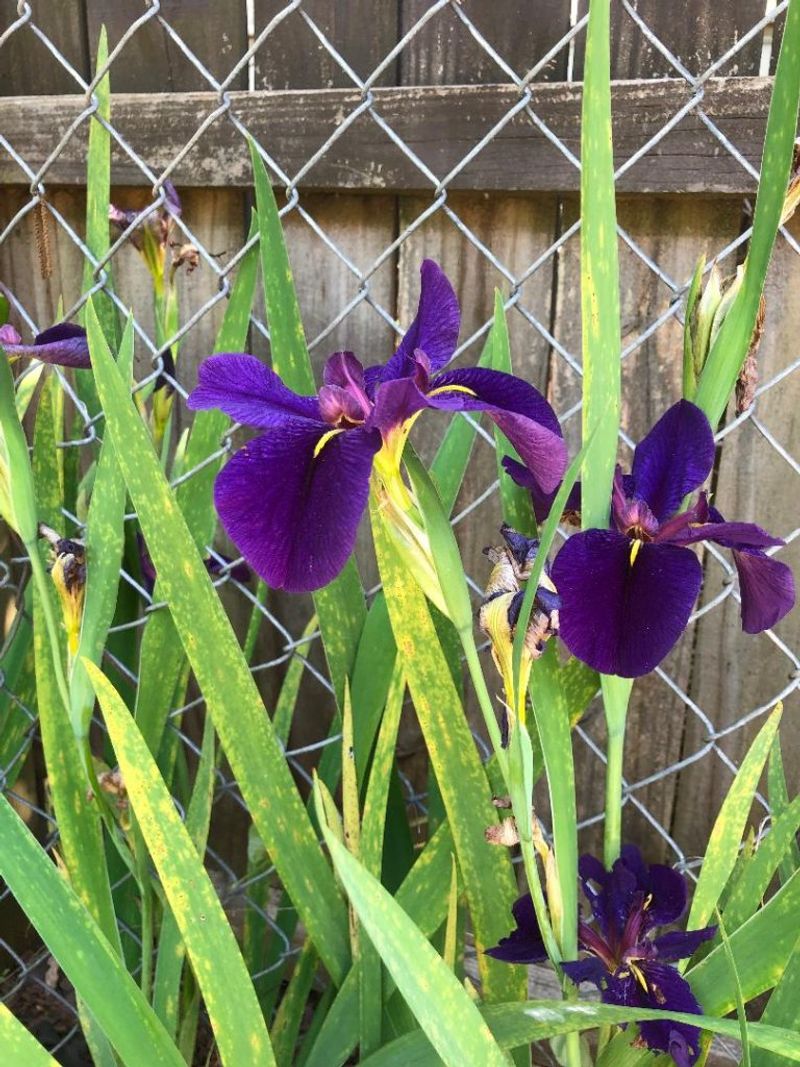
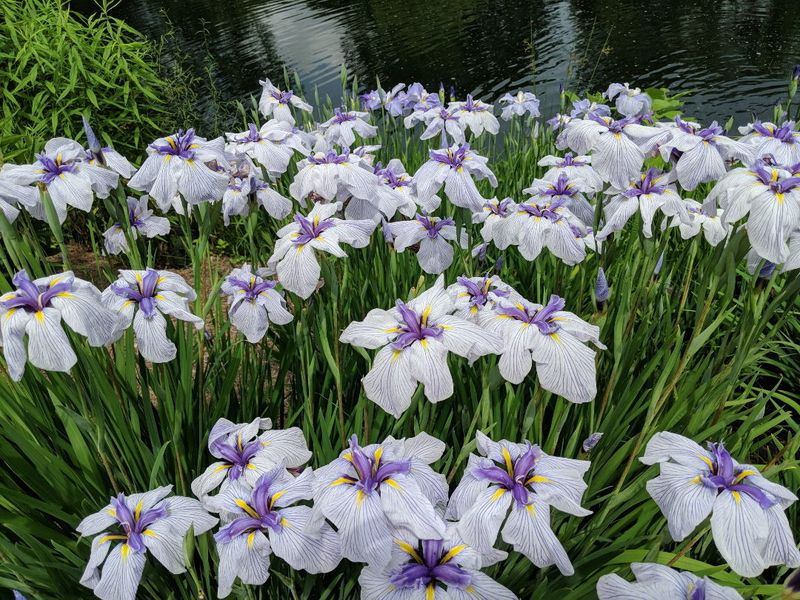
Siberian irises form clumps of grass-like foliage with more delicate flowers than bearded types. They tolerate wetter soils and partial shade, making them perfect for pond edges or rain gardens. Japanese irises demand consistent moisture and rich, acidic soil to produce their spectacular dinner-plate sized blooms.
Each iris type has specific care requirements. Louisiana irises thrive in boggy conditions that would kill bearded varieties, while Dutch iris bulbs need lifting and storing in warmer climates. Learning the particular needs of your iris types prevents frustrating failures and leads to spectacular blooming success.
19. Manage Iris Growth After Blooming
After flowering finishes, iris plants enter a critical growth phase when they rebuild energy reserves for next year’s blooms. The temptation to cut back foliage should be resisted unless leaves show disease. Those green fans actively photosynthesize throughout summer, storing energy in the rhizomes.
Remove only the spent flower stalks, cutting them at the base. This prevents energy waste on seed production while keeping the garden tidy. Fertilizing lightly after blooming supports this energy-building phase. A low-nitrogen, high-phosphorus formula encourages root development rather than excess foliage.
Summer dormancy doesn’t mean irises are inactive. While growth slows visibly, the plants continue developing next year’s bloom structures within the rhizomes. Reducing water during this period mimics natural conditions and helps prevent rot problems.
20. Recognize And Address Nutrient Deficiencies
Yellow streaking in iris leaves often signals iron deficiency, especially in alkaline soils where iron becomes less available to plants. Adding chelated iron or acidifying the soil with sulfur helps plants access this essential nutrient. Leaves that yellow from the tips inward may indicate potassium shortage instead.
Purple or reddish discoloration on normally green leaves suggests phosphorus deficiency. This common problem in cold spring soils often resolves as temperatures warm. If symptoms persist, bone meal worked into the soil around plants (but not touching rhizomes) provides slow-release phosphorus that supports blooming.
Stunted growth with overall pale foliage typically points to nitrogen deficiency. While irises need less nitrogen than many garden plants, severe deficiency limits their performance. A balanced organic fertilizer applied in early spring corrects most nutrient issues without promoting excessive foliage growth.