7 February Rose Care Must Dos For North Florida Homes
February is make-or-break month for roses in North Florida. What you do right now decides how strong your plants grow, how many blooms you get, and how long that color lasts into spring.
Skip the right steps and roses can struggle before the season even starts. Do it right and you set up fuller bushes, thicker stems, and nonstop flowering.
This is the window when roses wake up, push new growth, and respond fast to proper care. Cold snaps are fading, days are warming, and timing matters more than most gardeners realize.
Small tasks done now prevent bigger problems later and make maintenance easier all season. Rose growers cannot afford to coast through February.
These must-dos help your plants start strong, stay healthy, and deliver the kind of blooms North Florida gardeners love to show off.
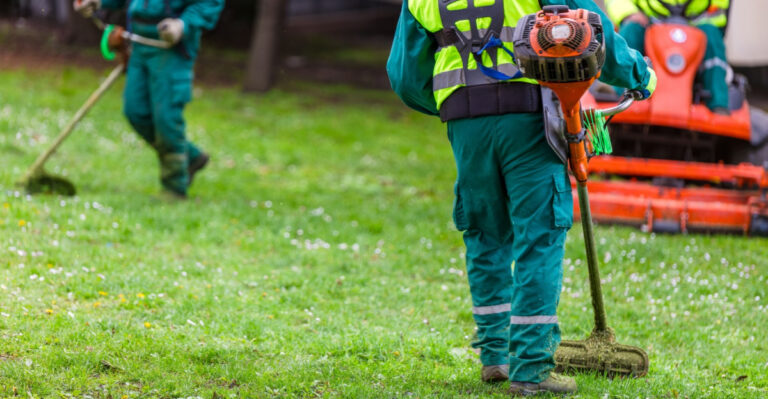
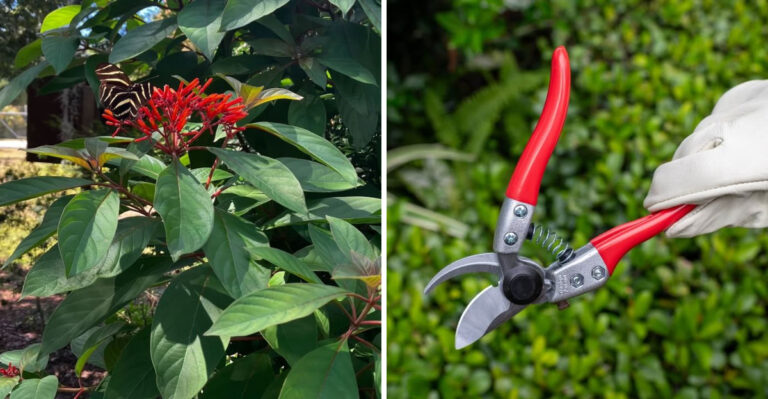
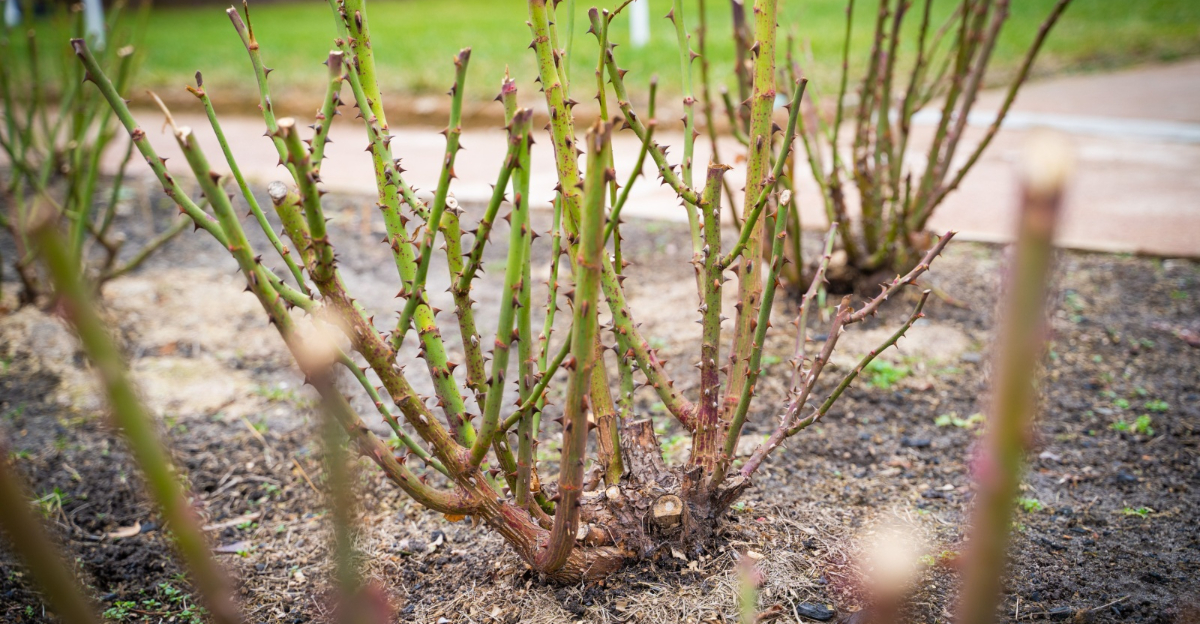
1. Finish Winter Pruning

Late winter pruning ranks among the most important tasks for North Florida rose growers. Your roses have spent January in dormancy, and February presents the final chance to shape them before new growth explodes.
Waiting too long means cutting off flower buds that have already formed, robbing you of early spring blooms. Grab sharp bypass pruners and look for damaged wood first.
These canes appear brown or gray instead of green, and they feel hollow or dried out when you scratch the surface. Remove them completely at the base where they meet healthier wood.
Next, scan for any branches thinner than a pencil, as these lack the strength to support quality flowers. North Florida’s humid conditions make crowded centers problematic because air cannot circulate freely.
Open up the middle by removing crossing branches and any growth pointing inward. This simple step reduces fungal diseases that thrive in our warm, moist climate.
Aim for a vase shape with the center exposed to sunlight and breezes. Cut at a 45-degree angle about a quarter inch above an outward-facing bud.
This angle sheds rainwater away from the bud and directs new growth outward rather than into the plant’s center. Hybrid teas typically get cut back to 18-24 inches tall, while shrub roses need lighter trimming.
Climbing roses require different treatment since they bloom on older wood. For climbers, remove only withered sections and thin out crowded areas without heavy cutting.
Clean your pruners with rubbing alcohol between plants to avoid spreading diseases.
Collect all trimmings and dispose of them rather than composting, especially if any showed signs of disease or pest damage during the growing season.
2. Shape Strong Canes
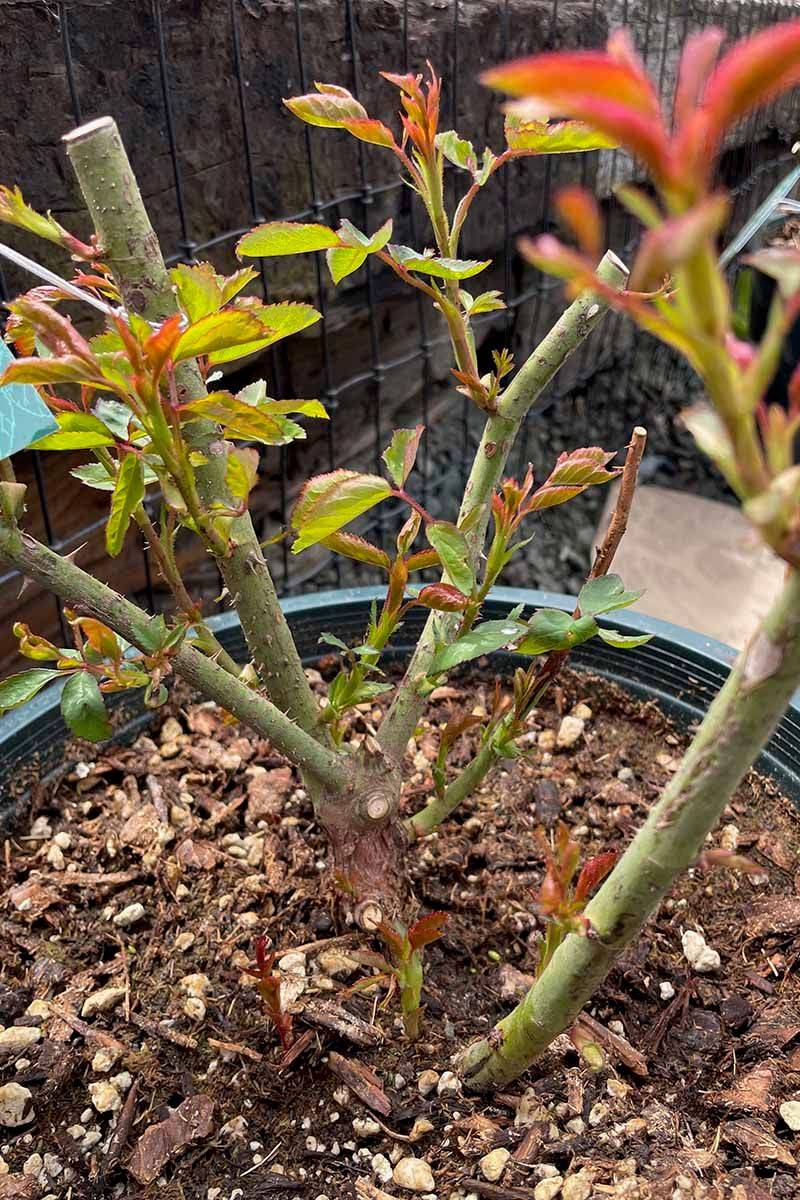
Strong canes form the backbone of productive rose bushes. After removing withered and weak wood, turn your attention to the remaining healthy growth.
These keepers should be thick as your thumb or larger, with vibrant green color when you scrape away a small section of bark. Count the main canes and decide how many to keep based on your rose type.
Hybrid teas perform best with three to five robust canes, while floribundas can handle six to eight. If you have more than this ideal number, choose the healthiest ones and remove extras at ground level.
More canes don’t equal more flowers in North Florida gardens. Too many canes create dense foliage that traps humidity and invites black spot and powdery mildew.
Examine where each cane grows from the base. Remove any emerging below the graft union, which appears as a knobby bulge near soil level.
These shoots come from the rootstock rather than your desired rose variety and will produce different flowers if allowed to grow. They also steal energy from the grafted rose above.
Look at the height of your selected canes. Uneven heights create an awkward appearance and unbalanced growth patterns.
Trim the tallest canes to match the others, creating a uniform canopy that looks intentional rather than wild. Most North Florida gardeners find 18-30 inches works well for bush roses, depending on the variety.
Mark any canes showing cankers, which appear as discolored sunken areas on the bark. These fungal infections spread rapidly in our climate.
Cut below the damaged section until you see completely white pith in the center of the cane. Brown or tan pith means the infection continues downward and requires more removal.
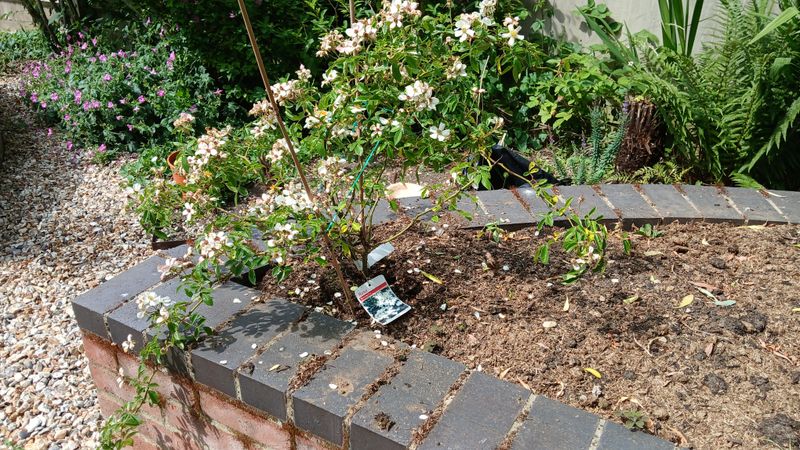
3. Refresh Mulch Layer
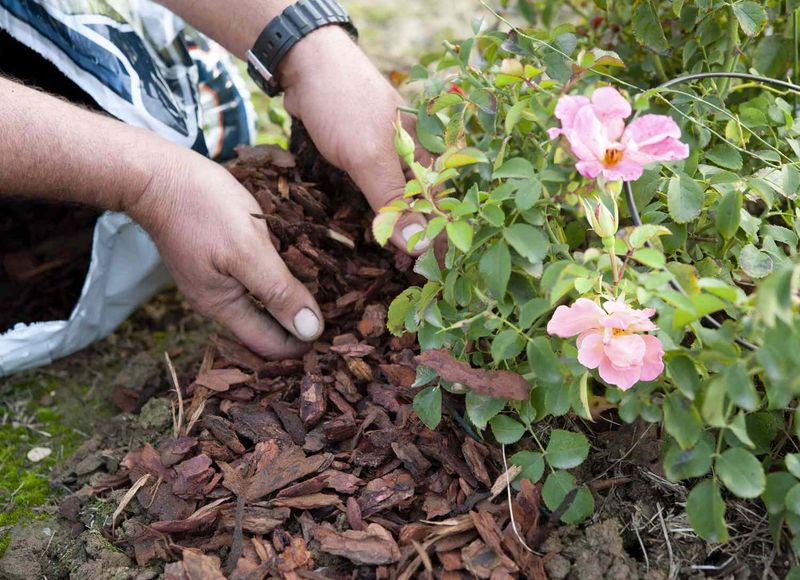
Mulch serves as your roses’ protective blanket against North Florida’s weather extremes. February provides the perfect timing to refresh this critical layer before spring rains and summer heat arrive.
Pull back any existing mulch that has decomposed into a thin mat or has become compacted over winter months. Check the soil level around each plant’s base.
You want the graft union sitting slightly above ground level, not buried under old mulch that has settled. Buried graft unions encourage unwanted rootstock growth and create rot problems in our humid conditions.
Apply fresh mulch in a three-inch layer extending outward to the drip line. This coverage insulates roots from temperature swings and locks moisture into the soil during dry spells.
Pine bark nuggets work exceptionally well for North Florida roses because they break down slowly and slightly acidify the soil as they decompose. Hardwood mulch offers another excellent choice, though it disappears faster in our climate.
Keep mulch pulled back about three inches from the base of each plant. Direct contact with stems invites fungal diseases and provides highways for insects to reach your roses.
This gap also prevents moisture from staying trapped against the bark where it causes rot. Spread mulch evenly rather than piling it high in the center.
A level layer looks neater and functions better than volcano-shaped mounds that shed water away from roots. Calculate roughly two cubic feet of mulch for every 100 square feet of rose bed.
This amount gives you the proper three-inch depth after settling. Fresh mulch dramatically reduces weed pressure as spring arrives and temperatures climb.
Fewer weeds mean less competition for water and nutrients, plus less time spent pulling unwanted plants from your beds.
4. Start Spring Feeding
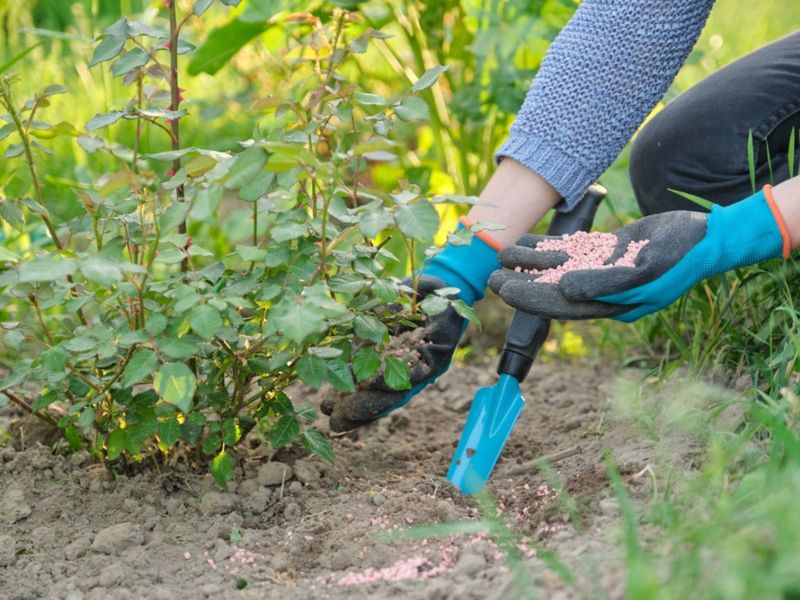
Your North Florida roses emerge from winter rest hungry for nutrients. February signals the right moment to begin feeding, giving plants the fuel they need as new growth accelerates.
Timing this first application correctly makes the difference between weak, sparse blooms and the abundant flowers you want. Choose a fertilizer formulated specifically for roses rather than generic plant food.
Rose formulas contain the nutrient ratios these plants crave, with balanced amounts of nitrogen for foliage, phosphorus for blooms, and potassium for overall health. Many also include micronutrients like iron and magnesium that prevent common deficiencies in our sandy soils.
Granular products work better than liquid fertilizers for this first feeding. They release nutrients gradually over several weeks, matching the pace of early spring growth.
Liquid fertilizers deliver nutrients too quickly and can push excessive leafy growth before roots are ready to support it. Measure according to package directions based on the size of each plant.
More fertilizer does not equal better results and can actually burn roots or create salt buildup in the soil. Scatter granules evenly around each rose, starting about six inches from the base and extending to the drip line.
Water thoroughly after applying fertilizer to begin dissolving the granules and moving nutrients into the root zone. North Florida’s sandy soil drains quickly, so nutrients leach away faster than in other regions.
Plan to fertilize every six weeks through October, but this February application sets the foundation for the entire growing season. Mark your calendar now for subsequent feedings so you don’t forget as the busy spring season arrives.
Organic gardeners can substitute well-aged compost or composted manure for synthetic fertilizers. Apply a two-inch layer around each plant and work it lightly into the top inch of soil.
5. Inspect Leaf Health
February’s mild weather allows careful inspection of emerging rose foliage before problems spiral out of control. New leaves unfurl rapidly as temperatures warm, and catching issues early saves months of frustration later.
Walk through your rose beds on a dry morning when you can see leaves clearly without water droplets obscuring your view. Check both leaf surfaces since many pests and diseases hide on undersides where they escape casual notice.
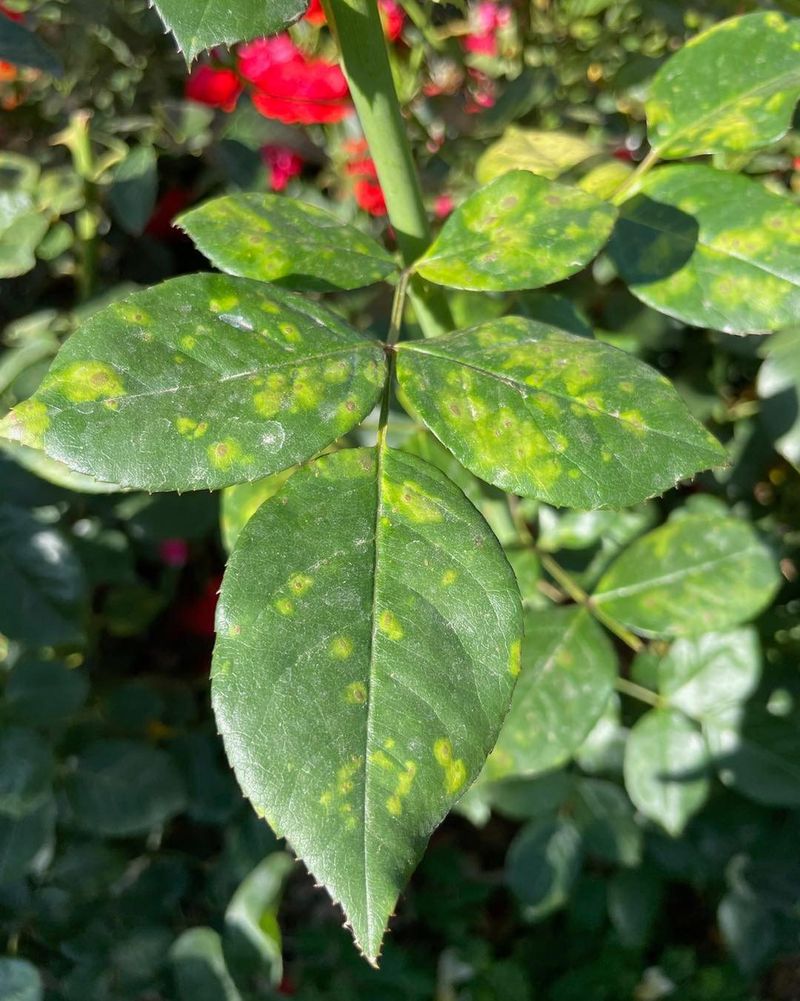
Black spot appears as dark circular lesions with feathery edges, often surrounded by yellowing tissue. This fungal disease thrives in North Florida’s humidity and spreads through water splash from rain or overhead watering.
Remove any affected leaves immediately and dispose of them in the trash, not your compost pile. Powdery mildew creates a white or gray coating that looks like someone dusted leaves with flour.
Young growth suffers most from this fungus, which distorts leaves and stunts shoots. Improving air circulation helps prevent mildew, making proper pruning even more important.
Look for tiny insects clustered on new growth tips. Aphids multiply explosively in spring and suck sap from tender tissues, causing leaves to curl and yellow.
A strong spray from the hose often dislodges them before populations explode. Spider mites leave fine webbing on leaf undersides and create a stippled, bronzed appearance on foliage.
These microscopic pests become problematic as weather warms and humidity drops. Examine leaves for unusual holes, ragged edges, or chewed sections.
Caterpillars, Japanese beetles, and other chewing insects wake up hungry in February and can strip plants quickly if left unchecked. Document what you find with photos or notes.
Tracking problems helps you recognize patterns and treat issues before they become severe.
Many North Florida gardeners find the same pests or diseases return annually, so records guide preventive treatments.
6. Deep Water Schedule
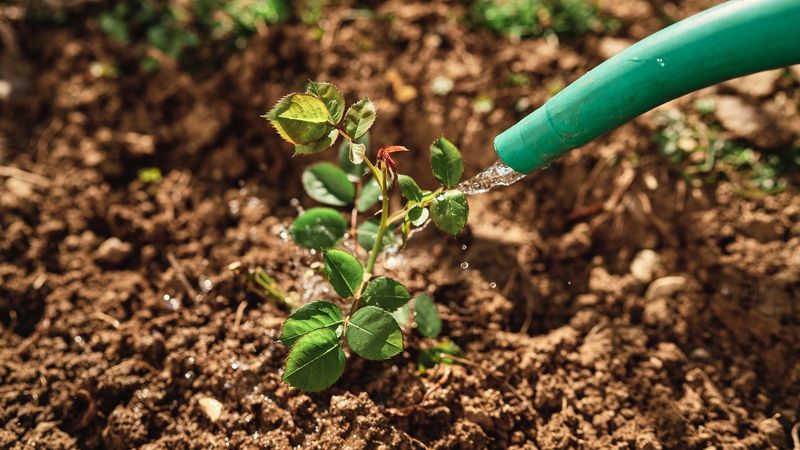
Establishing a proper watering routine in February prepares your roses for the demanding months ahead. North Florida’s weather can swing from wet weeks to sudden dry spells, making consistent moisture management essential for plant health.
Roses need approximately one inch of water weekly, whether from rainfall or irrigation. Deep, infrequent watering beats frequent shallow sprinkles every time.
Shallow watering encourages roots to stay near the surface where they become vulnerable to heat stress and drought. Deep watering trains roots to grow downward into cooler, more consistently moist soil layers.
Set up a rain gauge in your rose bed to track natural precipitation. These simple tools cost just a few dollars and eliminate guesswork about whether your roses received enough water from recent storms.
When rainfall falls short of one inch for the week, supplement with irrigation. Soaker hoses or drip irrigation deliver water directly to soil without wetting foliage.
Dry leaves mean fewer fungal disease problems, which matters tremendously in our humid climate. Overhead sprinklers spread diseases rapidly and waste water through evaporation.
Water early in the morning so any moisture that does land on leaves dries quickly as the day warms. Evening watering leaves foliage damp overnight, creating perfect conditions for black spot and powdery mildew to establish.
Run irrigation long enough for water to penetrate eight to twelve inches deep. Stick a long screwdriver into the soil an hour after watering to check penetration depth.
If the screwdriver doesn’t push in easily to that depth, you need to water longer next time.
Adjust your schedule as February progresses and new growth appears.
Actively growing roses consume more water than dormant plants, so increase amounts gradually rather than making sudden changes that stress roots.
7. Garden Bed Cleanup
A thorough cleanup removes disease spores and pest eggs that overwinter in garden debris. February offers ideal conditions for this task before new growth covers the ground and makes cleanup difficult.
Start by raking up all fallen leaves from under and around your roses. These leaves harbor fungal spores that splash back onto plants during spring rains, reinfecting foliage as soon as it emerges.
Even leaves that look clean can carry microscopic disease organisms ready to attack your roses. Bag these leaves and send them to the landfill rather than composting them.
Home compost piles rarely heat up enough to destroy rose disease pathogens, and you risk reintroducing problems when you spread that compost later. Pull any weeds growing in rose beds before they set seed.
February weeds are easier to remove than the tough, established plants you face if you wait until April or May. Many common North Florida weeds germinate in late winter, so catching them now prevents exponential multiplication.
Check the soil surface for any remaining old mulch that has decomposed into a slimy mat. This degraded material blocks water penetration and creates anaerobic conditions that harm roots.
Remove it before applying your fresh mulch layer. Inspect the base of each plant for any suckers growing from below the graft union.
These shoots drain energy from your grafted rose and will eventually dominate if not removed. Trace them to their origin point and cut them off flush with the main stem or root.
Clean and sharpen all your pruning tools during this cleanup session. Sharp, clean tools make better cuts that heal faster and spread fewer diseases between plants.
A few minutes of tool maintenance now saves problems throughout the growing season ahead in North Florida gardens.